Click2Call feature provides a method for UCM630x users with a remote connect plan to embed a simple click2call link into their websites, to enable their web visitors to call live agents from their browsers by adding a shortcode into the web page source and configure a Call queue on the UCM to receive those calls.
Using the UCM630x/A Click2Call feature will help to connect the website visitors immediately to one of the available agents without dialing a number and without leaving the webpage by clicking on a customizable Click2Call icon.
This guide describes in detail how to configure the Click2Call feature on the UCM630x/UCM630xA series.
Click2Call Overview
The following diagram illustrates the Click2Call process with the UCM630x:
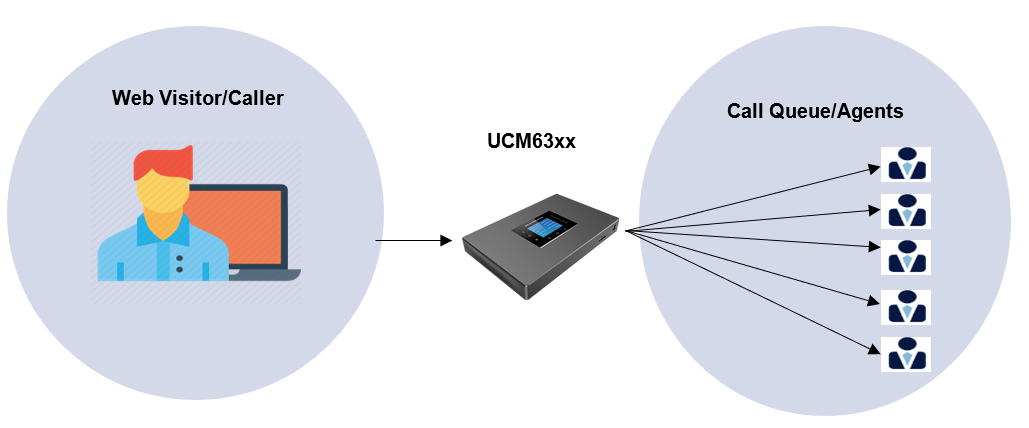
Click2Call feature consists of:
-
- Callers: The web visitors using their web browser to place a call to the configured call queue.
- Agents: Members defined to answer the queue calls received from the web visitors.
Click2Call Configuration
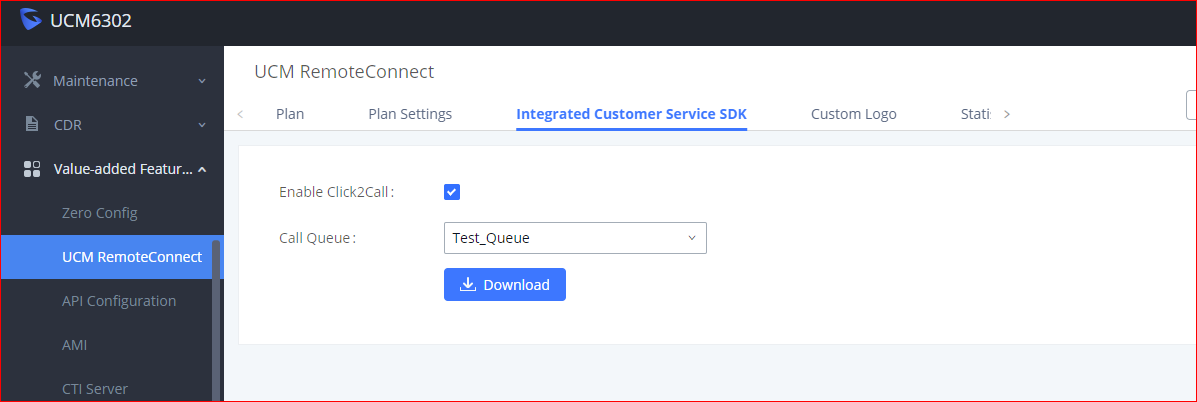
In order to configure the Click2Call, on the UCM web GUI navigate to Value-added Features→UCM RemoteConnect→Integrated Customer Service SDK and configure the following:
- Toggle on Enable Click2Call.
- Select the desired call queue to take calls made via Click2Call.
- Click on the Download button to download the SDK.
- Once the SDK is downloaded, extract the files.
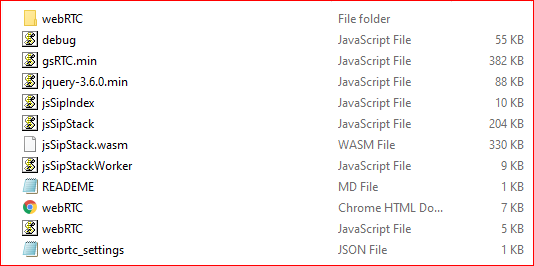
- Once these files are available, open the webrtc_settings.json file with the desired application and edit the value of the “websocket_proxy_url” parameter with your UCM’s RemoteConnect server address. Save the file.

- Embed the HTML file into the desired web page:
– Refer to ‘READEME.md’ file
– Add the following code to the ‘index.html‘:
<script type=”text/javascript” src=”./anonymousWebRTC/webRTC.js”></script>
– Please make sure to put the ‘anonymousWebRTC’ folder in the root directory of the web server hosting your website.
- Once embedded, the following icon should now appear on your website (assuming no other items in SDK package were modified):

- Clicking on this icon in the website should then send an audio call to the configured UCM and to the selected call queue.
Click2Call Application Example
This example is showing the click2Call button shown on a specific Web page. The web visitor has initiated the call with an agent of the queue after clicking on the Click2call button.

Upon clicking on the icon, a call will be reaching the UCM and be forwarded to the specified call queue to be answered by an agent as shown in the below screenshot.