INTRODUCTION
Grandstream GRP261X SIP phones support BroadWorks Shared Call Appearance feature. Shared Call Appearance allows multiple phones to share one extension number and manage a call as a group. Incoming calls will appear at multiple locations simultaneously. All devices where call appearance is shared can be used to answer an incoming call or make a call as if it is the main user. Calls can be transferred between two phones by simply putting the call on hold at one phone and picking it up on the other. Line keys light up or flash in different colors, allowing all people sharing the extension to monitor the call status. One important application for Shared Call Appearance is for an administrative assistant/executive scenario.
This document serves as an end-user guide on how to configure Grandstream GRP261X SIP phones for the BroadWorks Shared Call Appearance feature. How to configure SCA on BroadWorks Application Server is out of the scope of this document. System Administrators shall check BroadWorks Partner Configuration Guide for more detailed information.
KEY CONCEPTS
Line – One address-of-record as defined in RFC3261 represents one line. Line can be classified as being either “Private” or “Shared”.
Call Appearance – Every call is associated with a specific line. The presentation of a call on a line is called “Call Appearance”.
Shared Call Appearance – A Shared Call Appearance is any Call Appearance that is visible and accessible (optional) to the original endpoints as well as other authorized endpoints.
Public Hold – The held call is available for any shared line to retrieve.
Private Hold – The held call can only be retrieved from the shared line that held the call.
Bridging – Join an active call to form a multi-party conference.
SCA CONFIGURATION ON GRP261X PHONES
Configuring Grandstream GRP261X SIP phones to work with BroadWorks Shared Call Appearance feature is straightforward. First, configure the SIP account settings just as you would for a normal SIP account. Then set the Line Key mode of the corresponding Line to be a Shared Line.
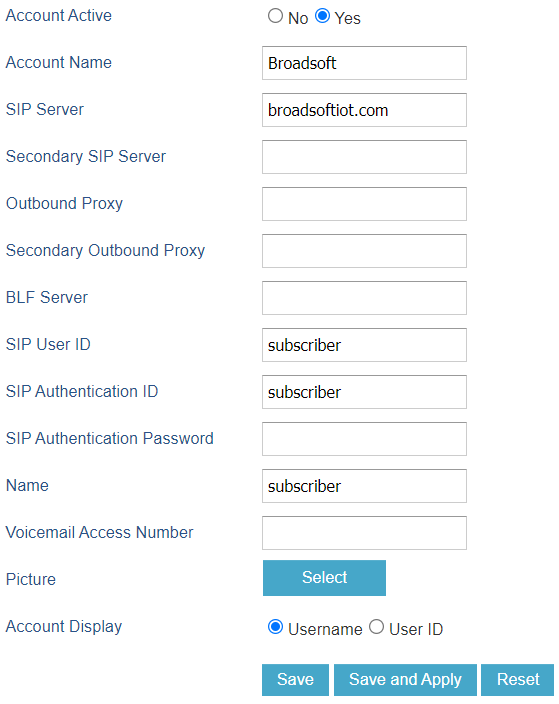
Primary Phone
- Configure Account Settings:
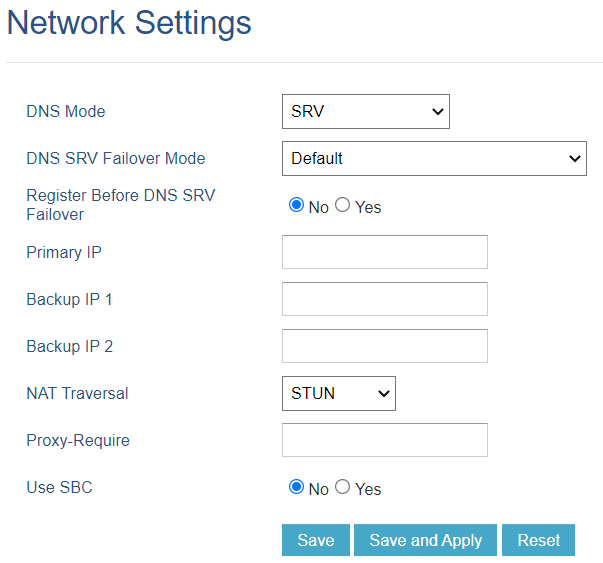
- Configure Network Settings:
- If DUT is put on a private network environment, it uses OBP. NAT Traversal should be set to “Auto” under Account X > Network Settings.
- If DUT is put on a public network environment, you don’t need to input “Outbound Proxy”. NAT Traversal should be set to “STUN”, and input a STUN server IP in web UI > Settings > General Settings > STUN Server.
- DNS mode needs to be set to “SRV”.
- Set Special Feature to “BroadSoft”, under Account X > SIP Settings > Advanced Features, see below:

- Set “Feature Key Synchronization” to “Enabled”, under Account X > SIP Settings > Advanced Features, see below:

- Set “Enable Local Call Features” to “No”, under Account X > Feature Codes, see below:

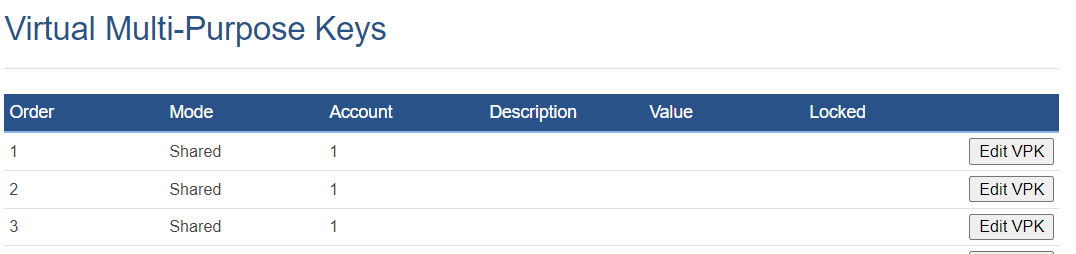
- Configure the Virtual Multi-Purpose Key mode under Programmable Keys > Virtual Multi-Purpose Keys page:

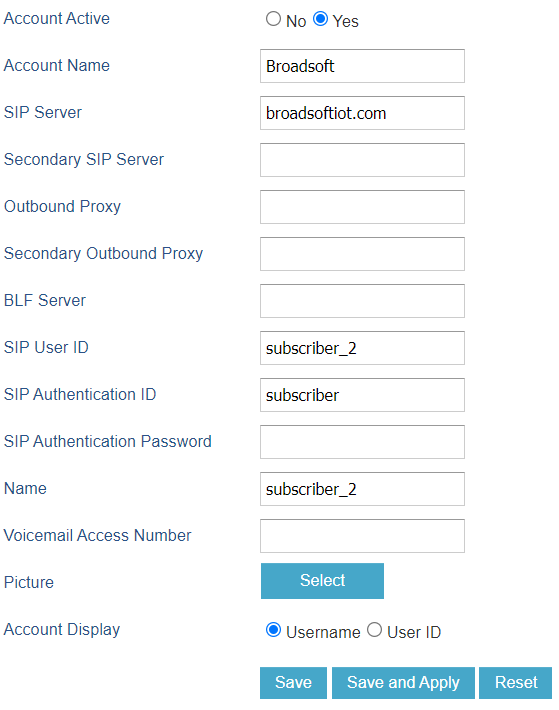
Secondary Phone
- Configure ACCOUNT Settings:
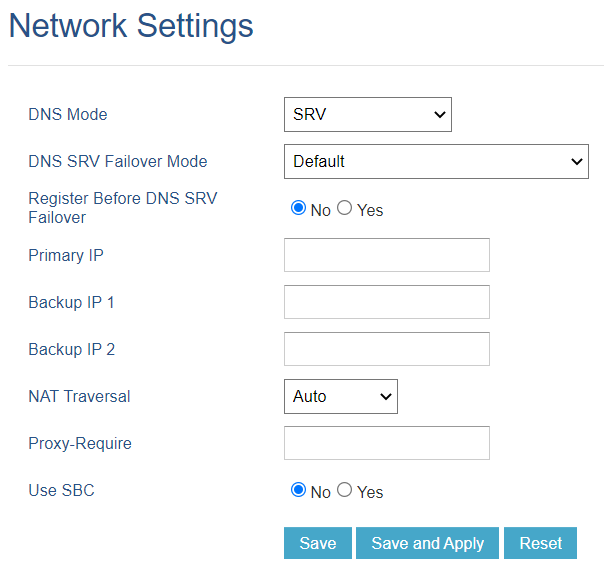
- Configure Network Settings:
- Set Special Feature to “BroadSoft”, under Account X > SIP Settings > Advanced Features, see below:

- Set “Feature Key Synchronization” to “Enabled”, under Account X > SIP Settings > Advanced Features, see below:

- Set “Enable Local Call Features” to “No”, under Account X > Feature Codes, see below:

- Configure the Virtual Multi-Purpose Key mode under Programmable Keys > Virtual Multi-Purpose Keys page, see below:

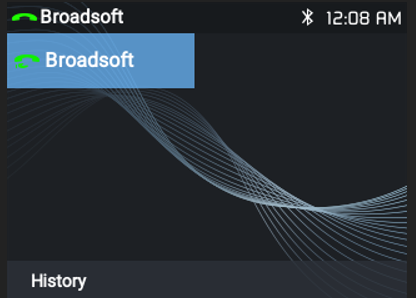
After completing the configuration, the LCD will show as follows:
USE SCA ON GRP261X PHONES
GRP261X supports two SCA usage methods:
- Configure only one Line key as Shared mode on a phone:
- When the SCA account is idle: Press Line key to enter the dialing interface to initiate a new call.
- When the SCA account have call in progress: Press the Active Line key on Secondary Phone to bridge the call.
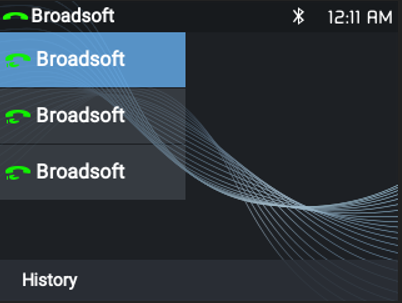
- Configure multiple Line key as Shared mode for one account, see below:
Check the Line Key LED status, and press to complete relevant operations. See below:
Specific LED statuses are shown in the [VISUAL INDICATORS] section.
VISUAL INDICATORS
GRP261X Line key LEDs provide visual indications of call appearances. In the following table, we assume the Primary Location initiates/picks up a call, and it is the location that puts a call on Public/Private Hold. The Line LED status for Multiply Call Arrangement is defined the same.
|
Call Status |
Line Key LED Status | |
|
Primary Location |
Other Locations | |
|
Idle |
LED Off |
LED Off |
|
Off-hook |
Solid Green |
Solid Red |
|
Dialing |
Solid Green |
Solid Red |
|
Ringing |
Fast Blinking Red |
Fast Blinking Red |
|
During a Call |
Solid Green |
Solid Red |
|
Public Hold |
Slow Blinking Green |
Slow Blinking Red |
|
Private Hold |
Slow Blinking Green |
Solid Red |
|
Barge-in |
Solid Green |
Solid Green |