
CloudUCM Overview
CloudUCM is a cloud audio/video communications and collaboration solution with powerful features like audio/video calling, conferencing, Live Chat customer service, etc., and rich system integration capabilities with CRMs, WhatsApp, Office365 and more with Wave API and SDK. Learn More
Share Your Feedback
- Having troubles?
If you encounter a fault during usage, please provide your feedback to our Support. Our Support will solve it for you as soon as possible.
Click on the option ![]() on the bottom of the GDMS platform page.
on the bottom of the GDMS platform page.
Start Using CloudUCM
Step 1: Create a trial CloudUCM device
Only 1 trial CloudUCM devices can be created for each GDMS account. Please contact Grandstream Support for help if you have questions.
- Log in to GDMS: https://www.gdms.cloud
- Click the option
 on the upper left corner to switch to the CloudUCM system.
 - On the CloudUCM Device page, you can click the “Free Trial” option to create a CloudUCM device for trial. If you are creating a trial CloudUCM for your customer, you can fill in the customer’s email and the device activation email will be automatically sent to your customer.

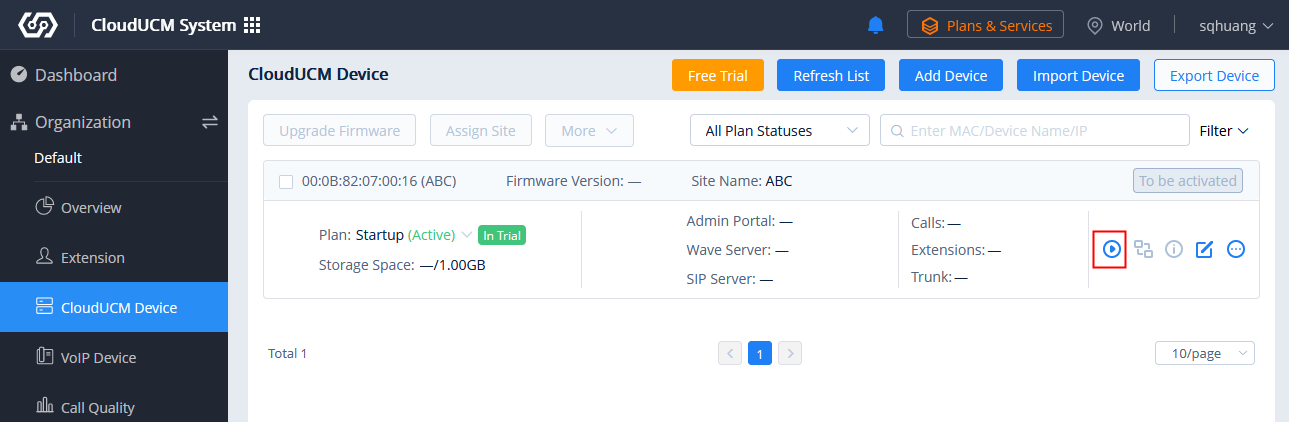
Step 2: Activate CloudUCM device
You need to activate your newly created CloudUCM device before using the CloudUCM services.
- You can activate the CloudUCM device by clicking the icon
 in the CloudUCM Device module of the GDMS platform.
- Before activating the CloudUCM device, you need to fill in the following information:
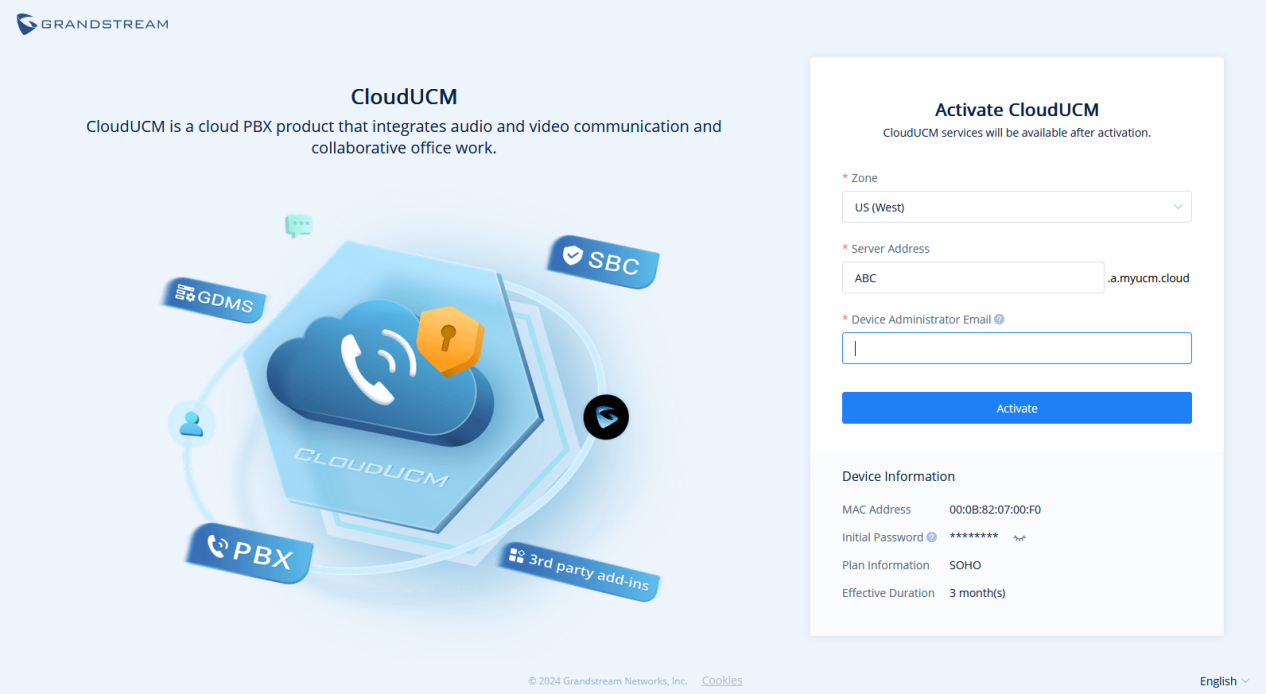
Zone | Select the nearest data center for quick access. |
CloudUCM Server Address | Enter your custom service address for easy memorization. Note: Only advanced plans support this function. |
Device Administrator Email | Enter the administrator email of your CloudUCM device so that you can use it to retrieve the password, receive plan notifications, storage space alerts, etc. |
The device information will be displayed after filling the information:
MAC Address | It indicates the virtual MAC address of the CloudUCM device, as a unique identifier for this device. |
Initial Password | It indicates the initial password of the CloudUCM device, and it is also the initial password of the super administrator for logging in to the CloudUCM Web UI. |
Plan Information | It indicates the plan name for this CloudUCM device. |
Valid Duration | It indicates the validity period of this CloudUCM device’s plan. |
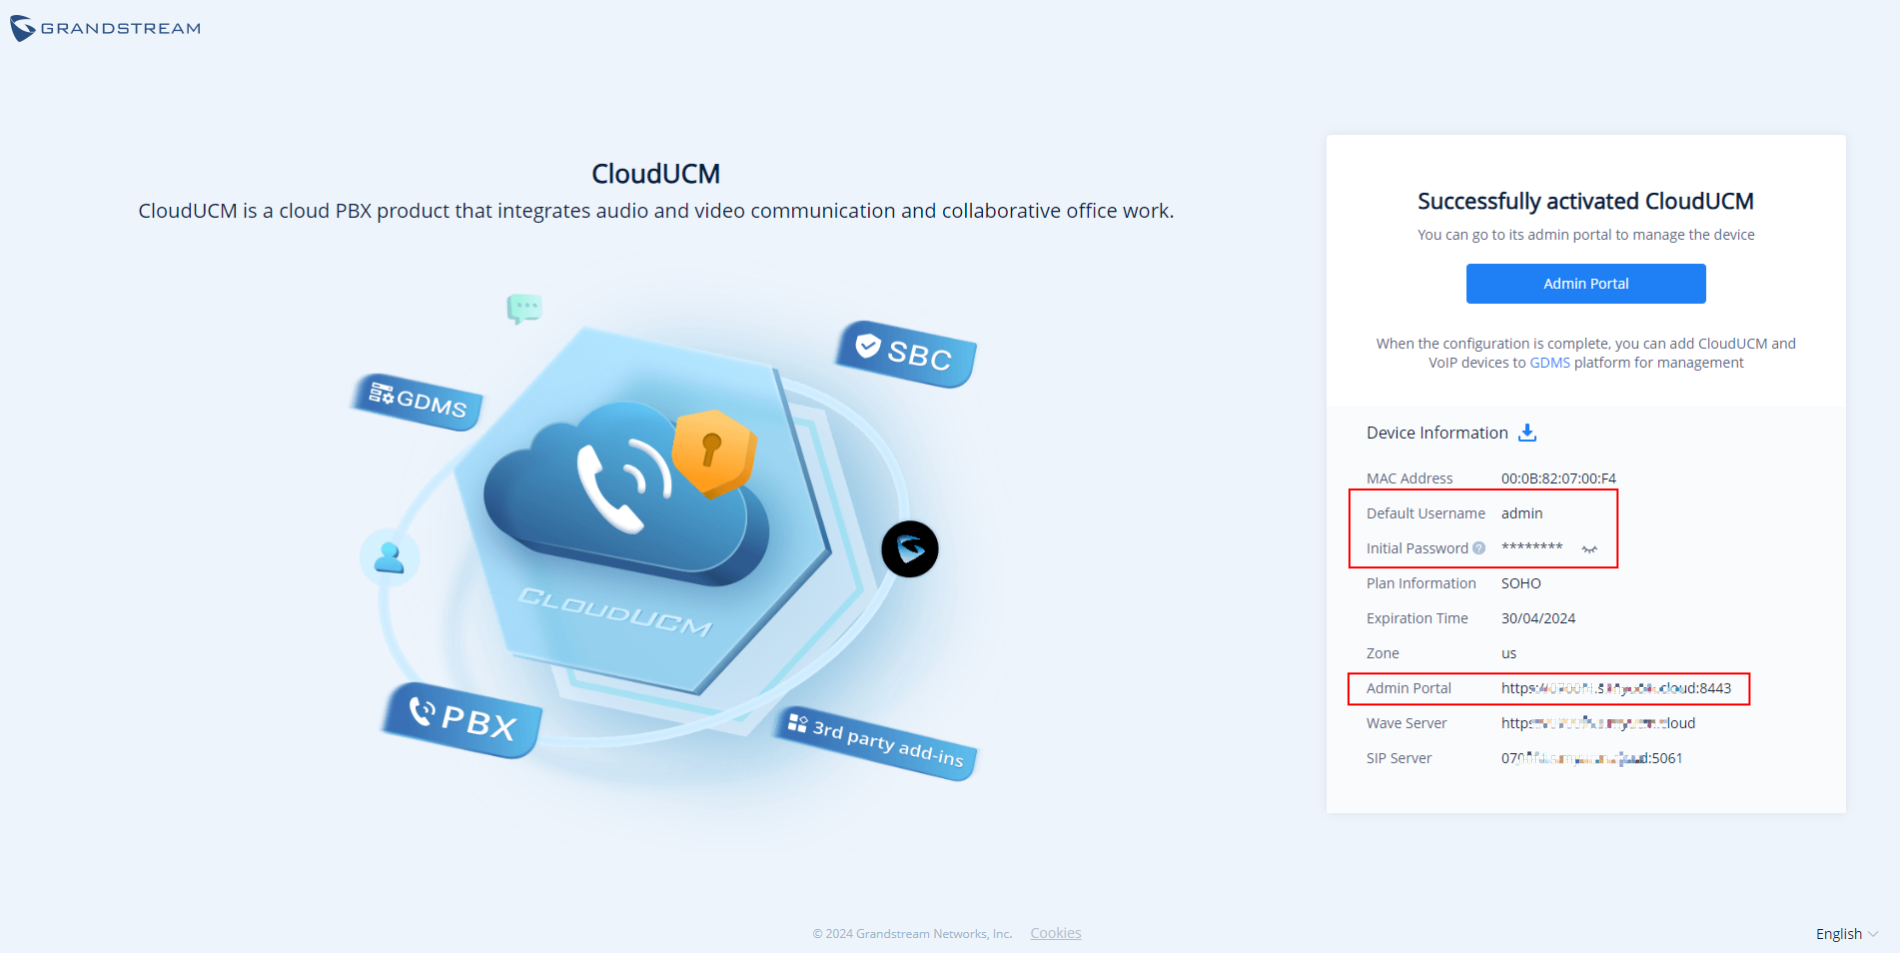
Step 3: Configure CloudUCM services
After activating the CloudUCM device, you can quickly access the CloudUCM admin portal to configure the CloudUCM service.
Method 1: After the activation is successful, you can view the CloudUCM Admin Portal address, default account, and initial password. As shown below:
Method 2: In the CloudUCM device list on the GDMS platform, you can click the option
![]() following the device to log in to the Web UI of the CloudUCM device.
following the device to log in to the Web UI of the CloudUCM device.

You can go to the CloudUCM Device list on the GDMS platform, click the option
![]() to view the login username and initial password.
to view the login username and initial password.
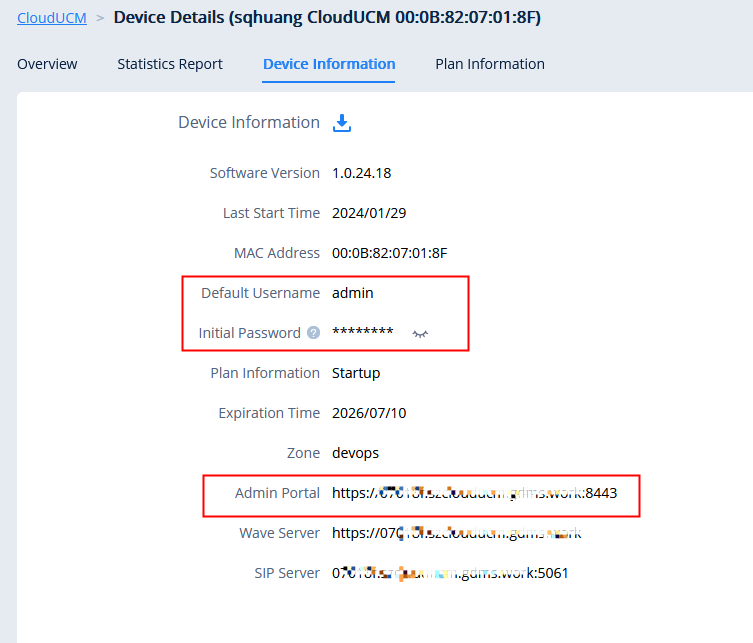
Then, you can log in to the Web UI of the CloudUCM device and follow the configuration wizard to perform configurations, such as creating extensions or trunks. For more details, please refer to the CloudUCM User Guide.

Step 4: Configure CloudUCM extensions on IP phones
Method 1: You need to set the following parameters on the IP phone:
Options | Parameters | Values |
Account Settings > Basic Settings (Required) | SIP Server | CloudUCM SIP Server Address.
Notes:
|
Account | Fill in the extension number of the CloudUCM device | |
Password | The SIP password corresponds to the extension number | |
NAT Traversal | STUN | |
DNS Mode | SRV | |
DNS SRV Failover Mode | Saved one until no response | |
Account Settings > SIP Settings (Optional. While TLS is recommended, UDP and TCP are also supported) | SIP Transport | Supports TLS, UDP, and TCP. It is recommended to use TLS for security reasons. |
Account Settings > SIP Settings (Optional. If your network environment is not stable, you are advised to set these parameters.) | REGISTER Expiration (m) | 50 (TLS or TCP) 3 (UDP) |
Enable Session Timer | Yes | |
Session Expiration (s) | 600 | |
Min-SE (s) | 90 | |
Caller Request Timer | Yes | |
Callee Request Timer | Yes | |
UAC Specify Refresher | UAC | |
UAS Specify Refresher | UAS | |
Security Settings > TLS Settings (Required) | Minimum TLS Version | 1.2 or 1.3 |
Maximum TLS Version | 1.2 or 1.3 |
Method 2: Add the IP phone to the GDMS platform. On the VoIP Device page, you can click on the option
![]() to enter the Account Configuration page, select the CloudUCM extension, and save the configuration. (For Grandstream IP phones only)
to enter the Account Configuration page, select the CloudUCM extension, and save the configuration. (For Grandstream IP phones only)

For more details, please refer to the document “How to Configure CloudUCM on IP Phones”.
Step 5: Log in to the extension via Wave clients
You can use Wave application to communicate and work remotely from anywhere.
- On the CloudUCM Device list, you can view the Wave Server address and log in to the Wave client using a browser.

- You can download the Wave Desktop or mobile app for login.
Step 6: Manage CloudUCM devices on GDMS
- Multiple tenants can be managed by multiple organizations or sites.
- If a tenant purchases 1 CloudUCM device and N VoIP devices, these devices can be grouped into one organization for management.
- Multiple sites can be established under one organization, such as the company in different office areas have different devices, can be divided into multiple sites to classify management.

- CloudUCM device remote management includes: stop/start services, remote access, schedule tasks, firmware upgrade, restart, factory reset, diagnosis, and statistics.

Status Descriptions:
Status | Description |
Device Status |
|
The firmware version is too low |
|
The Plan is about to expire |
|
Trunk Abnormal |
|
Unread Notification |
|
Fail2ban |
|
Server Address Descriptions:
- Admin Portal: This specifies the CloudUCM device Web UI access address. The username and password of the device are required.
- Wave Server: This specifies the server address of the Wave client.
- SIP Server: This specifies the SIP server address used for registering extensions.
- CloudUCM device extensions can be automatically synchronized to the GDMS platform, and then you can assign extensions to VoIP devices.

For more details, please refer to the document “Manage CloudUCM Services Through GDMS”.