


Introduction
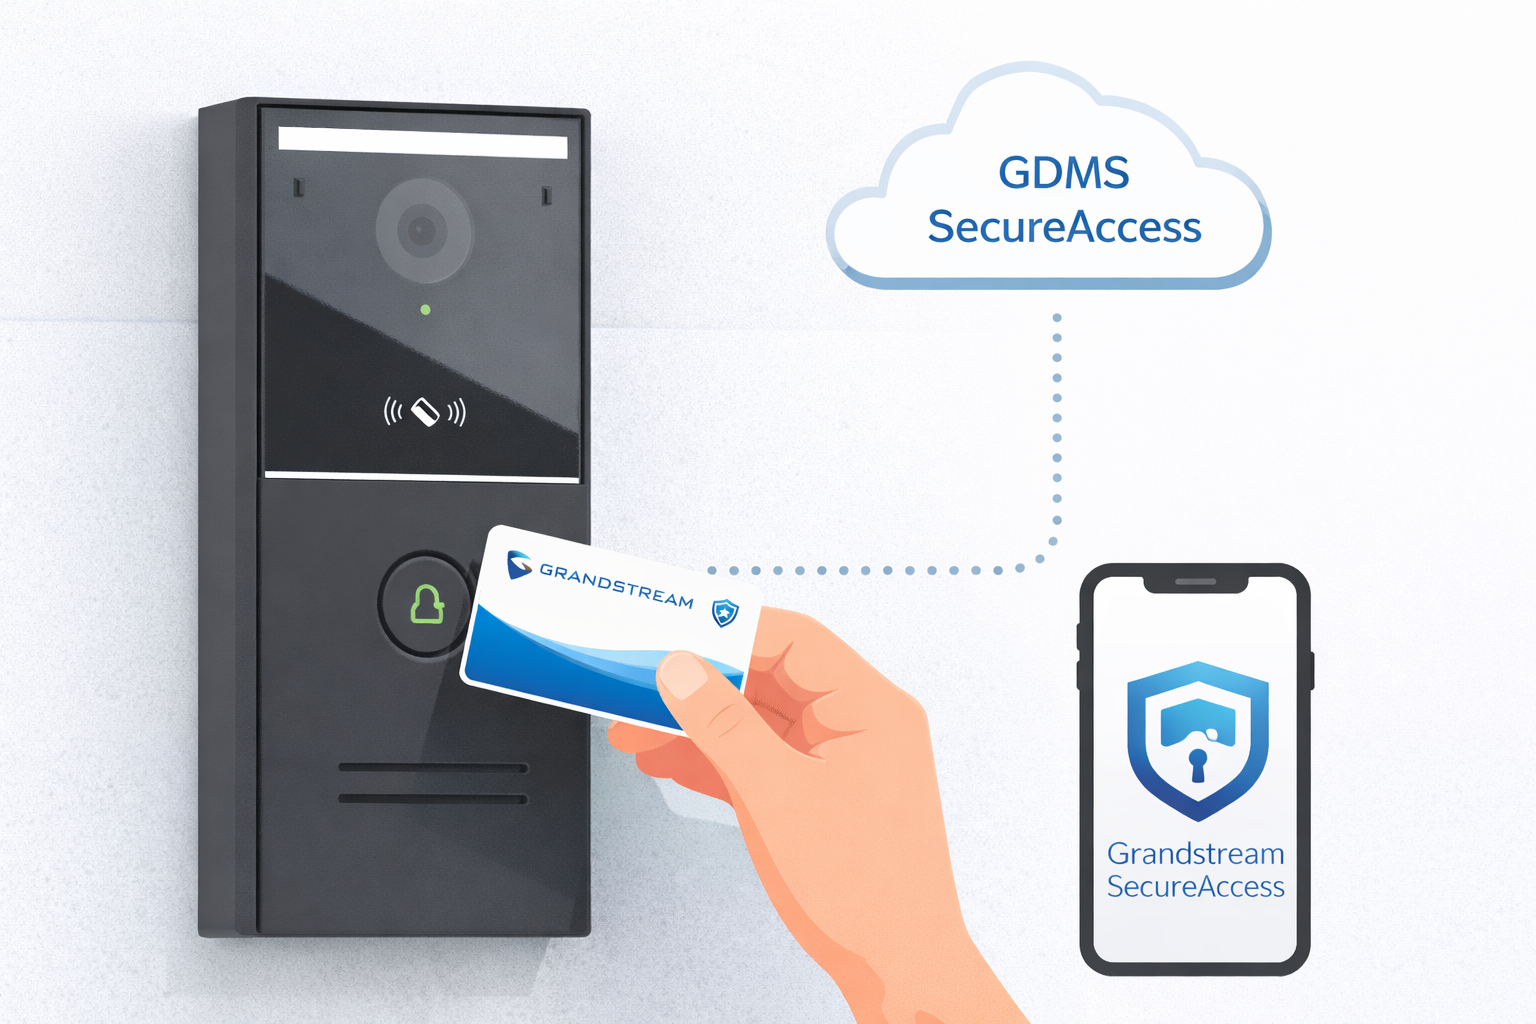
The GDS372X door controllers let users unlock the door using IC/ID cards. Each card has a unique credential (or “key”), and these credentials can be created and managed in three ways:
- Directly on the GDS372X device: add users and card numbers from the Web UI
- Through the Grandstream SecureAccess App: manage cards and write keys to IC cards using NFC
- Through GDMS SecureAccess Cloud: centrally manage users and sync them to multiple devices
All three methods work together so administrators can choose local setup, mobile management, or full cloud control, depending on the deployment.
This guide covers the following sections:
- Register cards quickly using Quick Card Entry from the webUI of the GDS372x
- Write IC card keys to unencrypted cards using the Grandstream SecureAccess App
- Export IC card user information from the app or the WebUI
- Import IC card user information into GDS372X
- Sync IC card keys from GDMS SecureAccess cloud to the device
- Supported IC Card Enrollment & Synchronization Workflows
Requirements & Prerequisites
Before starting the configurations, ensure:
Device & Firmware
- You are using the GDS3725 / GDS3726 / GDS3727 door station.
- The device is online and accessible.
- The GDS372x unit is updated to the latest supported firmware.
Cloud & App
- You have access to GDMS SecureAccess.
- You are logged into the Grandstream SecureAccess App.
- The GDS device is added & associated with your account if using cloud sync.
- An android smartphone that supports NFC reading.
File Handling
- Supported import types:
- UTF-8 .csv file.
- Encrypted .gs file.
- Encrypted .sec file (generated by GDMS SecureAccess).
IC Card Security Modes
If unencrypted IC cards are used:
- Keep in mind that cards can be cloned more easily.
- Prefer encrypted keys where possible.
Quick Card Entry
Quick Card Entry is a temporary enrollment mode that allows installers or administrators to swipe IC cards at the GDS372X reader or on the phone NFC area, and automatically register them into the user list, without needing to type the card number manually. This is especially useful during initial deployment or bulk enrollment sessions.
Scanning on the GDS Device
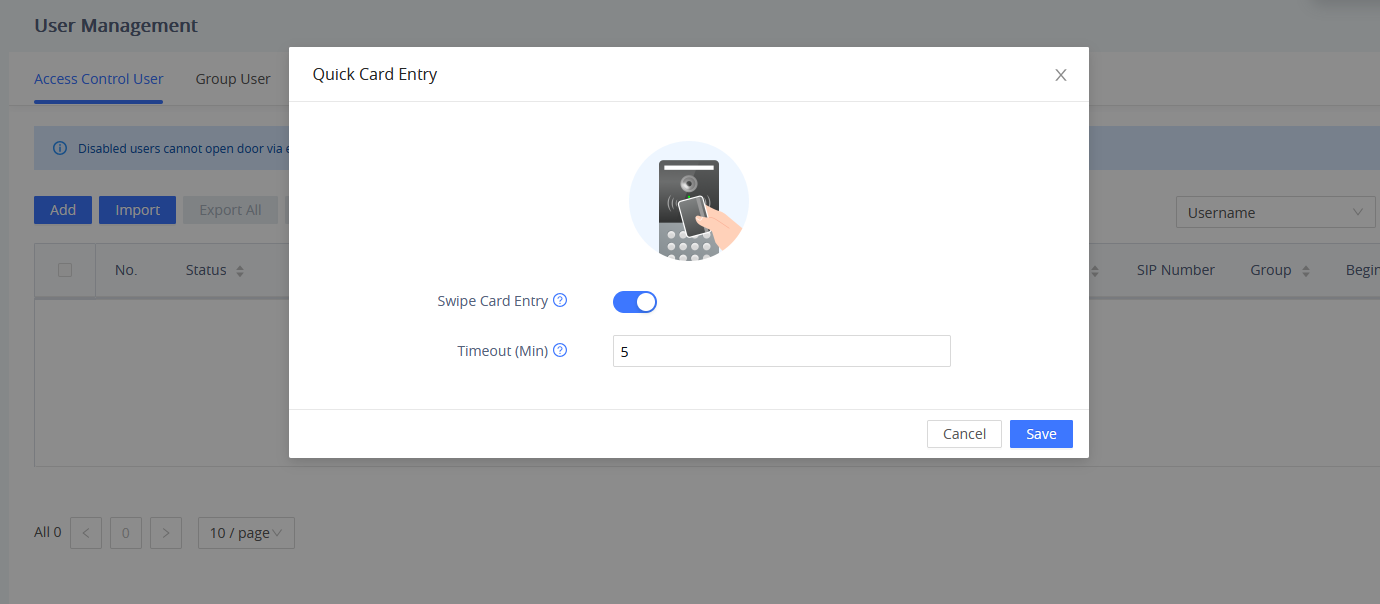
Please follow the instructions to enable Quick Card entry from the GDS372x WebUI:
- Log in to the GDS372X Web UI.
- Navigate to: Access Control Settings → User Management.
- Click the Quick Card Entry button.
- Enable Swipe Card Entry.
- Set the Timeout (1–1440 minutes): Default is 5 minutes; once this period expires, enrollment mode stops automatically.
- Click Save.
Scanning on the GDS SecureAccess App
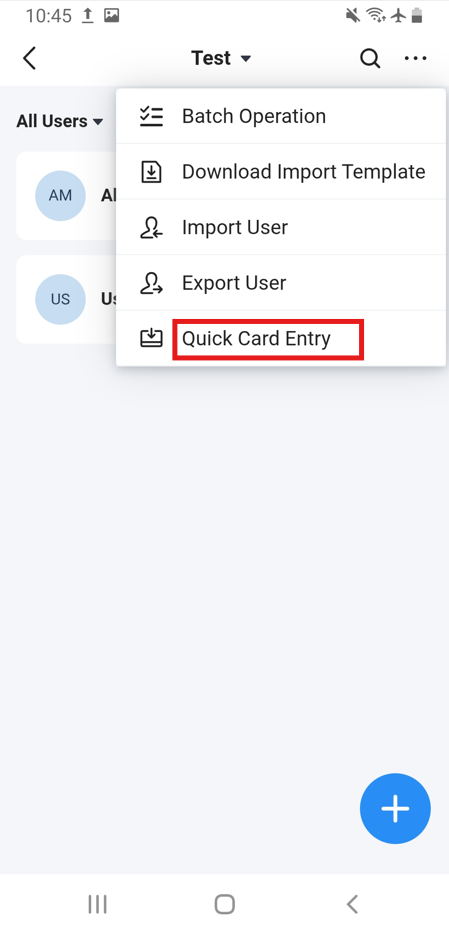
To perform quick card entry from the GDS Secureaccess App:
- Log in to your GDS SecureAccess Admin account.
- Go to Management → User → Quick Card Entry.
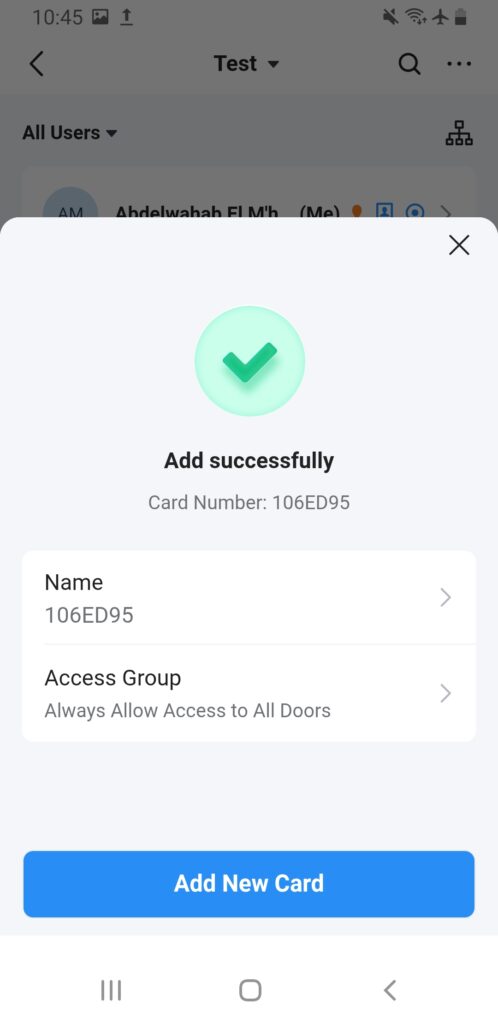
- Scan all the IC cards on the NFC-enabled area of your phone; all the scanned IC cards will be added
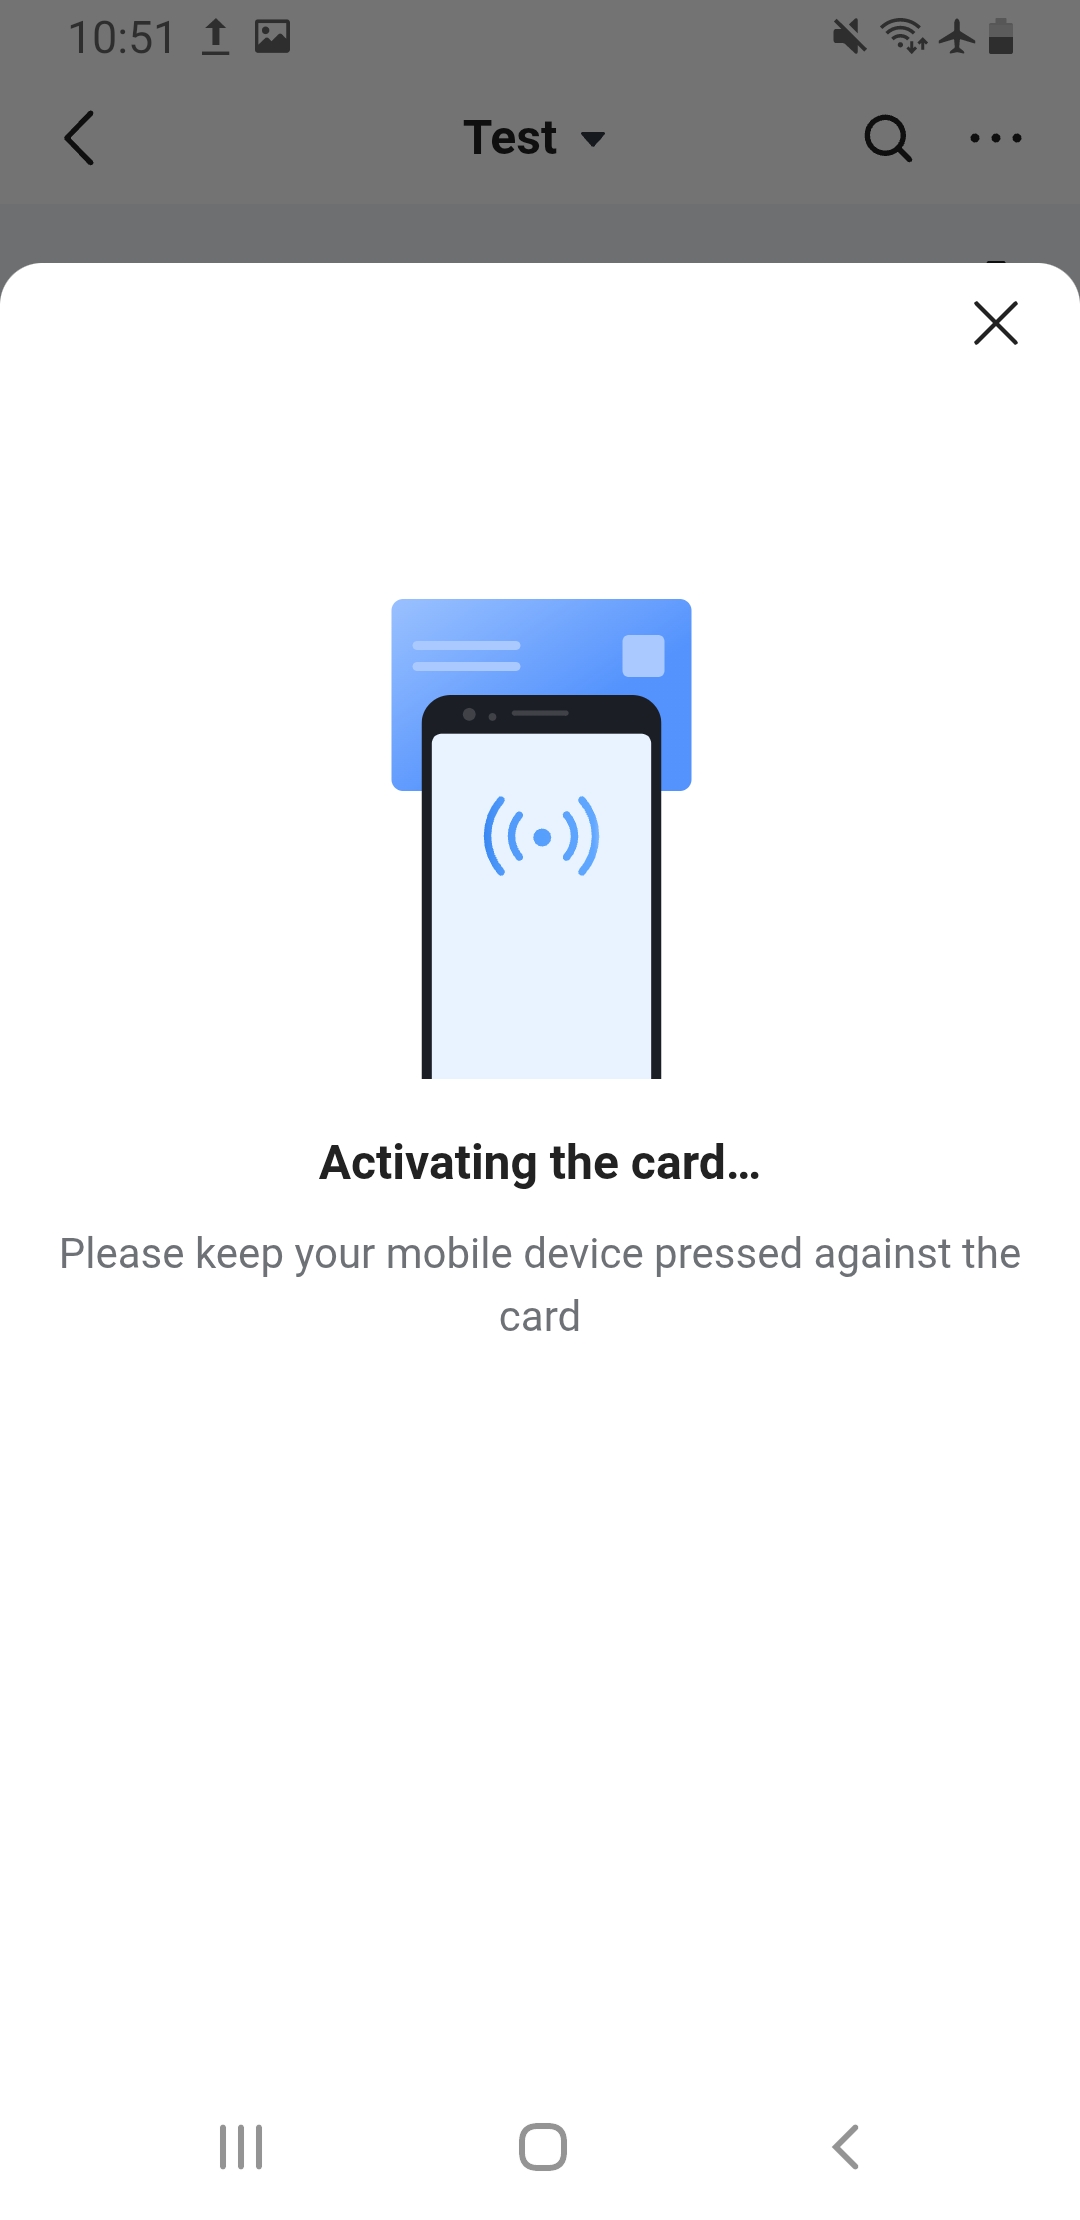
- When a card is scanned, it will ask you to confirm the card name and define the access group where the card will be used. The access group is the group that defines the list of users who can open a specific door station; each user will have an IC Card bound to him/her.
- When the card is scanned, and the user is added, the user will be added with their bound IC Card.
Results
What happens during Quick Card Entry Mode:
- The GDS device LED will turn white and slowly flash, indicating enrollment mode is active.
- When a card is swiped, the card number is automatically added to the user list.
- Door unlocking is disabled in this mode; swipes are used only for registration.
- When the timer expires, the device returns to normal operation automatically.
- If the same IC card is first enrolled directly on the GDS device and later scanned via the SecureAccess App, two users with the same card number will appear in Access Control → Users.
- The App user will be active
- The locally added card will be inactive
- To activate the local card, click IC Card Cloud Sync on the GDS Web UI to synchronize the keys. After syncing, the local card status will switch to active. For details, refer to How to Sync IC Card Keys from the Cloud.
The typical scenarios where the quick card entry will be useful:
- Mass-enrollment during installation.
- Registering dozens of employee or resident cards quickly.
- On-site enrollment when the card number is not printed on the card.
- Fast replacement when assigning new cards.
Writing Keys to Unencrypted IC Cards
This method is used when the deployment requires unencrypted IC cards. The Grandstream SecureAccess App writes the IC card key to the card using the phone’s NFC so the GDS372X can recognize it.
Prerequisites
- A phone that supports NFC
- Grandstream SecureAccess App installed and signed in
- The IC card assigned to a user in the app
Steps to Write the Card
- Open the Grandstream SecureAccess App
- Select the user you want to bind to the card
- Tap Write IC Card
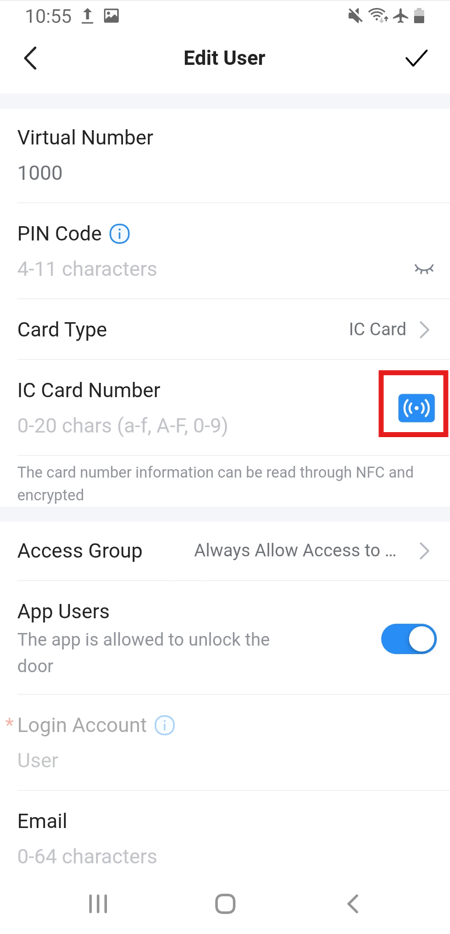
- Place the IC card on your phone’s NFC contact area.
- Wait for the success confirmation.
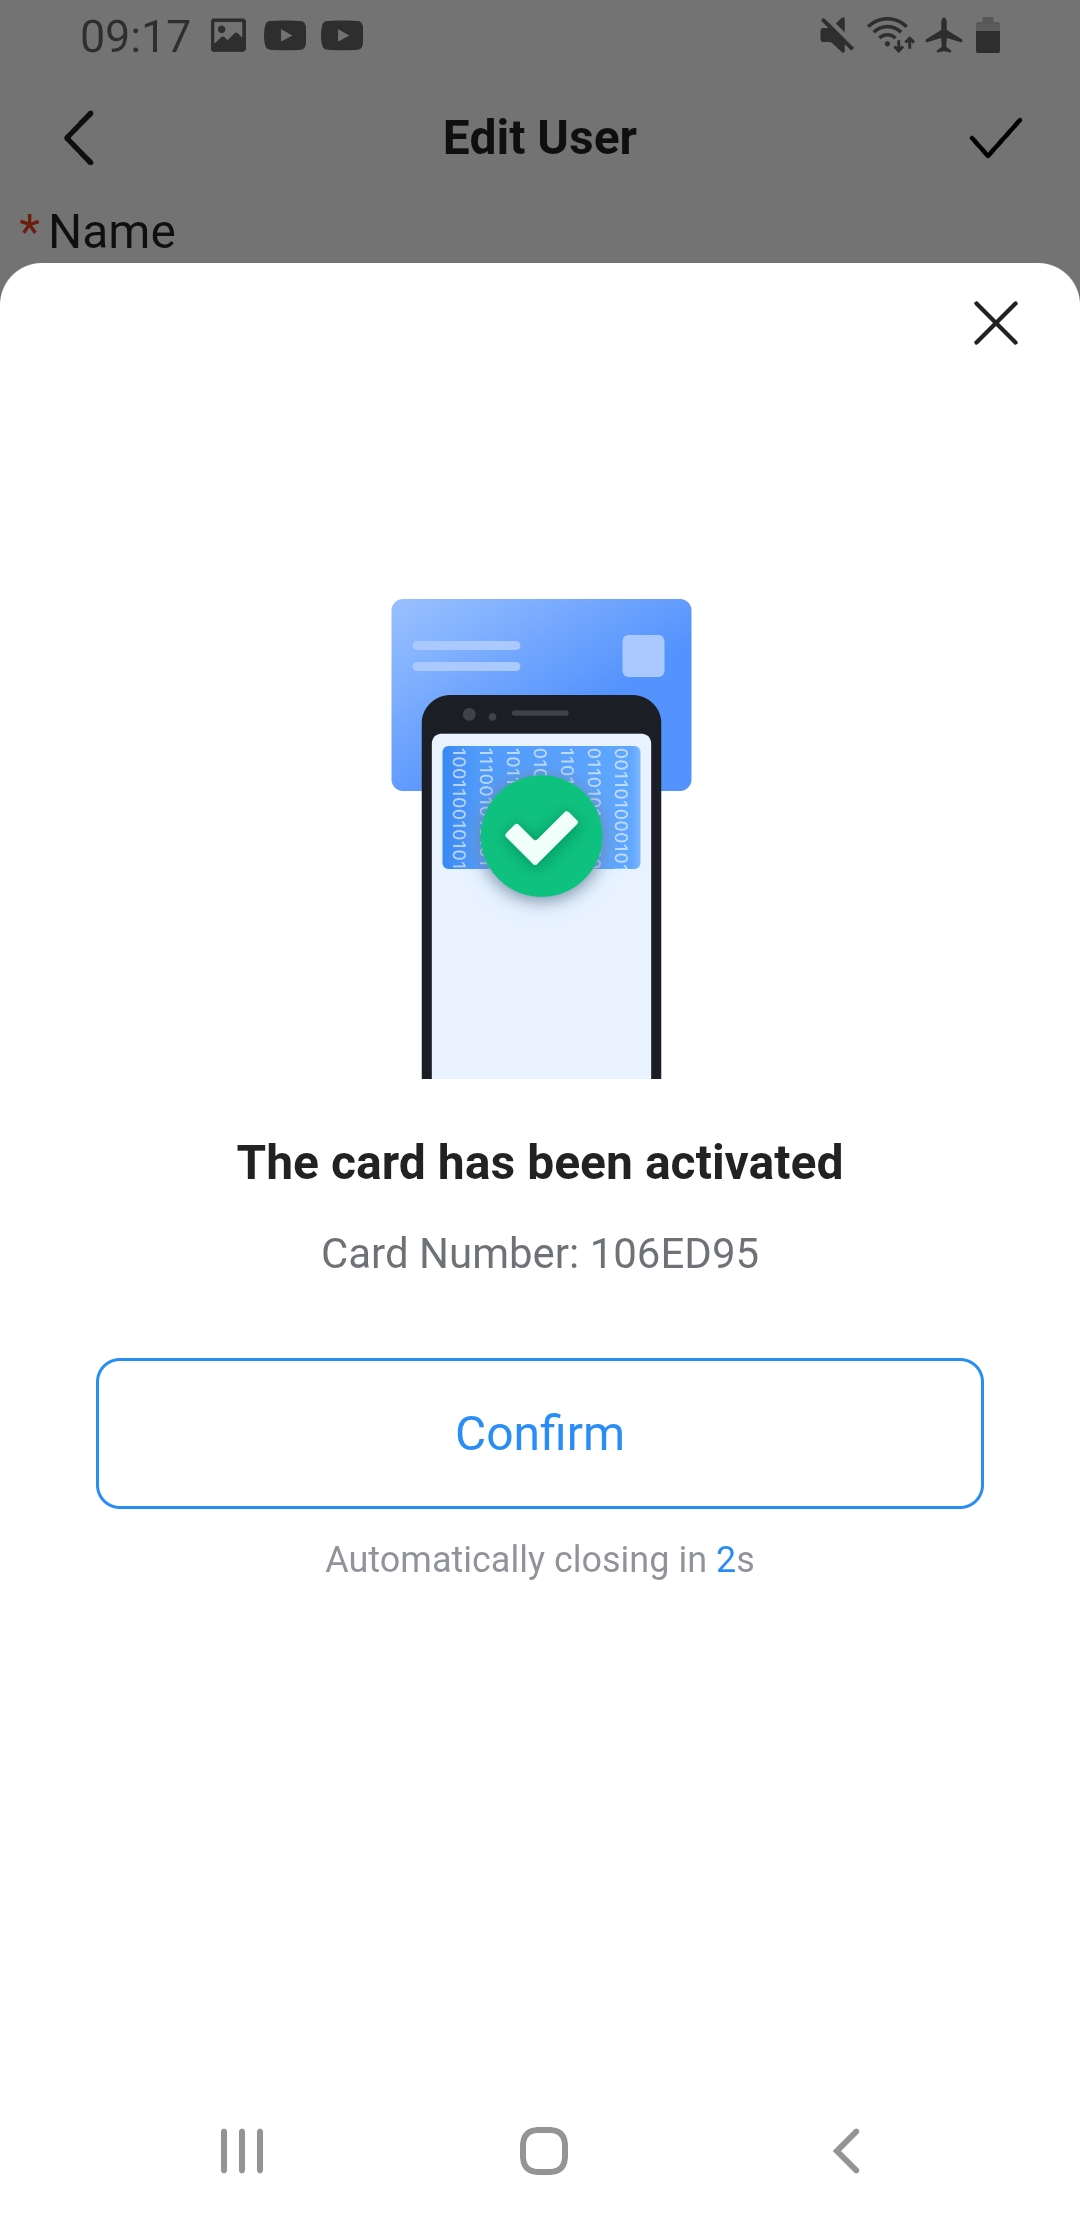
Once the action is completed, the card is ready to use on compatible GDS372X devices.
Exporting IC/ID Card and User data
Exporting Users (Including IC Card Details) from the GDS372X Web UI
The GDS372X Web UI allows administrators to export IC card information and user records from the device into a file. This export includes the IC card details associated with each user, which makes it useful for:
- Backup: keeping a secure copy of IC card records in case the device is reset or replaced.
- Migration: moving IC card data to another GDS372X device without manually re-registering cards.
- Record-keeping and auditing: maintaining administrative records of which IC cards are assigned to which users.
By exporting this data, administrators can preserve the IC card configuration and ensure that access credentials remain consistent across devices and deployments.
How to export user data
- Log in to the GDS372X Web UI.
- Navigate to Access Control Settings → User Management
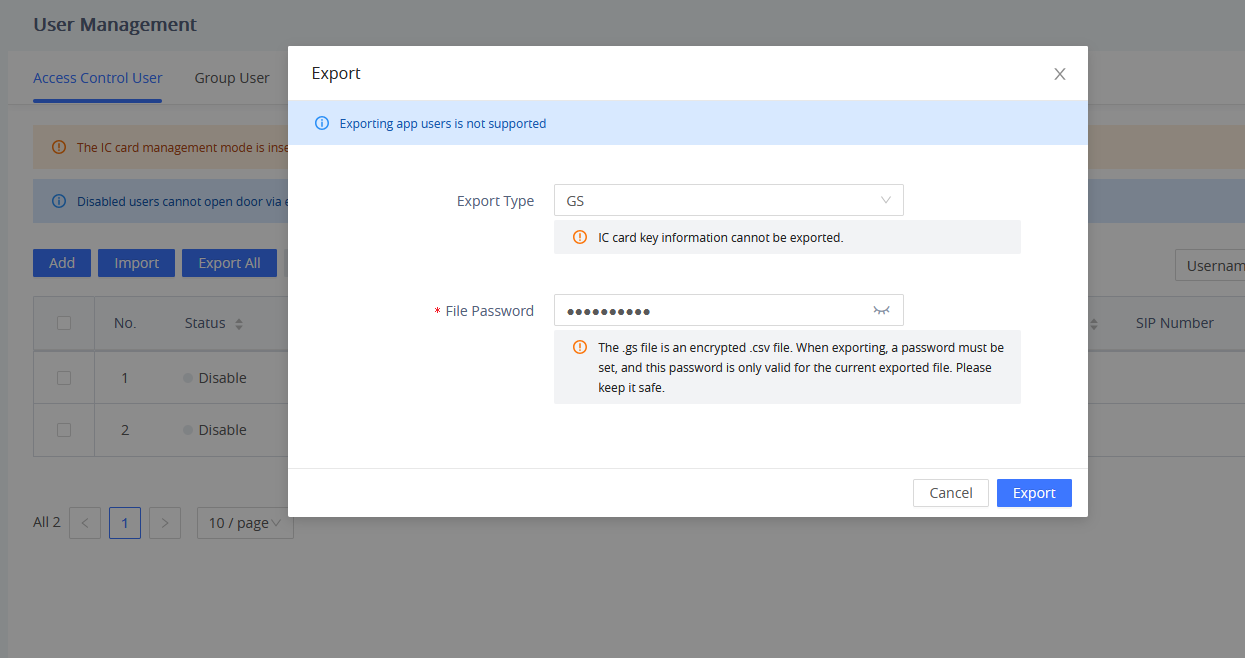
- Click Export All
- Select the export format:
- CSV
- GS (encrypted CSV — requires password)
- If exporting as GS, enter and confirm an export password
- Download and store the file securely
Exporting Users (Including IC Card Details) from the Grandstream SecureAccess App
When you export from the Grandstream SecureAccess App, the app generates an Excel-compatible file (XLXS) that contains the user list. This exported file includes each user’s IC card type and card number, along with other user information such as username, validity period, and permissions. This makes it easy to back up or migrate user and card records.
How to Export from the SecureAccess App
- Open the Grandstream SecureAccess App
- Go to Management → User
- Tap Export user
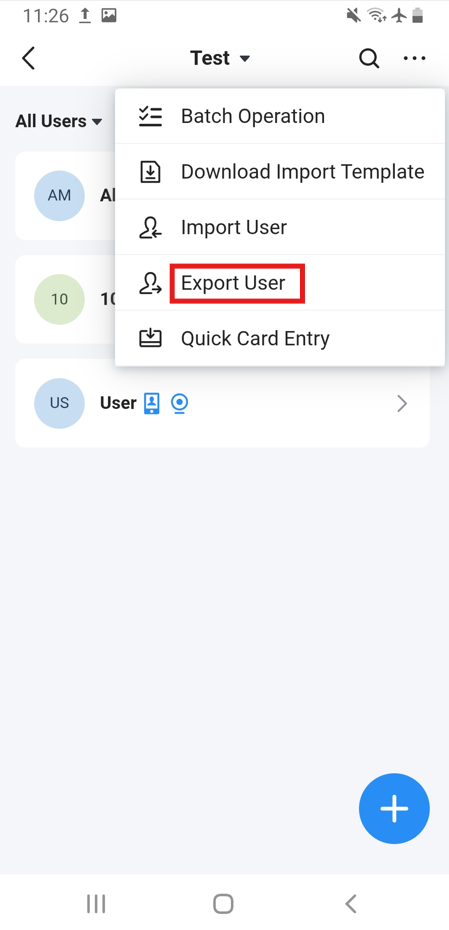
- When saving, the file will be saved in XLSX format
This export allows administrators to preserve user and IC card details together in one file for backup, migration, or auditing.
Exporting IC Cards Directly from the Login Page
Another way to export IC card information is by scanning each IC card individually using an NFC-supported smartphone with the Grandstream SecureAccess App installed. When the card is scanned, the app reads the IC card key and securely stores it in the credential list. From there, the administrator can assign a passkey (export password) and export the card credentials as an encrypted file.
This encrypted export file can then be:
- Imported to another smartphone running the SecureAccess App, or
- Imported to a GDS372X device
So the same IC card credentials can be reused without needing to re-register the cards at the door device.
Because the exported file is password-protected and encrypted, the IC card data remains secure while still being easy to back up, migrate, and centrally manage across multiple devices or administrators.
To scan and export IC Cards, follow the instructions:
- Open the Grandstream SecureAccess App and stay on the login page.
- Tap the IC Card Management icon shown on the login screen.
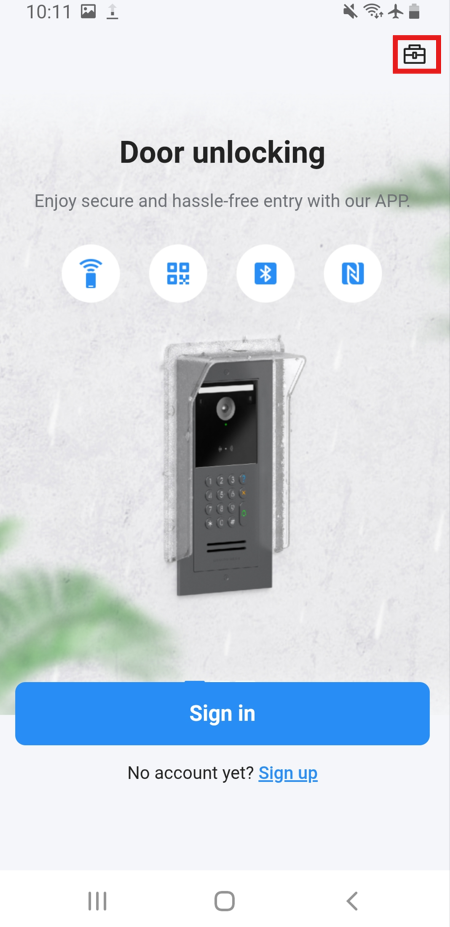
- Select Add IC Card.
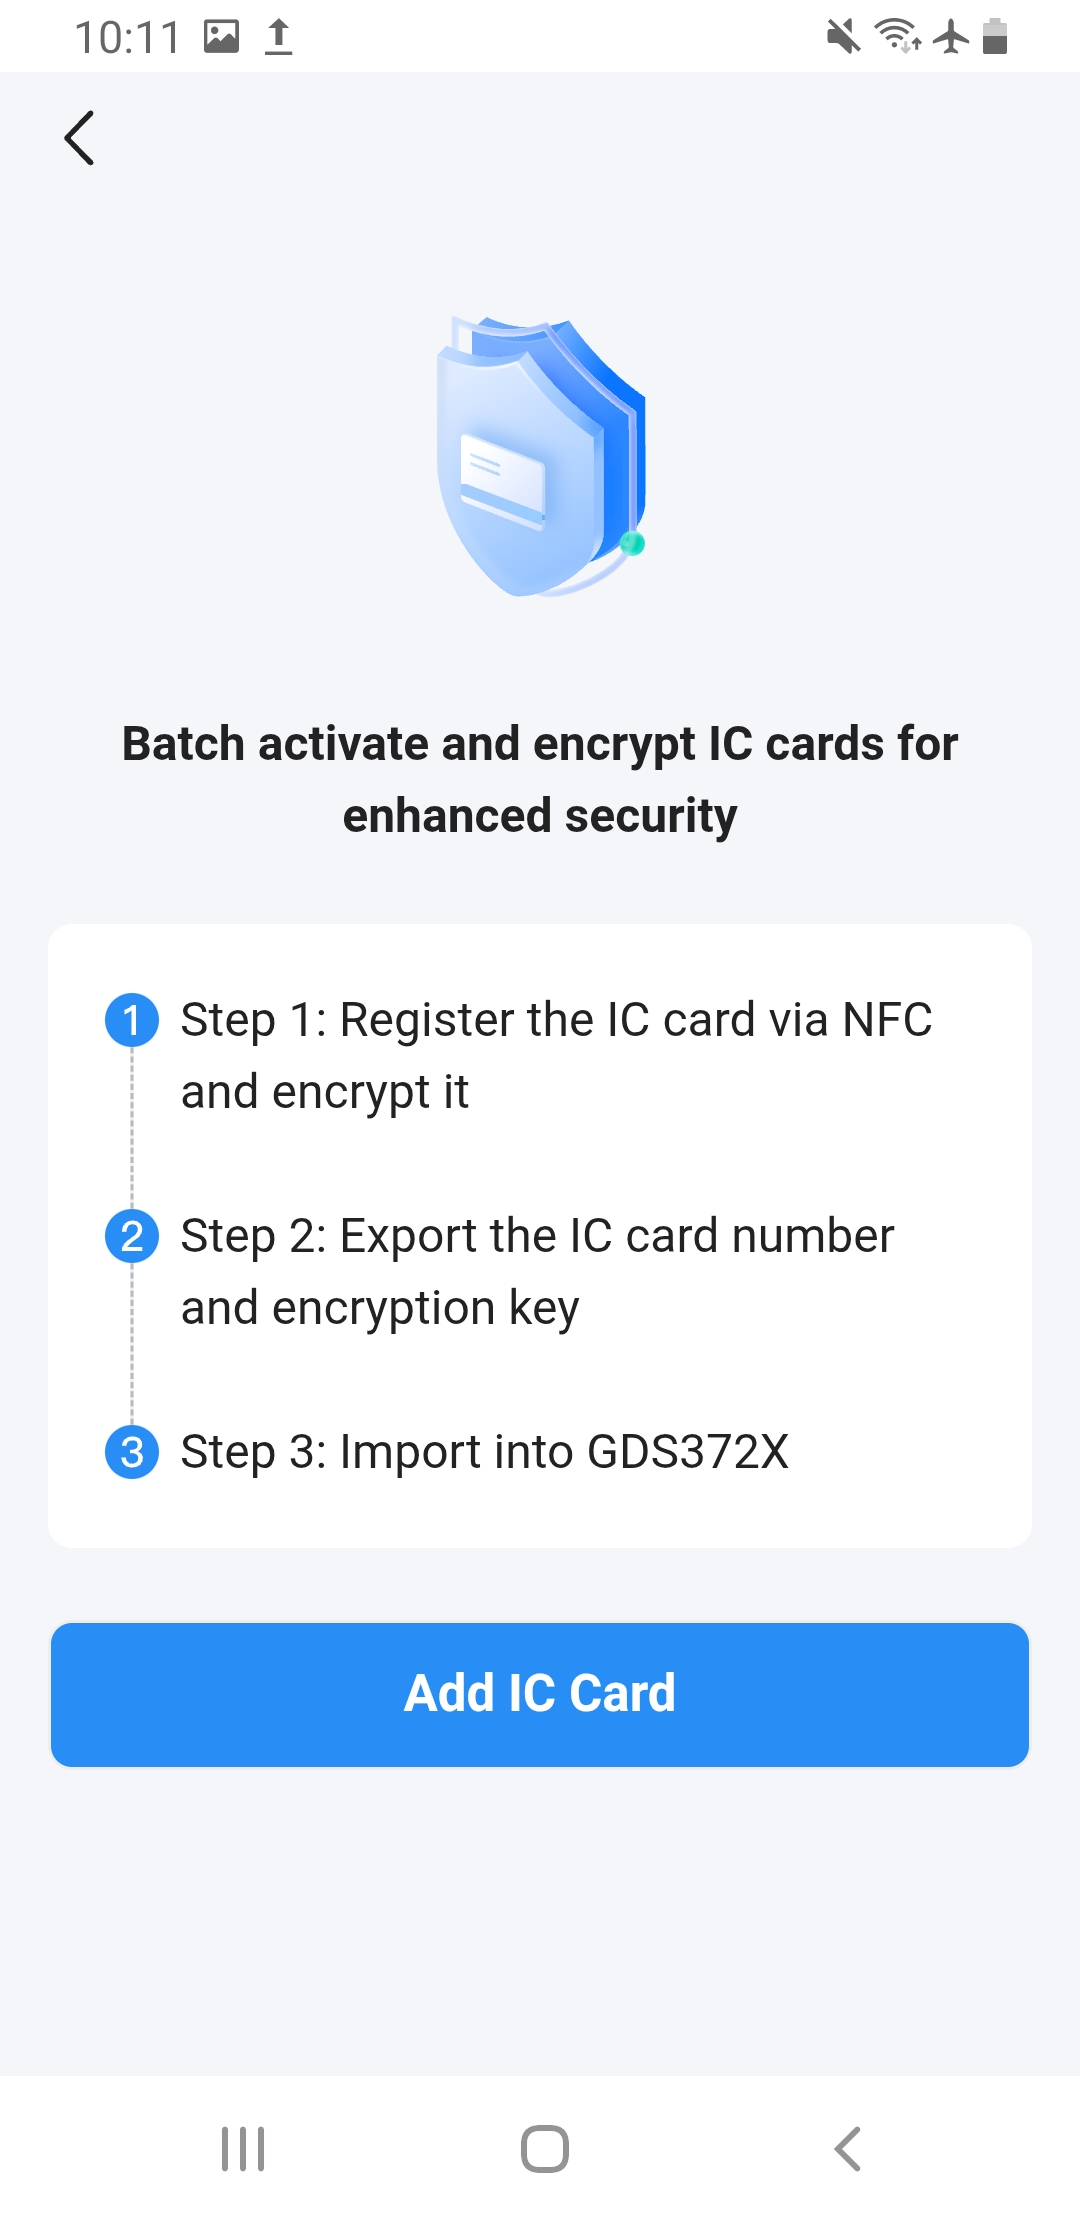
- Scan the IC card by placing it on the NFC area of your smartphone.
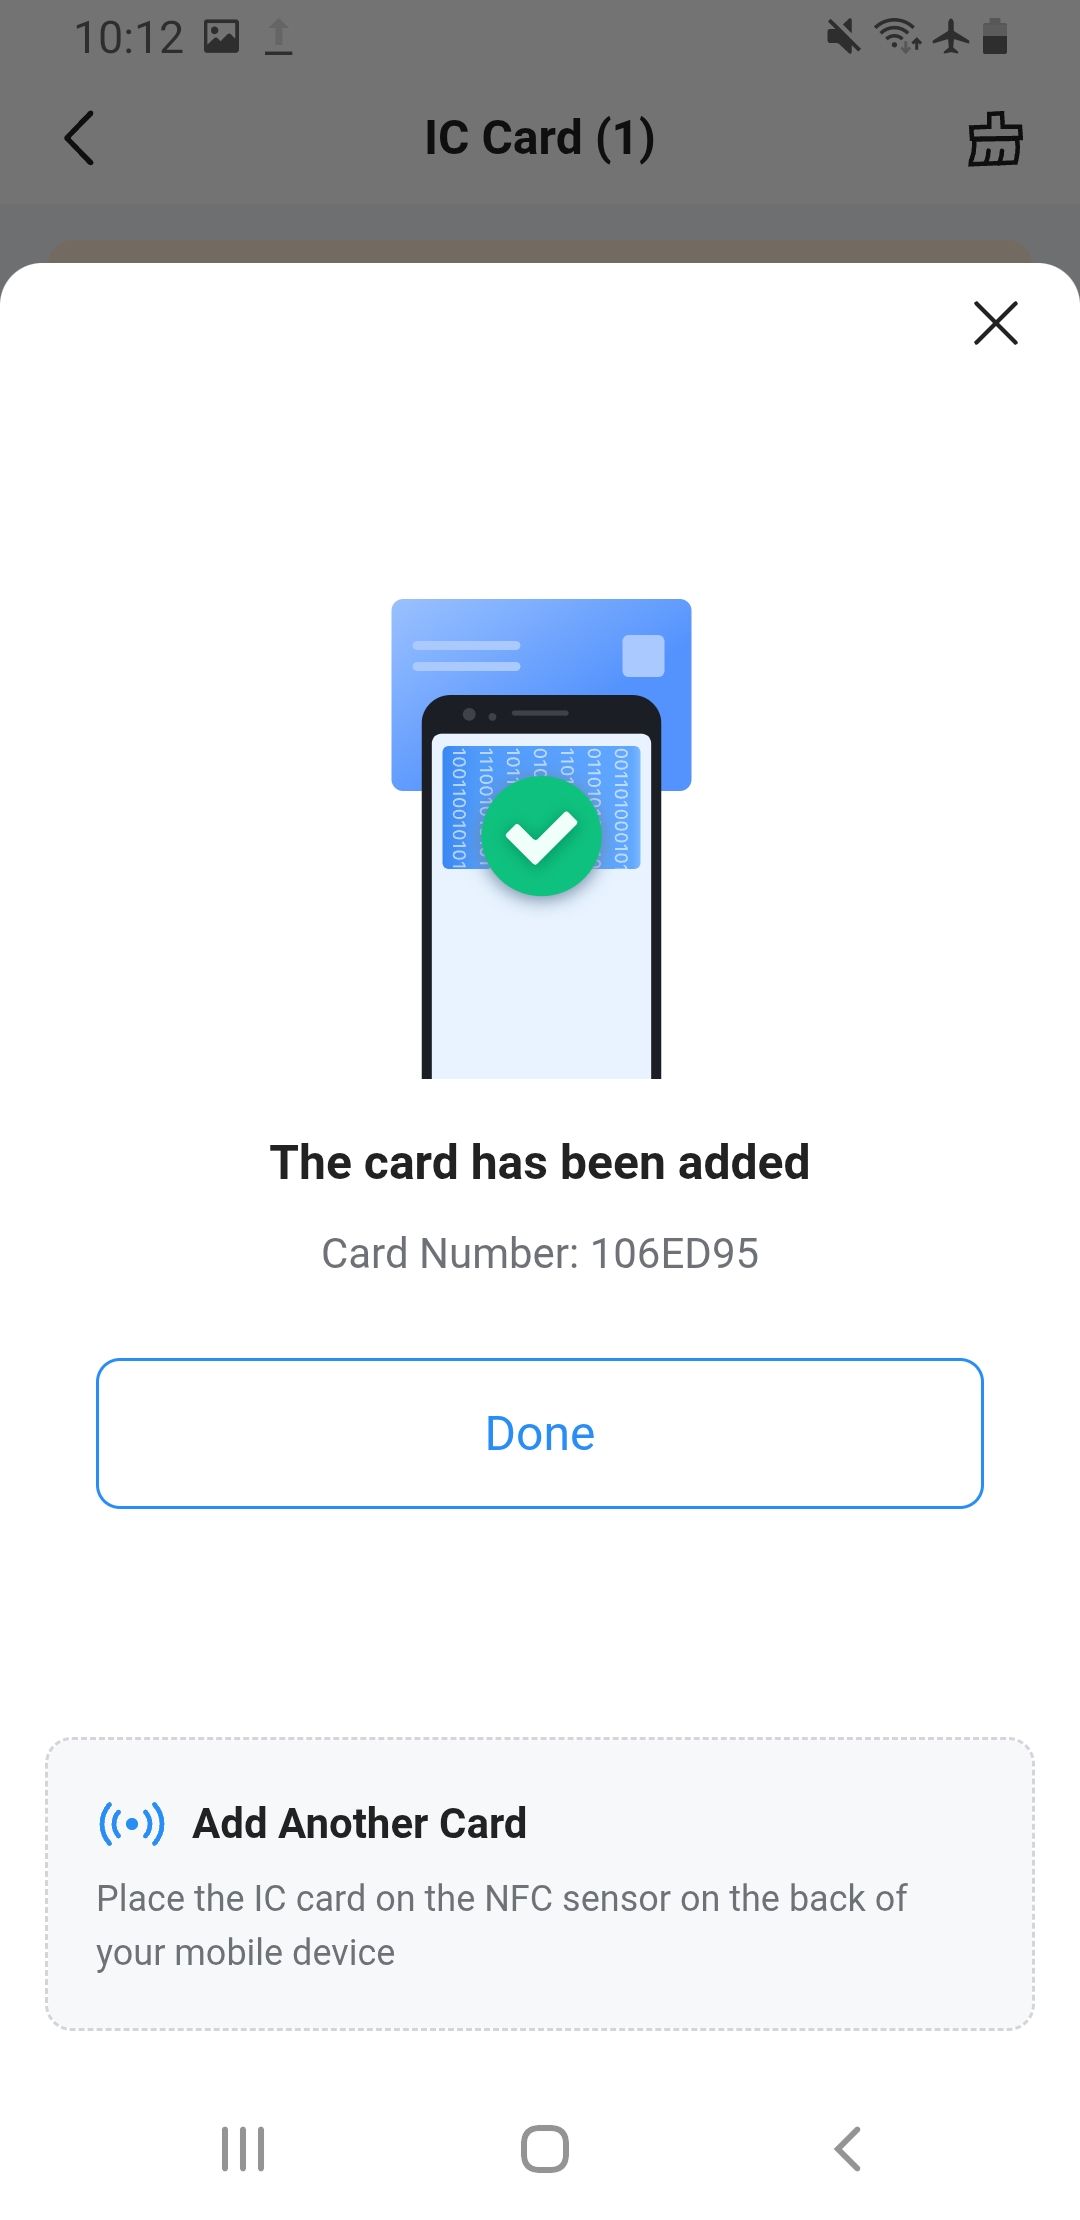
- Once the card is successfully read, it will appear in the list.
- After adding all required cards, tap Export All Cards.
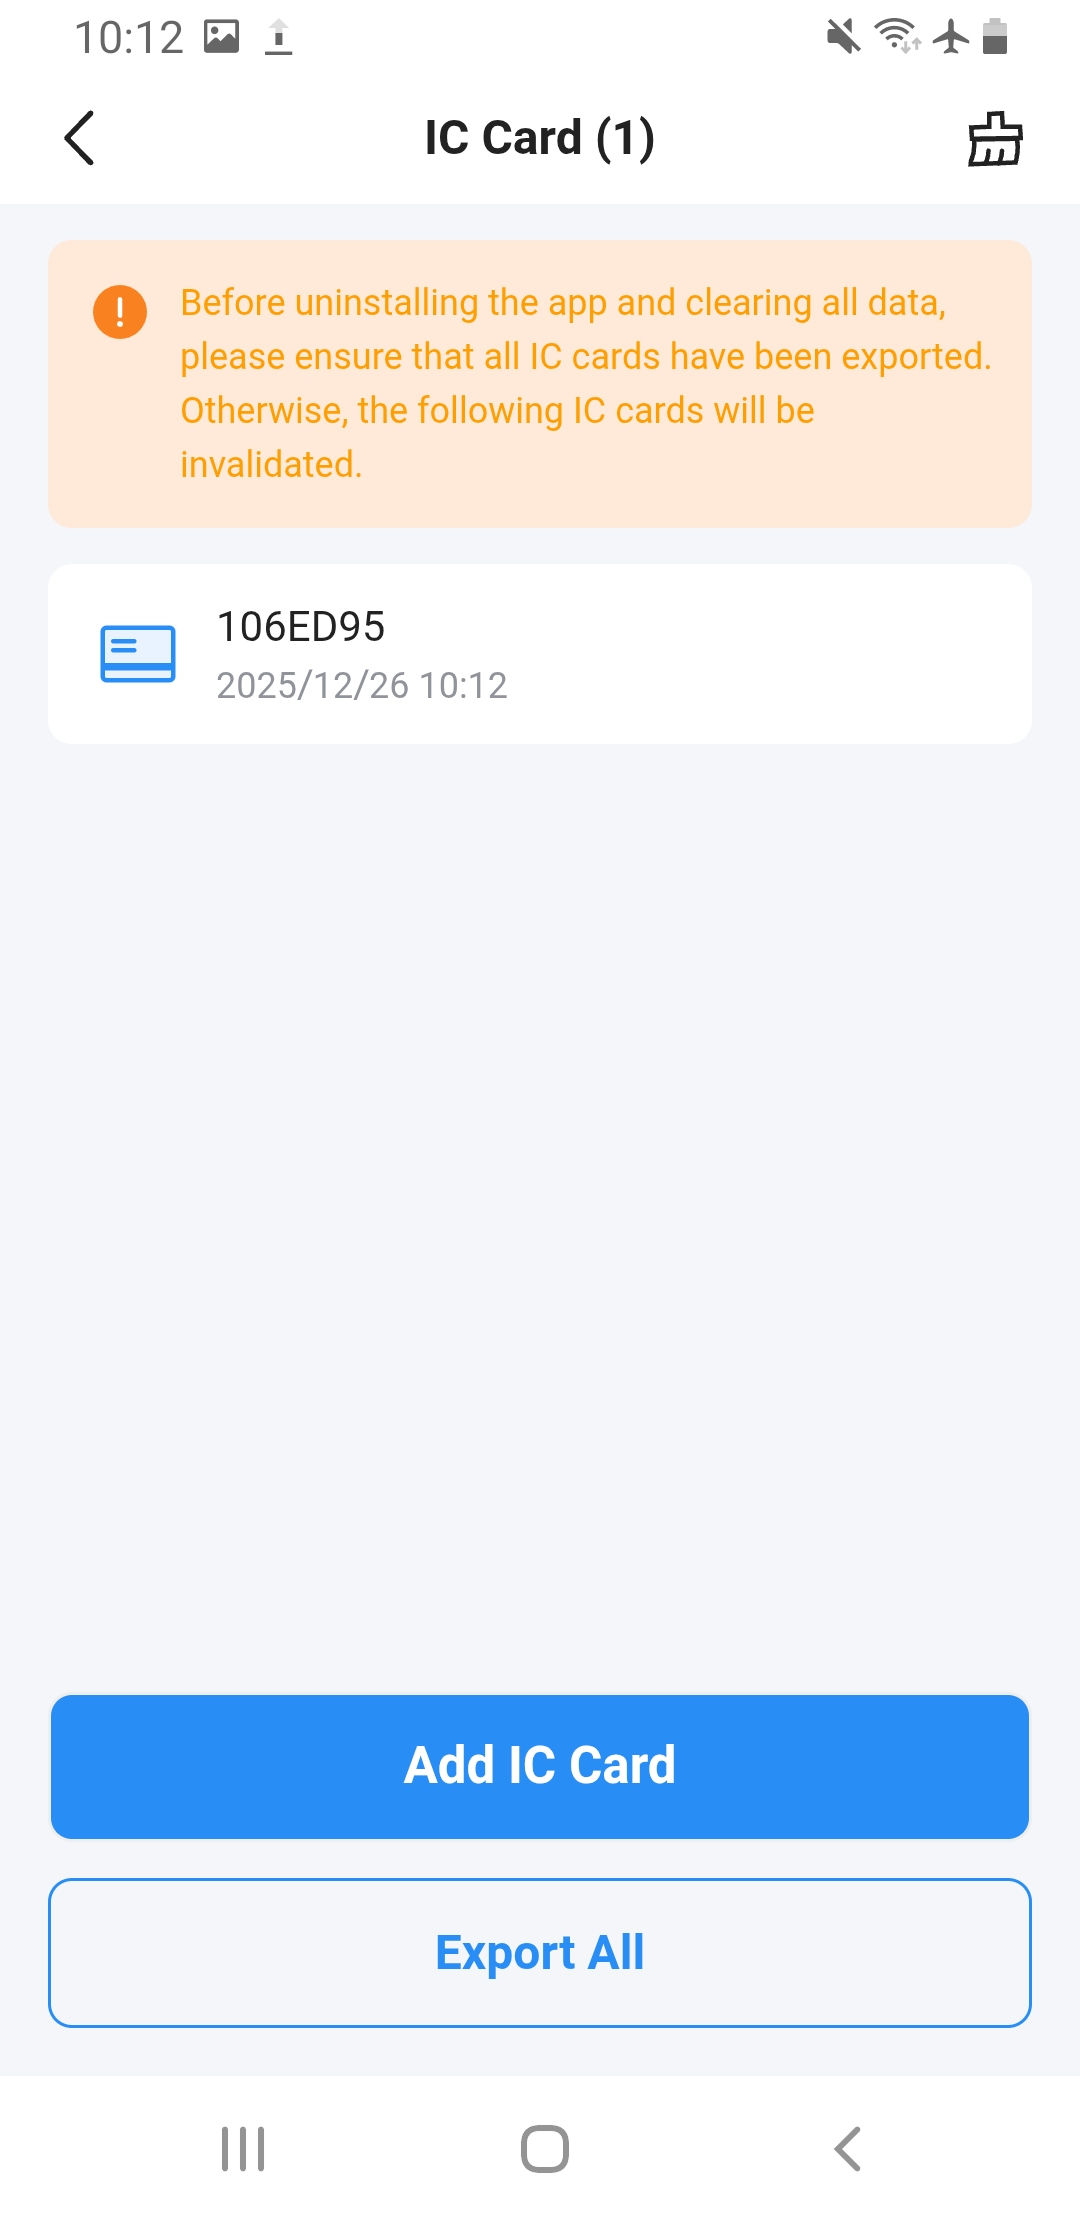
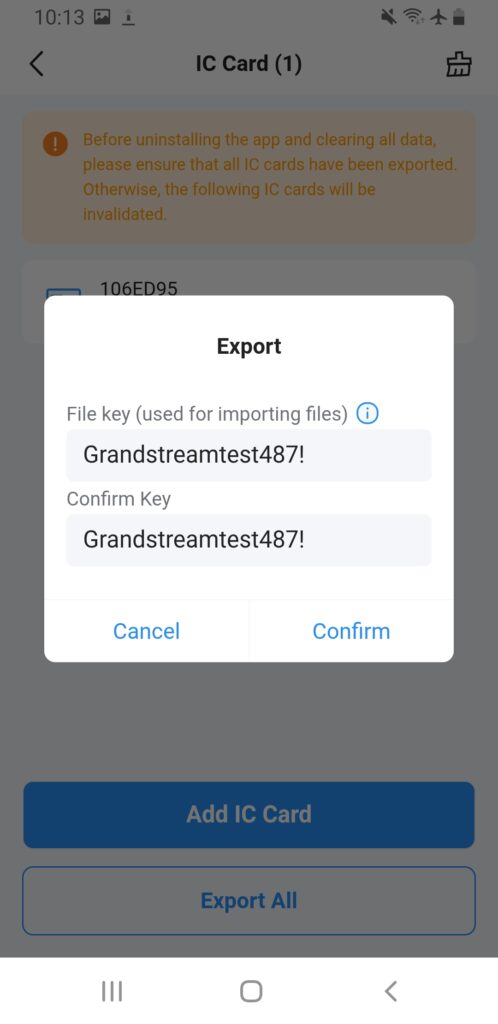
- Set a passkey (export password). This password will be required when importing the IC card file later.
- Share or save the exported encrypted file securely from the app.
Importing IC Card Keys into the GDS372X
IC card credential files that were saved from the Grandstream SecureAccess App, the GDS WebUI or through GDMS SecureAccess can be imported into the GDS372X so users can unlock the door using their IC cards.
Supported File Formats
- CSV — plain-text credential file
- GS — encrypted CSV export (password-protected)
- SEC — encrypted file generated by GDMS SecureAccess
How to Import IC Card Keys into the Device
- Log in to the GDS372X Web UI
- Navigate to Access Control Settings → User Management
- Click Import
- Select the Import Type (CSV / GS / SEC)
- Upload the credential file
- If importing GS or SEC, enter the required password
- Select what would happen to duplicate records: either skip them or update the older information with the newly added card information.
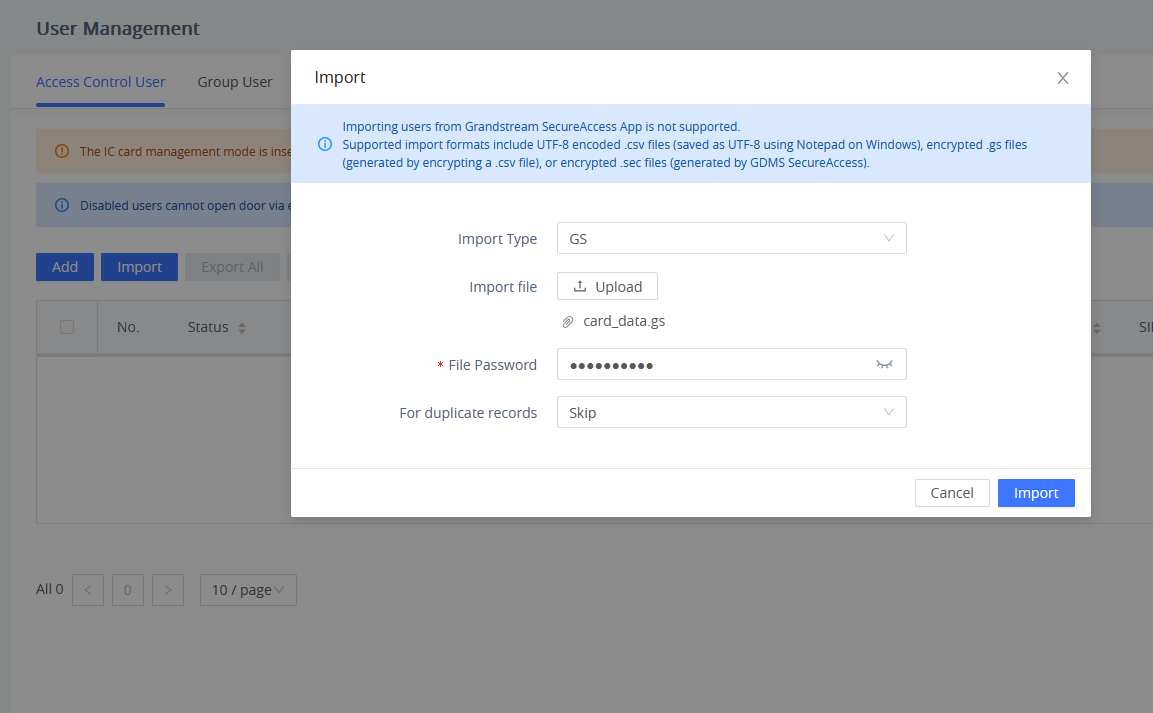
- Click Import to apply the credentials
Once completed, the IC card user information is stored in the device, and users can authenticate normally.
Sync IC Card Keys from GDMS SecureAccess Cloud
When IC card credentials are created and managed in GDMS SecureAccess, they can be synchronized to the GDS372X so that the device automatically receives the latest card data, without needing local file imports.
How to Sync IC Card Keys from the Cloud
- Log in to the GDS372X Web UI.
- Navigate to: Access Control Settings → User Management.
- Click IC Card Cloud Sync.
- If the cloud service (GDMS SecureAccess) is available, clicking the button will retrieve the IC card’s key information.
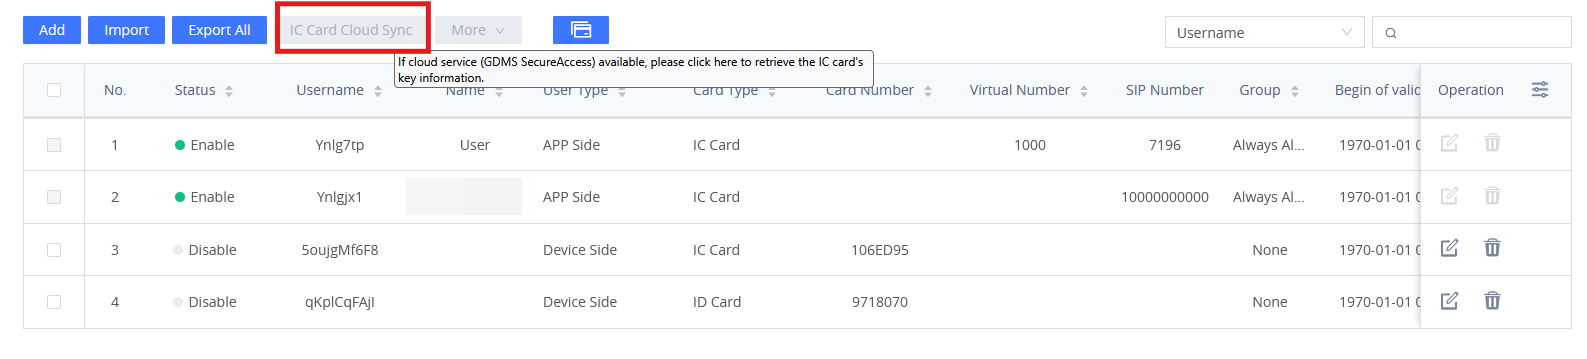
Once the sync is complete, users whose cards exist in the cloud database will be able to unlock the door according to their assigned permissions and schedules.
If the same IC card number exists in more than one system, the GDS372X applies the following priority:
- Grandstream SecureAccess App users always take priority over local device users.
- Within the same system, the first matching user entry is used (highest sort order).
This ensures consistent behavior when a card is duplicated across systems or user lists. Avoid assigning the same card number to different users to prevent conflicts.
Supported IC Card Enrollment & Synchronization Workflows
The GDS372X platform supports multiple end-to-end workflows for enrolling, exporting, and synchronizing IC card credentials. Administrators can choose the method that best fits their deployment size, security requirements, and operational model.
The following methods describe the supported credential lifecycle paths, from scanning and key generation to import and synchronization.
Method 1: Scan on GDS Device → Export → Import SEC File
This method is used for on-site IC card enrollment directly on the GDS device, followed by securely exporting and reusing the credentials on the same or another GDS372X device. Can be configured by following the steps below:
- Log in to the GDS372X Web UI.
- Navigate to Access Control Settings → User Management.
- Enable Quick Card Entry and activate Swipe Card Entry.
- Swipe IC cards on the GDS device to register them.
- Using an NFC-enabled Android phone, open the Grandstream SecureAccess App and stay on the login page.
- Tap IC Card Management → Add IC Card, then scan each card.
- After scanning all cards, select Export All Cards and generate an encrypted SEC file with a passkey.
- Return to the GDS372X Web UI and navigate to Access Control Settings → User Management → Import.
- Select SEC as the import type, upload the file, enter the passkey, and complete the import.
Method 2: Scan or Write Cards in App → Cloud Sync
This method is designed for cloud-managed deployments, where IC cards are enrolled or written using the SecureAccess App and then synchronized to the GDS device via GDMS SecureAccess.
- Open the Grandstream SecureAccess App on an NFC-enabled Android phone.
- Scan IC cards using Quick Card Entry in the app or write keys to unencrypted IC cards using Write IC Card.
- Bind each IC card to a user and assign the appropriate access group.
- Ensure the GDS device is registered and associated with GDMS SecureAccess.
- Log in to the GDS372X Web UI.
- Navigate to Access Control Settings → User Management.
- Click IC Card Cloud Sync to retrieve the card credentials from the cloud.
- Verify that the users and IC cards are successfully synchronized.
Method 3: Bulk Import via GDS Manager → Write Cards → Import SEC File
This method is intended for large-scale deployments that require bulk provisioning of users and IC cards using centralized management tool such as the GDS Manager software. Follow the below steps for configuration:
- Use GDS Manager to bulk import user and IC card information.
- Open the Grandstream SecureAccess App on an NFC-enabled Android device.
- Write IC card keys to unencrypted IC cards using the Write IC Card function.
- Export the IC card credentials as an encrypted SEC file from the app or management platform.
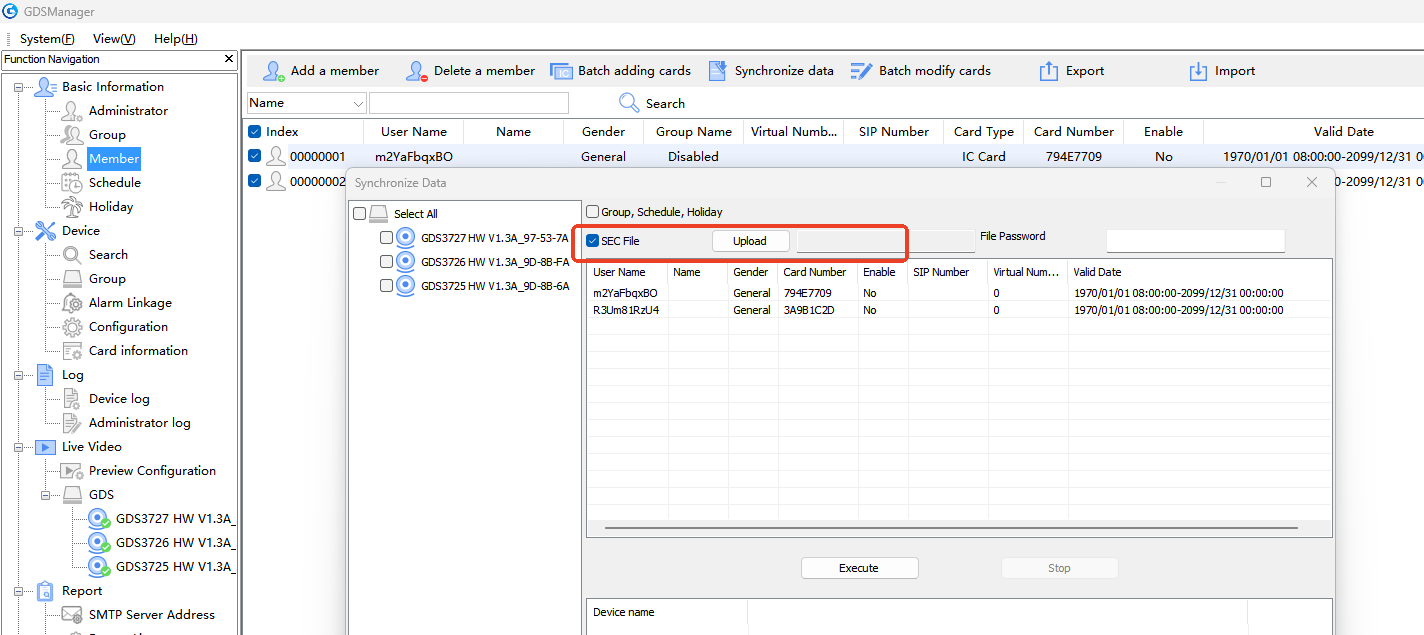
- In GDS Manager, import the SEC file to distribute credentials to target GDS devices.
- Confirm that the IC cards are recognized and function correctly on the devices.
Best-Practice Security Recommendations
Prefer encrypted IC cards
Encrypted IC cards generate and store secure authentication keys that cannot be easily copied. This prevents someone from cloning a card using cheap NFC tools.
Unencrypted cards (often older legacy models) are convenient, but they’re also easier to duplicate. The encrypted cards should always be the default choice, especially in offices, residential buildings, and critical facilities.
Protect export passwords
When exporting IC card user files (.gs / .sec), the system requires a password. Treat that password like a master key:
- Store it securely.
- Never reuse obvious passwords.
- Share only with authorized admins
- Rotate it if one member of the staff leaves
If someone gets both the export file + its password, they can re-import your users elsewhere, which can cause security risks.
Limit who can sync cloud data
GDMS SecureAccess lets admins centrally sync IC card information to devices. This is powerful, but also sensitive.
Limit cloud sync permissions only to trusted admins because they can:
- Add new users who instantly gain access
- Remove access credentials
- Overwrite credentials if misconfigured
Use role-based permissions whenever possible and avoid “everyone is admin” setups.
Disable unencrypted IC compatibility mode unless required
The GDS372X supports a compatibility mode for unencrypted IC cards. This exists mainly for legacy environments.
But there’s a trade-off:
- Compatibility = convenience
- Encryption = real security
So keep compatibility OFF unless you specifically need it for older cards. This prevents weak cards from being accepted.
Audit user lists regularly
Over time, systems accumulate ex-employees, expired visitors, contractors, test users, etc.
Review periodically:
- Who still has a valid card?
- Do validity dates make sense?
- Are groups assigned correctly?
- Do visitor cards expire?
This reduces silent backdoor access, which is one of the most common real-world security failures.
Remove unused or invalid cards promptly
Whenever someone leaves or loses a card:
- Delete or disable it immediately.
- Never “leave it in case they come back”.
- Log the reason where possible.
This protects against:
- Lost card misuse
- Contractors returning after contract end
- Former staff access attempts
Remote deletion via GDMS SecureAccess is especially useful here.
Troubleshooting
The table below summarizes some of the most frequently faced issues and their suggested solutions.
Issue | Likely Cause | Suggested Fix |
Card reads but won’t unlock | Quick Card Entry still enabled | Disable Swipe Entry from the WebUI |
Card works in app but not device | Key not synced to device | Run IC Card Cloud Sync |
Import fails | Wrong format / password missing | Verify file type & password |
Duplicate card behavior unexpected | Priority rule applies | Review user sources |
Cards can’t be read on Secureaccess App | Phone does not support NFC, or the NFC feature is disabled | Enable NFC Feature on the phone |
Supported Devices & Apps
Model | Firmware / software version |
GDS3727 | 1.0.1.30+ |
GDS3726 | 1.0.1.30+ |
GDS3725 | 1.0.1.30+ |
SecureAccess App | 1.0.1.30+ (Android) |