


Overview
GRP2613/W is a next generation enterprise IP Phone featuring 6 dual-color line keys (can be digitally programmed as up to 24 provisionable BLF/fast-dial keys), 2.8” (320×240) TFT color LCD, 4 programmable context-sensitive soft keys, 1000M network ports, integrated PoE, 3-way conference, and Electronic Hook Switch (EHS). The GRP2613/W delivers superior HD audio quality, rich and leading-edge telephony features, protection for privacy, and broad interoperability with most 3rd party SIP devices and leading SIP/NGN/IMS platforms. GRP2613/W is the perfect choice for enterprise users looking for a high quality, feature rich multi-line executive IP phone with advanced functionalities and performance.
Package Contents
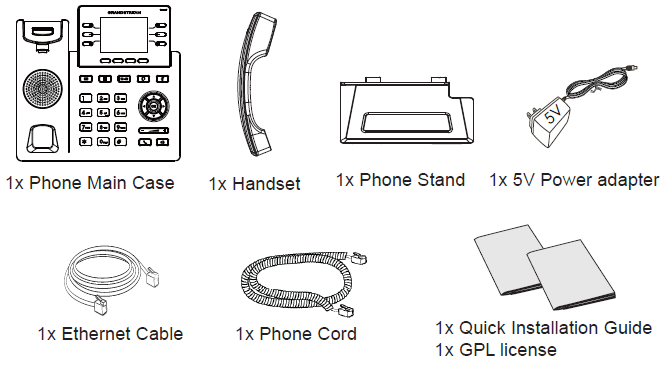
Phone Setup
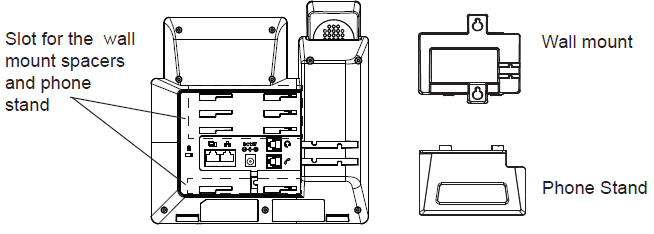
Installing the phone (Wall Mount *sold separately)
- Attach the wall mount spacers to the slot for wall mount spacers on the back of the phone.
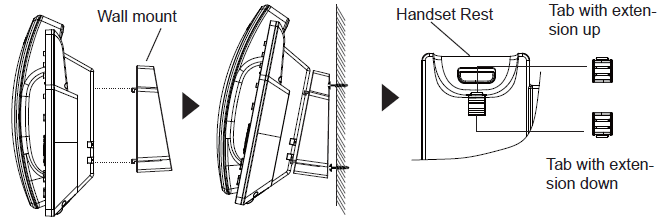
- Attach the phone to the wall via the wall mount hole.
- Pull out the tab from the handset cradle (See figure below).
- Rotate the tab and plug it back into the slot with the extension up to hold the handset while the phone is mounted on the wall (See figure below).
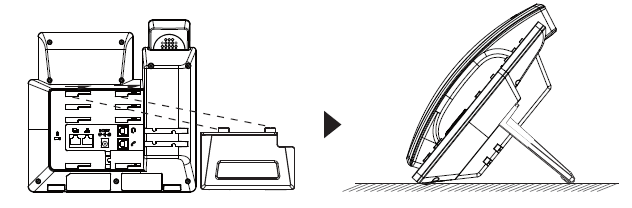
Installing the phone (Phone Stand)
For installing the phone on the table with the phone stand, attach the phone stand to the bottom of the phone where there is a slot for the phone stand. (Upper half, bottom part).
Connecting the Phone
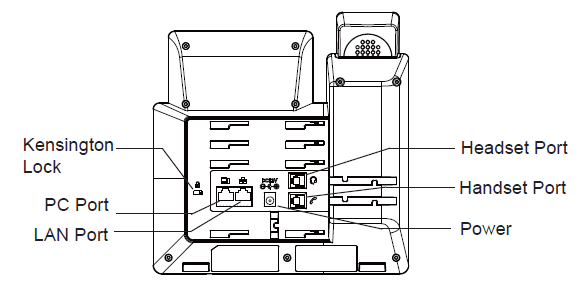
To setup the GRP2613/W, follow the steps below:
- Connect the handset and main phone case with the phone cord.
- Connect the LAN port of the phone to the RJ-45 socket of a hub/switch or a router (LAN side of the router) using the Ethernet cable.
- Network connection is possible via two methods which are described below.
- Using Ethernet:
- Connect the LAN port of the phone to the RJ-45 socket of a hub/switch or a router (LAN side of the router) using the Ethernet cable.
- Using Wi-Fi (GRP2613W only):
- On LCD menu, navigate to “System → Network → Wi-Fi settings” and enable Wi-Fi.
- Select “Scan” and GRP2613W will automatically start scanning within the range.
- A list of Wi-Fi networks will be displayed. Select the desired network, and if required, enter the correct password to connect.
- Using Ethernet:
4. The LCD will display provisioning or firmware upgrade information. Before continuing, please wait for the date/time display to show up.
5. Using the phone embedded web server or keypad configuration menu, you can further configure the phone using either a static IP or DHCP.
Phone Description
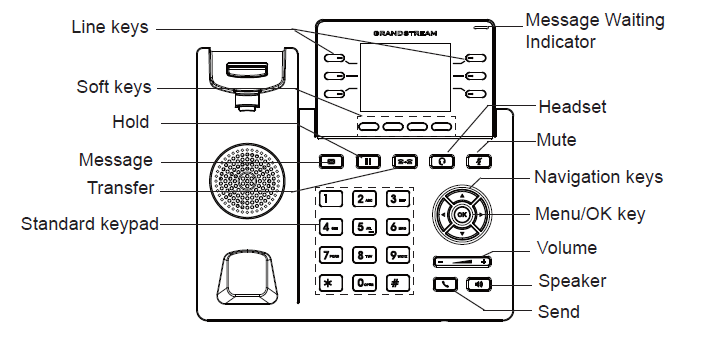
Phone Configuration
Configure the GRP2613/W using a Web Browser
- Ensure your phone is powered up and connected to the Internet.
- Press and hold the “UP” button for 3 seconds to see the IP address.
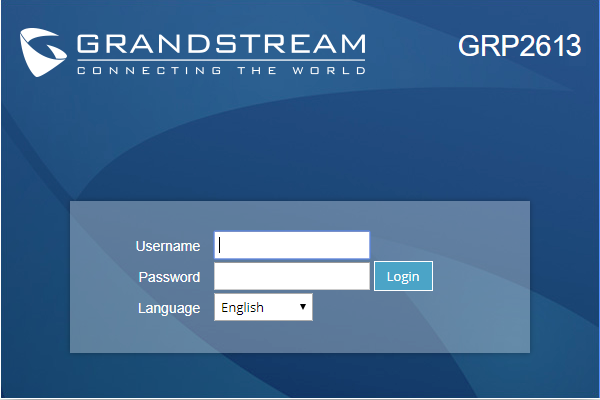
- Type the phone’s IP address in your PC browser.
- Enter admin’s username and password to access the configuration menu. (The factory default username is “admin” while the default random password can be found on the sticker at the back of the unit).
Configure the GRP2613/W using the Keypad
- Make sure the phone is idle.
- Press the MENU key to access the keypad MENU to configure the phone.
- Select MENU → Phone → SIP → Account to configure settings for SIP Proxy, Outbound Proxy, SIP User ID, SIP Auth ID and SIP Password.
- Follow MENU options to configure the basic features of the phone. For example: the IP address if using a static IP. For details, please check GRP26XX User Manual.
- Please contact your ITSP for additional settings that may be necessary to configure the phone.
Refer to online documents and FAQ for more detailed information:
http://www.grandstream.com/our-products

For Warranty and RMA information please visit www.grandstream.com