
Overview
The GWN7000 is a powerful enterprise-grade multi-WAN Gigabit VPN router. Ideal for the enterprise, small-to-medium business, retail, education, hospitality and medical markets, the GWN7000 supports comprehensive Wi-Fi and VPN solutions that can be shared across one or many different physical locations. It features high-performance routing and switching power and a hardware-accelerated VPN client/server for secure inter-office connectivity. To maximize network reliability, the GWN7000 supports traffic load balancing and failover. The GWN7000 features an embedded controller and automated provisioning master that can setup and manage up to 300+ in-network GWN series Wi-Fi Access Points. This can be easily operated through the product’s intuitive web browser user interface, which also offers a central panel to monitor and control the entire network. The GWN7000 also includes an advanced 7-layer network/application monitoring capability based on DPI (Deep Packet Inspection) technology to securely monitor all network activity.
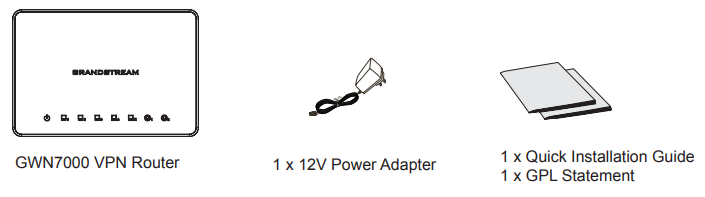
Package Contents
GWN7000 Ports

| Port | Description |
|---|---|
| POWER | Power adapter connector (DC12V, 2A) |
| RESET | Factory reset button. Press for 7 seconds to reset factory default settings. |
| LAN1/POE | Ethernet RJ45 port (10/100/1000Mbps) supporting PoE+. |
| LAN (2,3,4) | Ethernet RJ45 ports (10/100/1000Mbps). |
| NET | Ethernet RJ45 port (10/100/1000Mbps); can be configured as WAN, LAN or VoIP port. |
| WAN (1,2) | Ethernet RJ45 ports (10/100/1000Mbps), to connect to a modem’s LAN port. |
| USB | 2x USB 3.0 (for printer/file sharing) |
Hardware Installation
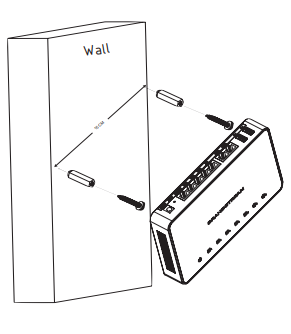
GWN7000 can be mounted on the wall. Please refer to the following steps for the appropriate installation.
Wall Mount
- Use a 6 mm drill bit to drill two holes 15 cm apart.
- Insert the anchors into the holes. Use a screwdriver to secure the screws to each anchor. Leave a clearance of approximately 5 mm between each screw head and its anchor.
- Position the GWN router with the Ethernet ports facing up. Place the wall-mount slots of the GWN7000 over the screw heads on the wall. Then slide it down to lock it into place.
Note: GWN7000 can be also mounted in a vertical orientation. - Connect power and Ethernet cables (RJ45) to the correct ports of your GWN7000.
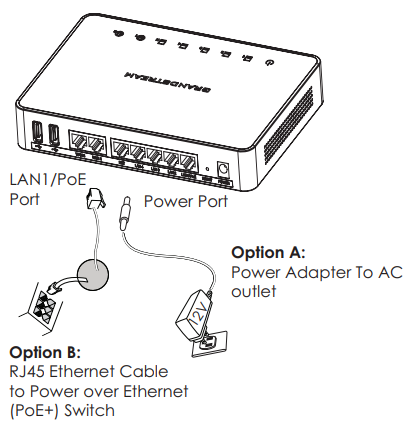
Powering and Connecting the GWN7000
The GWN7000 can be powered either using the right PSU (DC12V, 2A) or using a PoE+ switch.
Option A
Step 1: Insert the power adapter into the power port of the GWN7000 and plug the other end of the adapter into an AC power outlet.
Step 2: Plug a RJ45 Ethernet cable to the network port of the GWN7000.
Option B
Plug a RJ45 Ethernet cable to the network port of the GWN7000 and plug the other end to a PoE+ (Power over Ethernet Plus) switch.
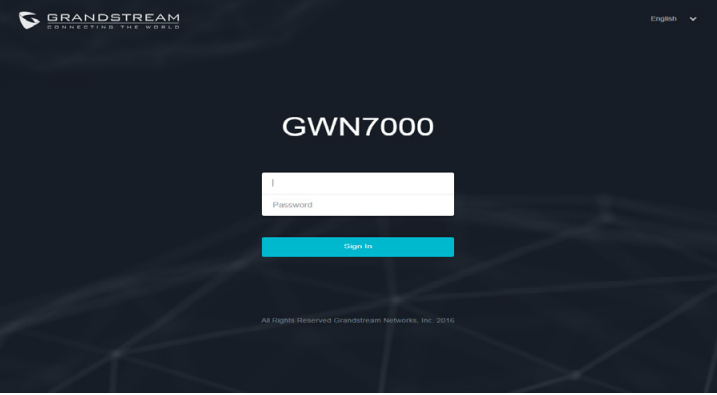
Accessing the Configuration Interface
- Connect your computer to one of the LAN ports on your router using an Ethernet cable.
- Once connected, your computer will be assigned with 192.168.1.x IP address from GWN7000 built-in DHCP server (enabled by default).
- Launch your web browser and type https://192.168.1.1 in the address field. Press enter (PC) or return (Mac).
- The login screen will appear. Enter admin in the username and password fields then click Sign In.
The GWN7000 configuration interface will appear, allowing you to customize your settings as needed.
Refer to online documents and FAQ for more detailed information:
http://www.grandstream.com/our-products
For Certification, Warranty and RMA information, please visit www.grandstream.com