
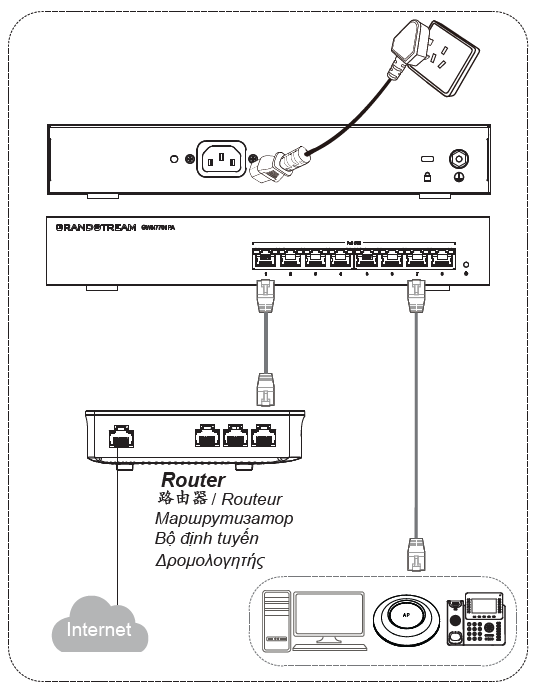
The GWN7700 series are unmanaged network switches that provide a quick and cost-effective way to add high-speed Gigabit connectivity to home offices and small/medium businesses. It requires no configuration or installation, offers a desktop and wall-mountable design, and provides auto MDI/MDIX to eliminate the need for crossover cables. Each port supports auto-negotiation to allow the GWN7700 series to recognize the link speed of any 10/100/1000Mbps network device and intelligently adjust for compatibility and optimal performance. The PoE (Power-over-Ethernet) models provide ports with IEEE 802.3af/at compliant, smart dynamic PoE output to power IP phones, IP cameras, Wi-Fi access points, and other PoE endpoints. The plug-and-play GWN7700 series are the ideal unmanaged network switches for home offices and small-to-medium businesses.
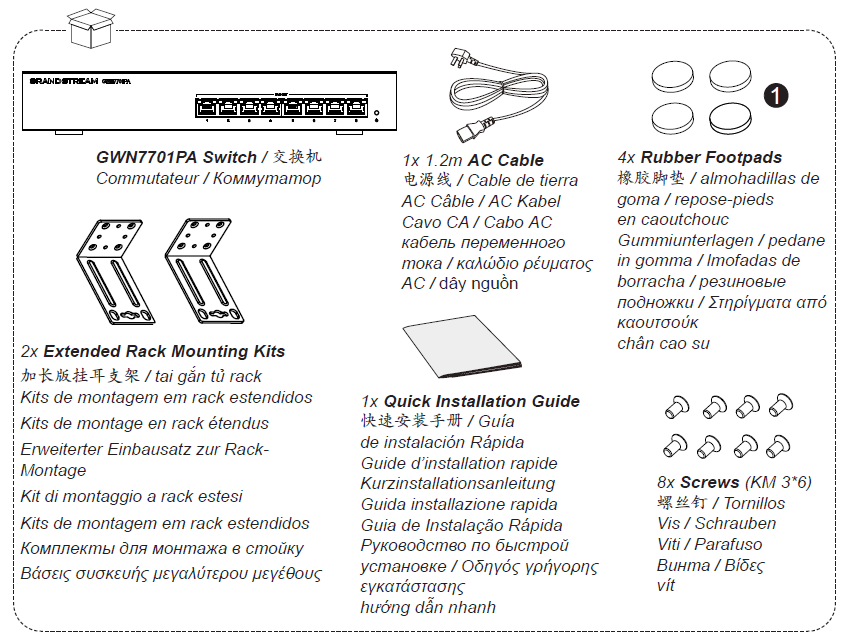
Package Contents
Installation
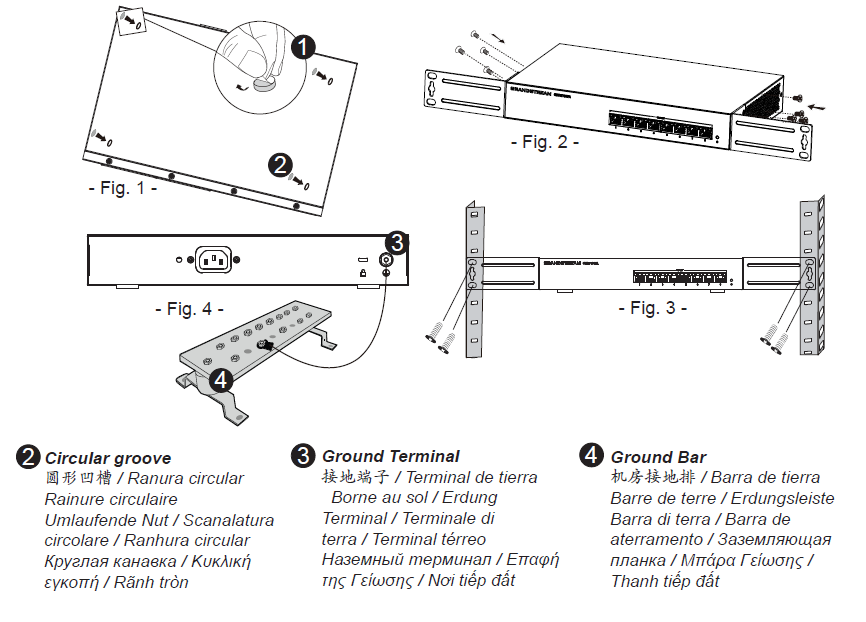
Install on the Desktop (Fig. 1)
- Place the bottom of the switch on a sufficiently large and stable table.
- Peel off the rubber protective paper of the four footpads one by one, and stick them in the corresponding circular grooves at the four corners of the bottom of the case.
- Flip the switch over and place it smoothly on the table.
Install on a 19” Standard Rack (Fig .2 and 3)
- Check the grounding and stability of the rack.
- Install the two L-shaped rack-mounting in the accessories on both sides of the switch, and fix them with the screws provided (KM 3*6).
- Place the switch in a proper position in the rack and support it with the bracket.
- Fix the L-shaped rack mounting to the guide grooves at both ends of the rack with screws (prepared by yourself) to ensure that the switch is stable and horizontally installed on the rack.
Grounding the Switch (Fig. 4)
- Remove the ground screw from the back of the switch, and connect one end of the ground cable to the wiring terminal of the switch.
- Put the ground screw back into the screw hole, and tighten it with a screwdriver.
- Connect the other end of the ground cable to the other device that has been grounded or directly to the terminal of the ground bar in the equipment room.
Refer to online documents and FAQ for more detailed information:
https://www.grandstream.com/our-products

For Certification, Warranty, and RMA information, please visit: www.grandstream.com