
Overview
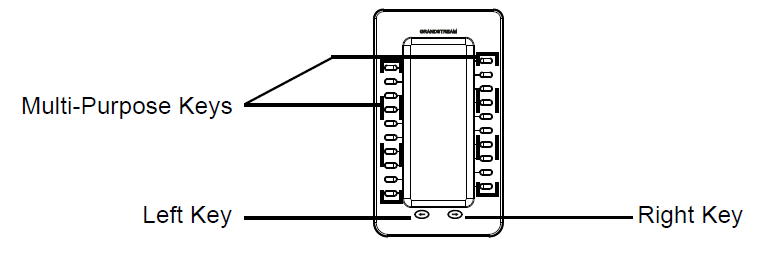
The GXP2200 extension module is an ideal solution for the busy enterprise environment looking to add the ability to receive and dispatch calls efficiently. Each extension module has 20 programmable left and right buttons, supporting 40 Multiple Purpose Keys to be configured. GXP2140/GXP2170 supports up to 4 extension modules, adding 160 fully programmable phone extensions to the phone.
Package Contents
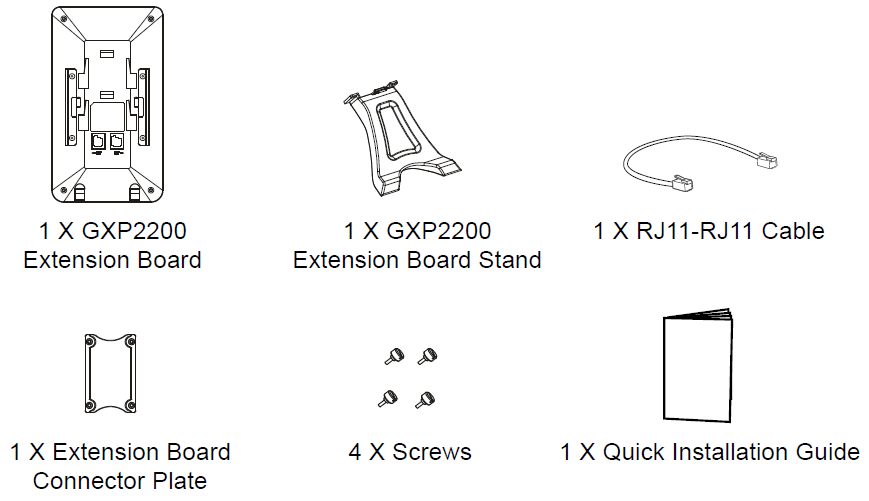
Installing GXP2200EXT Extension Module
On the back of GXP2140/GXP2170 and the extension board, there are slots for the connector plate. Attach the connector plate between the slots for GXP2140/GXP2170 and the extension board.
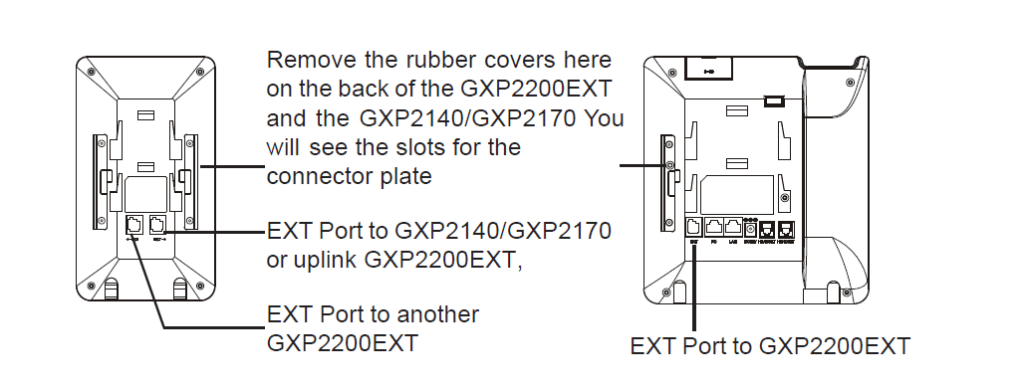
- Apply the screws provided and securely tighten them in.
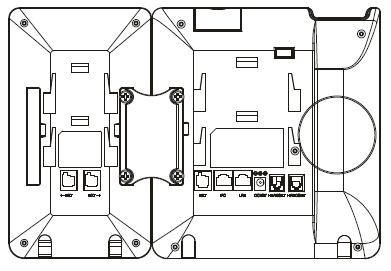
- Connect the extension board to GXP2140/GXP2170 via the EXT port using the RJ11-RJ11 cable.
- Install the phone stand on GXP2140/GXP2170 and the extension board.

Tips for using the GXP2200EXT
- Power up the GXP2140/GXP2170. The GXP2200 extension board will show the booting-up screen with version information and connecting status.
- After successfully booting up, the extension board will stay idle. Press and hold the Left key for 3 seconds to check the version information and status. Press any key to return to the standard display.
- Press the Left or Right key to switch between two pages if there are multi-purpose keys configured on both pages.
- Press the multi-purpose key to perform the assigned function.
Configuring the GXP2200EXT Extension Module
After the GXP2200EXT is successfully booted up and connected to the GXP2140/GXP2170,
the GXP2200EXT can be configured via the host GXP2140/GXP2170’s web GUI.
- Ensure the GXP2140/GXP2170 is properly powered up and connected to the Internet.
- Type the phone’s IP address in your PC’s browser.
- Login to GXP2140/GXP2170’s web GUI and configure Multiple Purpose Keys for Extension
board 1/2/3/4 under web GUI->Advanced Settings->MPK EXT Settings; - On the GXP2200EXT extension board, press the Left or Right button to browse all the
MPKs’ status on different pages; - For more information, please refer to the GXP21xx Administration Guide.
Refer to online documents and FAQ for more detailed information:
https://www.grandstream.com/our-products

For Warranty and RMA information, please visit
www.grandstream.com