
Overview
The GXV3380 IP Video Phone for Android combines a 16-line IP video phone with a multi-platform video conferencing solution and the functionality of an Android tablet to offer an all-in-one communications solution. The phone features a 8” 1280×800 capacitive touch screen IPS LCD, Mega pixel camera, dual Gigabit ports with PoE/PoE+, HD audio and video, integrated Wi-Fi (Dual band 802.11ac) & Bluetooth, rich peripheral interfaces, and Android 7.1.1. By combining a state-of-the-art IP video phone, an advanced conferencing solution, businesses throughout the world can now use the GXV3380 for all communication and productivity needs.
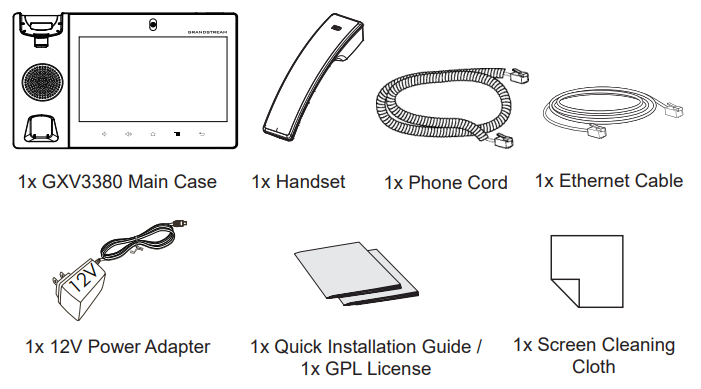
Package Contents
Phone Setup
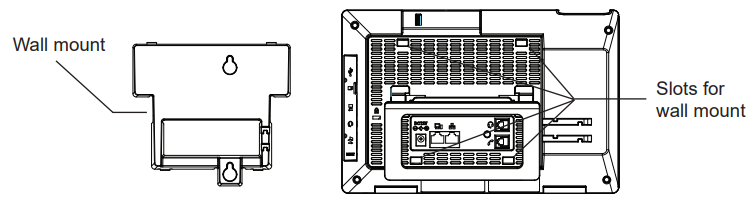
Installing the Phone (Wall Mount *Sold separately)
- Attach the wall mount to the slots on the back of the phone.
- Attach the phone to the wall via the wall mount hole.
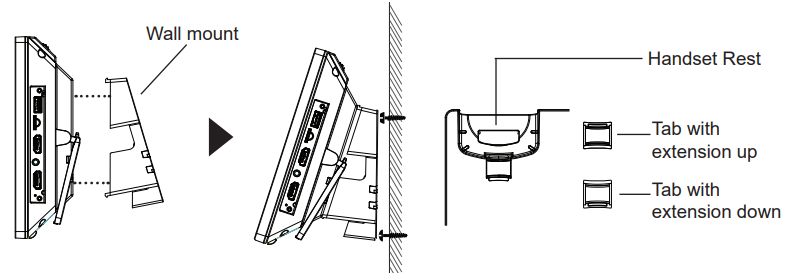
- Pull out the tab from the handset cradle (see figure below).
- Rotate the tab and plug it back into the slot with the extension up to hold the handset while the phone is mounted on the wall.
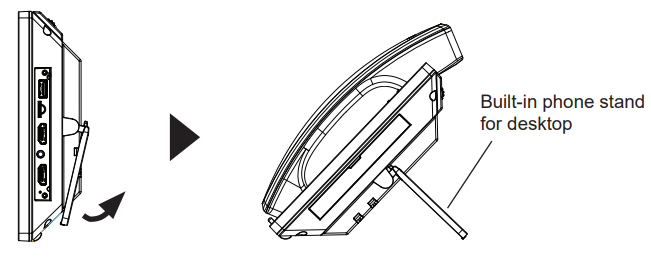
Using the Phone Stand
The GXV3380 has a built-in phone stand. To use it, pull out the phone stand handle on the back of the phone. Adjust the angle as preferred and make sure the phone stands still on the desktop.
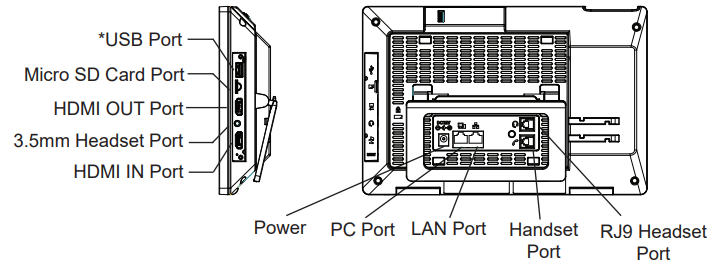
Connecting the Phone
- Connect the handset and main phone case with the phone cord.
- Connect the LAN port of the phone to the RJ-45 socket of a hub/switch or a router (LAN side of the router) using the Ethernet cable.
- Connect the 12V DC output plug to the power jack on the phone; plug the power adapter into an electrical outlet. If PoE switch is used in step 2, this step could be skipped.
- The LCD will display booting up or firmware upgrading information. Before continuing, please wait for the main screen display to show up.
- Using the web configuration interface or from the menu of the touch screen, you can further configure network connection using static IP, DHCP… etc.
Tips for using the GXV3380 Keys

- Tap on VOLUME DOWN / UP keys to adjust volume on the phone.
- Tap on HOME key to return to the default idle screen. Or press and hold on the HOME key for 2 seconds to take a screenshot.
- Press MENU key to access phone’s display settings, edit widgets and thread manager. Or press and hold on the MENU key for 2 seconds to enter managing application interface directly.
- Press BACK key to go back to the previous menu.
Phone Configuration
Configuring the GXV3380 using Touch Screen
- Make sure the phone is properly powered up and in idle screen.
- Select Settings → Advanced → Account settings. Tap on one of the Account to configure Account name, SIP Server, SIP User ID, SIP Auth ID, SIP Auth Password to register account on the GXV3380. After successfully registered, the dial screen will be shown.
- Follow the Menu options to configure other settings on the phone. For example, to configure static IP on the GXV3380, set up static IP address via LCD Menu → Settings → Network → Ethernet Settings.
- Please contact your ITSP (Internet Telephony Service Provider) for additional settings that may be necessary to configure the phone.
Configuring the GXV3380 using Web Browser
- Ensure your phone is properly powered up and connected to the Internet.
- Tap on Settings → Status → Network status, to obtain the IP address of your phone.
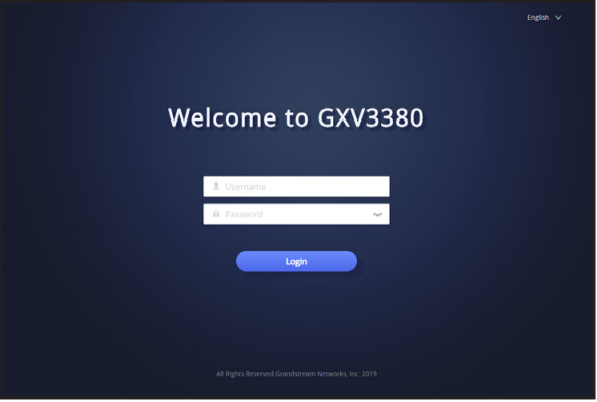
- Type the phone’s IP address in your PC’s browser.
- The default username and password for administrator are “admin” and “admin”. The default username and password for user are “user” and “123”.
- In the web GUI → Account, select Account 1/2/3/…/16 page to configure Account name, SIP Server, SIP User ID, Authenticate ID and Authenticate Password to register the account on the GXV3380.
Refer to online documents and FAQ for more detailed information:
http://www.grandstream.com/our-products

| HDMI, the HDMI Logo, and High-Definition Multimedia Interface are trademarks or registered trademarks of HDMI Licensing LLC in the United States and other countries. |
For Certification, Warranty and RMA information, please visit www.grandstream.com