INTRODUCTION
Grandstream GXV33XX/GXV34XX IP Multimedia series Phones allow users to customize the GUI desktop layout as well as GUI configurations on the phone, offering users with flexibility and control. The GUI configuration includes displaying/hiding applications, configuring parameters on the phone with specific requirements, controlling the display appearance, enabling/disabling some functions and much more.
This document describes how to use the Grandstream Graphical GUI Customization Web Tool to customize the GXV3350/GXV3370/GXV3380 GUI settings and applications. This tool allows users to do the following configurations on the GXV33XX/GXV34XX/GAC2570 IP Multimedia Phone for Android:
- Turn on/off applications
- Set up parameters
- Personalize phone display
- Turn on/off certain functions on applications
The Grandstream Graphical GUI Customization Tool is available through the following link: http://tools.grandstream.com:8081
GXV33XX/GXV34XX/GAC2570 LCD GUI CUSTOMIZATION STEPS
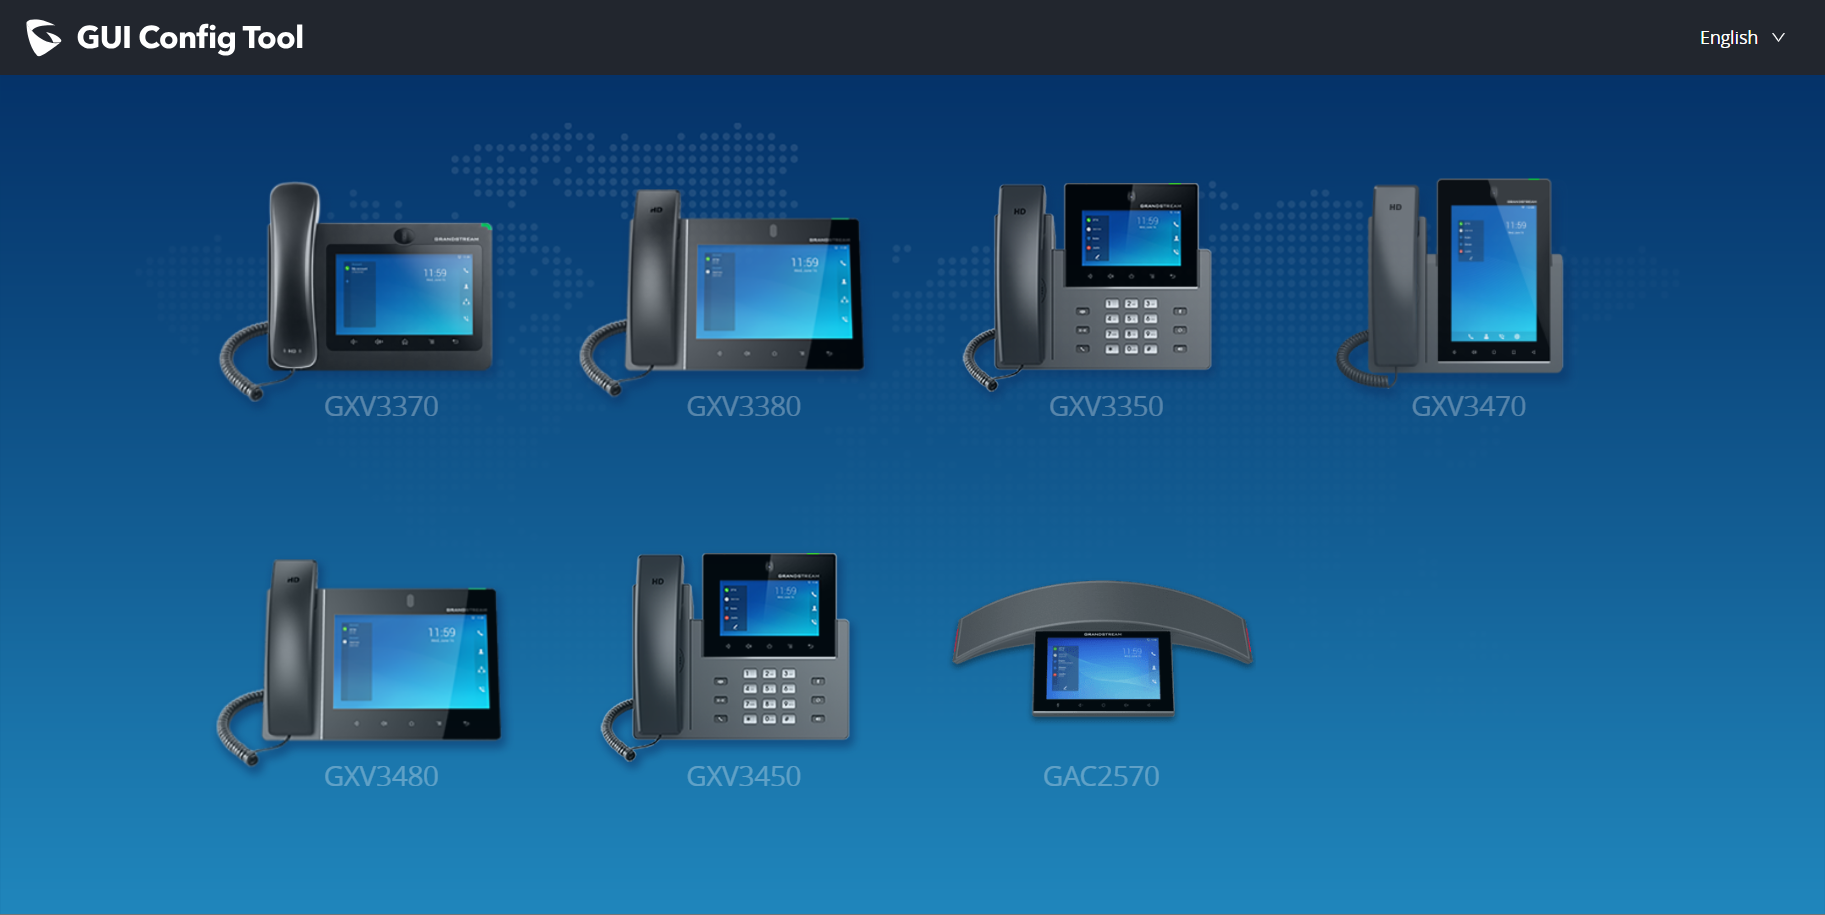
GXV33XX LCD GUI customization tool is available as a web service, users need to access to below URL in order to generate the GXV Customization file that will be uploaded to the phone: http://tools.grandstream.com:8081
First you will need to select the phone model by clicking on the GXV33xx phone:
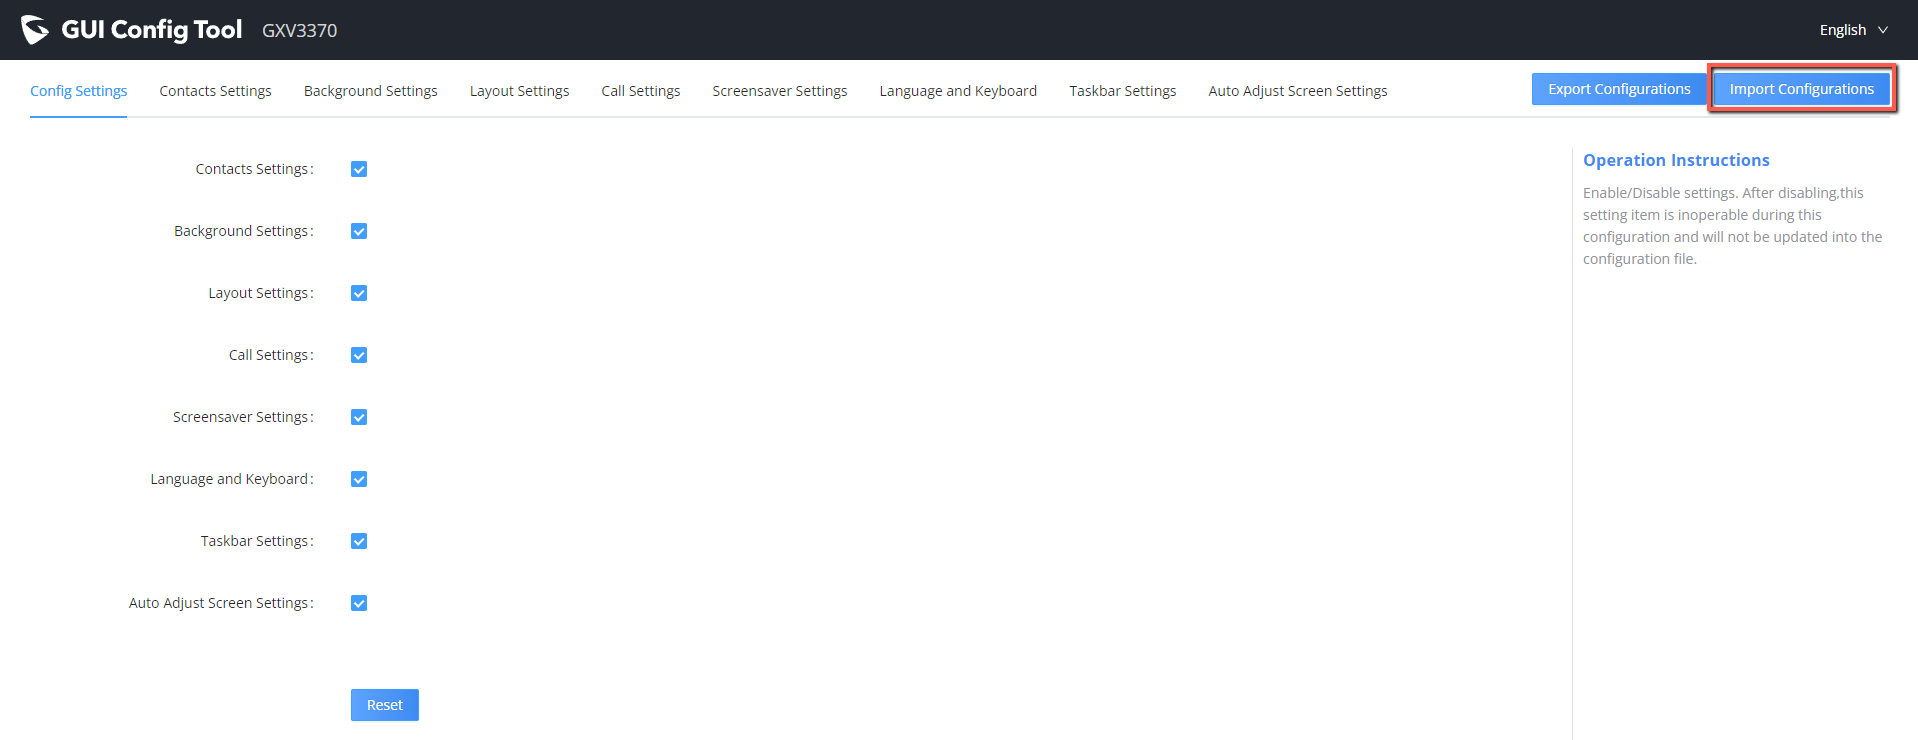
The GUI Config Web Tool contains 7 – 9 sections that will be used to build the customization file that is going to be generated in the end using the “Export Configurations” button shown in the following figure (all models have almost the same sections and in the later steps we have selected the GXV3370).
The Users can also import generated customization file using the “Import Configurations” button:
Steps below explains how to generate and upload the customization file to the GXV3xXX:
- Access GUI Config Tool link.
- Set up the parameters and application configurations.
- Generate the GXV3xXX custom file “GXV3XXXcust” by clicking on “Export Configuration” button.
- Put the generated custom file “GXV3XXXcust” on your HTTP/HTTPS/TFTP server.
- Go to GXV3XXX Web GUI 🡪 Maintenance 🡪 Upgrade 🡪 Config File 🡪 CUST File.
- Set the Download mode and enter the customization file path under “GUI Customization File URL”.
- Reboot the phone to trigger the upgrade.
- After booting up, GXV3XXX LCD shall display the customized GUI.
Configuration Guide
Config Settings
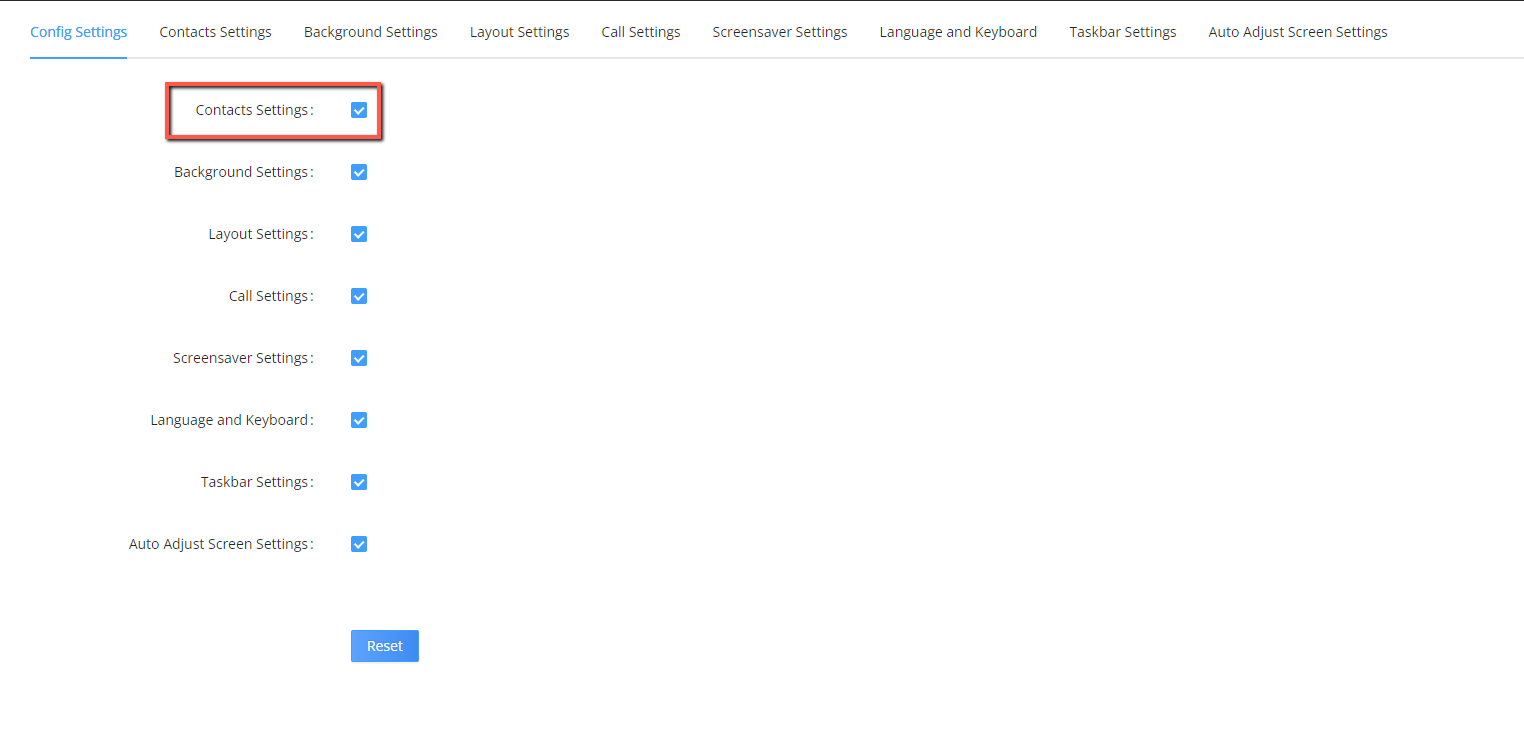
Under the GXV3XXX Config tool web interface 🡪 Config Settings, the user can choose what Settings to enable/disable from the web tool. See the following figure.
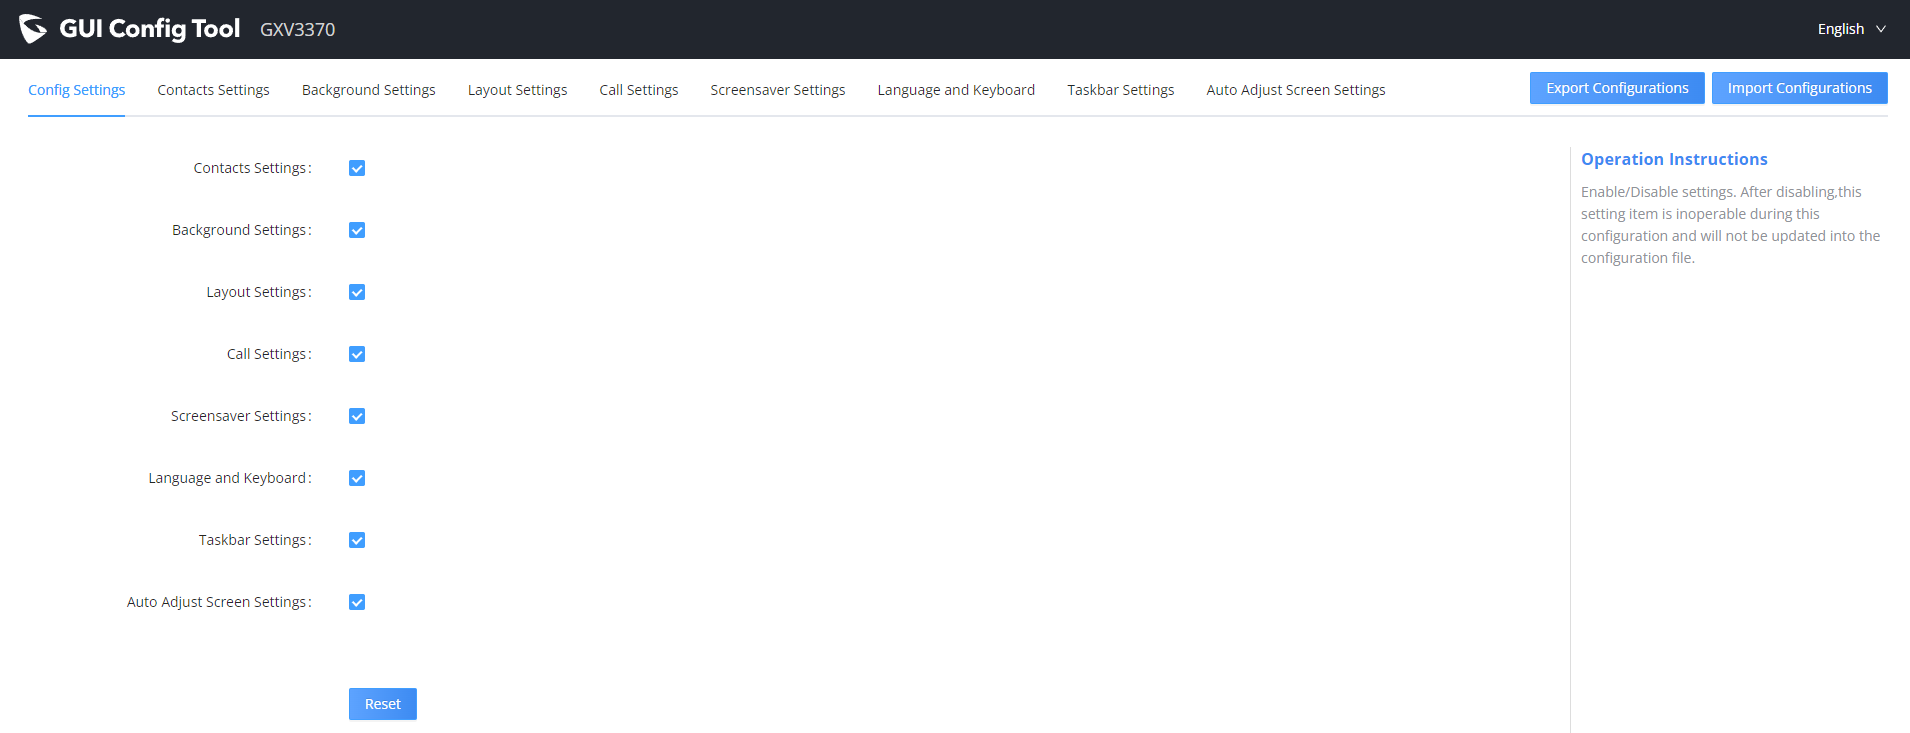
In this section, users have the following Settings that can be enabled or disabled:
- Contact Settings.
- Background Settings.
- Layout Settings.
- Call Settings
- Screensaver Settings.
- Language and Keyboard.
- Taskbar Settings.
- Auto Adjust Screen Settings.
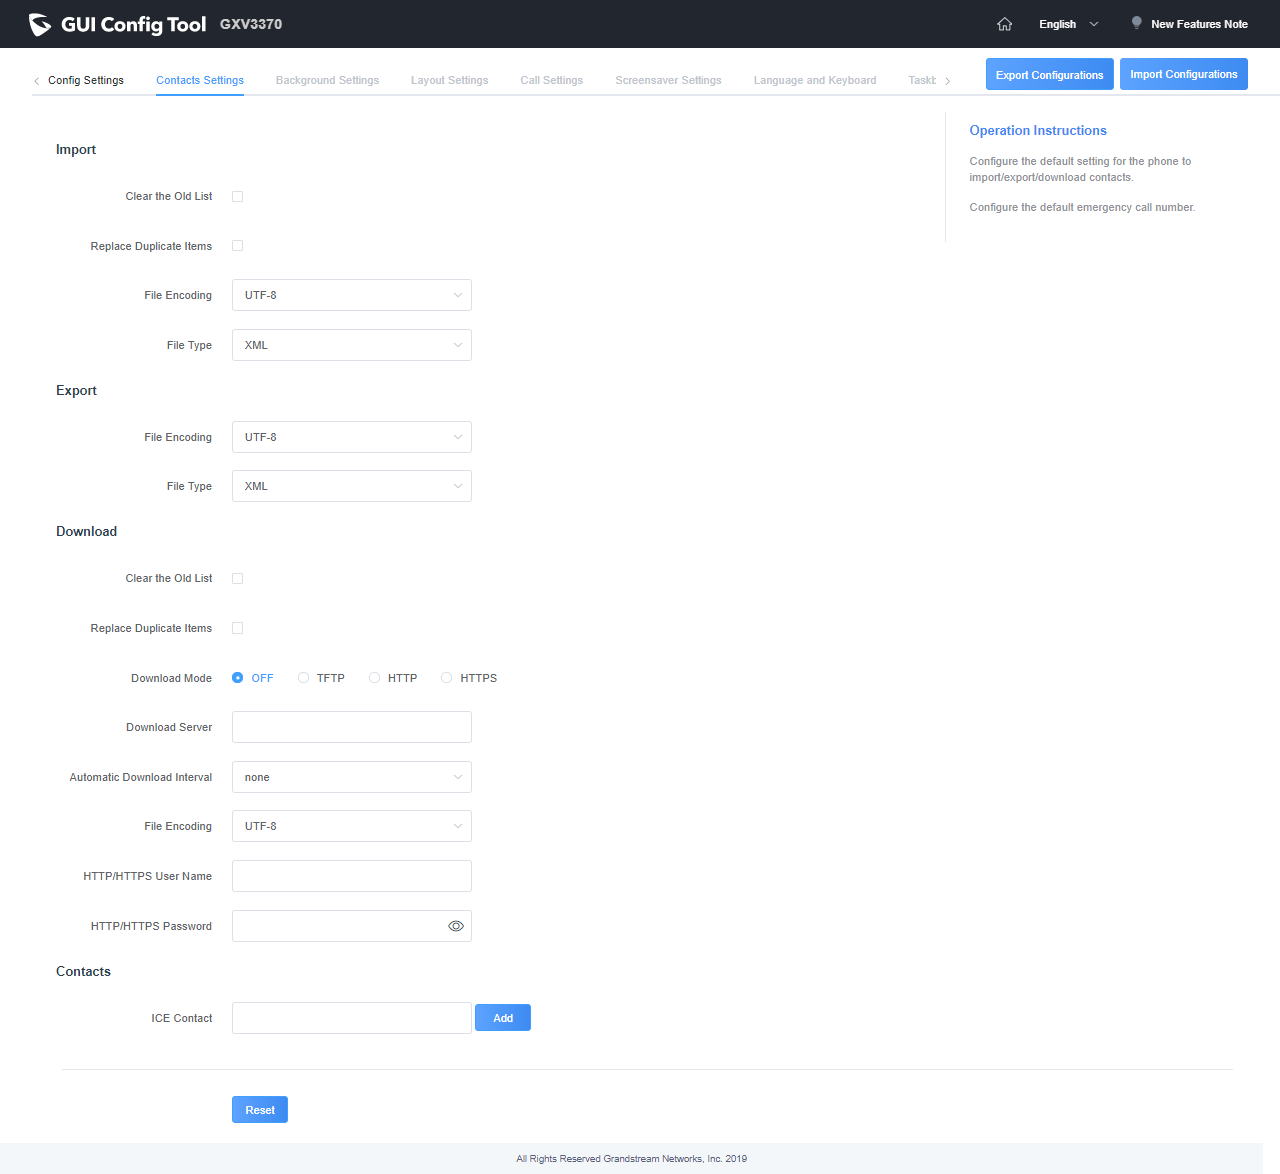
For instance, if the user unchecks “Contact Settings”, the related tab will be disabled and greyed as shown on figure below:
Contacts Settings
The “Contacts Settings” section on the Config Web Tool, as can be seen, provides the parameters for Contacts Import/Export, phonebook download and LDAP/Call History configuration for the GXV3XXX.
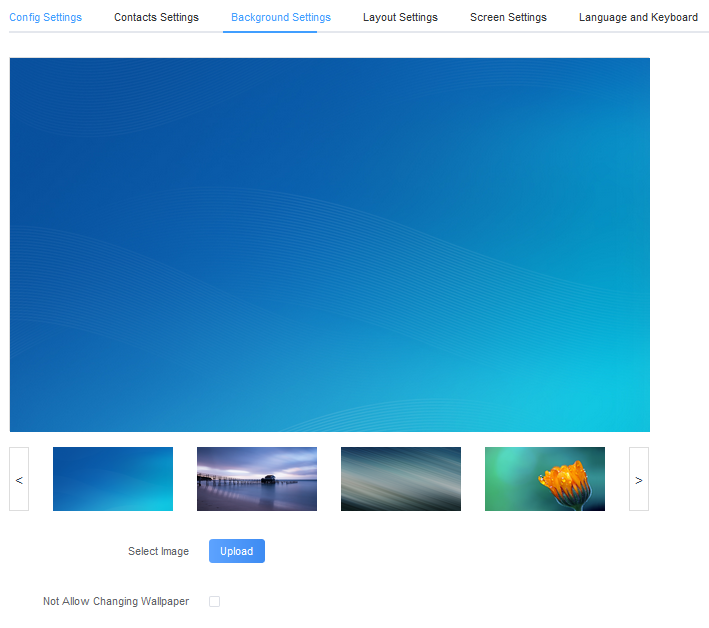
Background Settings
In the Background Settings page, the admin can select screen image from the available ones or import it by clicking on “Upload” under “Select image”.
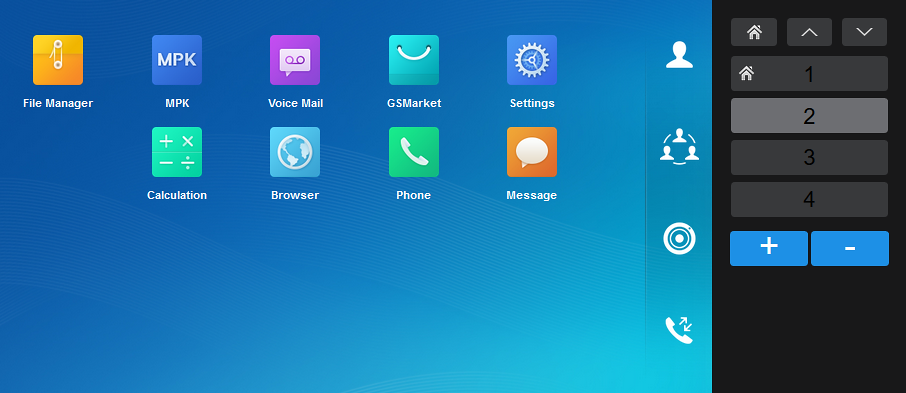
Layout Settings
This settings page gives the admin the ability to set the graphic design wanted, by changing and modifying the visual structure of the GXV3XXX user interface. See the following figure.

Under this section, the administrator can do the following operations:
-
The number of desktop pages can be increased by clicking on
 or decreased by clicking on
 .
.
- The administrator can also upload an android 3rd Party application using the “Add 3rd Party App” option. By clicking “Upload” button, and entering “Display Name” in the pop-up window, then uploading the apk file, finally clicking “Add”. The 3rd-party application with the icon and name will be displayed on the panel.
- The administrator can enable/disable the 5 softkeys on GXV3x50/GXV3x80 by clicking “Disable Touch Buttons”.
- The administrator can change the applications and widgets location on the pages, and in order to move an application to another page, the administrator can drag and drop the needed applications in the bottom in order to be able to put them in a different desktop page. Please, refer to the following figures:


- In addition to the available built-in apps and the 3rd party app, the admin can add widgets to the GUI of the GXV33XX/34XX by dragging the widget to the screen. Please, refer to the following figure:
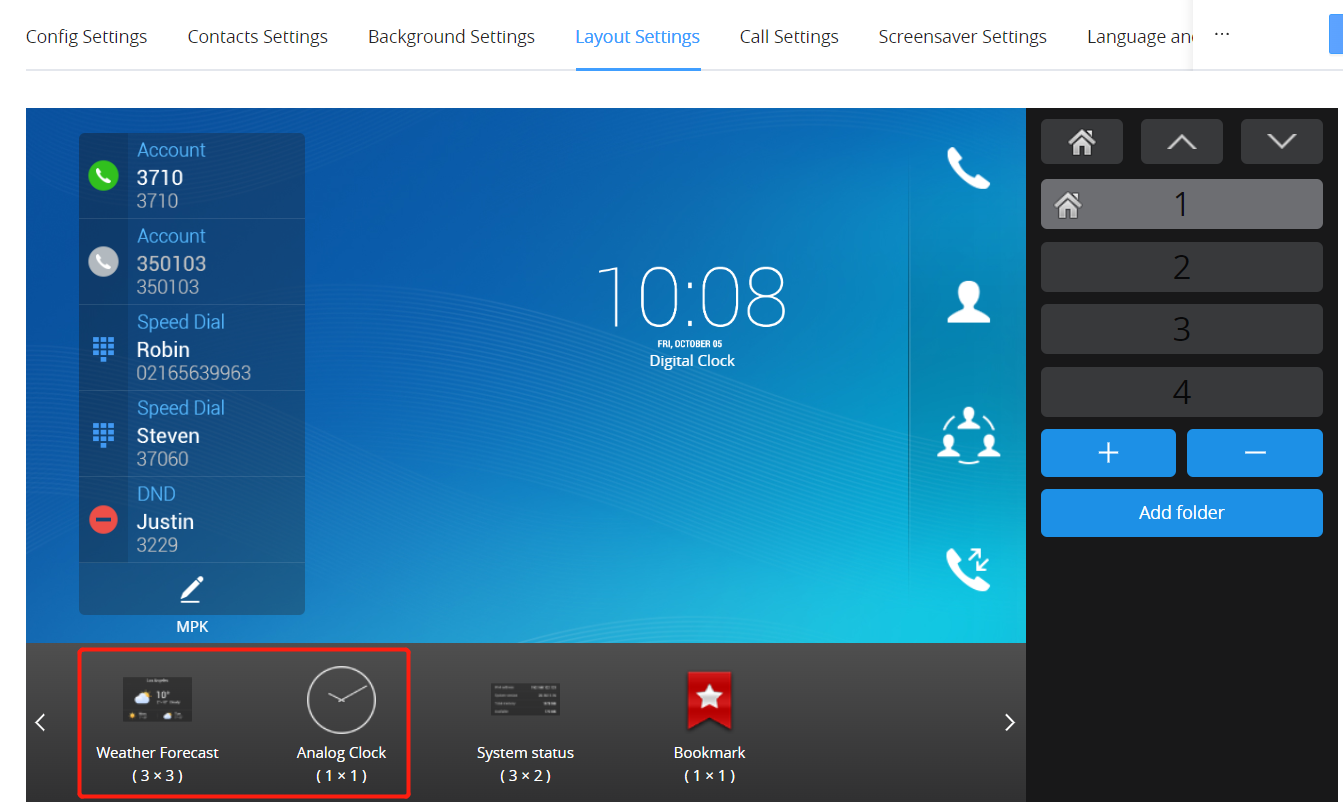
- Users can also configure shortcuts in the right of the layout. Please, refer to the following figure:
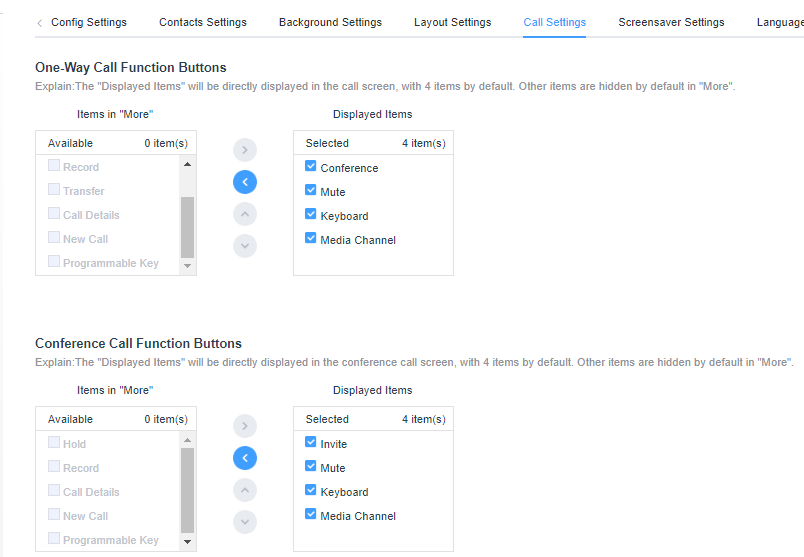
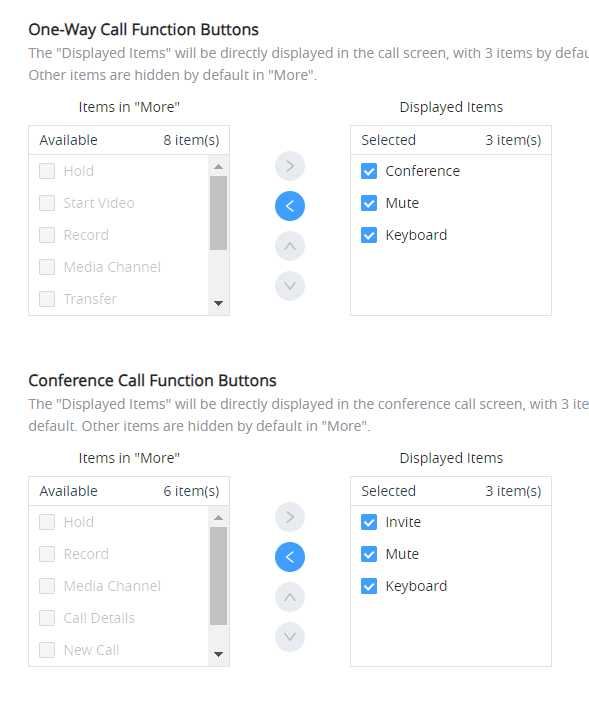
Call Settings
This is the page where the administrator can set One-Way Call Function Button (Hold, Start Video, Transfer…etc.) which will be directly displayed in the call screen, as well as Conference Call Function Buttons which will be directly displayed in the conference call screen, with 4 items by default. GAC2570 does not have call settings section.
Please, refer to the following figures:

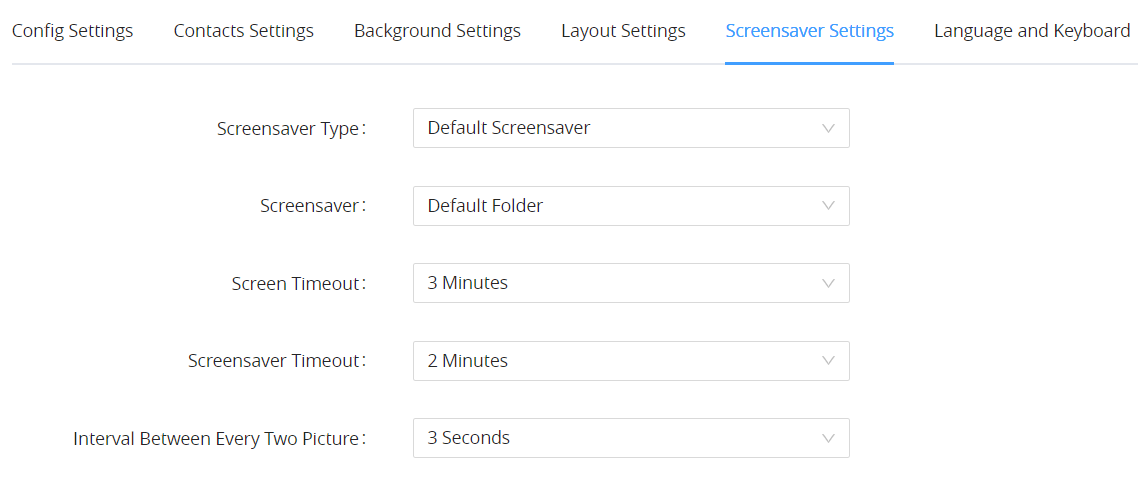
Screensaver Settings
This is the page where the administrator can configure screensaver parameters, such as the screensaver type, source of the screensaver (Default, local or from internet), screensaver start time, Turn off LCD Time, and the Interval between pictures. Please, refer to the following figure:
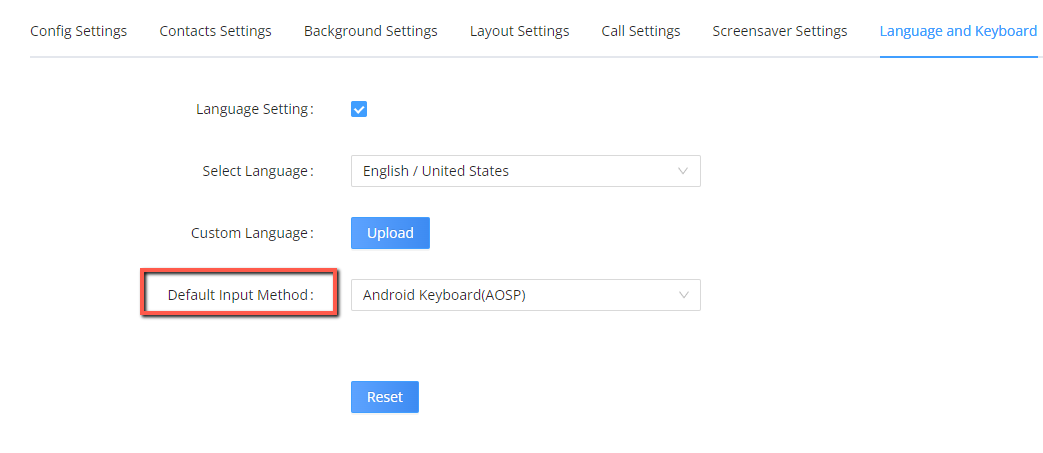
Language and Keyboard Settings
This section is used for disabling language setting or for choosing the phone’s display language among the languages available under “Language Settings” and can upload a custom language file. The admin has also 4 Keyboard choices: “Android Keyboard(AOSP)”, “Google Pinyin IME”, “Japanese IME” or “Custom Input Method” (To allow the admin to upload a customized Keyboard) available under “Default Input Method”.
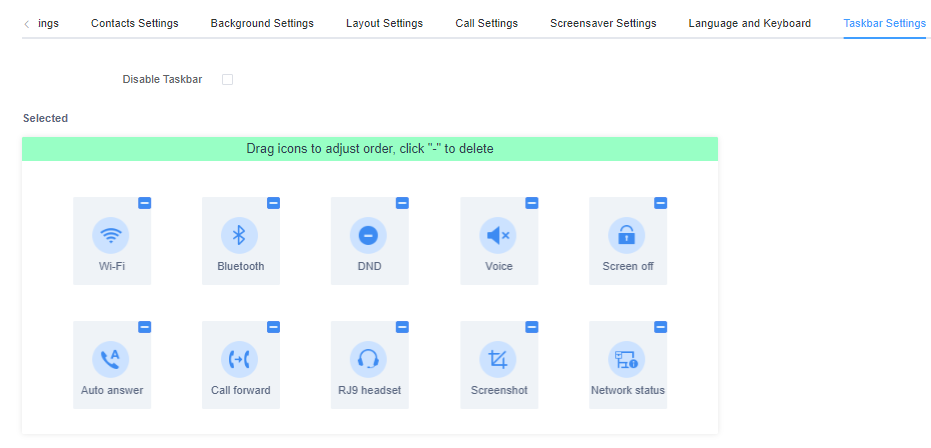
Taskbar Settings
Admin can disable or customize the taskbar in the top of the screen by clicking on “Edit” to choose the wanted functions in order to allow the user to easily enable/disable multiple programs and quickly switch among them by clicking the appropriate icon on the taskbar. See following figure.
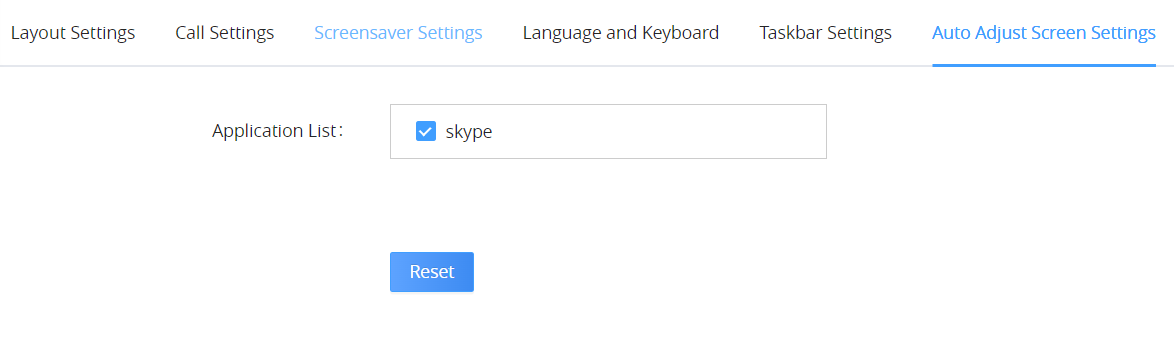
Auto Adjust Screen Settings
GXV3370 and GXV3380 can adjust the screen layout when some apps are installed, so that the display is compatible with the app used. See following figure.
Uploading the Configuration file
After Completing the configuration changes through the GUI Config tool , you can generate the file that will be uploaded to the endpoint that needs to be configured , to do that :
- Click the button
 to create a configuration file.
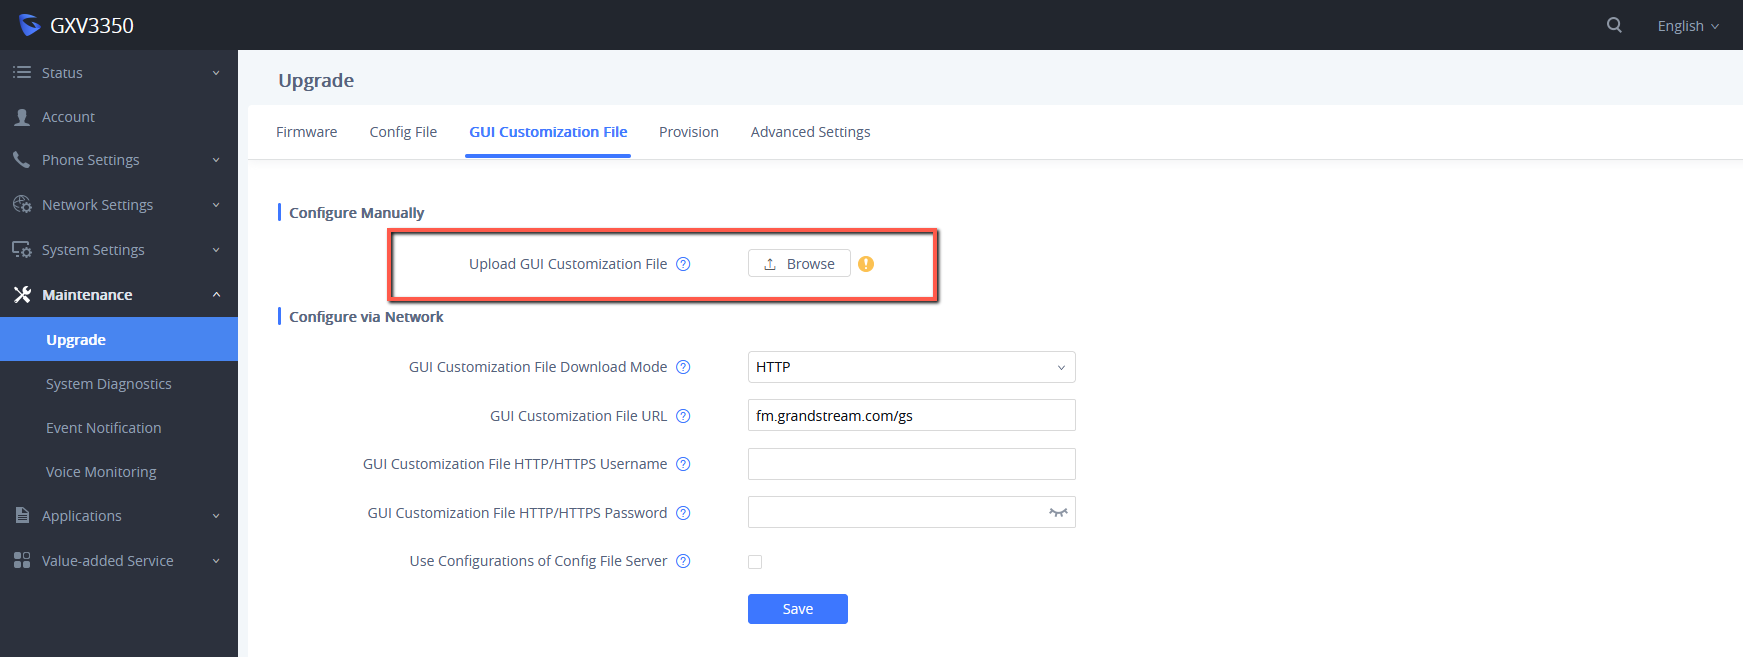
 - Access the Web UI of the endpoint, in our case it is the GXV3350
- Under Maintenance => Upgrade => GUI Customization File => Configure Manually, upload the downloaded configuration file
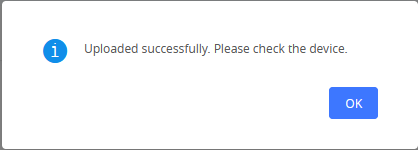
4. After it is uploaded , the device will prompt you to reboot the unit for the configuration to take effect, please reboot the unit and after that your GUI configuration will be applied: