
OVERVIEW
The GXW450X series are E1/T1/J1 Digital VoIP Gateways that allow digital PSTN and ISDN trunks to be integrated with VoIP networks. By connecting the GXW450X series with a VoIP network and traditional PBX or E1/T1/J1 providers, businesses can drastically increase the amount of PSTN/ISDN trunks integrated with their VoIP network and the concurrent calls supported. The GXW450X series offers three models that provide 1, 2 or 4 E1/T1/J1 spans and support 30, 60 or 120 concurrent calls to cater to the VoIP needs of large and medium sized enterprises.
PACKAGE CONTENTS
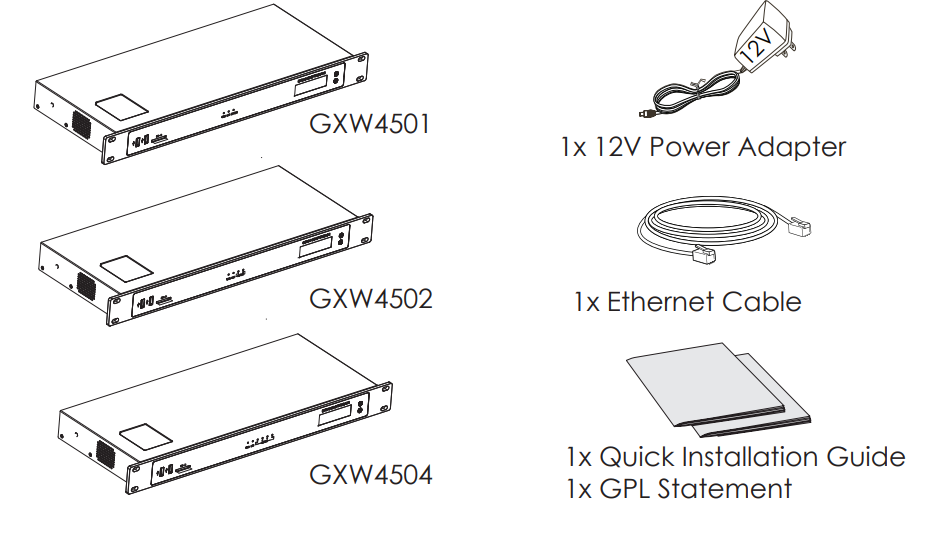
CONNECTING THE GXW450X SERIES
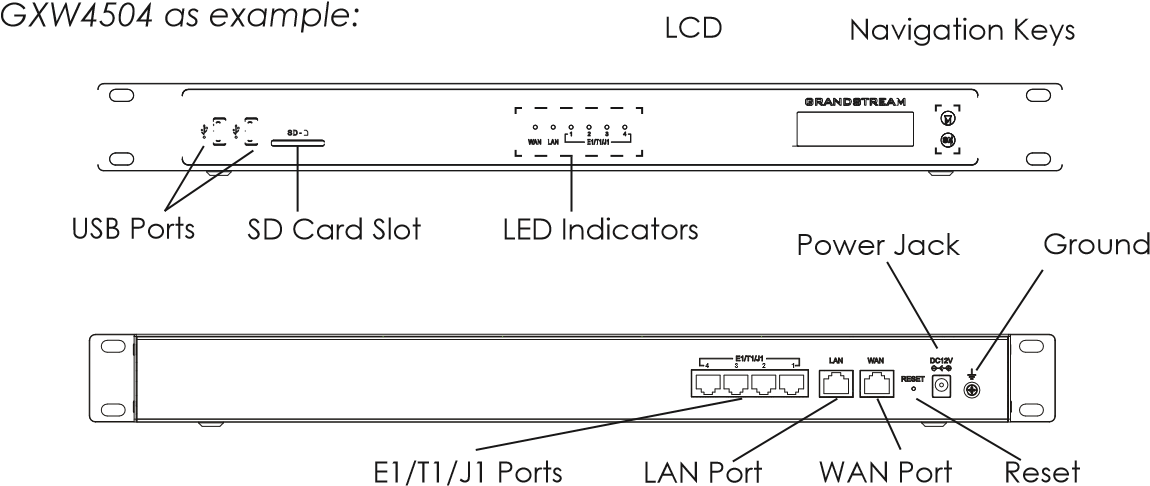
Basic connections for initial setup:
- Connect one end of a straight through RJ45 Ethernet cable into the WAN port of the GXW450X; connect the other end into the uplink port of an Ethernet switch/hub.
- Connect the 12V DC power adapter into the DC 12V power jack on the back of the GXW450X. Insert the main plug of the power adapter into a surge-protected power outlet.
- Connect one end of the E1/T1/J1 cable provided from the service provider into the E1/T1/J1 port of the GXW450X; connect the other end into the E1/T1/J1 wall jack.
- Wait for the GXW450X to boot up. The front LCD display will show the GXW450X hardware information when the boot process is completed.
- Once the GXW450X is successfully connected to the network via WAN port, the Network LED indicator will be lit green, and an IP address will be shown on the LCD display.
USING THE GXW450X KEYPAD MENU
- Press “OK” key to start browsing menu options.
- Press “Down” to browse different menu options. Press “OK” to select an entry.
- In the menu option, select “Back” to go back to previous menu.
- The LCD will return to default display after being idle in menu for longer than 20 seconds.
CONFIGURING THE GXW450X VIA WEB GUI
- Connect the computer to the same network as the GXW450X.
- Ensure the GXW450X is properly powered on and displays the IP address on the LCD screen.
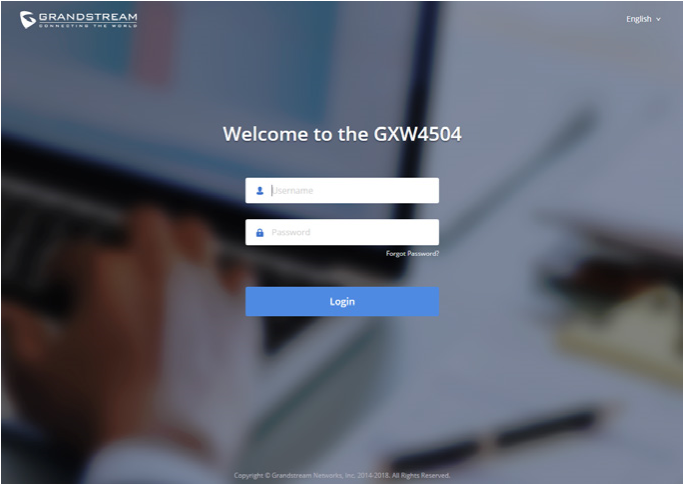
- Open a web browser on the computer and enter the displayed IP address into the search bar in the following format: https://ipaddress:portnumber
- Enter username and password to login. (The default administrator username is “admin” and the default random password can be found at the sticker on the GXW450X).
Please download the user manual and FAQ for more detailed configuration instructions: https://www.grandstream.com/our-products