


About Home Assistant
Home Assistant is an open-source home automation platform focused on local control, privacy protection, and device compatibility. It allows users to centrally manage smart home devices (such as lights, access control systems, security cameras, etc.) and create automation scenarios (e.g., an “Away Mode” that automatically turns off lights and locks doors).
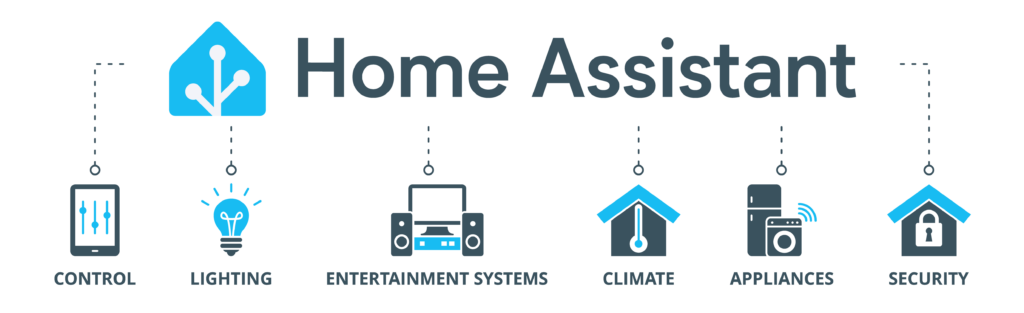
Core Features:
- Local Operation: Data is stored on a local server, reducing reliance on cloud services, thereby improving response speed and enhancing privacy and security.
- Broad Compatibility: Supports devices from over 2000 brands and can integrate different protocols (such as Zigbee, MQTT).
- High Customizability: Users can create automation workflows either through a graphical interface or by writing code, offering flexibility for complex needs.
- Open-Source Ecosystem: Boasts an active community that provides a wealth of third-party plugins and integration solutions.
About HACS
HACS (Home Assistant Community Store) is a third-party component and plugin store for Home Assistant. It is not an integration itself but rather a management tool. Its core function is to allow users to easily discover, install, and update third-party custom components, frontend themes, integrations, and plugins developed by the community.
Think of it as the “App Store” for Home Assistant.
Main Functions:
- Extend Official Capabilities: Install popular community-developed integrations not yet included officially (e.g., for specific brands or domestic services).
- Install Frontend Themes: Change the appearance of the Home Assistant interface with one click.
- Convenient Management: Centrally browse, search, install, and update these community projects without manually downloading and copying files.
- Automatic Update Notifications: Receive timely notifications for updates to installed projects.
How to Install the Grandstream Home Integration via HACS
Step 1: Install Home Assistant
https://www.home-assistant.io/installation
Step 2: Install HACS
Step 3: Install the Grandstream Home integration via HACS
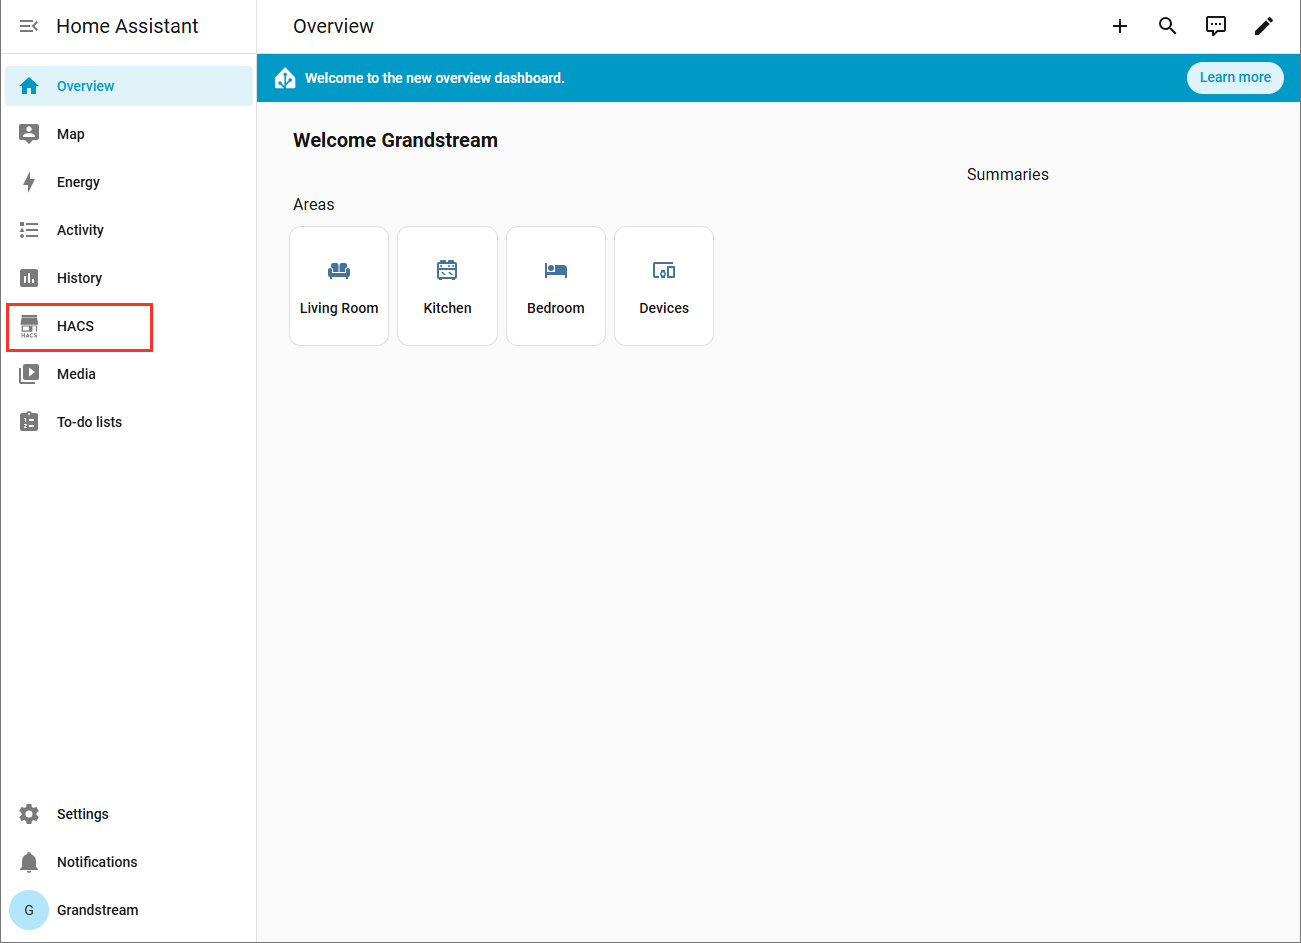
- Restart Home Assistant. After restarting, you will see a new “HACS” option in the sidebar.
- Go into HACS, click “Add Integration”.
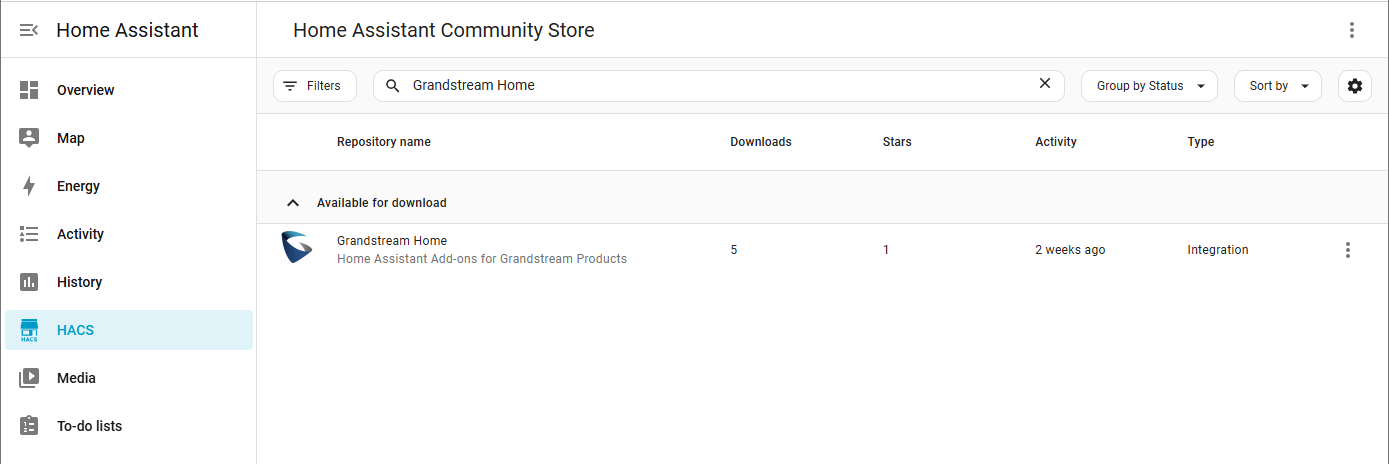
- Search for “Grandstream Home”.
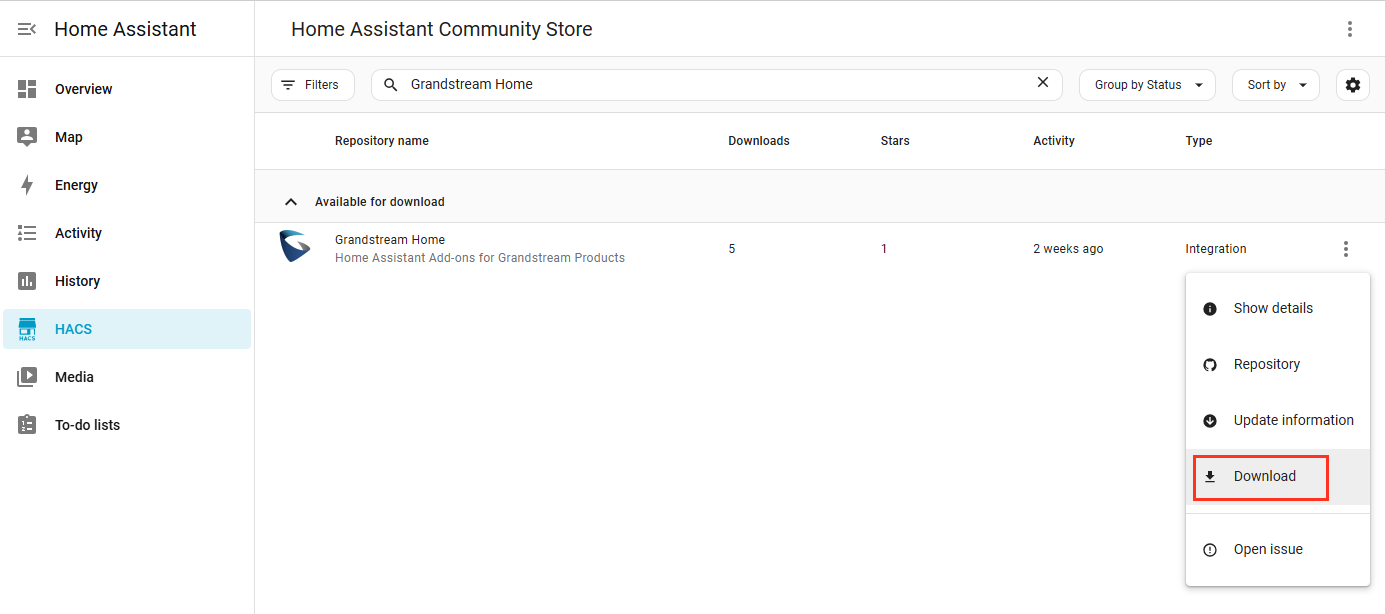
- Click on the three dots, then click “Download”.
- Restart Home Assistant.
Step 4: Configure the GDS3725 Device
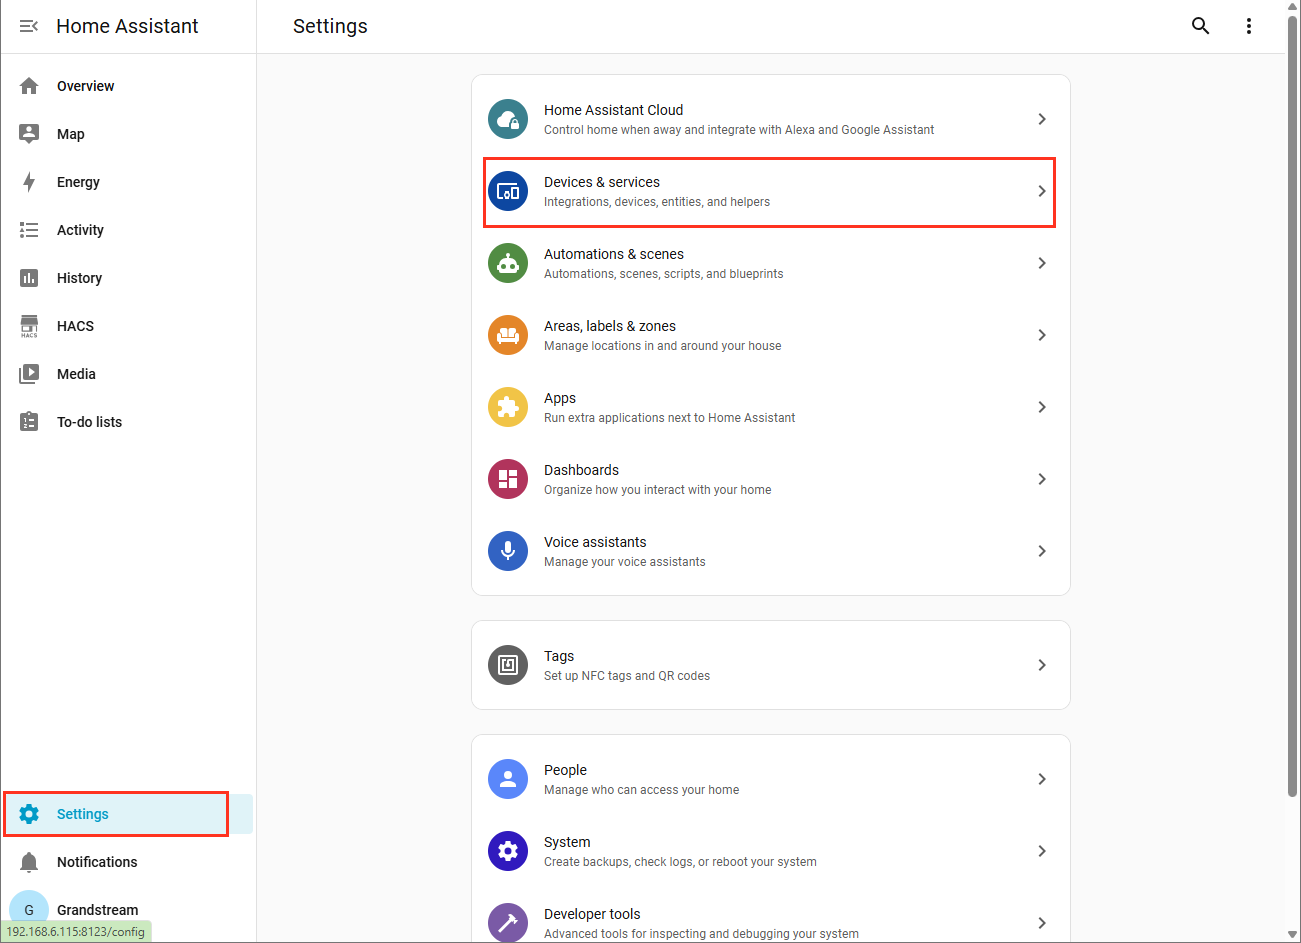
- Go to “Settings” > “Devices & Services”.
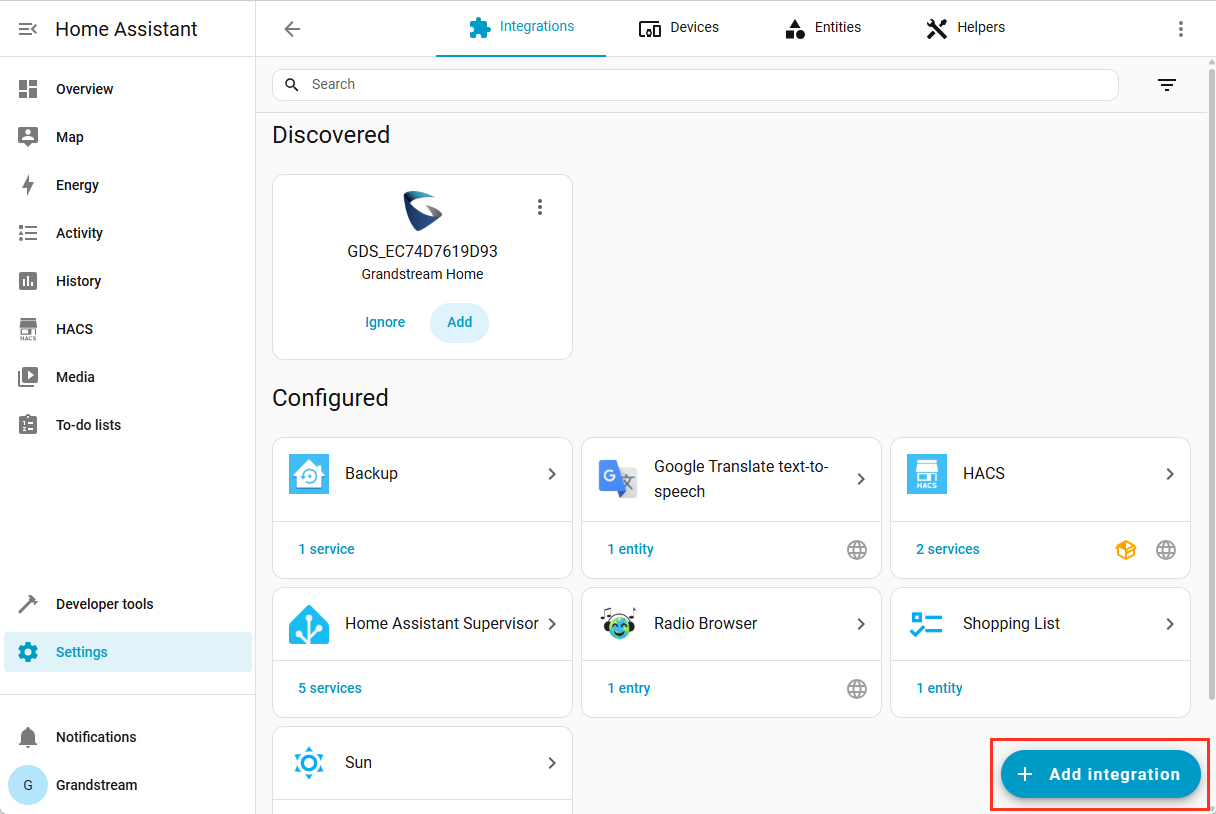
- Click on “Add Integration”.
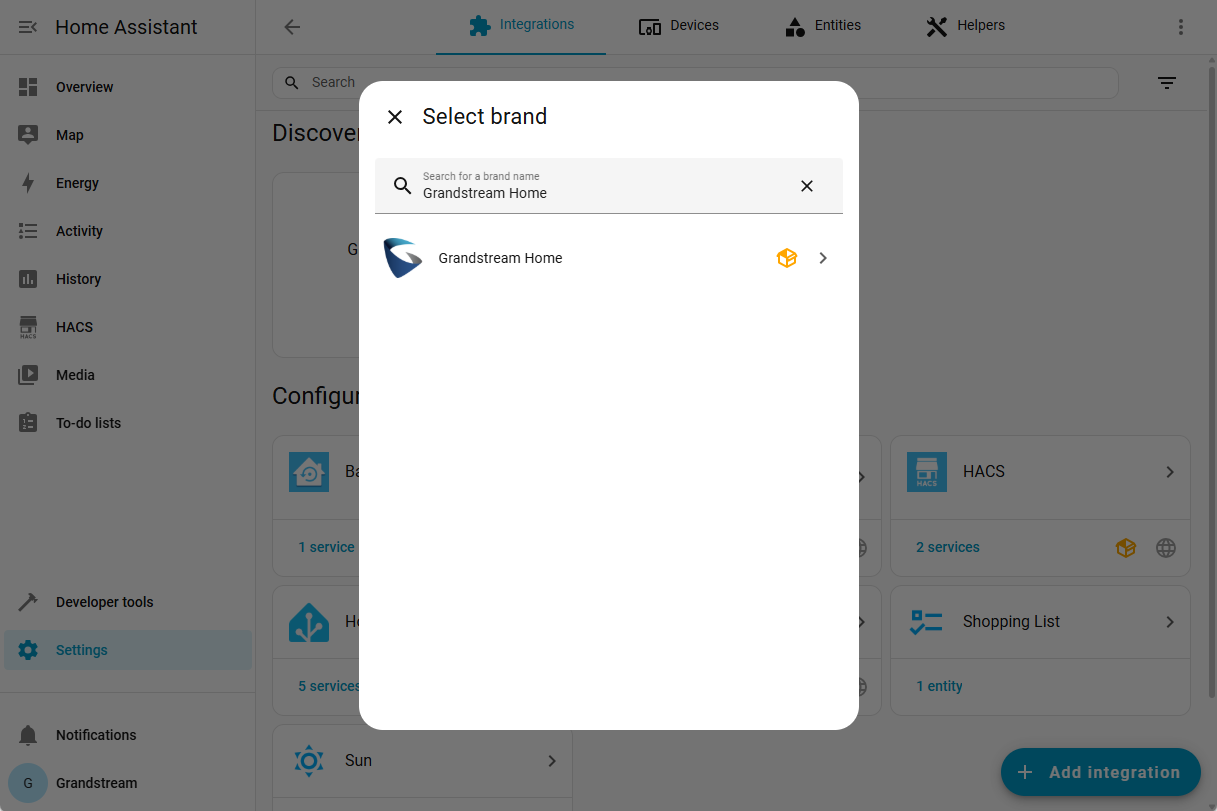
- Search for “Grandstream Home”.
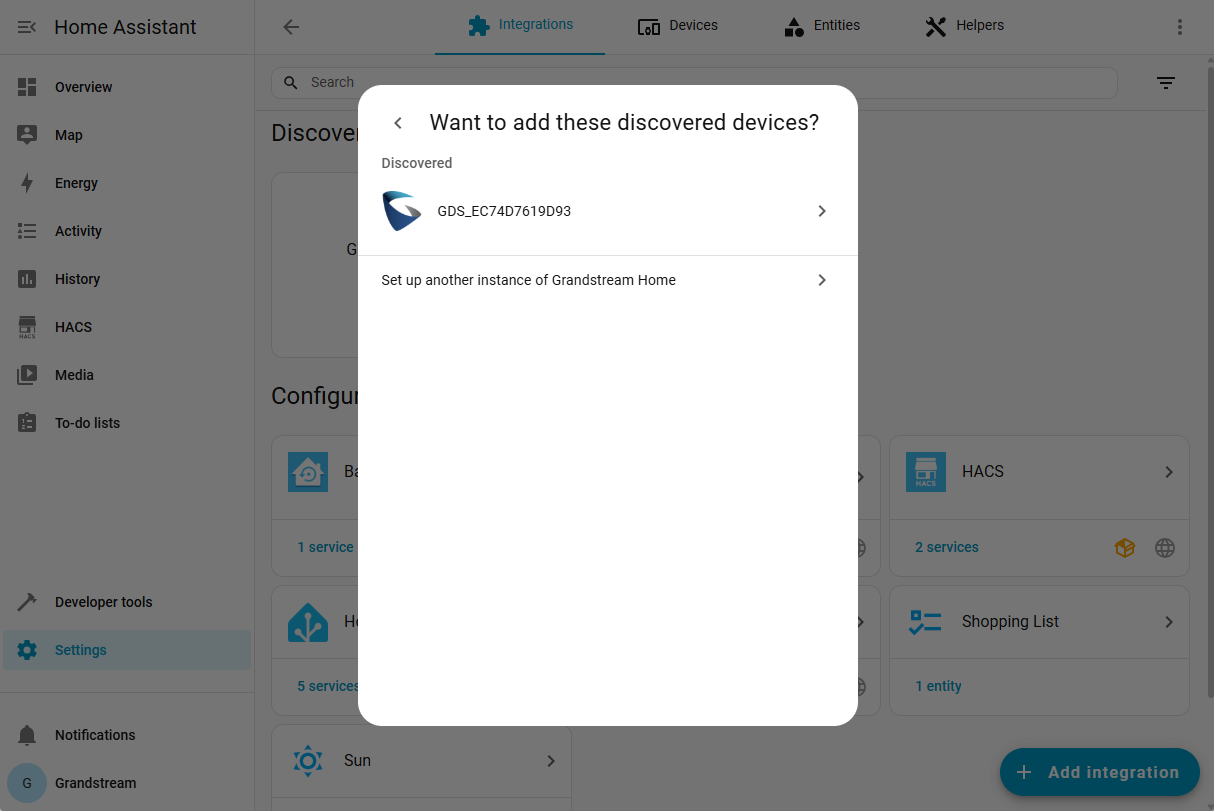
- Choose one of the devices discovered automatically. If your device is not discovered, click on “Set up another instance of Grandstream Home”.
- Click “Add” and enter the Admin Password for your GDS device. To enable RTSP video preview, also enter the corresponding username and password if prompted.
- Submit your configuration.
Step 5: Configure Automation (Optional but Recommended)
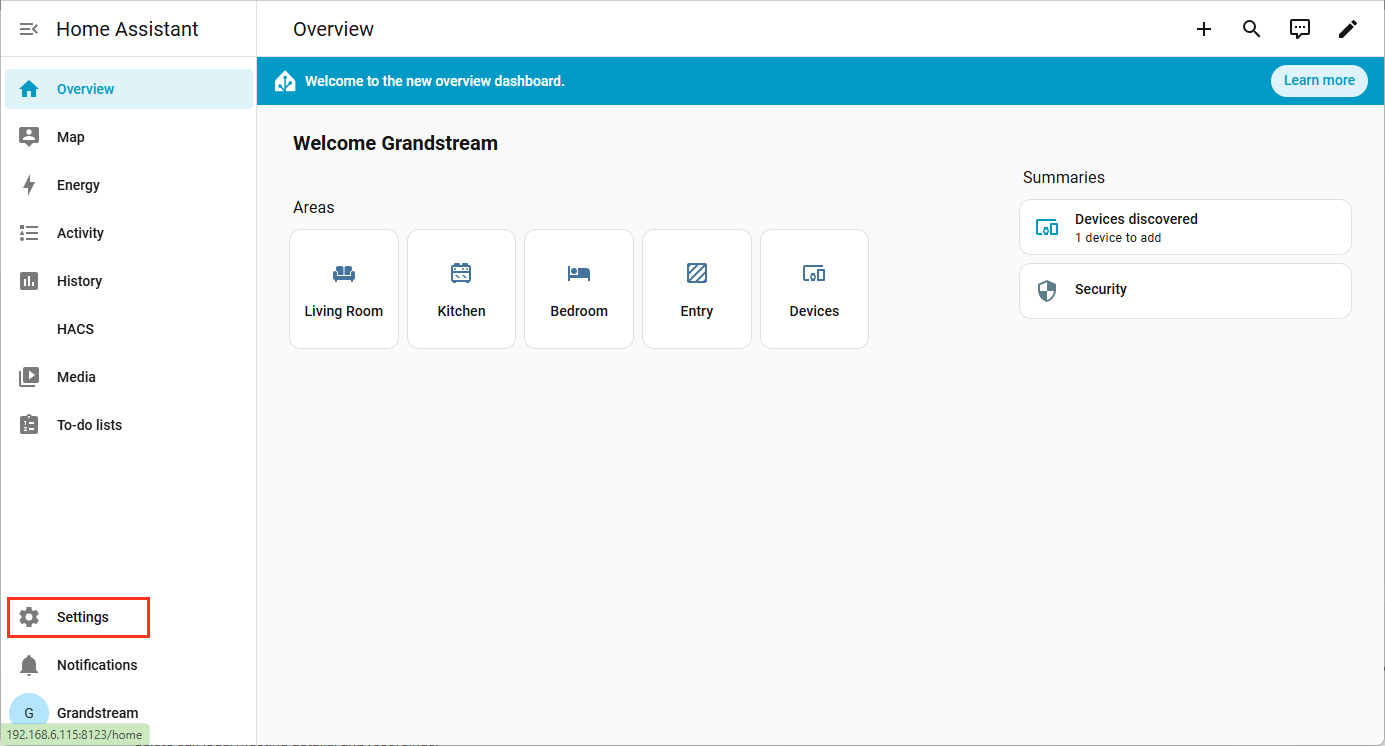
- Open the Home Assistant sidebar and go to “Settings”.
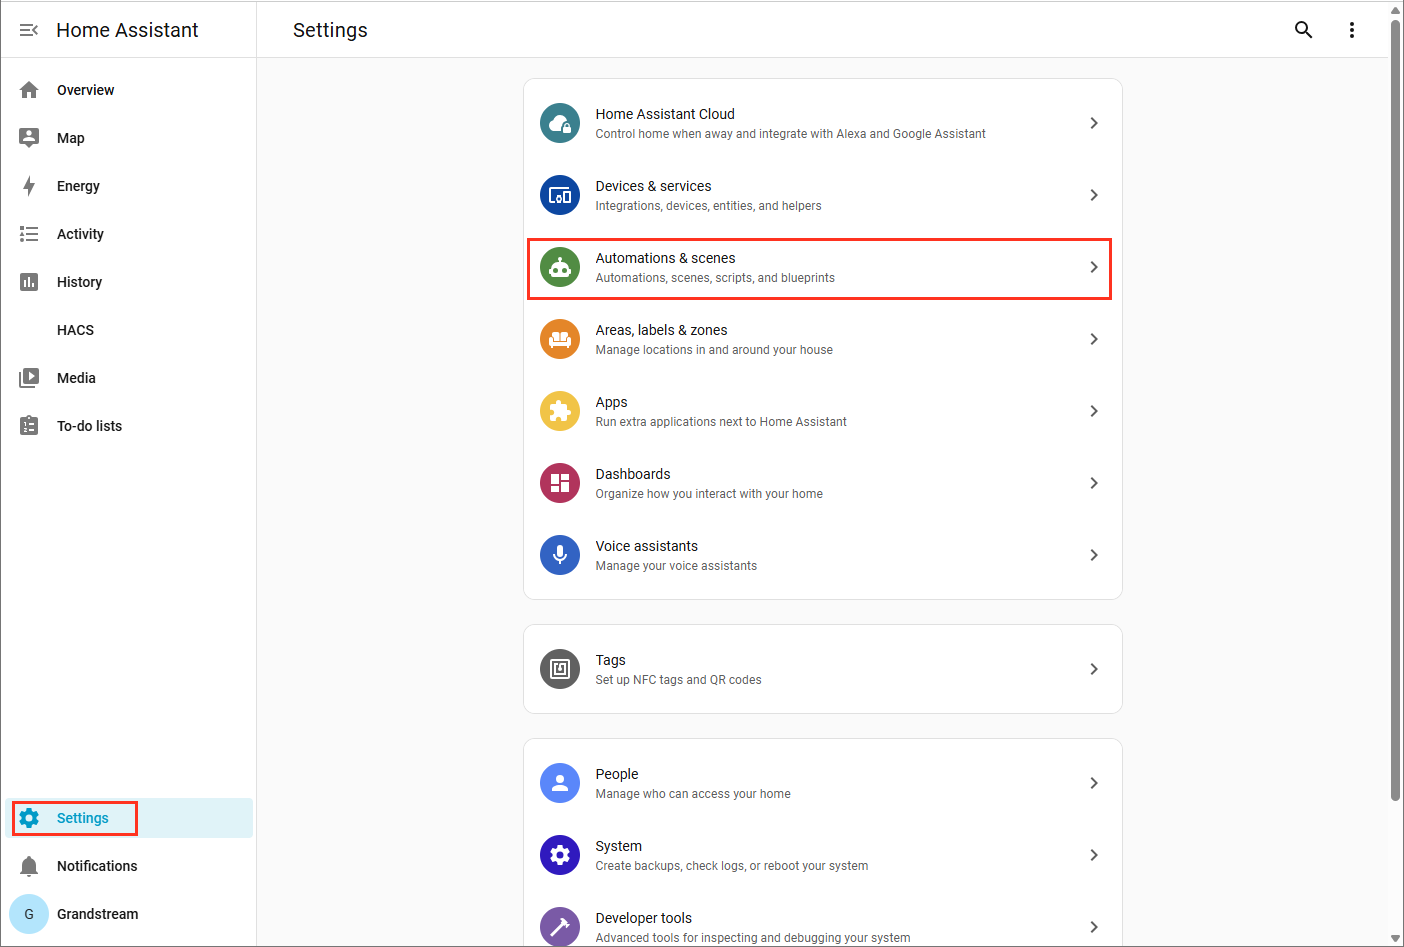
- Select “Automations & scenes”.
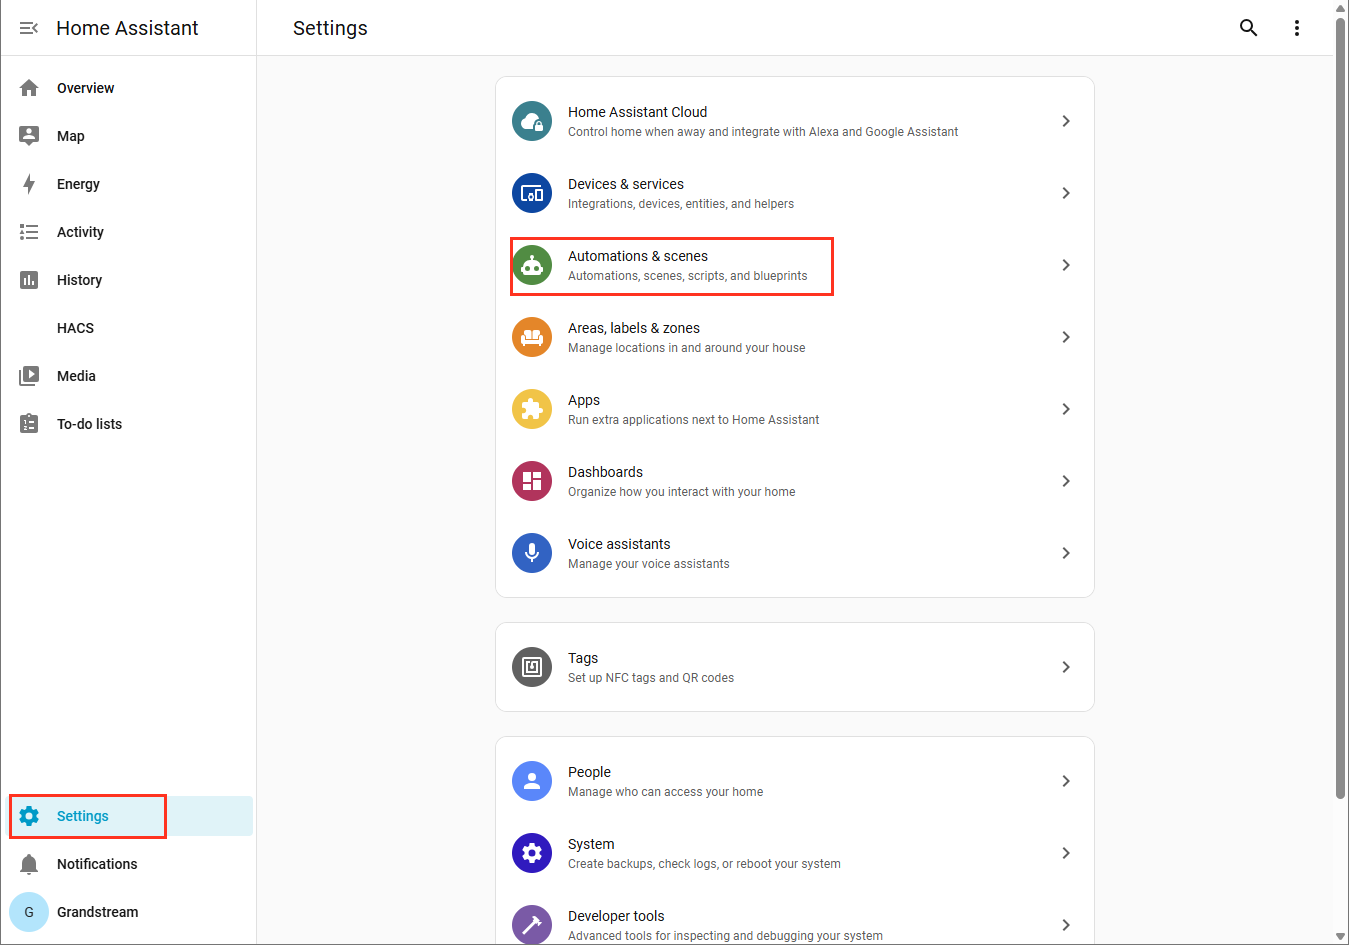
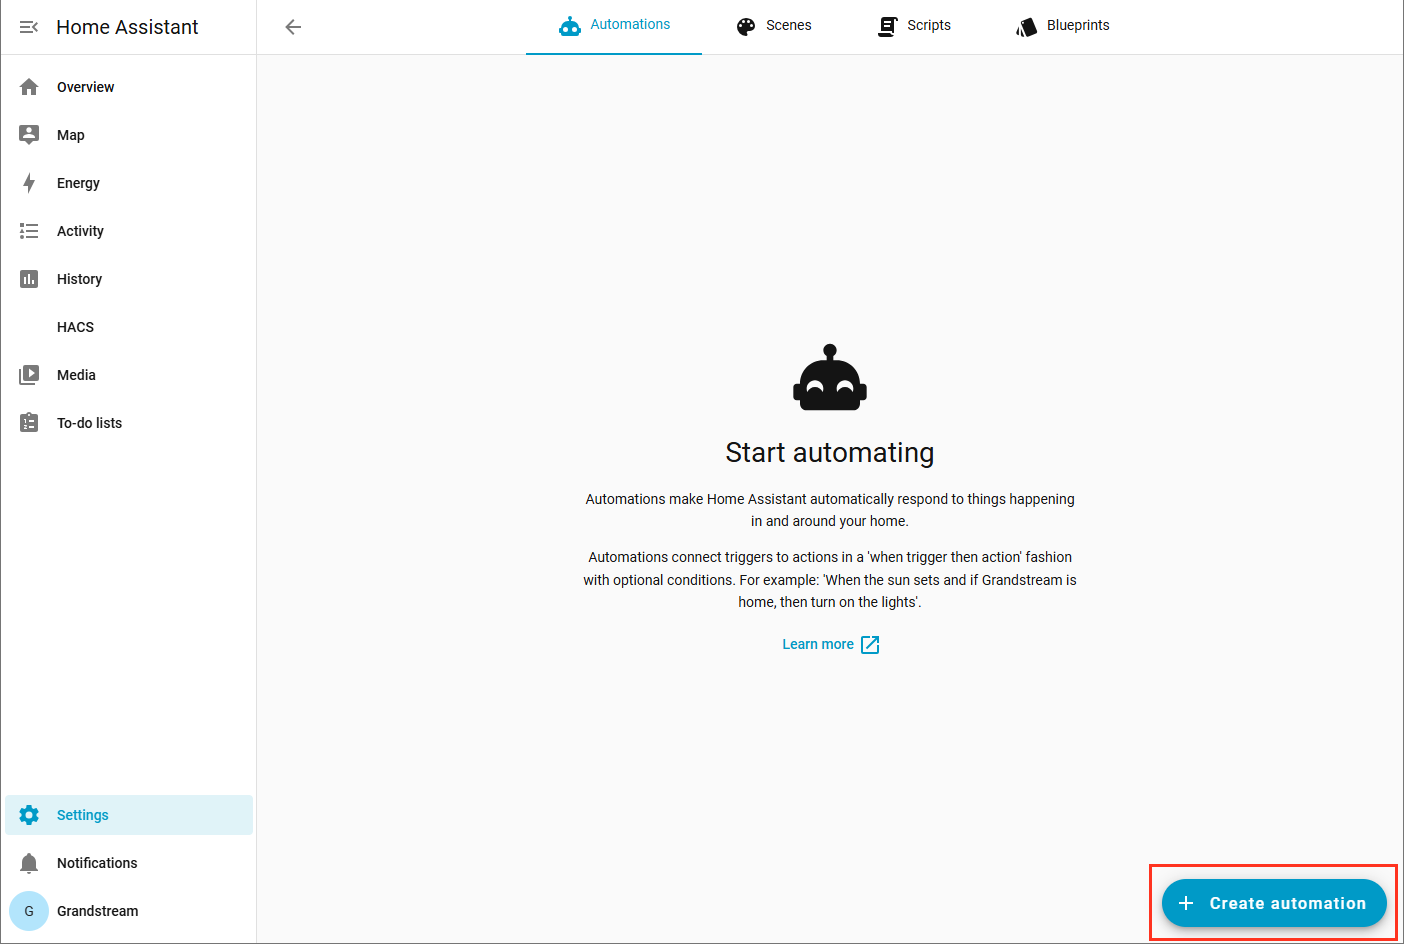
- Click the “Create automation” button in the bottom right corner.
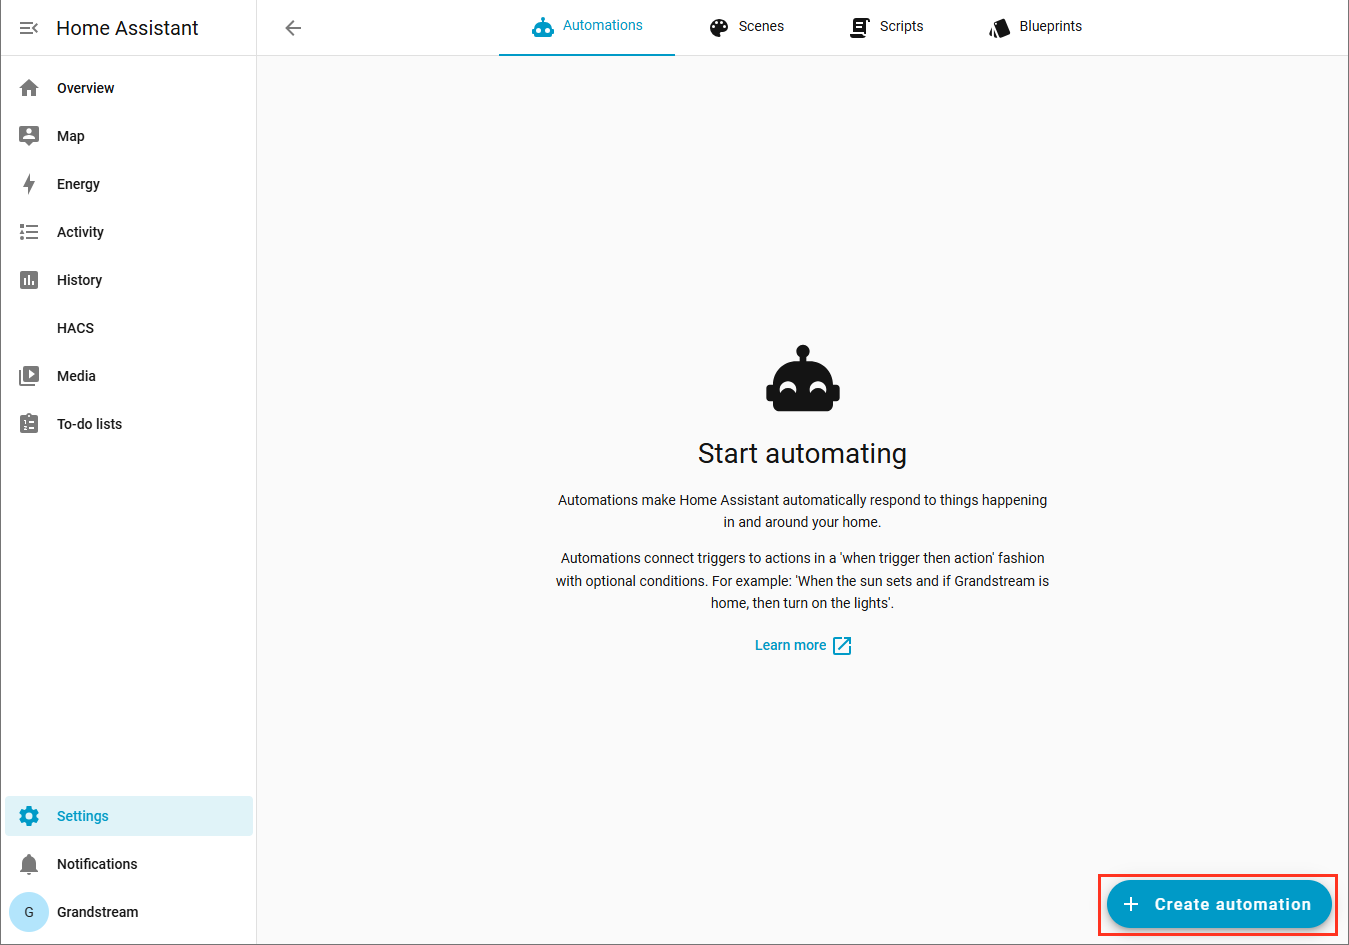
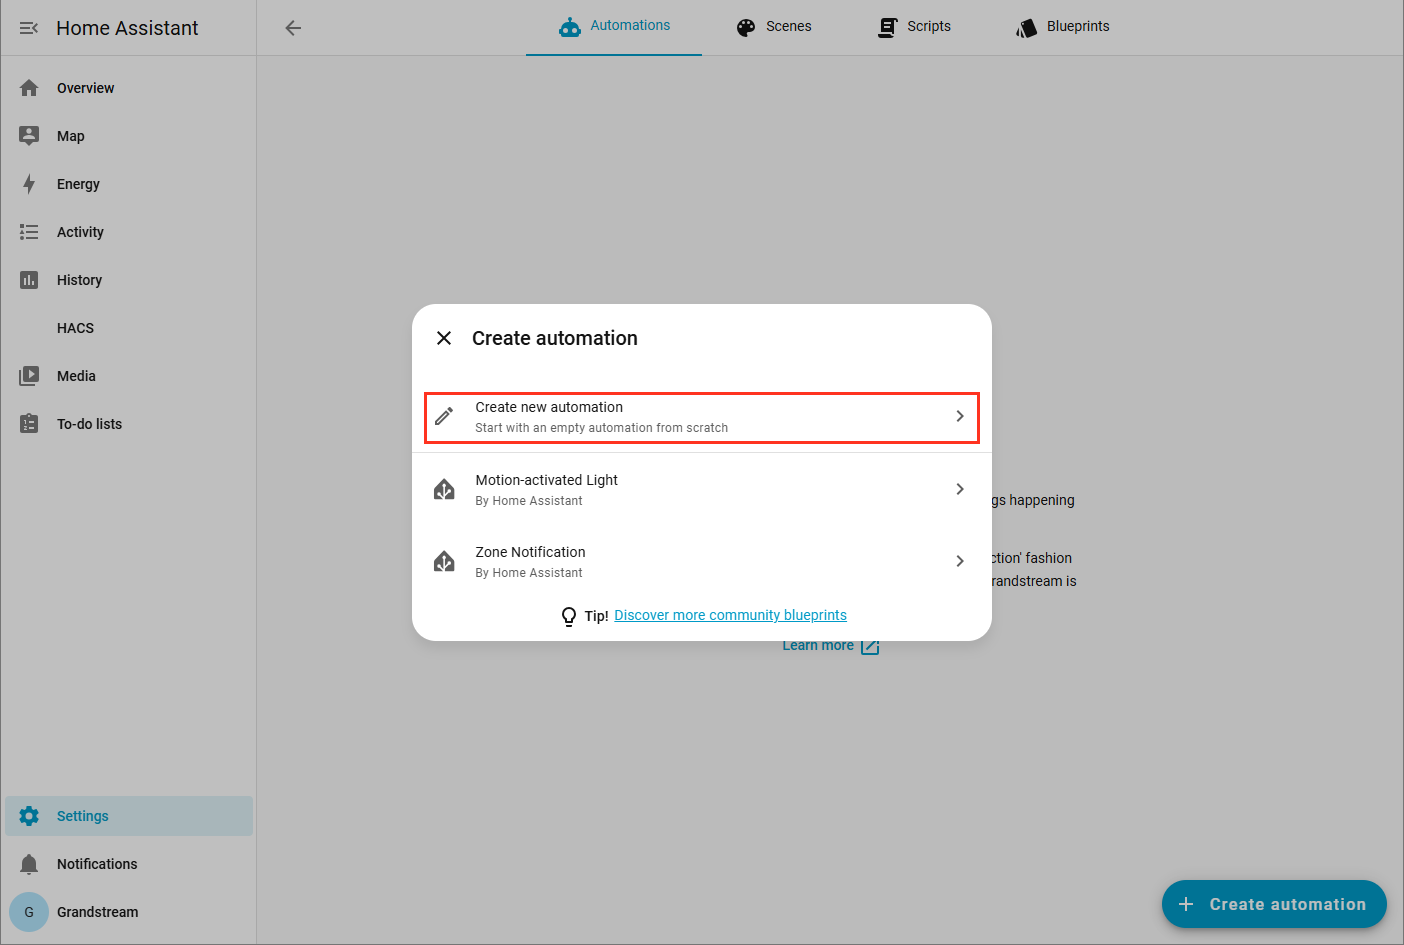
- Choose “Create new automation”.
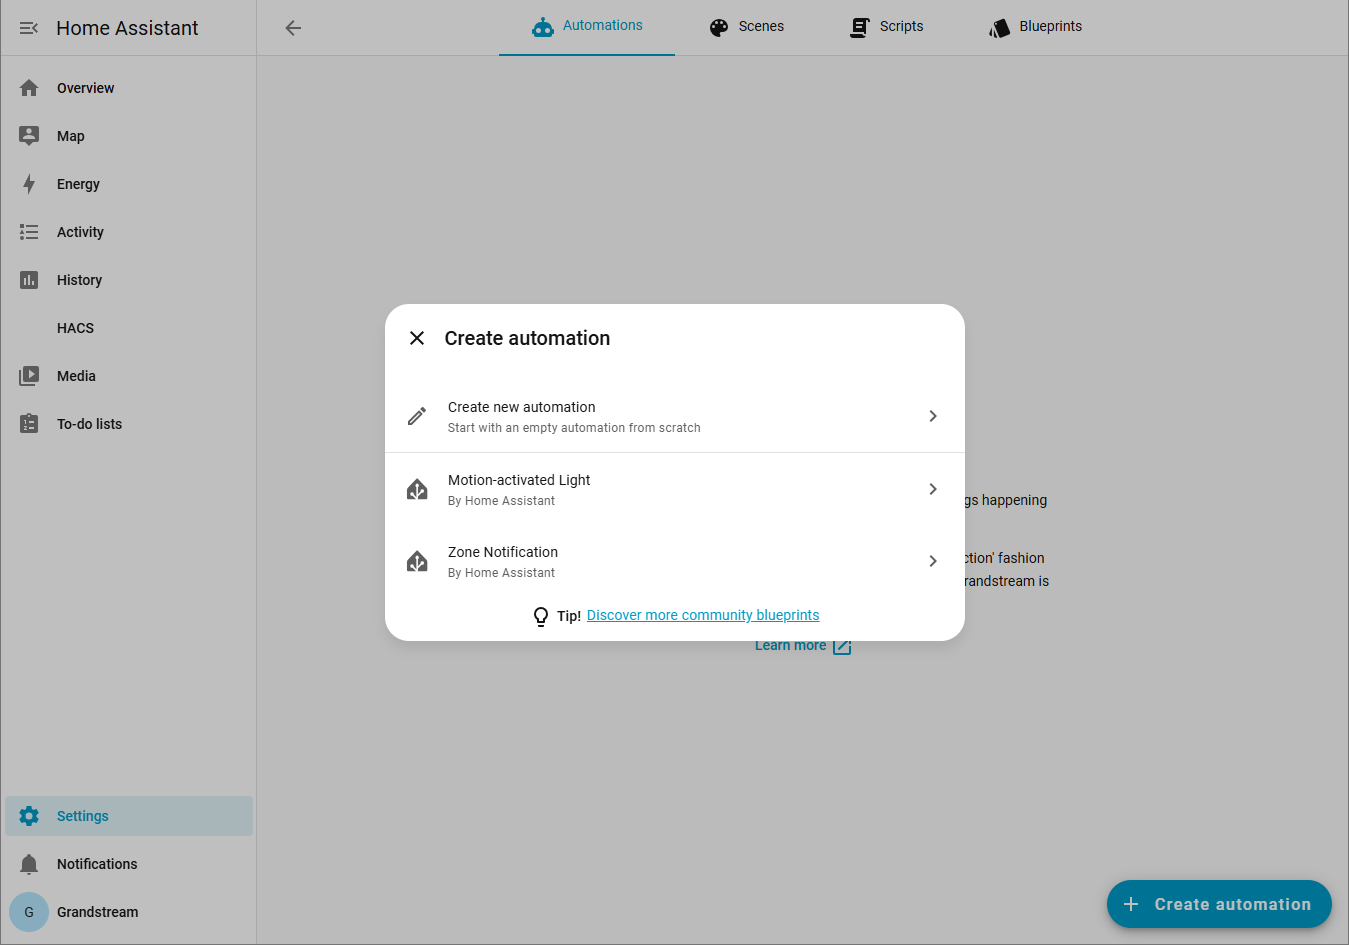
- Choose the trigger, the condition, and the action to execute.
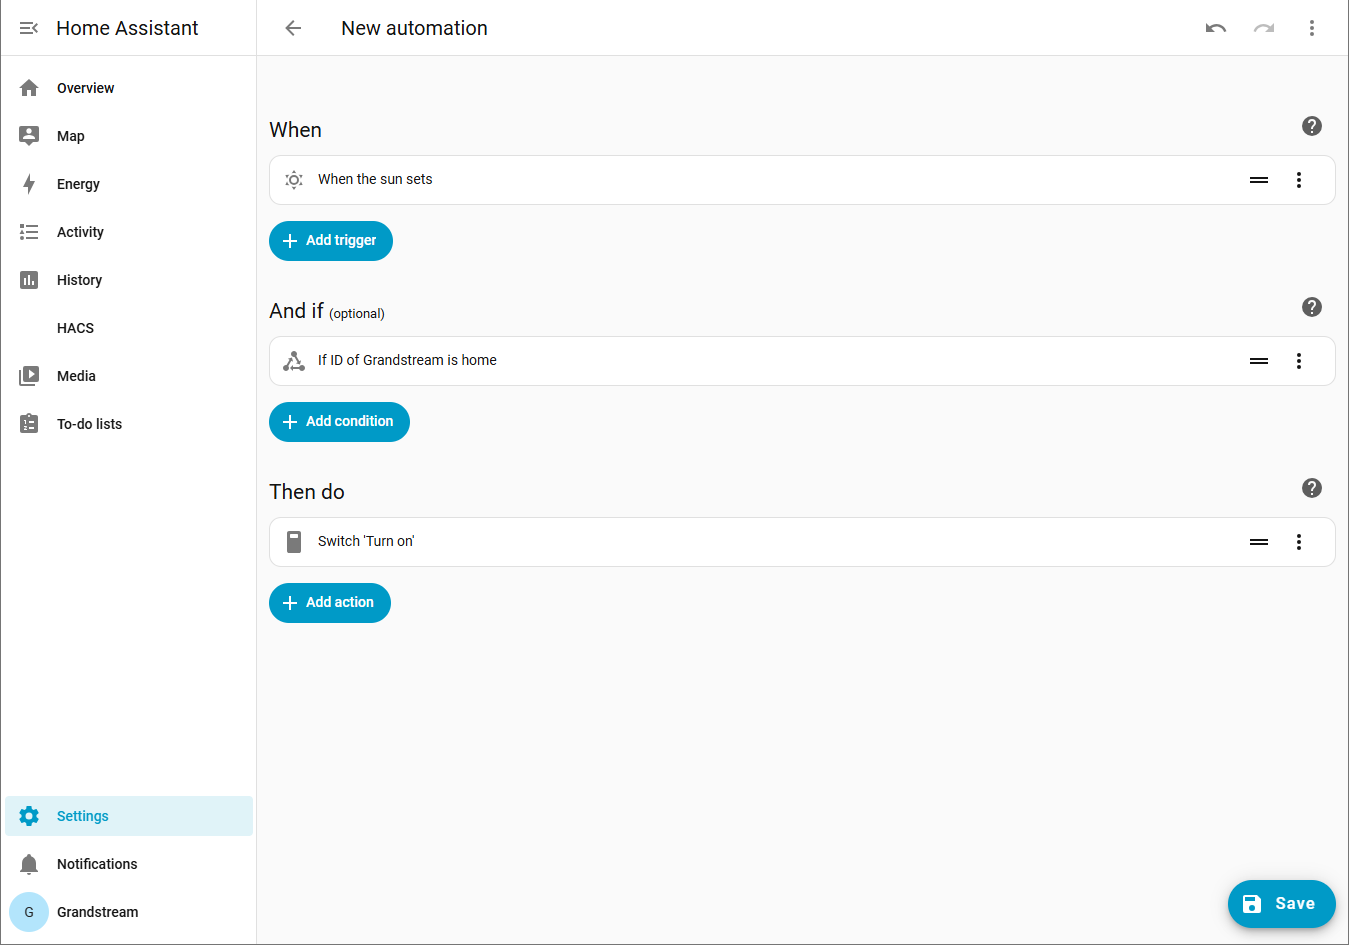
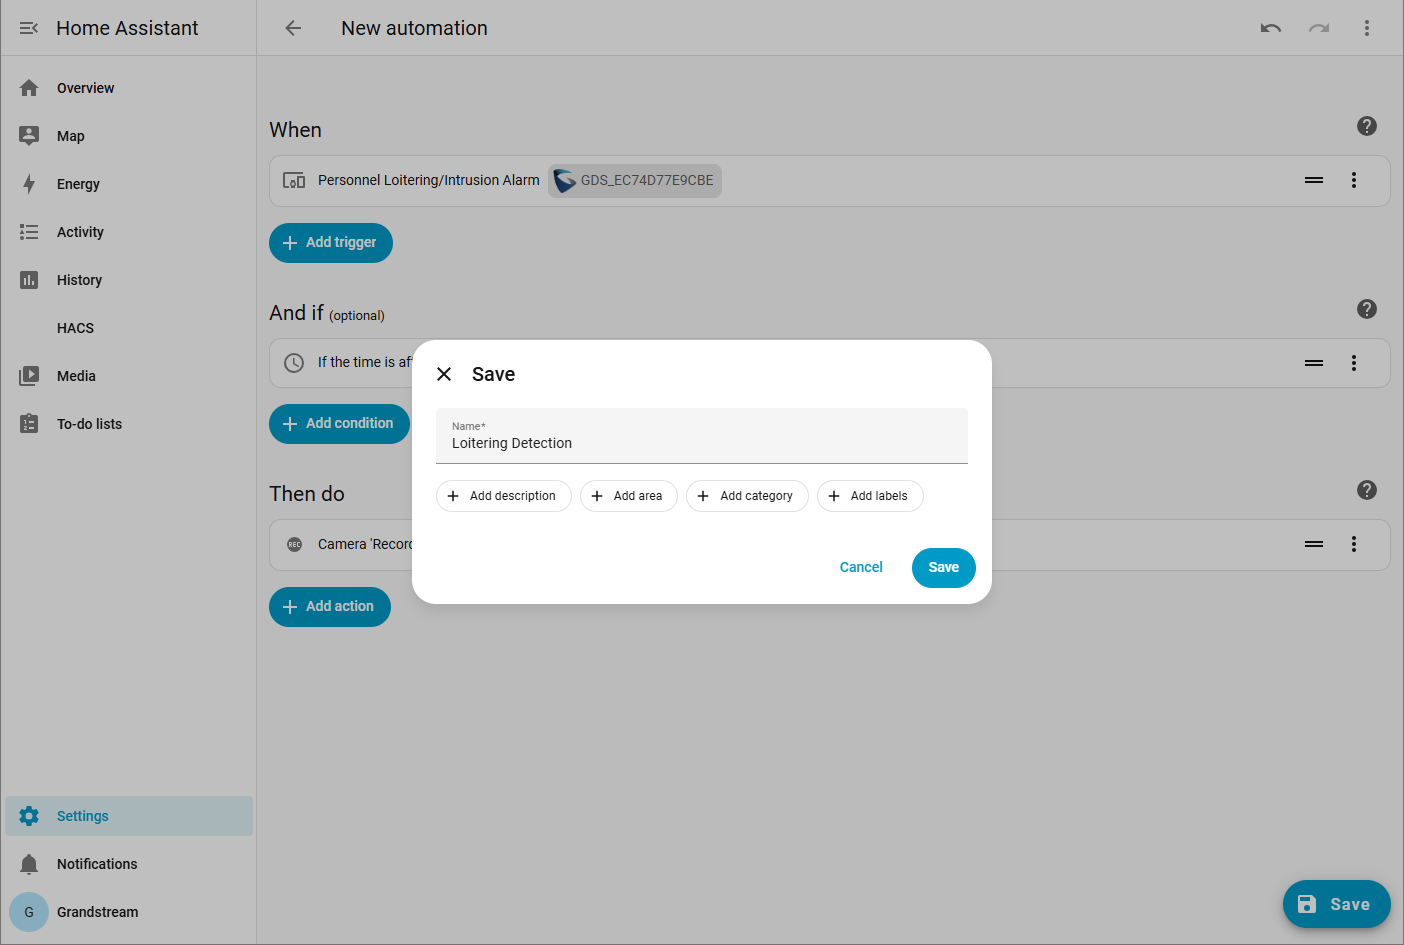
- Then click “Save”.
EXAMPLE
Scenario: Sending a notification when a human figure is detected
In this example, we will configure an automation with the trigger of human figure detection. Once the GDS is triggered, the user will be notified immediately using a persistent notification, and GDS will start recording the video feed into a file.
Configuration Steps
- On the overview page of the Home Assistant, click on “Settings” on the sidebar of the page layout.
- On the list, select “Automations & scenes”.
- Click on the “Create automation” button.
- Click on “Create new automation”.
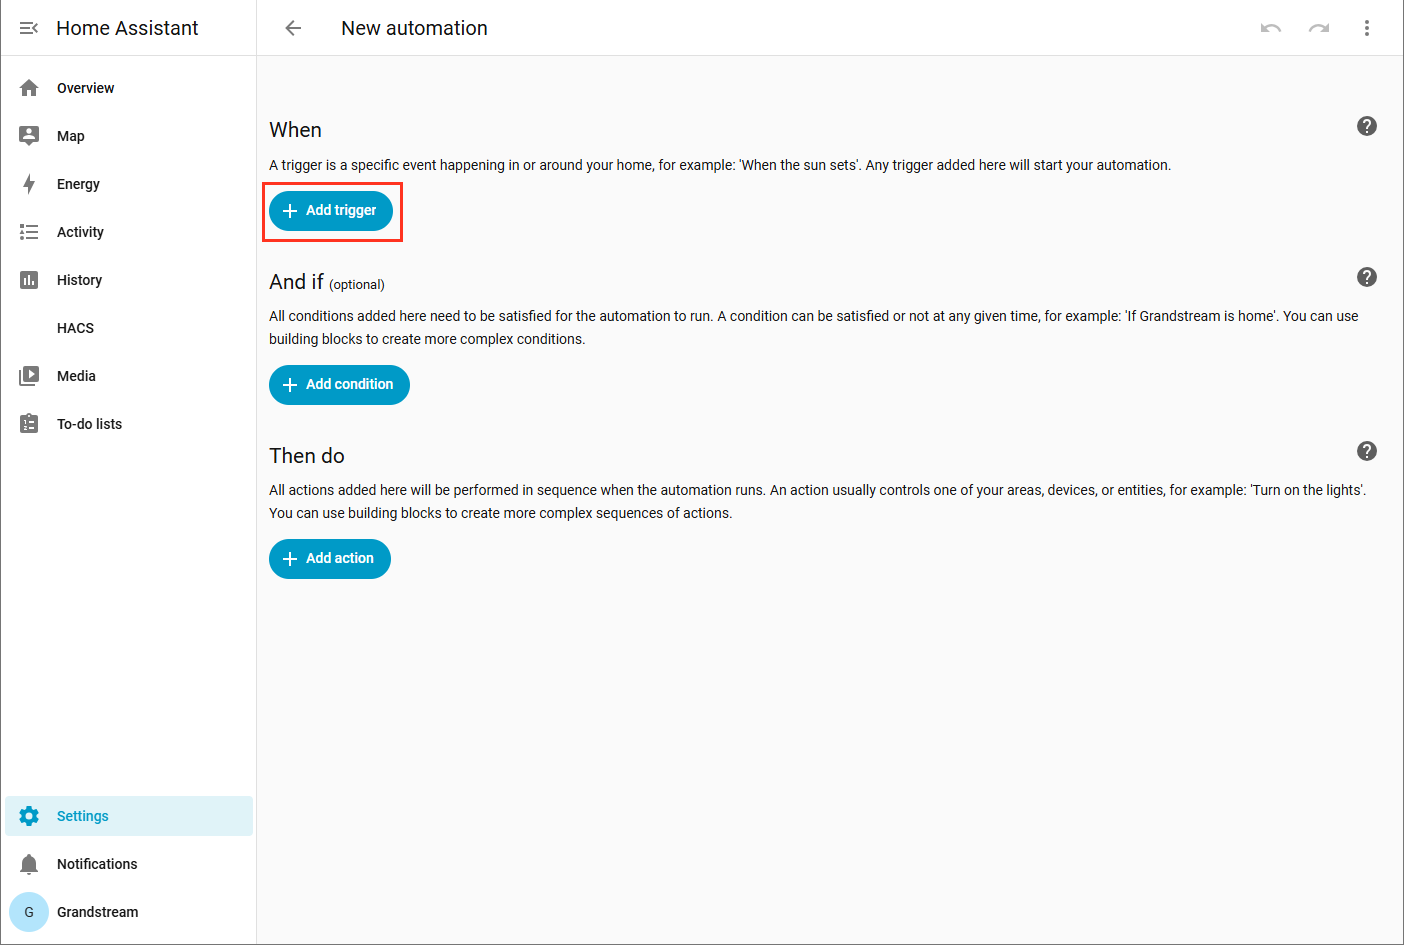
- At this stage, we need to configure the trigger, the condition, and the action to carry out. The user can select multiple triggers, multiple conditions, and multiple actions. Note that when adding multiple conditions, all of the conditions need to be met before the action is performed. If one condition is not met, then the action will not be carried out.
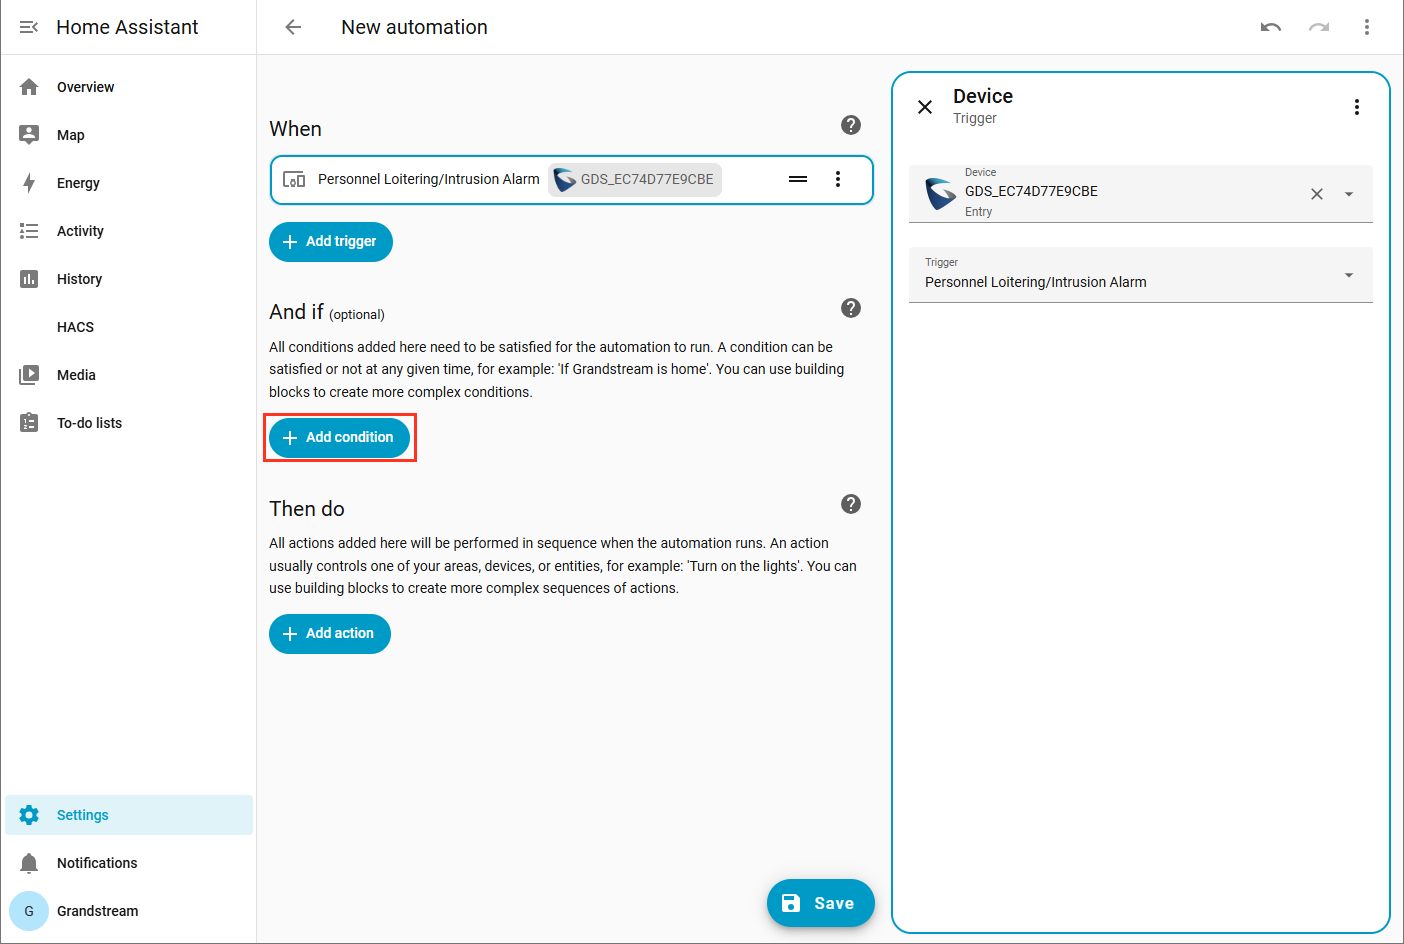
To proceed, click on “Add trigger”.
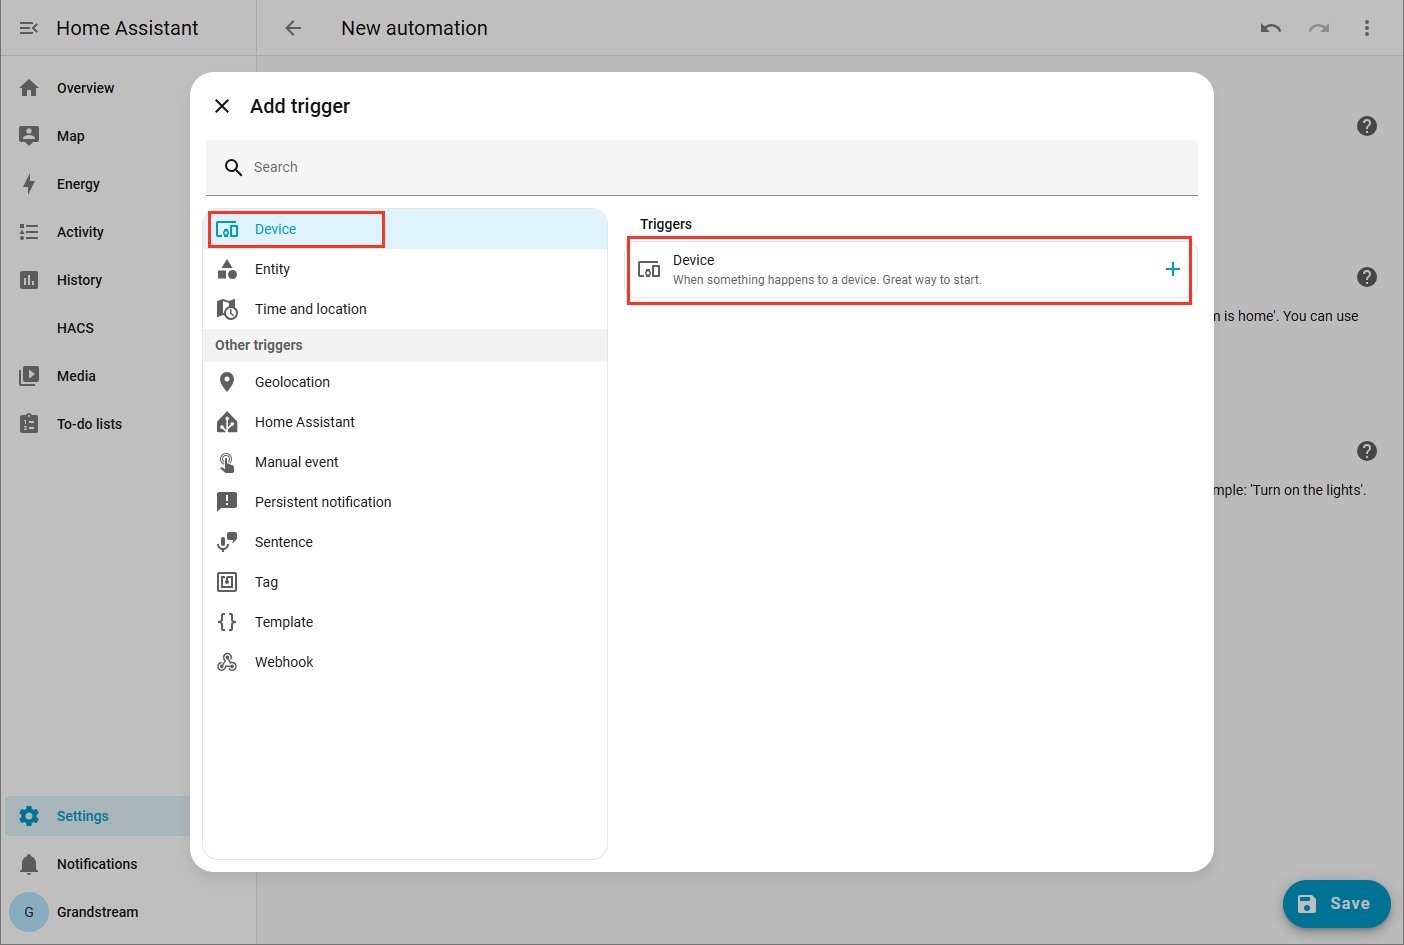
- Select click on “Device” to open the list of devices added to the Home Assistant.
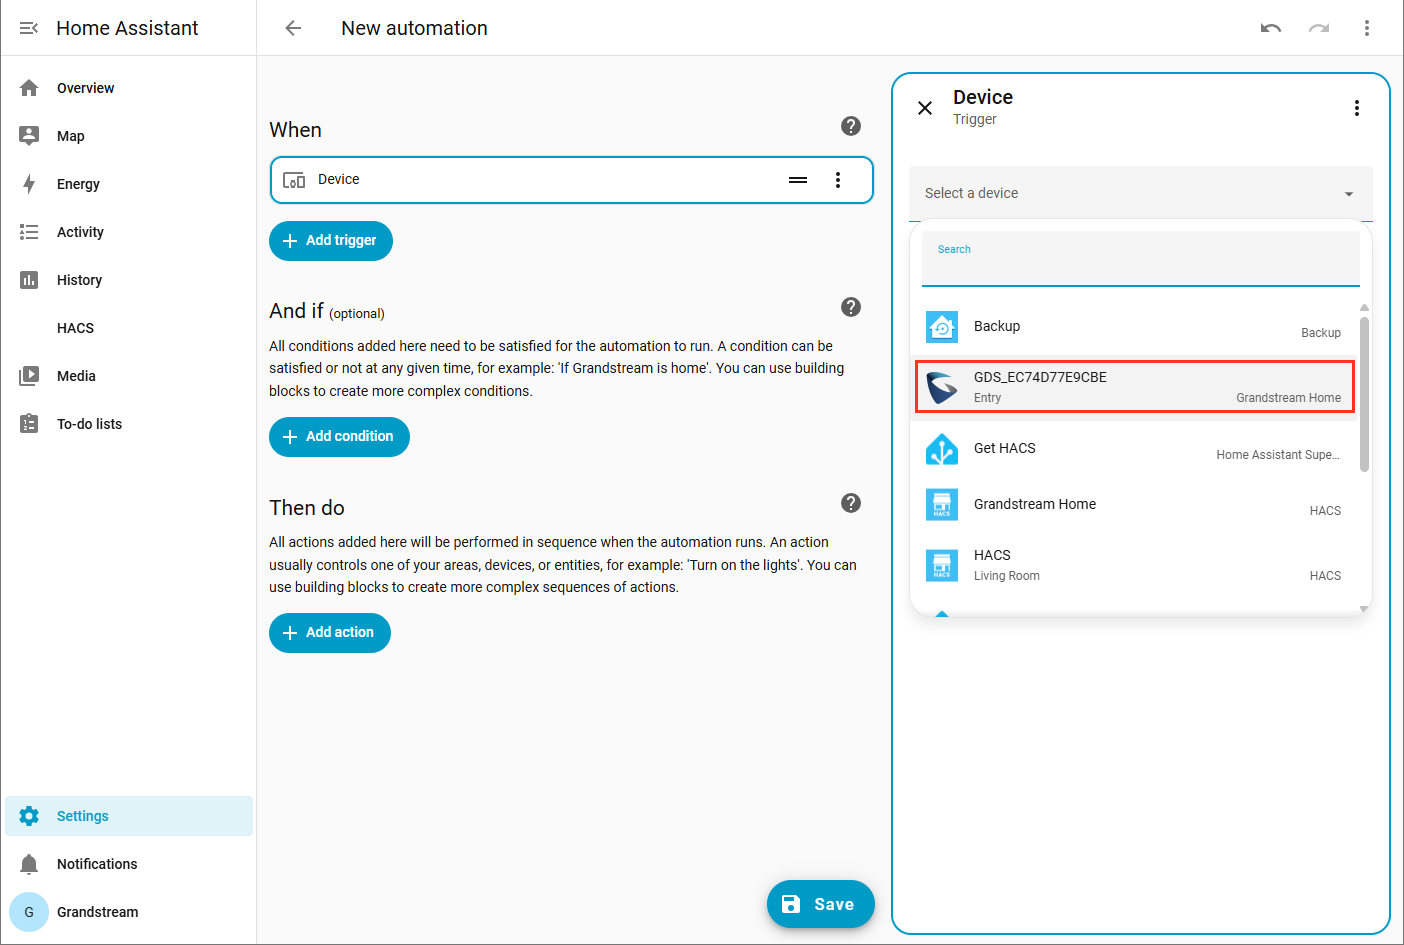
- From the list, select the GDS device.
- In the Trigger menu, select the type of trigger to use, in this example, and then “Personnel Loitering/Intrusion Alarm”.
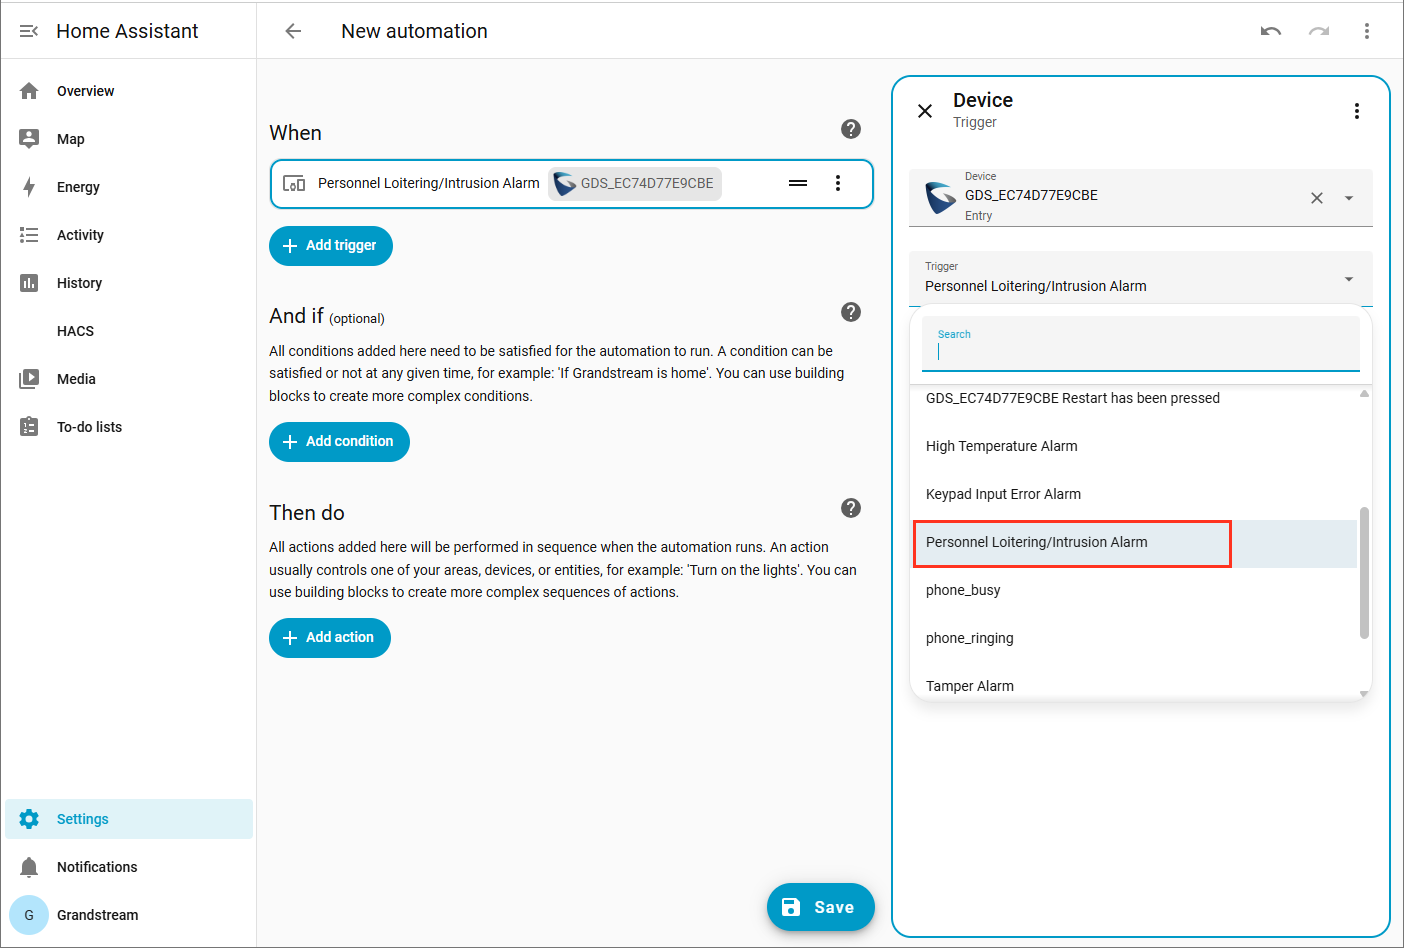
- Add the condition of the trigger by clicking on “Add condition”.
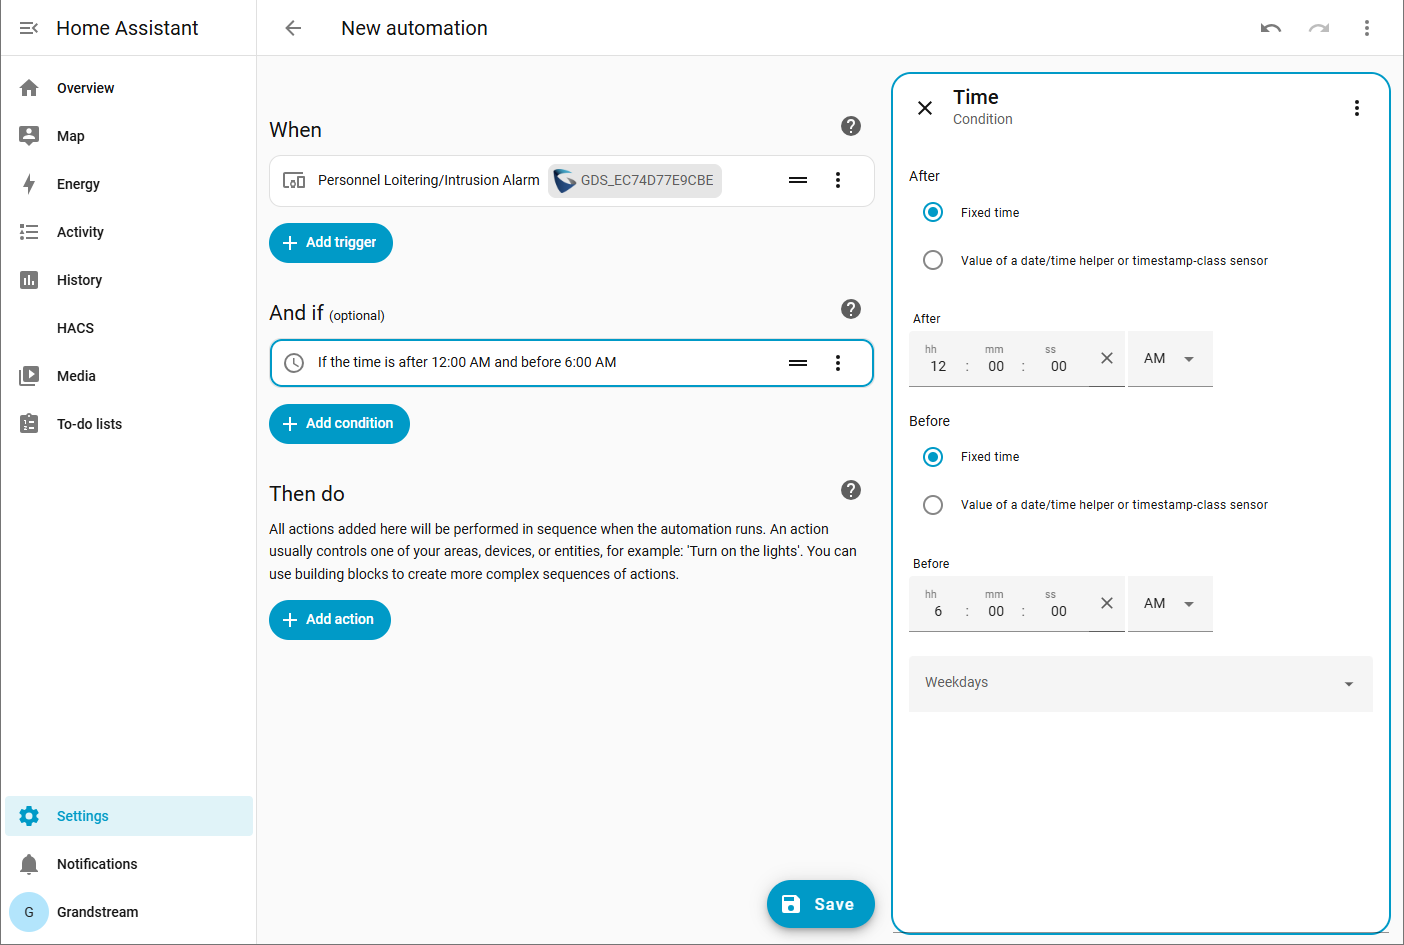
- The condition we will use in this example is a time frame from 12:00 AM to 06:00 AM. If the trigger is triggered during this time, the action will be carried out.
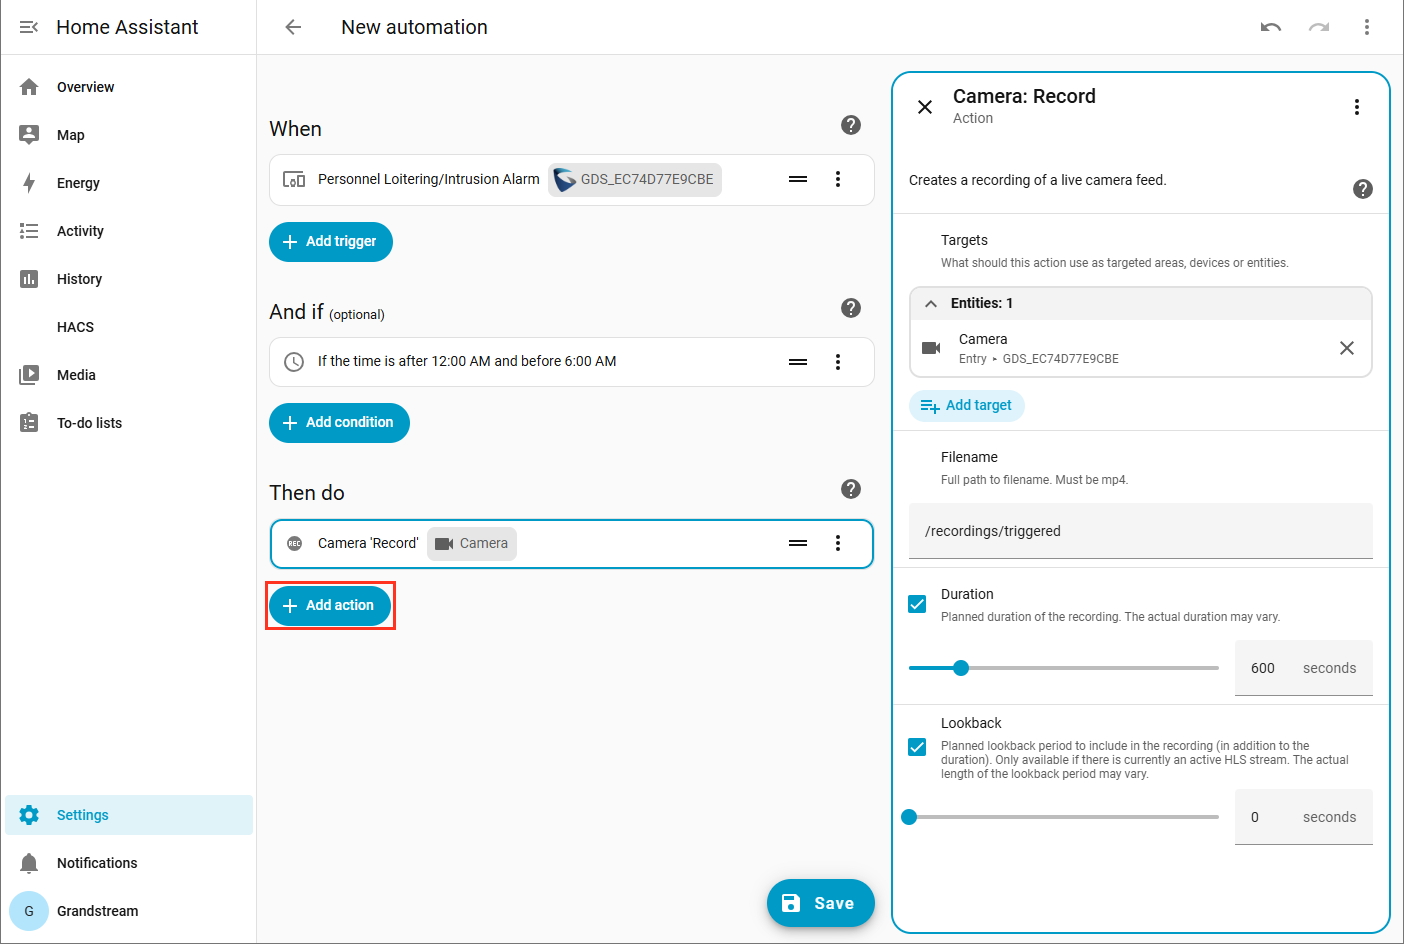
- Click on “add action” to select the action to carry out.
You can add multiple actions if needed.
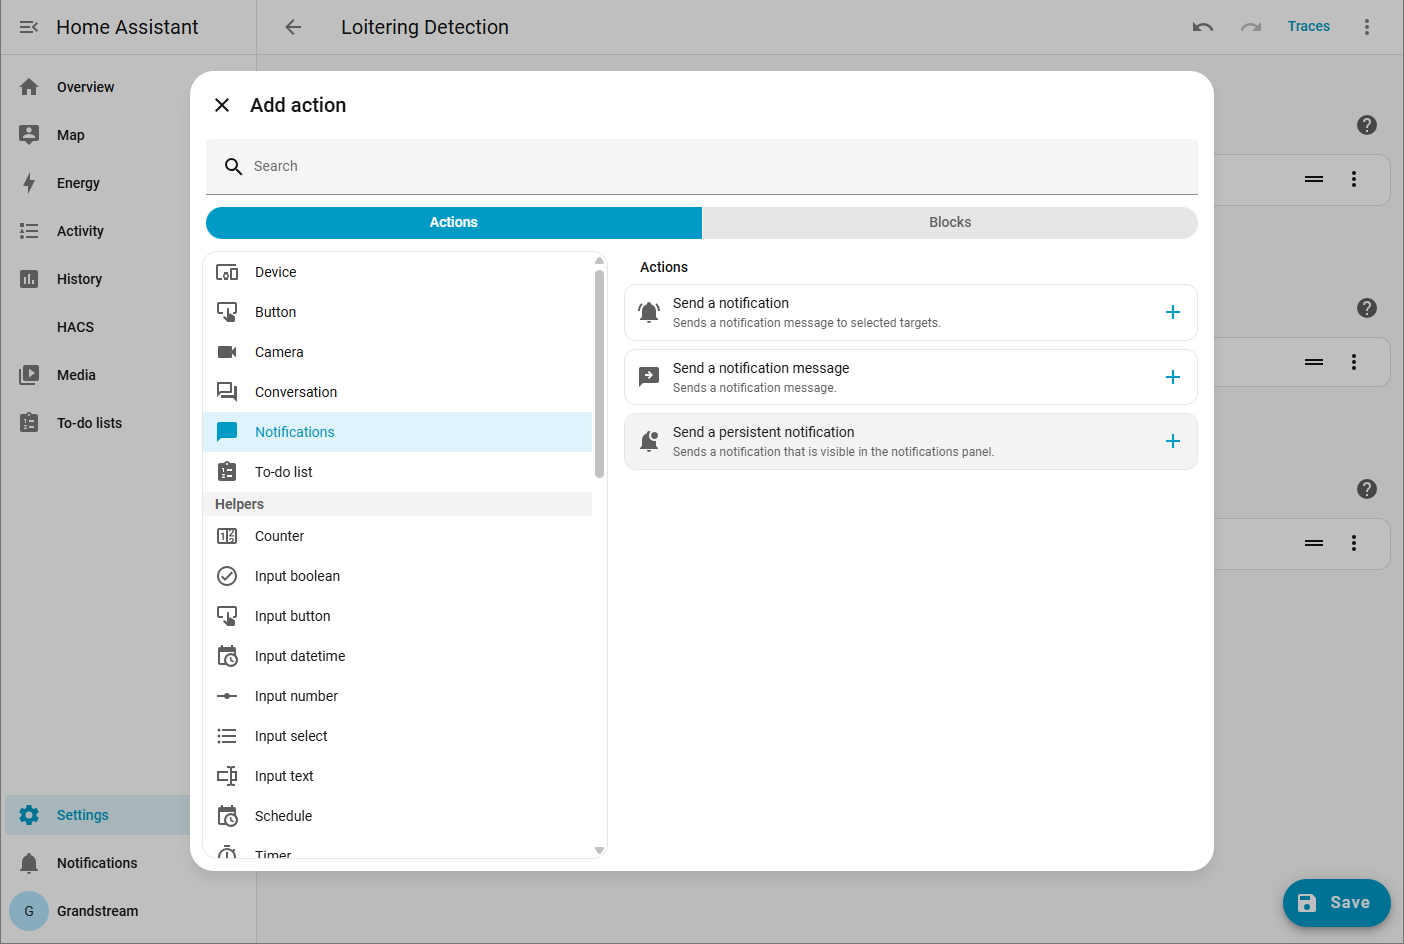
- Under the “Notifications” category, select “Send a persistent notification”.
- Add the name of the automation with description, label, category, and area.
Conclusion
By using Home Assistant and HACS, you can seamlessly integrate the GDS372x series into your local smart home ecosystem, unlocking more possibilities for your automation scenarios. Start your smart home journey now! Begin with one light, one access control device, and gradually build your own truly interconnected and private smart living space.