

Thank you for purchasing the Grandstream GSC3560/GSC3565.
The GSC3560/GSC3565 is a smart outdoor intercom that functions as an advanced access control system, delivering secure facility access and real-time monitoring for buildings of all sizes.
This guide explains how to integrate the GSC356x series with Home Assistant using HACS. It covers installation of the required components, device configuration, and automation setup to enable access control monitoring and event-based actions within Home Assistant.
About Home Assistant
Home Assistant (HA) is an open-source home automation platform that enables centralized management, monitoring, and automation of smart devices within a single system. It operates primarily on a local network, providing enhanced data control, improved responsiveness, and reduced reliance on cloud services.
Designed to support both basic and advanced smart home environments, it offers a scalable and extensible solution backed by an active open-source ecosystem, making it well-suited for users and organizations that require strong customization, broad integration capabilities, and reliable data privacy.
Key Capabilities:
- Centralized device management: Integrates and controls a wide range of devices (e.g., lighting, cameras, access control systems) from different manufacturers through one interface.
- Automation engine: Allows the creation of rule-based workflows and scenarios to automate actions based on triggers, schedules, or conditions.
- Primarily local operation: Processes data locally to enhance privacy, security, and system reliability.
- Broad interoperability: Supports thousands of devices and multiple communication protocols such as Zigbee, Z-Wave, and MQTT.
- Flexible configuration: Provides both a graphical interface for standard setups and advanced configuration options for more complex deployments.
- Open-source ecosystem: Maintains an active community that provides a wide range of third-party plugins and integration solutions.
About HACS
HACS (Home Assistant Community Store) is a community-driven extension manager for Home Assistant that simplifies the discovery, installation, and management of third-party integrations, frontend themes, and plugins by providing a centralized way to access community-developed content not included in the official ecosystem.
Main Functions:
- Extends official capabilities: Enables installation of community-developed integrations that are not part of the default Home Assistant distribution.
- Frontend customization: Allows installation and management of UI themes to modify the appearance of the Home Assistant interface.
- Centralized management: Provides a unified interface to browse, install, and update community content without manual file handling.
- Update handling: Offers notifications and streamlined updates for installed components.
Install the Grandstream Home Integration via HACS
The following section covers the installation of Home Assistant, HACS, and the Grandstream Home integration.
Step 1: Install Home Assistant
To install Home Assistant, please refer to the official installation guide: https://www.home-assistant.io/installation/
Step 2: Install HACS
For installing HACS, please refer to the official installation guide: https://hacs.xyz/docs/use/
Step 3: Install the Grandstream Home Integration
To install the Grandstream Home integration via HACS, follow the steps below:
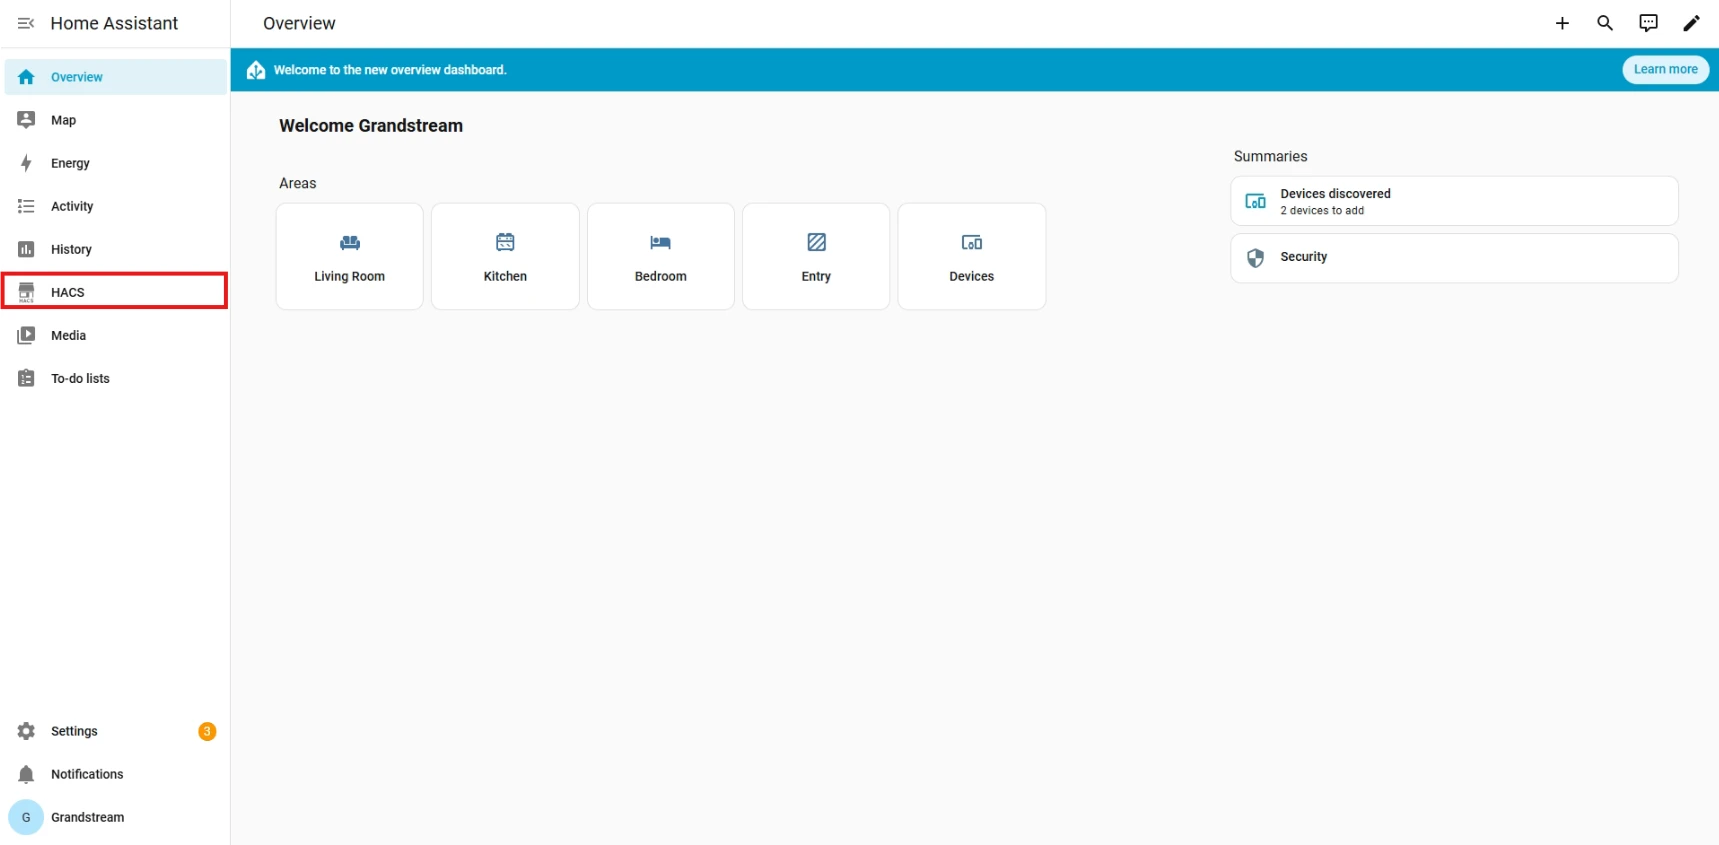
- Restart Home Assistant after installing HACS, and open HACS from the sidebar.
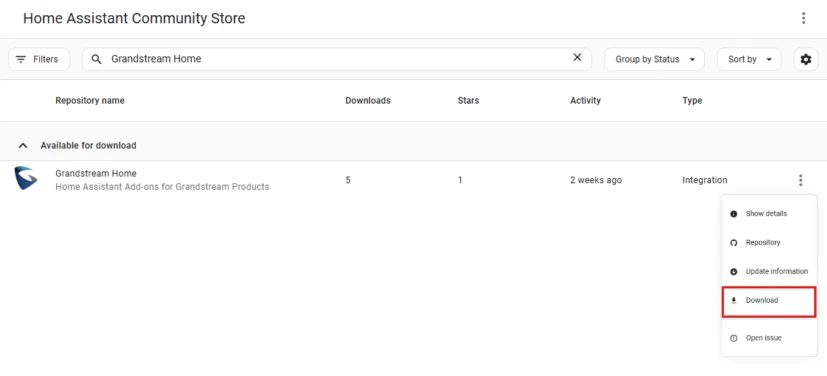
- In HACS, go to the Home Assistant Community Store search field and search for “Grandstream Home”.
- Under Available for Download, open the three-dot menu of the Grandstream Home integration, and select Download.
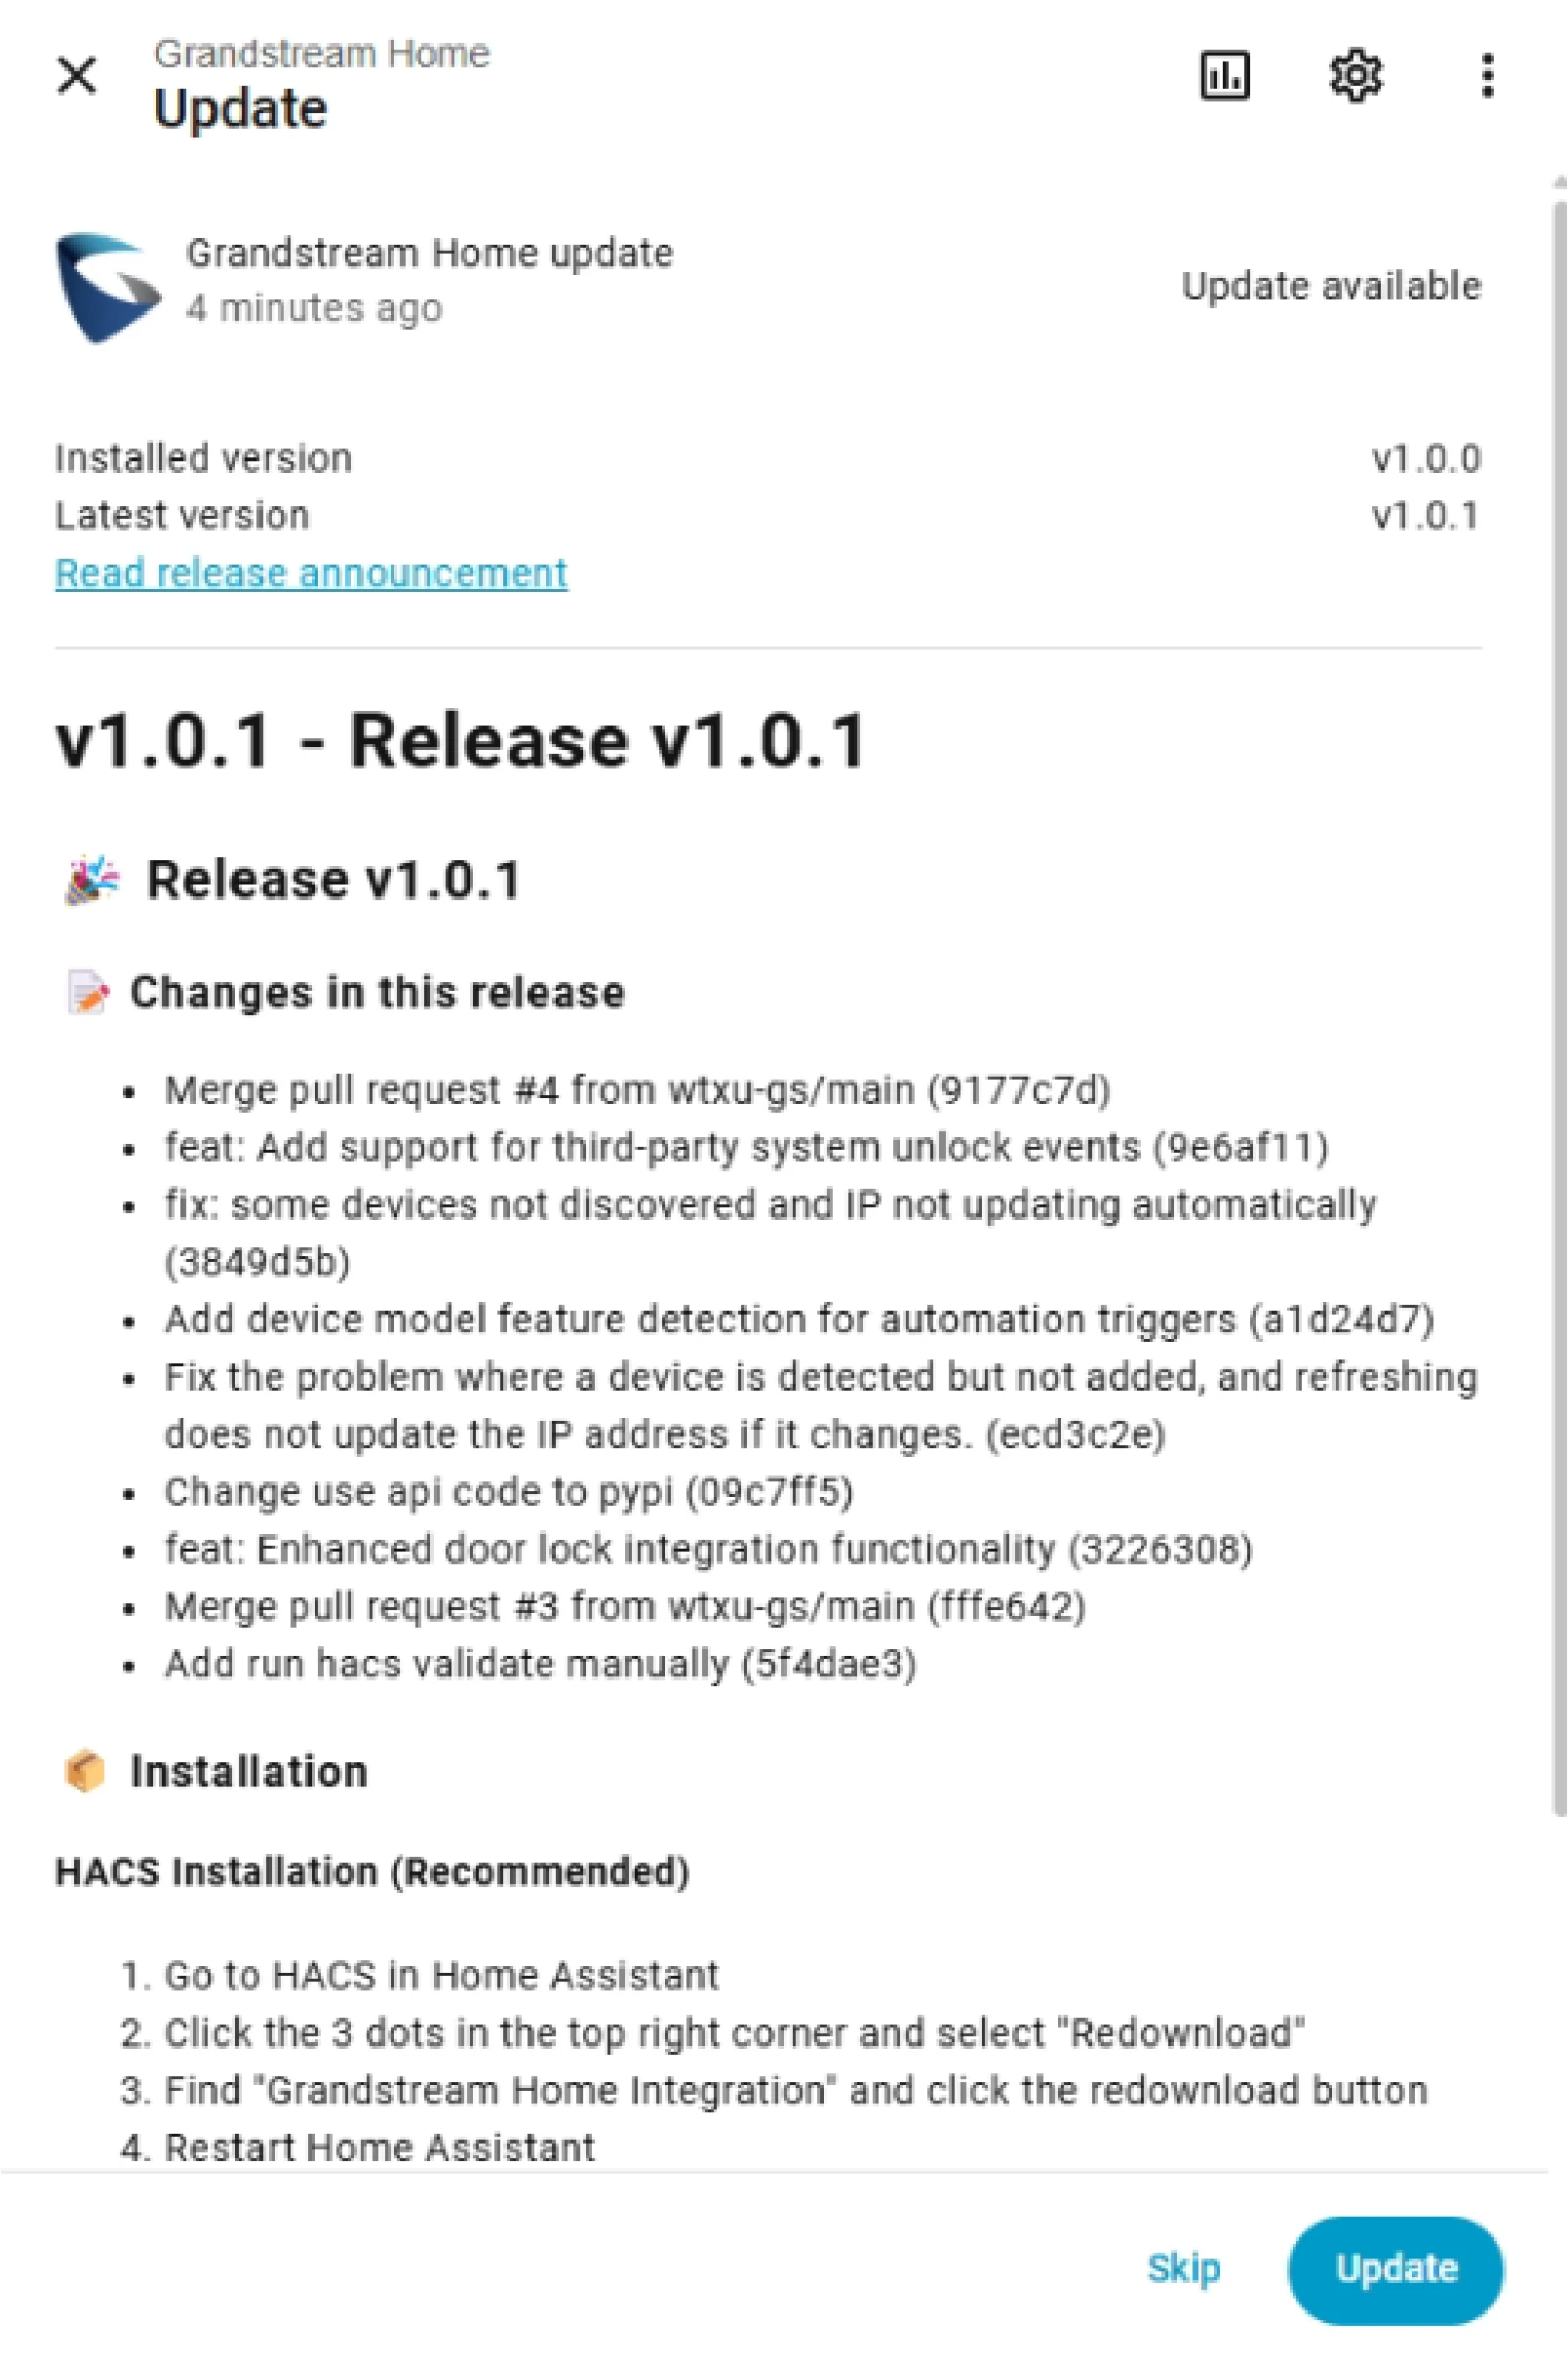
- Restart Home Assistant again to complete the installation.
Configure the GSC356x Device
The following section covers the GSC356x integration within Home Assistant using the Grandstream Home integration installed via HACS.
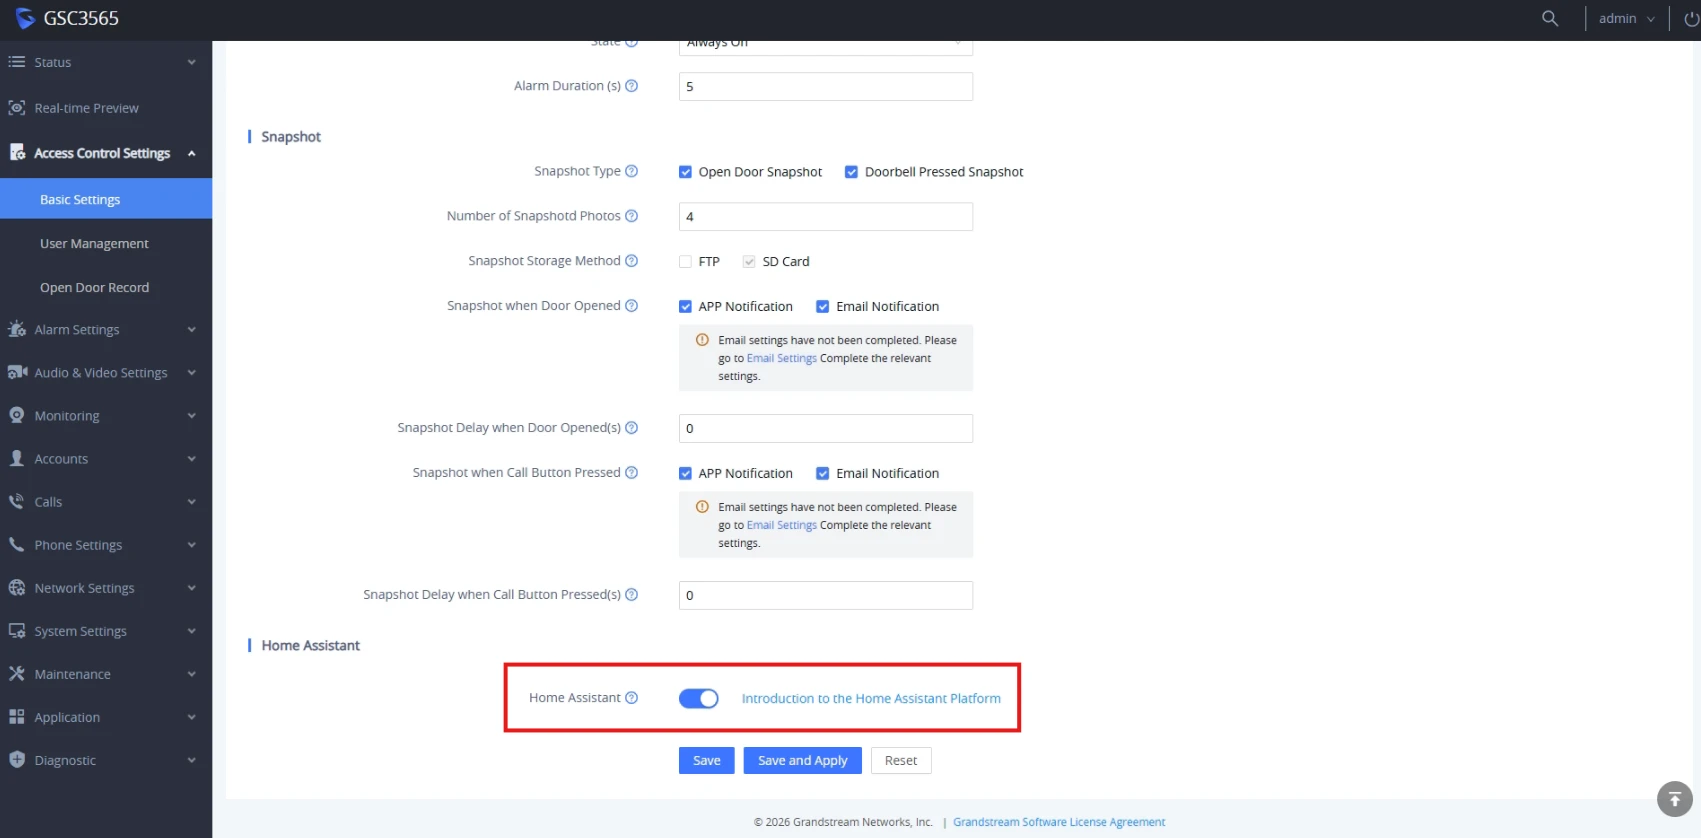
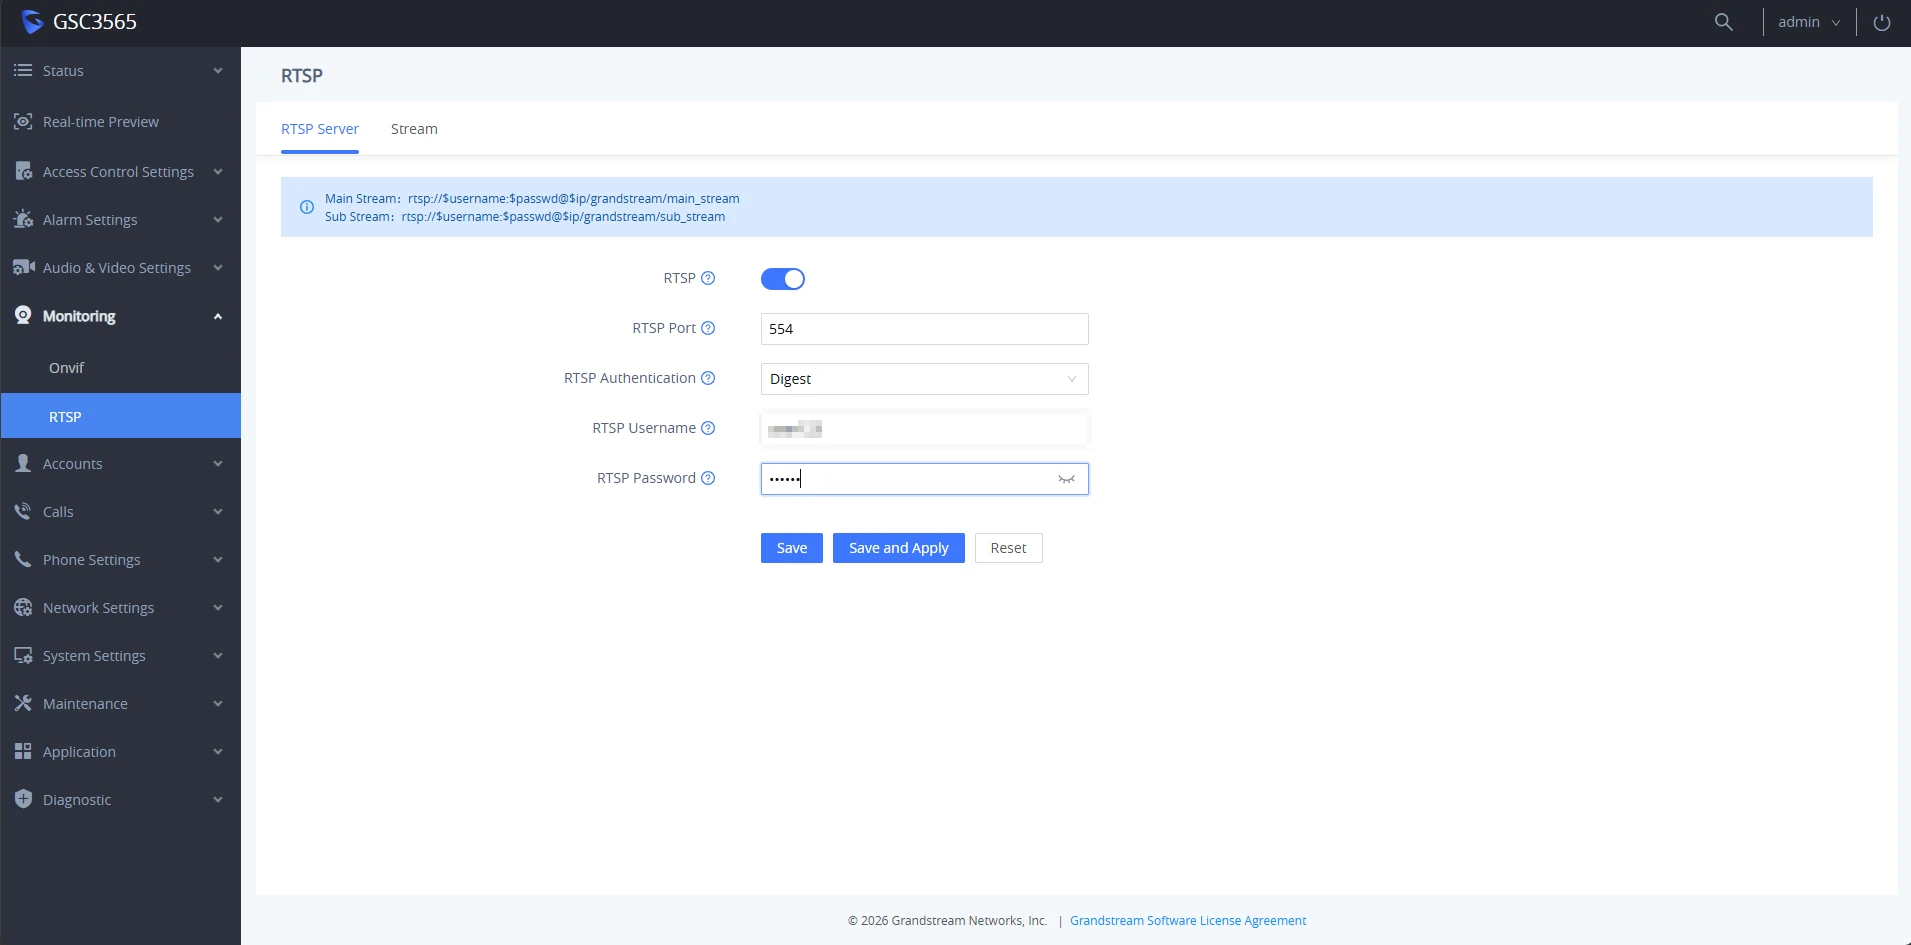
Before configuring in Home Assistant, ensure the following settings are properly configured on the GSC356x Web UI:
- Access Control Settings → Basic Settings → Home Assistant and verify that Home Assistant is enabled.
- Access Monitoring → RTSP, enable RTSP, and set the Username and Password that will later be used during the Home Assistant configuration.
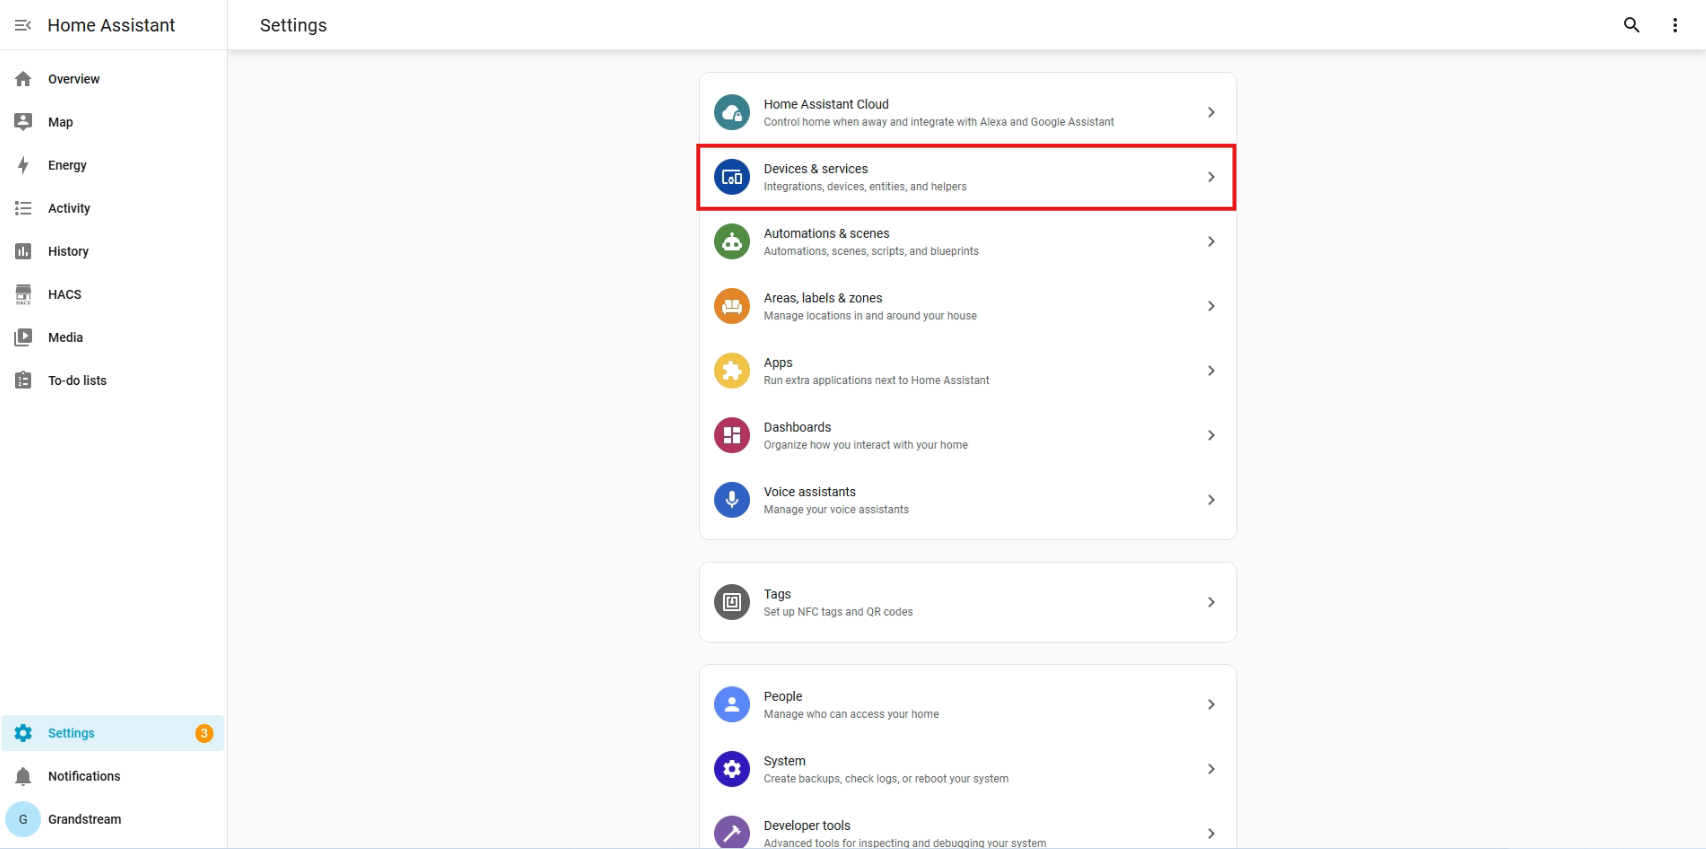
On Home Assistant, follow the steps below:
- After Home Assistant restarts, open Settings from the sidebar and access Devices & Services.
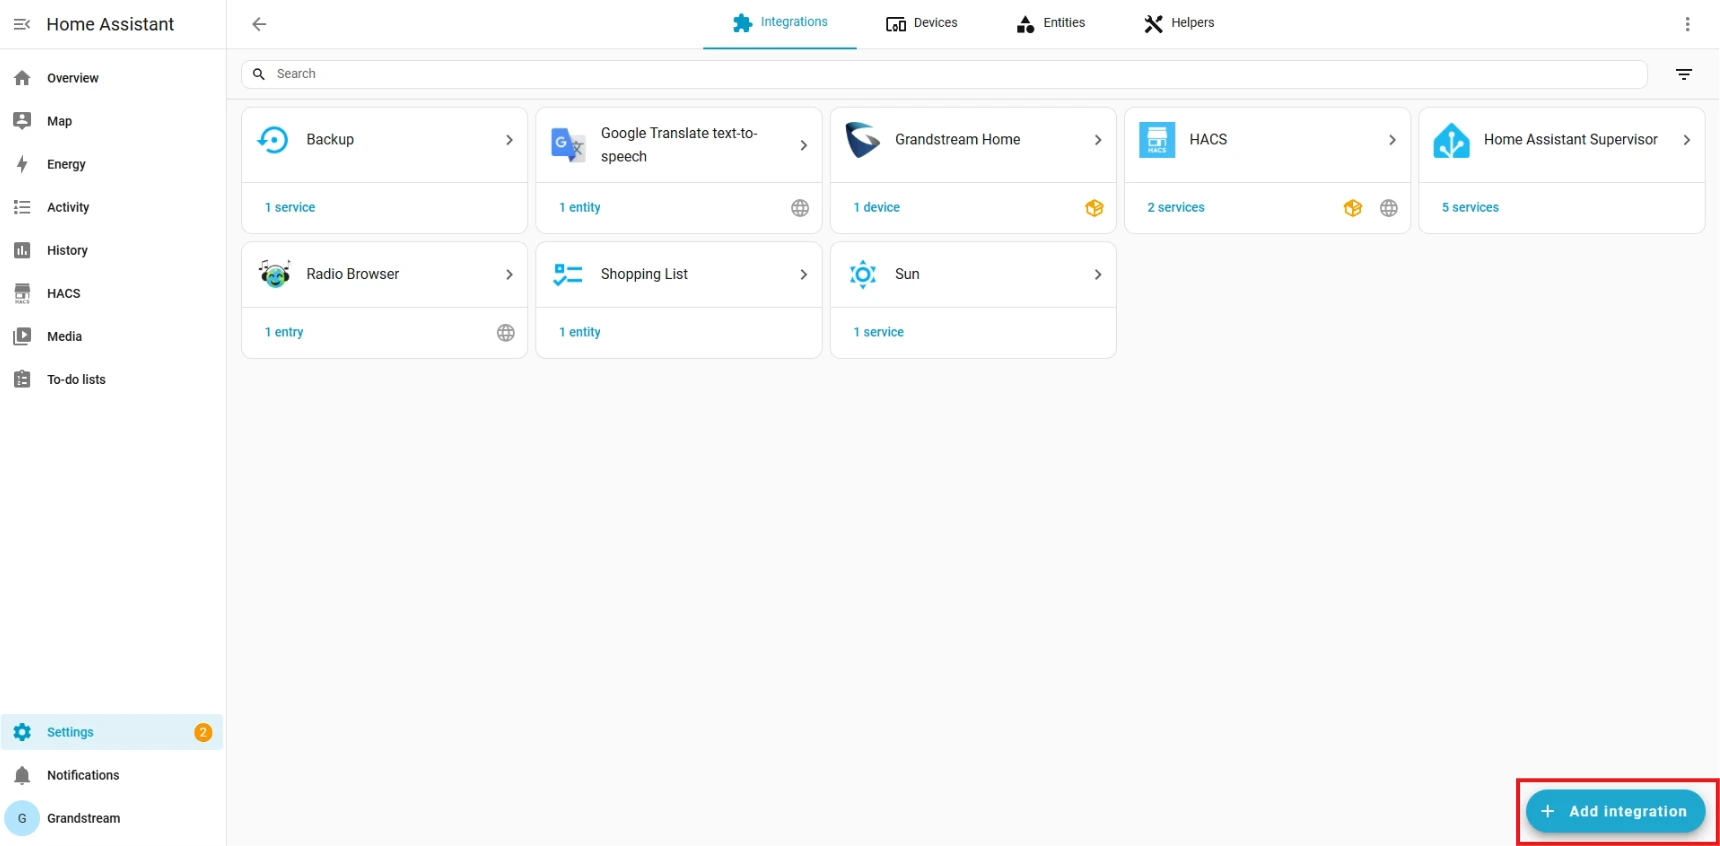
- In the Integrations page, press Add integration.
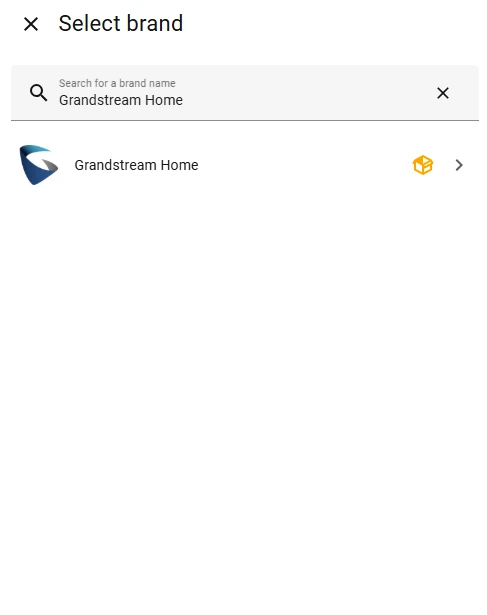
- Enter “Grandstream Home” in the search field, then select it from the results.
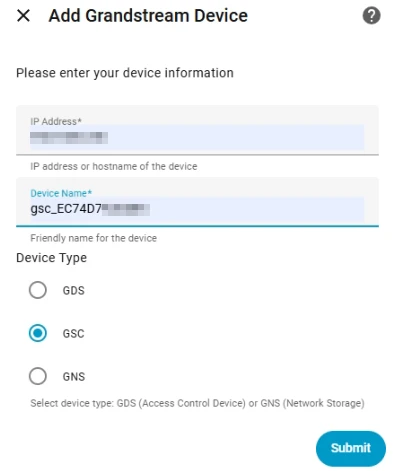
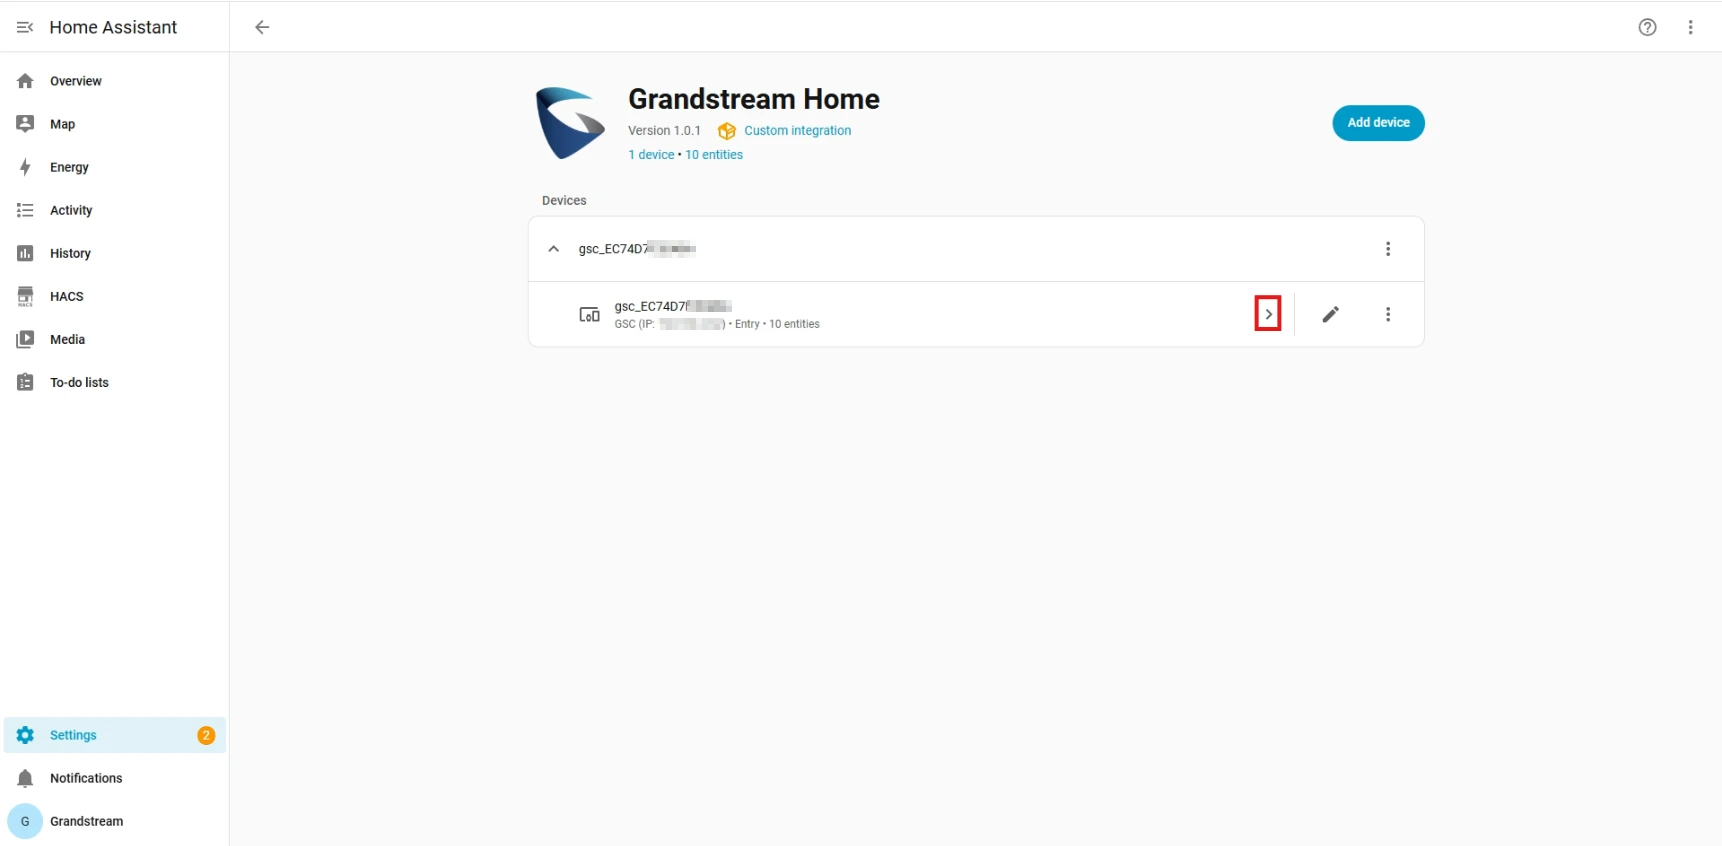
- A list of discovered devices will be displayed. If the target device appears, select it; otherwise, manually add it by entering the IP address and the device name, then selecting GSC as the device type.
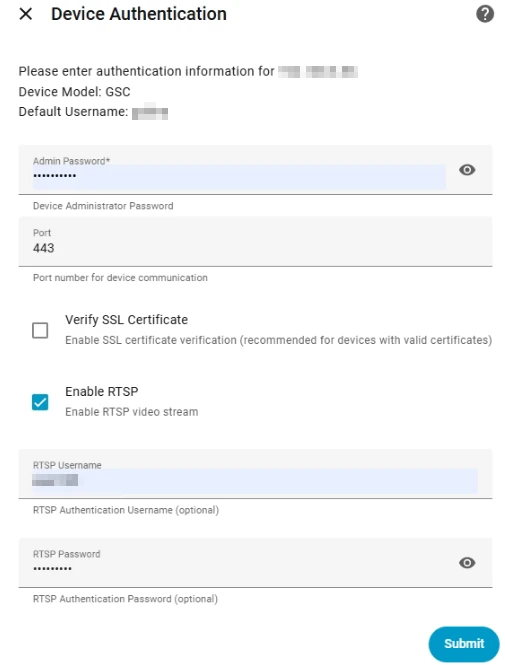
- On Device Authentication, enter the GSC356x admin password and the HTTPS device communication port. Enable RTSP and enter the Username and Password to access the device camera livestream (Only the GSC3565 includes a camera).
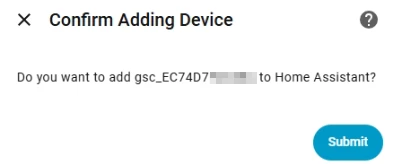
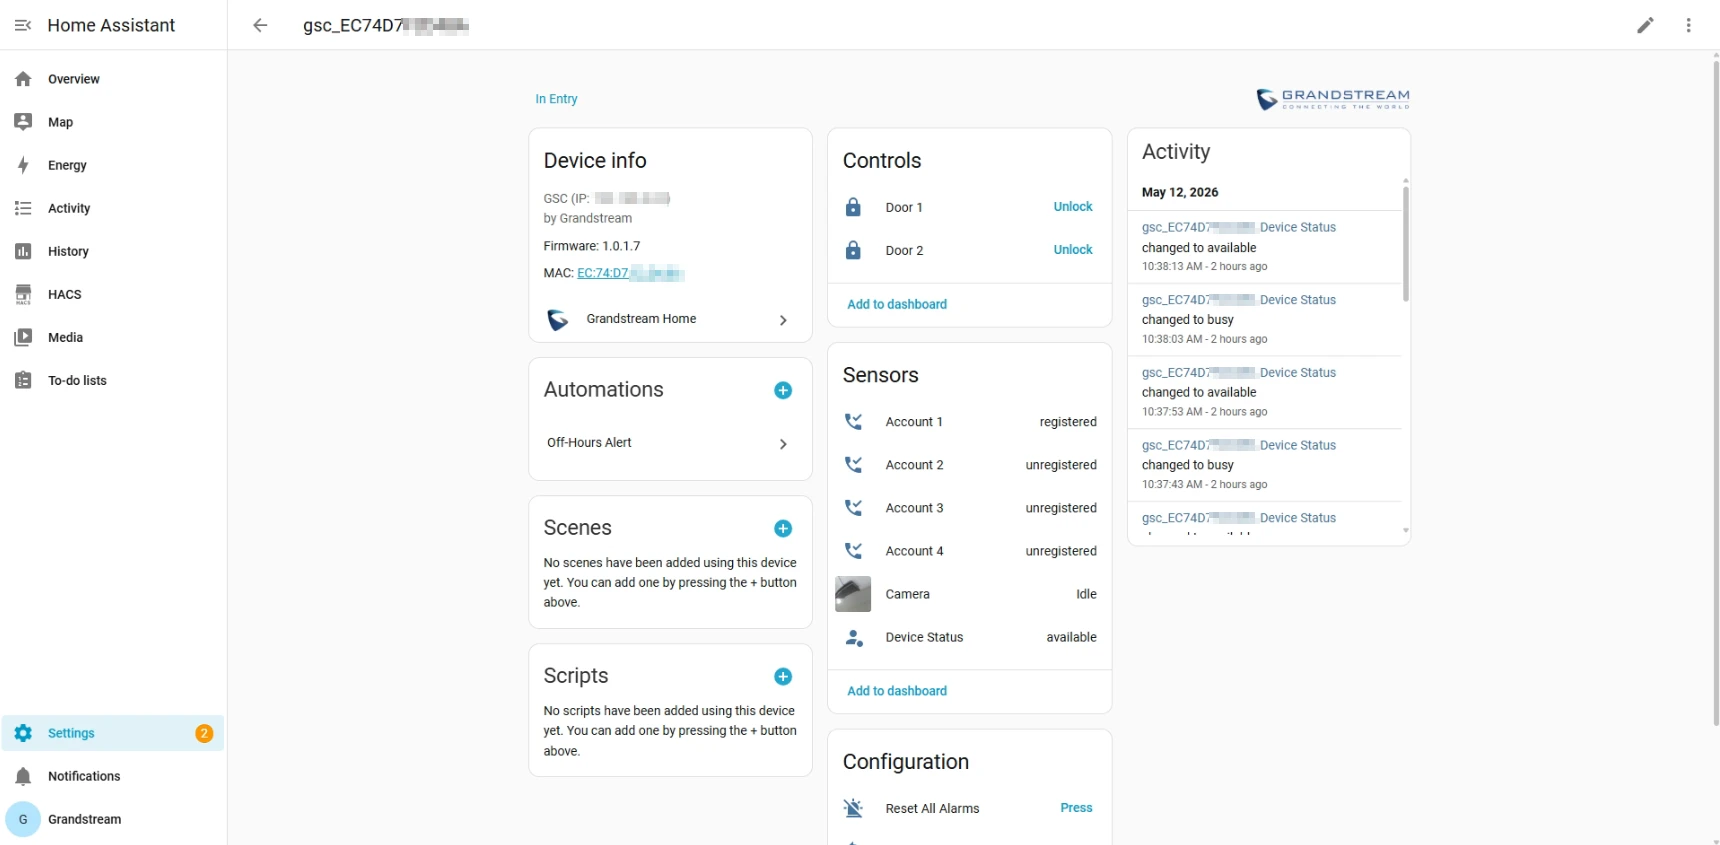
- Press Submit to confirm adding the device to Home Assistant.
Automation Configuration Scenario
This section demonstrates an automation setup for the GSC3565 model, which includes a built-in camera. The example defines an office environment with standard working hours (09:00 am – 05:00 pm) and triggers an alert when access is detected outside of these hours.
Configure the Automation
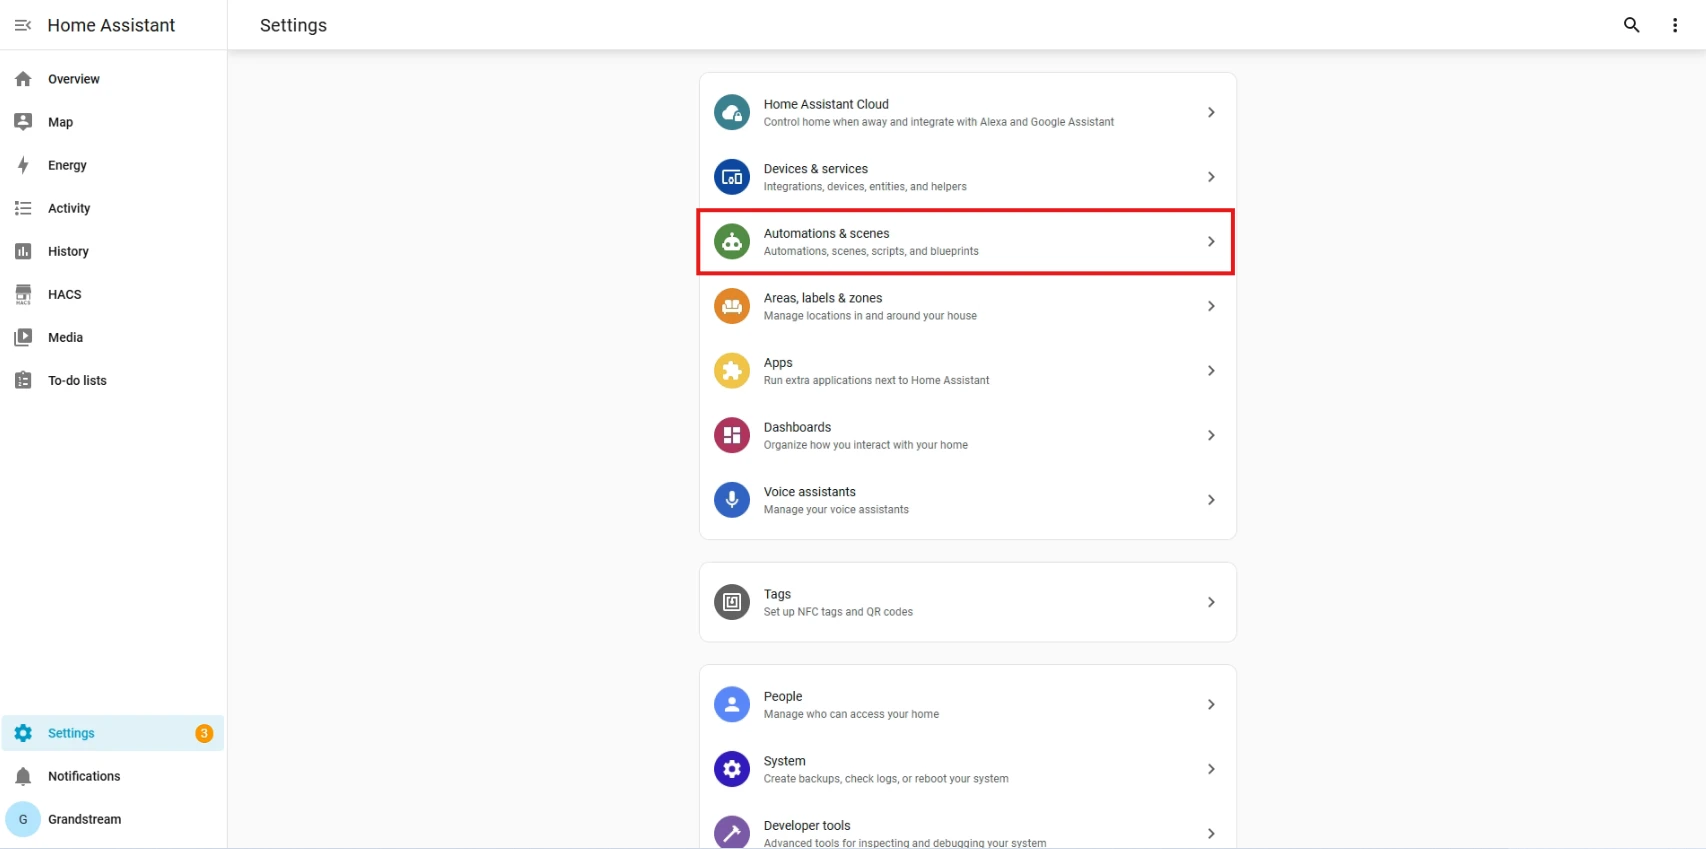
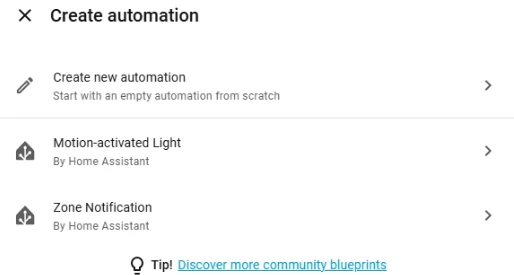
- Open Settings and press Automations & Scenes, then press Create Automation.
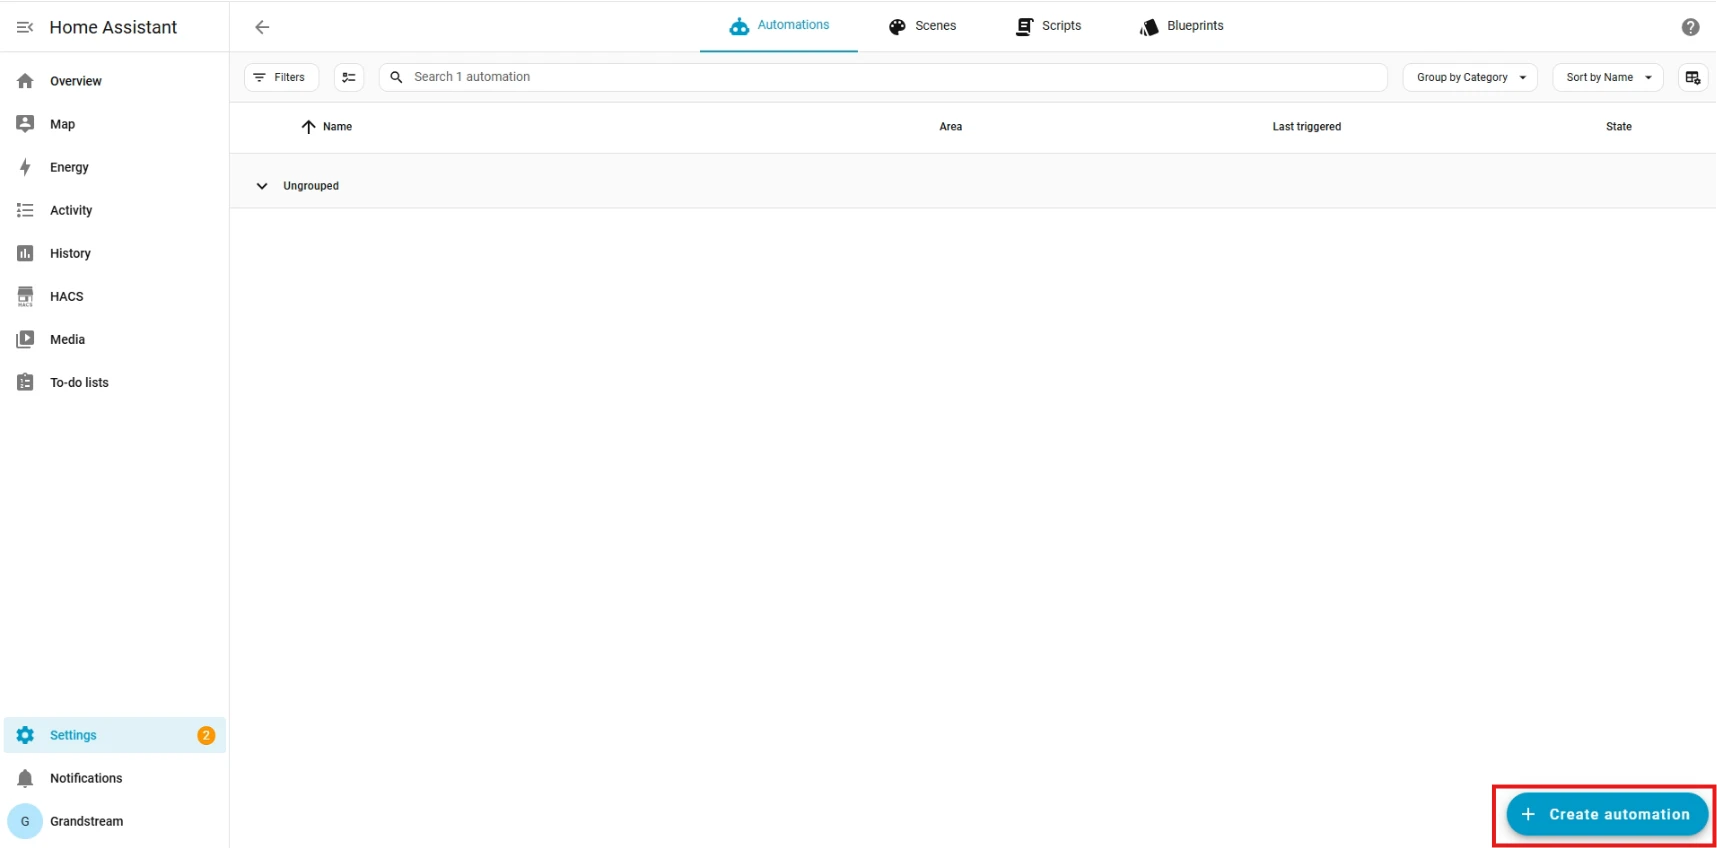
- Press Create New Automation.
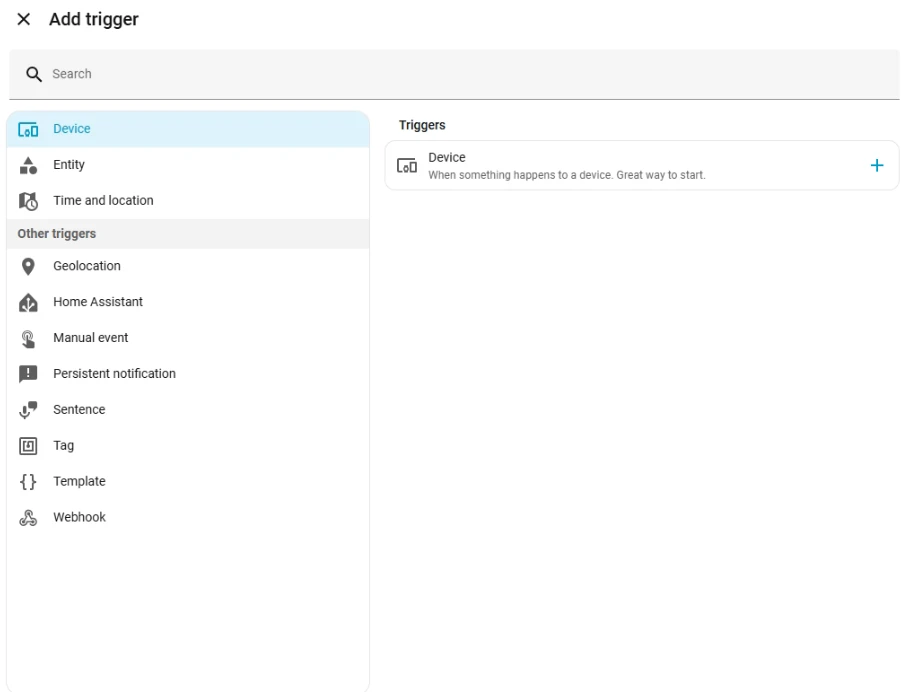
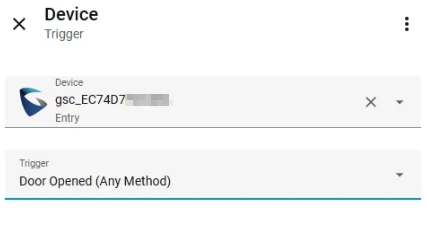
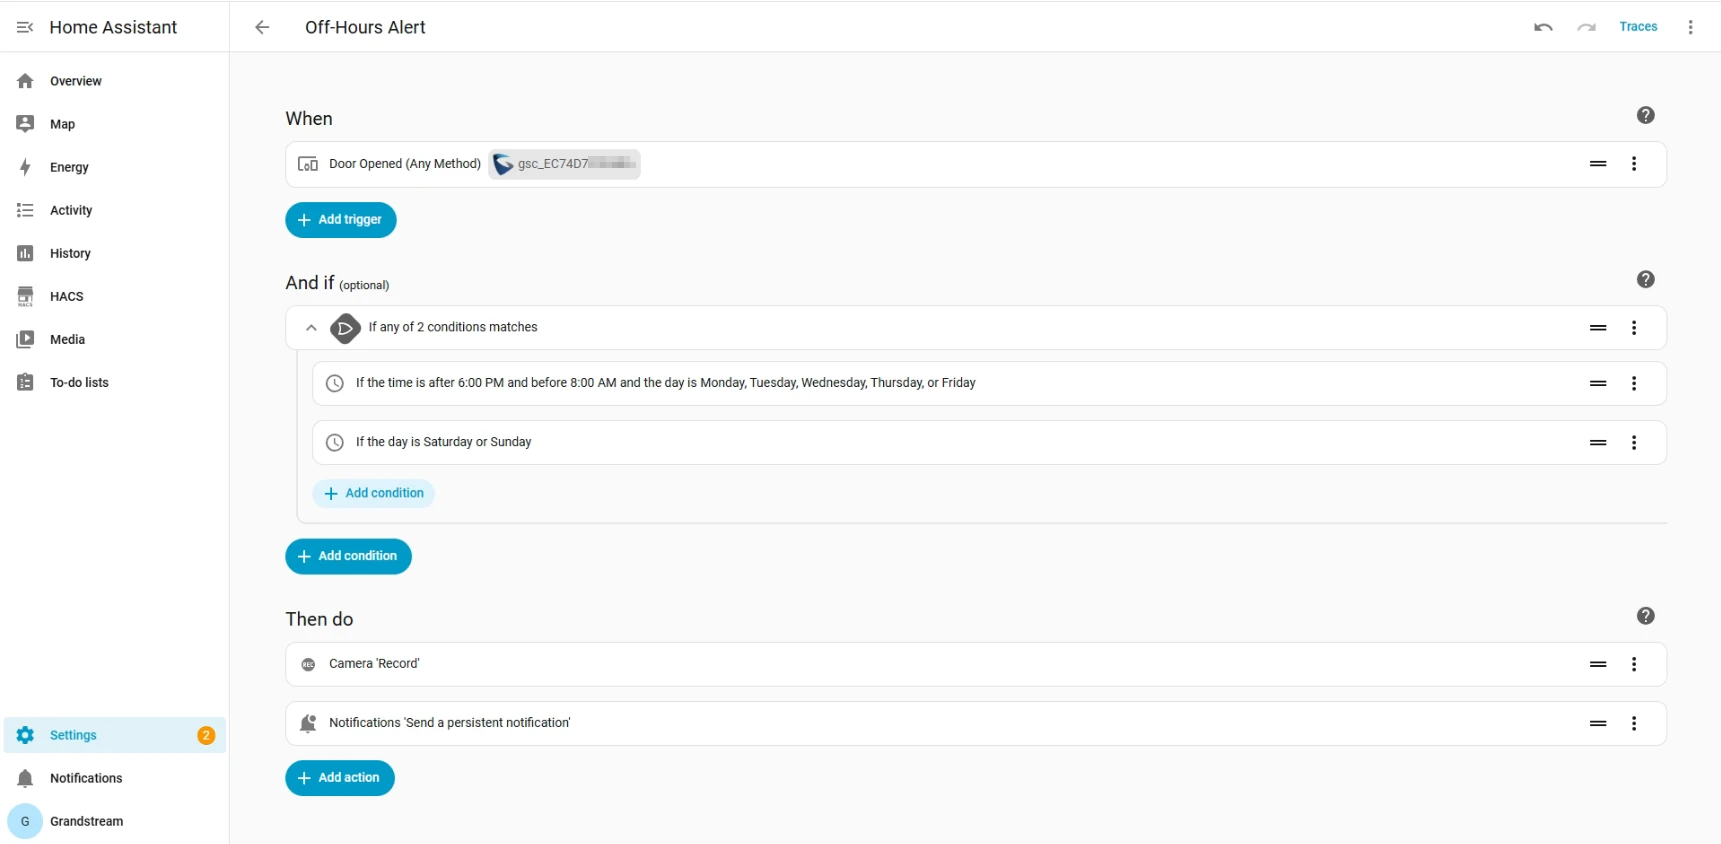
- Press Add Trigger, select Device, choose the previously added GSC3565 device, then select a trigger. In this example, Door Opened (Any Method) is selected.
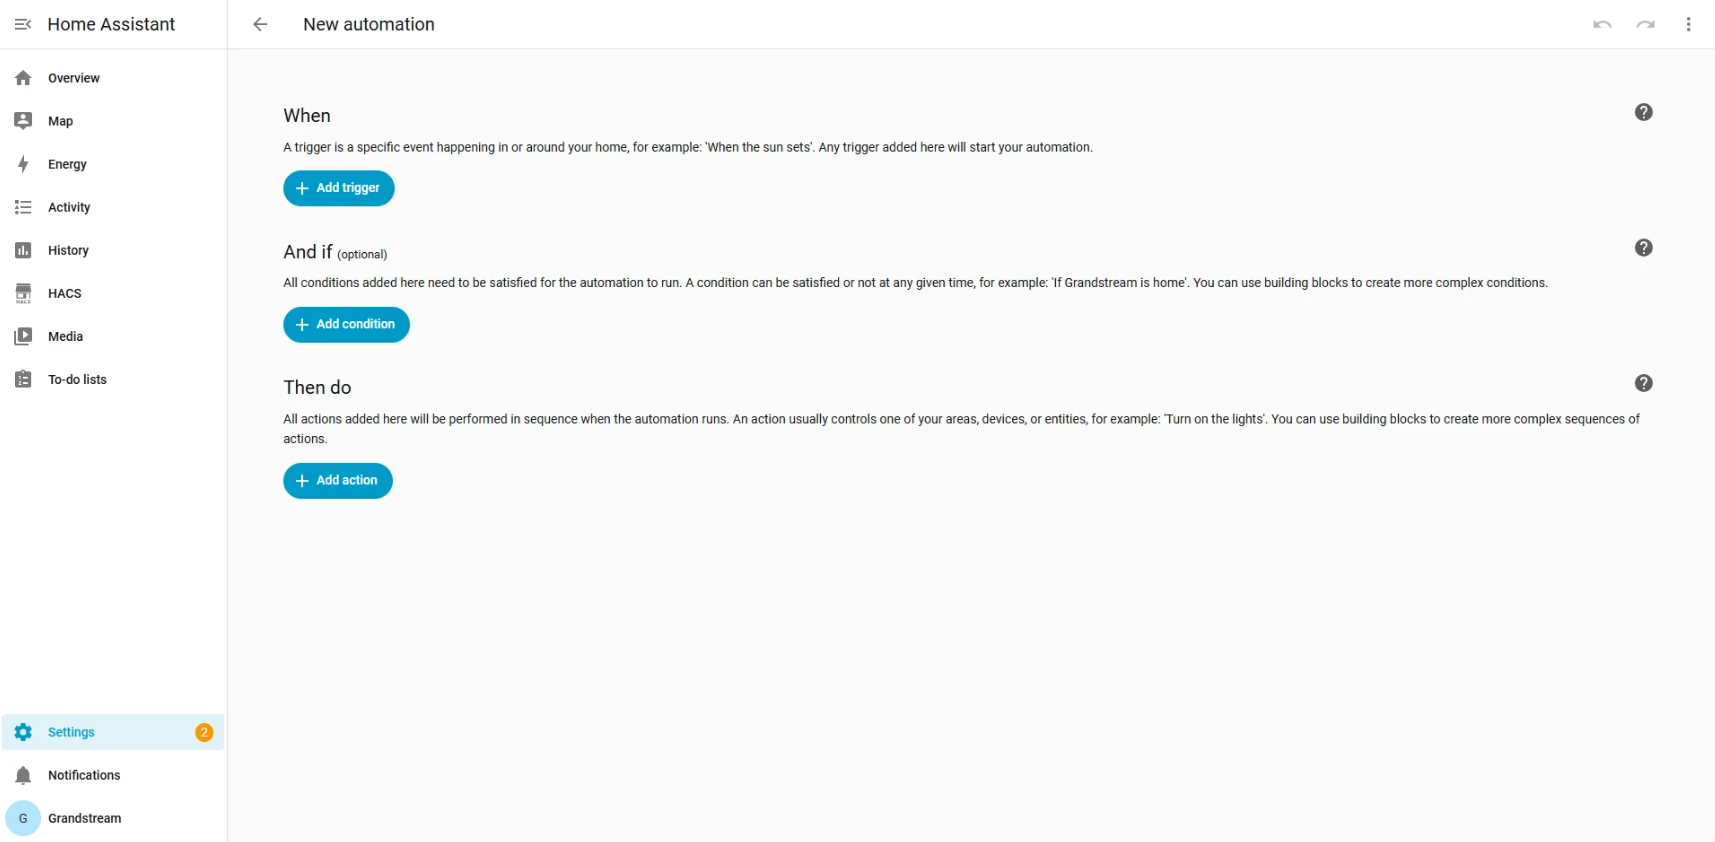
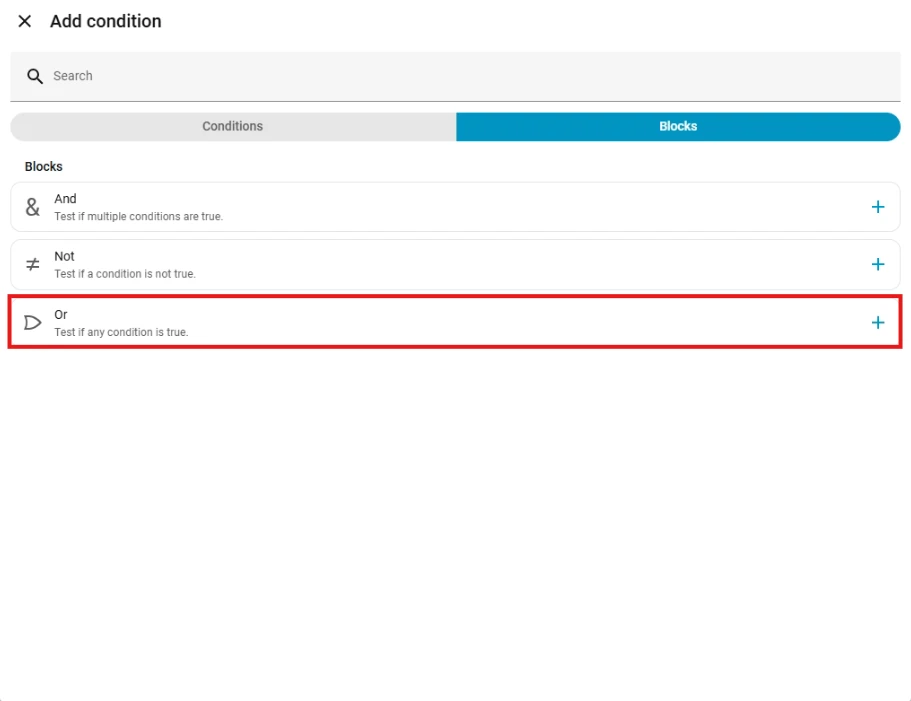
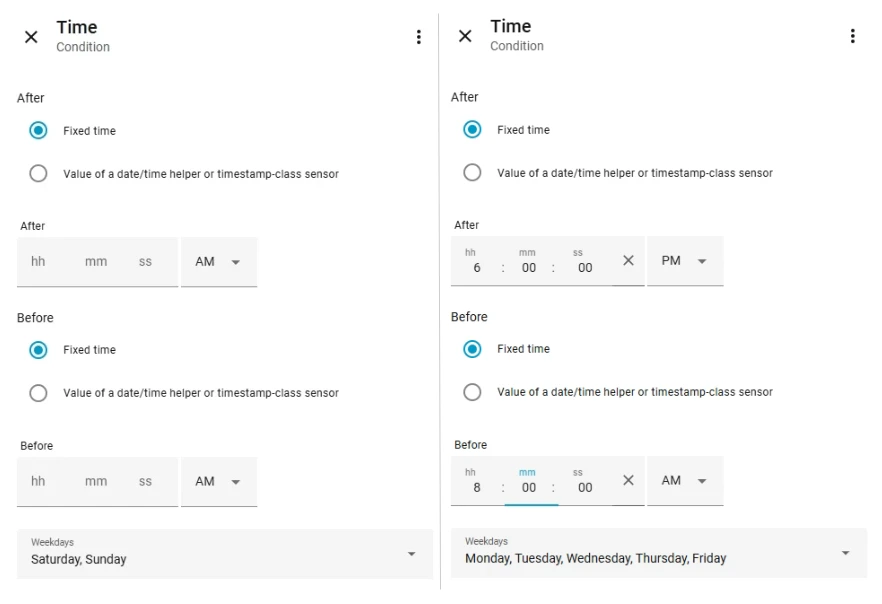
- Press Add Condition and select the Multiple Conditions block to define the required logic. In this example, the OR block is used to combine two time-based rules that define when the automation should trigger outside working hours: weekdays before 08:00 am and after 06:00 pm, and all day during weekends.
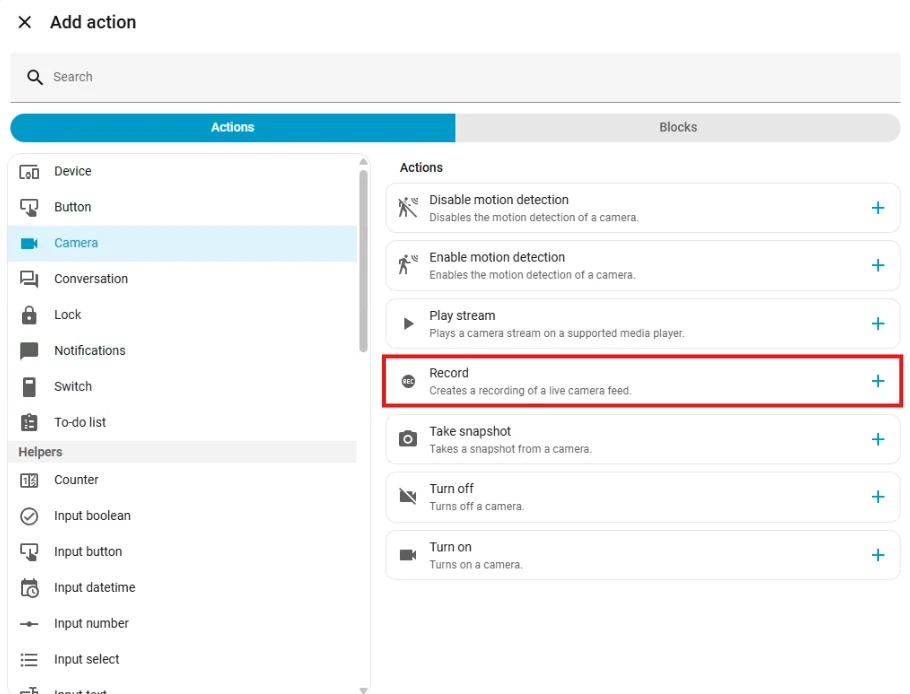
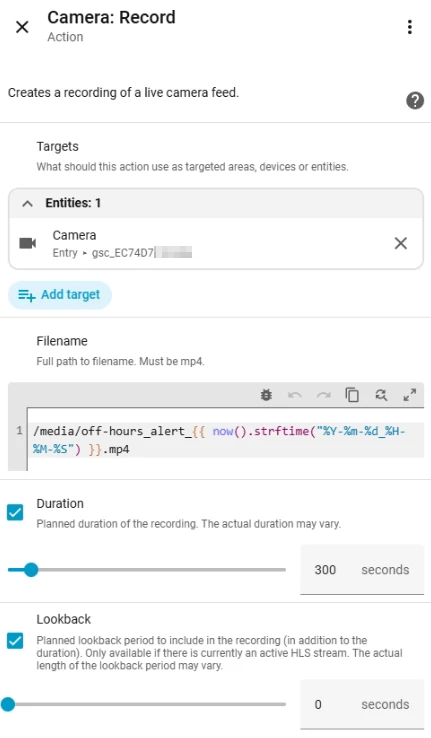
- Press Add Action, select Camera, then choose Record. Set the target to the GSC3565 camera, configure the file path where recordings will be saved, and specify the recording duration in seconds. In this example, the duration is set to 300 seconds (5 minutes).
- Press Add Action, select Notifications, then choose Send a persistent notification and customize the notification message as needed.
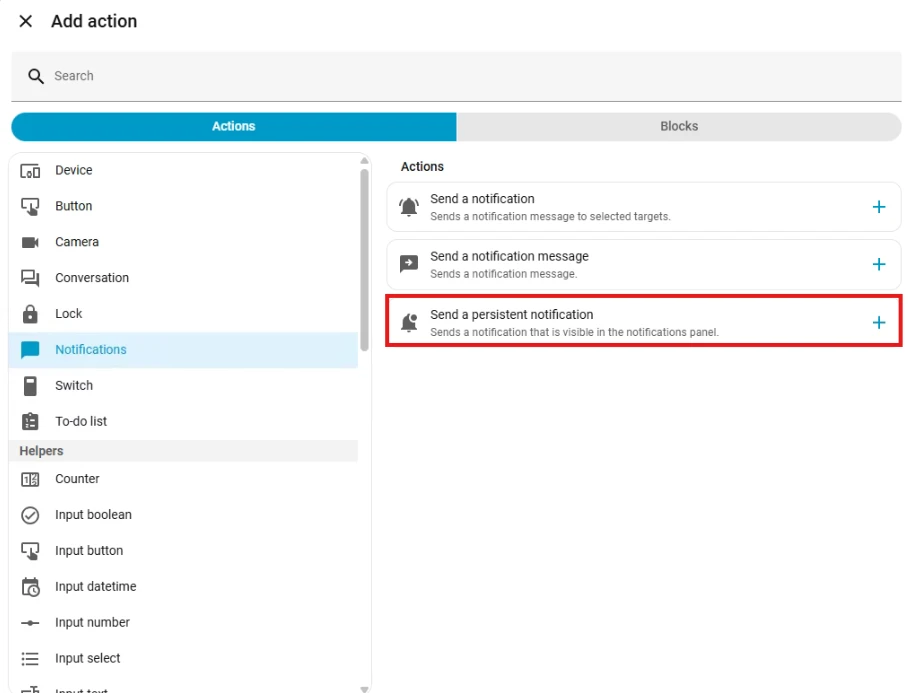
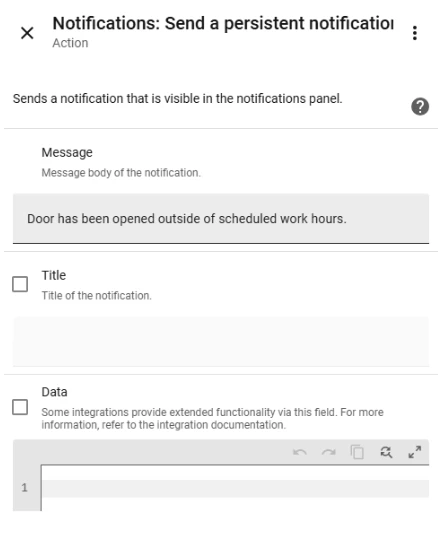
Once the automation is created, access its page in Home Assistant under Settings → Automations & Scenes, then select the automation, where you can view and edit the trigger, conditions, and actions.
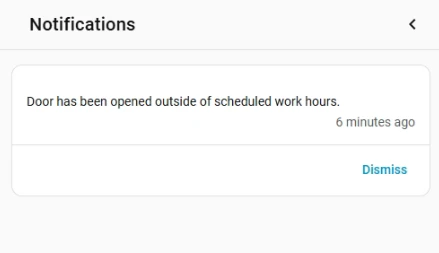
When the Automation is Triggered
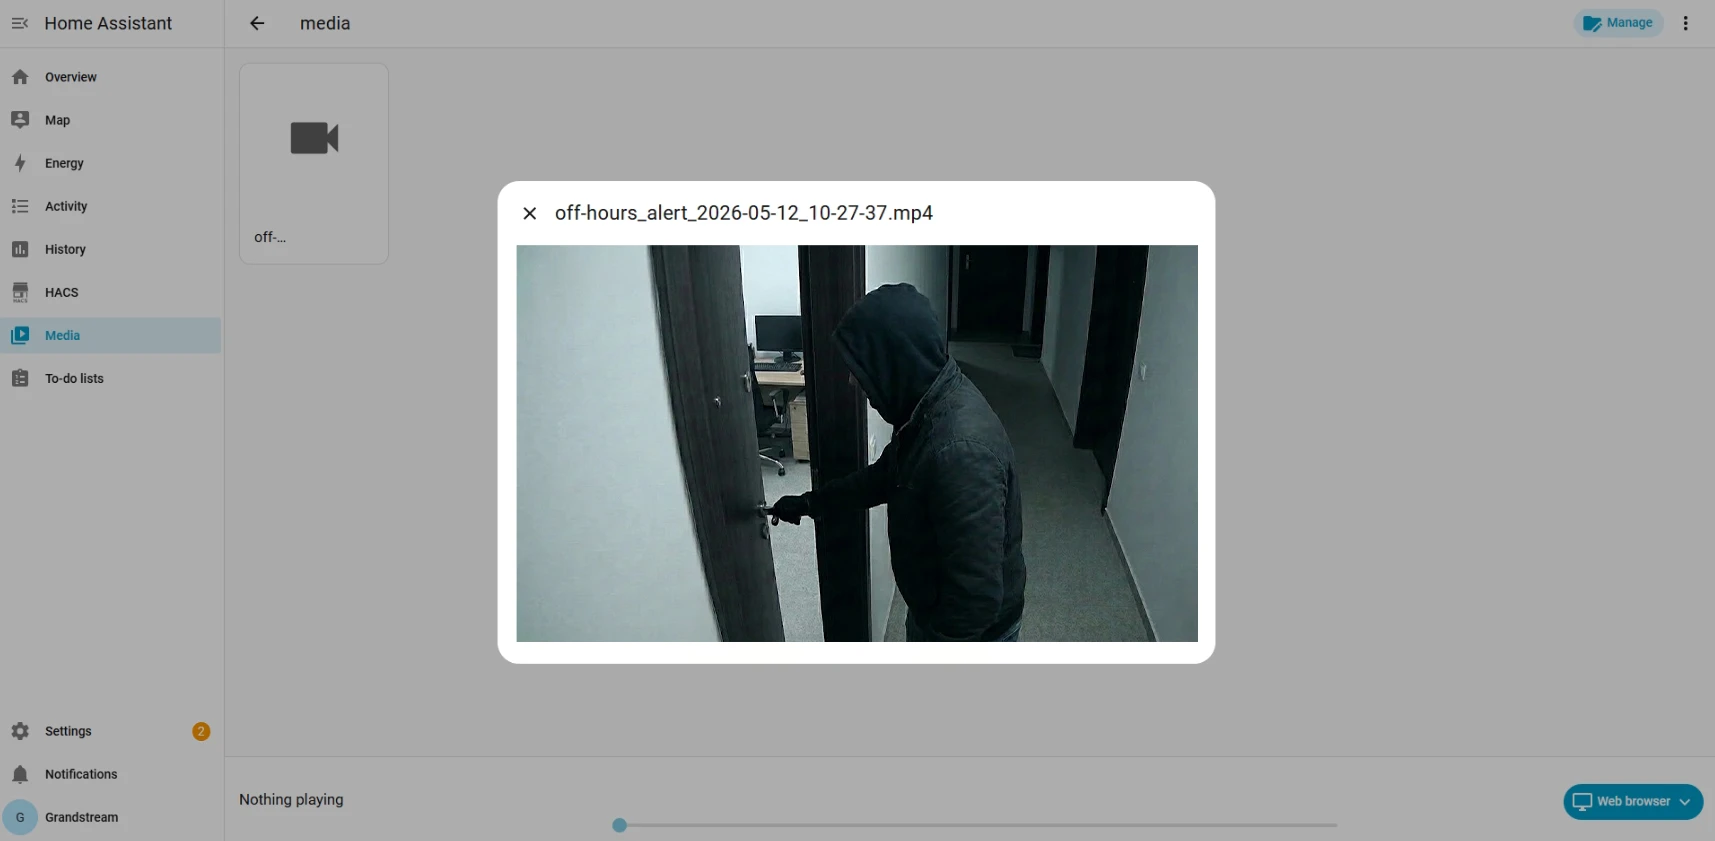
- When the door is opened outside working hours, Home Assistant will send a notification alerting of the access event.
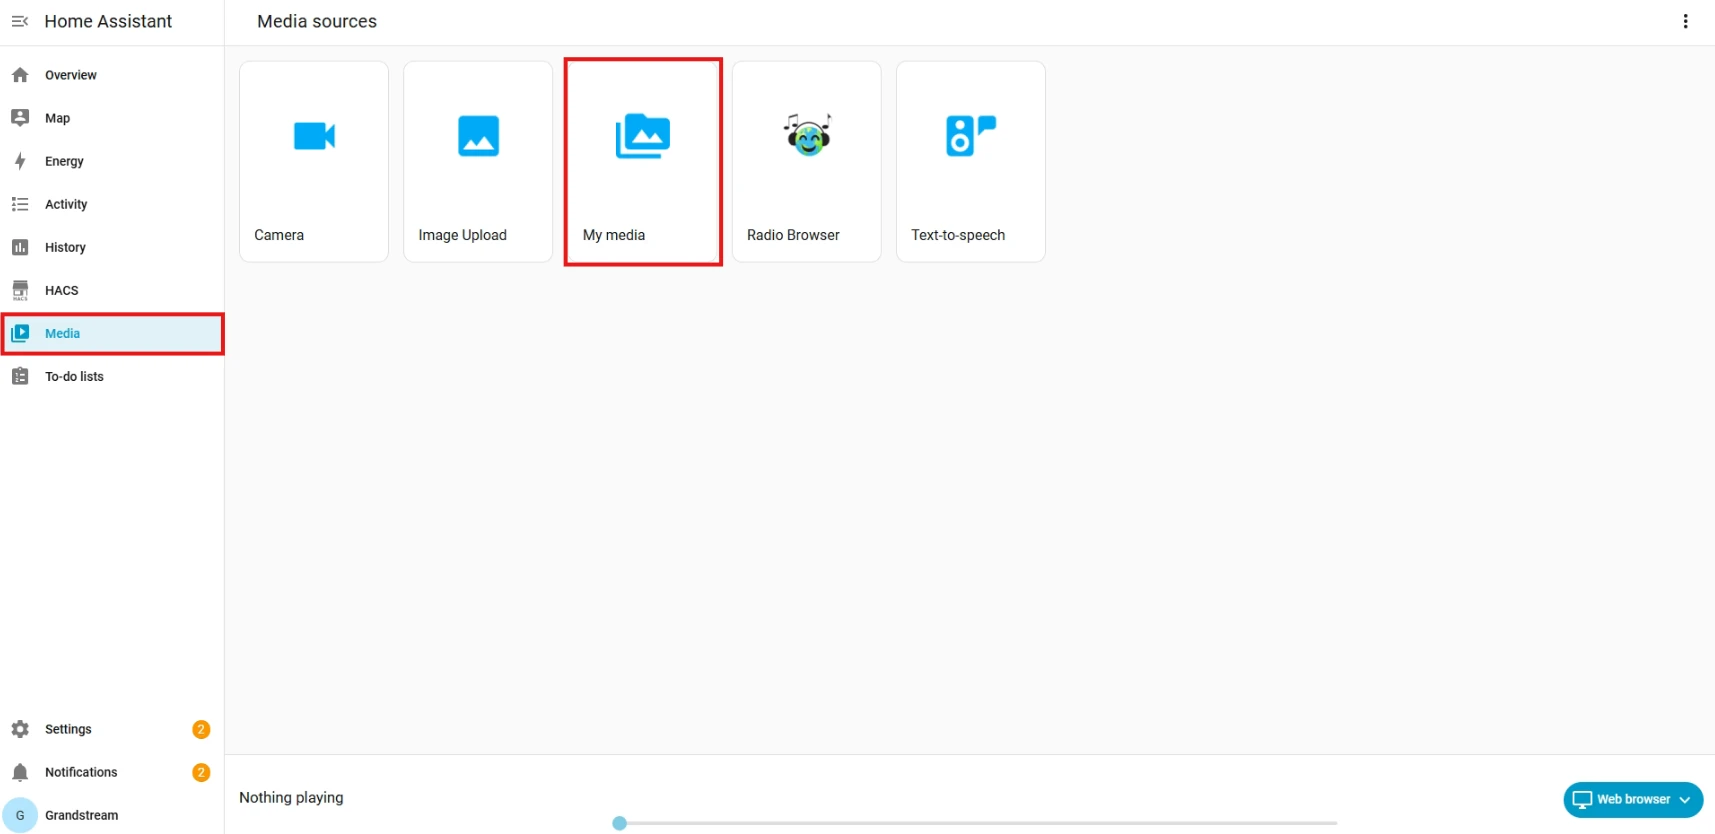
- To view the recorded video from the camera, go to Media → My Media and select the corresponding recording. This allows playback of the 5-minute video captured at the time of the access event.
The GSC356x series, when integrated through HACS into Home Assistant, becomes part of a smart ecosystem that enables real-time event handling and monitoring through automated configurations, facilitating remote device management through device interconnection and centralized control, which enhances overall system security and operational efficiency.
Supported Devices
Supported Devices | Fimware Version |
GSC3560 | 1.0.1.3+ (Initial version) |
GSC3565 |