
The GAC2500 can be used as a standalone SIP conferencing phone, as well as a speaker when it is connected to GVC320x. When being used as a speaker, the GAC2500 can be connected to GVC320x via Micro-USB cable or Bluetooth. This document describes how to connect GAC2500 to GVC320x when it’s used as a speaker as well as how to use GAC2500 to make calls using GVC320x’s account via Bluetooth connection.
For more information about GAC2500, please go to the following link to check the latest documentations:
http://www.grandstream.com/products/business-conferencing/audio-conferencing/product/gac2500
Connect Via Micro-USB Cable
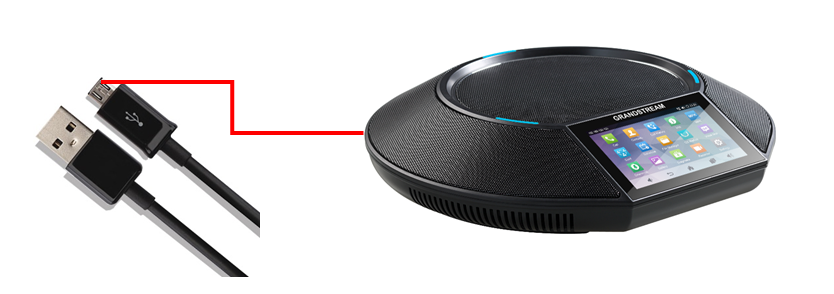
The GAC2500 can be used as a USB speaker for GVC320x when it’s connected to GVC320x via micro-USB cable. To connect the GAC2500 with GVC320x device via Micro-USB cable, plug the USB port of the cable into GVC320x device SPKR socket and plug the Micro-B (5 pins) port into GAC2500 Micro USB socket. After that, users can use GAC2500 as a speaker.
Here are the detailed steps:
- Power up GAC2500 and GVC320x device.
- Plug the USB port of the Micro-USB cable into the GVC320x device SPKR socket. The socket is on the back of GVC320x device.
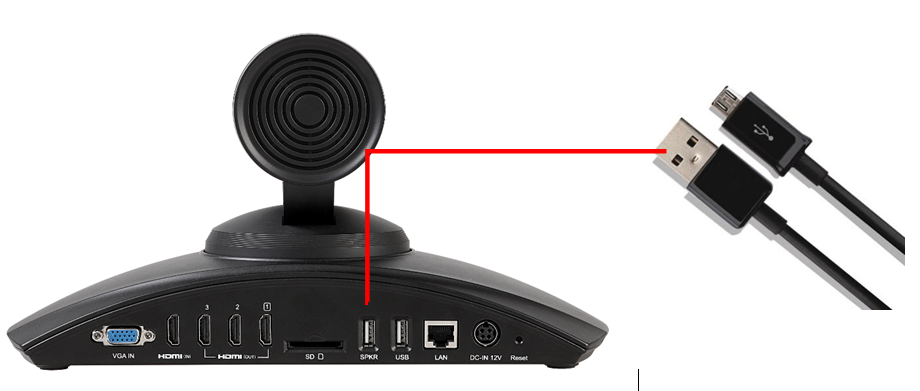
- Plug the Micro-B (5 pins) port of the Micro-USB cable into the GAC2500 Micro-USB socket. The socket is covered by a cap on the left side of the GAC2500.
- After connection, the GAC2500 LCD will display the call control interface as below. Users could tap the icons to answer or reject incoming call, mute/unmute and adjust volume during the call.
- On the top, it shows connection status “GVC3200 connected”.
-
 Mute/Unmute
 -
 Answer incoming call
 -
 Reject incoming call
 -
 Adjust volume

 Answer incoming call
  Reject incoming call
  Adjust volume
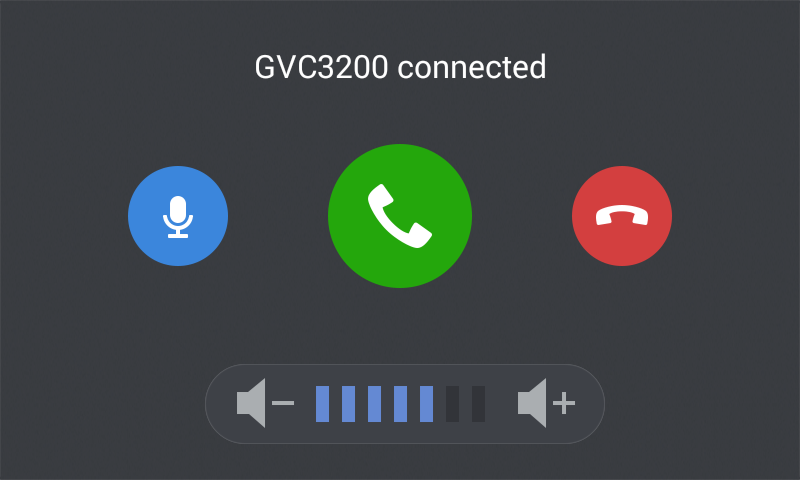
Connect Via Bluetooth
The GAC2500 can be used as speaker for GVC320x when it’s connected to GVC320x via Bluetooth. To connect the GAC2500 to a device via Bluetooth, the users need turn on GAC2500’s Bluetooth radio first. The first time when using a new Bluetooth device with the GAC2500, “pair” the device with GAC2500 so that both devices know how to connect securely to each other. After that, users could simply connect to a paired device.
Connect Bluetooth from GAC2500 to GVC320X
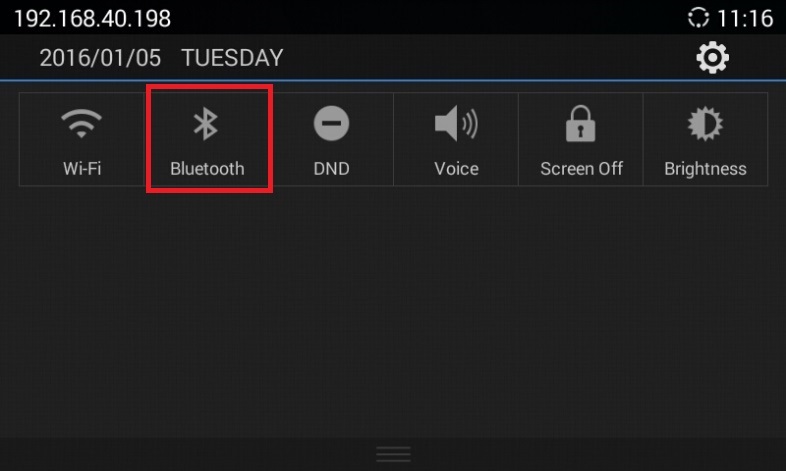
- On GAC2500, swipe LCD and select Settings
 .
. - Select Bluetooth.
- Tap on Bluetooth to turn it on/off.

Or, users could slide down the top status bar on the LCD and tap on Bluetooth icon ![]() to turn it on/off.
to turn it on/off.
- In Bluetooth settings interface, slide up and tap on icon
 , then select “Search for devices”.
 - In the listed discovered devices, find the GVC320x device. The device name should end with the last 4 digits of MAC address by default.
- Tap on the device name to pair by select “Pair” on pairing request. Please see the picture below. There would be a pairing request on GVC320x at the same time displaying the same passkey, so please also select “Pair” on GVC device after confirmation.
 , then select “Search for devices”.
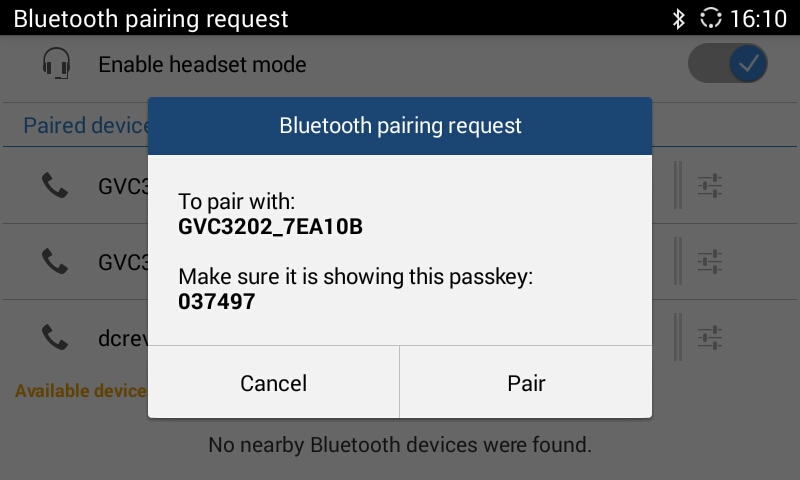
- After successful pairing, select the GVC320x name again to connect the GVC320x to the GAC2500. The Bluetooth icon
 will show up on the top status bar.
 will show up on the top status bar.
 Connect Bluetooth from GVC320X to GAC2500
- On GVC320x, please use the GVC remote control to go to GVC320x LCD -> Settings -> Networks-> Bluetooth.
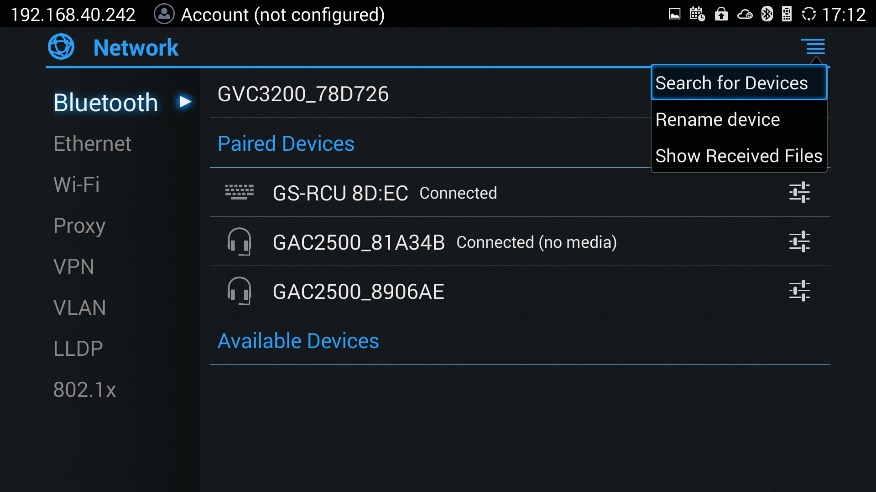
- Press Menu button and select “Search for Devices” to find the GAC2500 with Bluetooth on (see figure below). The device name ends with the last 4 digits of MAC address by default.
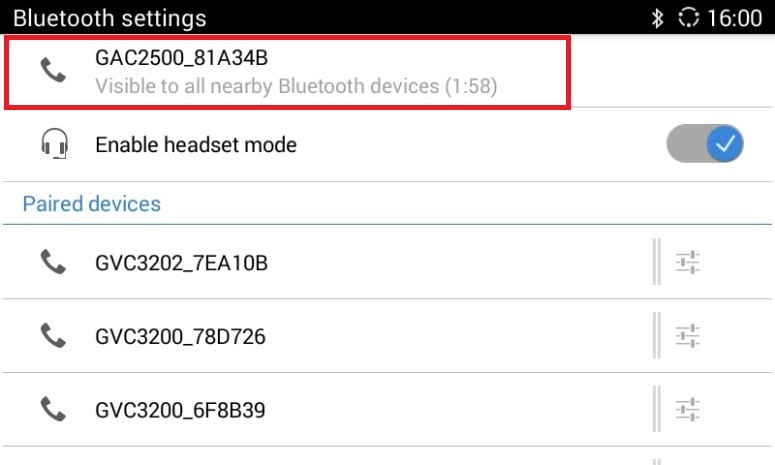
- If the user cannot find the GAC2500, please go to GAC2500 Bluetooth settings and tap on the device name so that the GAC2500 will be visible by other devices for 2 minutes (see figure below). During this period, try the above steps on GVC320x again.
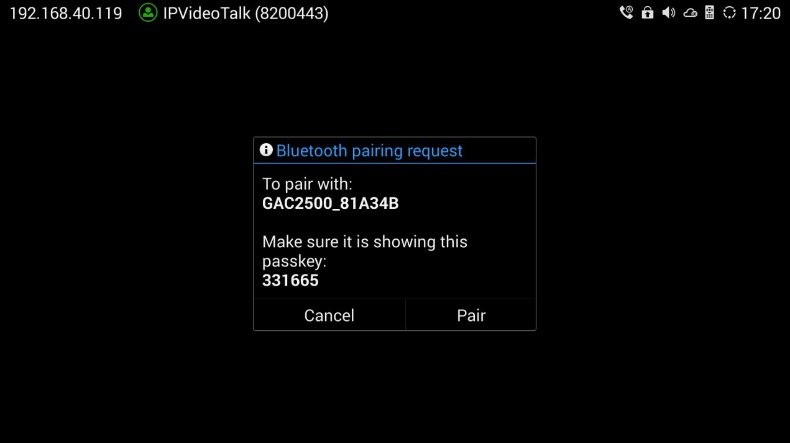
- Select the GAC2500 name to pair by select “Pair” on pairing request. Please see the picture below. There would be a pairing request on GAC2500 LCD at the same time displaying the same passkey, so please also select “Pair” on GAC device after confirmation.
- After successful pairing, select the GAC2500 name again so that the GVC320x will connect to the GAC2500. The Bluetooth icon
 will show up on the GVC320x LCD top status bar.
 will show up on the GVC320x LCD top status bar.
Make a Call from GAC2500 using GVC320X Account
When GAC2500 is connected to GVC320x via Bluetooth, the users could make call from GAC2500 using the GVC320x account. Here are the steps:
- On GVC320x LCD->Settings->Accounts, press the MENU icon on the upper right and select “Default account”. Then select the desired account in “Account” field to be the default account.
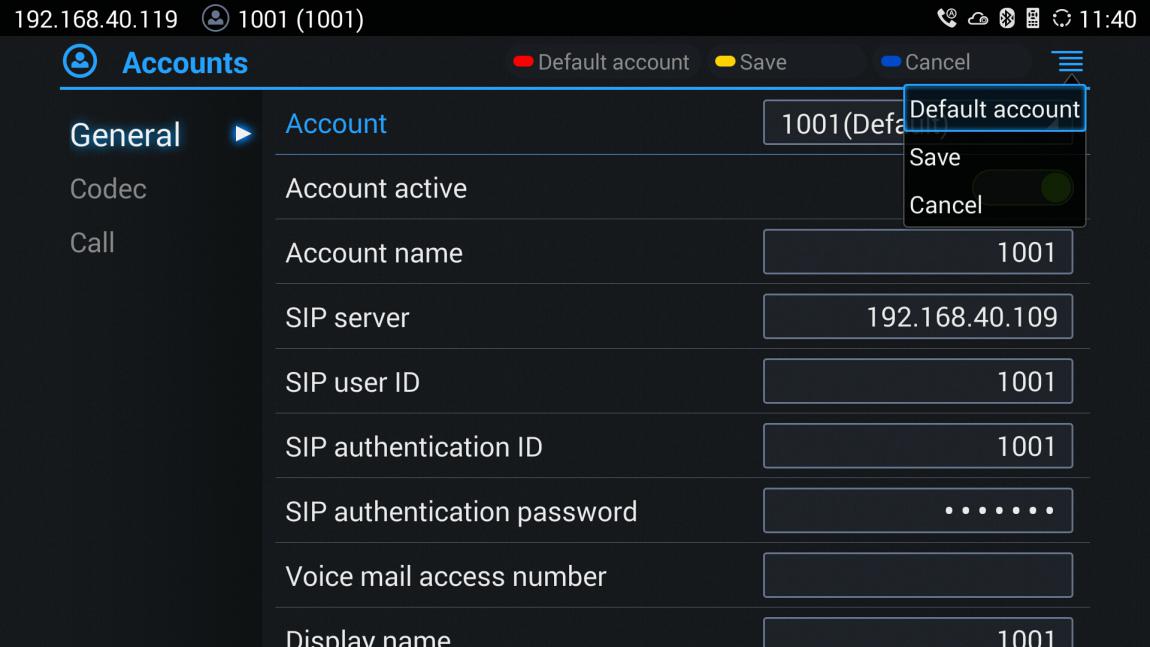
- After selection, press the yellow shortcut key on the GVC remote control to save the change.
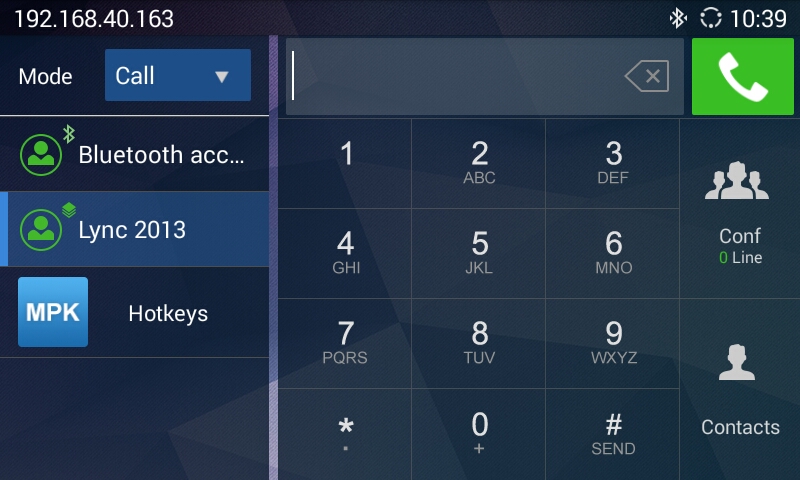
- When GAC2500 is connected with GVC320x via Bluetooth, the account panel on GAC2500 LCD will display a “Bluetooth account” which is the default account configured in GVC320x in step 1. Tap on the “Bluetooth account” and enter desired number to dial out.
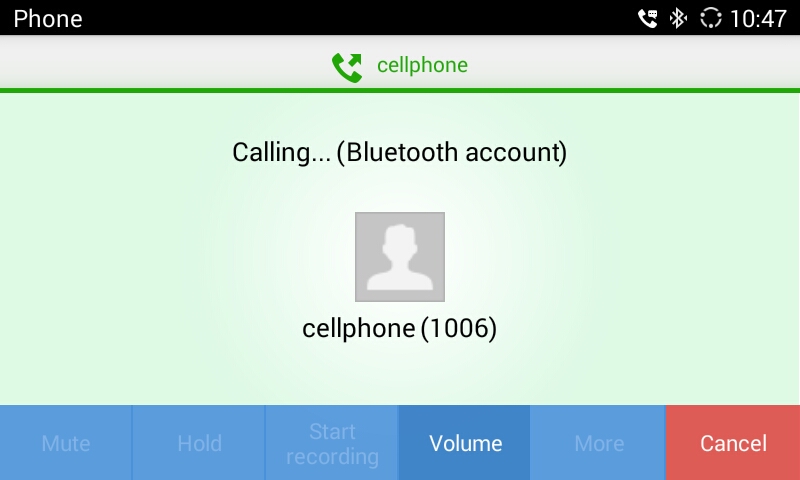
- Now the users can make a call using the default account on GVC320x, without accessing the GVC320x. The GAC2500 LCD will show as below.
* Android is a trademark of Google Inc.
* Skype and Lync are Registered Trademarks of Microsoft Corporation.
![]() HDMI, the HDMI Logo, and High-Definition Multimedia Interface are trademarks or registered trademarks of HDMI Licensing LLC in the United States and other countries.
HDMI, the HDMI Logo, and High-Definition Multimedia Interface are trademarks or registered trademarks of HDMI Licensing LLC in the United States and other countries.