OVERVIEW
The HT841/HT881 Analog VoiP Gateway series is an easy to set up IP communications solution that is suitable for small enterprises, as well as those with virtual and branch locations, who wish to benefit from their broadband network or integrate new IP technology with their existing phone system. This series of enterprise analog VoIP gateway can con-vert SIP/RTP IP calls into conventional PSTN calls, and it is available in two models, the HT841 and HT881, with 4 and 8 FXO ports, respec-tively. Both models share the same installation process.
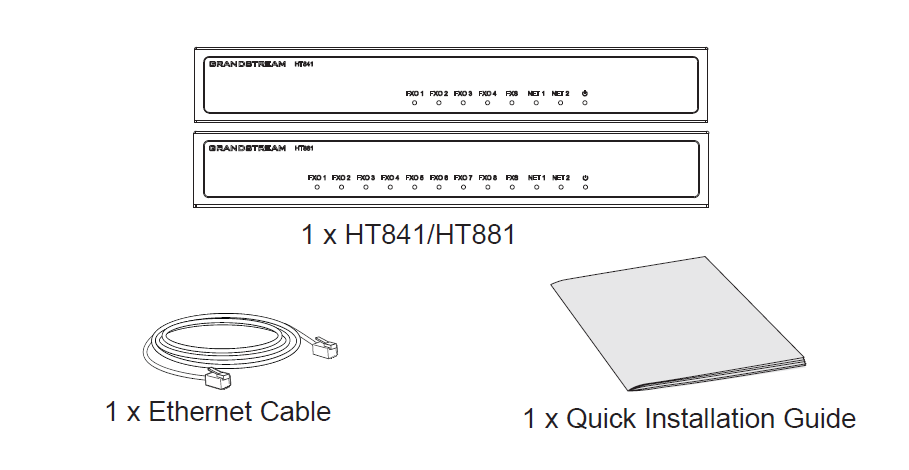
PACKAGE CONTENTS
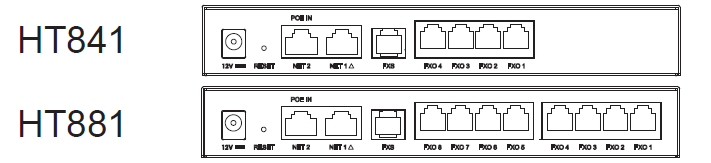
HT841/HT881 PORTS
| Port | Description |
|---|---|
 | Power socket. Used to power HT841/HT881 (12V – 0.5A) |
 | Network NET2 port. Connects the HT841/881 to your PC or switch using an Ethernet RJ45 network cable. |
 | Network NET1 port. Connects the HT841/881 to your router or switch using an Ethernet RJ45 network cable. |
 | PoE supported port. |
 | FXS port to connect analog phone / fax machine to HT841/HT881 using RJ11 telephone cable. |
 | FXO ports to be connected to physical PSTN line from a traditional PSTN PBX or PSTN Central Office. HT841 supports 4 FXO ports and HT881 supports 8 FXO Ports. |
 | Factory reset button. Press for 7 seconds to reset to factory default settings. Quick press will only reboot the unit. |
CONNECTING THE HT841/HT881
The HT841/HT881 can be connected either via NET 1 port (DHCP client) or via NET 2 port (DHCP Server):
Connecting the HT841/HT881 using NET 1 port
- Insert a standard RJ11 telephone cable into FXS port and connect the other end of the telephone cable to a standard touch-tone analog telephone.
- Connect the NET 1 port of the HT841/HT881 to a router, switch or modem using an Ethernet cable.
- Insert the power adapter into the HT841/HT881 and connect it to a wall outlet and make sure to respect the technical specifications of the power adapter used.
- Power, NET 1, FXO and FXS LED will be solidly lit when the HT841/HT881 is ready for use.
Connecting the HT841/HT881 using NET 2 Port
- Insert a standard RJ11 telephone cable into FXS port and connect the other end of the telephone cable to a standard touch-tone analog telephone.
- Connect a computer or switch to the NET 2 port of the HT841/HT881 using an Ethernet Cable.
- Insert the power adapter into the HT841/HT881 and connect it to a wall outlet and make sure to respect the technical specifications of the power adapter used. If PoE switch is used in step 2, this step could be skipped.
- Power, NET 2 and FXS, and FXO LED will be solidly lit when the HT841/HT881 is ready for use.
CONFIGURING THE HT841/HT881
Configure via IVR Menu
- Use an analog telephone connected to FXS port of your HT841/HT881.
- Press *** (press the star key three times) to access the IVR menu and wait until you hear “Enter the menu option “.
- Follow IVR Menu options to configure your HT841/HT881. Move to next option by pressing * or press # to go to main menu.
Configure using Web UI
- Connect the computer to the same network as your HT841/HT881 and make sure the HT841/HT881 is booted up.
- You may check your HT841/HT881 IP address using the IVR on the con-nected phone.
- Open the Web browser on your computer.
- Enter the HT841/HT881’s IP address in the address bar of the browser.
- Enter the administrator’s password to access the Web Configuration Menu.(By default the admin password is found on a sticker on the back of the unit ).
Refer to online documents and FAQ for more detailed information:
http://www.grandstream.com/our-products

For Certification, Warranty, and RMA information,
please visit www.grandstream.com
Please download the user manual and FAQ for more detailed configuration instructions: