
Overview
UCM6510 is an innovative IP PBX appliance designed to bring enterprise-grade Unified Communications and Security Protection features to small-to-medium businesses (SMBs) in an easy-to-manage fashion. Powered by an advanced hardware platform and revolutionary software functionalities, UCM6510 offers a breakthrough turnkey solution for converged voice, video, data, fax, security surveillance, and mobility applications out of the box without any extra license fees or recurring costs.
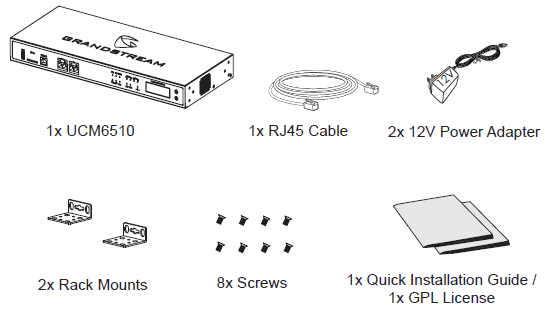
Package Contents
Connecting the UCM6510
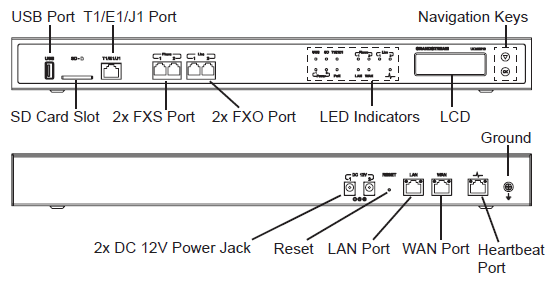
Basic connections for initial setup:
- Connect one end of a straight through RJ45 Ethernet cable into the WAN port of the UCM6510; connect the other end into the uplink port of an Ethernet switch/hub.
- Connect the 12V DC power adapter into the DC 12V power jack 1 on the back of the UCM6510. Insert the main plug of the power adapter into a surge-protected power outlet. (Connect the second power adapter into the DC 12V power jack 2 for failover purpose in case the first one is down).
- Wait for the UCM6510 to boot up. The front LCD display will show the UCM’s hardware information when the boot process is completed.
- Once the UCM6510 is successfully connected to the network via WAN port, the Network LED indicator will be lit green, and an IP address will be shown on the LCD display.
Optional connections depending on how the UCM6510 is used:
- PSTN Connection: connect PSTN lines from the wall jack to the UCM6510 ports FXO ports.
- Analog Line Connection: connect analog devices (phone and fax) to FXS ports.
- T1/E1/J1 Line Connection: connect one end of the T1/E1/J1 cable provided from the service provider into the T1/E1/J1 port of the UCM6510; connect the other end into the T1/E1/J1 wall jack.
Using the UCM6510 Keypad Menu
- Press “Down” or “OK” key to start browsing menu options.
- Press “Down” to browse different menu options. Press “OK” to select an entry.
- In the menu option, select “Back” to go back to previous menu.
- The LCD will return to default display after being idle in menu for more than 20 seconds.
Configuring the UCM6510 via Web GUI
- Connect the computer to the same network as the UCM6510.
- Ensure the UCM6510 is properly powered on and displays the IP address on the LCD screen.
- Open a web browser on the computer and enter the displayed IP address into the search bar in the following format: http(s)://ipaddress:portnumber
The default protocol is HTTPS and the default port number is 8089.
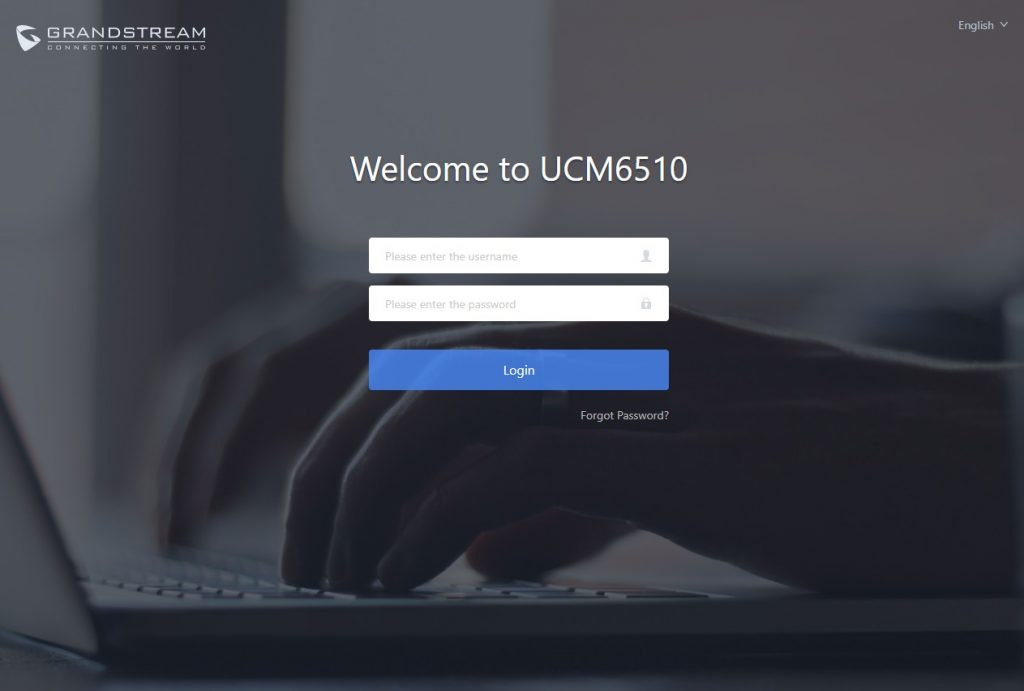
- The web portal should be shown (see figure below). Enter the default administrator credentials:
Username: admin
Password: admin
- For more detailed information on how to configure SIP extensions, PSTN connections, SIP trunks, and other system settings via the web UI, please download the UCM6510 user manual here: http://www.grandstream.com/support/
Refer to online documents and FAQ for more detailed information:
http://www.grandstream.com/our-products
For Certification, Warranty and RMA information, please visit