
VPN (Virtual Private Network) is a network that communicates by creating a dedicated and encrypted network channel (tunnel) on the public network, which can help remote users, company branches, business partners and suppliers in practical applications. Establish a secure and trusted network connection between them.
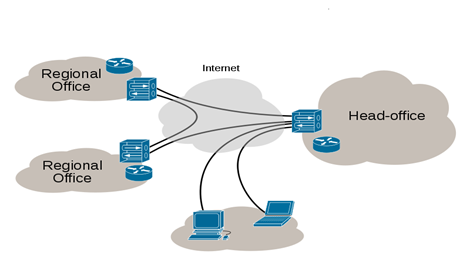
OpenVPN® is a well-known open source VPN software, very stable and reliable to use, its main features: open source, cross-platform, easy to use, stable and secure. The WP820 can be used as a client to connect to a VPN server using the OpenVPN® function for remote communication. This article briefly describes how the WP820 uses the OpenVPN® feature.
ENABLE OPENVPN® FEATURE
If users want to use the OpenVPN function, they need to set the OpenVPN related configuration from the WP820 Web GUI as follow:
- Log in to the WP820 Web GUI page.
- Navigate to Network Settings 🡪 OpenVPN® Settings page.
- Check Enable OpenVPN®.
- Select either Simple Mode or Expert Mode, Then Configure related parameters or upload a configuration file to save the configuration.
OPENVPN® MODES
The WP820 supports two modes:
- Simple Mode: only configure some basic or common parameter configurations.
- Expert Mode: support configuration file upload, fully customized.
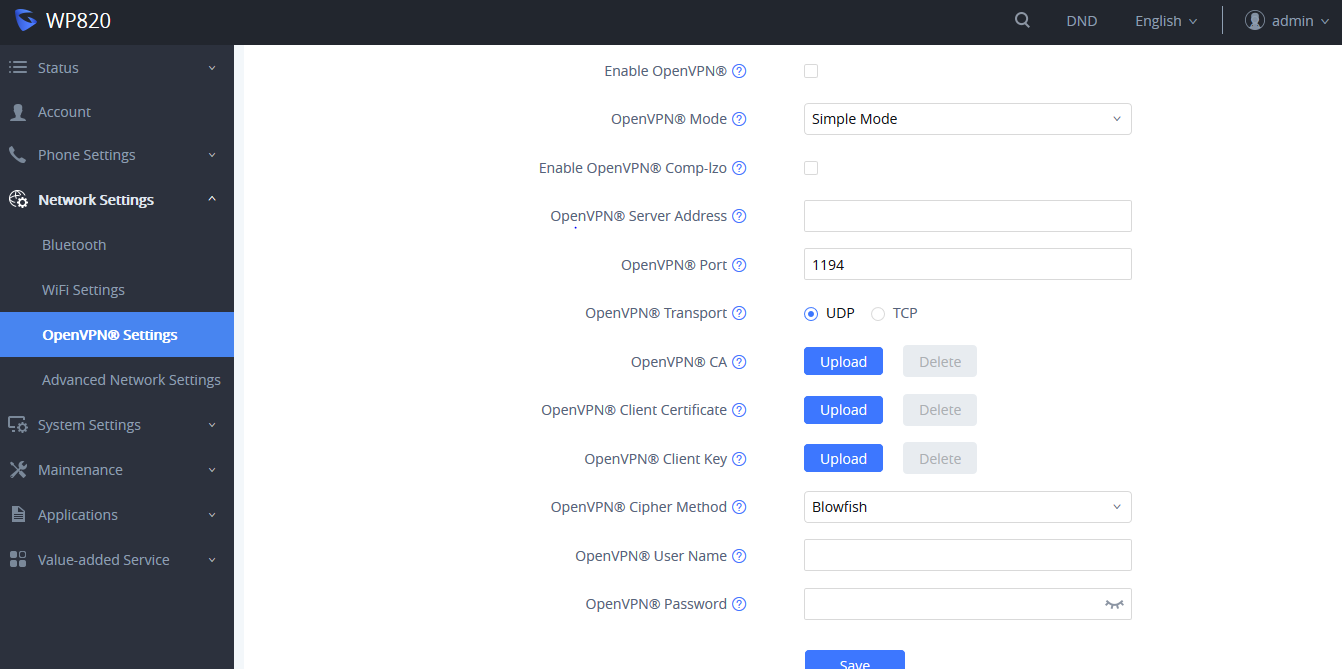
Simple Mode
Name | Description |
Enable OpenVPN® | This enables/disables OpenVPN® functionality and requires the user to have access to an OpenVPN® server. |
OpenVPN® Mode | Select either Simple Mode (Default) or Expert Mode. |
Enable OpenVPN® Comp-lzo | Choose to enable/disable the LZO compression. When the LZO Compression is enabled on the OpenVPN server, you must turn on it at the same time. Otherwise, the network will fail to connect. |
OpenVPN® server address | The URL/IP address for the OpenVPN® server. |
OpenVPN® port | Set up the network port to communicate with the OpenVPN® server. The default port is 1194. |
OpenVPN® Transport | Determines network protocol used for OpenVPN® (UDP or TCP). The default setting is TCP. |
OpenVPN® CA | The OpenVPN® certificate used for authentication with OpenVPN® servers. Click "Upload" to upload the certificate file (ca.crt) to the device. |
OpenVPN® client certificate | The OpenVPN® Client Certificate used for authentication with OpenVPN® servers. Click "Upload" to upload the client certificate file (*.crt) to the device. |
OpenVPN® client key | The OpenVPN® client key used for authentication with the OpenVPN® server. Click "Upload" to upload the client certificate file (*.key) to the device. |
OpenVPN® Cipher Method | Set the OpenVPN® encryption method, you must use the same encryption method as the OpenVPN® server. Supported encryption methods are Blowfish, AES-128 and AES-256. |
OpenVPN® username | Set the OpenVPN® username (optional). |
OpenVPN® password | Set the OpenVPN® password (optional). |
Professional Mode (Expert Mode)
Professional mode supports configuration file upload in zipped format, which is totally customized by need, please refer to https://openvpn.net for more information.
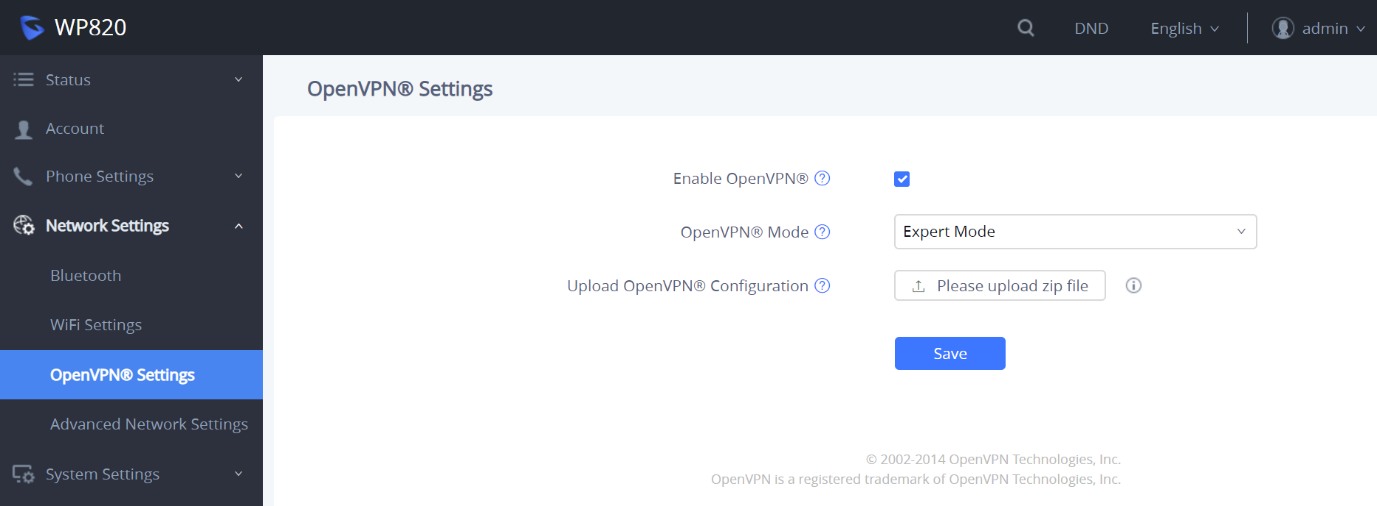
The below example shows the Professional mode (Expert Mode) related configuration:
- Select OpenVPN mode as Expert Mode,
- Click “upload zip file” and browse your local directory to select the custom configuration file.
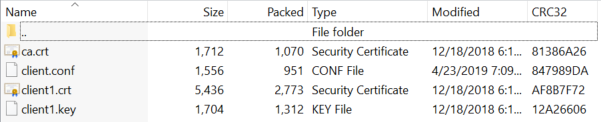
The contents of the client.conf file format are as follows:
# Indicates that the file is a client configuration file
client
# The tun mode is used. Currently OpenVPN® only supports this mode.
dev tun
# Connection method used
proto udp
#VPN Service address
remote 192.168.124.110 1194
# Connection failed number of attempts
connect-retry 3

# Whether to bind local address and port
;nobind

# Indicates whether the server push routing configuration
# When the attribute is not configured, the custom route and server push route will take effect.
# If this attribute is configured, the custom route and server push route will not take effect.
#route-nopull

# Indicates whether to redirect all traffic to OpenVPN as shown below to indicate that ipv4 is redirected to OpenVPN
# Can use “!” to express the opposite
# Configurable value ipv4 ipv6. If not configured, the default is redirect all traffic to OpenVPN.
redirect-gateway !ipv4 ipv6
persist-key
persist-tun

# Configuring custom routes
route 192.168.126.1 255.255.255.0
route 192.168.124.1 255.255.255.0

# Configure account and password
# The first parameter is the account name
# The second is the account password
;auth -user -pass Account Passwd

# Certificate configuration path. The configuration file needs to be an absolute file path.
ca /data/openvpn/ca.crt
cert /data/openvpn/client1.crt
key /data/openvpn/client1.key

# Specify DNS resolution retry interval
resolv-retry infinite

# Configuring DNS. Generally using DNS delivered by the VPN server
dhcp-option DNS 114.114.114.114

# Transmission encryption
cipher BF-CBC
# Whether to enable the lzo compression algorithm and other OpenVPN custom features
comp-lzo

# Specify the server verification method.
ns-cert-type server
# Debugging log level
verb 3
*OpenVPN is a registered trademark of OpenVPN Inc