


INTRODUCTION
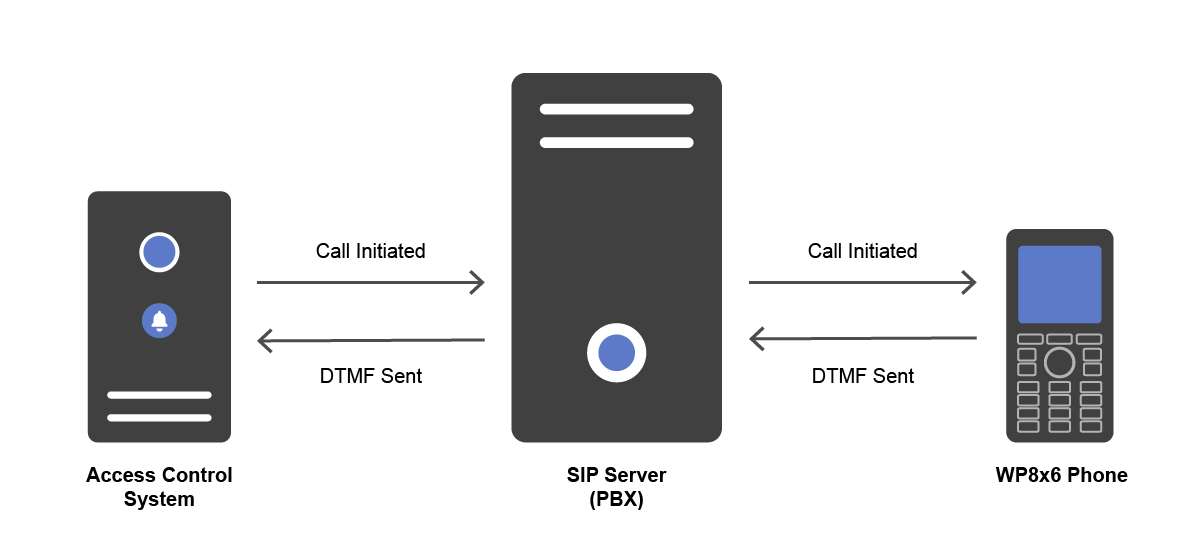
Grandstream WP8x6 series Wi-Fi phones can be integrated with third-party access control systems (e.g., Akuvox, 2N) to support remote door opening via DTMF tones.
This guide outlines how to configure the WP8x6 phone to work with DTMF enabled access control devices, including basic configuration steps and examples for known brands.
WP8X6 CONFIGURATION FOR ACCESS CONTROL
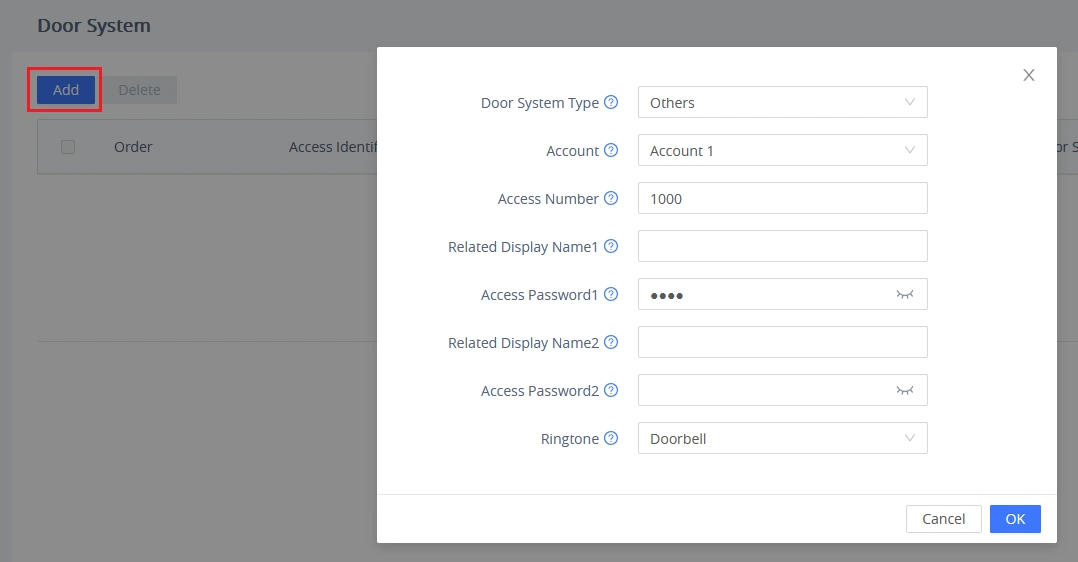
On the WP8x6 phone’s Web UI, navigate to External Service → Door System then click “Add” to configure a new access control system.
- Set Door System Type to “Others”.
- Choose the local SIP account that will be associated with this access control system.
- Enter the number to call the access panel under Access Number.
- Set the numeric code to be sent as DTMF for door unlocking in the Access Password field.
ACCESS CONTROL SYSTEM EXAMPLES
This section provides configuration examples using known third-party access control systems. These examples demonstrate how to set up SIP calling and DTMF-based door unlocking with the WP8x6 phone.
Akuvox E12S Configuration
The following steps show how to configure the Akuvox E12S to call the WP8x6 and accept DTMF input for door unlocking.
- Press and hold the Call Button on the E12S panel to retrieve the IP address, which will be announced audibly.
- Access the E12S Web UI by entering the announced IP address into a web browser on the same network.
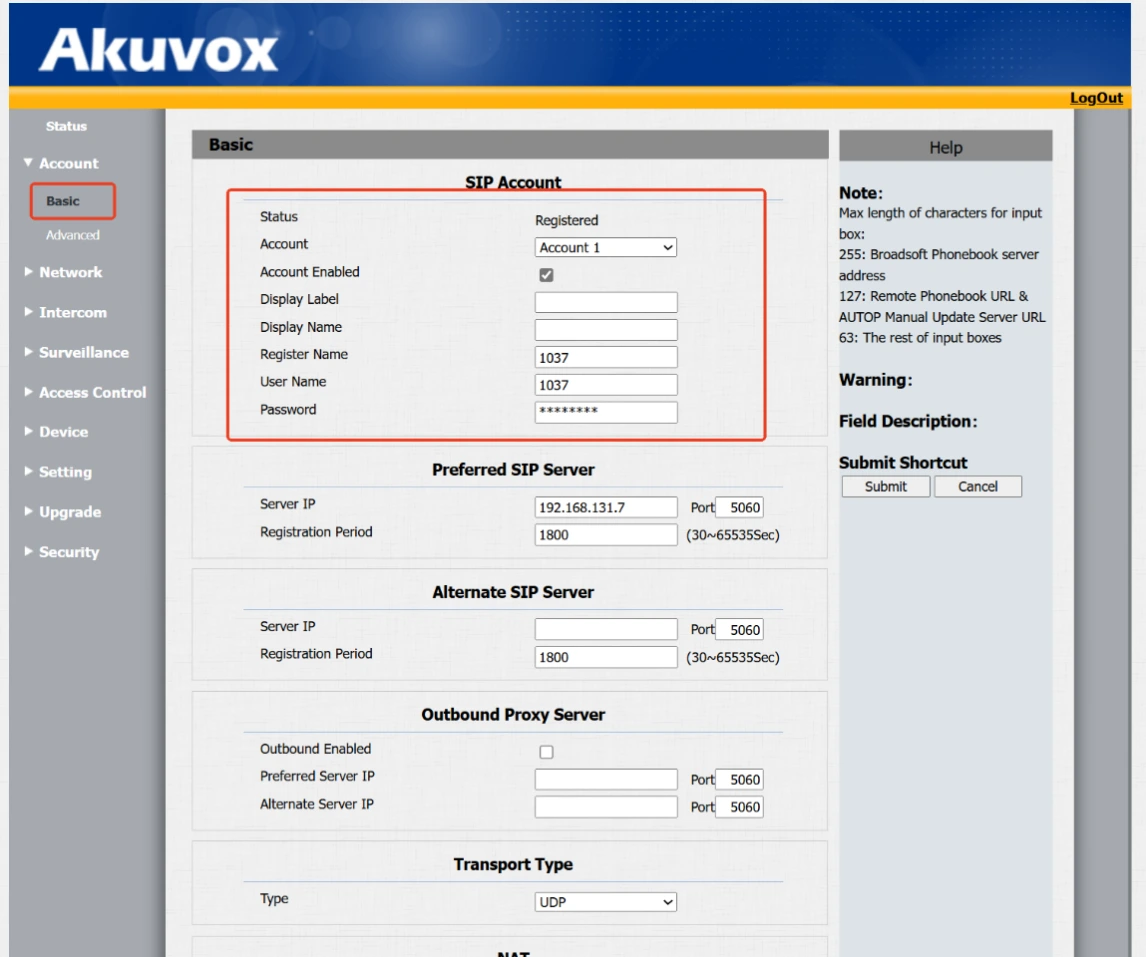
- Go to the Akuvox Web UI and navigate to Account → Basic to configure the access control panel to register with the same SIP server as the WP8x6 phone.
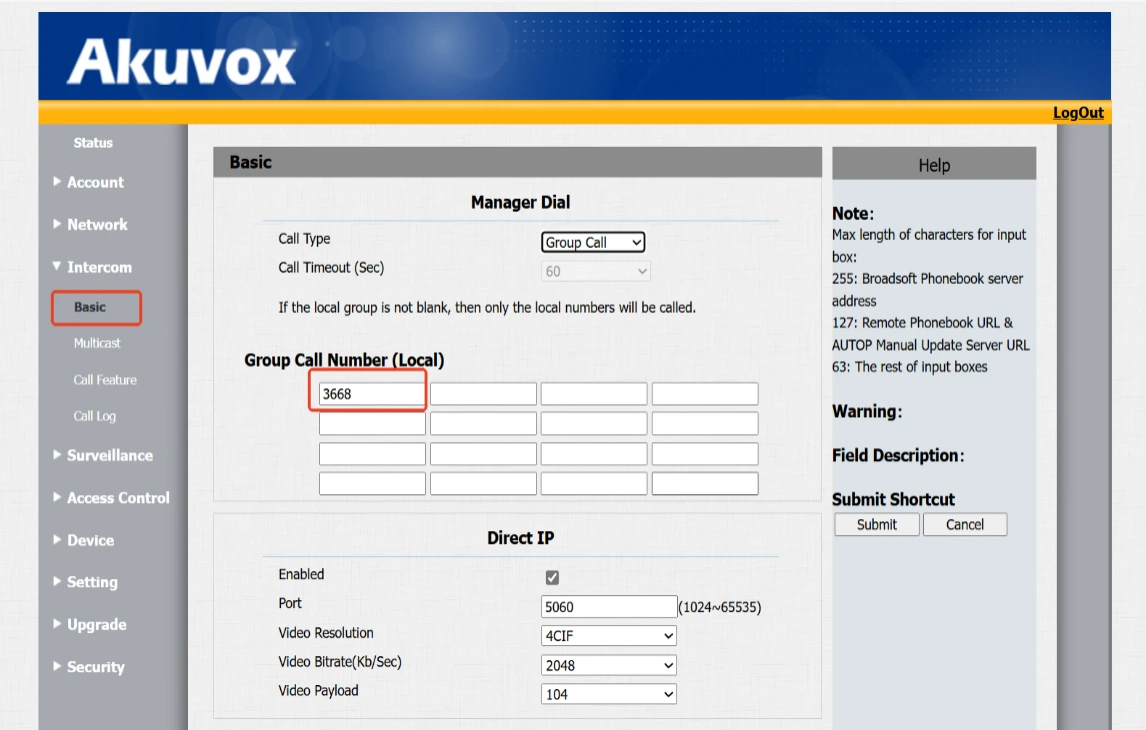
- Go to the Intercom → Basic section and configure the control panel to dial the SIP extension or number assigned to the WP8x6.
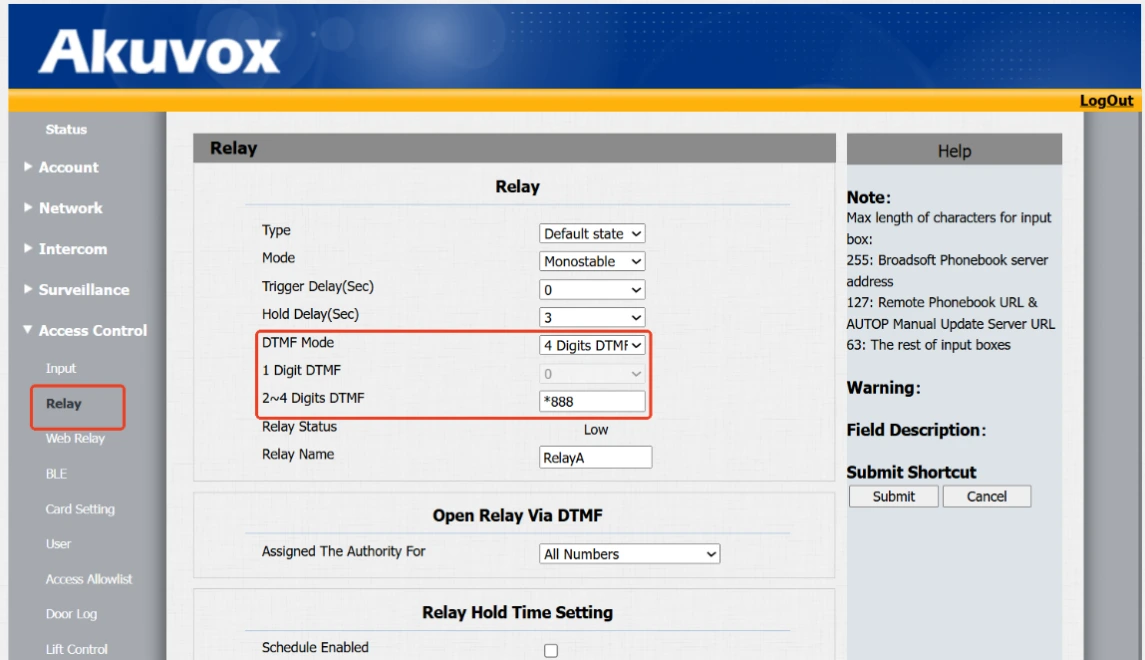
- Navigate to the Access Control → Relay page to set the DTMF transmission method and password:
- Select the appropriate DTMF length.
- Enter the DTMF password that will be matched on the WP8x6 phone for door access.
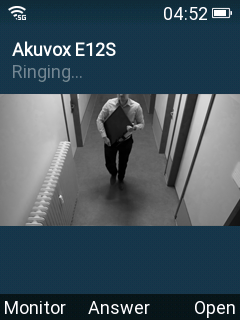
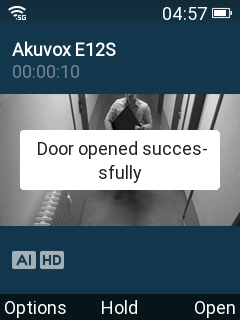
- Save the changes, then test by pressing the call button to verify the call reaches the WP8x6 and triggers door unlocking after DTMF input.
2N Helios IP Solo Configuration
This section outlines how to configure the 2N Helios IP Solo access control panel to call the WP8x6 phone and unlock the door using DTMF input.
- Press and hold the Reset button on the back of the panel until both red and green LEDs light up (around 15–35 seconds) then release. An audio prompt will play, followed by the device’s IP address.
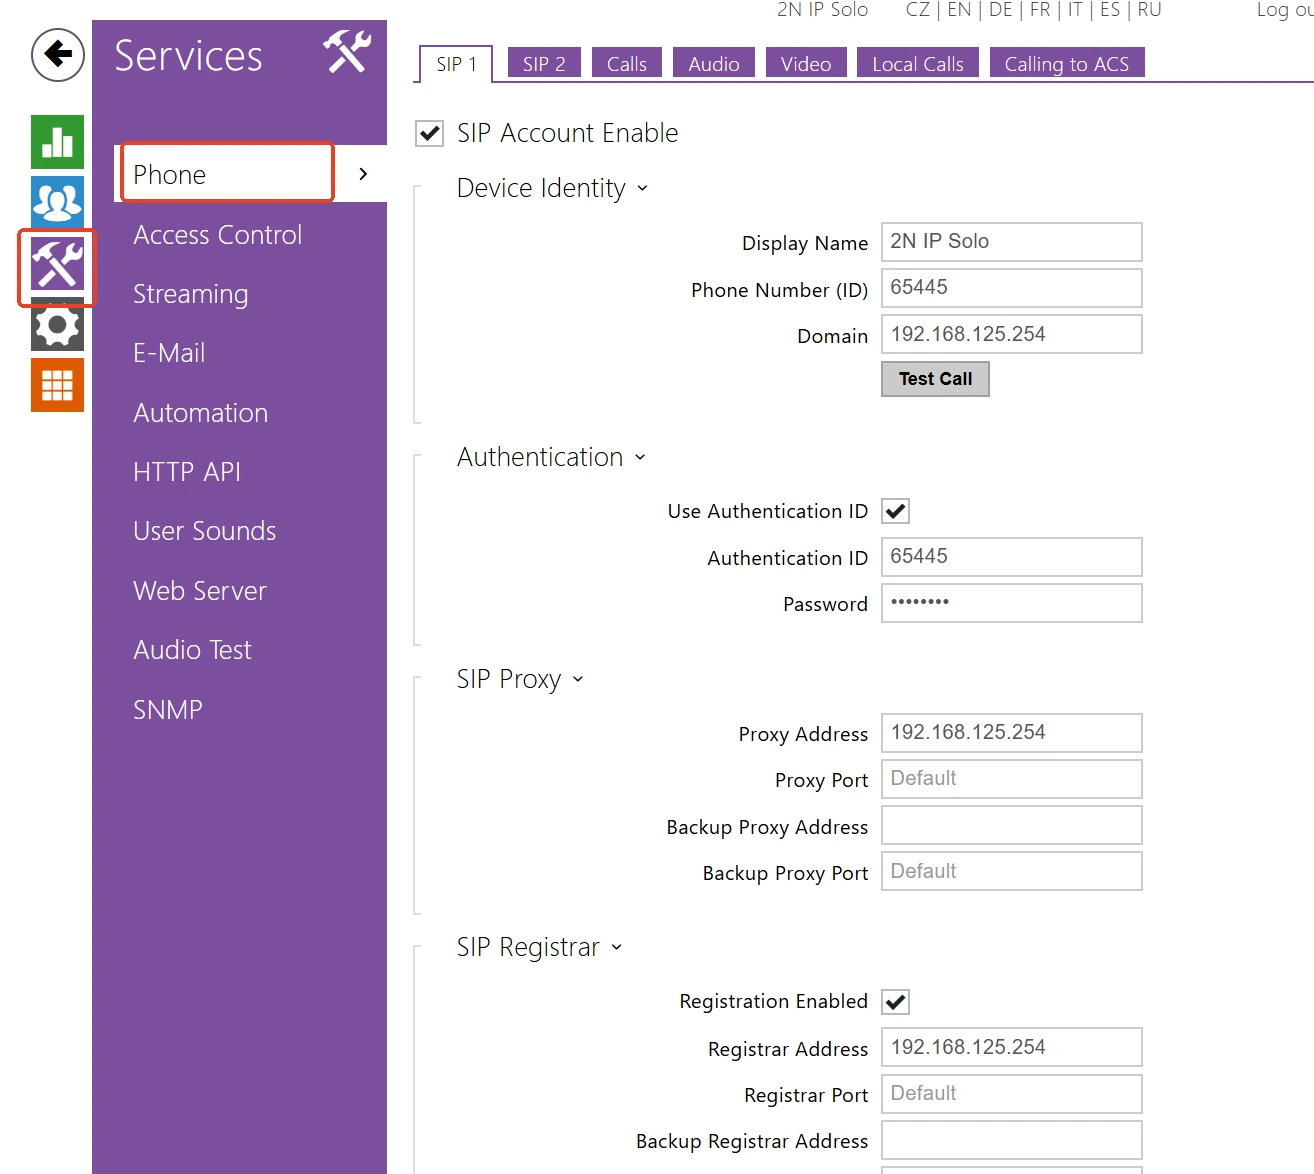
- Log in to the 2N Web UI and navigate to Services → Phone. Enter the SIP server details to register the device to the same server as the WP8x6 phone.
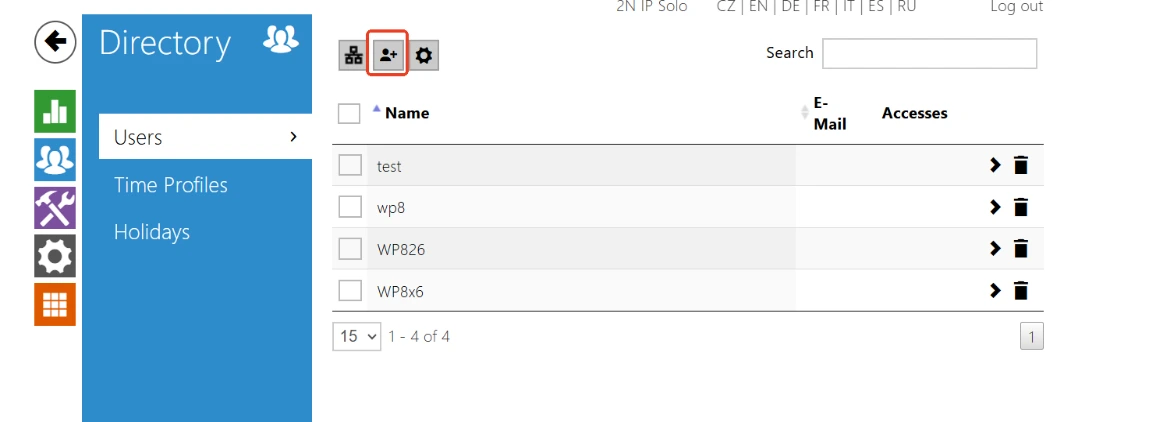
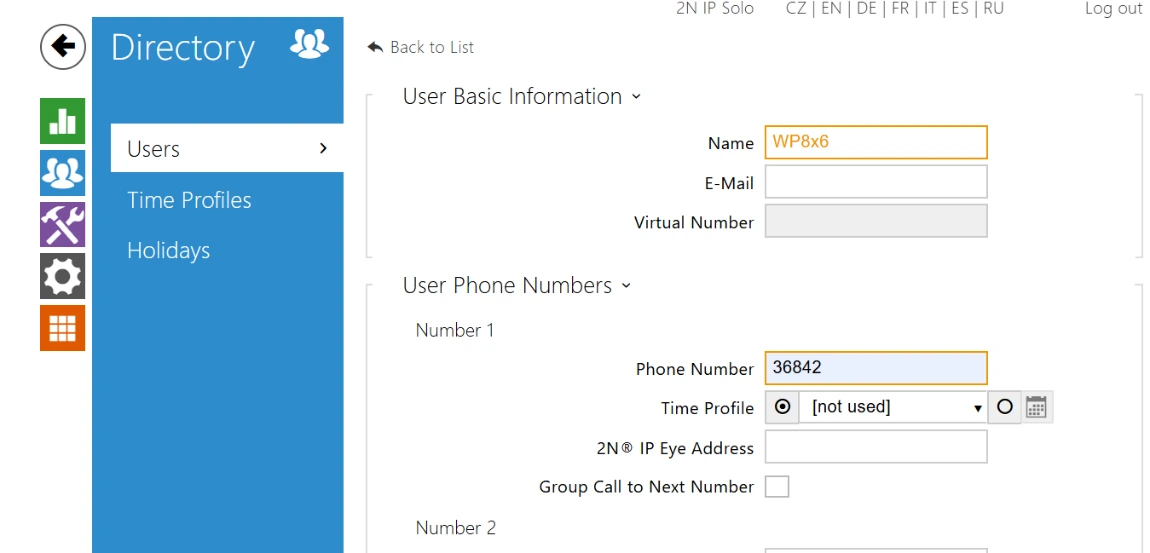
- Go to Directory → Users and click “Add” to create a user entry with the number assigned to the WP8x6 phone.
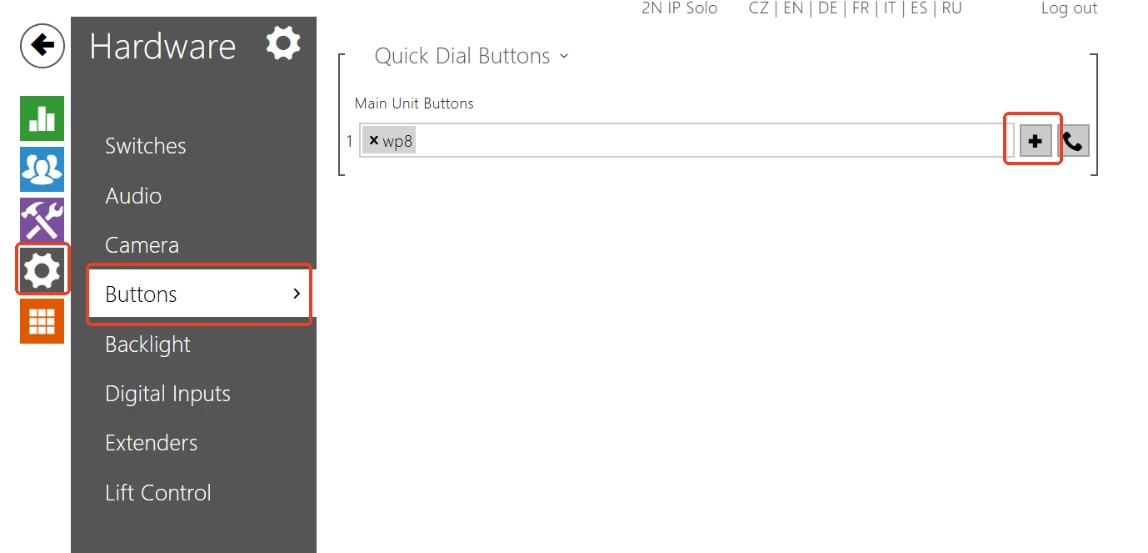
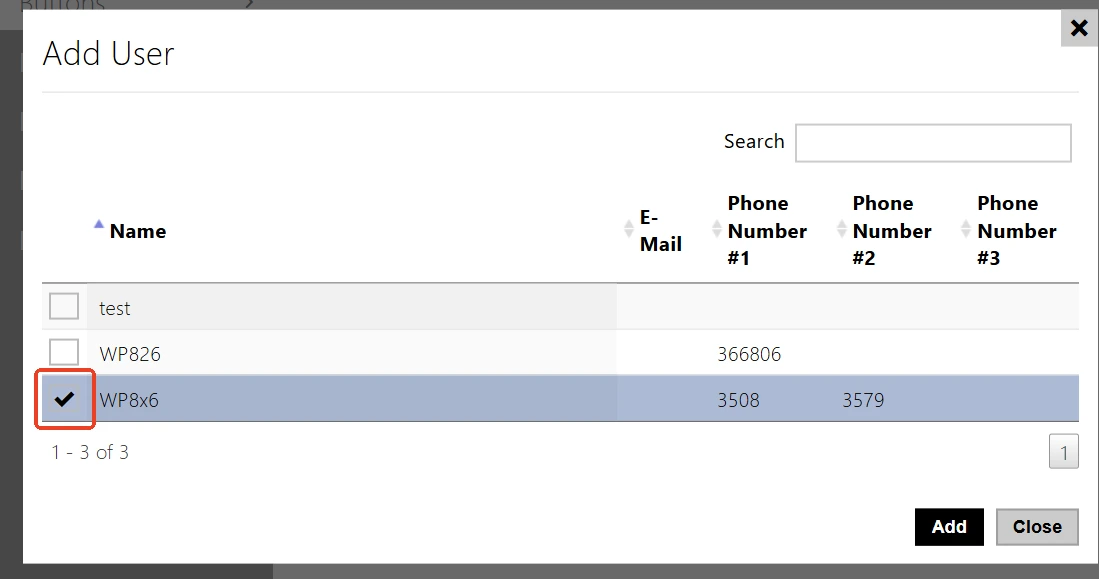
- Navigate to Hardware → Buttons and assign the created user to the call button so that it dials the WP8x6 when pressed.
- Go to Hardware → Switches and set the DTMF access password that matches the DTMF code configured on the WP8x6.
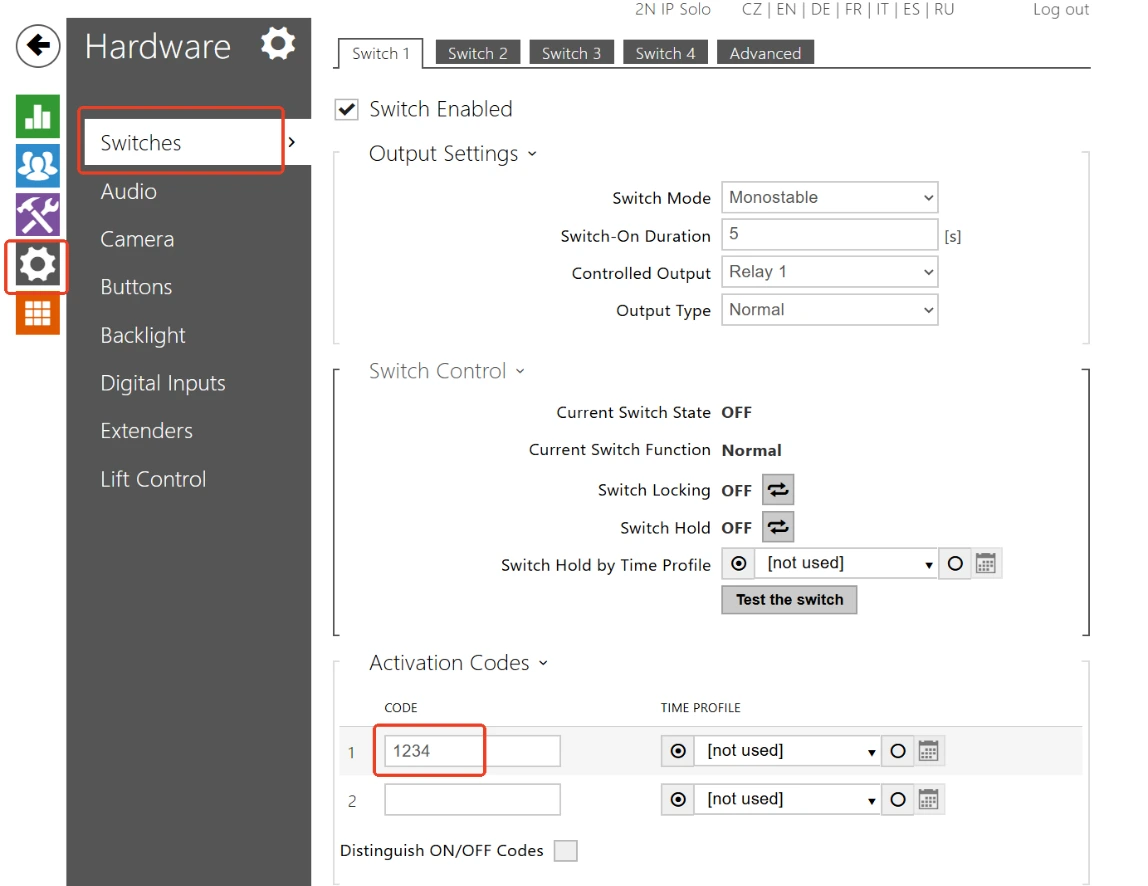
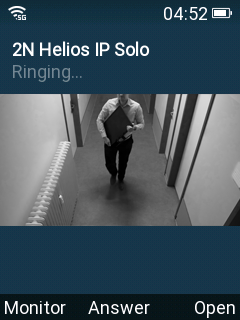
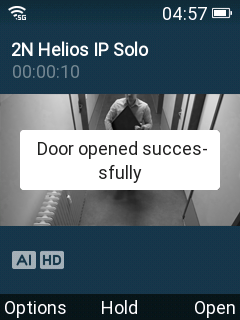
- Save all changes and press the call button to ensure the call reaches the WP8x6 and the door unlocks after DTMF input.
SUPPORTED DEVICES
Supported Devices | Firmware Version |
WP816 | 1.0.1.49+ |
WP826 | 1.0.1.49+ |
WP836 | 1.0.1.49+ |