This document introduces the IPVideoTalk service configuration on Grandstream UCM device with IPVT10 server.
- Connect Grandstream UCM with IPVT10 conferencing system:
- Configure SIP Trunk server in IPVT10 server, which is the server address of Grandstream UCM.
- Configure VoIP Trunk, Outbound Route and other information in Grandstream UCM.
- Calling out via UCM on IPVT10 server:
- Configure SIP Trunk server for calling out on IPVT10 server, which is the server address of Grandstream UCM.
- Configure Inbound Route in Grandstream UCM.
- Introduce how to join into IPVideoTalk conferencing system for UCM users.
IPVIDEOTALK SERVICE CONFIGURATION ON UCM
Configure SIP Trunk on IPVT10
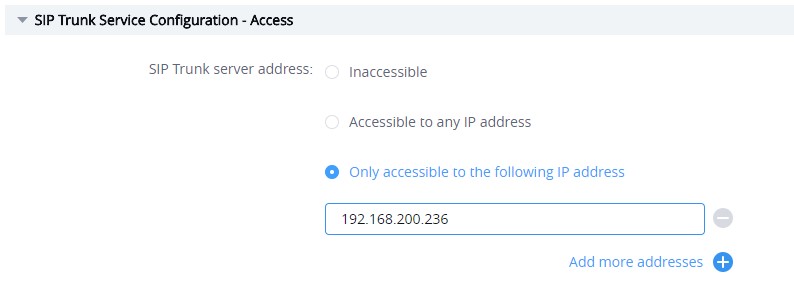
Login in IPVT10 Web UI, and access “SIP Trunk Service Configuration → Access” to fill in the information below:
- SIP Trunk Server Address (Necessary)
Accessible to any IP address: All IP addresses are allowed to access the IPVT10 server, including UCM SIP server.
Only accessible to the following IP address: Users need to fill in the UCM SIP server address, which means only the filled IP address is allowed to access the IPVT10 server.
- IVR Service Access Number (Optional)
Grandstream UCM supports to dial into the IPVideoTalk meeting via meeting ID directly. Please kindly refer to the UCM User Guide for more details.
Configure Grandstream UCM
Configure VoIP Trunk
- Login Grandstream UCM Web UI, and access to “Extension / Trunk → VoIP Trunk”.
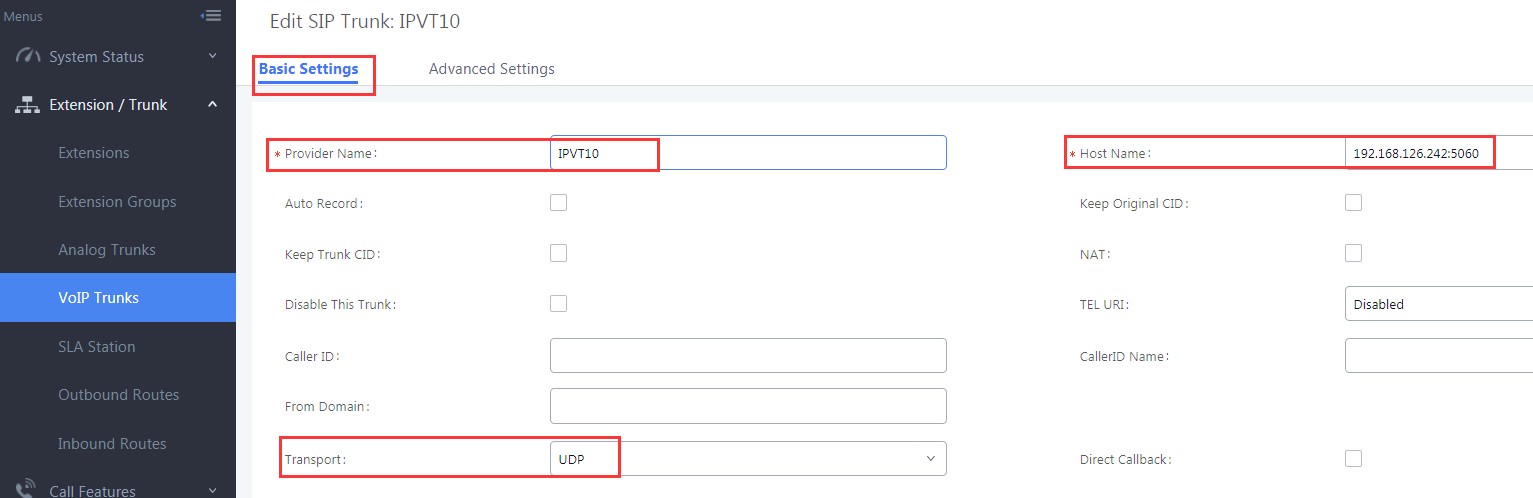
- Select Create New SIP Trunk, and fill the information into option “Provider Name” and “Host Name” as the figure shows below:
Configure VoIP Trunk

2: Configure VoIP Trunk
- Provider Name: Users need to fill in the provider name, and the duplicated name is not allowed. The provider name will be shown up during inbound/outbound routing.
- Host Name: Users need to fill in the IP/URL address of IPVT10 server for Host Name option. If the IPVT10 server has customized port, users need to fill in the IP/URL address of IPVT10 server with the customized port, such as 192.168.126.242:5060.
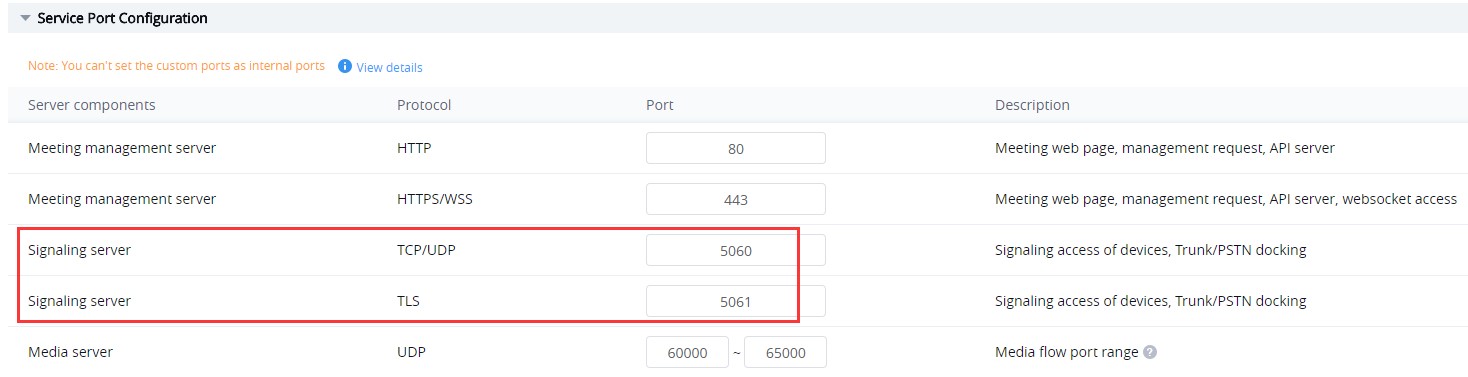
Configure Service Port

- Configure VoIP Trunk SIP Transport and Codecs
- SIP Transport: Users could select UDP/TCP/TLS as the SIP Transport, and the Port number should correspond the SIP Transport type. Please see the figure below:
Configure SIP Transport
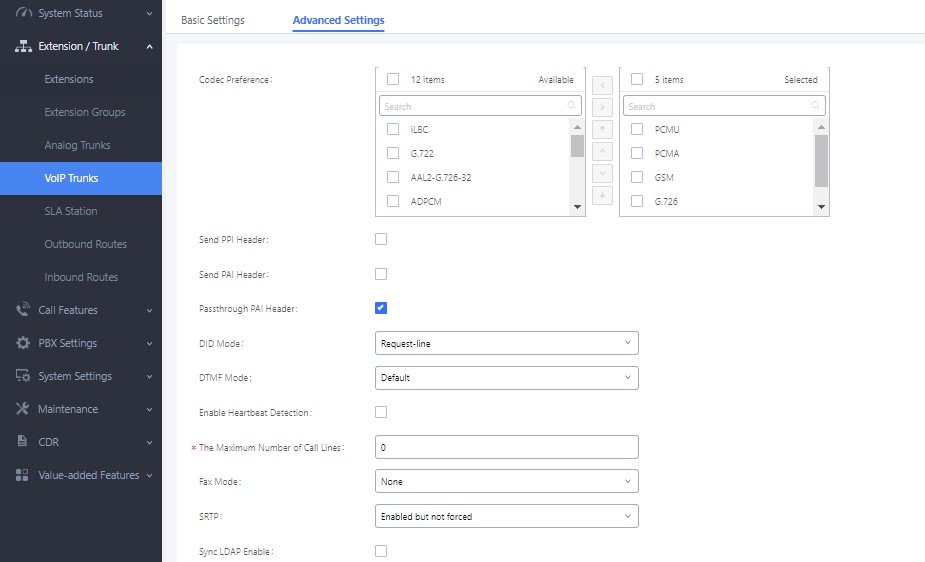
- Codecs: Users need to select at least one codec which is supported by IPVideoTalk service. Otherwise, the call cannot be established. The available codecs: o Audio: “GSM / PCMU / PCMA / G.722 / OPUS” o Video: “H.264 / VP8”
- SRTP Mode: The default setting is “Disabled”, and it is suggested to set as “Enabled but not forced”.
Configure Outbound Route
Users could go to “Extension / Trunk → Outbound Routes”, and click on “Add” to add the Outbound Route. As the figure shows below:
Configure Outbound Route
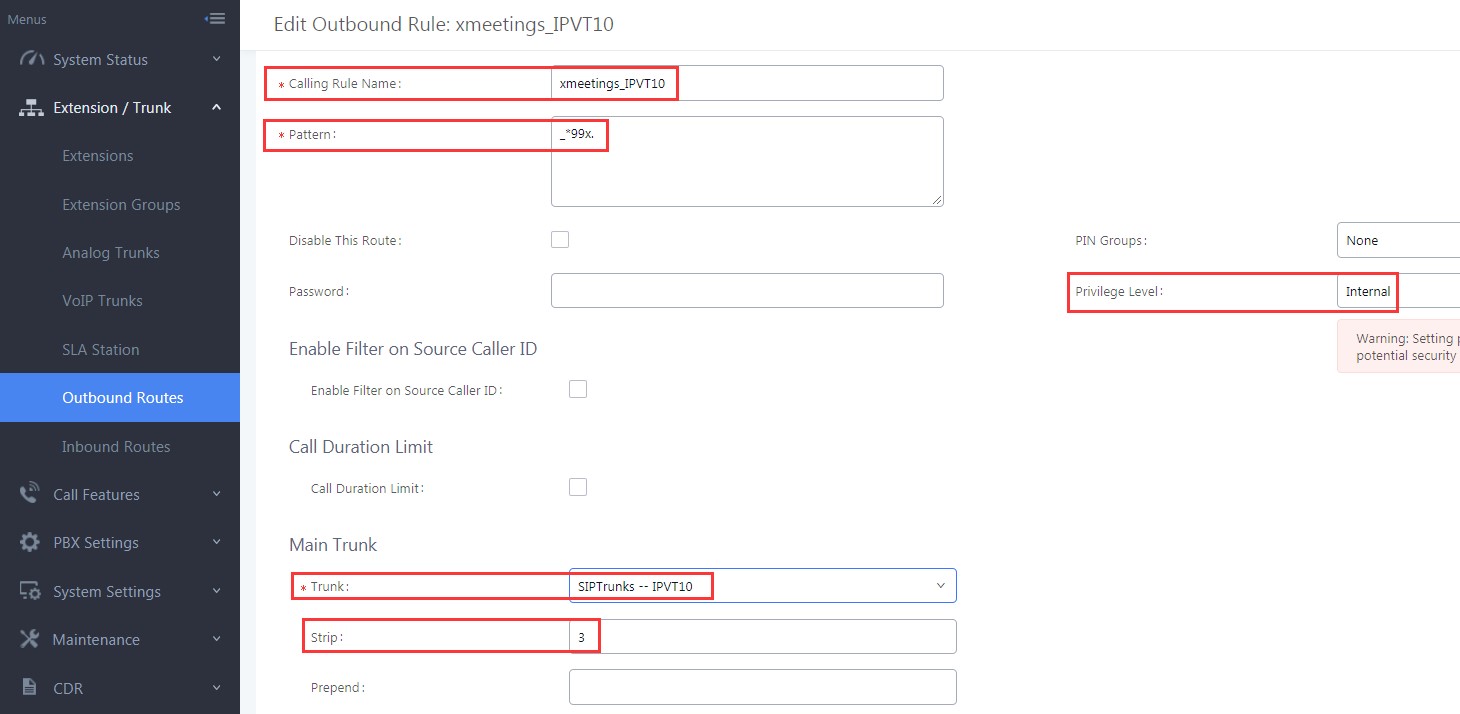
- Configure Calling Rule Name: Users need to fill in the Calling Rule Name for each Outbound Route, and the duplicated Calling Rule Name is not allowed.
- Configure Pattern: Users need to configure “Pattern” to recognize the dialing numbers for UCM, and the initial pattern should be “_”. The special characters and wildcard characters are allowed for patterns configuration. For instance, users could configure the pattern as “prefix + meeting ID”, such as “_*99x”. Then, UCM clients could dial “*99 + IPVideoTalk meeting ID” to dial into the meeting. The meeting ID could be 1 or multiple digits, and users may need to configure “Strip” option, please see the table below:
Parameters | Description |
X/x | 0-9 |
Z/z | 1-9 |
N/n | 2-9 |
[345-9] | 3,4,5,6,7,8,9 |
! | 0 or multiple characters (any character) |
. | 1 or multiple characters (any character) |
- Configure Privilege Level: Users need to configure the VoIP Trunk Privilege Level as “Internal” since the UCM clients’ default privilege level is “Internal”. The privilege level of the clients should be no lower than Outbound Route privilege level. Otherwise, the server will send 603 error messages to the clients.
- Configure Use Trunk: Users need to select the configured VoIP Trunk.
- Configure Strip: Users could configure the how many characters will be ignored for the prefix. For example, if users want to “*99”, users could set “3” for this option.
Users could click on “Save” → “Apply” to create the new Outbound Route, as the figure shows below:

Configure UCM Clients
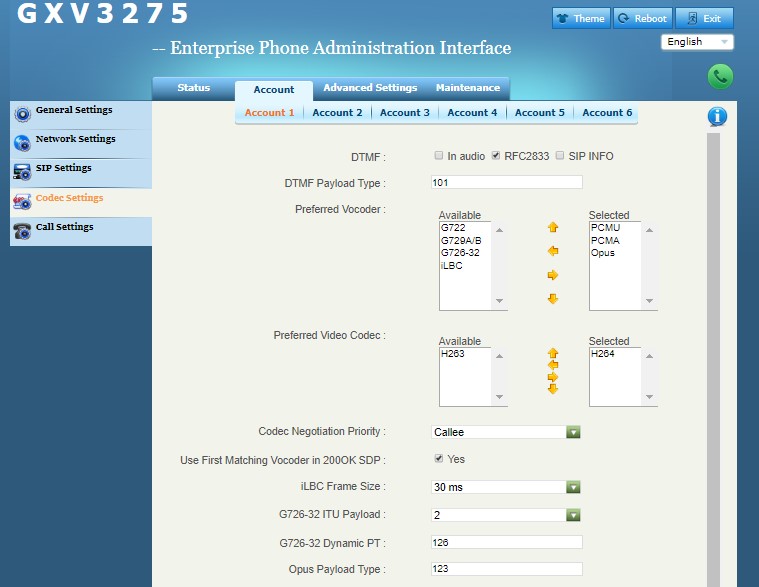
- Configure Codecs: Users could go to the UCM client’s Web UI → Account → Codec Settings to select the codecs. Users have to select at least one same codec as the codec for the SIP account configured on the UCM clients.
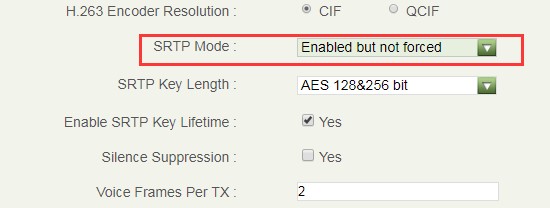
- SRTP Mode: The default setting is “Disabled”, and it is suggested to set as “Enabled but not forced”.
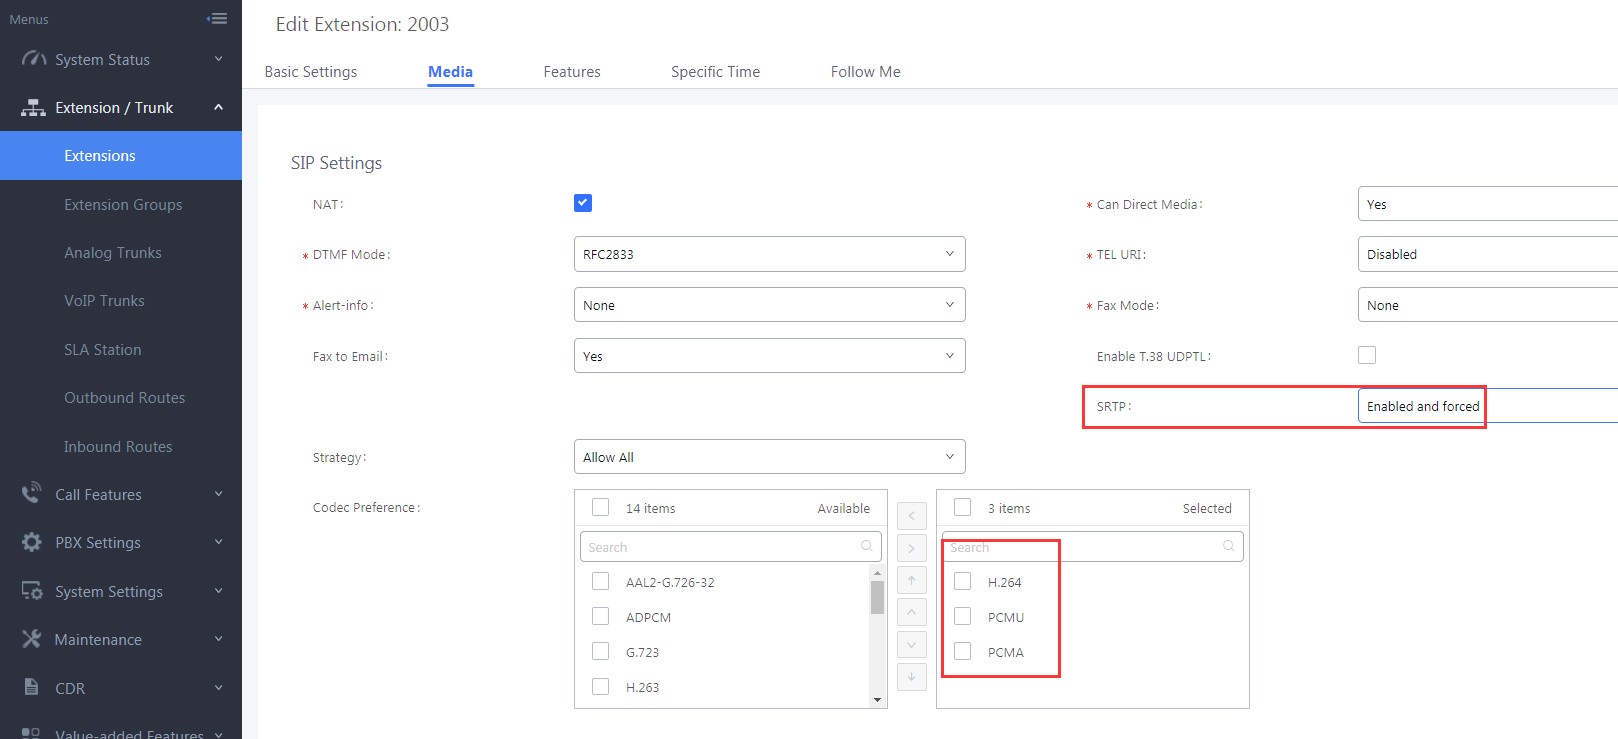
Users also need to check the account configuration for the configuration on clients in order to make consistent for the account information.
CONFIGURE IPVIDEOTALK OUTBOUND CALLS VIA UCM
Configure Outbound Calls via SIP Trunk
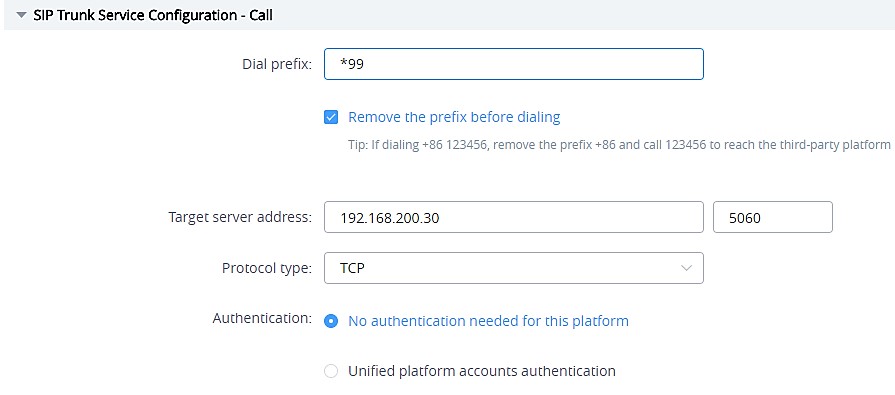
Users could login IPVT10 Web UI, and go to “SIP Trunk Service Configuration → Call”, and fill the information for the options below:
- Dial Prefix (Necessary)
This is used to recognize the numbers/characters for IPVT10 server, and IPVT10 server will forward the request to UCM server. Users have to fill in at least one special character (*#+) or word (a, b, c, ….), this character or word should be available on the dialing keypad.
Users also need to check option “Remove the prefix before dialing”.
- Target Server Address (Necessary)
Users have to fill in the UCM server address and SIP port for this option. Users need to make sure the SIP Transport and Port should be matched. For example, UDP/TCP protocol corresponds port number 5060, TLS protocol corresponds port number 5061.
- SIP Transport (Necessary)
Users have to select one SIP Transport between TCP / UDP / TLS.
- Authentication (Necessary)
Users need to select “No authentication needed for this platform”.
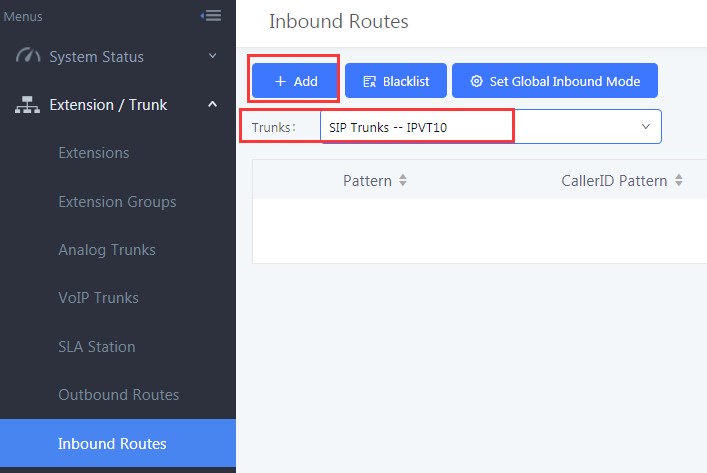
Configure UCM Inbound routes
Users have to configure Inbound Route in Grandstream UCM. Users could go to “Extension / Trunk → Inbound
Routers”, and select the created VoIP Trunk, click on “Add” to add Inbound Route, as the figure shows below:
Users need to fill in the “Inbound Route” information as the figure shows below:
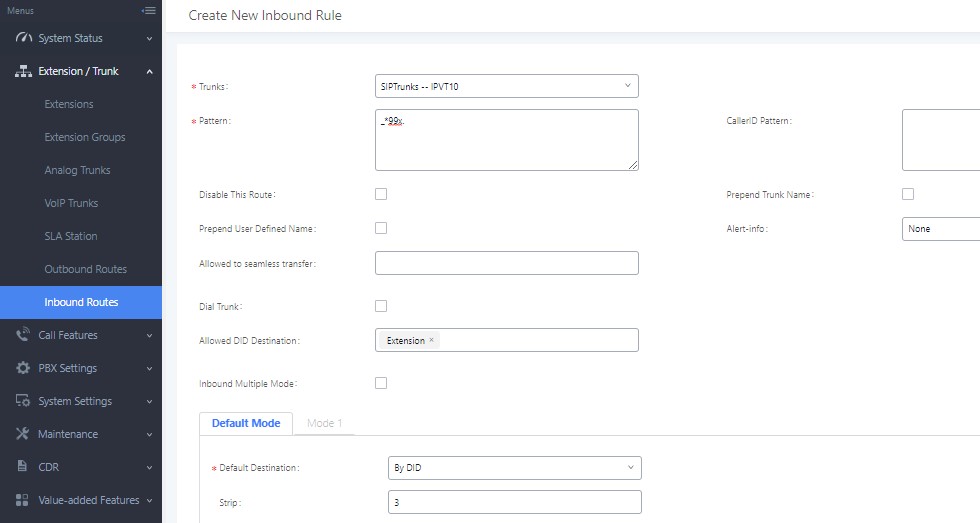
- Configure Trunk: Users could select the created VoIP Trunk for this option.
- Configure Pattern: Users could configure “_*99x.” as the pattern, which means Inbound Route allows the numbers with prefix “*99”. If the configuration is “_x”, which means Inbound Route allows one or multiple digits calling number to dial into the meeting. The special characters and wildcard characters are allowed for this option and the rule is the same as Outbound Route configuration.
- Configure Default Destination: Users could configure default destination for the local clients. With this configuration, users could dial to UCM extensions directly via IPVideoTalk server.
DIAL INTO IPVIDEOTALK MEETINGS
We assume client A has a registered IPVideoTalk ID, and client B has a registered SIP extension in UCM (e.g. 2003), the Dial Prefix for SIP Trunk is “*99”.
UCM Extension Joins into IPVideoTalk Meeting
Scenario 1: UCM extension joins into the IPVideoTalk meeting by dialing IPVideoTalk meeting ID via audio call.
Prerequisite: Active meeting M
Operations:
Users could dial IPVideoTalk meeting ID M (*99M) to join into the meeting on client B.
IPVideoTalk Conferencing System Invites UCM Client to Join into the Meeting
- Scenario 1:
Schedule the IPVideoTalk meeting and invite client B, then start the IPVideoTalk meeting.
Operations:
- Client A schedules and hosts the IPVideoTalk meeting M, set the SIP extension on client B (*992003) as the invitee.
- The IPVideoTalk meeting M has been started.
- Client B receives the incoming call and answers the call via audio mode.
- Scenario 2: The meeting host invites the client B during the IPVideoTalk meeting.
Prerequisite:
Client A is the meeting host during the IPVideoTalk meeting.
Operations:
- Client A invites the SIP extension on client B (*992003) during the IPVideoTalk meeting.
- Client B receives the incoming call and answers the call via audio mode.
Conference Control
Prerequisite: Client A and client B are in the IPVideoTalk meeting M.
Operations:
- Client A mutes/unmutes the audio.
- Client B mutes/unmutes the audio.