
OVERVIEW
GVC3200/GVC3202 supports Blue Jeans in two methods. The users could choose either one of the following ways to use Blue Jeans on GVC3200/GVC3202.
METHOD ONE
Use Blue Jeans account from GVC3200/GVC3202 built-in SIP dialer to join Blue Jeans meeting.
METHOD TWO
Install Blue Jeans AndroidTM app from Google Play, and use the app on GVC3200/GVC3202.
This document describes how to use Blue Jeans on GVC3200/GVC3202 with the above 2 methods. Please choose one of them per your preference.
For detailed information about GVC3200/GVC3202 configuration and operations, please visit the following link to download the latest GVC3200/GVC3202 User Manuals:
http://www.grandstream.com/support
USE BLUE JEANS ACCOUNT ON GVC3200/GVC3202
GVC3200/GVC3202 comes with a Blue Jeans account with registered status, and it can be used right away after bootup.
JOIN MEETING
On GVC3200/GVC3202, user can join Blue Jeans meeting from LCD, or web UI. User needs to have the meeting ID and passcode (if required) before joining a meeting.
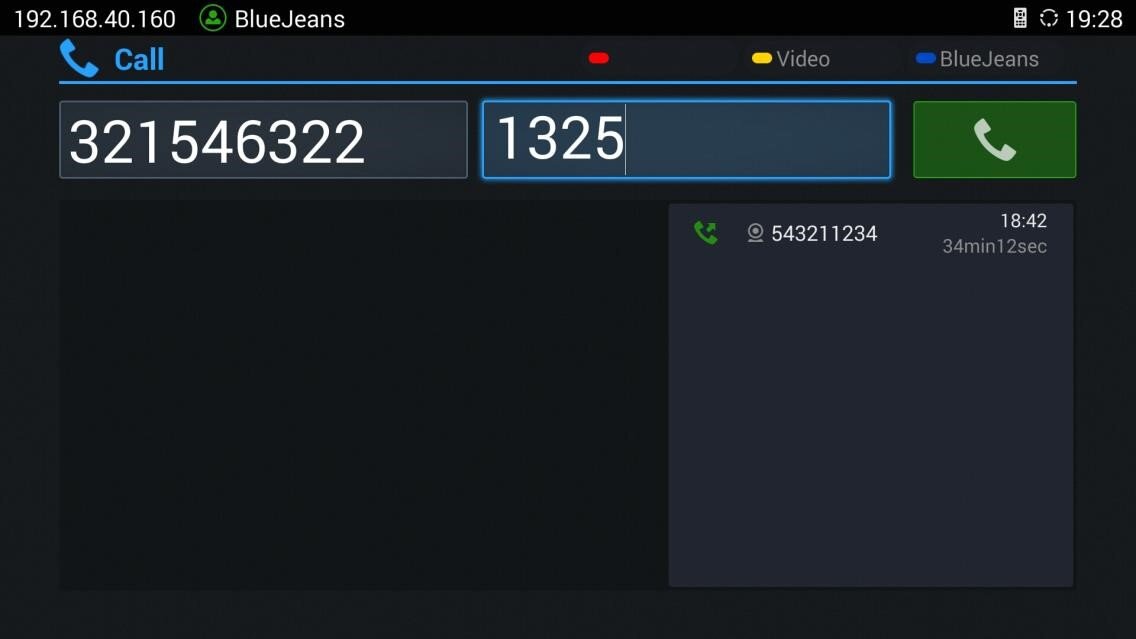
JOIN MEETING FROM LCD
- Use GVC remote control to navigate on the LCD 🡺 Call
 .
. - Use the red shortcut key on remote control to toggle account to “Blue Jeans”
 .
. - Use the yellow shortcut key on remote control to select Video call or Audio call
 .
. - Enter the meeting ID in the left input field.
- Enter the meeting passcode (if required) in the right input field.
- Click on Call button
 to dial out.


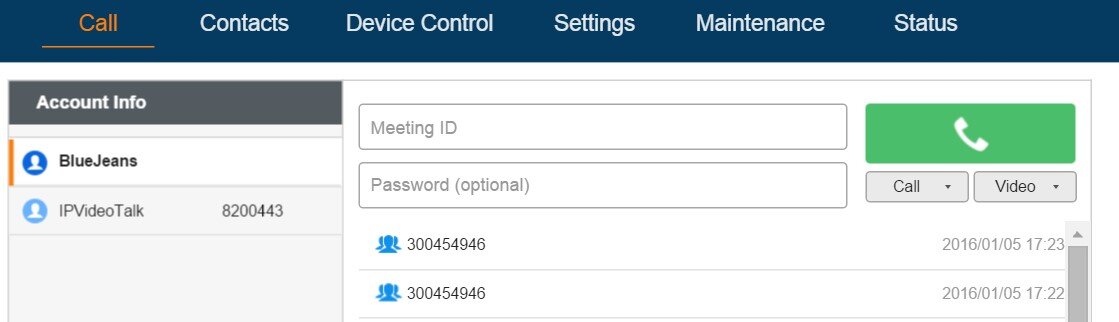
JOIN MEETING FROM WEB UI
- Log in GVC3200/GVC3202 web UI.
- Navigate to “Call” page.
- On the left panel “Account Info”, select “Blue Jeans” as the account to dial out.
- Enter phone number and password (if required) for the meeting you would like to join.
- Select Video or Audio for the call by clicking on
 .
. - Press
 to dial out.
DURING MEETING
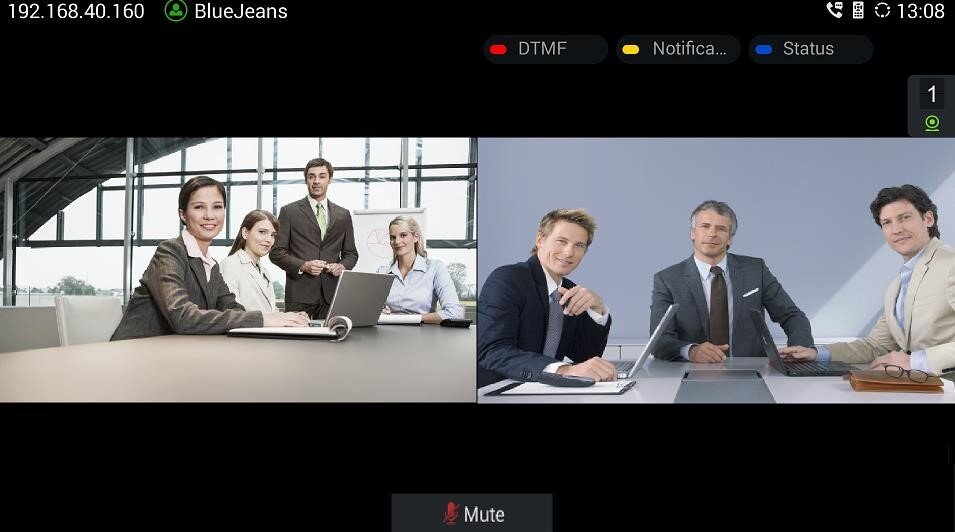
MUTE/UNMUTE
- On GVC remote control, Press the MUTE button
 during the call. This will mute the local party. MUTE indication will be displayed on the bottom of the screen.
 - Pressagain to unmute.
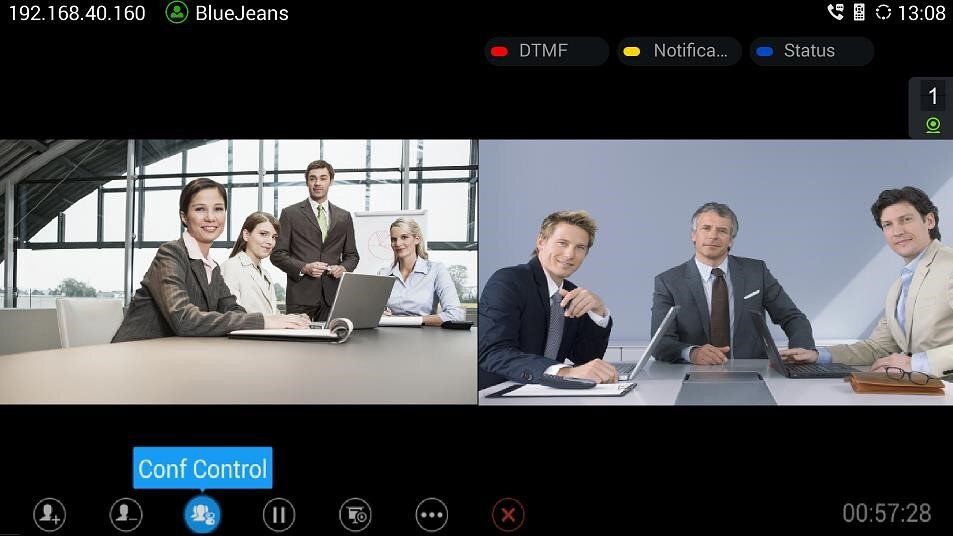
CONFERENCE CONTROL
During the call, click on Conference Control icon on the bottom menu. A new window will pop up for users to select conference control options for each member.
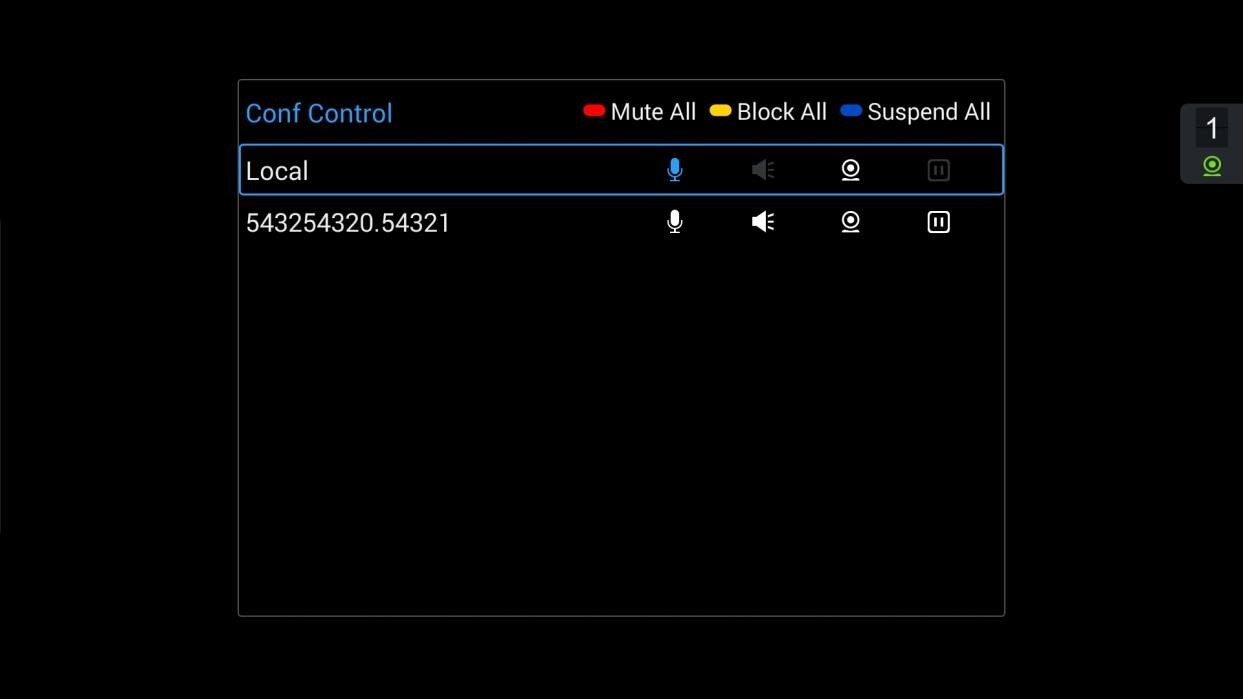
Click on the icon for the party you would like to adjust audio or video control:
 The selected party will not be heard by other parties.
- The selected party will not hear other parties.
- The video call with the selected party will turn into audio call only.
- Suspend video from the video party. The video from this party will not be seen anymore.
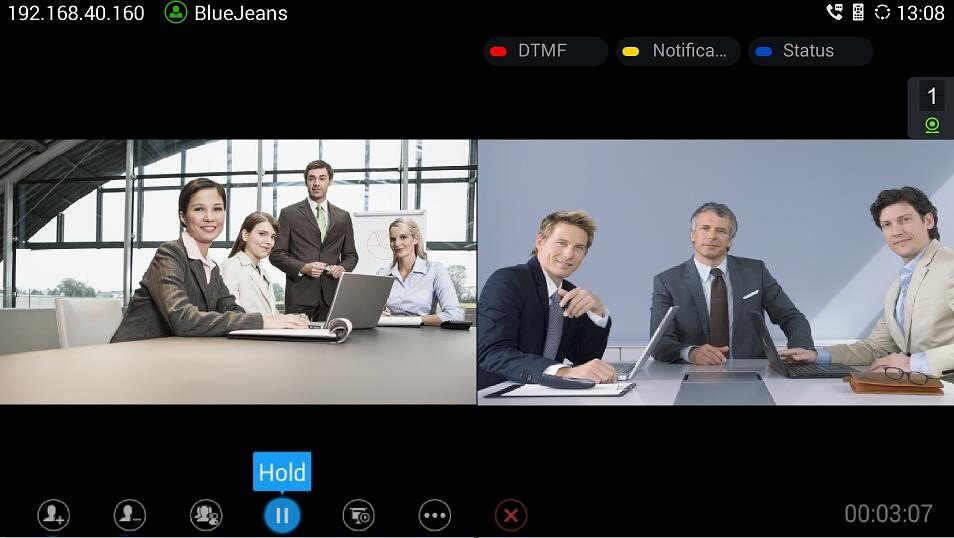
HOLD/RESUME
On the bottom menu of call screen, click on HOLD icon to put the call on hold. Press it again to resume.
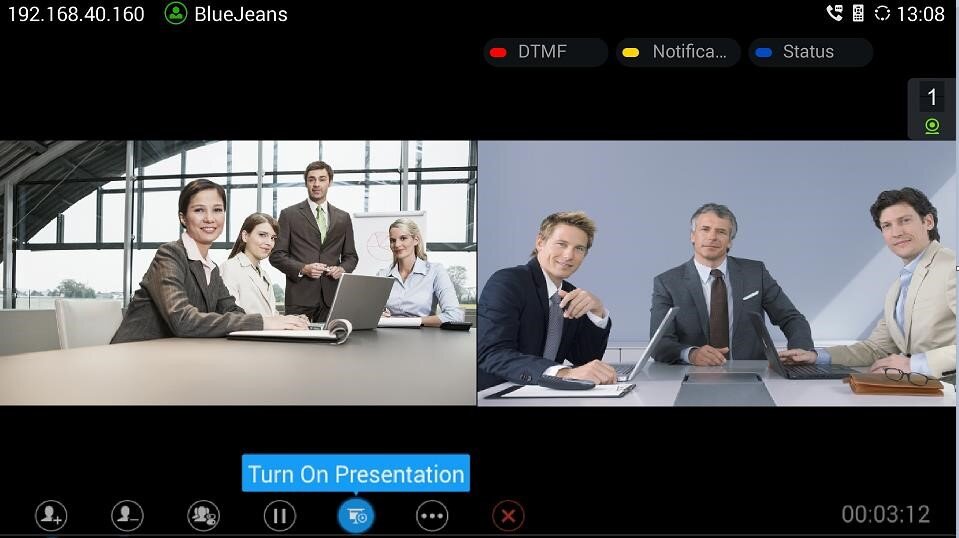
PRESENTATION
On the bottom of the screen, click on icon “Turn on Presentation” or press button on GVC remote control to turn on presentation. Press it again to turn it off.
If the remote Blue Jeans party turns on presentation, and GVC3200/GVC3202 Blue Jeans party cannot see it, please press PIP button on GVC3200/GVC3202 remote control, and select layout “REMOTE” layout to display the presentation.
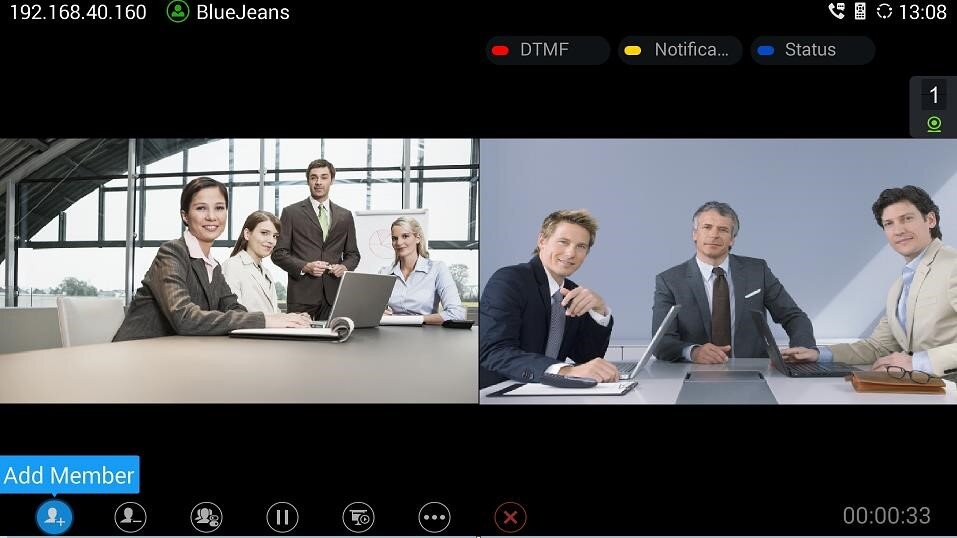
ADD MEMBER
During a Blue Jeans call, user could add another Blue Jeans call, adds SIP calls using a SIP account, or IPVideoTalk account registered on GVC3200/GVC3202 (depending on the IPVideoTalk plan capability on the GVC3200/GVC3202 IPVideoTalk account). GVC3200/GVC3202 is used as a bridge to mix calls across different platforms in this way.
- During a Blue Jeans call, click on icon “Add Member” on the bottom menu.
- A dial interface will show up. Enter the number, select call mode and the account to dial out.
- Press the Call button.
- Once the call is answered, the callee will be brought into the Blue Jeans call.
If there is an incoming call to SIP account or IPVideoTalk account on GVC3200/GVC3202, once GVC3200/GVC3202 answers the incoming call, it will be automatically mixed with the ongoing Blue Jeans call.
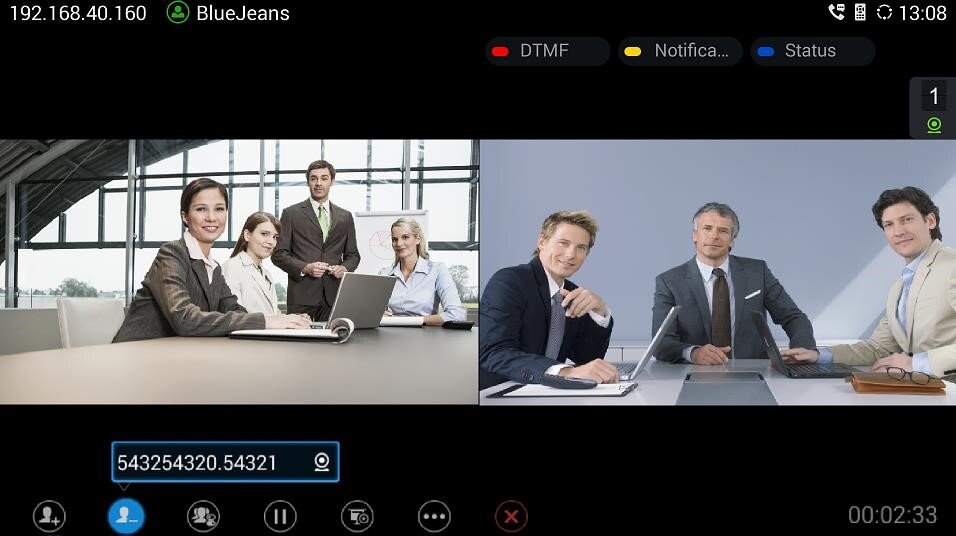
REMOVE MEMBER
During a Blue Jeans call, click on “Delete Member” icon, and select the party to remove from the call. After that, the remaining parties will stay in the call.
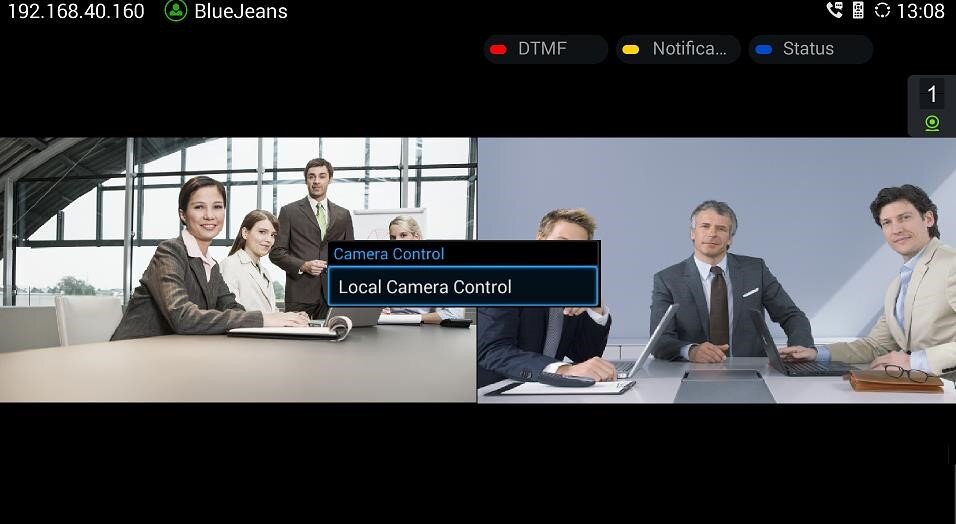
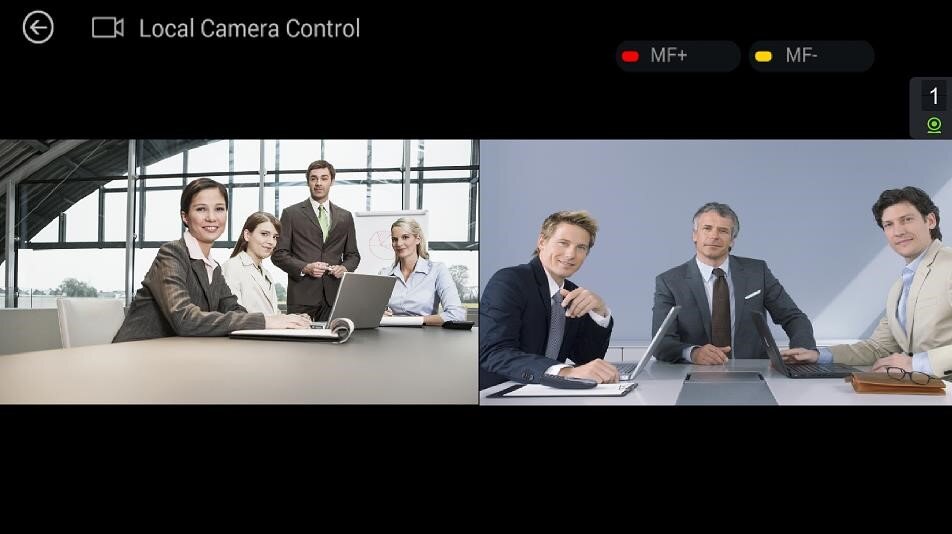
LOCAL PTZ CONTROL
- During a Blue Jeans call, press the CAMERA button
 on GVC remote control to open Camera Control.
 - Click on “Local Camera Control”.
- On GVC remote control, press UP/DOWN/LEFT/RIGHT to adjust direction, press red or yellow shortcut key to adjust manual focus.
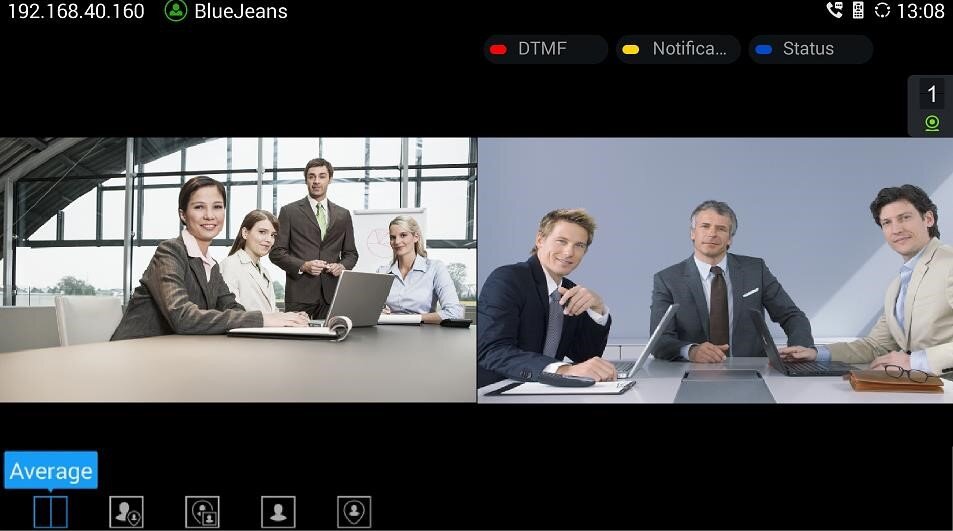
VIDEO DISPLAY
- During a Blue Jeans call, press the PIP button
 on the GVC remote control.
 - The options for different layout will show up on the bottom of the screen. Select the layout you would like to use for your call screen, for example, Remote only.
CALL RECORDING
During a Blue Jeans call, users could record the video to the external SD card plugged into GVC3200/GVC3202. Once the video is recorded, users can view the recorded video in Recorder application, and download the video from web UI->Maintenance->Recording.
- During an active call, press the recording key
 on GVC remote control. A red Rec icon will show up.
 - Press the recording keyagain to stop recording.
- The recording files will be automatically saved to the external SD card plugged into GVC3200/GVC3202.
DTMF
Besides the local call control options mentioned above, Blue Jeans also provides in-call options for video conference systems so that users can access them via DTMF.
- Press the red shortcut key on GVC remote control to input DTMF. Or, users could click on button
 on the bottom menu, and select “Open DTMF”.

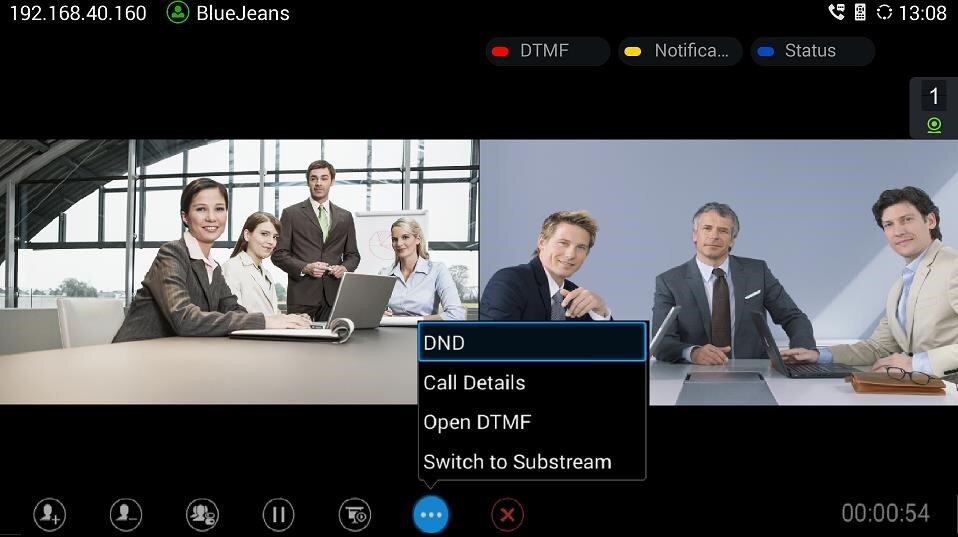
- Input * in the DTMF input field to activate the menu.
- Users will see a list of menu options on the screen. Enter the digit for the corresponding option.
Item | Name |
1 | Switch Layout |
2 | Change Menu Language |
3 | Meeting Information |
4 | Mute Audio |
5 | Mute Video |
6 | Hide Overlay Graphics |
7 | Include Self View |
* | Close Menu |
 Note:
Note:
Please make sure GVC3200/GVC3202 Blue Jeans account has DTMF set to “In-Audio” or “RFC2833” when using in-call DTMF. This setting is under GVC3200/GVC3202 web UI 🡺 Settings 🡺 Blue Jeans 🡺 Codec.
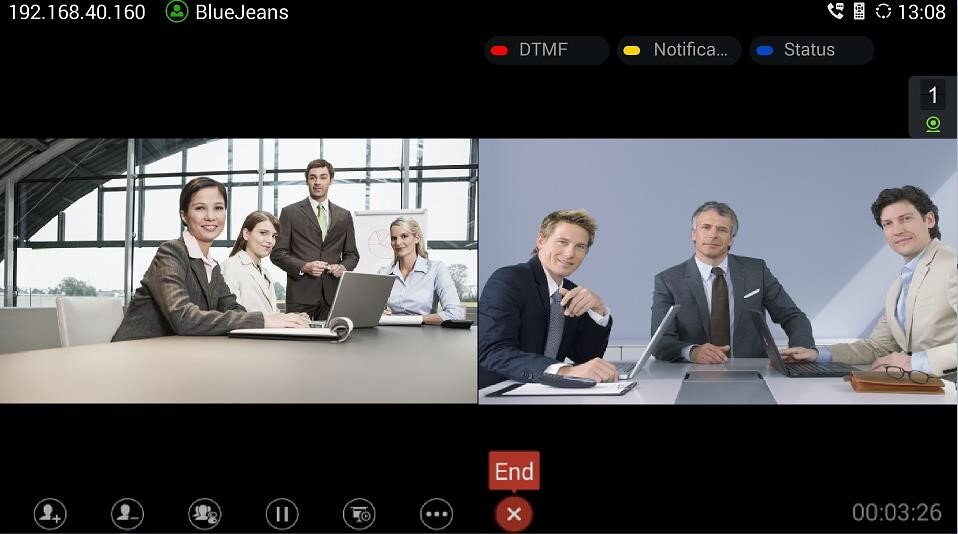
END CALL
During a Blue Jeans call, click on the End Call icon on the bottom menu to end the call. GVC3200/GVC3202 will leave the meeting, and other parties will remain in the meeting.
MIX BLUE JEANS CALL WITH OTHER THIRD PARTY APP
GVC3200/GVC3202 runs on AndroidTM Operating System, and it offers full access to the thousands of Android apps in Google Play Store, e.g., Google Hangouts, and etc. The calls using certain apps can be mixed with a Blue Jeans call so that they can be brought into the same conference on GVC3200/GVC3202.
For example, to use third party app Hangouts during a Blue Jeans conference:
- Install Hangouts and sign in.
- Establish a call using Hangouts.
- Establish a call using the Blue Jeans account registered on GVC3200/GVC3202.
- On the conference screen, click on MORE button, and select “Third party applications”.
- Select “Hangouts” in the pop up menu.
- The new call will be added to the conference. The icon
 will show up on the top status bar of GVC3200/GVC3202 displaying device, indicating the call is mixed.
 , and select “Third party applications”.
 Note:
- For the example above, the Blue Jeans call needs to be established using the SIP dialer with the built-in Blue Jeans account, instead of the Blue Jeans app installed on GVC3200/GVC3202.
- When the call is mixed, GVC3200/GVC3202 is the bridge that mixes the Blue Jeans call and the remote third party app call. The remote third party using the app can see the video from all parties. The remote Blue Jeans party can see the video from GVC3200/GVC3202 only. All parties can hear each other.
BLUE JEANS ACCOUNT SETTINGS
GVC3200/GVC3202 provides a list of settings for the Blue Jeans account registered on GVC3200/GVC3202. All the settings can be accessed via GVC3200/GVC3202 web UI 🡺 Settings 🡺 Blue Jeans. Some of the settings are also available in GVC3200/GVC3202 LCD display 🡺 Settings 🡺 Accounts: select Blue Jeans as the account.
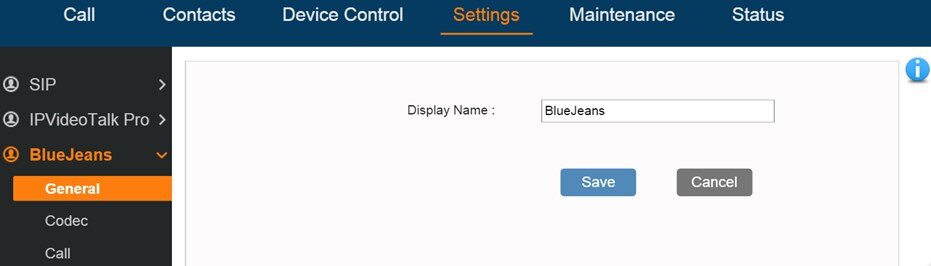
The following table lists all Blue Jeans settings available on GVC3200/GVC3202 web UI. For more detailed information about how to access and use GVC3200/GVC3202 web UI, please refer to GVC3200/GVC3202 user manuals in http://www.grandstream.com/support.
Parameters | Descriptions |
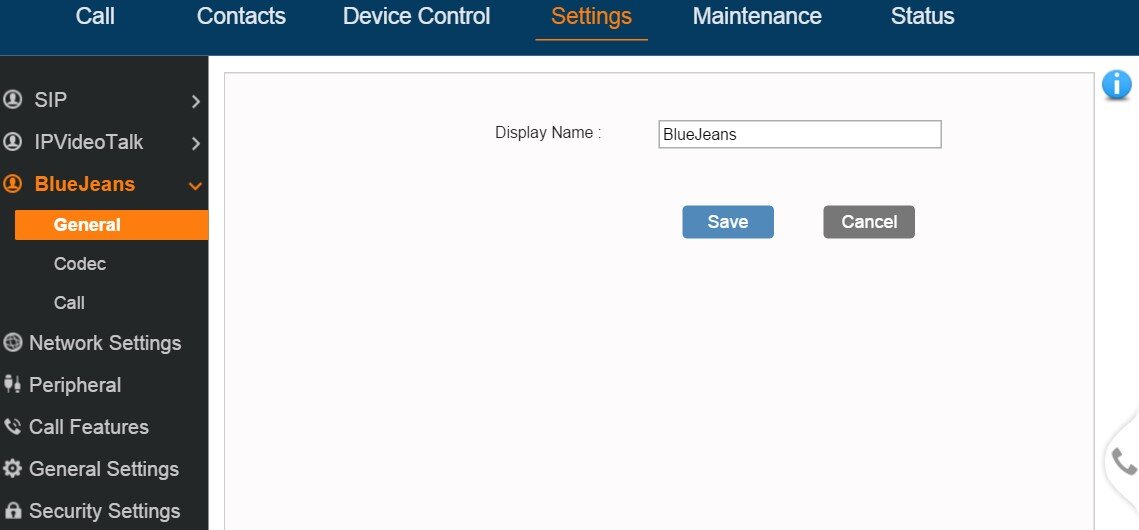
General | |
Display Name | It is used to configure the SIP server subscriber’s name (optional) that will be used for Caller ID display. The configured content will be included in the From, Contact and P-Preferred-Identity headers of SIP INVITE message. |
Codec | |
DTMF | It is used to set the parameter to specify the mechanism to transmit DTMF (Dual Tone Multi-Frequency) signals. There are 3 supported modes: in audio, RFC2833, or SIP INFO.
DTMF is combined in the audio signal (not very reliable with low-bit-rate codecs).
Specify DTMF with RTP packet. Users could know the packet is DTMF in the RTP header as well as the type of DTMF.
Use SIP INFO to carry DTMF. The disadvantage of this mode is that it’s easy to cause desynchronized of DTMF and media packet if the SIP and RTP messages are required to transmitted respectively. The default setting is “RFC2833”. |
DTMF Payload Type | It is used to configure the RTP payload type that indicates the transmitted packet contains DTMF digits. The valid range is from 96 to 127. The default setting is “101”. |
Preferred Vocoder | It lists the available and enabled audio codecs for this account. Users can enable the specific audio codecs by moving them to the Selected box and set them with a priority order from top to bottom. This configuration will be included with the same preference order in the SIP SDP message. The codec option includes “PCMU”, “PCMA”, “Opus”, “G.722”, and “G.722.1”. |
Codec Negotiation Priority | It is used to configure the codec negotiation sequence when the GVC3200/GVC3202 is acted as a callee. If set to “Caller”, the device will negotiate codec by SDP codec sequence from the received SIP INVITE message. If set to “Callee”, the device will negotiate codec according to the codec priority configuration on the device itself. The default setting is “Callee”. |
Silence Suppression | It is used to set the silence suppression/VAD feature. If it is set to “Yes”, when silence is detected, a small quantity of VAD packets (instead of audio packets) will be sent during the period of no talking. If set to “No”, this feature is disabled. The default setting is “No”. |
Voice Frames Per TX | It should be noted that the “ptime” value for the SDP will change with different configurations here. This value is related to the codec used and the actual frames transmitted during the in payload call. e.g.: if set to 2 and the first codec is G.729, G.711 or G.726, the “ptime” value is 20ms for the SDP. If the TX exceeds the maximum allowable value, the device will use and save the maximum allowed value according to what the first codec is. For end users, it is recommended to use the default setting, as incorrect settings may influence the audio quality. The default setting is “2”. |
G.722.1 Rate | It is used to select encoding rate for G.722.1 codec. It supports 24kbps or 32kbps. The default setting is “24kbps encoding rate”. |
G.722.1 Payload Type | It is used to configure payload type for G.722.1 codec. The valid range is 100-126. The default setting is “104”. |
Opus Payload Type | It is used to configure payload type for Opus codec. The valid range is 96-126. The default setting is “123”. |
Use First Matching Vocoder in 200OK SDP | If set to “Yes”, the device will use the first matching vocoder in the sent 200OK SDP as the codec. The default setting is “No”. |
Enable RFC5168 Support | If set to “Yes”, the RFC5168 mechanism will be enabled for video call. RFC5168 allows SIP party to request the sender to refresh its video frame in H.264, or refresh the full picture in VP8. The default setting is “Yes”. |
Enable Video FEC | If enabled, the video sender will temporarily allocate part of the bandwidth to one data channel to send FEC data to system, thus to improve the video quality the receiver gets. Enabling this function will take up part of bandwidth and reduce call rate. The default setting is “Yes”. |
FEC Payload Type | It is used to configure FEC payload type. The range is 96-127. The default setting is 120. |
FEC RED Payload Type | It is used to configure FEC RED payload type. The valid range is from 96 to 127. The default value is 122. |
H.264 Payload Type | It is used to configure the H.264 codec message payload type format. The default setting is 99. The valid range is from 96 to 127. |
H.264 Image Size | It is used to set the H.264 image size. It can be selected from the dropdown list.
The default setting is 1080P. |
H.264 Profile Type | It is used to set the H.264 profile type. It can be selected from the dropdown list.
The default setting is “BP&MP&HP”.
Lower profile is easier to decode while higher profile provides higher compression ratio. For device with low CPU, select “Baseline Profile”. Also, “Baseline Profile” is likely to be used in a video conference that has high demanding for the video quality. |
Video Bit Rate | It is used to configure the bit rate of the video device. The default setting is 2048kpbs. It is recommended to increase bit rate if bandwidth allows. If the bandwidth is not enough, the video quality will be reduced.
|
SDP Bandwidth Attribute | Select the SDP bandwidth attribute from “Standard”, “Media Level” or “None”.
The default setting is “Media Level”.
Note: Please do not change the format as it may cause decode failure if the user is unclear about what format the server supports. |
Video Frame Rate | Configures the frame rate for SIP video call. The default is 30 fps. Increase frame rate will take up bandwidth; the video quality will be reduced if not allocated enough bandwidth. |
Video Jitter Buffer Maximum (ms) | Configures the video buffer size according to the network environment. The valid range is 0-1000, the default setting is 50. |
Disable Presentation | If set to “Yes”, the device will disable presentation and will not receive presentation during video call. The default setting is “No”. |
Presentation H.264 Image Size | It is used to select the H.264 image size from “720P” or “1080P”. The default setting is “1080P”. |
Presentation H.264 Profile Type | Select the H.264 profile type from “Baseline Profile”, “Main Profile”, “High Profile” or “BP&MP&HP”. The default setting is “BP&MP&HP”. Lower profile type is easier to decode, while higher level has higher compression ratio. For device with low CPU, select “Baseline Profile”. Also, “Baseline Profile” is likely to be used in a video conference that has high demand for the video quality. |
Presentation Video Bit Rate | Configures the bit rate of the video. The video bit rate can be adjusted based on the network environment. Increasing the video bit rate may improve video quality if the bandwidth is permitted. If the bandwidth is not permitted, the video quality will decrease due to packet loss. The default setting depends on presentation H.264 image size.
|
Presentation Video Frame Rate | Configures the video frame rate for presentation. The options are 5fps, 10fps and 15fps. The default setting is 15fps. |
Call |
|
Call Log | It is used to categorize the call logs saved for this account. If it is set to “Log All”, all the call logs of this account will be saved. If set to Log Incoming/Outgoing Calls (Missed Calls Not Record), the whole call history will be saved other than missed call. If it set to Disable Call All, none of the call history will be saved. The default setting is “Log All”. |
Use # as Dial Key | It is used to set the device whether to use the “#” key as the “Send” key. If set to “Yes”, if the end user taps the “#” key on the remote control, the device will send out the typed digits. If set to “No”, the “#” key is included as part of the dialing string and please make sure the dial plan is properly configured to allow dialing # out. The default setting is “Yes”. |
Upload Local MOH Audio File
| It is used to load the MOH (Music on Hold) file to the device. Click on “Browse” button to upload the music file from local PC. The MOH audio file has to be in .wav or .mp3 format.
Note: Please be patient while the audio file is being uploaded. It could take more than 3 minutes to finish the uploading especially the file size is large. The button will show as “Processing” during the uploading. Once done, it will show as “Browse” again. Click on “Save” on the bottom of the web page and “Apply” on the top of the web page to save the change. |
Enable Local MOH | If set to “Yes”, the local MOH will be enabled. Users need to upload local MOH audio file. Once enabled, users could play the file when holding the call. The default setting is “No”. |
Note:
The Web UI settings of Blue Jeans account on GVC3200/GVC3202 only applies to Blue Jeans calls using
SIP dialer. If the user is using Blue Jeans app (described in next section) on GVC3200/GVC3202, GVC3200/GVC3202 web UI settings will not apply the configurations. Blue Jeans app is an independent application running on GVC3200/GVC3202. Please use the settings within the app for Blue Jeans app.
USE BLUE JEANS APP ON GVC3200/GVC3202
DOWNLOAD AND INSTALL BLUE JEANS APP
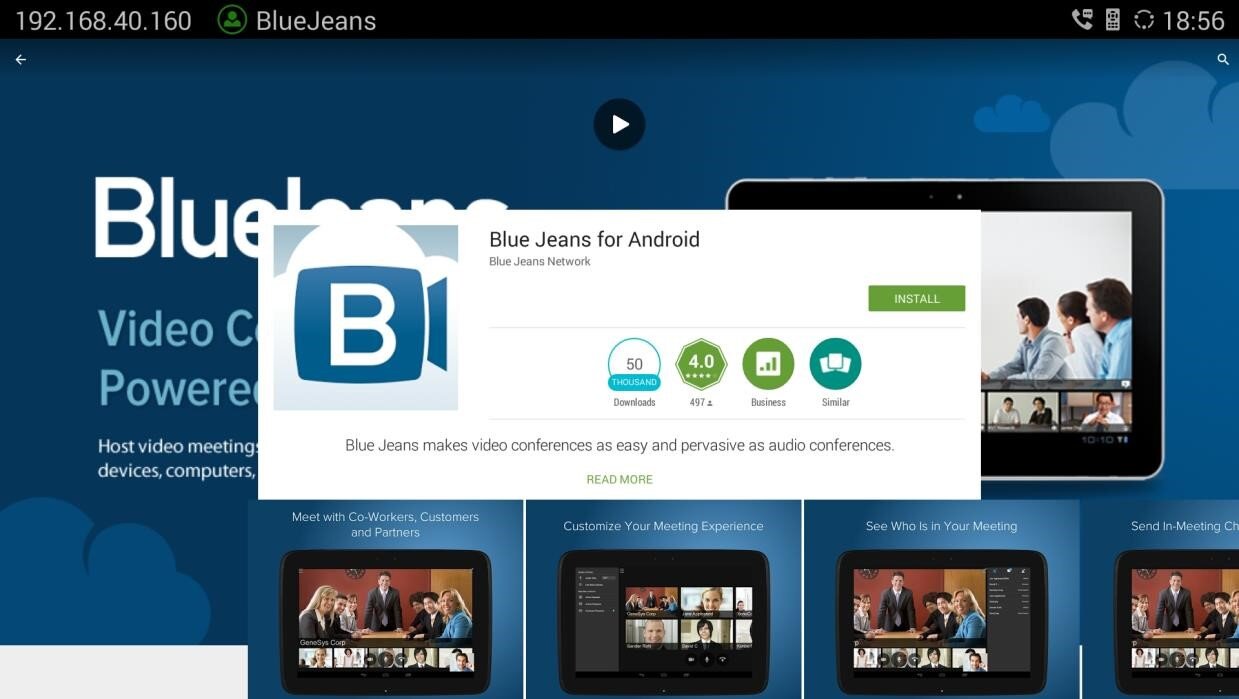
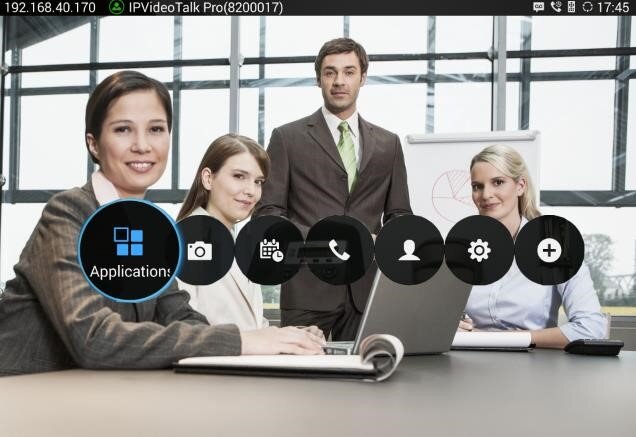
The latest Blue Jeans app can be downloaded from Google Play Store. On GVC3200/GVC3202, users need to install Google Play Store, and then download Blue Jeans app from there. Here are the application downloading and installation steps on GVC3200/GVC3202:
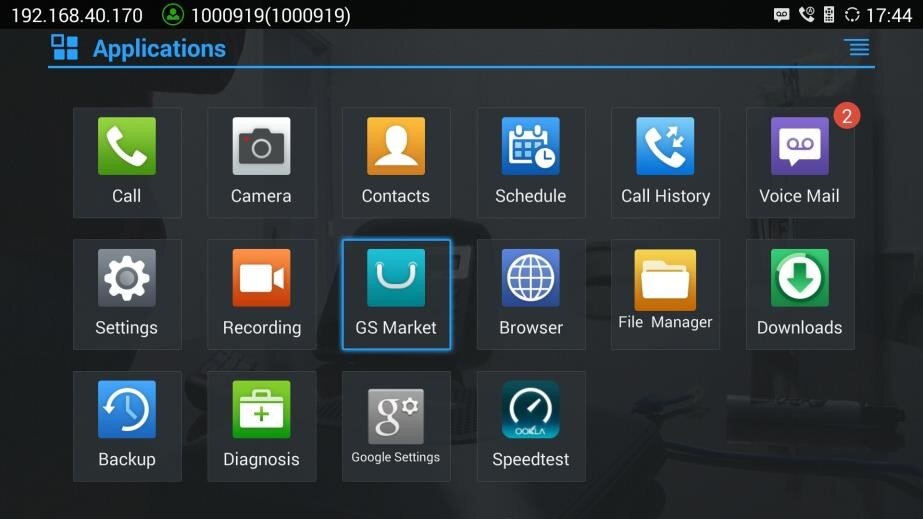
- On GVC3200/GVC3202 main screen, select “Applications”.
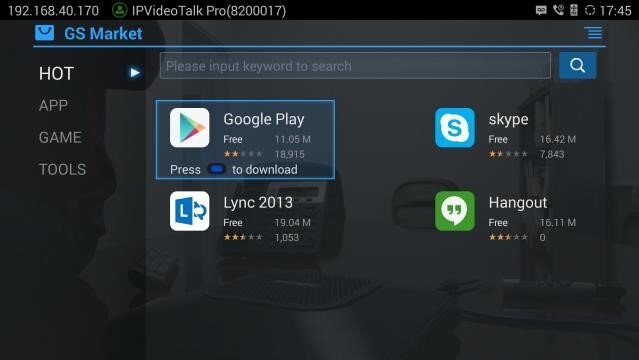
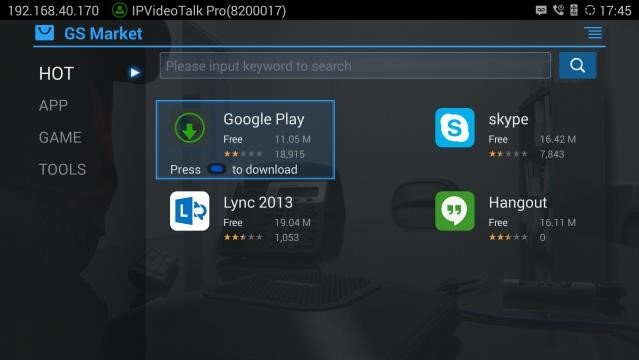
- Select “GS Market”.
- Select “Google Play” to download, and it will be installed on GVC3200/GVC3202.
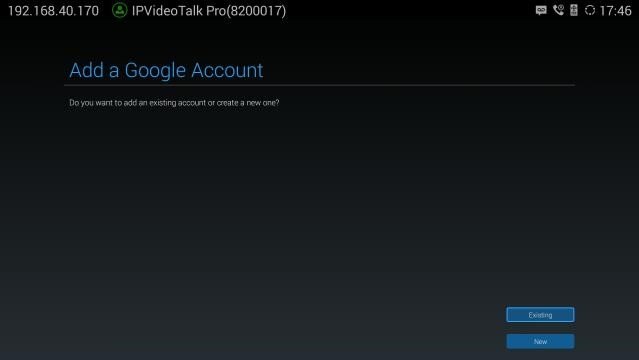
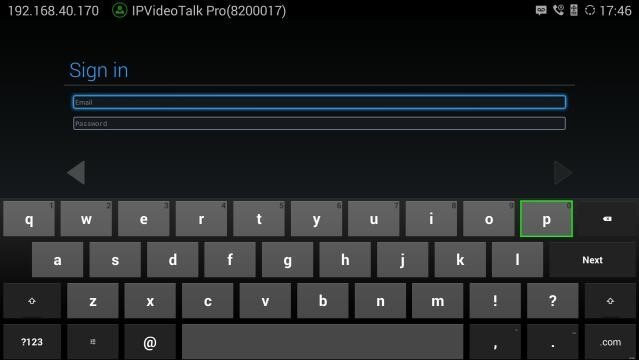
- Open Google Play, and sign in with your Google account.
- In Google Play, search for “Blue Jeans”, and install the application.

Note:
When there is an updated version of Blue Jeans app in Google Play, users could go to GVC3200/GVC3202 main menu->Applications to open Google Play->Blue Jeans, and then select “Update” to update the app on GVC3200/GVC3202.
OPEN BLUE JEANS APP
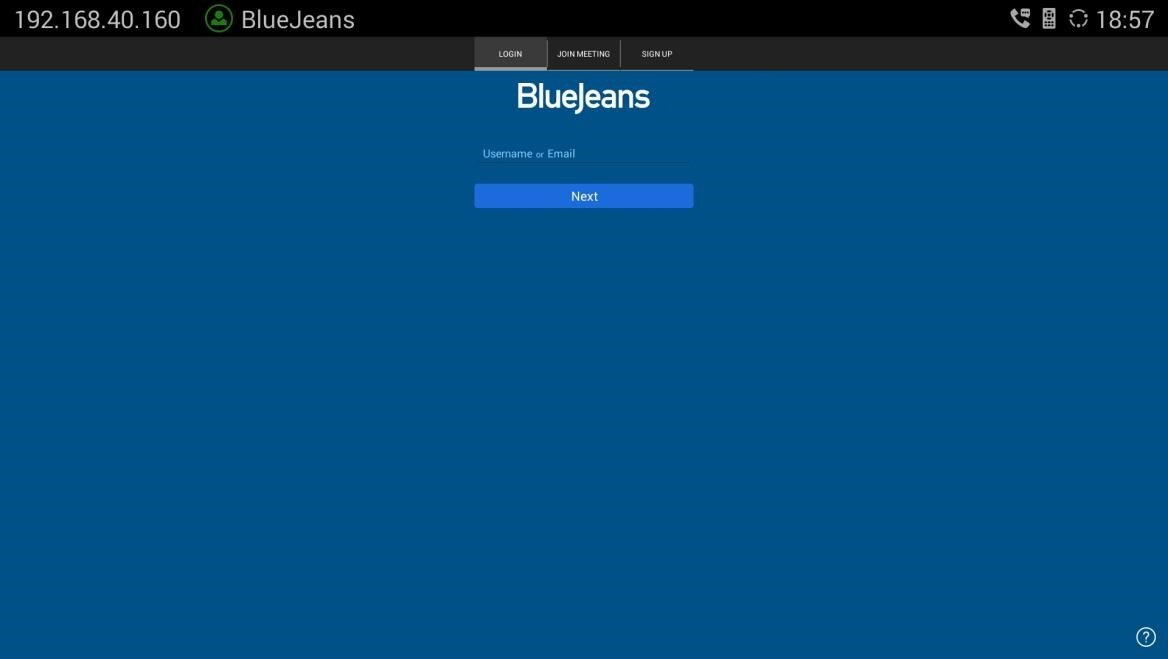
On GVC3200/GVC3202, Blue Jeans app works similarly as on other AndroidTM platform devices. Open Blue Jeans app from GVC3200/GVC3202 main screen 🡺 Applications. There are three tabs on the top:
“LOGIN”, “JOIN MEETING” and “SIGN UP”. Use GVC remote control to navigate, input necessary information and make selections.
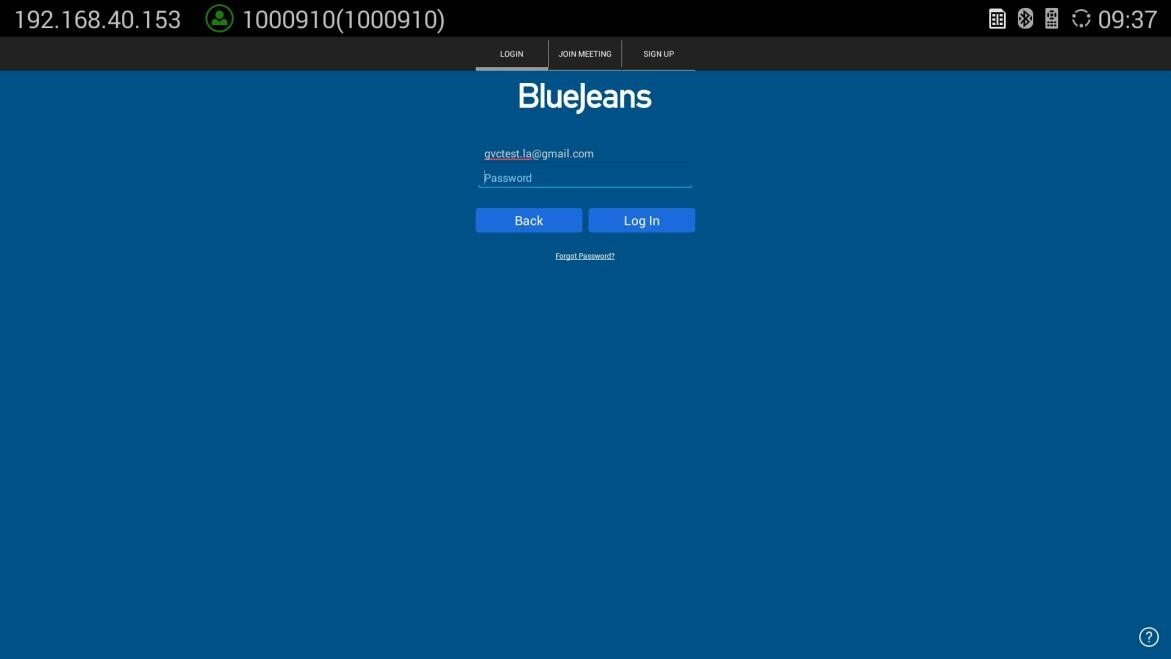
LOG IN
- If you already have a Blue Jeans account signed up, select “LOGIN” tab.
- Enter the Blue Jeans username here, click on “Next”.
- Enter the Password and click on “Log In”. Or, if you forget your password, click on “Forgot Password?”. It will redirect you to Blue Jeans password recovery web page where you can enter your Email address to reset the password.
- After logging in Blue Jeans account, normally the users will see three main sections (depending on the account’s capability when being created):
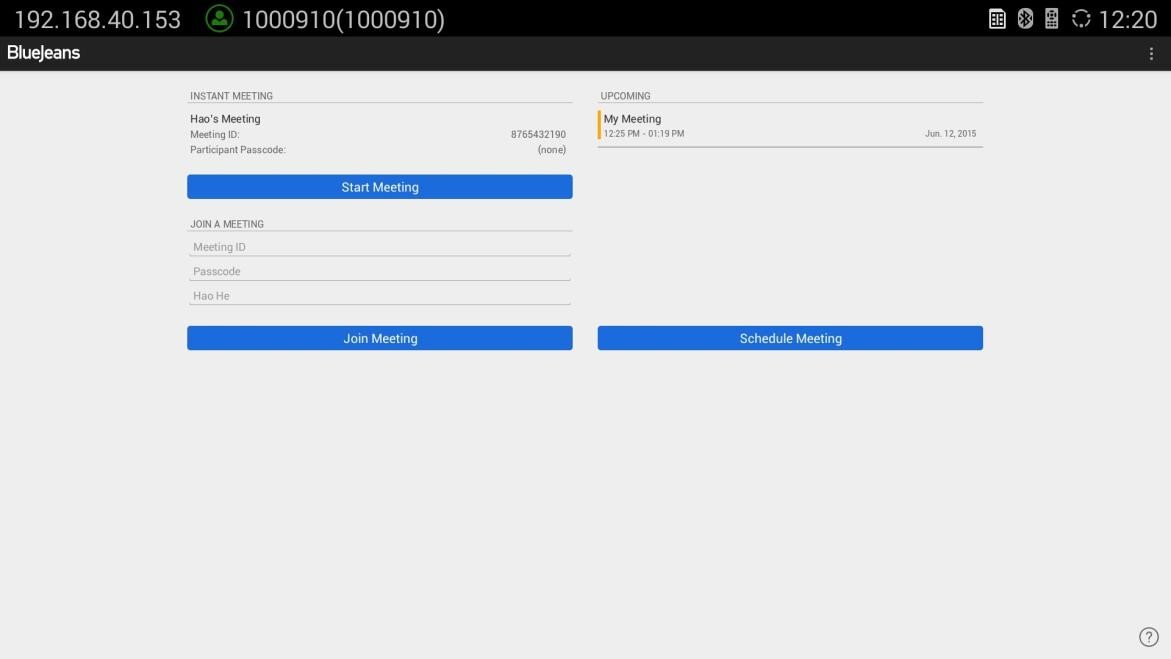
- Start Meeting
- Join Meeting
- Schedule Meeting
Note:
- If the user has already signed in Blue Jeans app on GVC3200//GVC3202, by default it will always automatically sign in after rebooting.
- If you do not see all the above three options “Start Meeting”, “Join Meeting” and “Schedule Meeting” after logging in, please check with your system administrator about your Blue Jeans account configurations.
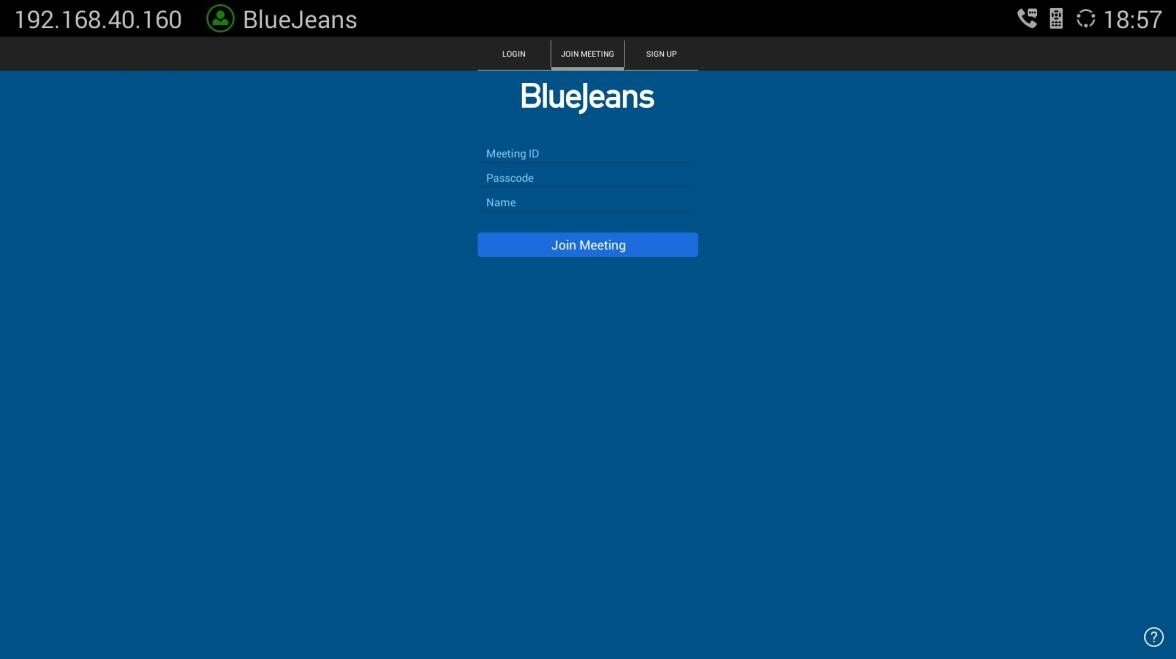
JOIN MEETING WITHOUT LOGIN
Some meetings doesn’t require login for the users to join. In this case, select “JOIN MEETING” tab, enter the Meeting ID, Passcode (if required) and Name of the user who is joining the meeting, and then click on “Join Meeting” button.
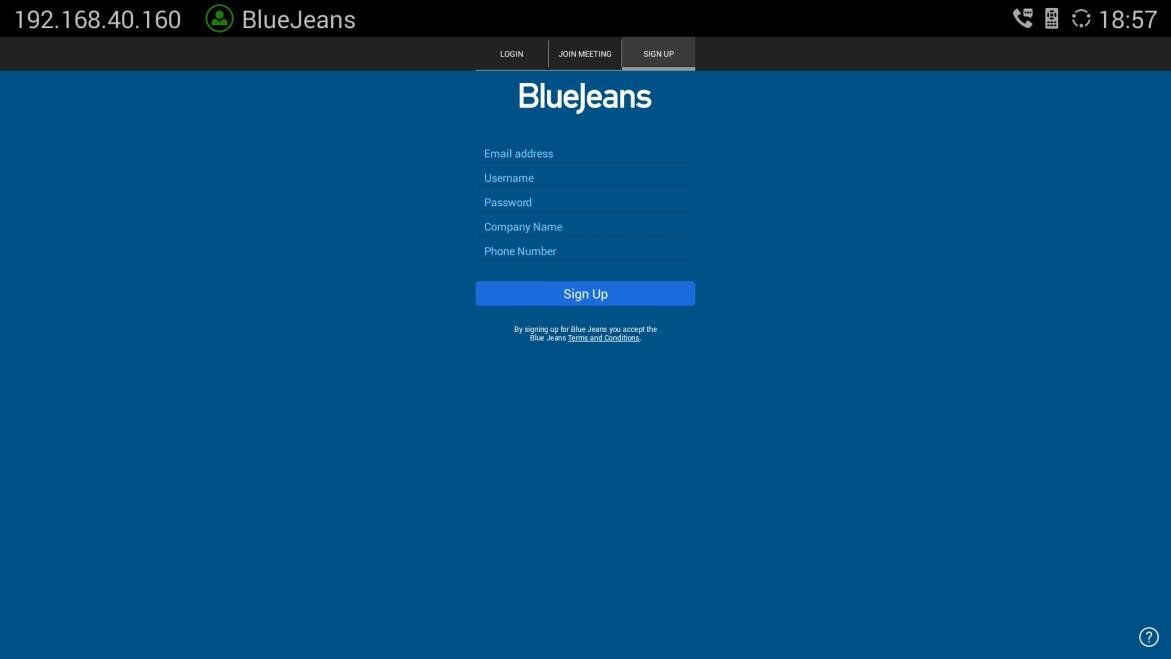
SIGN UP
If the user doesn’t have Blue Jeans account yet, select “SIGN UP” tab, enter Email address, Username, Password, Company Name and Phone Number to sign up before logging in the app.
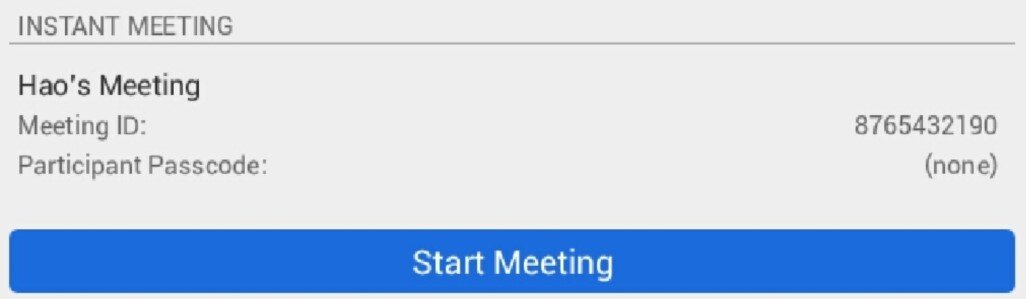
START MEETING
After logging in Blue Jeans app, the users will see “Start Meeting” section on the app interface. Normally, the user already has a meeting ID displayed there, which is pre-configured when the Blue Jeans account is created by the administrator. Click on “Start Meeting” to start it. For the participants you would like to have to join the meeting, please let them know your meeting’s meeting ID and passcode (if required) so they can dial in from their PC, Mobile devices, GVC3200s/GVC3202s, and etc.
JOIN MEETING
After logging in Blue Jeans app, the users will see “Join Meeting” section on the app interface. Before joining a meeting, the user should already have the Meeting ID and Passcode (if required) for the meeting you would like to participate. Enter the Meeting ID, Passcode as well as the participant name, and click on “Join Meeting” to attend the meeting.

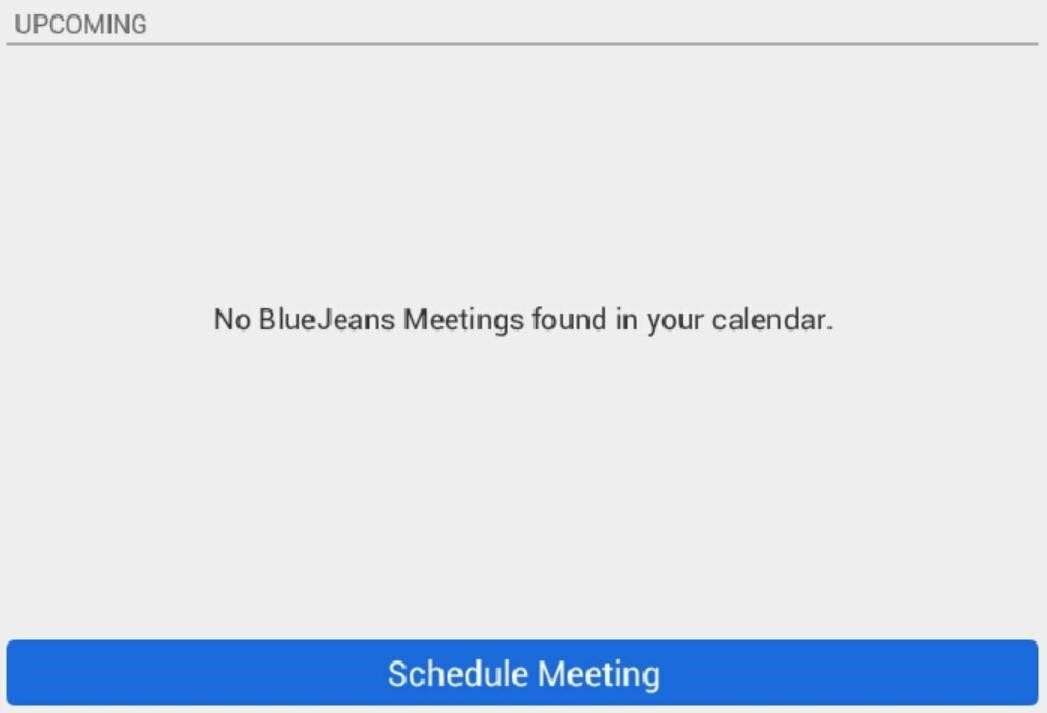
SCHEDULE MEETING
- After logging in Blue Jeans app, users will see “Schedule Meeting” section on the app interface. Click on it to start scheduling your meeting.
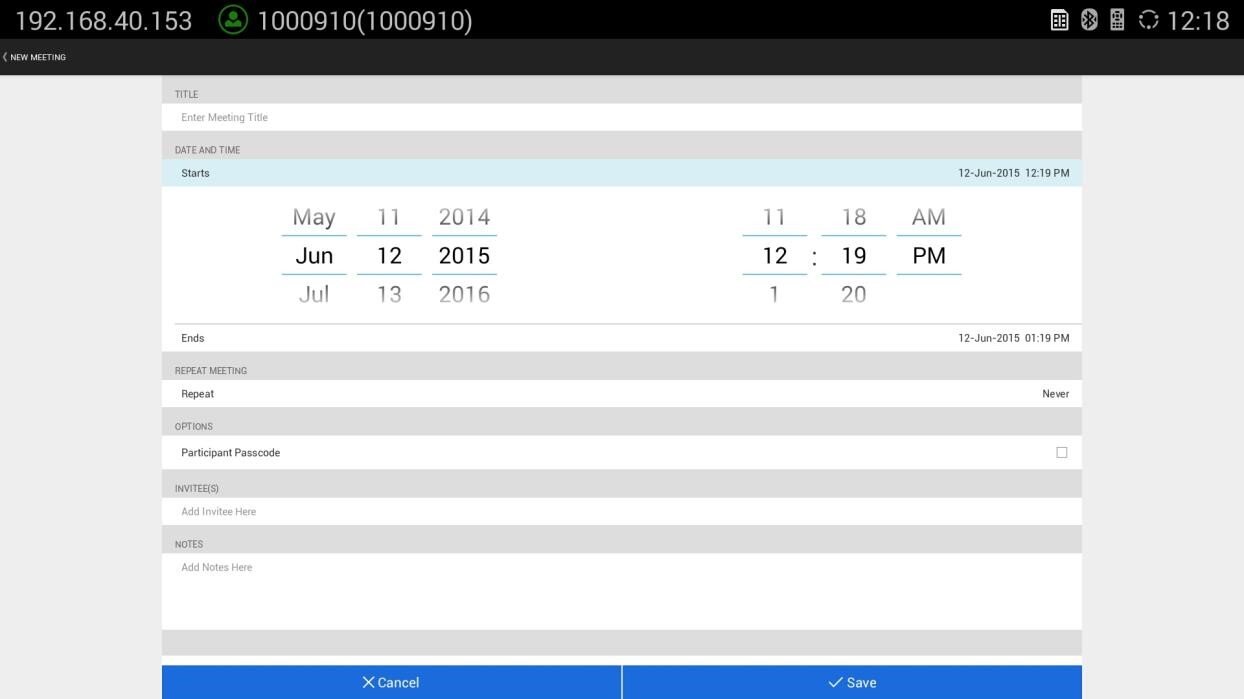
- Fill in meeting title, start time, end time, passcode, invitees, and etc in the new window as shown below.
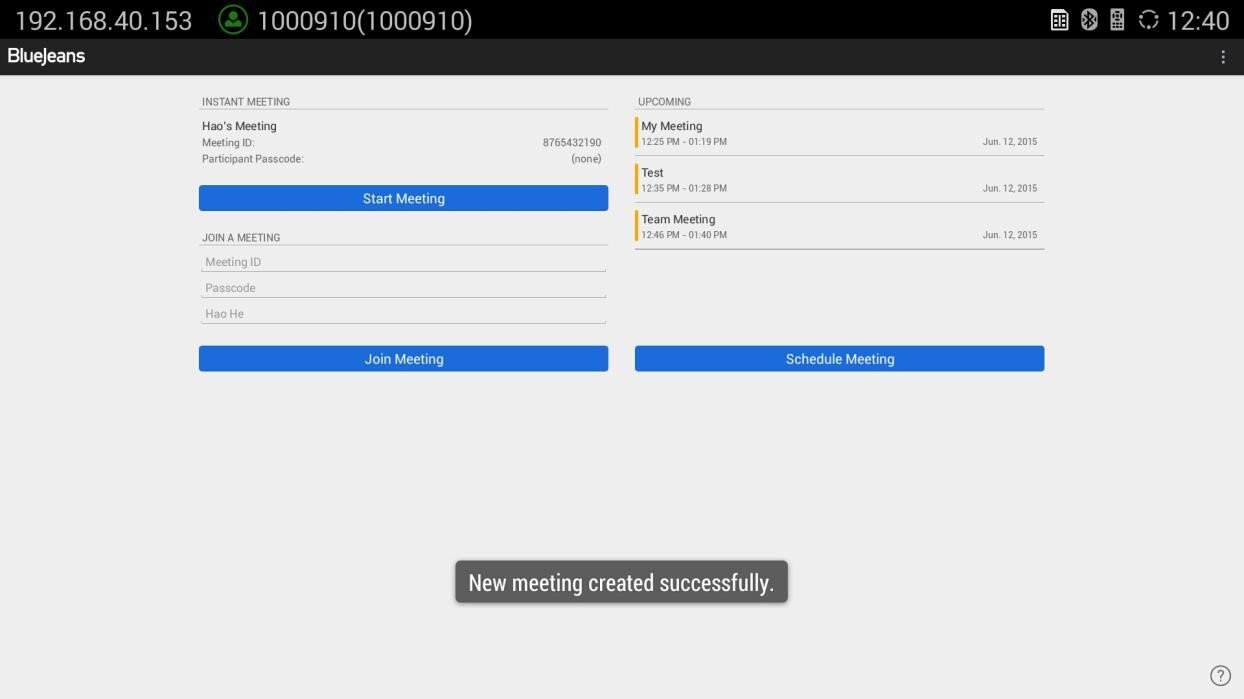
- The upcoming meeting will be displayed after it is scheduled.
DURING MEETING
VIDEO ON/OFF
During the meeting, tap the trackpad on GVC remote control to activate the bottom menu. Click on the Camera icon to turn on/turn off video.
MUTE/UNMUTE
During the meeting, tap the trackpad on GVC remote control to activate the bottom menu. Click on the MIC icon to mute/unmute local audio.
END CALL/LEAVE CALL
During the meeting, tap the trackpad on GVC remote control to activate the bottom menu. Click on the icon to bring up the Hang Up prompt.
In the Hang Up prompt:
- Select “Cancel” to stay in the call.
- Select “End” to end the call. Other participants in the meeting will no longer remain in the call.
- Select “Leave” to leave the call. Other participants in the meeting will remain in the call.
Instead of clicking on End Call icon, the user could also press the BACK button on the trackpad of the GVC remote control to activate Hang Up prompt.
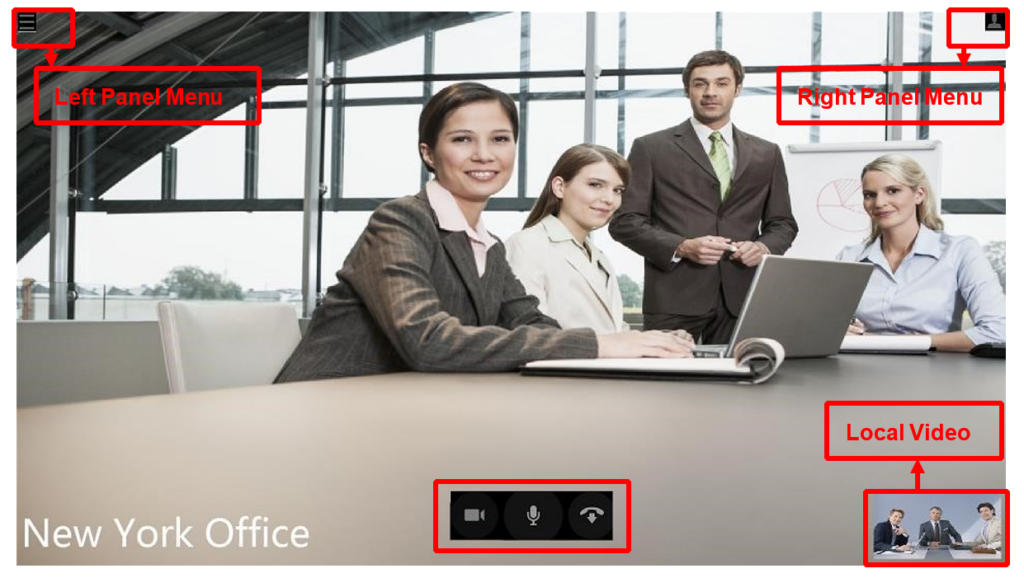
LEFT PANEL MENU DURING MEETING
- Use the trackpad on GVC remote control to select the menu icon on the upper left.
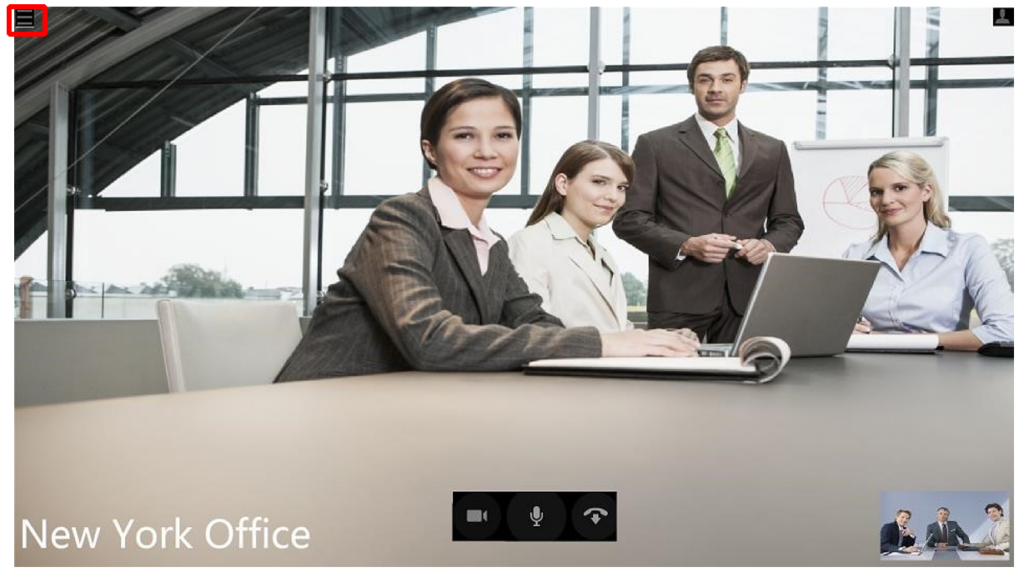
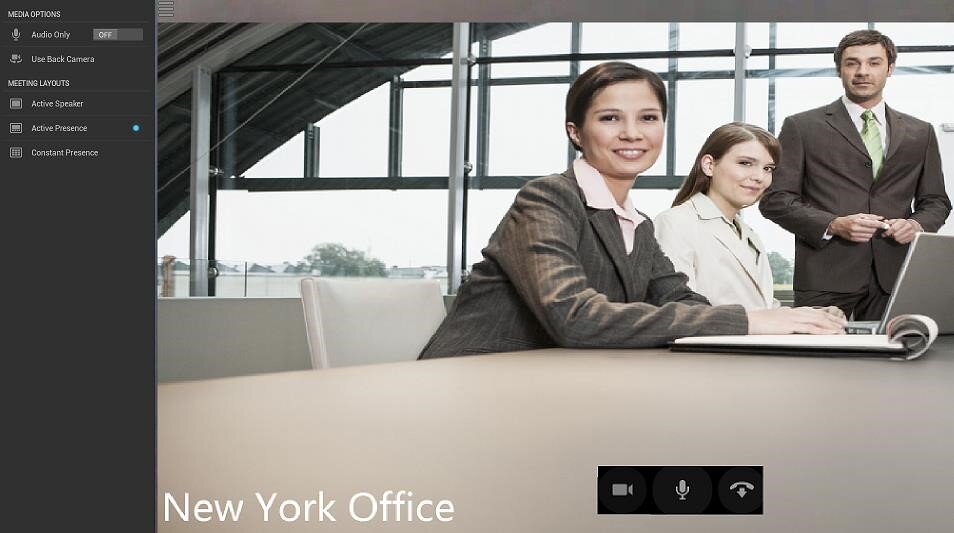
- The menu options will slide out from the left.
- Audio Only: If it is enabled, the call will become an audio call. There is no local or remote video.
- Meeting Layout: Select meeting layout as “Active Speaker” “Active Presence” or “Constant Presence”.
The selections here will take effect immediately.
- Tap on the trackpad of GVC remote control to hide the menu.
PTZ CONTROL
To adjust PTZ for GVC3200/GVC3202 camera during call using Blue Jeans app:
- Go back to the main screen of GVC3200/GVC3202 by pressing the HOME function key on GVC remote control trackpad.
- Press the CAMERA button on GVC remote control and adjust PTZ.
- Go to GVC3200/GVC3202 main screen->Applications to open Blue Jeans app again to return to the ongoing call.
VOLUME CONTROL
To adjust volume during the call, users could tap on the VOLUME UP / VOLUME DOWN buttons on the remote control trackpad. Alternatively, the external speaker connected to GVC3200/GVC3202 also has the volume buttons that will take effect when being pressed.
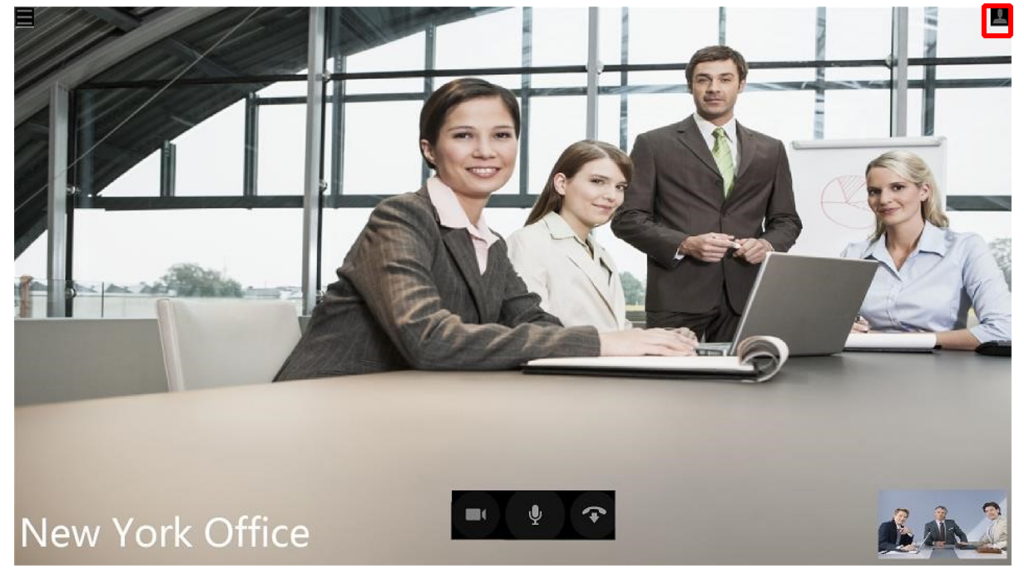
CHAT
- During a Blue Jeans call, click on the icon on the upper right of the screen.
- Select the chat icon in the middle using GVC remote control trackpad.

- Users could type in chat and see other participants’ chat here during the meeting.
INVITE OTHER USERS
- During a Blue Jeans call, click on the icon on the upper right of the screen.
- Select “Add People” icon on the right side.

- Select “Invite from Email” to enter the Email address for the user you would like to invite into the meeting. This will send an Email with meeting information for the user to join. If “Copy URL” is selected, use another app on GVC3200/GVC3202 to send the URL to the user you would like to invite into the meeting.
Note:
Function keys on GVC remote control such as MUTE, End Call, PIP, and Presentation will not work during calls using Blue Jeans app. Users need to use the trackpad to navigate, and select options/icons in Blue Jeans app in order to use the supported functions by Blue Jeans app, or use the Blue Jean app via GVC3200/GVC3202 SIP dialer instead.
SETTINGS
After logging in Blue Jean app on GVC3200/GVC3202, click on the menu icon on the upper right for related settings.
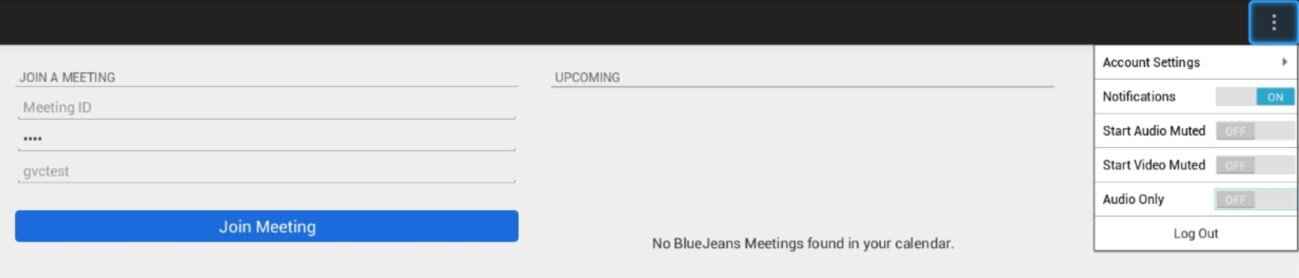
- Account Settings
This will open up a new window for users to configure account name and etc.
- Notifications
This will enable or disable the notification tone for upcoming scheduled meetings.
- Start Audio Muted
If it is enabled, all the meetings will be started with audio muted automatically.
- Start Video Muted
If it is enabled, all the meetings will be started with video off automatically. Users can see the remote video, but the remote participants cannot see the video from GVC3200/GVC3202.
- Audio Only
If it is enabled, all the meetings will be established with audio only. There is no local or remote video displayed.
BRIDGING SIP CALL AND BLUE JEANS APP CALL
Due to GVC3200/GVC3202 could bridge calls among Blue Jeans and other platforms using Blue Jeans account built-in with the GVC3200 SIP dialer. Additionally, if users prefer to use Blue Jeans app on GVC3200/GVC3202 instead of SIP dialer, users can also bridge SIP calls and Blue Jeans app calls together. When the call is bridged between Blue Jeans app and SIP call, GVC3200/GVC3202 and the remote Blue Jeans parties can hear and see all parties, but the remote SIP party can see GVC3200/GVC3202 bridge only. All parties can hear each other.
Steps to bridge SIP calls and Blue Jeans app calls:
- Use Blue Jeans app to join a meeting.
- Make a SIP call from GVC3200/GVC3202 call interface.
- Once the SIP call is established, the call will be automatically mixed with the Blue Jeans app call.
- Go back to GVC3200/GVC3202 LCD main screen->Applications and open Blue Jeans app view videos for all parties.
Note:
- Blue Jeans app installed on GVC3200/GVC3202 must stay active, and open on the screen during the meeting. Otherwise, the remote Blue Jeans participants will not be able to see the video from GVC3200/GVC3202 when Blue Jeans app is running in the background.
- The video resolution shown in the pictures in this document does not reflect the actual resolution in the call using SIP or app. The video resolution varies depending on the network conditions, settings and the device capabilities that is running the app, or establishing the SIP call.
*Android is a Registered Trademark of Google, Inc.
*Blue Jeans is a Registered Trademark of Blue Jeans Network, Inc.
*Skype and Skype for Business are Registered Trademarks of Microsoft Corporation.