
WELCOME
Thank you for purchasing Grandstream GAC2500 Audio Conference Phone for AndroidTM. This User Guide describes the basic concept and tasks necessary to use and configure your GAC2500. This document covers the topics of conference environment setups, start conference and the relevant operations like conference reservation. To learn the advanced features and configurations, please visit http://www.grandstream.com to download the latest “GAC2500 Administration Guide”.
GAC2500 is a next generation enterprise-grade 6-line Android IP conference phone with a 4.3″ capacitive touch screen that that runs the Android Operating System and therefore offers full access to the hundreds of thousands of Android apps in the Google Play Store, including business productivity apps such as Skype™, Skype for Business™, and Google Hangouts™. The phone features Gigabit ports, 7-way conference, 3x microphones, 1 Micro USB port, integrated WiFi and Bluetooth for network flexibility. The GAC2500 delivers superior HD audio quality, rich and leading-edge telephony features, automated provisioning for easy deployment, advanced security protection for privacy, and broad interoperability with most 3rd party SIP devices and leading SIP/NGN/IMS platforms. GAC2500 is a perfect choice for enterprise users looking for a high performance, feature rich conference phone with superb audio quality at competitive price.
PRODUCT OVERVIEW
Feature Highlights
The following tables contain the major features of the GAC2500:
 GAC2500 |
|
GAC2500 Features in a Glance
GAC2500 Technical Specifications
The following table resumes all the technical specifications including the protocols / standards supported, voice codecs, telephony features, languages and upgrade/provisioning settings for the GAC2500.
Protocols/Standards | SIP RFC3261, TCP/IP/UDP, RTP/RTCP, HTTP/HTTPS, ARP, ICMP, DNS (A record, SRV, NAPTR), DHCP, PPPoE, SSH, TFTP, NTP, STUN, SIMPLE, LLDP, LDAP, TR-069, 802.1x, TLSv1.1, TLSv1.2, SRTP, IPv6, OpenVPN (pending) |
Voice Codec | Support for G.711µ/a, G.722, G.726, iLBC, Opus, G.722.1 and G.722.1c (pending), in-band and out-of-band DTMF (In audio, RFC2833, SIP INFO), G.729A/B, VAD, CNG, AEC, PLC, AJB, AGC |
Platform Bridging | Bridge SIP calls with any Android™ VoIP apps such as Skype™, Skype for Business (Lync), Google Hangouts™ and more |
Telephony Features | Hold, transfer, forward (unconditional/no-answer/busy/conditional), call park/pickup, 7-way audio conference, auto answer, downloadable XML phone book (up to 2000 entries), LDAP, call waiting, call history (up to 2000 entries), flexible dial plan, personalized music ringtones, server redundancy & fail-over. |
Sample Applications | Skype™, Google Hangouts™, Skype for Business (Lync), Web browser, Facebook™, Twitter™, YouTube, Google calendar, mobile phone data import/export via Bluetooth, etc. API/SDK available for advanced custom application development |
Application Deployment | Allows Android 4.4 compliant applications to be deployed in the device with provisioning control |
QoS | Layer 2 QoS (802.1Q, 802.1p) and Layer 3 (ToS, DiffServ, MPLS) QoS |
Security | User and administrator level passwords, MD5 and MD5-sess based authentication, 256-bit AES encrypted configuration file, TLSv1.1, TLSv1.2, 128/256-bit SRTP/TLS, HTTPS, 802.1x media access control |
Multi-Language | English, German, Italian, French, Spanish, Portuguese, Russian, Turkish, Polish, Chinese, Korean, Japanese, and more |
Upgrade/ Provisioning | Firmware upgrade via TFTP / HTTP / HTTPS or local HTTP upload, mass provisioning using TR-069 or AES encrypted XML configuration file
|
Network Interface | 1x auto-sensing Gigabit Ethernet port, integrated 2.4GHZ auto-band Wi-Fi (802.11a/b/g/n) and Bluetooth. |
HD Audio | 3x microphones (12 ft. pickup range), 1x speaker (220-18,000 Hz, 15 ft. coverage range up to 86dB) |
Auxiliary Ports | 3.5mm audio interface, Micro-USB interface, RJ48 interface, reset pin |
Graphic Display | 4.3″ (800*480) capacitive touch screen LCD |
Power & Green Energy Efficiency | Universal power adapter included:
Input: 100-240VAC 50-60Hz; Output: 12VDC, 2A (24W) |
Temperature and Humidity | Operating: 32 – 104oF / 0 – 40oC
Storage: 14 – 140oF / -10 – 60oC Humidity: 10% to 90% Non-condensing |
Compliance | FCC: Part 15 (CFR 47) Class B; UL 60950 (power adapter) CE: EN55022 Class B,EN55024,EN61000-3-2, RCM:AS/ACIF S004;AS/NZS CISPR22/24;AS/NZS 60950;AS/NZS 4268 |
GAC2500 Technical Specifications
GETTING STARTED
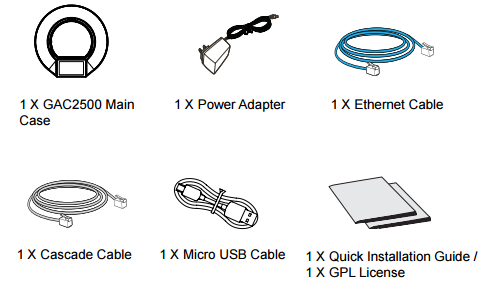
This chapter provides basic installation instructions including the list of the packaging contents and also information for obtaining the best performance with the GAC2500.
Equipment Packaging
GAC2500 |
|
Equipment Packaging
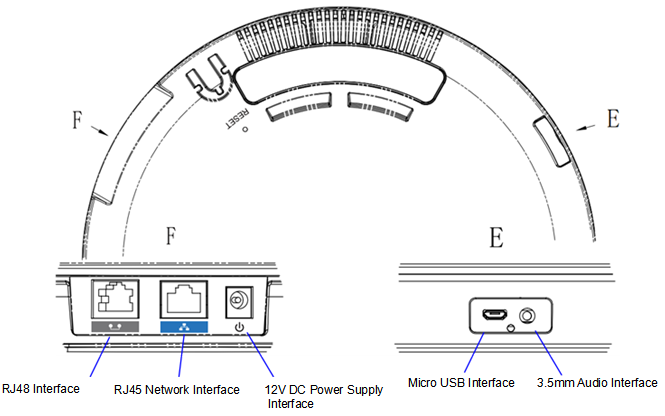
Product Appearance
Name | Explanation |
RJ48 Interface | Daisy chain (up to 2 units via RJ48 CAT5) mode in large conference room for better audio quality. |
RJ45 Network Interface | Connect to LAN port. |
12V DC Power Supply Interface | Connect to Power Adaptor. |
Micro USB Interface | USB OTG devices can be connected to GAC2500 via the USB cable. For example, connect a USB flash drive to read data, or PC USB Interface or GVC32XX SPKR Interface can be connected to the GAC2500 USB Interface via USB cable for audio pickup and play |
3.5mm Audio Interface | Connect to 3.5mm devices like mobile phone or PC for mobile audio pickup and play |
Reset Pin | When the GAC2500 is powered up, use a small pin to press the button one time to reboot. When powering up GAC2500, long press the button for 4 to 9 seconds to detect whether firmware file exists in USB OTG device to update system. When powering up GAC2500, long press the button for more than 10 seconds to quick restore factory settings.
|
GAC2500 Interfaces Explanations
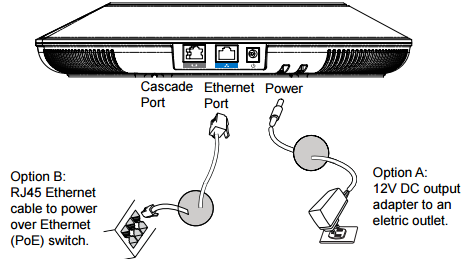
Powering the GAC2500
The GAC2500 can be powered either using POE or PSU, please refer to the following picture to have more visibility how to connect your audio conferencing system.
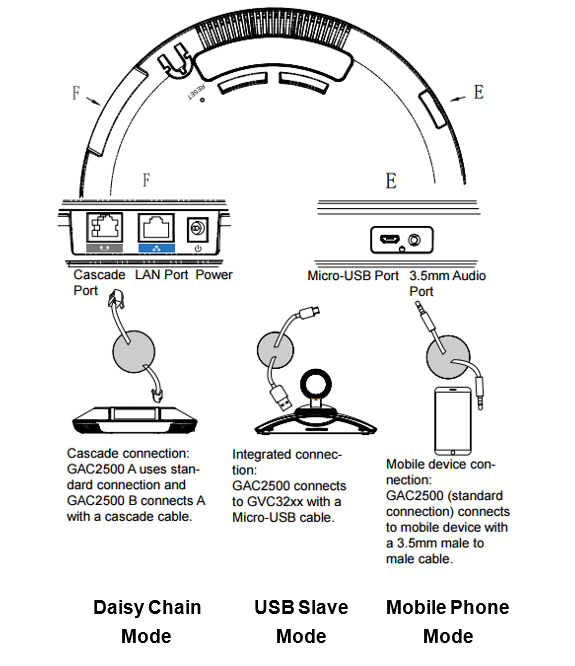
Connection Configuration
GAC2500 provides the following connection configurations:
IP Mode
The GAC2500 is used as an independent phone in IP mode. Please follow the steps below to connect.
- Connect the LAN port of the device to the external network port (the port in the office or at home) via Ethernet cable;
- Plug in the power adapter into the power supply interface then power up the GAC2500.
USB Slave Mode
GAC2500 can be used as auxiliary device for GVC3200 or PC for audio acquisition and play. The conference feature will be disabled in USB slave mode. Follow the steps below to connect route.
- Connect one end of the USB cable to the Micro USB port of the device and the other end to the USB port of GVC3200/PC;
- Plug in the power adapter into the power supply interface then power up the GAC2500.
The GAC2500 screen is as shown below in USB slave mode.
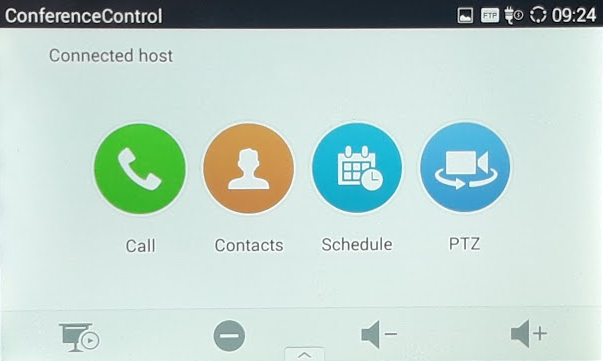
- Call
Tape on the Call icon to see the GVC3200 call screen, users can make Audio/Video calls, share contents, Hold/UnHold, Record, Enable/Disable DND, and add more users to the conference.
- Contacts
Tape on contact and a list of the GVC3200 will show up, users can search, make calls and sync with GVC3200 contacts if a new entry is added from the GVC3200.
- Schedule
Tape on Schedule to view all the scheduled meeting from GVC3200.
- PTZ
Tape on PTZ to access the GVC3200 PTZ settings, users could control PTZ movement in camera mode, set presets, zoom In/Out and adjust the focus.
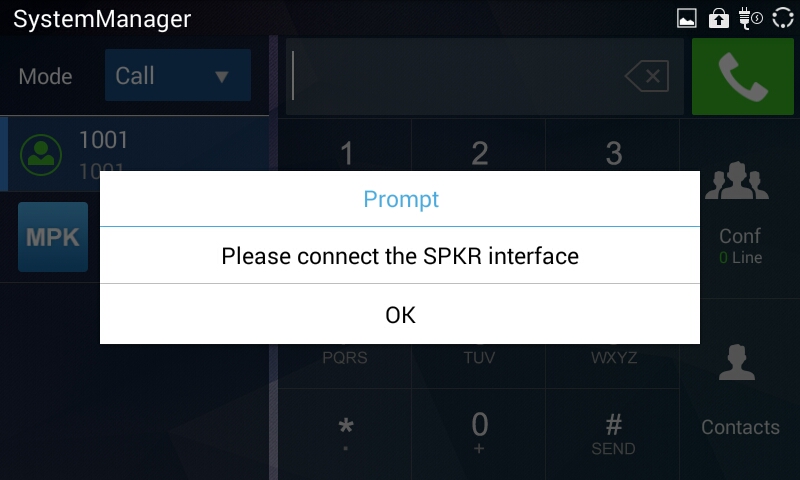
If the GAC2500 is not connected to the SPKR USB interface it will prompt the following message in order to switch the port on the GVC3200.
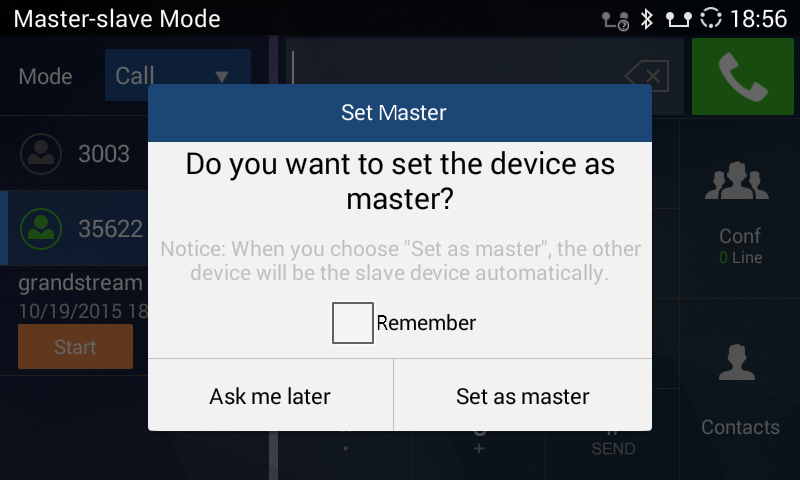
Cascade Mode
Connect two GAC2500 (s) via RJ48 CAT5 for larger space. Please follow the steps below to connect.
- Connect the LAN port of the device to the external network port (the port in the office or at home) via Ethernet cable;
- Connect the RJ48 ports of two devices with RJ48 CAT5;
- Plug in two power adapters into the power supply interfaces then power up two devices;
- The screen is as shown below. Tap on “Yes” on the first device and set it to be the master while the other the slave.
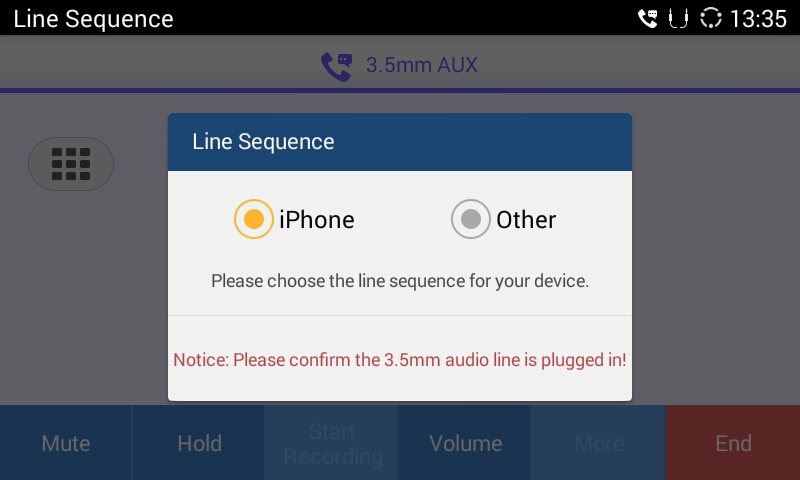
Mobile Phone Mode
GAC2500 could be connected to mobile phone for expanded use. Please follow the steps to connect.
- Connect the LAN port of the device to the external network port (the port in the office or at home) via Ethernet cable;
- Plug in the power adapter into the power supply interface then power up the GAC2500;
- Connect one end of the via 3.5mm audio aux cable to 3.5mm headset interface on the mobile phone first, then connect the other end to 3.5mm audio interface on GAC2500, once connected, it will access 3.5mm AUX call screen;
- When the mobile phone is answering an incoming call or dialing out, GAC2500 will collect and play the sound.
GETTING TO KNOW GAC2500
Desktop
When the GAC2500 is on idle screen, hold the screen at the bottom of the screen, drag upward to bring up 5 soft keys; hold the screen at the top of the status bar, drag and drop down to open the status bar,


- Home Screen. GAC2500 Home screen is a dial screen by default. You can dial up or start a conference on this screen. To change the home screen, please long press the blank area and select “Edit desktop”. Press the
 button in the preview desktop to set it as home screen.
 - Widget. GAC2500 supports tools and Apps like Clock, MPK, and etc.
- Status Bar. The GAC2500 status bar is located on the top of the screen to indicate the current status of the device. Please refer to chapter Status Icons for more details.
- Soft Keys. 5 softkeys Including Volume+, Volume-, Back, Home, and Process Manager. Drag and slide upward at the bottom of the screen o bring out soft keys, the keys will be hidden automatically if no operation timeout.
 button in the preview desktop to set it as home screen.
 Status Icons
Touch the status bar of GAC2500 and slowly drag it down to display the full status list. Users could view status icons that indicate the current status of the device. The following table lists the main status icons used on GAC2500.
Icon | Descriptions | Icon | Descriptions | Icon | Descriptions |
Ethernet is connected | Trying to connect to Ethernet | Ethernet is disconnected | |||
Missed call | One line is in active | Unread voicemail | |||
Calls from blacklist | Call forward is set up | Auto answer is set up | |||
DND mode is enabled | Wi-Fi is connected | Wi-Fi is enabled but not connected | |||
Bluetooth is connected | Sending files via Bluetooth | Bluetooth has been plugged in | |||
Using Bluetooth headset for calls | Volume is turned to silent | Mute is enabled. | |||
Downloading | Download failed | Updating Application | |||
3.5mm headset is inserted | Switch 3.5mm headset line sequence | Powering the device with PoE | |||
PPPoE is connected | PPPoE connection failed | Missed conference | |||
Warnings | New message | Full messages storage | |||
VPN is connected | VPN connection failed | More notifications | |||
The USB mouse is connected | The USB keyboard is connected | VPN is connected | |||
RJ48 CAT5 is connected | Set GAC2500 as master device | Set GAC2500 as slave device | |||
Hotspot is enabled | USB device is inserted | Full USB device storage |
GAC2500 Status Icons Descriptions
Using the Onscreen Keyboard
Keyboard
The default keyboard on the GAC2500 is English keyboard. The GAC2500 English keyboard supports multiple languages input methods. Users could tap on
![]() to switch among different languages configured under LCD Menu Settings 🡪 Language & Keyboard 🡪 Keyboard & Input methods. See figure below.
to switch among different languages configured under LCD Menu Settings 🡪 Language & Keyboard 🡪 Keyboard & Input methods. See figure below.
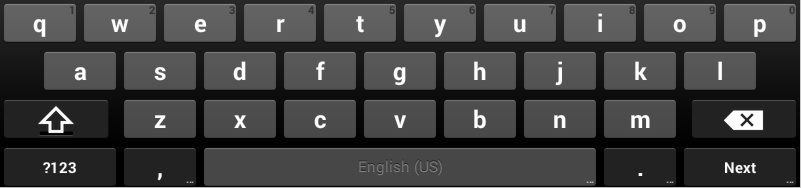
Tap on![]() to switch Caps Lock.
to switch Caps Lock.
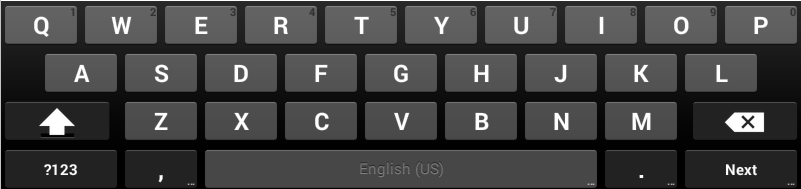
Numbers and Symbols
To input numbers and symbols, tap on the default keyboard![]() to switch to numbers/symbols. Tap on
to switch to numbers/symbols. Tap on![]() for more numbers/symbols.
for more numbers/symbols.
Using the LED Indicator
The GAC2500 LED indicator is located on the top part of the device. It can be used to notify the users with current status of the device. The priority of the indicator from high to low is shown below.
Color | LED Indicator Status | Descriptions |
Blue | Fast Flashing | Incoming call (including calls when conferencing and when phone is busy). |
Solid | Calling, Talking, Conferencing, Screensaver status. | |
Slow Flashing | Call on hold. | |
Orange | Slow Flashing | Unhandled events. Including missed call (s), new voicemail (s), new SIP message (s). |
Solid | High memory usage, full message box, full contacts storage, network disconnection. | |
Rapid Flashing | Upgrading. | |
None | OFF | Normal. |
GAC2500 LED Indicator Descriptions
Note: The colors and statuses of LED indicators are by default. You can go to Web page🡪Maintenance🡪Device Manager to custom indicators.
ASSISTIVE TOUCH
Use the Touchscreen
To fully manipulate the GAC2500 capacitive touch screen, use your fingers to operate the following on the GAC2500 icons, buttons, menu items, onscreen keyboard and etc.
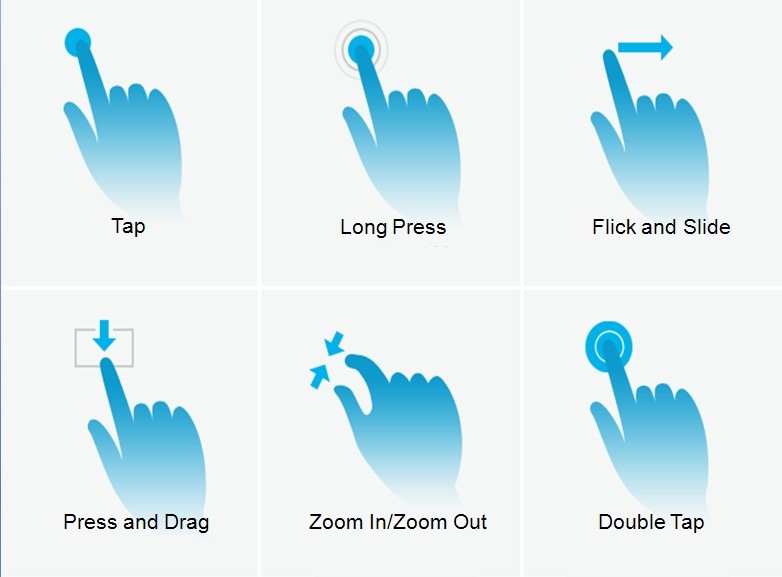
- Tap
Slightly touch the screen with fingertip to initiate menu, options or applications. For example, to select items on the screen (e.g., setting options, apps and etc.); to press onscreen buttons (e.g., “End” or “Options” soft key during the call); to type letters and symbols using the onscreen keyboard.
- Long Press
Touch the screen with fingertip and press for about 2 seconds without lifting your finger from the screen till an action occurs. For example, long press on a picture to bring up selection option.
- Flick and Slide
Touch the screen with fingertip and slide over the screen. For example, user could slide up to scroll up the page, slide down to open dropdown menu, slide left or slide right to delete an item from the list. If your finger stays on the screen for too long, the item may be selected and sliding won’t occur.
- Press and Drag
Touch and press the item, then move it by dragging it up, down, left or right, without lifting your finger from the screen.
- Zoom in/Zoom Out
Place two fingers on the screen, then pinch them together (zoom out) or spread them apart (zoom in).
- Double Tap
Quickly touch the screen twice with fingertip to switch between default display and zoomed-in display. This is usually used when viewing photos or web pages.
Shortcut Keys
GAC2500 supports shortcuts for some special operation like Screenshots, Factory Reset, Upgrade and Security.
- Screenshot. Long press the Process Manager icon
 on GAC2500 screen, the screenshot file will be saved automatically in the screenshot folder under SD card. Go to File Manager🡪Storage🡪Pictures🡪Screenshots to view files.
- Factory Reset. When powering up GAC2500, long press the reset button on the back of the device for more than 10 seconds to restore to factory settings.
- Upgrade. When powering up GAC2500, long press the button for 4 to 9 seconds to update system.
 on GAC2500 screen, the screenshot file will be saved automatically in the screenshot folder under SD card. Go to File Manager🡪Storage🡪Pictures🡪Screenshots to view files.
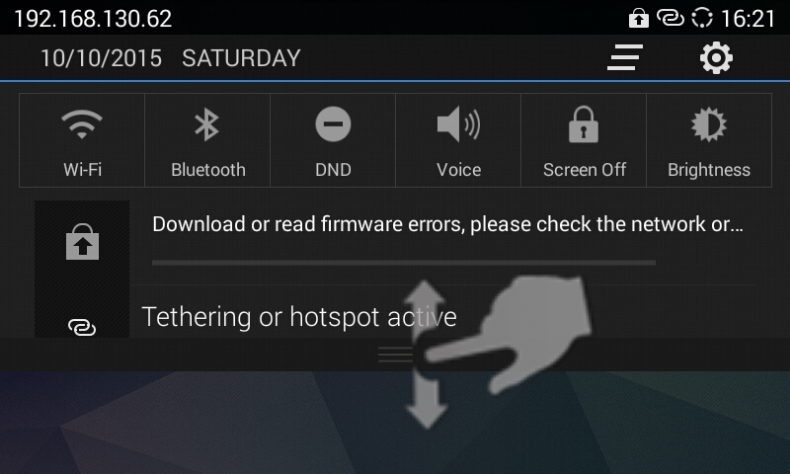
Managing Status Bar
The GAC2500 status bar is located on the top of the screen. Touch the bar and slowly drag it down to display the full status list. Once the status bar is opened, users could view Notifications.
The Notifications in the Status Bar is as shown in figure below.
Click on button
![]() on the upper right corner to clear all notification messages.
on the upper right corner to clear all notification messages.
- Slide a notification message to left or right to delete it.
- Click a notification message to view the details.
- Tap on the corresponding icon on the top of the screen to quick turn on/off the applications.
- Long press the corresponding icon on the top of the screen to quick access the applications.
- Drag the seek bar behind the icon
 to adjust LCD brightness.
Desktop Menu
When the GAC2500 is on idle screen, long press the blank area, then you can tap on “Edit desktop” or “Set wallpaper”. See figure below.
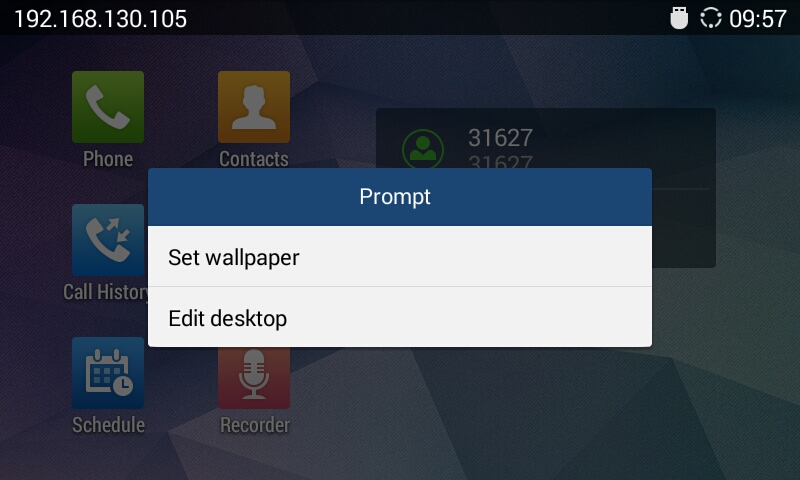
- Edit Wallpaper: Edit the idle screen wallpaper.
- Edit Desktop: Add, delete, edit desktop or add widgets on the desktop.
Edit Wallpaper
You can set wallpapers, live wallpapers or choose photo from gallery. See figure below.
- Long press the blank area on home screen then tap on “Set Wallpaper”;
- Slide wallpapers to left or right to view a list of sample wallpapers embedded in the GAC2500, tap on wallpaper to preview, tap on “Set Wallpaper” to confirm the selection. You can also select photo from gallery or file manager, or set live wallpapers.
Note: The user has the ability to block image gallery options using GUI Customization Tool 3.9.0. The GUI Customization Tool can be found under the link: http://www.grandstream.com/support/tools .
Edit Desktop
The desktop screen is as shown below.
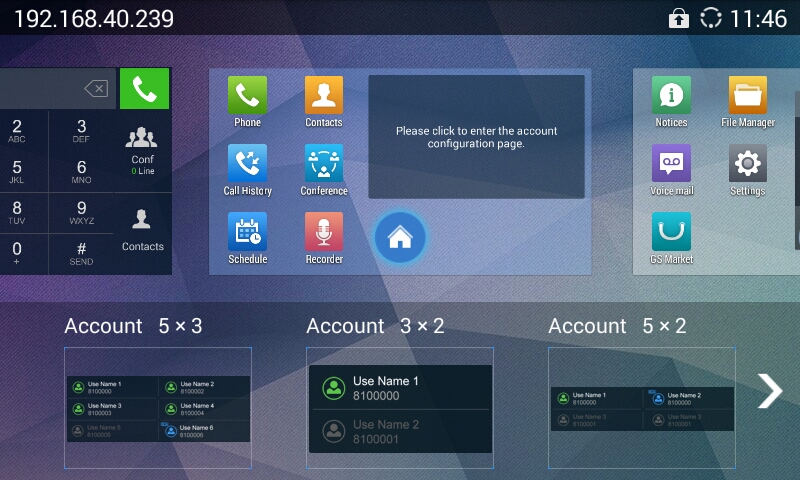
- Add Desktop: Press finger slightly in free space of the screen and fast slide to the last screen and click
 on the middle screen to add a new desktop. Users could add up to 15 desktops.
-
Delete Desktop: Click
 on the upper right corner of the blank desktop to delete it. The desktop with widgets and shortcuts on it is undeletable.
-
Tap on the
icon of a preview desktop to set it as home screen.
 icon of a preview desktop to set it as home screen.
Adding an Item to Desktop
Users could add commonly used items (Weather Forecast, RSS News, etc.) to the desktop. Follow the steps below:
- When the GAC2500 is running on idle screen, long press the blank area, then tap on “Edit Desktop”;
- Slide left or right to view a list of options;
- Press and drag the shortcut or widget you would like to add and drag it to the desktop you want to put on.
Managing Desktop Apps and Items
All the GAC2500 apps/items can be accessed /removed. Take Weather Forecast as an example in the following chapter.
Tap on Weather Forecast icon to access screen as shown on the following figure. Users could edit Weather Forecast after accessing it.
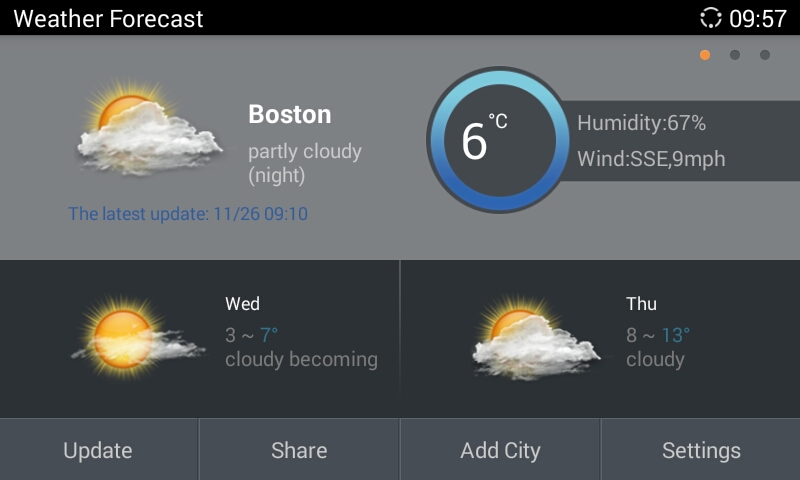
Touch and hold the Weather Forecast icon, when the icon begins to float, drag it to any desktop with free space.

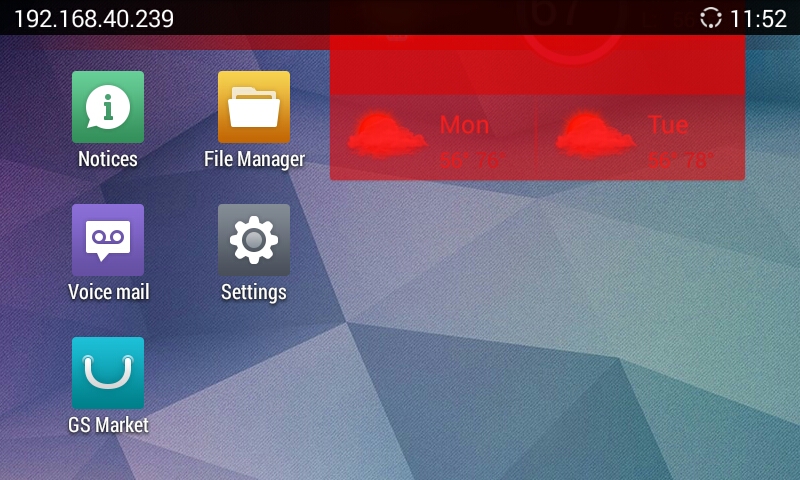
Touch and hold the Weather Forecast icon until the Recycle Bin ![]() icon displayed on the top as shown in figure 18, drag the widget to the Recycle Bin, when the item gets close to the Recycle Bin, it will turn red. Now release your finger to delete.
icon displayed on the top as shown in figure 18, drag the widget to the Recycle Bin, when the item gets close to the Recycle Bin, it will turn red. Now release your finger to delete.
Managing Applications
Tap on the Process Manager icon
 on screen to view the running applications on the GAC2500 as shown below.
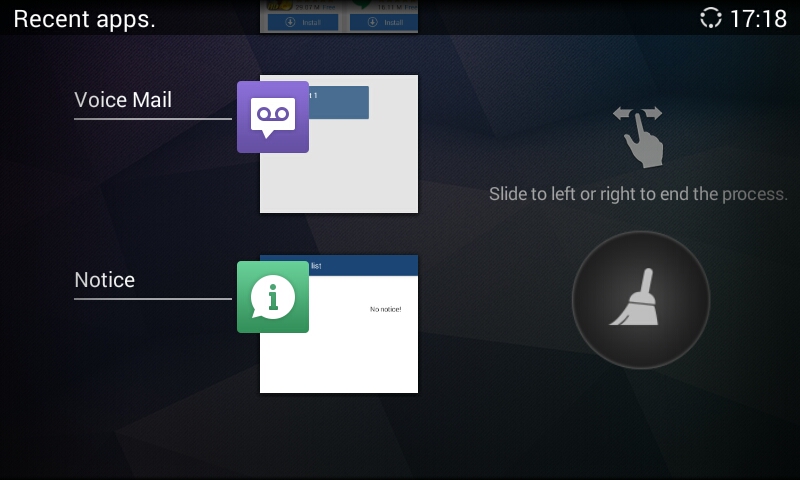
Slide up/down to view the applications, tap on one and slide left/right to turn it off, or tap on it to access the corresponding interface. Tap on ![]() to turn off all running applications.
to turn off all running applications.
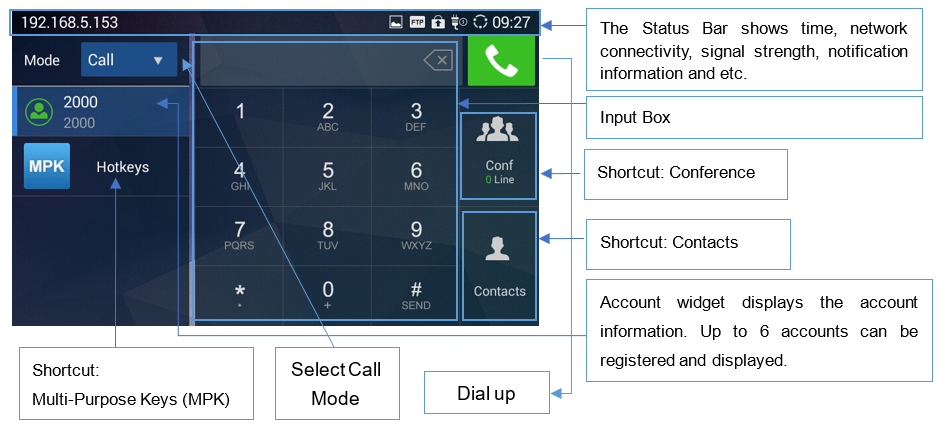
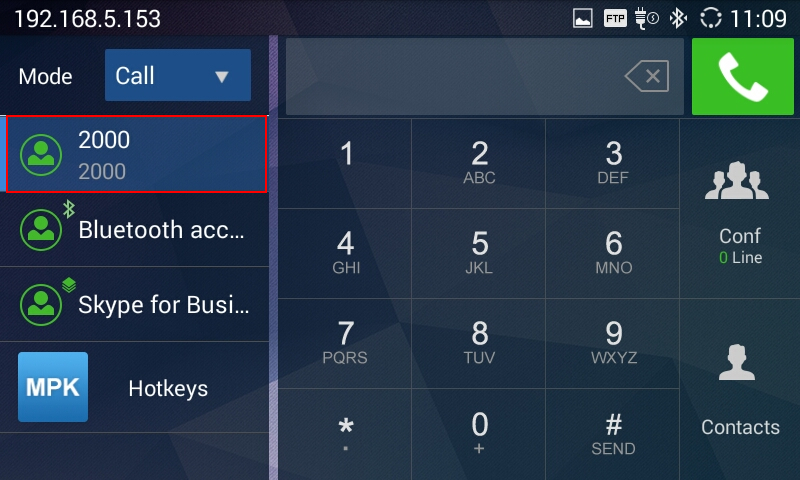
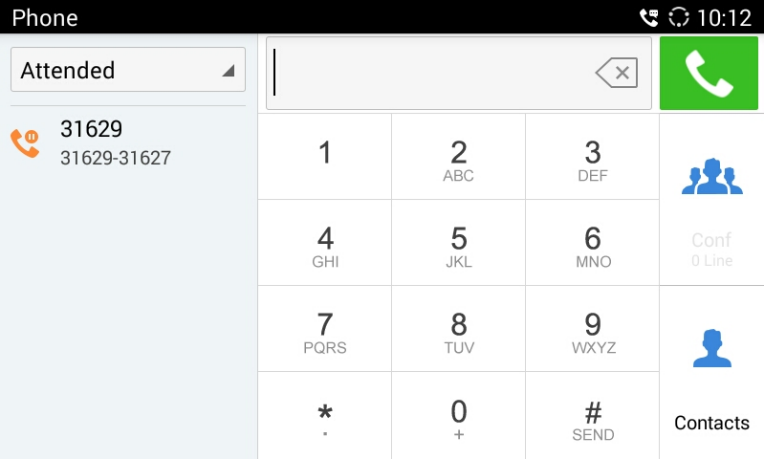
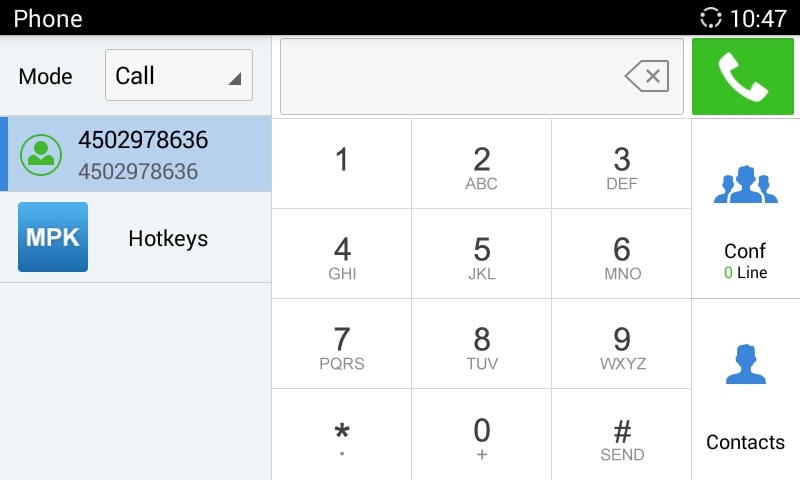
- Mode. Set the call mode.
- Account. Display all registered accounts. Tap to select account.
- Input box. Tap on digits below to input phone number, or tap on the input box to bring out the soft keyboard. You will see all the matching numbers on the left when you are inputting digits, tap on the number to add it to input box directly, you can add up to 6 numbers.
- Dial-up. Tap to dial out.
- Conference. Display the conference line. Tap to access conference interface.
- Contacts. Tap to access Contacts interface to add more contacts to the input box.
- Hotkeys. This is a quick access to MPK app.
You can slide left or right to the Conference app on other desktops, or dial out multiple numbers to start a conference on home screen.
CONNECTING TO NETWORK AND DEVICES
The GAC2500 supports a variety of network connections (Ethernet, Wi-Fi) and device connections, you can configure on GAC2500 or log in the GAC2500 web UI to configure. For more information about using web UI, please refer to the GAC2500 Administration Guide in www.grandstream.com.
Network
Network connection has a variety of ways, one is wired connection via the cables, and the other way is to connect via Wi-Fi.
Ethernet
If the user would like to use Ethernet connection for network access, please connect the Ethernet cable to the LAN port of the GAC2500. Ethernet connection is turned on as DHCP by default.
To configure Ethernet settings on GAC2500:
- Plug the Ethernet cable into the LAN port on the back of the GAC2500.
- Go to LCD menu🡪Settings🡪Advanced settings 🡪 Wireless & network 🡪 Ethernet 🡪 IPv4 Settings.
- Tap on “Address Type” to select DHCP, Static IP or PPPoE as the address type.
- For DHCP, save the setting and the GAC2500 should be able to get IP address from the DHCP server in the network.
- For static IP, enter IP Address, Subnet Mask, Default Gateway, DNS Server and Alternative DNS server for the GAC2500 to correctly connect to the network.
- For PPPoE, enter PPPoE account ID and password so the GAC2500 can get IP address from the PPPoE server.
WI-FI
Turning Wi-Fi On or Off
Wi-Fi is supported and built-in on the GAC2500. On the LCD display, go to Settings🡪Advanced settings🡪Wireless & network 🡪 Wi-Fi to turn on and configure Wi-Fi.
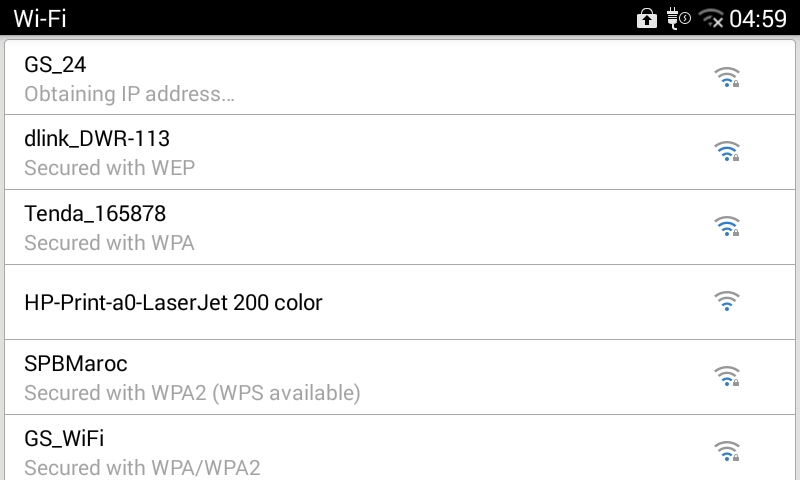
Search and Add Wi-Fi
Once Wi-Fi is turned on, GAC2500 will automatically start the scanning within the range. A list of Wi-Fi networks will be displayed as scanning result. Tap on the SSID and enter the correct password information to connect to the selected Wi-Fi network.
Follow the steps below for static IP usage in Wi-Fi environment:
- Tap on one Wi-Fi network in the scanned Wi-Fi list to bring up the dialog that shows signal strength, security, password and option “Show advanced options”.
- Select “Show advanced options”. The dialog will show additional option “IP settings”.
- In “IP settings”, select Static IP, enter IP Address, Subnet Mask, and Default Gateway for the GAC2500 to correctly connect to the network.
Bluetooth
Users could use the Bluetooth to send or receive files to cellphone, or use Bluetooth speaker and etc.
Turning Bluetooth On or Off
There are two ways to enable Bluetooth:
- On the LCD display device, go to Settings🡪Network🡪Bluetooth.
- Click
 to enable the Bluetooth in the drop-down status bar.
Pairing GAC2500 with a Bluetooth Device
Before connecting GAC2500 with other Bluetooth device, users must pair them first. They will stay paired afterwards unless they are manually unpaired. To pair Bluetooth device:
- On the LCD display device, go to Settings🡪Bluetooth. Switch the “Bluetooth” option.
-
Select “Bluetooth settings”, drag up from LCD bottom and press
 button on the remote control and select “Search for devices”.
- The GAC2500 scans and displays the IDs of all available Bluetooth devices in range. Once the Bluetooth device shows up in the result, tap on it to start pairing.
- Confirm the passkey in the prompted message (if any). Or if passcode is required, please refer to the device’s documentation or other procedures to obtain the passcode.
 button on the remote control and select “Search for devices”.
Connecting to a Bluetooth Device
After successfully paired, the device will be connected to the GAC2500 immediately. Users will see this device listed under “Paired Devices”. Tap on![]() next to the connected device. Users will see options “Rename”, “Unpair” and etc.
next to the connected device. Users will see options “Rename”, “Unpair” and etc.

If the connection is lost between the Bluetooth device and GAC2500, go to LCD menu 🡪 Settings 🡪 Bluetooth 🡪 Bluetooth setting and click on the device name under “Paired devices” again to reconnect.
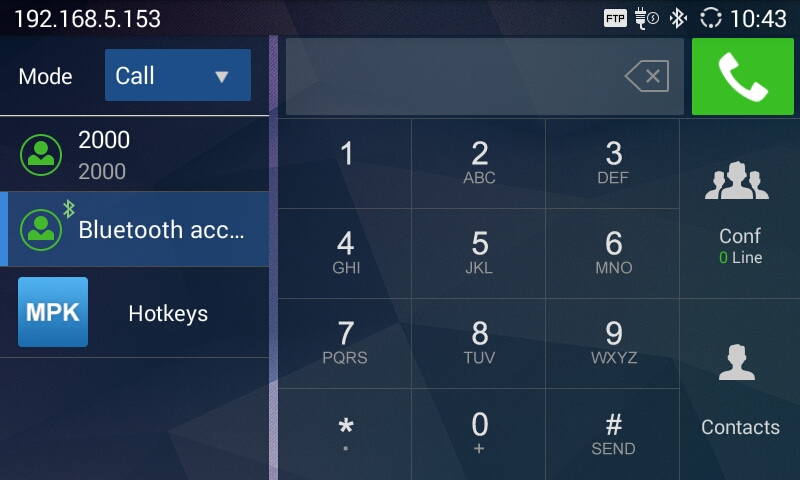
When enabled headset mode, the connected Bluetooth device could use GAC2500 as a headset audio device. You can see the Bluetooth device is displayed as an account on the left home screen. You can make dial-ups with this account directly, or as a party to join conference.
Sending Files via Bluetooth
Users could transfer files, share contacts information from other Bluetooth portable devices to GAC2500 after pairing and connection. A prompt for file transferring will be displayed on GAC2500 LCD display device when the GAC2500 receives the file transferring request. Accept the request to receive file and the file will be stored under SD Card/Bluetooth directory.
VPN Settings
Users can add VPN using different protocols. Follow the steps below to set up VPN.
- On the LCD display device, go to Settings 🡪Advanced settings🡪Wireless & network🡪VPN.
- Tap on “Add VPN file” to access configuration page as shown below;
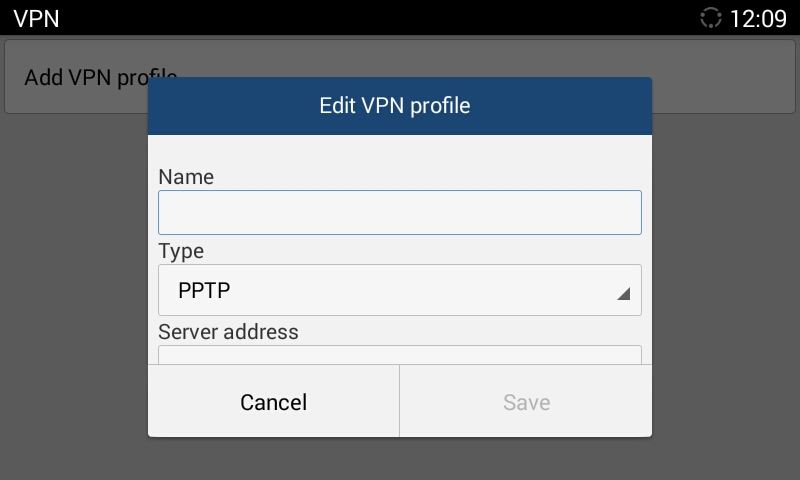
- Fill in parameters and save, go back to VPN page, you will find the new VPN file you just added;
- Tap on the VPN file to open the validation page, fill in correct username and password to connect to VPN.
If the GAC2500 is connected to VPN successfully, icon![]() will be shown in the top status bar; if the connection is failed, a prompt box will pop up to remind users whether to connect again. If icon
will be shown in the top status bar; if the connection is failed, a prompt box will pop up to remind users whether to connect again. If icon![]() displays in the top status bar, please check whether your VPN configuration is correct.
displays in the top status bar, please check whether your VPN configuration is correct.
Parameters | Descriptions |
Layer 2 QoS 802.1q/VLAN Tag | Assigns the VLAN Tag of the Layer 2 QoS packets for LAN port. Default value is 0. |
Layer 2 QoS 802.1p Priority | Assigns the priority value of the Layer 2 QoS packets. Default value is 0. |
GAC2500 VLAN Configuration Parameters
LLDP Settings
Access GAC2500 home screen, go to Settings🡪Advanced settings🡪Wireless & network🡪Additional network settings to configure LLDP settings on the GAC2500.
Parameters | Descriptions |
LLDP | Enable or disable LLDP. The default setting is disabled. |
Layer 3 QoS for SIP | This field defines the layer 3 QoS parameter for SIP packets. It is the value used for IP Precedence, Diff-Serv or MPLS. The Default value is 48. |
Layer 3 QoS for Audio | This field defines the layer 3 QoS parameter for audio packets. It is the value used for IP Precedence, Diff-Serv or MPLS. The Default value is 48. |
LLDP TX Interval(s) | Configures the interval the phone sends LLDP-MED packet, the default setting is 30s. |
GAC2500 LLDP Configuration Parameters
802.1x Mode
Access GAC2500 home screen, go to Settings🡪Advanced settings🡪Wireless & network🡪Additional network settings🡪802.1X Mode. By default, 802.1X is disabled. Select 802.1X mode to “EAP-MD5”, “EAP-TLS5” or “EAP-PEAP” to turn on 802.1X. Once 802.1X mode is enabled, the user will be required to enter the identity and Password to be authenticated in the network.
Parameters | Descriptions |
802.1x Mode | Allows the user to enable/disable 802.1X and configure 802.1X mode. The default setting is disabled. |
Identity | Enter the Identity information for the 802.1X mode. |
MD5 Password | Enter the MD5 Password for the 802.1X mode. |
CA Certificate | Upload the CA certificate for the 802.1X mode. |
Client Certificate | Upload the CA certificate for the 802.1X mode. |
Private Key | Upload the private key for the 802.1X mode. |
GAC2500 802.1X Mode Parameters
MAKING PHONE CALLS
Account
GAC2500 supports up to 6 independent SIP account and 1 BlueJeans™ account. Users need to register their own accounts to the SIP server to make calls via the accounts.
The following figure shows the account is successfully registered (account icon is highlighted in green).
The GAC2500 supports also using dial pad to dial out call in Skype for business app.
Making a Call
Direct Dialing
GAC2500 home screen is the dial screen or you can tap on
![]() on desktop to access dial screen.
on desktop to access dial screen.
- Enter the dial screen, select account and call mode;
- Enter the necessary digits on the keypad;
-
Tap on
 to dial out.
Redial is to dial the last dialed-out number. It is only available when the call log exists.
- Enter the dial screen;
-
Press the button
 or tap on “#” to dial the last dialed-out number automatically.
Dialing a Number via Contact
Follow the steps below to dial from dial pad Contacts.
-
Click on the Contacts
 on the down right of dial pad.
- Input the number.
-
Tap on the dial key
 to dial out.
 on the down right of dial pad.
Or, check the
![]() for more than one contact, then tap on
for more than one contact, then tap on
 on the up right to start a conference.
Follow the steps below to dial a number via Contacts app.
-
On the LCD display device, access Contacts by tapping on the icon
 on LCD.
- Navigate and select in the Contacts entries using the remote control navigation keys.
-
Tap on the dial key
 to dial out.
Dialing a Number via Call History
- On the LCD display device, access Applications on home screen and access call history by selecting icon
 .
. - The LCD will display all call history types. Navigate in the call history list by selecting the call history category. Select the call history entry you would like to dial out.
- Press to dial out.
Or, check the
![]() for more than one contact, then tap on
for more than one contact, then tap on
 on the up right to start a conference.
Follow the steps below to dial a number via Contacts app.
-
On the LCD display device, access Contacts by tapping on the icon
on LCD.
- Navigate and select in the Contacts entries using the remote control navigation keys.
-
Tap on the dial key
to dial out.
Direct IP Call
Direct IP Call allows GAC2500 and another VoIP device to talk to each other in an ad-hoc fashion without a SIP proxy. VoIP calls can be made between these two if:
- Both GAC2500 and VoIP phone have public IP addresses
Or
- Both GAC2500 and VoIP phone are on the same LAN / VPN using private or public IP addresses
Or
- NAT is disabled in network or GAC2500 NAT is disabled for the account.
Both devices can be connected through a router using public or private IP addresses (with necessary port forwarding or DMZ).
To make a direct IP call, please follow the steps below:
- Access the dial screen on GAC2500;
- Set the mode to “IP Call”;
- Input the target IP address. For example, if the target IP address is 192.168.124.123 and the port is 5062, input the following:
192*168*124*123#5062
The * key represents the dot (.) and the # key represents the colon (:). - Press
 to dial out.
Paging/Intercom
Before placing paging/intercom, please make sure the callee has paging/intercom enabled so it can automatically answer the paging/intercom call. To make paging/intercom call:
- Access the dial screen on GAC2500;
- Set the mode to “Paging”;
- Enter the number to dial;
- Pressto dial out.
Answering a Call
When the device is in idle and there is an incoming call, the device will show the call screen as below.
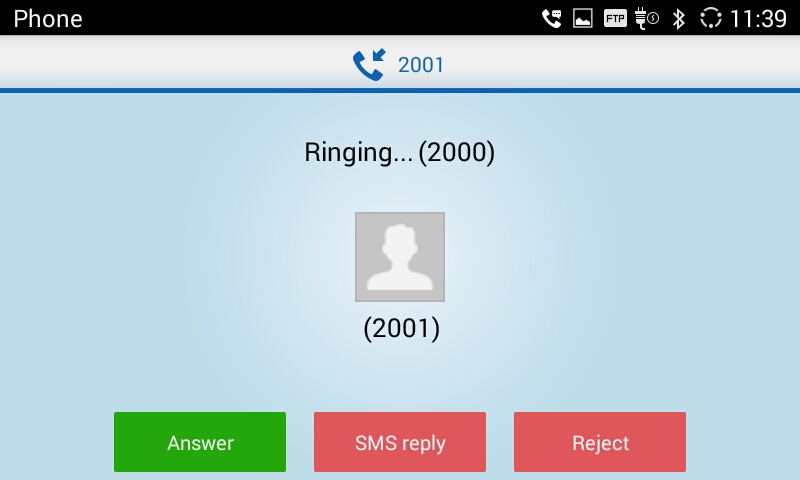
Select “Answer” to answer the call, or reject the call by pressing the “Reject” soft key.
When there is an incoming call during an active call, users will hear a call waiting tone with the LCD displaying the caller name and ID for the incoming call.
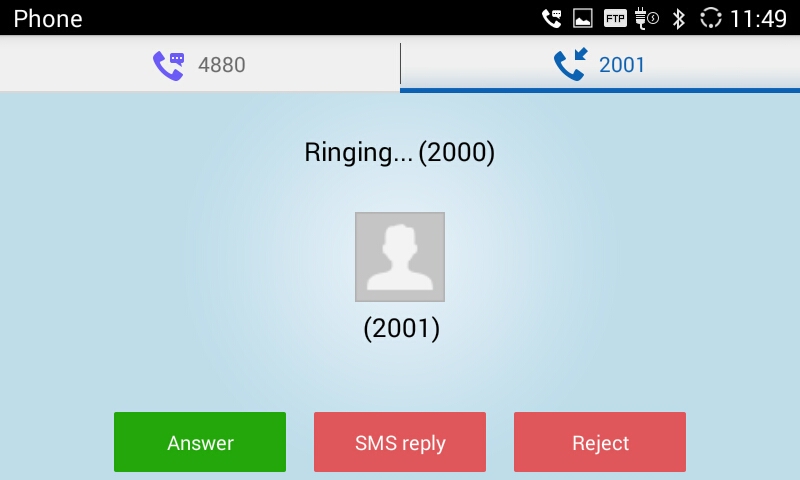
Users could select “Answer” to answer with audio only, or eject the call by pressing the “Reject” soft key.
Reject Call via SMS
Users could reject incoming calls via messages. Please access Notices application
 on desktop and tap on Settings
 on the upper right corner, and enable “Enable Quick Reply”. You can also tap on
![]() below to custom your reply.
below to custom your reply.
Once enabled “Enable quick reply”, when there is an incoming call, you can tap on “SMS reply” to access quick reply list, select the reply to send the reject call.
Call Management
During an active call, you can make other operations like hold/hold, mute/unmute, call recording, add a new call, start conference, or end the call.
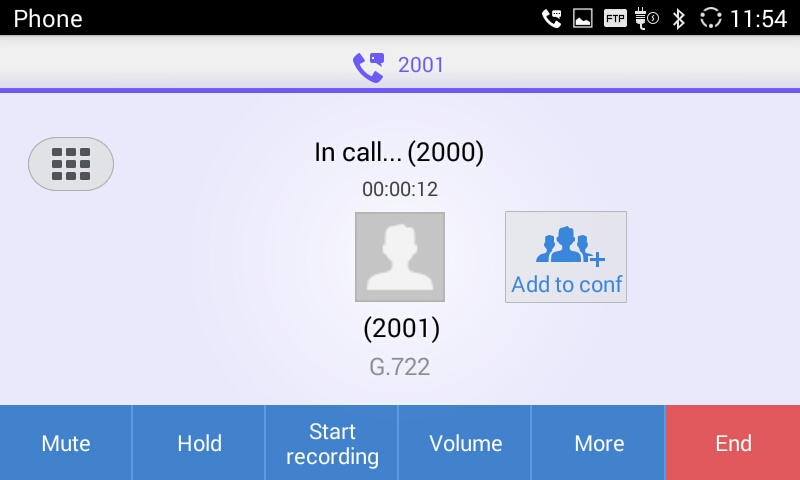
- Call Lines: Display the current line status: active, hold, incoming, outgoing.
- Add to Conf: Tap to add all active lines to conference members.
- Mute/Unmute: Tap to mute/unmute the call.
- Hold/UnHold: Tap to hold/hold the call.
- Start/Stop recording: Tap to start/stop recording.
- Volume: Tap to bring up the volume bar to adjust the volume, The 3.5mm interface is mainly used for placing a cellphone in a conference. So, the volume range differs from cellphones. Please adjust the volume on the cellphone if it is too high.
- More: Bring up more options including like MPK, Transfer, etc.
 DTMP Keypad: Tap to bring up the DTMF keypad.
 - End: End the current line.
Call Hold and Call Resume
During the active call, press HOLD
![]() button to put the current call on hold. Users could then make or answer a new call. It shows as follows:
button to put the current call on hold. Users could then make or answer a new call. It shows as follows:
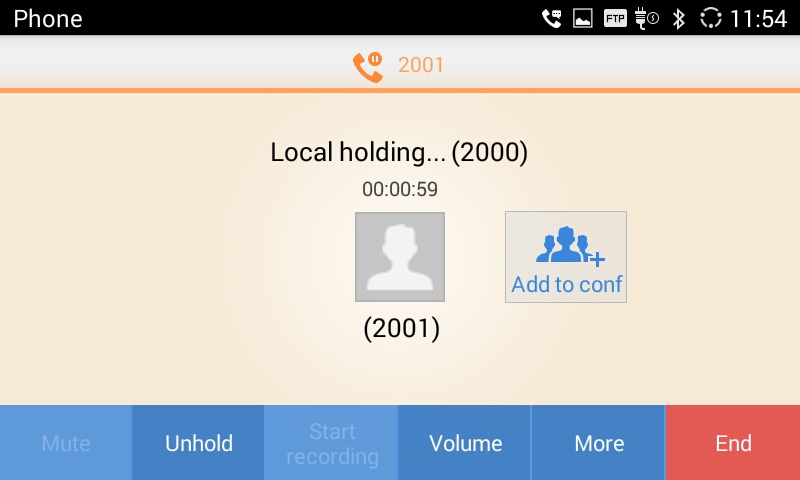
If the active call is on hold, users could press the “UnHold” button to resume call or tap on the “End” button to hang up the call.
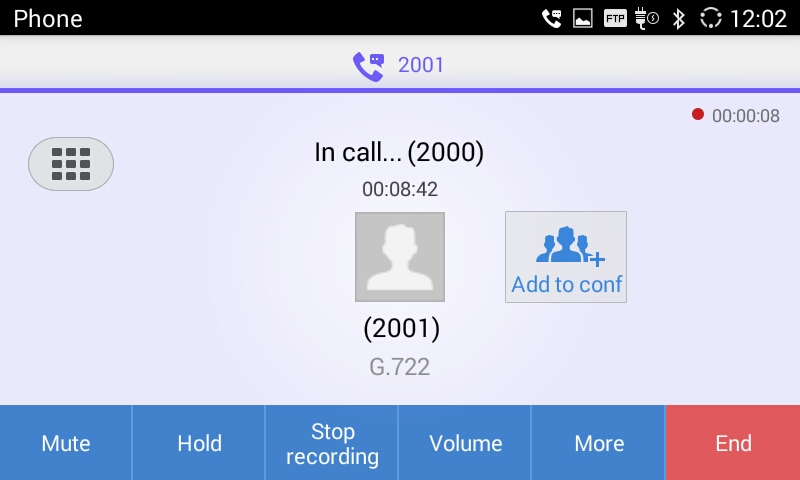
Call Record
Users could save the call conversations to the GAC2500 by recording during an active call. You can listen to the recordings from Recorder, please refer to the chapter Recorder for details.
- During an active call, tap on the “Start Recording” soft key in the bottom to start recording as shown in the figure below:
- Tap on the Stop Recoding soft key to stop recording.
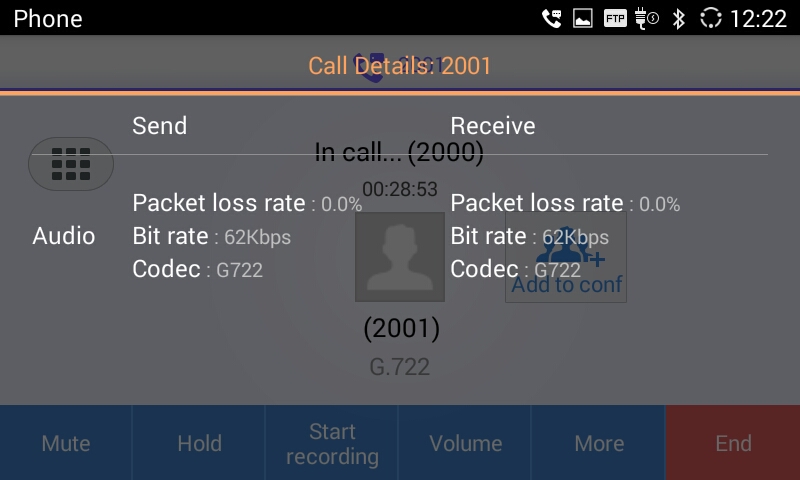
Call Details
Users could view the call details of the GAC2500 during an active call by following steps below:
- During an active call, tap on the “More” soft key in the bottom to show more options as shown in the figure below:
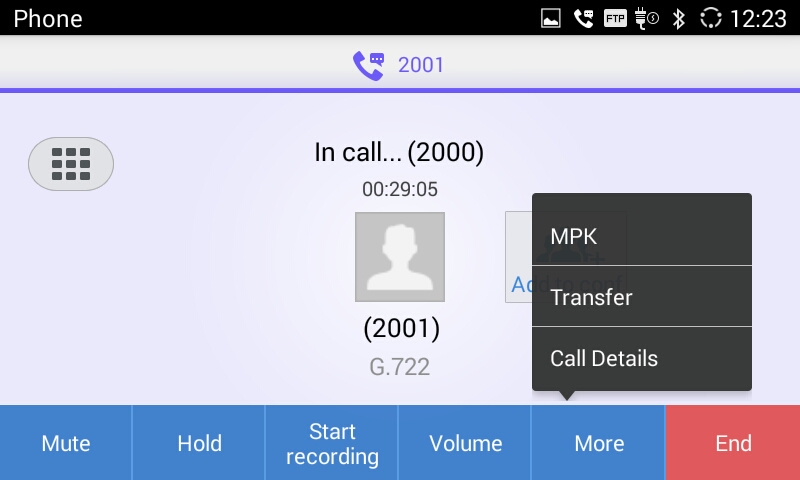
2. Tap on the “Call Details” soft key to show the call details.
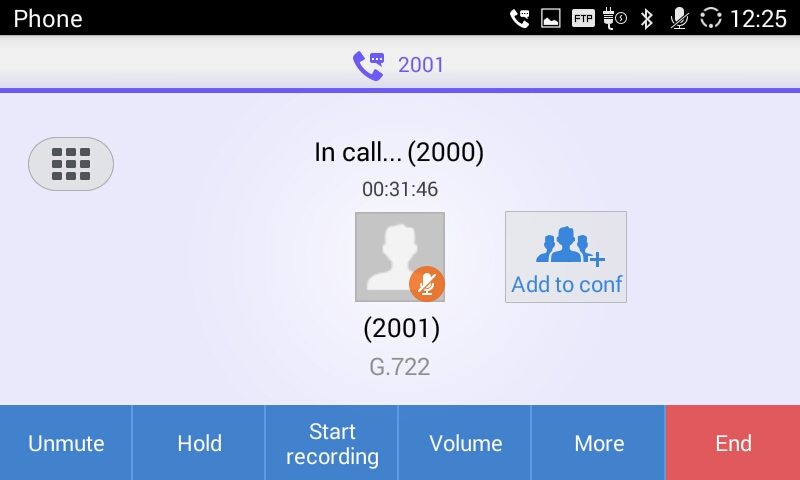
Mute
During the active call, you can tap on the “Mute” button to mute the call, you will not be heard by others. The screen is as shown below.
Call Transfer
is a telecommunications mechanism that enables a user to relocate an existing telephone call to another phone or attendant console, call transfer including blind transfer and attended transfer according to different situations, for example, if user A wants to transfer the call with user B to user C, blind transfer or attended transfer is optional.
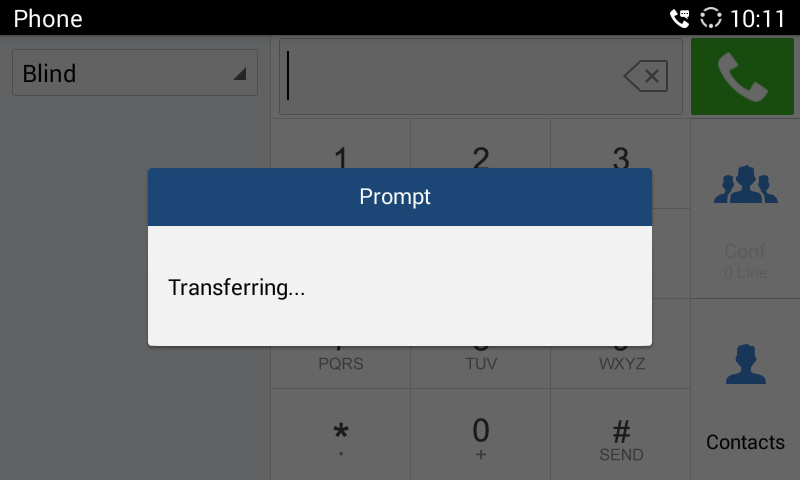
Blind Transfer
- User A and user B are in an active call.
- User A tap on Transfer button to bring up the transfer screen;
- Set the transfer mode to Blind. The default mode is Blind;
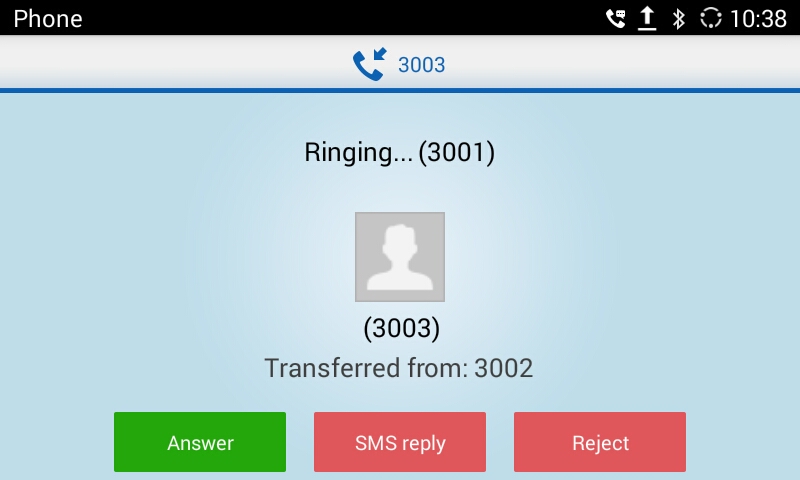
- Enter the digits and press the SEND to transfer the call with user B to User C. When user C’s phone rings, the phone interface of user A is shown in figure 32. If user C answers the call, user A will automatically go back to the idle screen, which indicates the successful transfer;
- User C’s phone will ring, the phone with CID function will display user B’s number on screen as the caller.
Attended Transfer
There are two ways of attended transfer: Call Forward and Call Transfer.
- CALL TRANSFER
- User A and user B are in an active call;
-
User A presses the button
to add a new line with user C. The call with user B will be automatically put on hold;
- User C answers the phone to set up the line with user A; User A taps on More button in the menu then choose Transfer to bring up the transfer screen. The line with user B will be displayed on screen;
- User A sets the transfer mode to Attended then choose to display user B’s number, the call will be transferred to user C. User B and user C could talk directly via the phone.
 to add a new line with user C. The call with user B will be automatically put on hold;
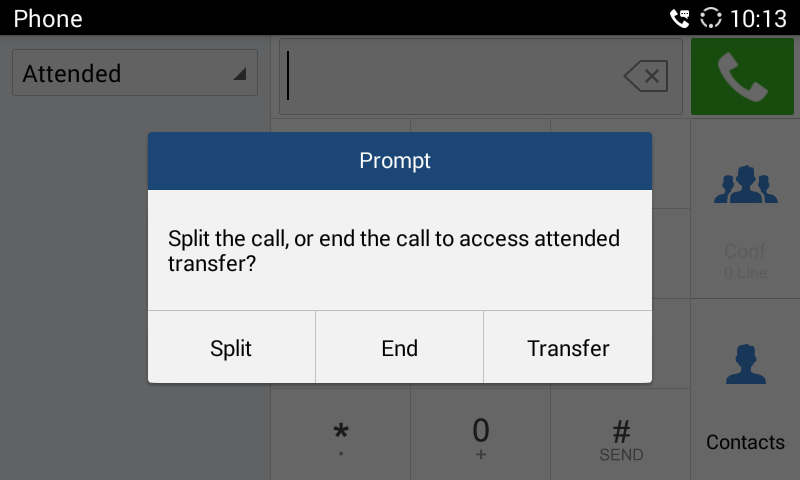
- CALL FORWARD
- User A and user B are in an active call. User A tap on More button in the menu to choose Transfer to bring up the transfer screen;
- Select the Transfer mode. As shown in figure 34;
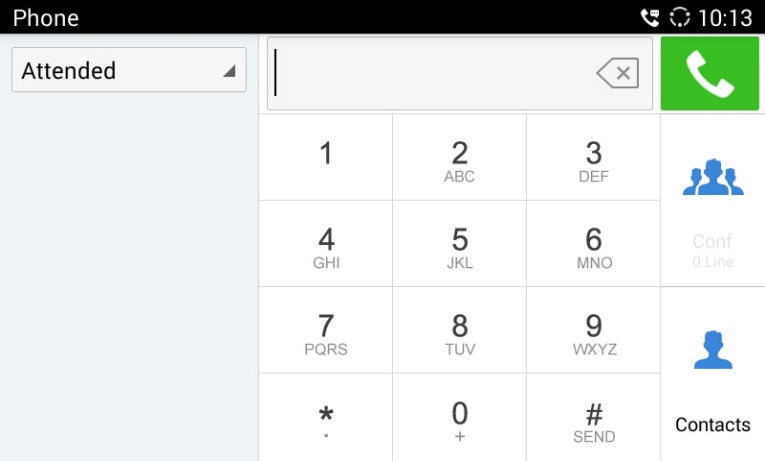
3. Input digits and then press the Send soft key;
4. Users will hear the ring back tone and see the prompt as shown below. Hang up the phone to transfer the call to the third party C automatically; press the “Cancel” button will cancel the transfer;
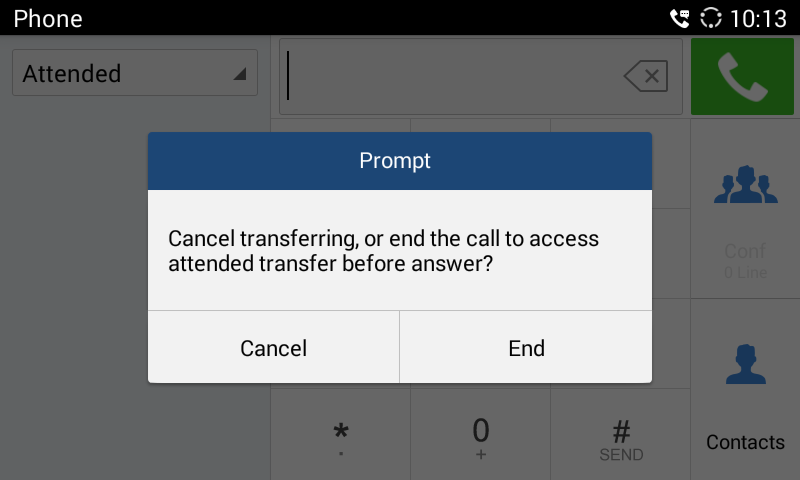
5. User A could press the “Transfer” button to forward the call to user C. Click on “Split” button to establish line with the third patty, while user B will be put on hold.
DND (Do Not Disturb)
When DND is on, the incoming calls to the GAC2500 will be blocked without ringing. Users could see the blocked calls in call history. Once enabled, the DND icon ![]() will be displayed in the status bar on the top of the screen.
will be displayed in the status bar on the top of the screen.
- Hold the screen at the top of the status bar, drag and drop down to open the status bar.
- Touch the DND icon
 to turn it on/off.
Missed Call
When there is a missed call, the LCD will show missed call screen instead of regular idle screen.
Users can tap on the one of missed call entry to access the missed call log. To close the missed call screen and return to the idle screen, tap on
![]() on the upper right.
on the upper right.
Call Forward
Call forward (Unconditional/No-answer/Busy/Time-based) can be set up on device or from web GUI. Log in GAC2500 web GUI and go to Settings page🡪Account🡪Call Settings. For details, please refer to “GAC2500 Administration Guide”.
Set On LCD
Go to Settings🡪Personalized account to select the account and access configuration page and Tap on Call Forwarding Type to access and specify the forward type.
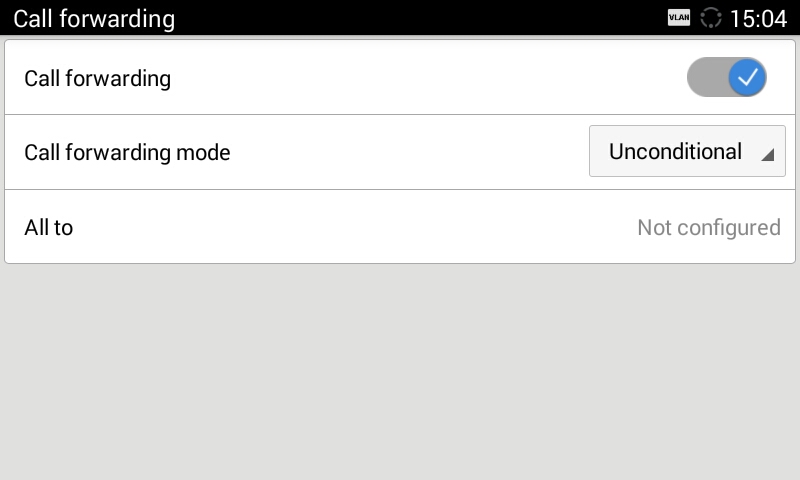
- Unconditional: Forward all calls to particular number
- Time based: Forward calls based on the time range.
- Busy: Forward calls when an active call exists.
- No-answer: Forward calls when phone is not answered.
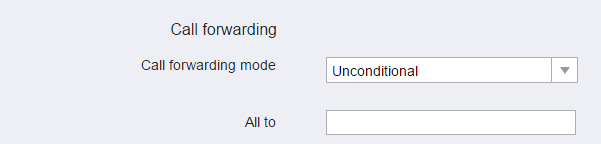
Set from Web GUI
Log in the Web GUI and go to Account🡪Call Settings to find Call Forward option as shown below and specifies the call forward mode in the drop-down list.
7-way Conference
The GAC2500 supports up to 7-way conference. The GAC2500 can be the host to initiate a conference or join other conferences as a party.
Initiating Conference
The conference can be initiated from dial screen, or start conference from schedule. The following steps introduces two ways to start conference from dial screen, please refer to chapter Schedule Conference for more details about initiating conference from schedule.
- Enter multiple numbers in the text box or select parties from the list below.
- Access dial screen when the phone is on idle;
- Set call mode and select account;
- Enter digits in the textbox;
- Tap on the matching phone number on the left to add it to the textbox, you can add multiple numbers.
- Repeat the steps 3-4 to add more numbers;
- Tap onto dial out.
- Press
 to access conference page, then tap on to add parties.
 to add parties.
- Access dial screen when the phone is on idle;
-
Tap on Conf button
or the icon
 on desktop to access conference page as shown below;
 on desktop to access conference page as shown below;
-
Tap on
to start adding parties to conference;
 to start adding parties to conference;
-
Enter digits and then tap on
 to dial out;
- Repeat the steps 3-4 to add more parties.
 to dial out;
Answering an Incoming Call in Conference
You can specify how your GAC2500 handles incoming calls. Depending on your configuration, your GAC2500 automatically answers a call or prompts you to answer a call manually. Log in GAC2500 web GUI and go to Account🡪Call Settings and set “Auto-answer” option to “Yes”, or go to Settings🡪Personalized Account🡪Account and set “Auto-answer” to “Yes” on GAC2500. Once enabled, All incoming calls will be automatically answered, you can see the icon![]() displayed on the status bar.
displayed on the status bar.
During a conference call, when an incoming call is received, the following prompt will be displayed:
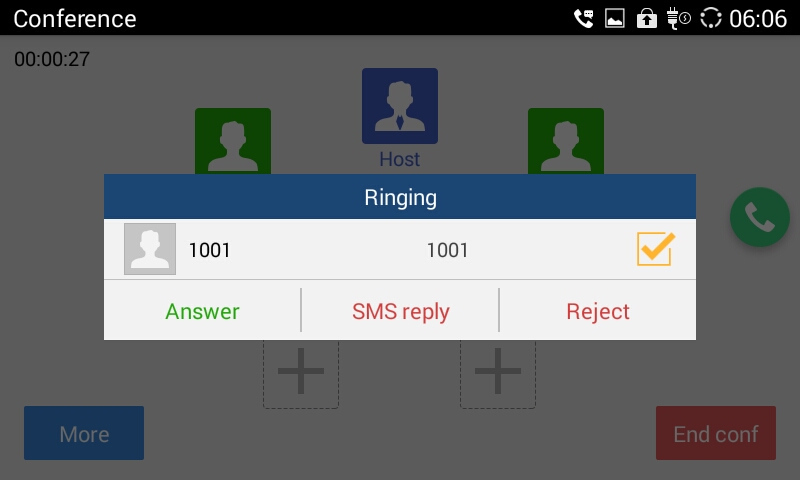
If the call is answered, it will be added automatically to the conference.
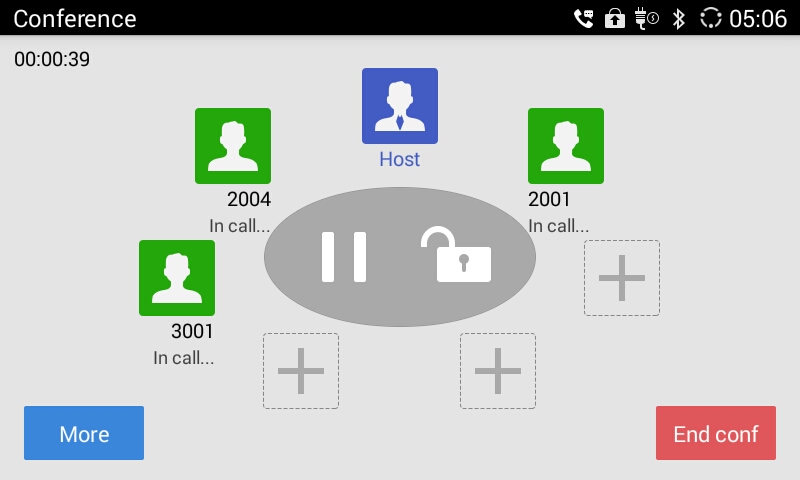
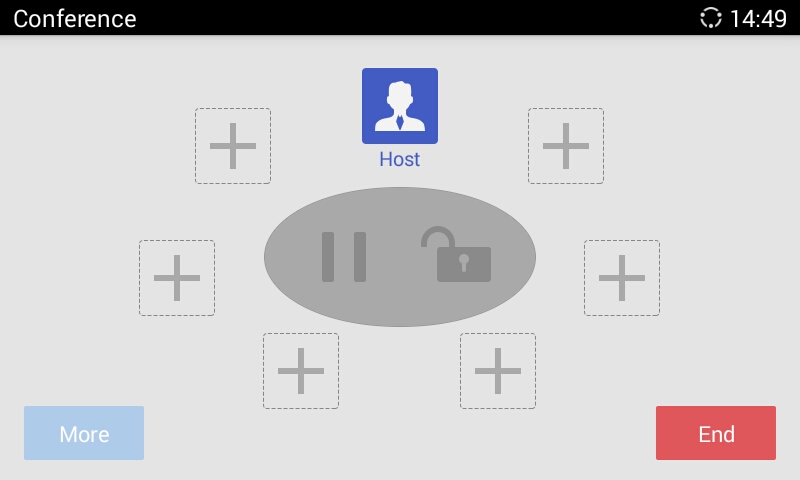
Conference Management
The following figure shows a 3-way conference established.
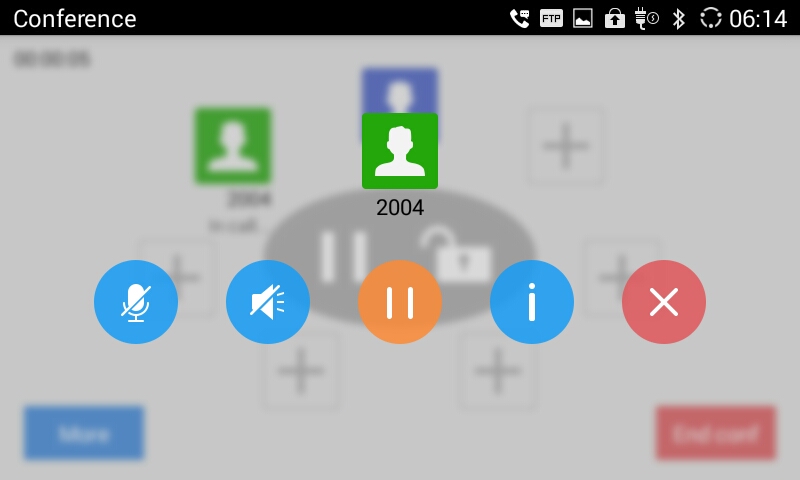
Tap on participant icon to bring up more operations.
 Redial. Tap on the icon to dial out again if the call failed.
 Mute. Once enabled, the icon next to the conference member will turn to
![]() , and the Mute icon becomes
, and the Mute icon becomes
![]() . The selected member will not be heard by other parties. You can tap on
. The selected member will not be heard by other parties. You can tap on
![]() to unmute the member.
to unmute the member.
 Block. Once enabled, the icon next to the conference member will turn to
![]() , and the Block icon becomes
, and the Block icon becomes
![]() . The selected member will not hear other members. You can tap on
. The selected member will not hear other members. You can tap on
 to unblock the member.
![]() Hold. Tap to put participant on hold.
Hold. Tap to put participant on hold.
 Details. Tap to view conference details, including whether to use SRTP or codec.
 Delete. Tap to delete conference members.
More. Bring up more options including Open DTMF, Mute All, Block All, etc.
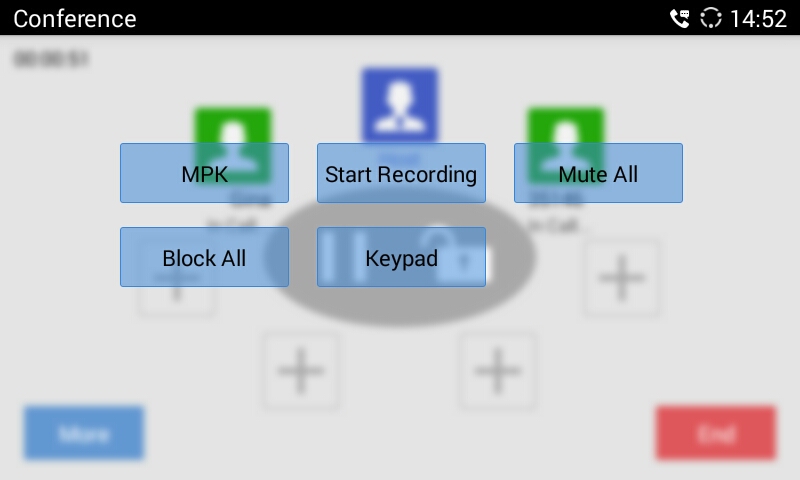
- MPK. Tap to access MPK interface.
- Mute All. Tap to mute/unmute all parties except the host.
- Block All. Tap to block/unblock all parties except the host.
- Start Recording. Tap to start/stop recording. The recording file will be saved automatically.
- Keypad. Tap to pen DTMF keyboard.
![]() Hold. Hold/UnHold conference.
Hold. Hold/UnHold conference.
![]() Lock. Lock/Unlock conference.
Lock. Lock/Unlock conference.
End. End conference and go back to home screen.
Invite Members to Conference
Users could use one of the following ways to add members.
-
Access the dial screen by clicking on the ADD icon
on conference screen. Then enter the number to dial out. Once the member answers the call, it will be connected into the conference automatically.
-
Tap on
to access the dial screen, then enter the number to dial out. Once the member answers the call, it will be connected into the conference automatically.
- The member calls the conference number. If the host answers the call, the member will join conference automatically.
 on conference screen. Then enter the number to dial out. Once the member answers the call, it will be connected into the conference automatically.
 to access the dial screen, then enter the number to dial out. Once the member answers the call, it will be connected into the conference automatically.
Removing Member from Conference
To remove a member from the conference, tap on the member icon and click
![]() to delete it.
to delete it.
Third Party Applications
The GAC2500 runs the Android Operating System and therefore offers full access to the hundreds of thousands of Android apps in the Google Play Store, including Skype for Business™, Google Hangouts™ etc. For example, to use third party app Skype for Business™ during the conference:
- Establish a conference call on the GAC2500;
-
On conference screen, click on
 ;
;
- Input numbers or contacts of Skype for Business™ and dial out;
- The new call will be added to conference.
End Conference
To end the conference, tap on END button to disconnect. If the GAC2500 is the conference host, ending the conference will disconnect all the members from the conference. If the conference member hangs up the call, it will be disconnected from the conference but other parties in the conference will stay in the conference.
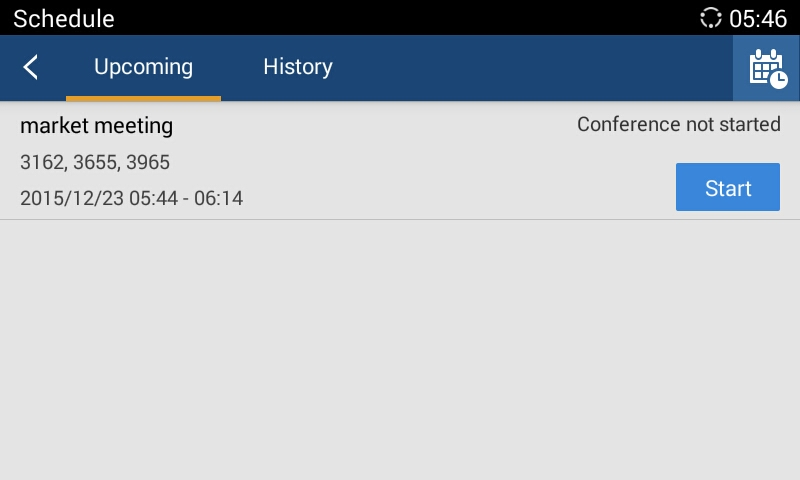
Schedule Conference
Schedule feature allows the user to set a specific time to hold a conference in advance, with conference reminder and members.
Tap on
 on desktop to access Schedule screen, the schedule page is shown below, including upcoming conferences and conferences that has been held:
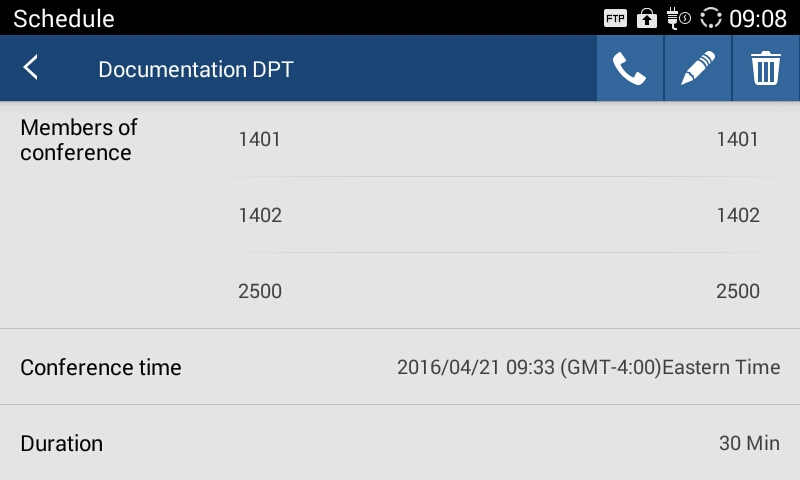
View Conference Details
Users could view scheduled conference details after the current time. Select one conference and tap to view conference details. Press
 on the upper left corner or
 to exit.
Add Scheduled Conference
Follow the steps below to add a scheduled conference:
-
Tap on
 on desktop to access Schedule screen.
-
Tap on
on the upper right corner to access “Add Conference” screen as below.
 on desktop to access Schedule screen.
 on the upper right corner to access “Add Conference” screen as below.

- Fill in conference name, members, start time, conference duration, etc.;
-
Tap on
to save the scheduled conference and go back to schedule screen.
Parameters | Descriptions |
Conference name | Set the conference name to identify this conference. |
Members of conference | Click on the add button to access the Add Member screen. You can add one member or a group of members. Tap on on the upper right corner to save and go back to the Add Conference screen. Up to 6 members can be added. Note: You can only add up to 6 members. |
Cycle conference | Set conference cycle. |
Conference date | Configure the date when the conference starts. It should not be earlier than the current date. |
Time zone | Configure conference time zone. |
Start Time | Configure the time when the conference starts. It should not be earlier than the current time. |
Duration (Min) | Configure conference duration. |
Reminder time | Configure whether to remind users in advance. A prompt dialog box will pop up on the GAC2500 screen before the conference starts. |
Auto conference | Configure whether to initiate conference when the conference time comes. If disabled, a prompt dialog box will pop up on the GAC2500 screen 10 minutes before the conference starts to reminder users whether to start conference. |
Auto-answer for conference member | Configure whether to answer the call from the conference member automatically. If the call is not from the conference member, it will not be answered automatically.
|
Lock | Users could lock/unlock the scheduled conference. Once locked, the other incoming calls will not be able to join conference. The conference screen will display the lock icon when the scheduled conference started, you can also disable this function, please refer to chapter Conference Management for more details. |
Auto record | Configure whether to record automatically once the conference started. If enabled, it will record when the conference starts (with active line). |
Block when enter | Configure whether to block conference members when they enter conference. If enabled, conference members who auto answered will not hear others unless unblocked by the host. |
GAC2500 Add Conference Parameters
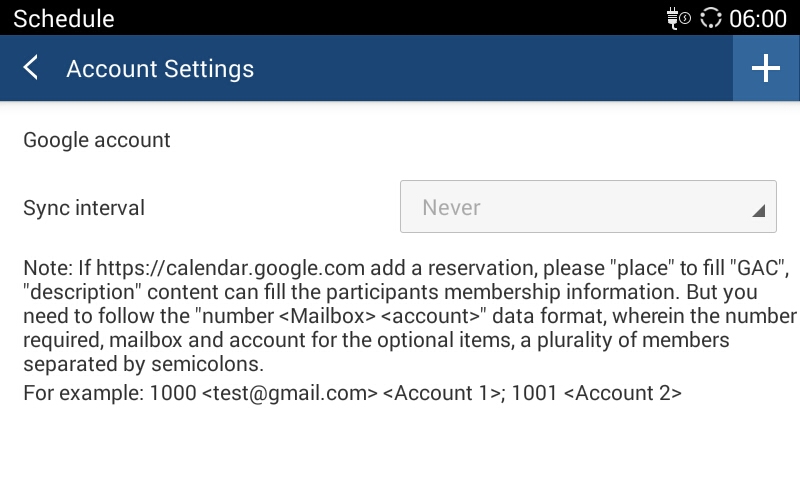
Schedule Conference via Google Calendar
Access Schedule screen, then tape on
 , the following page is shown:
-
Click on
 .
.
- Add an existing or create a new email, and follow instruction.
- Once done the following screen will be shown:
 .
.
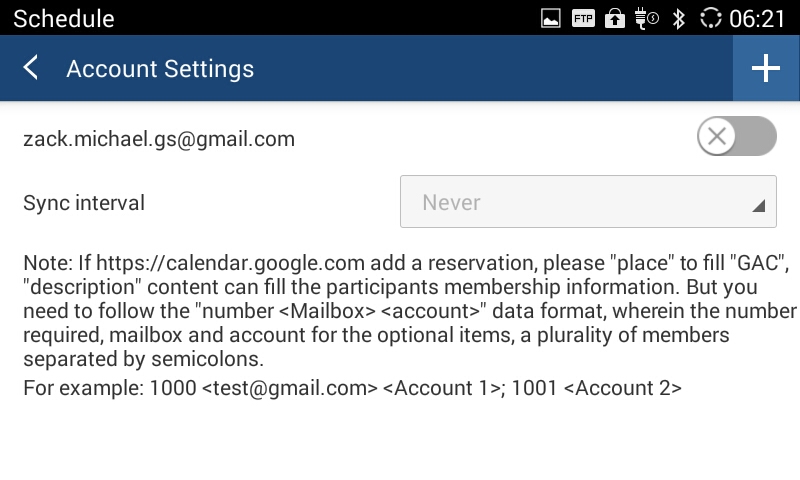
4. Click on account Settings, then go to the google account and create a new event Then enter conference members in “Description” option. The members should be in the format: Number<Email><Account> “Number” filed is required while the other two fields are optional.
For example: 1000<test@gs.com><1000>;0655443322<gsconf@gs.com>;0655443311
5. After creating the conference go back to the schedule screen and tap on 

Edit Scheduled Conference
Follow the steps below to edit scheduled conference:
- Access conference schedule screen and select the conference entry you would like to edit.
-
Tap on
on the upper right corner to access edit screen.
-
Tap on
on the upper right corner to save changes and go back to schedule screen.
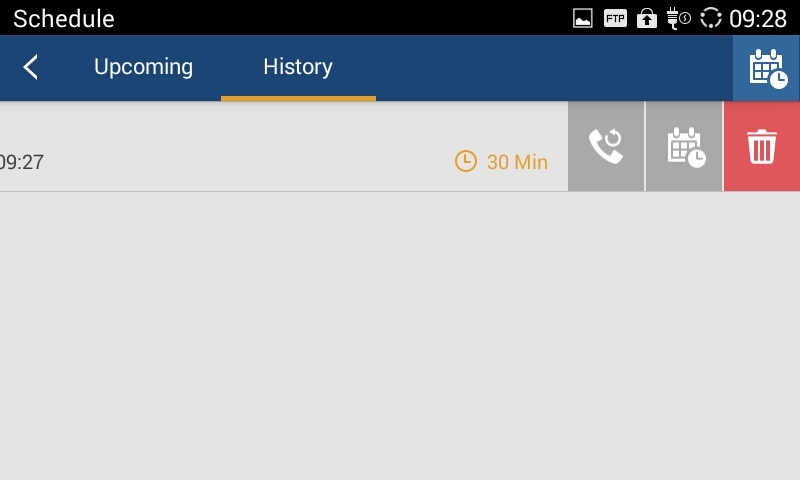
Reschedule Conference
If you want to reschedule the conference that has been held, please refer to steps in chapter Edit Scheduled Conference to edit conference again and save.
- Go to Schedule app 🡪 History section.
- Slide left to go to conference history.
-
Tap on the reschedule icon
 to configure it.
-
Tap on confirm icon
 .
.
Delete Scheduled Conference
Follow the steps below to delete the existing scheduled conference:
- Access Schedule screen;
- Long press the conferences entry to access the edit screen as shown below:
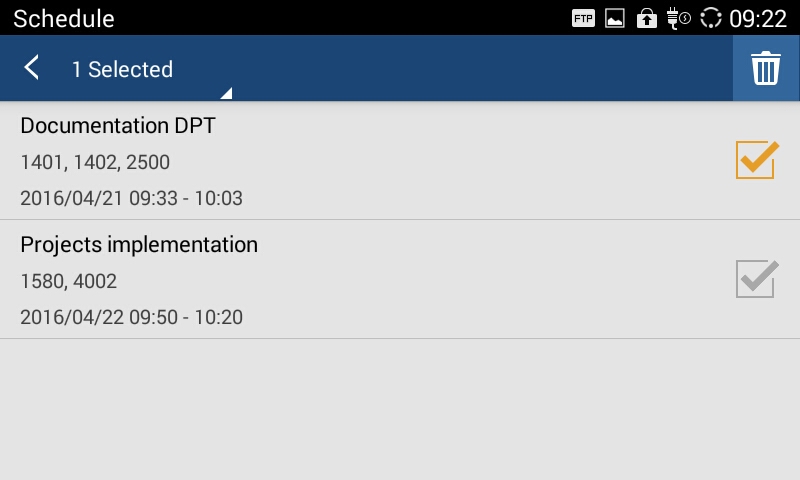
3. Check the conference (s) you want to delete and tap on ![]() on the upper right corner to delete.
on the upper right corner to delete.
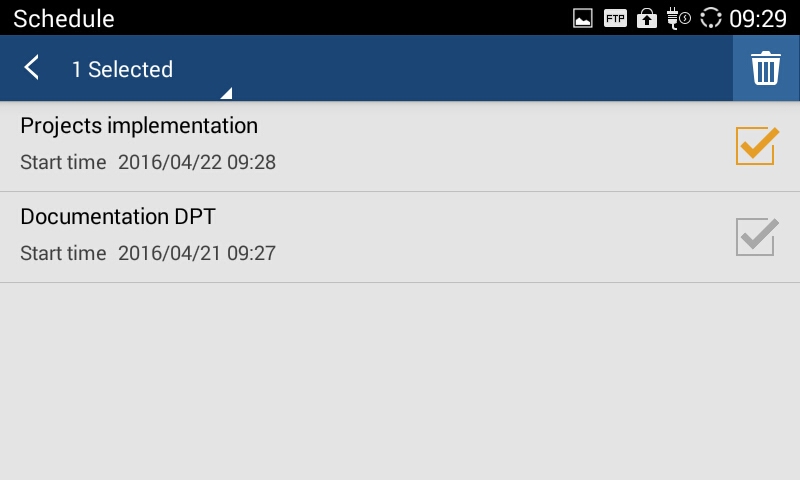
Delete History Conference
You can see all scheduled conferences which has passed the scheduled time in “History” option, you can edit/delete/reschedule the conference here.
There are 2 ways to delete history conference.
- Delete single conference entry.
- Access schedule screen and select the conference entry you would like to delete;
-
Slide left on screen as shown below and tap on
 to delete conference.
 to delete conference.
- Batch delete conference entries.
- Access Schedule screen;
- Long press the conferences entry to access the edit screen as shown below:
-
Check the conferences you want to delete and tap on
on the upper right corner to batch delete conferences.
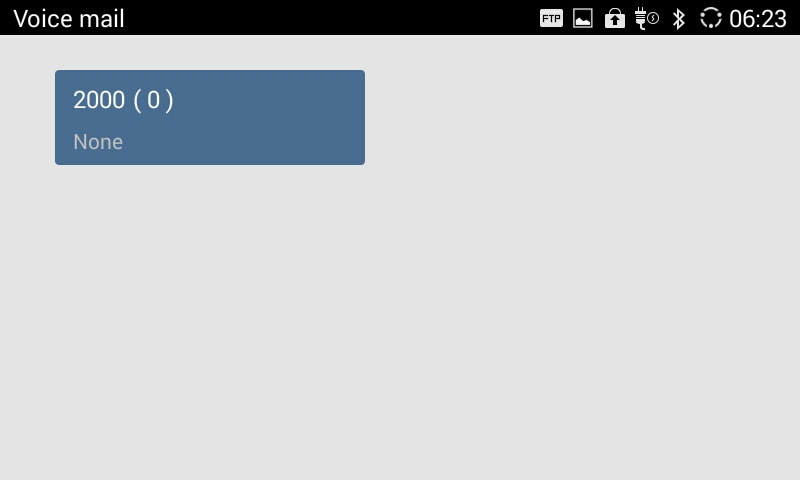
Voicemail
When there is a new voicemail, voice mail icon
![]() will show up as a notification in the status bar. Users could go to LCD Settings🡪Advanced settings🡪Account, or login the web UI🡪Settings🡪Account🡪General Settings🡪Voice Mail UserID to configure the access number for the voicemail.
will show up as a notification in the status bar. Users could go to LCD Settings🡪Advanced settings🡪Account, or login the web UI🡪Settings🡪Account🡪General Settings🡪Voice Mail UserID to configure the access number for the voicemail.
Follow the steps below to access voicemail:
Access the dial screen and input voicemail access number;
Tap on
 on the dial screen to dial into the voicemail box;
Follow the Interactive Voice Response (IVR) for the message retrieval process.
Users could also tap on
 to access the voicemail box. The number of new voicemail messages will be shown on the voice mail app icon as well. See figure below.
APPLICATIONS
GAC2500 provides built-in applications such as like Contacts, Call History, File Manager, Browser and etc. Users could also download the apps from GS market to install on the GAC2500.
Contacts
GAC2500 Contacts app helps users to easily store and manage phone number and contact information. Users can add contacts on the GAC2500 or import contacts from external devices as well as download from a server. On the GAC2500 home screen, you can see local Contacts and LDAP Contacts.
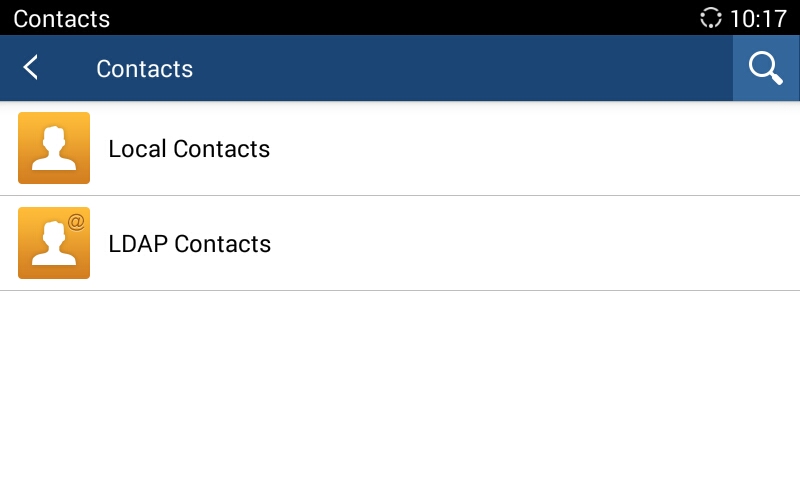
Local Contacts
The Local Contacts screen shows as follows:
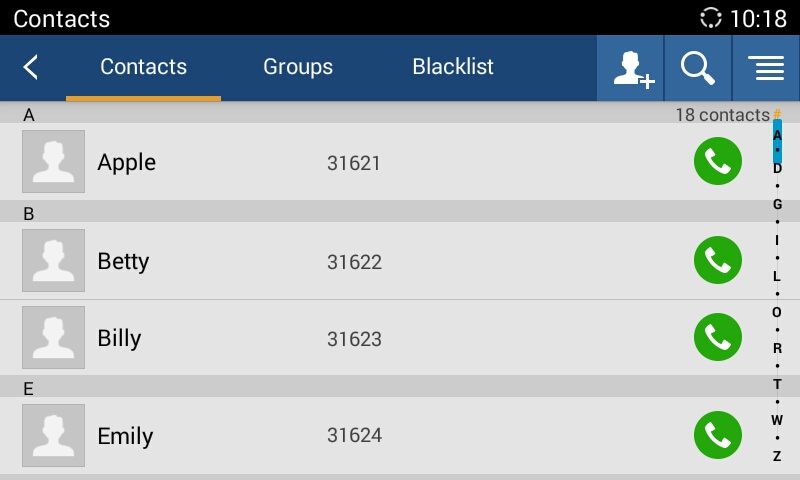
- Back. Back to the previous page.
- Contacts. Display all contacts.
- Groups. View groups. Select one group to view group details.
- Blacklist. Display blacklist.
- Call. Tap
on the contact you would like to call.
- Add Contact. Tap to access New Contact screen. Fill in contact information and save.
- Search Contact. Tap to access Search Contact screen.
- More. Tap on
 to export/import/download Contacts, view storage status or sort Contacts.
- Contact Details. Select one contact to view contact details.
 on the contact you would like to call.
 to export/import/download Contacts, view storage status or sort Contacts.
Add Contact
- Add Single Contact
Follow the steps below to add one single contact.
- On the Contacts screen, tap on the button
 to access New Contact screen;
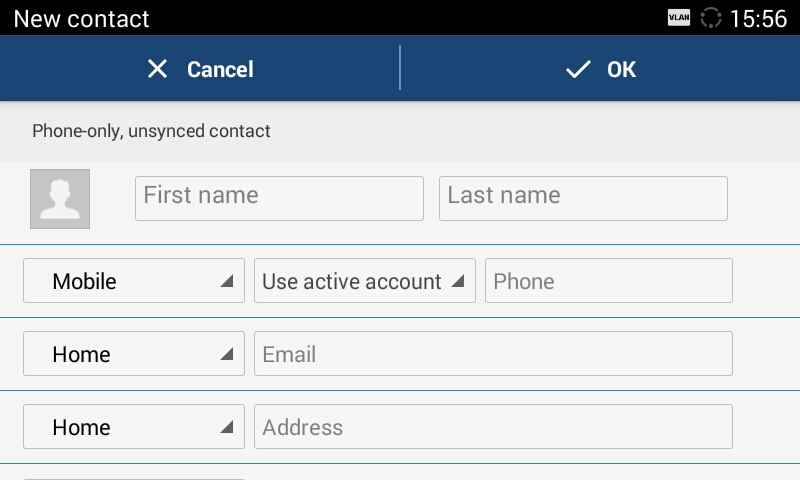
- Enter contact information. Choose the account on the left of the “Phone” field to dial out this number;
- Click “OK” to save the contact information.
- Batch Import Contacts
Import function allows users to batch import contacts. The phonebook with compatible format needs to be saved to the storage devices like SD card/USB flash drive and plugged into the GAC2500.
- On the Contacts screen, tap on the MENU keyon Contacts screen and select “Import” to access Import Contacts screen;
- Configure parameters and select the path to save the imported file;
- Click “OK” to save the contact information.

Parameters | Descriptions |
Clear old history | If enabled, the previous contact records will be deleted when a new phonebook file is loaded into the phone. If disabled, both the old contacts and new contacts will be kept in the GAC2500. |
Clear old history Mode | Configures whether clear all contacts or reserve local contacts when clear old list. The default setting is “Clear All”. |
Replace duplicate Entries | If enabled, when the phonebook file is imported to the phone, the duplicated entries will be removed. If disabled, both the old contacts and new contacts will be kept in the GAC2500. |
Replace duplicate Entries Mode | You can replace duplicate entries by name or number. |
File encoding | Select the encoding format for XML contact file. |
File type | Select the file format for phonebook file import. The device supports xml, csv and VCard format. |
Select file | Select file from storage device plugged into the GAC2500. |
GAC2500 Import Contacts Parameters
Download Contacts
GAC2500 supports downloading phonebook from the file server to batch add contacts. The default file name the GAC2500 looks for is “phonebook.xml”. The phonebook XML file should be placed under the file server directory for the GAC2500 to retrieve. The GAC2500 supports VCard/xml/csv file format.
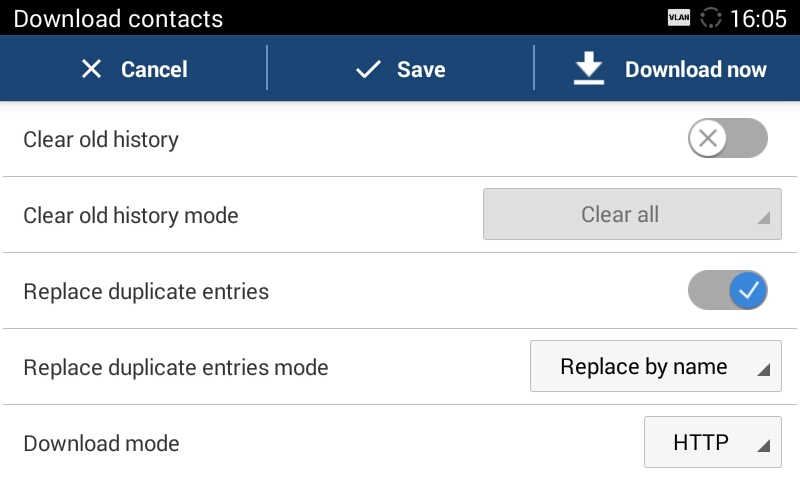
- On the Contacts screen, tap on the MENU keyand select “Download” to bring up the Download Contacts screen;
- Configure parameters and select the path to save the file;
- Tap on the “OK” key to save the contact information.
Parameters | Descriptions |
Clear old history | If enabled, the previous contact records will be deleted when a new phonebook file is loaded into the phone. If disabled, both the old contacts and new contacts will be kept in the GAC2500. |
Clear old history mode | Configures whether clear all contacts or reserve local contacts when clear old list. The default setting is to “Clear All”. |
Replace duplicate entries | If enabled, when the phonebook file is downloaded to the GAC2500, the duplicated entries will be removed. If disabled, both the old contacts and new contacts will be kept in the GAC2500. |
Replace duplicate entries mode | You can replace duplicate entries by name or number. |
Download mode | Select the phonebook download mode from TFTP, HTTP or HTTPS. |
File encoding | Select the encoding format for the XML contact file. |
Time intervals | Configure the time interval to download XML contact file. |
Download server | Fill in the server URL or IP address to download the XML contact file to the device. |
Username | The username that may be used for download server login |
Password | The password that may be used for download server login |
GAC2500 Download Contacts Parameters
Search Contacts
GAC2500 supports Search function, users could tap on
![]() icon on the Contacts page and input the keyword to search in the pop-up dialog. GAC2500 will automatically display contacts items related to the search info. Fuzzy search and precise search are both supportive.
icon on the Contacts page and input the keyword to search in the pop-up dialog. GAC2500 will automatically display contacts items related to the search info. Fuzzy search and precise search are both supportive.
Manage Contacts
- Delete Contact
- Long press the contact you would like to delete to access edit screen;
- Check the contact, or click the button on the upper left corner of the toolbar for quick operation. “Select All” indicates check all select entries while “Cancel All” indicates uncheck all selected entries;
- The digit on the upper right corner indicates how many contacts you have selected, tap onto delete contacts you selected.
In GAC2500, users can add at most 18 star contacts.
- Locate a contact from the list, tap on the contact, shown as below.
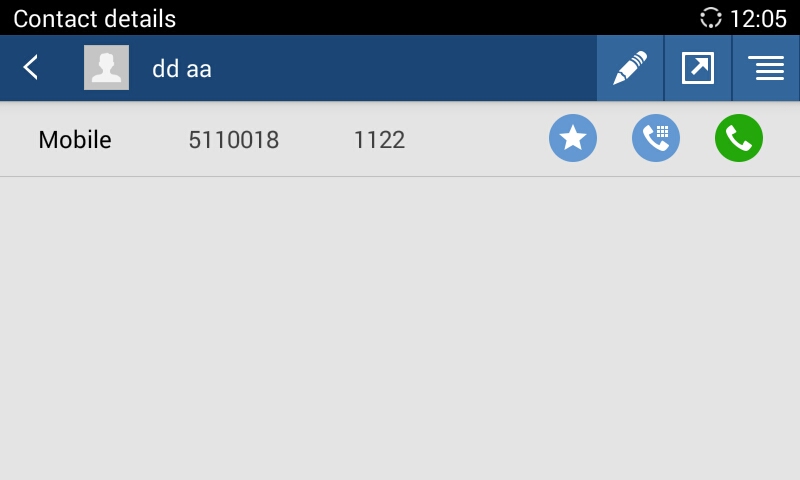
-
Choose a number to star, and tap the icon
on the right. Then the number will be displayed on the top of contacts list.
- Create Contact Short Cut
GAC2500 supports creating a shortcut of a contact to desktop, or to speed dial hotkey.
- In Contacts app, find the contact to create shortcut, tap on the contact to edit the detail.
-
Tap on the send icon
 and choose shortcut mode in the prompt.
 and choose shortcut mode in the prompt.
- Export Contacts
The GAC2500 supports exporting phonebook as VCard/xml/csv files and save the files to other external storage devices.
- Press the MENU keyon Contacts screen to bring up the Export contacts screen.
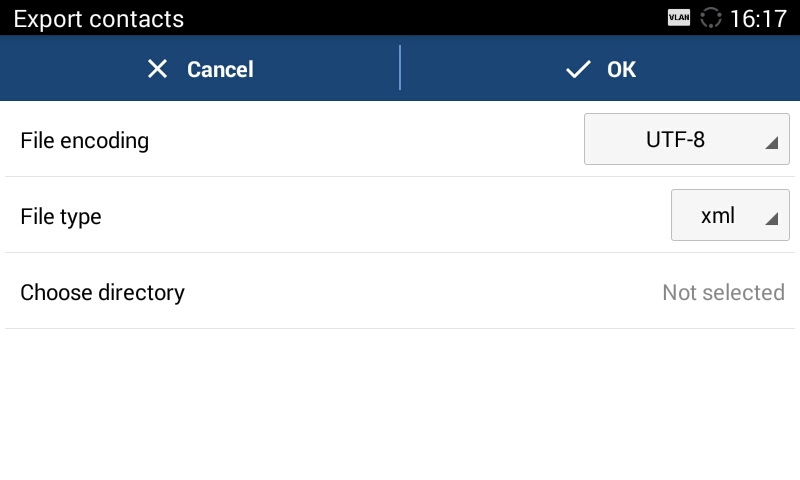
- Configure parameters as shown in table below and select the directory to save the exported file.
- Tap on the “OK” key to export the file.
Parameters | Descriptions |
File encoding | Select the encoding format for XML contact file. |
File type | Select the file format for phonebook file export. The device supports xml, csv ,vcard. |
Choose directory | Select directory to save file. |
GAC2500 Export Contacts Parameters
- Send Contacts
- Long press the contact you would send to enable edit screen;
- Check the contact you want to send;
- Choose the way to send contact. If Bluetooth Device Chooser has been enabled, users could send the contact to the paired user via the Bluetooth.
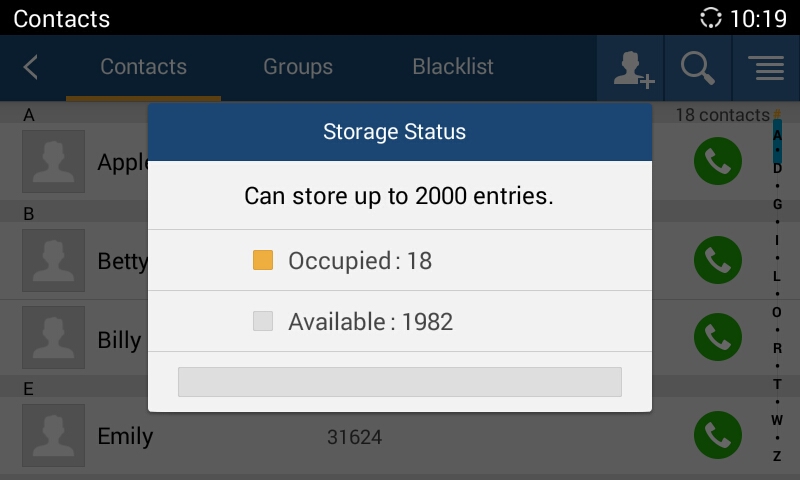
Tap on![]() the Contacts page to view the contacts storage. You can store up to 2000 entries.
the Contacts page to view the contacts storage. You can store up to 2000 entries.
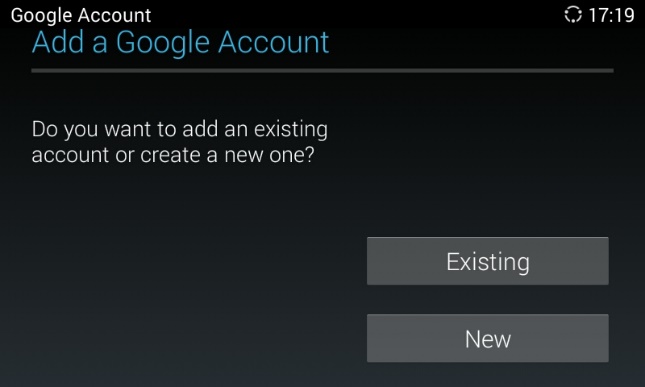
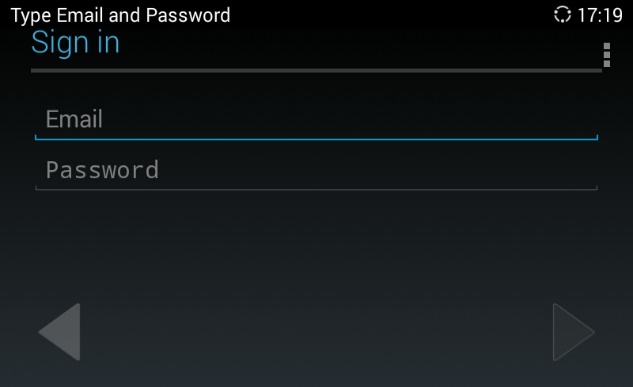
Account allows users to add vast number of 3rd party Android applications (including Google, Lync, Skype, company, Email, and etc.). Users can also sync GAC2500 via Google Play account, corporate account or Email.
Tap “Add Account” button to add new account according to the installation wizard.
The following steps demonstrate how to add a Google account.
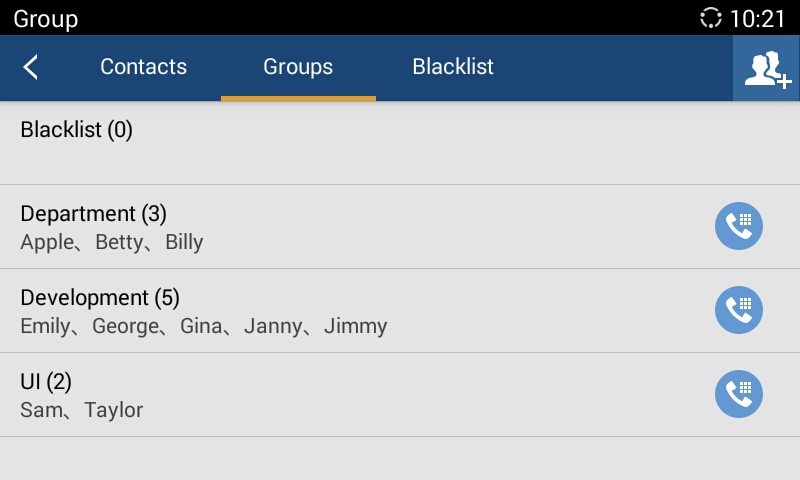
Groups
Users could divide contacts into different groups with specific names. Tap on one group entry to view group details.
There are 2 ways to add group members.
- Add the contact to the group when editing or adding a new contact.
- Select the contact you would to add to this group on Groups page when adding or editing a new group.
Follow the steps below to create a new group:
-
Tap on
the Groups page as shown below;
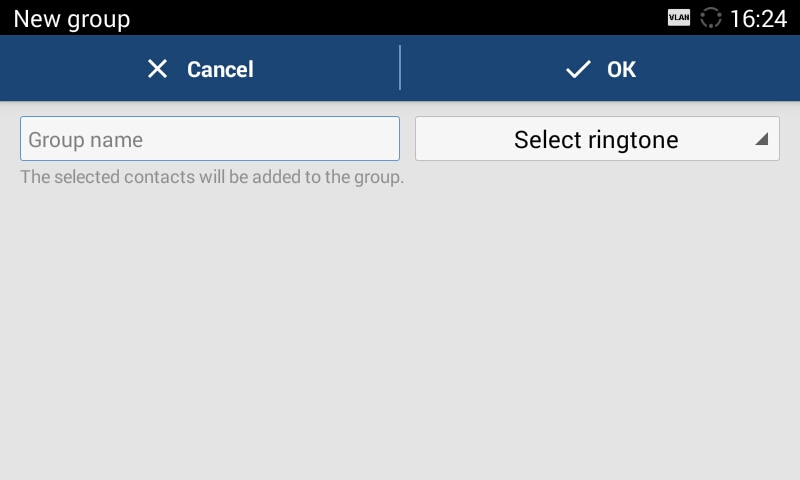
-
Tap on
the upper right corner on Groups screen to access screen as shown below:
 the upper right corner on Groups screen to access screen as shown below:

- Check group member (s) you want to call;
- Tap on the CALL button to dial out.
Follow the steps below to delete groups.
- Long press the group entry you want to delete; the screen is shown below:

- Check to select the group (s) you would like to delete;
-
Tap on
the upper right corner to delete.
 the upper right corner to delete.
GAC2500 supports creating a shortcut of a group to LCD desktop, or to Group Call in hotkeys app.
- In Groups tab under Contact app, tap on one group item to enter edit detail.
-
Tap on the send icon
 to prompt modes to select.
- Check the mode to send and tap “OK”.
 to prompt modes to select.
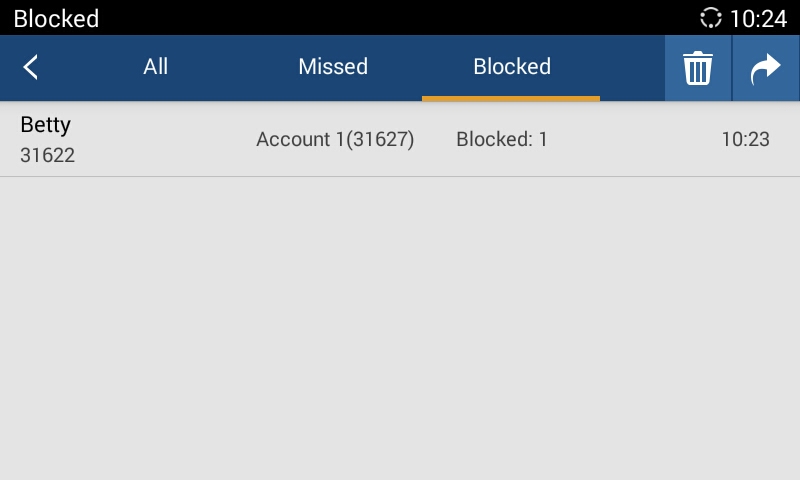
Blacklist
Blacklist helps users to block calls from blacklist at the same time does not affect normally answering other incoming calls.
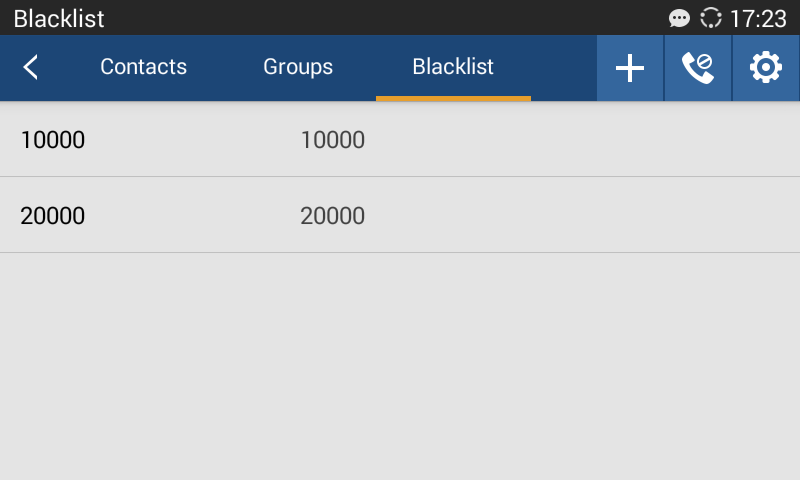
![]() Display blocks history.
Display blocks history.
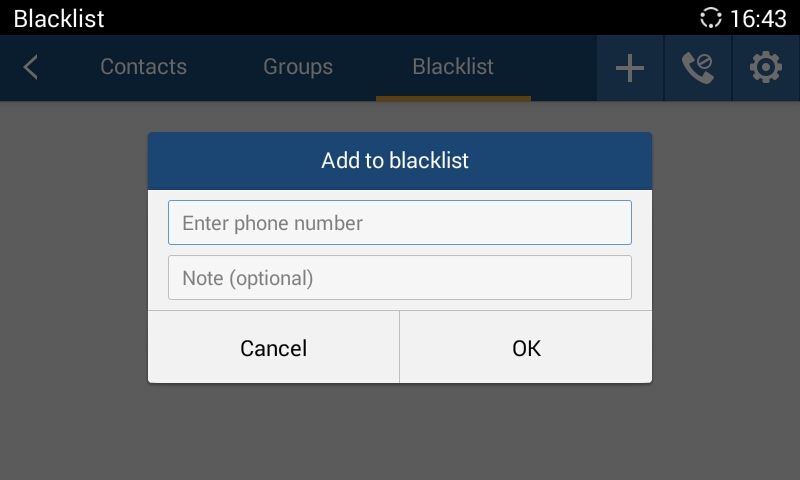
![]() Tap to add number to blacklist. There are 3 ways to add number: Manually add, add from contacts, Add from call history. Select one way and tap on “OK” to add the corresponding number to blacklist.
Tap to add number to blacklist. There are 3 ways to add number: Manually add, add from contacts, Add from call history. Select one way and tap on “OK” to add the corresponding number to blacklist.
Long press one blacklist log to enter the editing mode to edit or delete the selected contact (s). Users could edit the blacklist entry when only one is selected.
![]() Blacklist Settings.
Blacklist Settings.
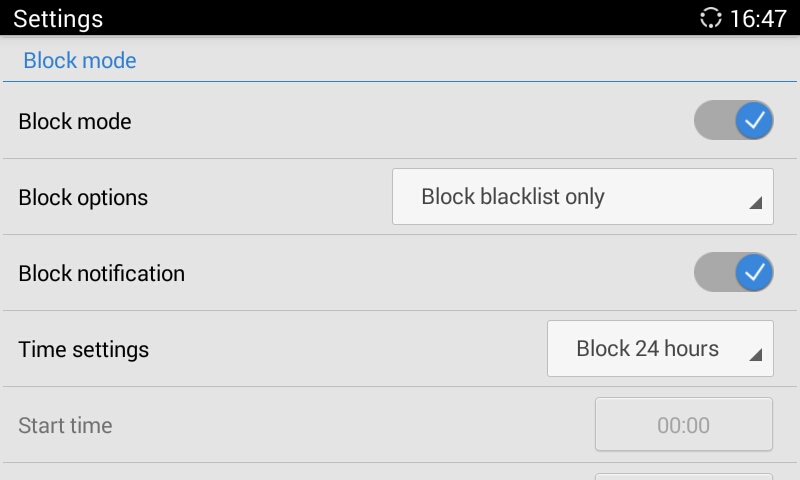
Parameters | Descriptions |
DND mode | Turn on/off DND mode. Once it’s turned on, the phone would reject all incoming calls. |
Block mode | Turn on/off Block Mode. Once it’s turned on, the incoming calls from the numbers in the blacklist will be rejected. |
Block options | Set the types of incoming calls. This option is valid once the Block Mode is turned on. |
Block notification | Set up whether to notify the user after blocked calls. Once it’s turned on, the block icon will be displayed in the status bar after the device blocked calls. Users could go to the notification bar to view details. |
Time settings | Set up the block schedule. |
GAC2500 Blacklist Settings Parameters
LDAP
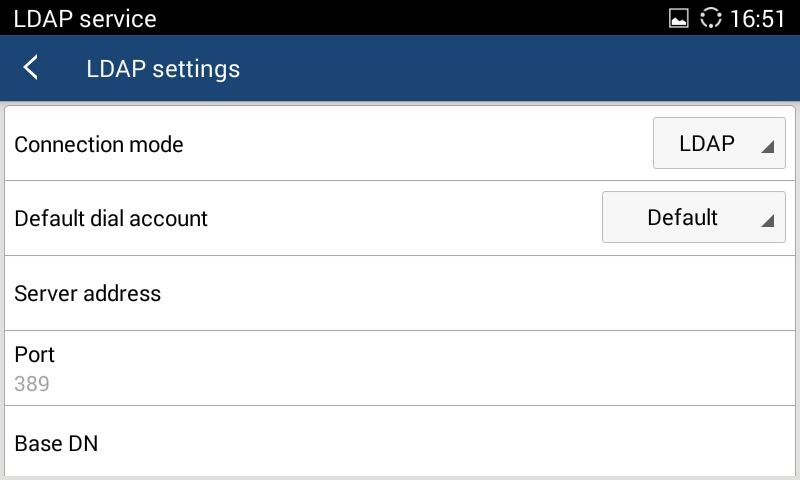
GAC2500 supports LDAP. Tap on LDAP Contacts to access the main interface as shown below:
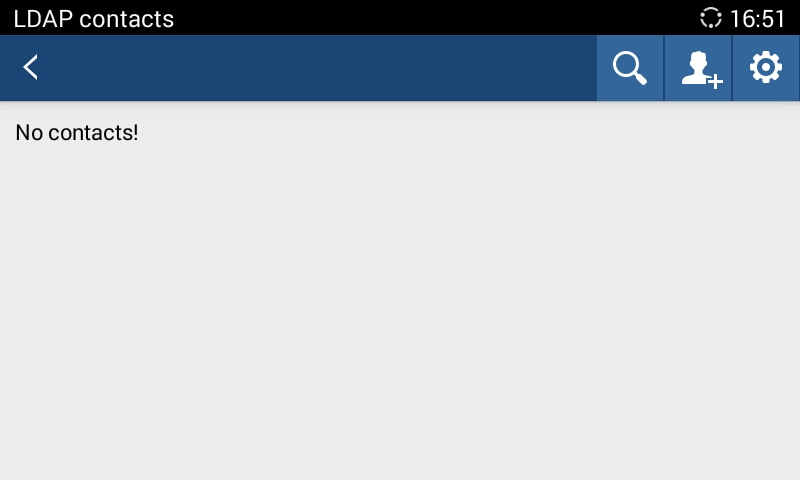
Tap on![]() the upper right corner or login the Web page to configure it. (Maintenance 🡪LDAP Book).
the upper right corner or login the Web page to configure it. (Maintenance 🡪LDAP Book).
Parameters | Descriptions |
Connection mode | Selects which protocol will be used for LDAP searching, LDAP or LDAPS. |
Default dial account | Specifies default account when making outgoing from LDAP contacts. |
Server address | Configures the URI of the LDAP (Lightweight Directory Access Protocol) server. |
Port | Configures the LDAP server port. The default LDAP port number is 389. |
Base DN | Determines the LDAP search base. This is the location in the directory where the search is requested to begin.
Example:
dc=grandstream, dc=com
ou=Boston, dc=grandstream, dc=com |
User name (binding DN) | Configures the bind “Username” for querying LDAP servers. Some LDAP servers allow anonymous binds in which case the setting can be left blank. |
Password | Specifies the bind “Password” for querying LDAP servers. The field can be left blank if the LDAP server allows anonymous binds. |
LDAP name attributes | Configures the “name” attributes of each record which are returned in the LDAP search result. This field allows the users to configure multiple space separated name attributes.
Example:
gn
cn sn description |
LDAP number attributes | Configures the “number” attributes of each record which are returned in the LDAP search result. This field allows the users to configure multiple space separated number attributes.
Example:
telephoneNumber
telephoneNumber Mobile |
LDAP mail attributes | Determines the “mail” attributes of each record which are returned in the LDAP search result.
Example: mail |
LDAP name filter | Configures the filter used for name lookups.
Examples:
(|(cn=%)(sn=%)) returns all records which has the “cn” or “sn” field starting with the entered prefix;
(!(sn=%)) returns all the records which do not have the “sn” field starting
with the entered prefix;
(&(cn=%) (telephoneNumber=*)) returns all the records with the “cn” field starting with the entered prefix and “telephoneNumber” field set. |
LDAP number filter | Defines the filter used for number lookups.
Examples:
(|(telephoneNumber=%)(Mobile=%) returns all records which has the “telephoneNumber” or “Mobile” field starting with the entered prefix;
(&(telephoneNumber=%) (cn=*)) returns all the records with the “telephoneNumber” field starting with the entered prefix and “cn” field set. |
LDAP mail filter | Determines the filter used for mail lookups.
Example: (mail=%) (!(sn=%)) returns all the records which do not have the “sn” field starting
with the entered prefix.
(&(cn=%) (telephoneNumber=*)) returns all the records with the “cn” field starting with the entered prefix and “telephoneNumber” field set. |
LDAP displaying name attributes | Configures the entry information to be shown on phone’s LCD. Up to 3 fields can be displayed.
Example: %cn %sn %telephoneNumber |
Max hits | Specifies the maximum number of results to be returned by the LDAP server. If set to 0, server will return all search results. The default setting is 50. |
Search timeout (s) | Configures the interval (in seconds) for the server to process the request and client waits for server to return. The default setting is 30 seconds. |
LDAP lookup when dialing | Sets the phone system to do the LDAP number searching when making outgoing calls. The default setting is “No”. |
Search LDAP for incoming call | Sets the phone system to do LDAP number searching for incoming calls. The default setting is “No”. |
GAC2500 LDAP Book Parameters
Once configured, you can tap on Search button
![]() to input digits or name to search LDAP contact as shown below.
to input digits or name to search LDAP contact as shown below.
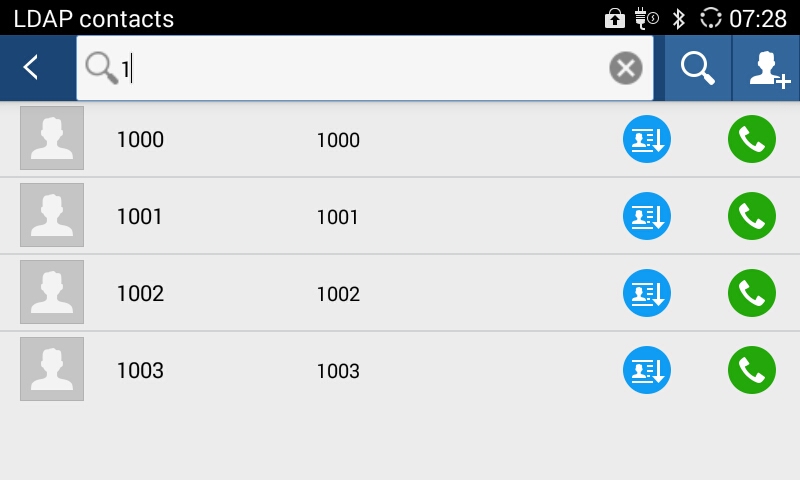
 Dial out.
 Add the LDAP contact to local Contacts.
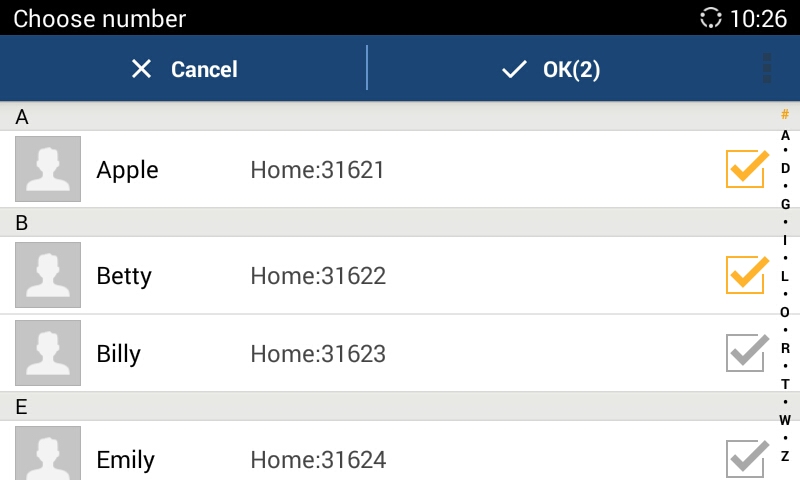
Follow the steps below to batch add LDAP contacts:
- Search LDAP contacts;
-
Tap on
 to access add contact screen as shown below:
 to access add contact screen as shown below:
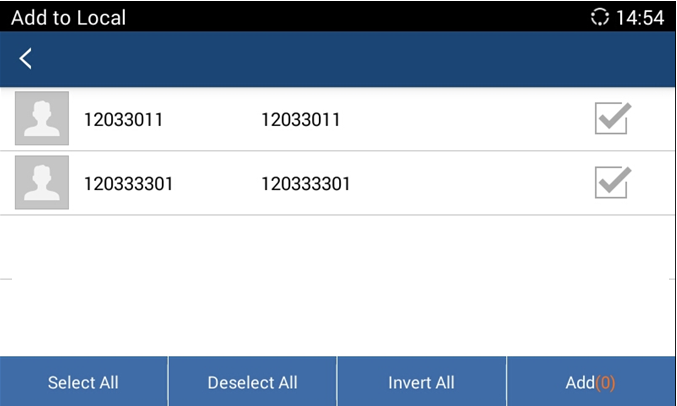
3. Check contacts entries to add contacts to local.
Broadworks XSI Contacts
Besides the Local and LDAP phonebook, the GAC2500 also supports BroadWorks Xsi contacts if BroadWorks XSP server is available within the network. For more details about Broadworks XSI Contacts, Please, refer to GAC2500 Administration Guide.
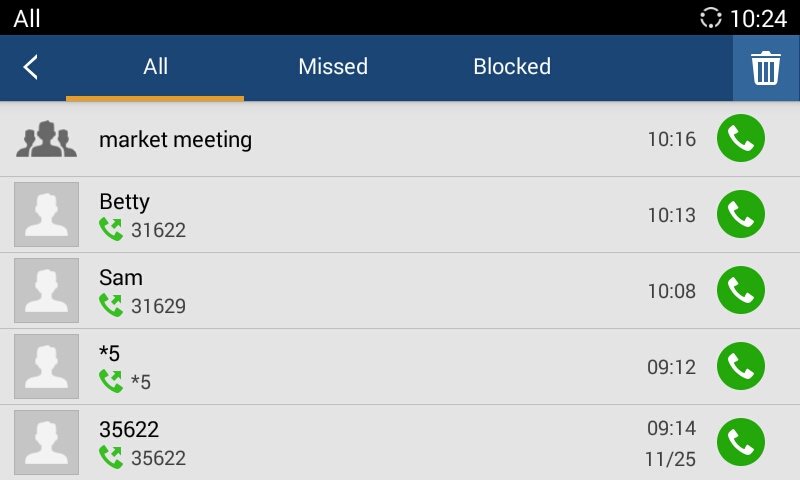
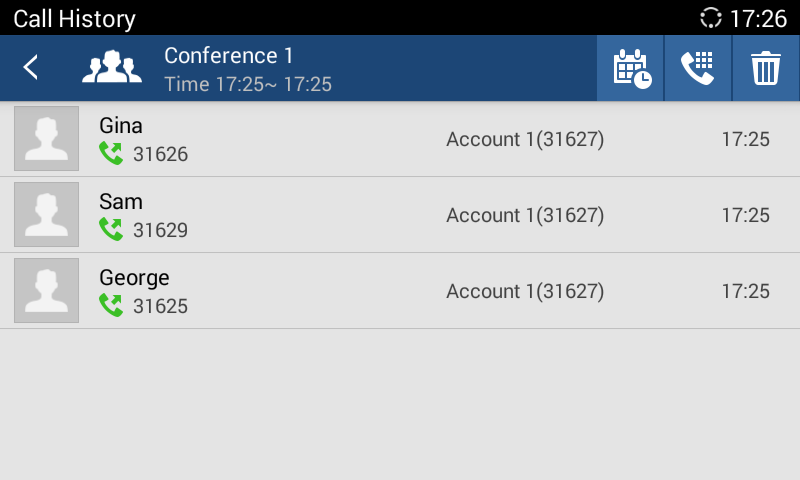
Call History
Call History provides users access to phone’s recent call records. The user can view all records, or select different categories for incoming calls, outgoing calls, missed call and conference.
To access Call History, go to Home screen🡪 Applications🡪![]() .
.
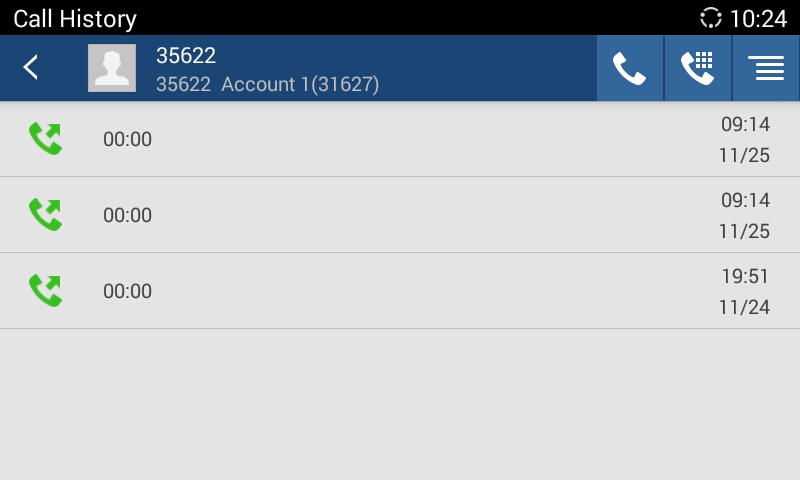
Click on a record in the call history and press
 to dial out this number directly. Tap one history entry to view call details for this number.
 to dial out directly and there is no need to input the password again. However, if the conference doesn’t exist or the password has been changed, the re-dial will fail.
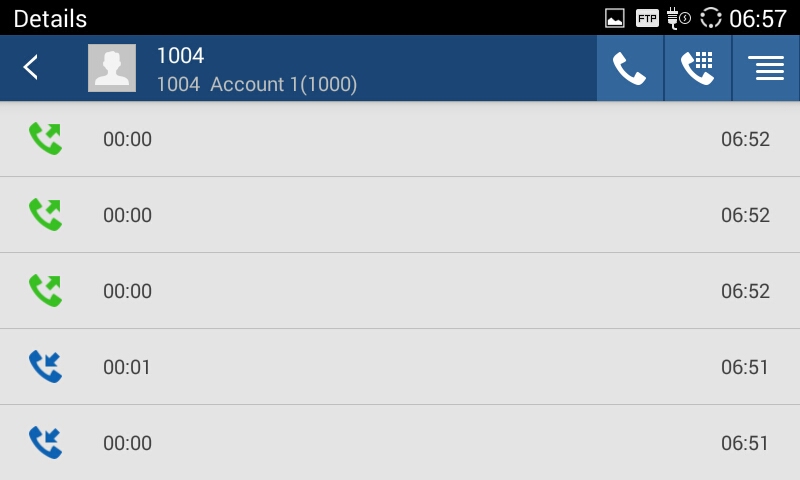
 Call Count Call History
Users can view number of calls made or received from one extension by following these steps:
- Access Call History
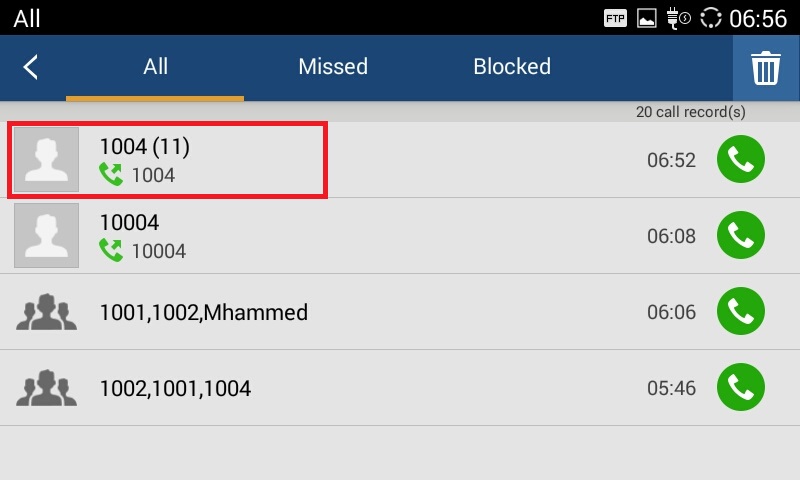
2. Select one call history entry to access details of the call.
Add Contact from Call History
- Access Call History screen;
- Select one call history entry to access details screen;
- Tapon the upper right corner and select “View contact” to access “Add a contact” screen;
- Tap on “Create new contact” to add new contact information.
- Confirm to add contacts.
Delete Call History
- Long press the call history entry you want to delete to access editing mode;
- Check the entry and tap on, click “OK” to delete.
Schedule Conference via Call History
- Select one call history entry you would like to add to scheduled conference;
2. Tap![]() on the upper right corner to access schedule screen.
on the upper right corner to access schedule screen.
3. Fill in information and tap on ![]() to save.
to save.
Intercepted History
When the incoming call is from contact in blacklist, the GAC2500 will reject it automatically. The screen is as shown below.

 Empty intercepted history.
 Restore to be the contact.
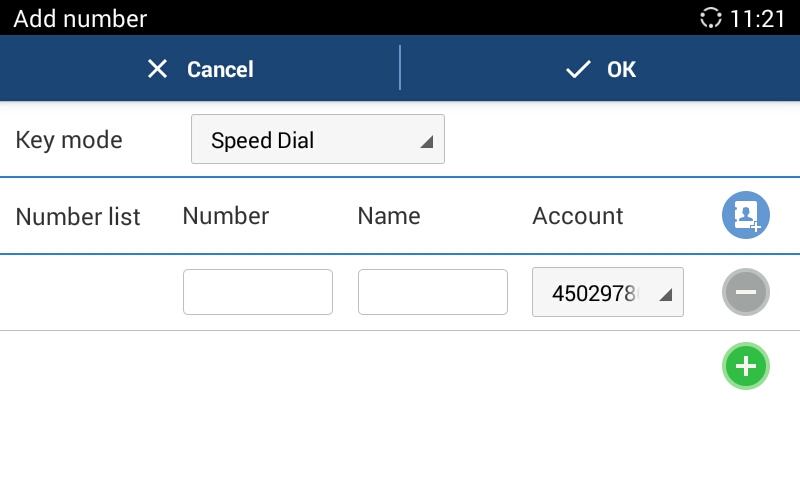
Hotkeys (MPK)
- User could login the Web page and go to Advanced🡪MPK LCD Settings or go to LCD menu🡪Hotkeys to configure it.
-
Open Hotkeys app from LCD menu, tap on
 the upper right corner to access Number List page. Tap on
to add number.
the upper right corner to access Number List page. Tap on
to add number.
-
Users could also tap on
to add number directly from Contacts. See figure below.
 the upper right corner to access Number List page. Tap on
 to add number.
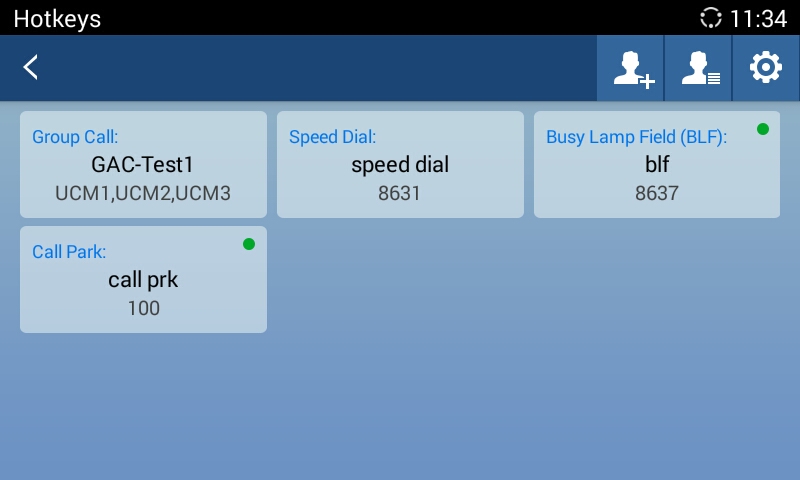
4. The MPK screen is shown in figure 76 after adding numbers.
Event list
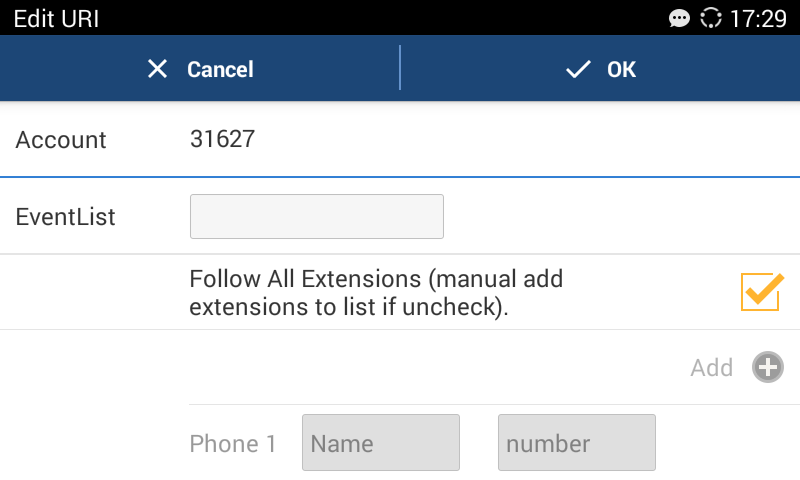
The Event List URI in MPK list, it requires server support. Users should firstly configure an Event List URI including expanded list on the server (e.g.: BLF1006@myserver.com) and fill in URI without a domain name (e.g.: BLF1006).
-
Open MPK, tap on
on the upper right corner and select Event list as key mode.
- Fill in information and save.
 on the upper right corner and select Event list as key mode.
MPK List
Open Hotkeys(MPK), select
 on the up-right corner to enter MPK list, shown as below.
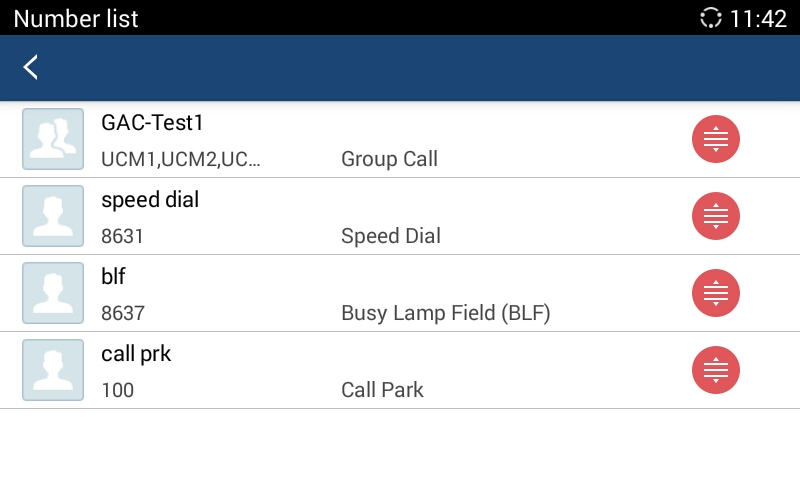
Users can edit, order or delete the hotkeys in the list.
Edit: Click on an item to enter the edit page.
Order: Hold the
![]() on the right and move the item to reorder.
on the right and move the item to reorder.
Delete: Hold the item to enter selection page, then check one or more items to delete
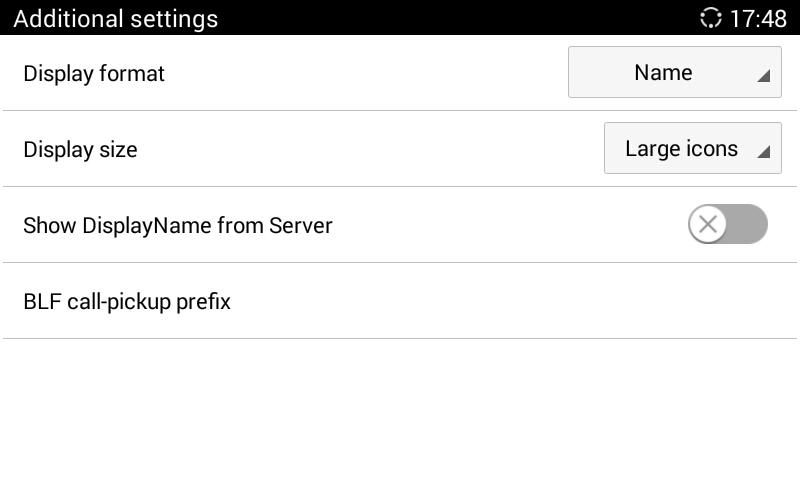
MPK Settings
Tap on
 the upper right corner on MPK screen to access Settings screen as shown below:
Parameters | Descriptions |
Display format | Configures the display format for the MPK. The default setting is “Name”. |
Display size | Configures the display size for the MPK. The default setting is “large icons”. |
Show Display Name from server | If selected, the display name on the server will replace the name users configured. The default is “No”. |
BLF call-pickup prefix | If configured, the phone will add the prefix each time using MPK button to answer the call. The default setting of each account is “**”. |
GAC2500 MPK Settings Parameters
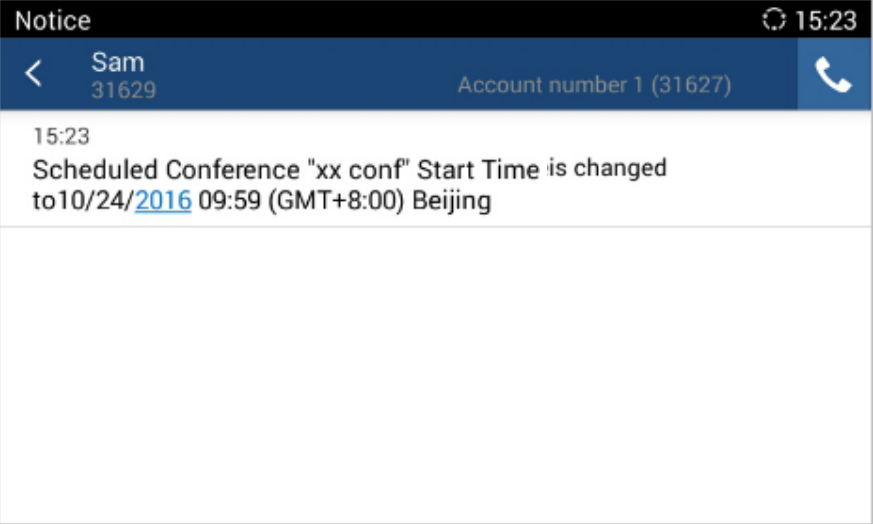
Notices
Users could receive SIP messages and set up reject calls in Notices function. The Notices page is as shown below:
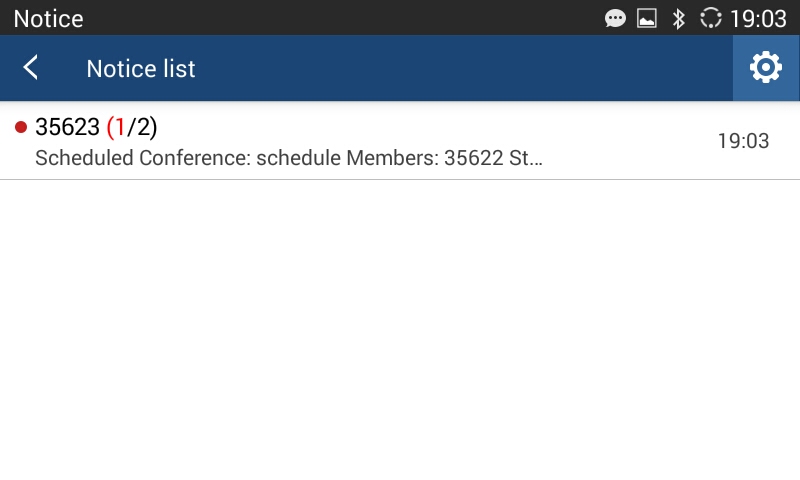
View Notices
The Notices page displays notices list, the notices are classified by contacts name or phone number and sorted by the time when you received notices. Tap on one notice entry to view details.
Delete Notices
- Long press one notice entry to access edit screen;
-
Check the notice (s) you want to delete and tap on
to delete.
 to delete.
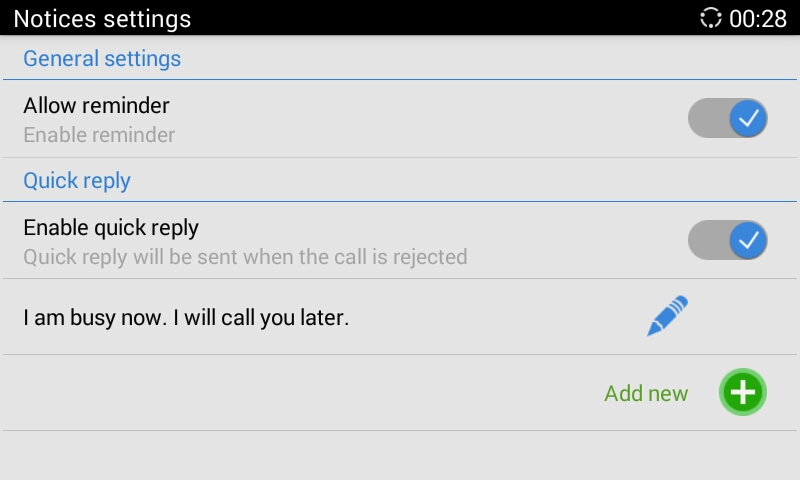
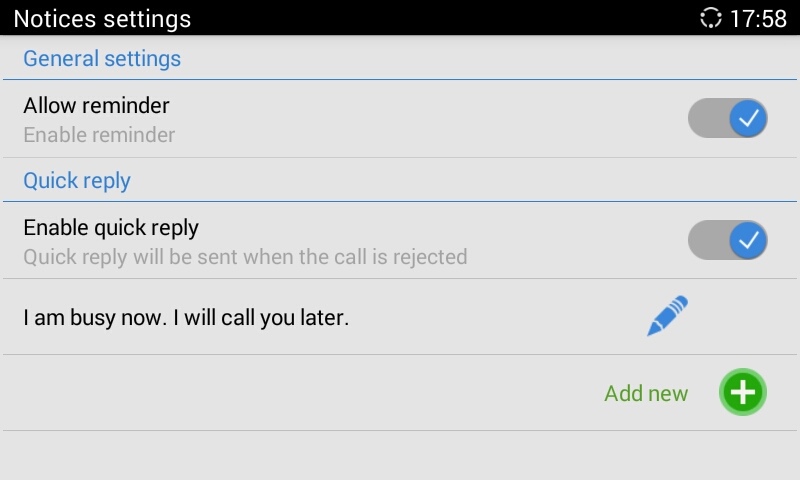
Notices Settings
If enable “Allow Reminder”, a warning will be sounded and you’ll see notification on the status bar when receiving a notice; If enable “Quick Reply”, a quick reply will be sent when the incoming call is rejected.
-
Tap on
the upper right corner on Notices page to access Settings screen;
2. Enable quick reply and add reply content;
3. When there is an incoming call, the screen is as shown below:
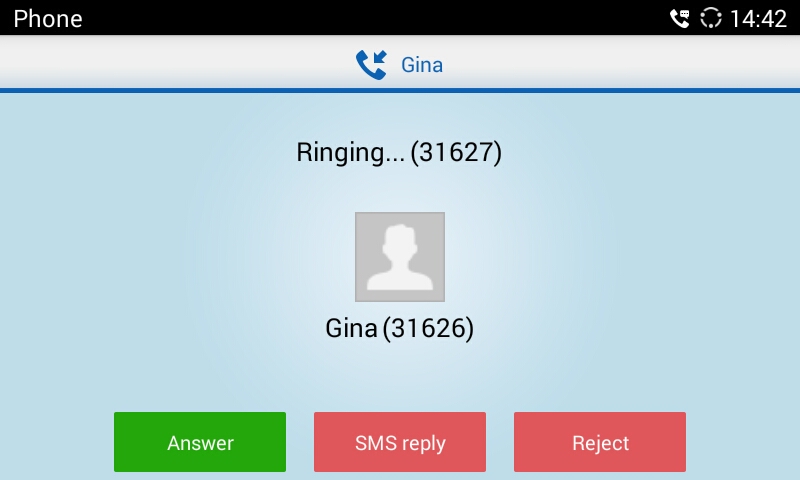
4. Tap on “SMS Reply”;
5. Select one reply to send, the call will be rejected and the caller will receive the message.
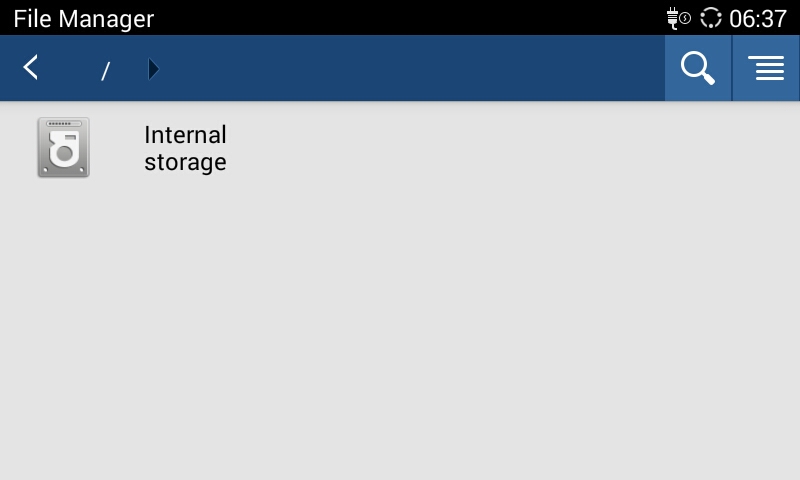
File Manager
File Manager allows users to delete, move, copy, paste, send, rename files (including files on storage device such as USB flash drive), and query file properties on the GAC2500.
Copy File
To copy the file from the GAC2500 to USB storage device:
- Insert USB/SD storage device into USB port on the GAC2500. It will take a few seconds for the GAC2500 to prepare the connection;
- The USB storage icon will show on the status bar;
- Go to Home screen, find the application File Manager;
- Open the target folder;
- Long press the file to select;
- Tap on the upper right corner to copy file and press
 to go back to the upper level directory;
 - Select target storage device and go to the directory where the file will be pasted to paste the file.
Send File
The first 5 steps are the same as the ones in Copy File.
- Tap on the upper right corner select “Send” option;
- Select target location and confirm to send file.
Delete File
The first 5 steps are the same as the ones in Copy File.
-
Tap on
the upper right corner, a dialog will pop up for users to confirm whether to delete the file or not.
- Press the “OK” key to delete the file successfully.
 the upper right corner, a dialog will pop up for users to confirm whether to delete the file or not.
Rename File
- Go to Home screen, find the application File Manager.
- Open the target folder and long press the file.
- Press MENU key on the upper right corner and select “Rename”.
- Input the new file name in the pop-up dialog and press the “OK” key to save, tap on “Cancel” or press to cancel.
Recorder
Users could record conference, institution and personal notes via GAC2500 Recorder conveniently. There is no time limit to recording time and the larger the available storage capacity is, the longer the recording time is. Users could also find the recording file from a call in the recorder and listen to it.
Long press the recording files to access editing interface, tap on the MENU key![]() to make other operations to recording files like export, rename, and lock/unlock.
to make other operations to recording files like export, rename, and lock/unlock.
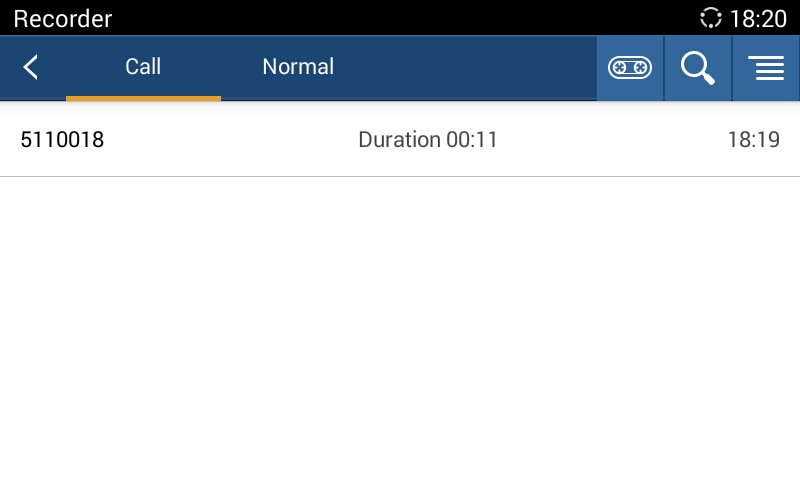
Normal Recorder
-
Tap on
the upper right corner to access recording interface, Tap on
 to start recording;
- Click “Save” to save the record file, click “Cancel” will bring out the dialog for users to confirm whether to save the file or not and to stop recording;
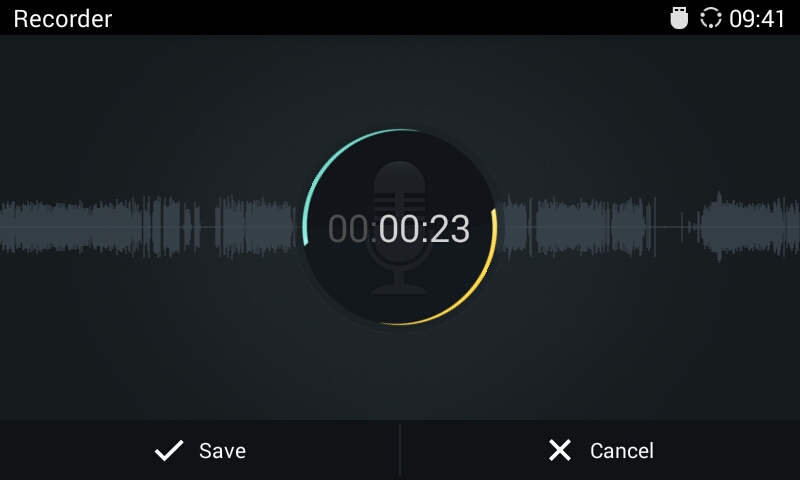
3. Go back to the Recorder page, select one recording file and click![]() on the right of the progress bar to play the file.
on the right of the progress bar to play the file.
Call Recorder
In the process of an active call, the recording file will be saved on the phone. Users can only listen to it via Recorder.
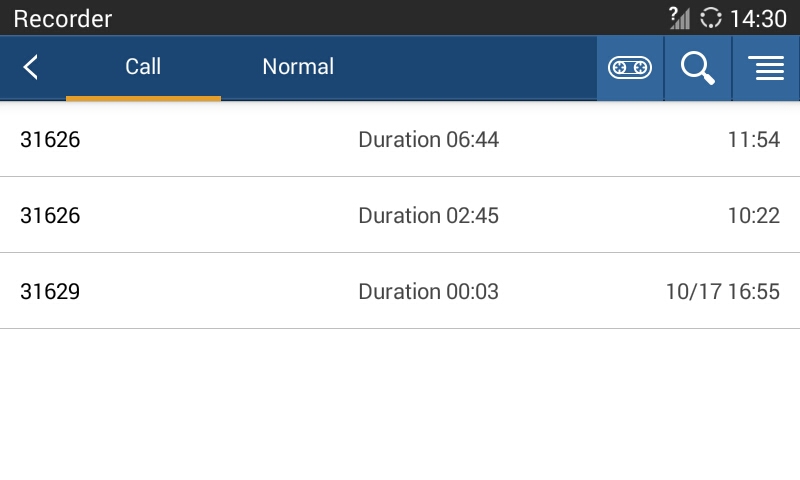
Recorder Settings
Tap on
![]() the upper right corner on Recorder screen to sort the recording files, or access the recording setting screen as shown below:
the upper right corner on Recorder screen to sort the recording files, or access the recording setting screen as shown below:
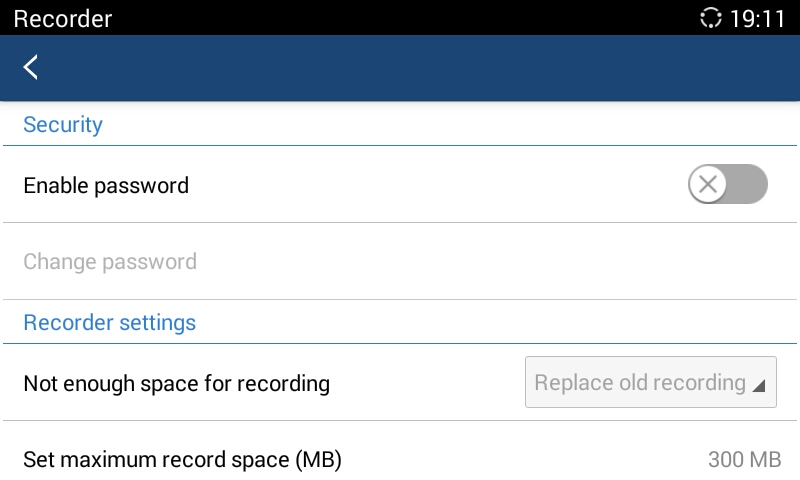
- Enable password. Enable and set password. Once set the password, input the password to access Recorder.
- Change password. To change password, please enable “Enable Password” option first.
- Set store location. When a USB disk is detected, you can set the recorder stored in the USB disk.
- Not enough space for recording. Set “Replace Old Recording” or “Stop and Save” when there is no enough space for recording.
- Set maximum record space (MB). Set the maximum recording space on the device, you cannot view recording files via File Manager.
- Set export location. It can be an SD card or external export device.
Sound
User could set silent mode, increase GAC volume, Select Ring Tones and notification tones as well as selecting different voice mode from LCD under “Settings > Sound”.
Diagnosis
Users could make operation like LCD Diagnosis, Keypad Diagnosis, and LED Diagnosis on GAC2500 by entering the feature code “***3424*” in the dial screen’s keypad.
Browser
Users could browse webpage, view news and watch video via the built-in GAC2500 Browser. Press on ![]() in the main menu to open Browser.
in the main menu to open Browser.
- Slide up and down with slide gesture to scroll the screen.
- Zoom in/out the page via zoom gesture.
-
Press the menu button
on the upper right corner to open the menu bar for more operations.
 on the upper right corner to open the menu bar for more operations.
GS Market
GAC2500 provides direct access to apps via built-in GS market app. Users could download the apps from the market and install to the GAC2500.
Search Apps
In the GAC2500 Home screen, click on Applications🡪GS Market ![]() . The users could view the apps by category, or input key words and click on
. The users could view the apps by category, or input key words and click on ![]() to search.
to search.
Download and Install Apps
- Users could see if the app has been installed or downloaded by pressing the blue shortcut key.
- Press MENU key to view the downloaded apps and installed apps.
-
Tap on
to cancel download in process.
-
Tap on
 to try again if the download failed.
- The installing process will be automatically started after downloading the app.
-
Go to Installed screen to view the installed apps, or tap on
to uninstall the downloaded apps.
Update Apps
The GAC2500 will automatically detect if there is new version available for the installed apps to upgrade when the network connection is normal. User can view the relevant information and update apps on the Installed screen.
FTP Server
The GAC2500 supports file transferring via FTP Server app.
-
Go to LCD menu and tap on
.
- Tap on Start FTP server to start the server.
- Go to PC browser and type in the address on LCD to manage the files from PC.
 .
.
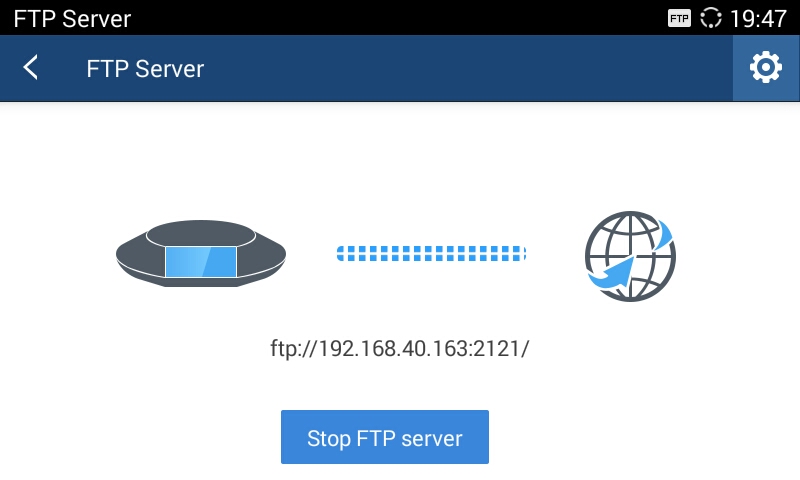
You can change the settings of FTP server before file transfer. Tap on the
 on up right to open FTP server settings. From here, user can set username and password to login, port number and directory to access.
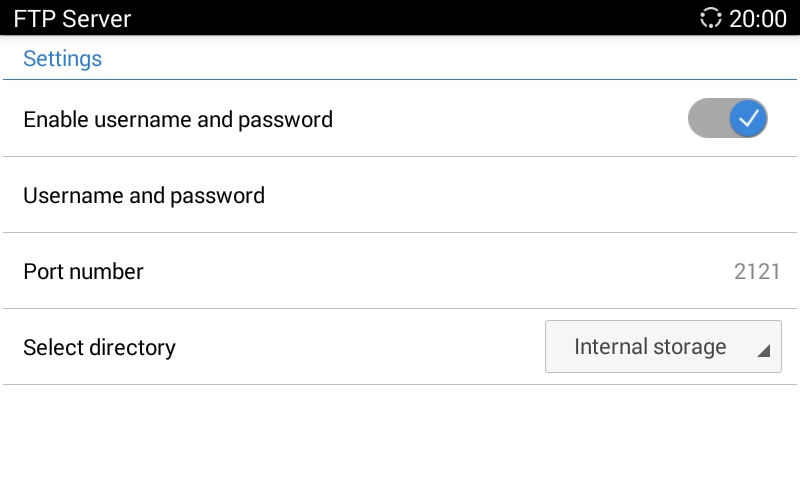
User Helper
For the first time, it powers up or after factory reset, GAC will open User helper and tips. Users can follow the guide to use GAC2500.
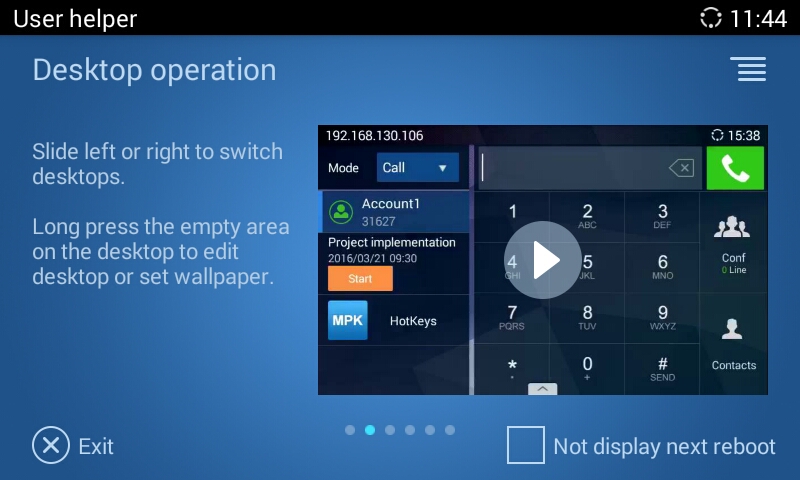
Downloads
Downloads is for viewing and managing the files downloaded from internet. Click on the icon
 to open Downloads.
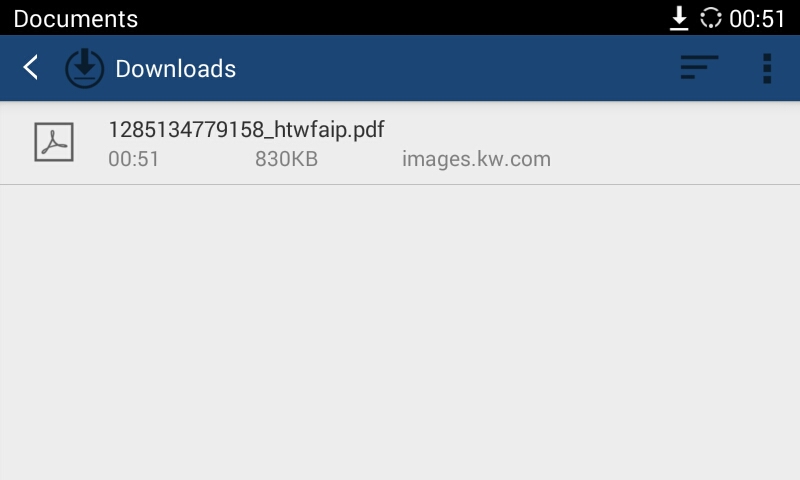
-
Click on icon
 to sort the files by name, date modified, or size.
-
Click on icon
 to configure the view of files.
GAC2500 WEB UI FEATURES
Accessing GAC2500 Web GUI
The IP address of the GAC2500 displays on LCD display screen.
To access the GAC2500 Web GUI:
- Connect the computer to the same network as GAC2500.
- Open a Web browser on your computer, enter the phone’s IP address in the address bar of the browser; for example: http://192.168.124.111;
- Enter the administrator’s login and password to access the Web Configuration Menu. The default username and password are: admin, admin; you can set language to English or Chinese in the drop-down menu of language;
4. Click “Login” to access the configurations in web UI.
Saving Changes
When changing any settings on the web UI, always submit them by pressing the SAVE button ![]() on the bottom of the page, and then clicking the Apply button on the top of the page to apply the configuration changes. For those options with
on the bottom of the page, and then clicking the Apply button on the top of the page to apply the configuration changes. For those options with ![]() next to it in the Web page, users must reboot the GAC2500 for the changes to take effect.
next to it in the Web page, users must reboot the GAC2500 for the changes to take effect.
Definitions
This section describes the 6 options in the GAC2500 Web GUI. Please view Advanced, Maintenance and Status specifications in Administration Guide.
- Call: Users could start conference and control conference from Web GUI.
- Contacts: Contacts, Schedule, Call History.
- Account: Configure account info.
- Advanced: General Settings, Call Features, Tone Generator, MPK General Settings, MPK LCD Settings.
- Maintenance: Network Settings, Time & Language, Security Settings, Upgrade, Troubleshooting, Device Manager.
- Status: Account Status, Network Status, System Info.
You can log in as an administrator or a normal user. The following table shows the web pages accessible by normal user and administrator.
User Type | Username | Default Password | Accessible Web Pages |
Normal User | user | 123 |
|
Administrator | admin | admin | All pages. |
GAC2500 Users Access Permissions
Toolbar
The web UI tool bar is on the upper right corner of the web UI page.

- DND: Turn on/off DND mode. Once enabled, the DND text will turn into red and all incoming calls will be rejected.
- English: Select the display language for the web UI.
- Reboot: Reboot the device.
- Expert: Click to switch to expert mode and click again to cancel. Once enabled, the administrator can view all settings items.
- Logout: Log out from the web UI.
Call Page
GAC2500 Web UI call page is shown below. Users could make calls and initiate conference from Web UI.
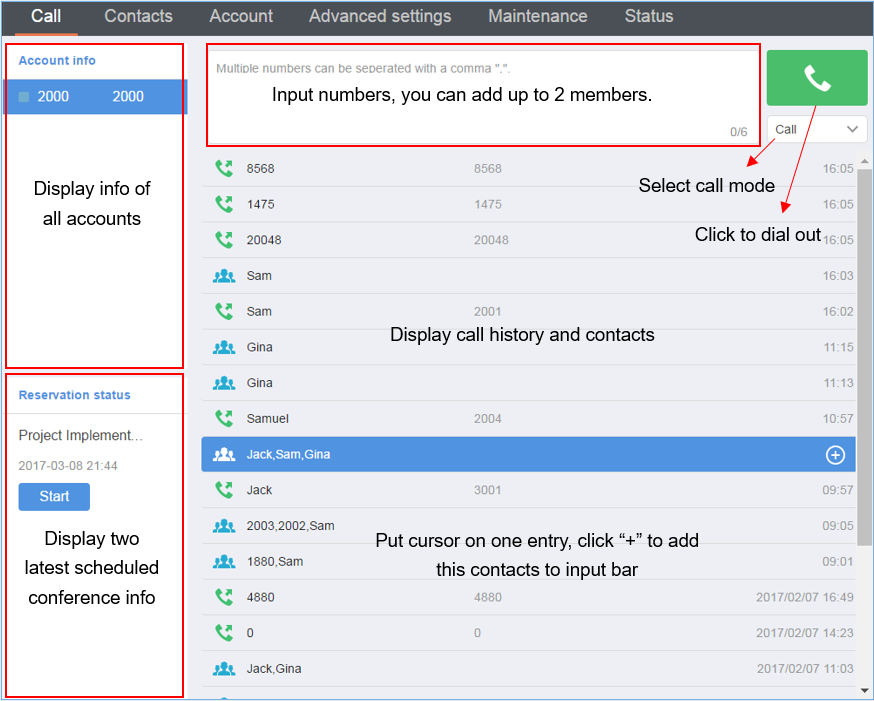
Making a Call
- Select account in Account Info box;
- Select call mode, then input phone number (s) in input box, use “,” to separate different numbers or tap on other place on screen to confirm your input;
- Tap onto dial out.
You can also tap on
![]() behind one call history entry to add the contact to input box.
behind one call history entry to add the contact to input box.
Single Incoming Call
When the GAC is in idle, the dial screen will pop up when dialing out as shown below:
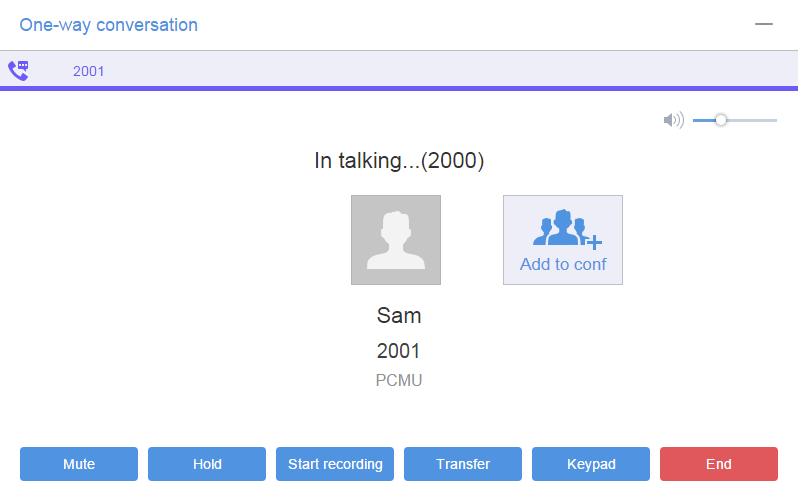
If the callee answers the call, you will see dial screen which is the same as the one on GAC2500 LCD.
Tap on
![]() on the upper right corner to minimize dial screen to the lower right corner as shown below:
on the upper right corner to minimize dial screen to the lower right corner as shown below:
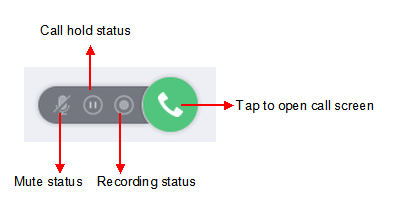
When the line is in mute/hold/recording status, the corresponding icons will be highlighted.
Conference Control
When the GAC2500 is on conference, the conference screen is as shown below.
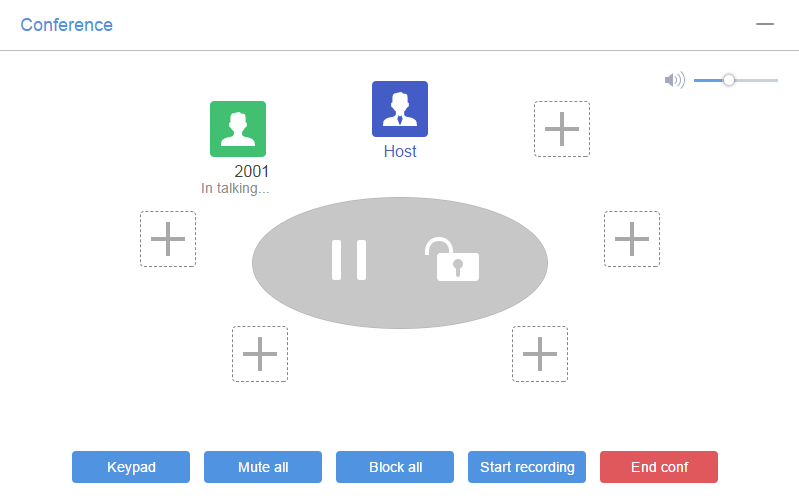
The conference screen on Web is the same as the one on GAC2500 LCD.
Tap on
![]() the upper right corner to minimize conference screen to the lower right corner as shown below:
the upper right corner to minimize conference screen to the lower right corner as shown below:
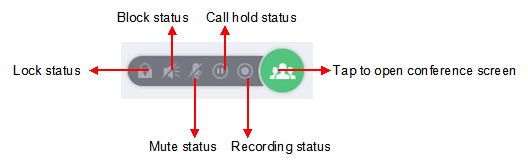
When the line is in lock/mute all/block all/hold/recording status, the corresponding icons will be highlighted.
Contacts Page
This page lists Contacts, Schedule, Call History and LADP.
Contacts
The operations will be synchronized and can be viewed from LCD as well. Users could search/add/delete/edit contact on web page. The web UI contacts page is as shown below.
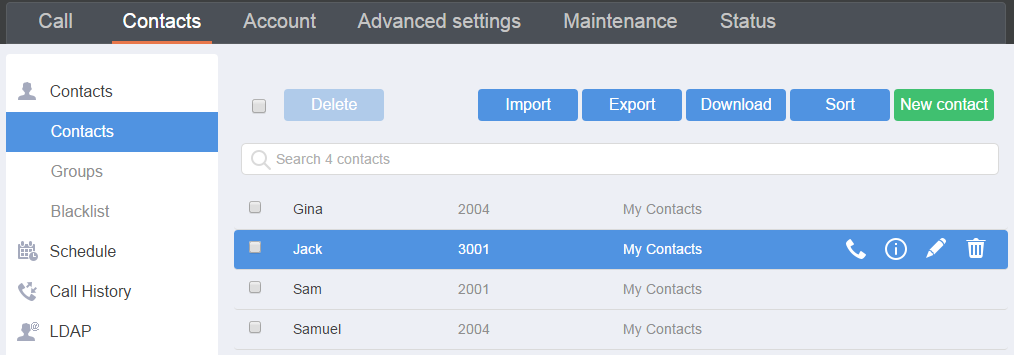
- Tap on “Import” option to access Import screen. Refer to chapter BATCH IMPORT CONTACTS to fill in info and import the contacts on PC to device.
- Tap on “Export” option to access Export screen. Refer to chapter EXPORT CONTACTS to fill in info and export the contacts on device to PC.
- Tap on “Download” option to access Download screen. Refer to chapter DOWNLOAD CONTACTS to fill in info and download the contacts on server to PC.
- Tap on “Sort” option to access Sort Phonebook screen. Sort the contacts by first name or last name.
- Tap on “New Contact” option to access Add Contact screen. Fill in contact information and save.
Put the cursor on contact to display more operation buttons.
![]() Tap to dial this contact.
Tap to dial this contact.
![]() Tap to view the contact details.
Tap to view the contact details.
![]() Tap to access Edit screen, you can edit contact and save the changes.
Tap to access Edit screen, you can edit contact and save the changes.
![]() Tap to delete this contact.
Tap to delete this contact.
Groups
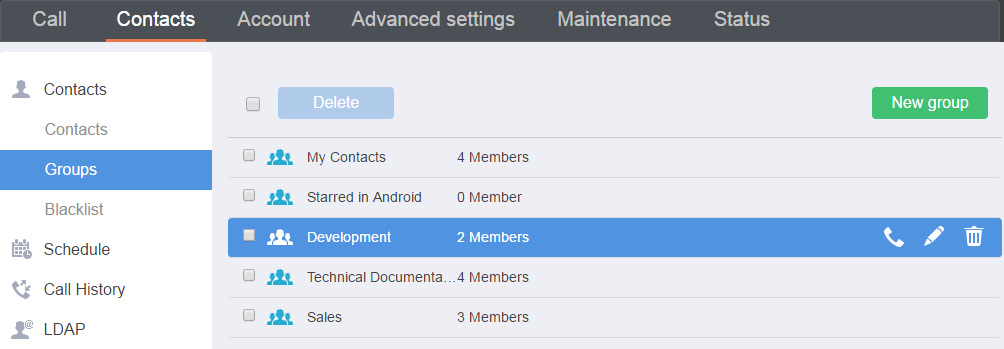
- Tap on “New Contact” option to access New Group screen. Input group name and check group member (s) then save.
- Click on the group name to view all members in this group.
Put the cursor on group to display more operation buttons.
![]() Tap to call this group. Please note that GAC2500 supports up to 6 lines (7-way) conference. If there are more than 6 conference members, check 6 members you want to add to conference first.
Tap to call this group. Please note that GAC2500 supports up to 6 lines (7-way) conference. If there are more than 6 conference members, check 6 members you want to add to conference first.
![]() Tap to access Edit screen, you can edit group and save the changes.
Tap to access Edit screen, you can edit group and save the changes.
![]() Tap to delete this group, the contacts in this group will not be deleted the same time.
Tap to delete this group, the contacts in this group will not be deleted the same time.
Blacklist
Blacklist function on Web UI is the same as on local. Please refer to chapter Blacklist for more details.
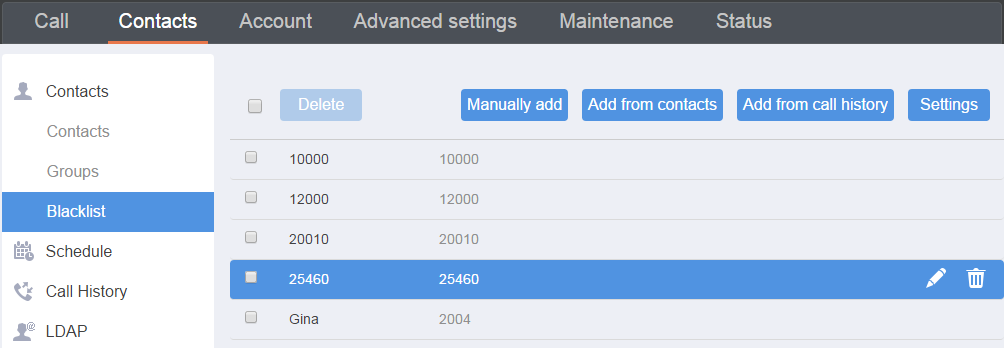
Schedule
You can refer to chapter Schedule for more details.
Conference can be scheduled, edited and deleted from web UI.
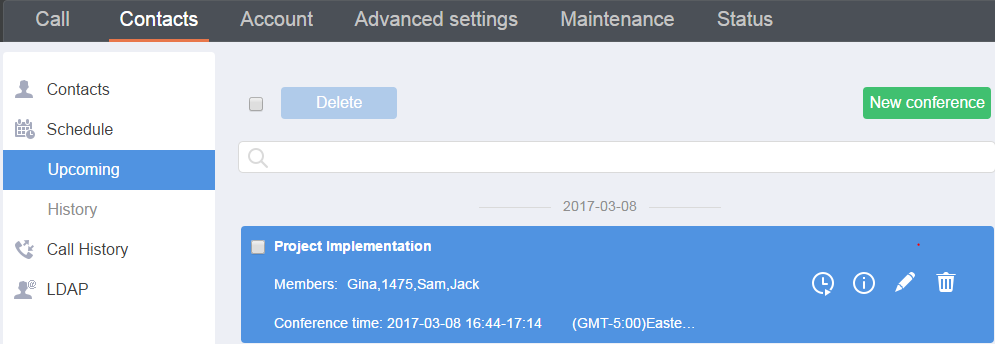
Tap on “New Conference” option to access New Conference screen. Input conference name and check conference member (s) then save.
Put the cursor on conference to display more operation buttons.
![]() Tap to call this conference.
Tap to call this conference.
![]() Tap to access Details screen. You can also edit and save conference on this screen.
Tap to access Details screen. You can also edit and save conference on this screen.
![]() Tap to access Edit Schedule screen, you can edit conference and save the changes.
Tap to access Edit Schedule screen, you can edit conference and save the changes.
![]() Tap to delete this conference.
Tap to delete this conference.
History conference screen is as shown below, you can dial/reschedule/delete history conference from web UI.
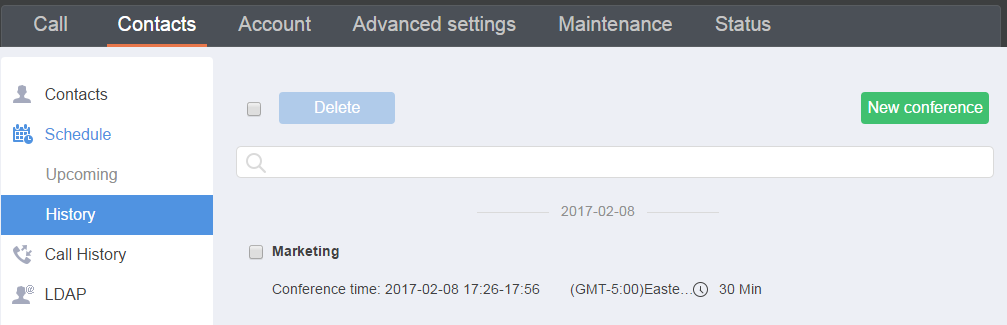
Put the cursor on conference to display more operation buttons.
![]() Tap to call this conference.
Tap to call this conference.
![]() Tap to access Details screen. You can also edit and save conference on this screen.
Tap to access Details screen. You can also edit and save conference on this screen.
![]() Tap to access Edit Schedule screen. You can reschedule the history conference on this screen.
Tap to access Edit Schedule screen. You can reschedule the history conference on this screen.
![]() Tap to delete this conference.
Tap to delete this conference.
Call History
From web UI, users could also access Call history, which is synchronized with the call history from LCD.
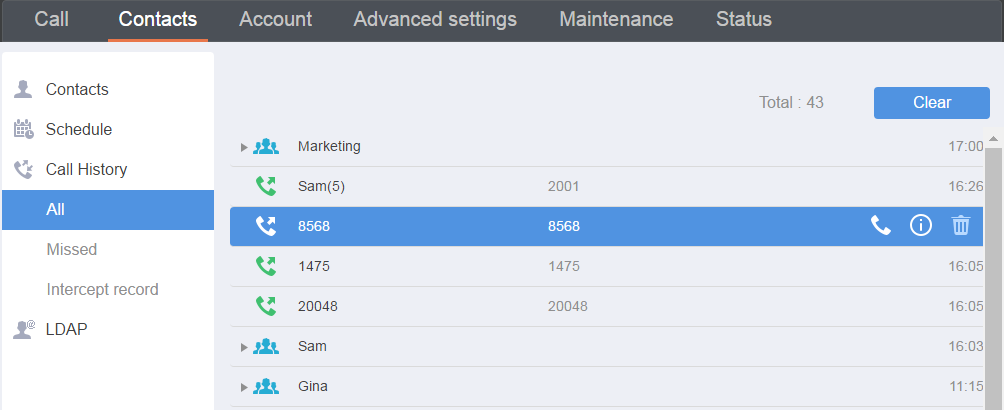
- Tap on “Clear” option to clear all call history.
Put the cursor on call history to display more operation buttons.
![]() Tap to call this contact.
Tap to call this contact.
![]() Tap to access Edit Schedule screen. You can reschedule the history conference on this screen.
Tap to access Edit Schedule screen. You can reschedule the history conference on this screen.
![]() Tap to delete this conference.
Tap to delete this conference.
LDAP
From web UI, users can configure LDAP contacts. Please refer to chapter of LDAP under Application to fill in info and import LDAP contacts.
FACTORY RESET
Users could reset factory settings via the following ways: Reset via local GUI, via Web page, via the reset button on the back panel of GAC2500. Factory reset will delete configuration info and syslog info, the HDD data and videos will not be deleted.
Restore to Factory Default via LCD Menu
Access to the GAC2500 LCD Settings🡪Advanced Settings🡪Factory Reset, tap on Factory Reset, a confirmation message will be displayed. Tap on OK to confirm or return to avoid.
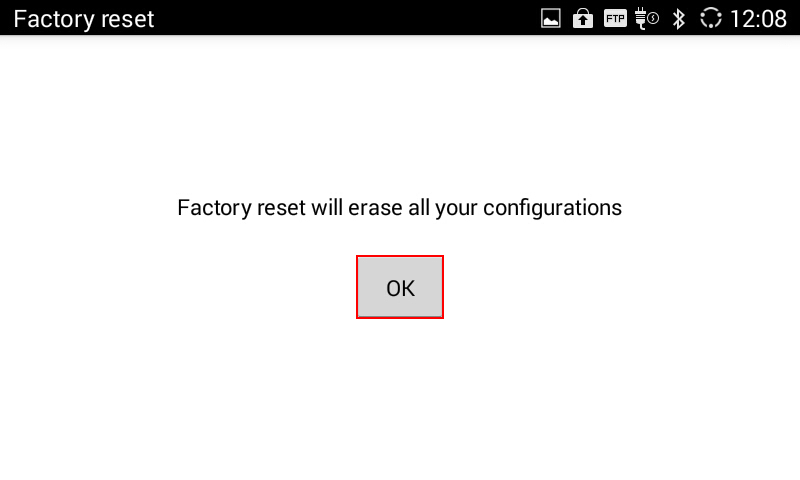
Restore to Factory Default via the Web GUI
- Access to the GAC2500 Web GUI 🡪 Maintenance🡪Upgrade page.
- At the bottom of the page, click on the Reset button for Factory reset. Select whether you would like to clear the SD card if there is SD card plugged in.

3. A dialog box will pop up to confirm factory reset;

4. Click OK to restore the phone to factory settings.
Reset Via Button
Use a small pin to press the button Reset button on the back panel of GAC2500 for more than 10 seconds to reboot and restore to factory reset.
EXPERIENCING THE GAC2500 APPLICATION PHONE
Please visit our website: http://www.grandstream.com to receive the most up- to-date updates on firmware releases, additional features, FAQs, documentation and news on new products.
We encourage you to browse our product related documentation, FAQs and User and Developer Forum for answers to your general questions. If you have purchased our products through a Grandstream Certified Partner or Reseller, please contact them directly for immediate support.
Our technical support staff is trained and ready to answer all of your questions. Contact a technical support member or submit a trouble ticket online to receive in-depth support.
Thank you again for purchasing Grandstream Enterprise Application phone, it will be sure to bring convenience and color to both your business and personal life.
* Android is a trademark of Google Inc.
* Skype and Lync are Registered Trademarks of Microsoft Corporation.
CHANGE LOG
This section documents significant changes from previous versions of GAC2500 user manuals. Only major new features or major document updates are listed here. Minor updates for corrections or editing are not documented here.
Firmware Version 1.0.3.48
- No Major changes.
Firmware Version 1.0.3.47
- No Major changes.
Firmware Version 1.0.3.45
Firmware Version 1.0.3.42
- No major changes
- No major changes
- No major changes
- Supported BroadWorks Xtended Services Interfaces (XSI) features. [Broadworks XSI Contacts]
- No major changes
- No major changes
- Optimize Bluetooth performance.
- Added support for TLSv1.1 and TLSv1.2.
- Added option to block image gallery options via GUI Config Tool 3.9.0. [block image gallery options]
- Updated some Chinese translation in LCD menu.
- Updated displaying caller information based on “Referred-By” header in incoming call page on LCD. [Incoming Transferred call notification]
- Deleted “Lock” in Add conference. [Conference]
- Added volume control bar in conference on web UI. [Volume control]
- Made members label visible when adding new members in Schedule. [Schedule]
- Added total number of calls in Call History in web UI. [Call History]
- Added a prompt to recover intercepted calls from blacklist. [Blacklist]
- Hid “Associated account” in Schedule if there is no active account. [Active account]
- Added support to change background color when clicking a file in File Manager List view. [File Manager]
- Updated prompt of exporting record file on LCD. [Call record]
- Updated prompt of video call request on LCD. [Video Call]
- Prompt tips when GAC2500 is connected to wrong GVC USB port. [USB Slave Mode]
- Improved audio process performance.
- Supports using dial pad to dial out call in Skype for business app. [Account]
- When removing app from GUI Config tool, the GAC2500 will delete it including background service rather than hiding the app in background only.
- Added call detail in calling interface. When in a call, simply choose “More” and “Call Details”. [Call Details]
- DUT in a conference with an outgoing call will add all incoming call to conference. [Answering an Incoming Call in Conference]
- Changed LDAP search timeout unit to second. [Search timeout (s)]
- Changed internal storage icon. [File Manager]
- Modify phone type and Email type to English only while importing/exporting Contacts xml file on Universal Phone Editor.
- Added more operation on LCD for GVC320x when GAC2500 is connected to GVC320x via USB. [USB Slave Mode]
- Added count of calls for call history on LCD. [Call Count Call History]
- Improved DUT’s behavior when using option “Use # as Dial Key” to dial out. [Direct Dialing]
- Added support for Google Calendar conference schedule features. [Schedule Conference via Google Calendar]
- Shortened reminding tone for incoming intercom call. [Paging/Intercom]
- Added support for Bluetooth A2DP sink role, which means GAC2500 can connect to GVC320x and mobile devices via Bluetooth to play music files. [Play music files.]
- Packed new CFG file for new hardware production.
- Added some missing tooltips.
- Improved the web UI design on IE browser.
- Added voice mode setting, users can set 6 different voice modes. [Sound]
- Trimmed the multicast name displaying on web talking interface.
- Allowed DUT to display a widget shape even there is no account registered.
- No major changes.
- No major changes
- Improved the sound quality.
- The 3.5mm interface is mainly used for placing a cellphone in a conference. So, the volume range differs from cellphones. Please adjust the volume on the cellphone if it is too high. [Call Management]
- The dial pad has a MPK access key, and MPK app has different layout. [Shortcut]
- MPK app is renamed to Hotkeys. [Hotkeys]
- Updated call feature of Contact on dial pad. [Dialing a number via contact]
- Updated LCD layout (Only reset to enable new layout. Move some apps to Tool Folder). [Toolbar]
- Enabled password for schedule conference. [Initiate a Conference]
- Added ability to start a contact and put it on top of contact. [Contacts]
- Added direct IP call on dial pad without changing call mode. [Direct IP Call]
- Added ability to create a hotkey for a contact or a group. [hotkeys]
- Updated RJ48 cascade mode. LCD supports complete synchronization. [Cascade Mode]
- When screen lock is enabled, unlock is required for MPK, transfer, add to Conf in a call. [Lock]
- Added a PNP icon on status bar when enabled. [Status icons]
- Updated videos in Tips app. [User helper]
- Added setting LCD home screen. [Home Screen]
- Added Hold/UnHold for individual conference participant. [Hold/UnHold]
- Added FTP server. [FTP Server]
- Added GAC2500 quick guide. [GAC2500 quick guide]
- Increased call history to 2000 entries. [Telephony Features]
- Updated 3.5mm AUX line sequence interface. [Auxiliary Ports]
- Added cycle conference. [Add Scheduled Conference]
- Updated the chapter of third party application. [Sample Applications]
- This is the initial version.