INTRODUCTION
In order to seamlessly integrate with the GVC3220, the GAC2570 offers the Conference Control application. To utilize this app, the GAC2570 needs to establish a connection with a GVC device using an Ethernet cable, connecting it to the Media port on both devices. Once the connection is established, users gain access to the contact list, call interface, scheduling, and camera features directly from the GVC device.
The GAC2570 interface offers convenient control over the GVC3220 device, eliminating the need to access its configuration panel. Essentially, the GAC2570 functions as a remote controller for the GVC3220, enabling conference call setup, camera adjustment, contact list access, call-making capabilities, and SIP parameter configuration.
In the following guide, we will walk through all the steps to properly use the Conference Control app on the GAC2570 in conjunction with the GVC3220 Video Conferencing solution.
GETTING STARTED
Software Requirements
To use the Conference control app, make sure that both the GAC2570 and the GVC3220 are up to date with the following firmware:
- GAC2570 on firmware 1.0.3.4 or higher.
- GVC3220 on firmware 1.0.1.41 or higher.
Connecting GAC2570 with GVC3220
For the conference control app to be ready for use, the GAC2570 and GVC3220 need to be connected through the media port of both units as shown in the illustration below:

Once Connected, the following icon will be displayed on the notification bar of the GAC2570 when both devices will be connected successfully :

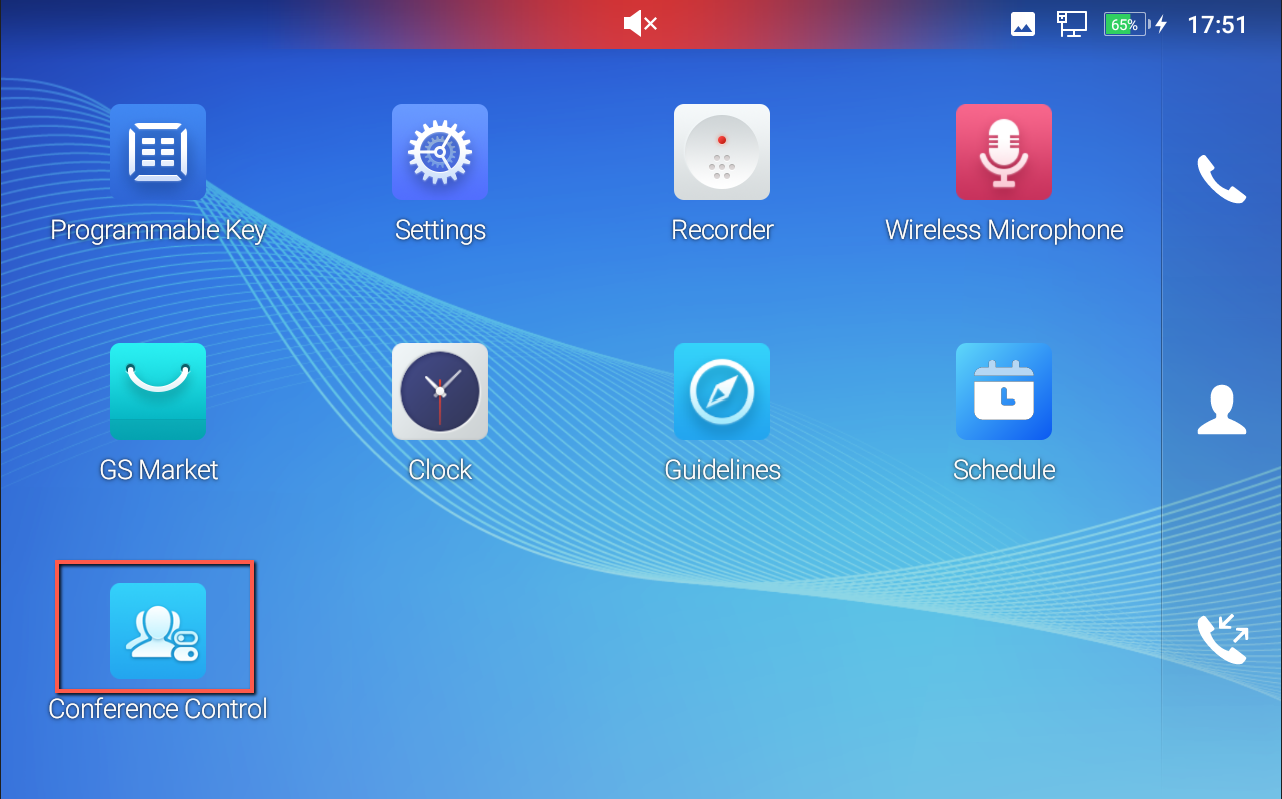
Accessing the Conference Control App
To Access the Conference control app on GAC2570, simply click the icon highlighted below:
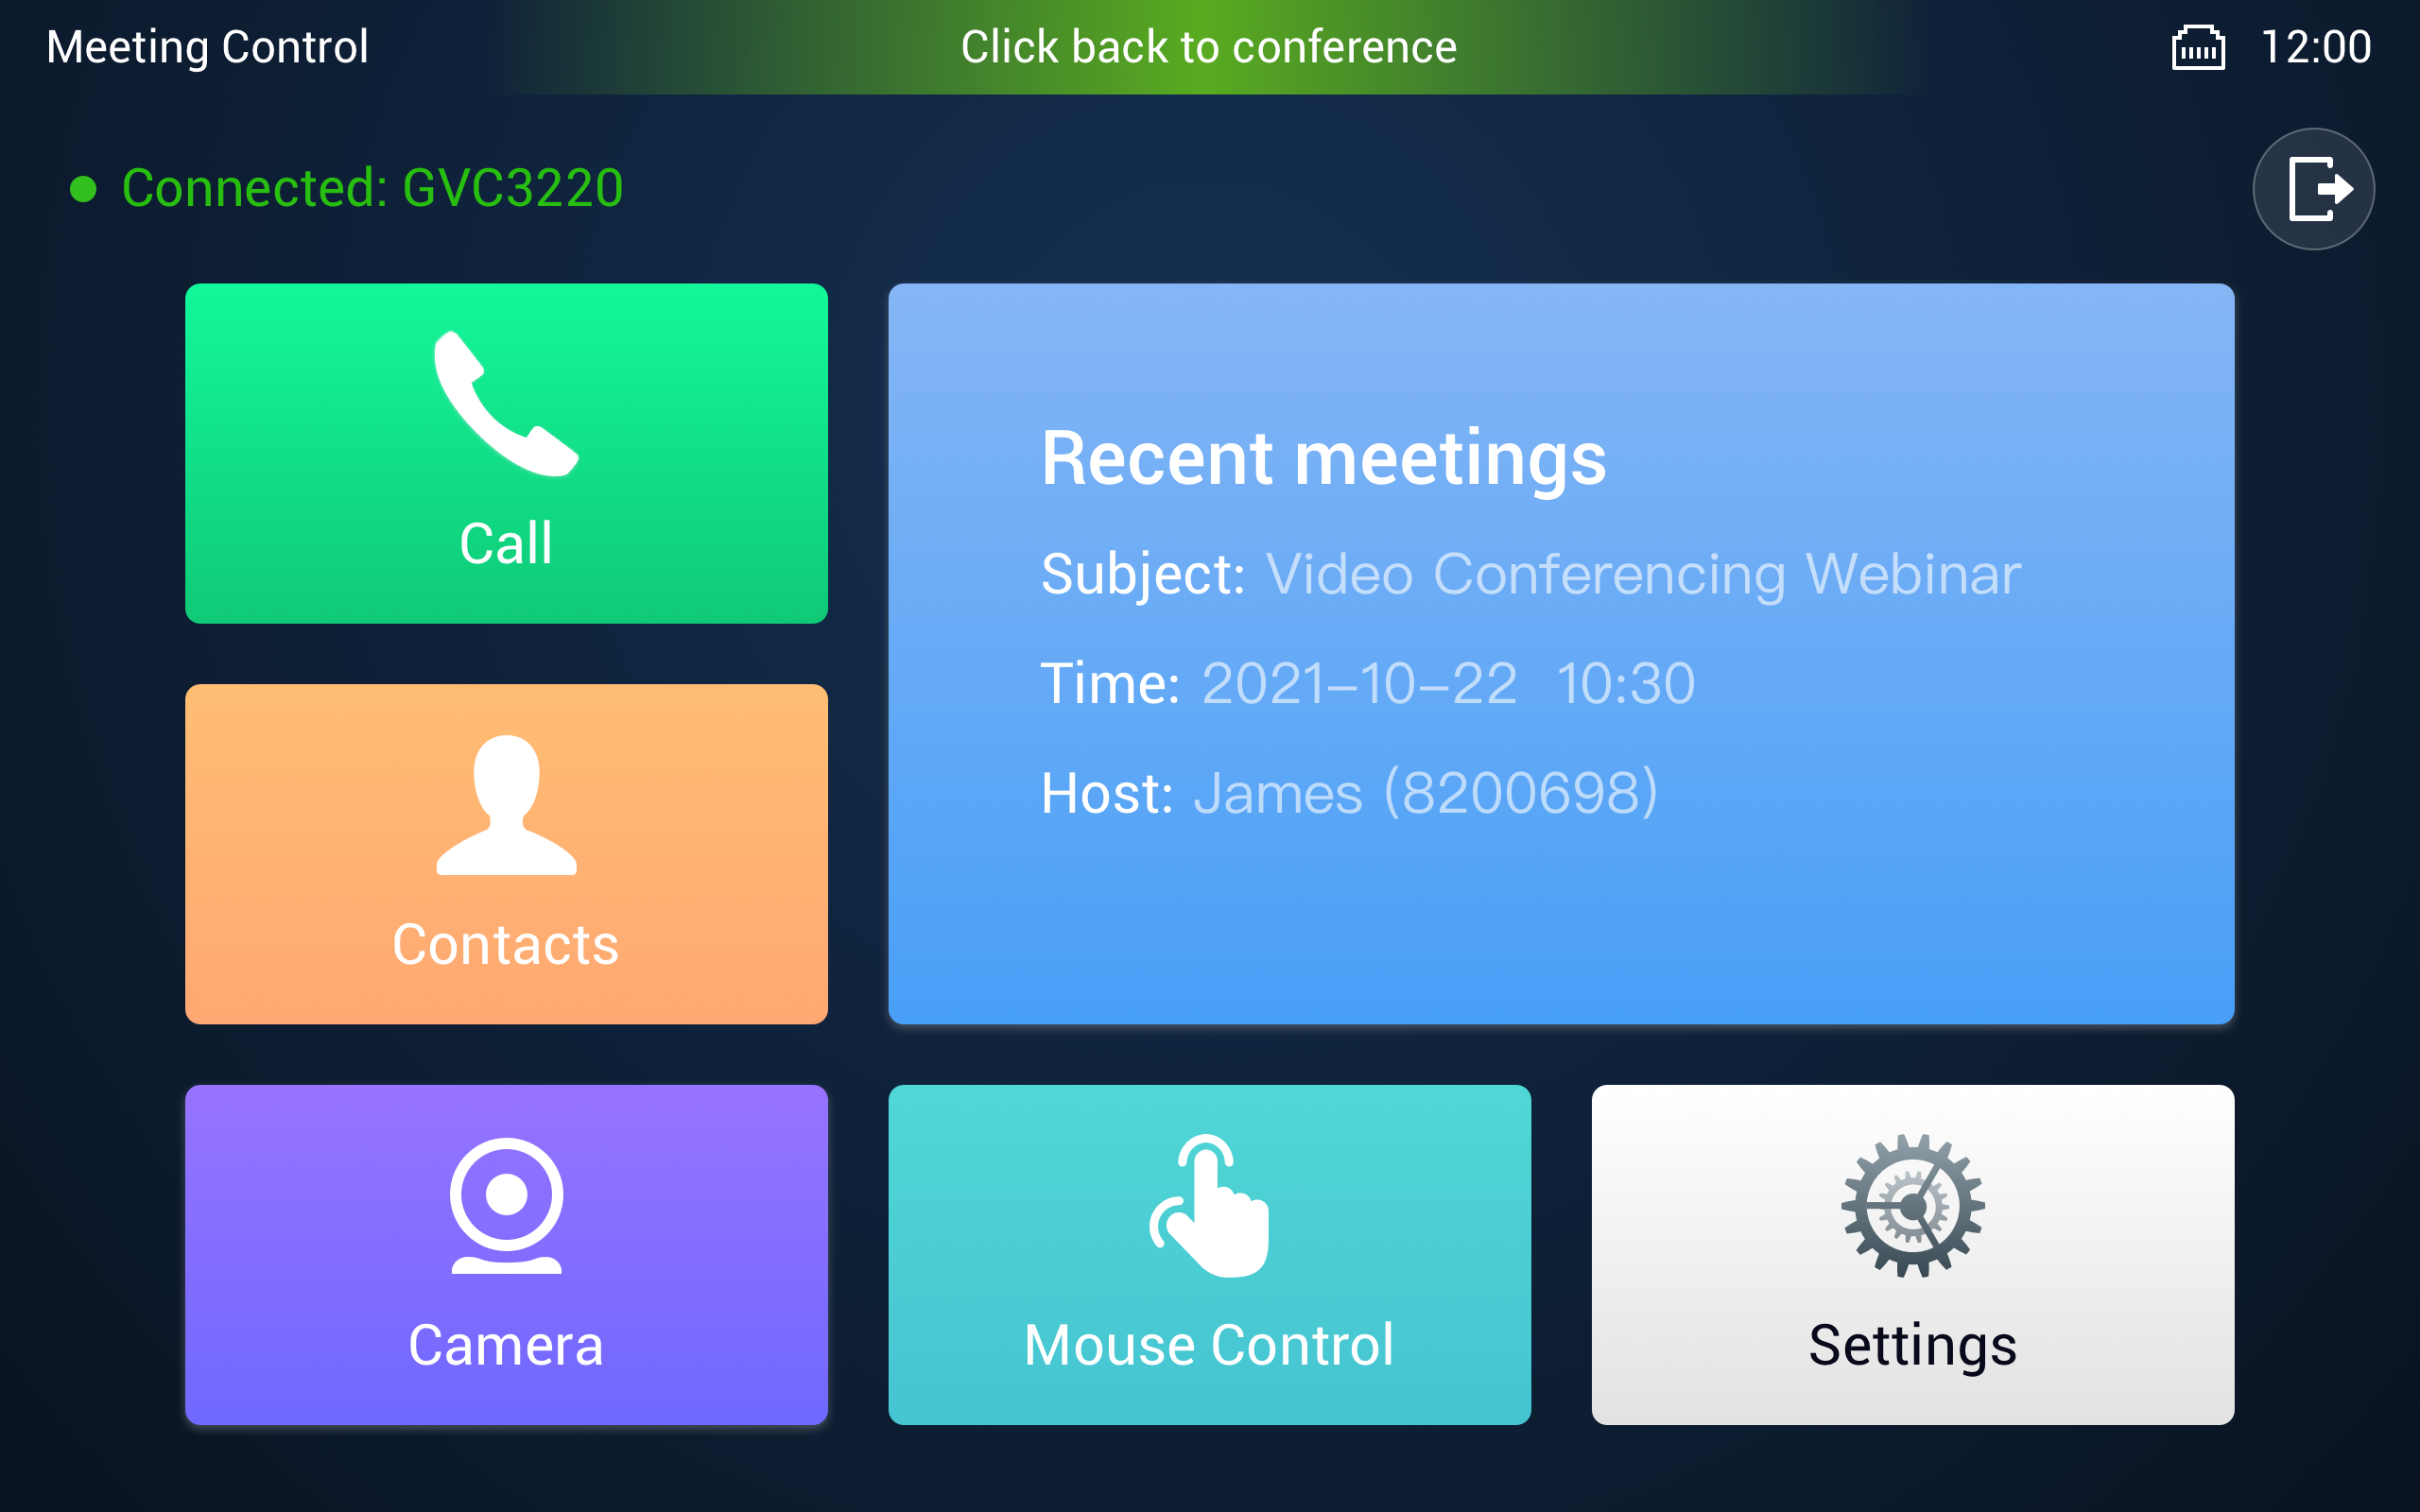
You will then be redirected to the main page of the conference control app displayed below:

CALLING OPERATIONS
On the main Conference Call Panel, Press the “Call” Icon to access the Calling interface.
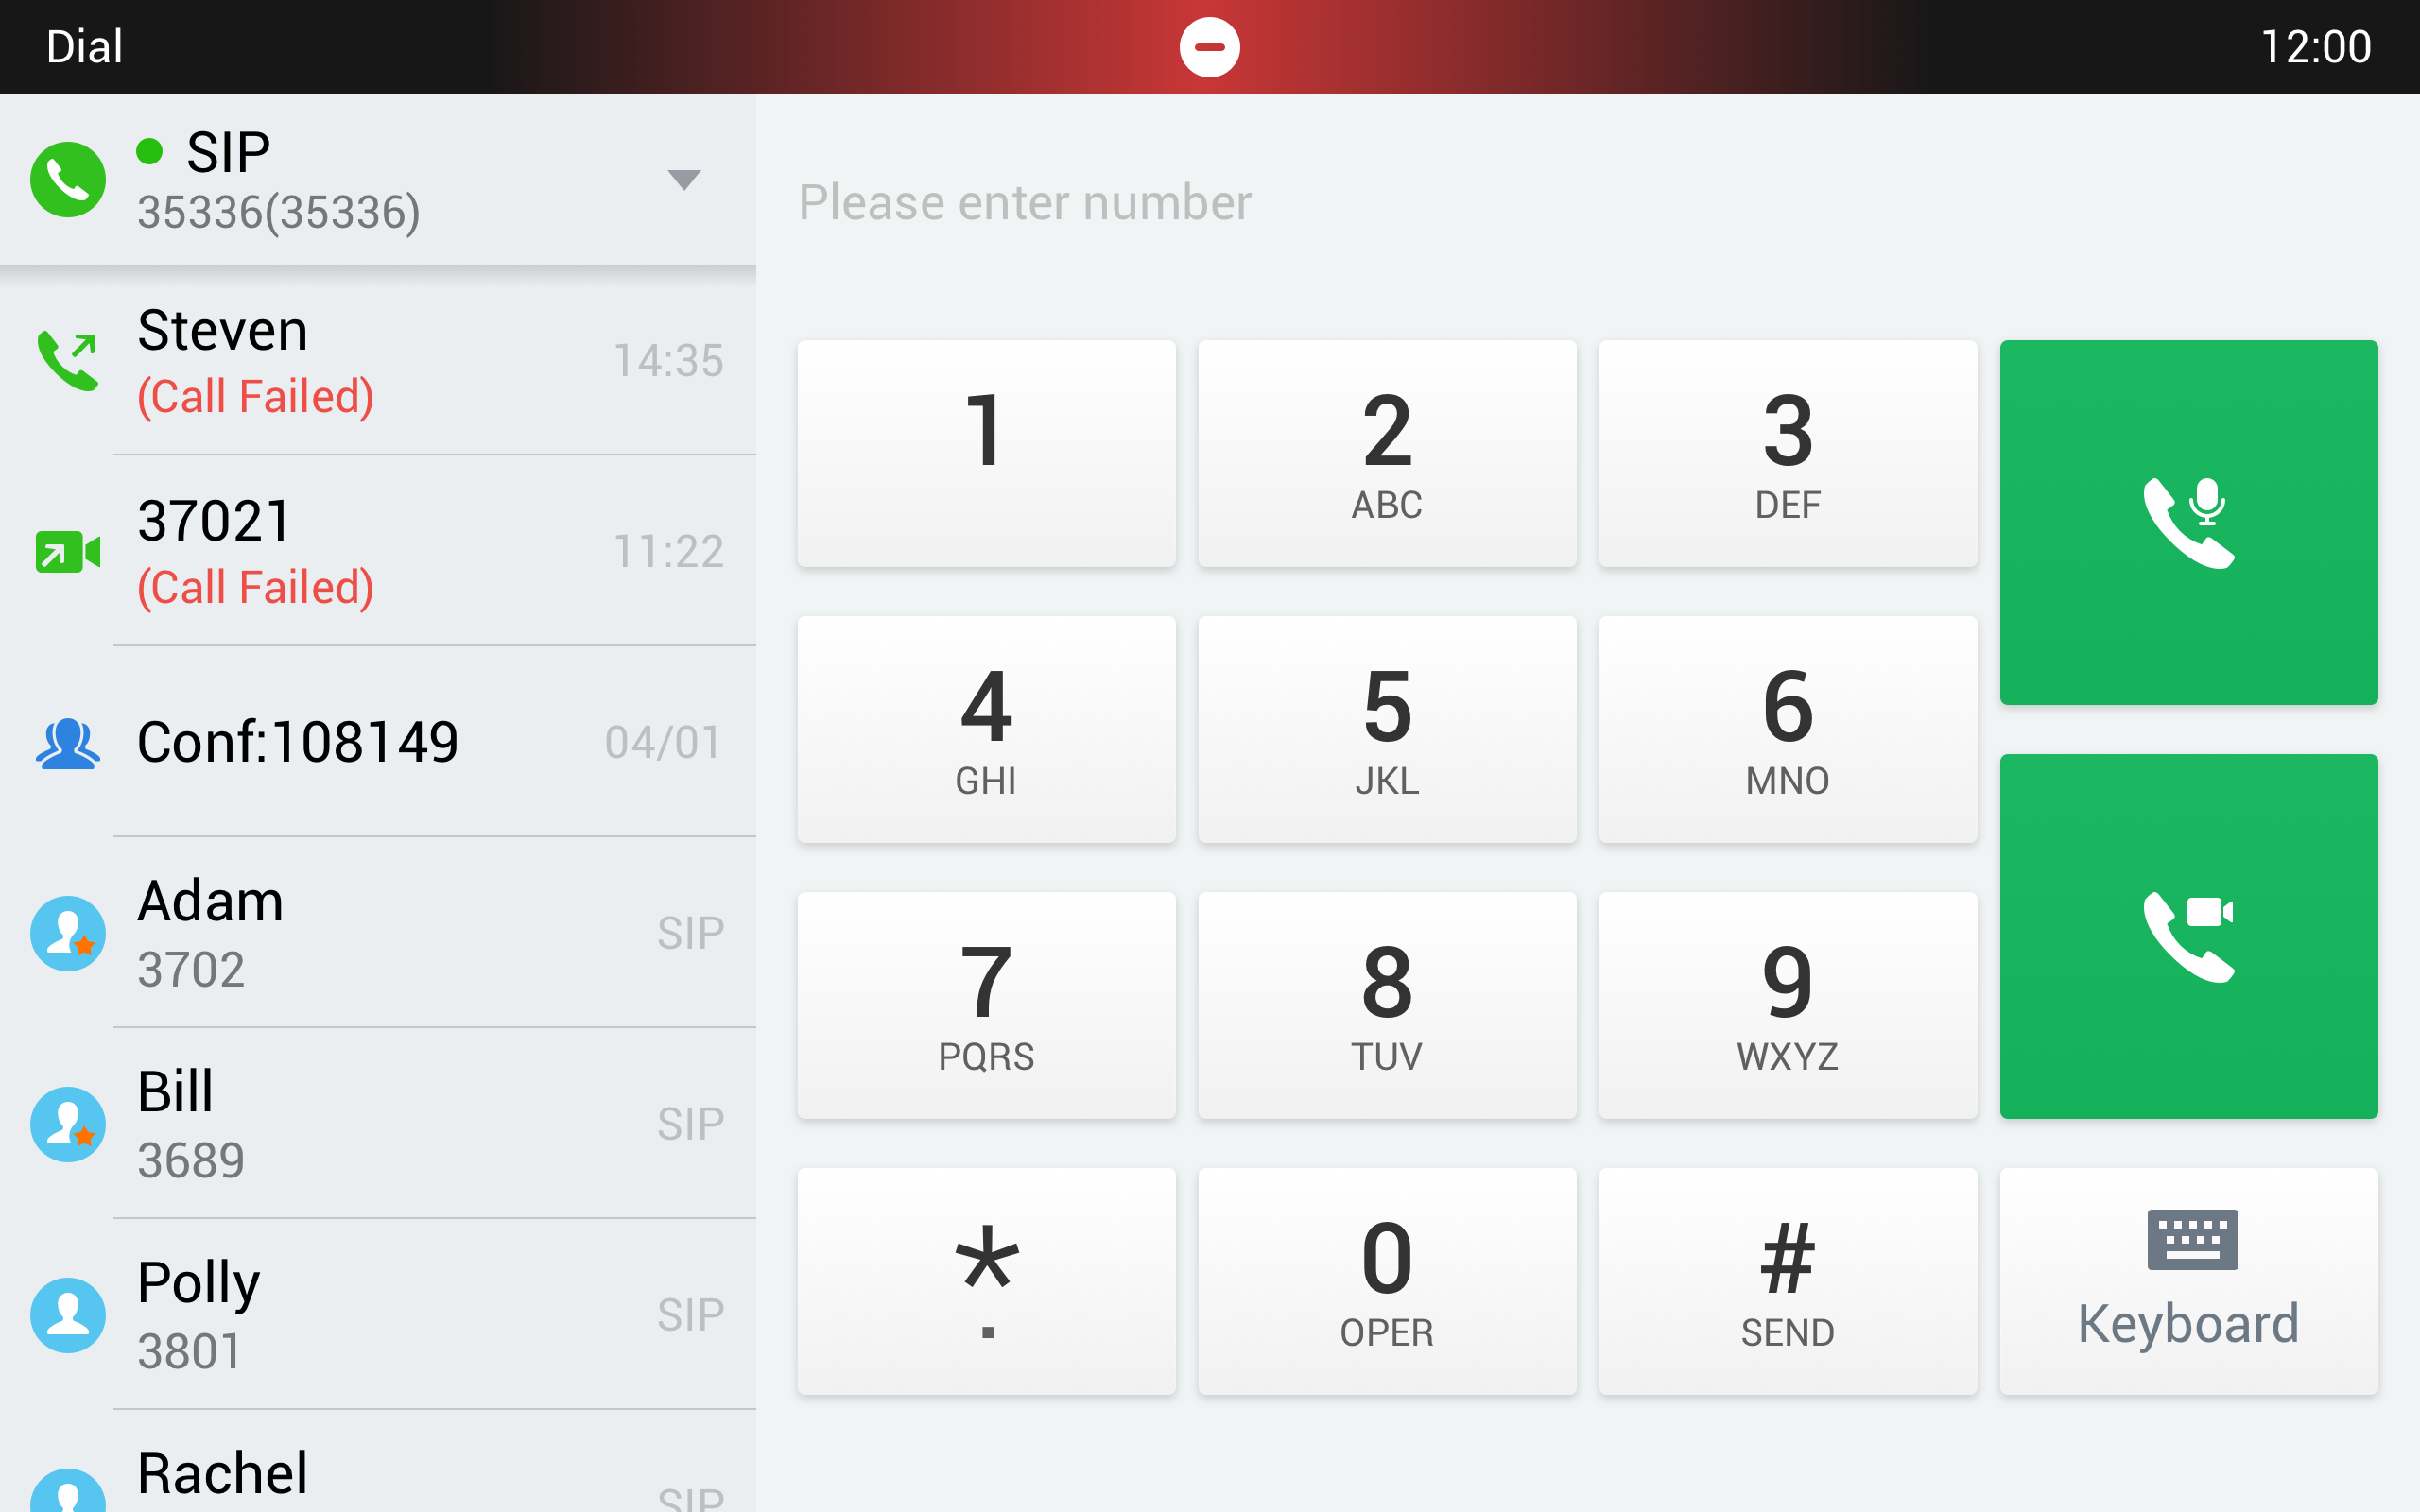
Make a call
To make a call :
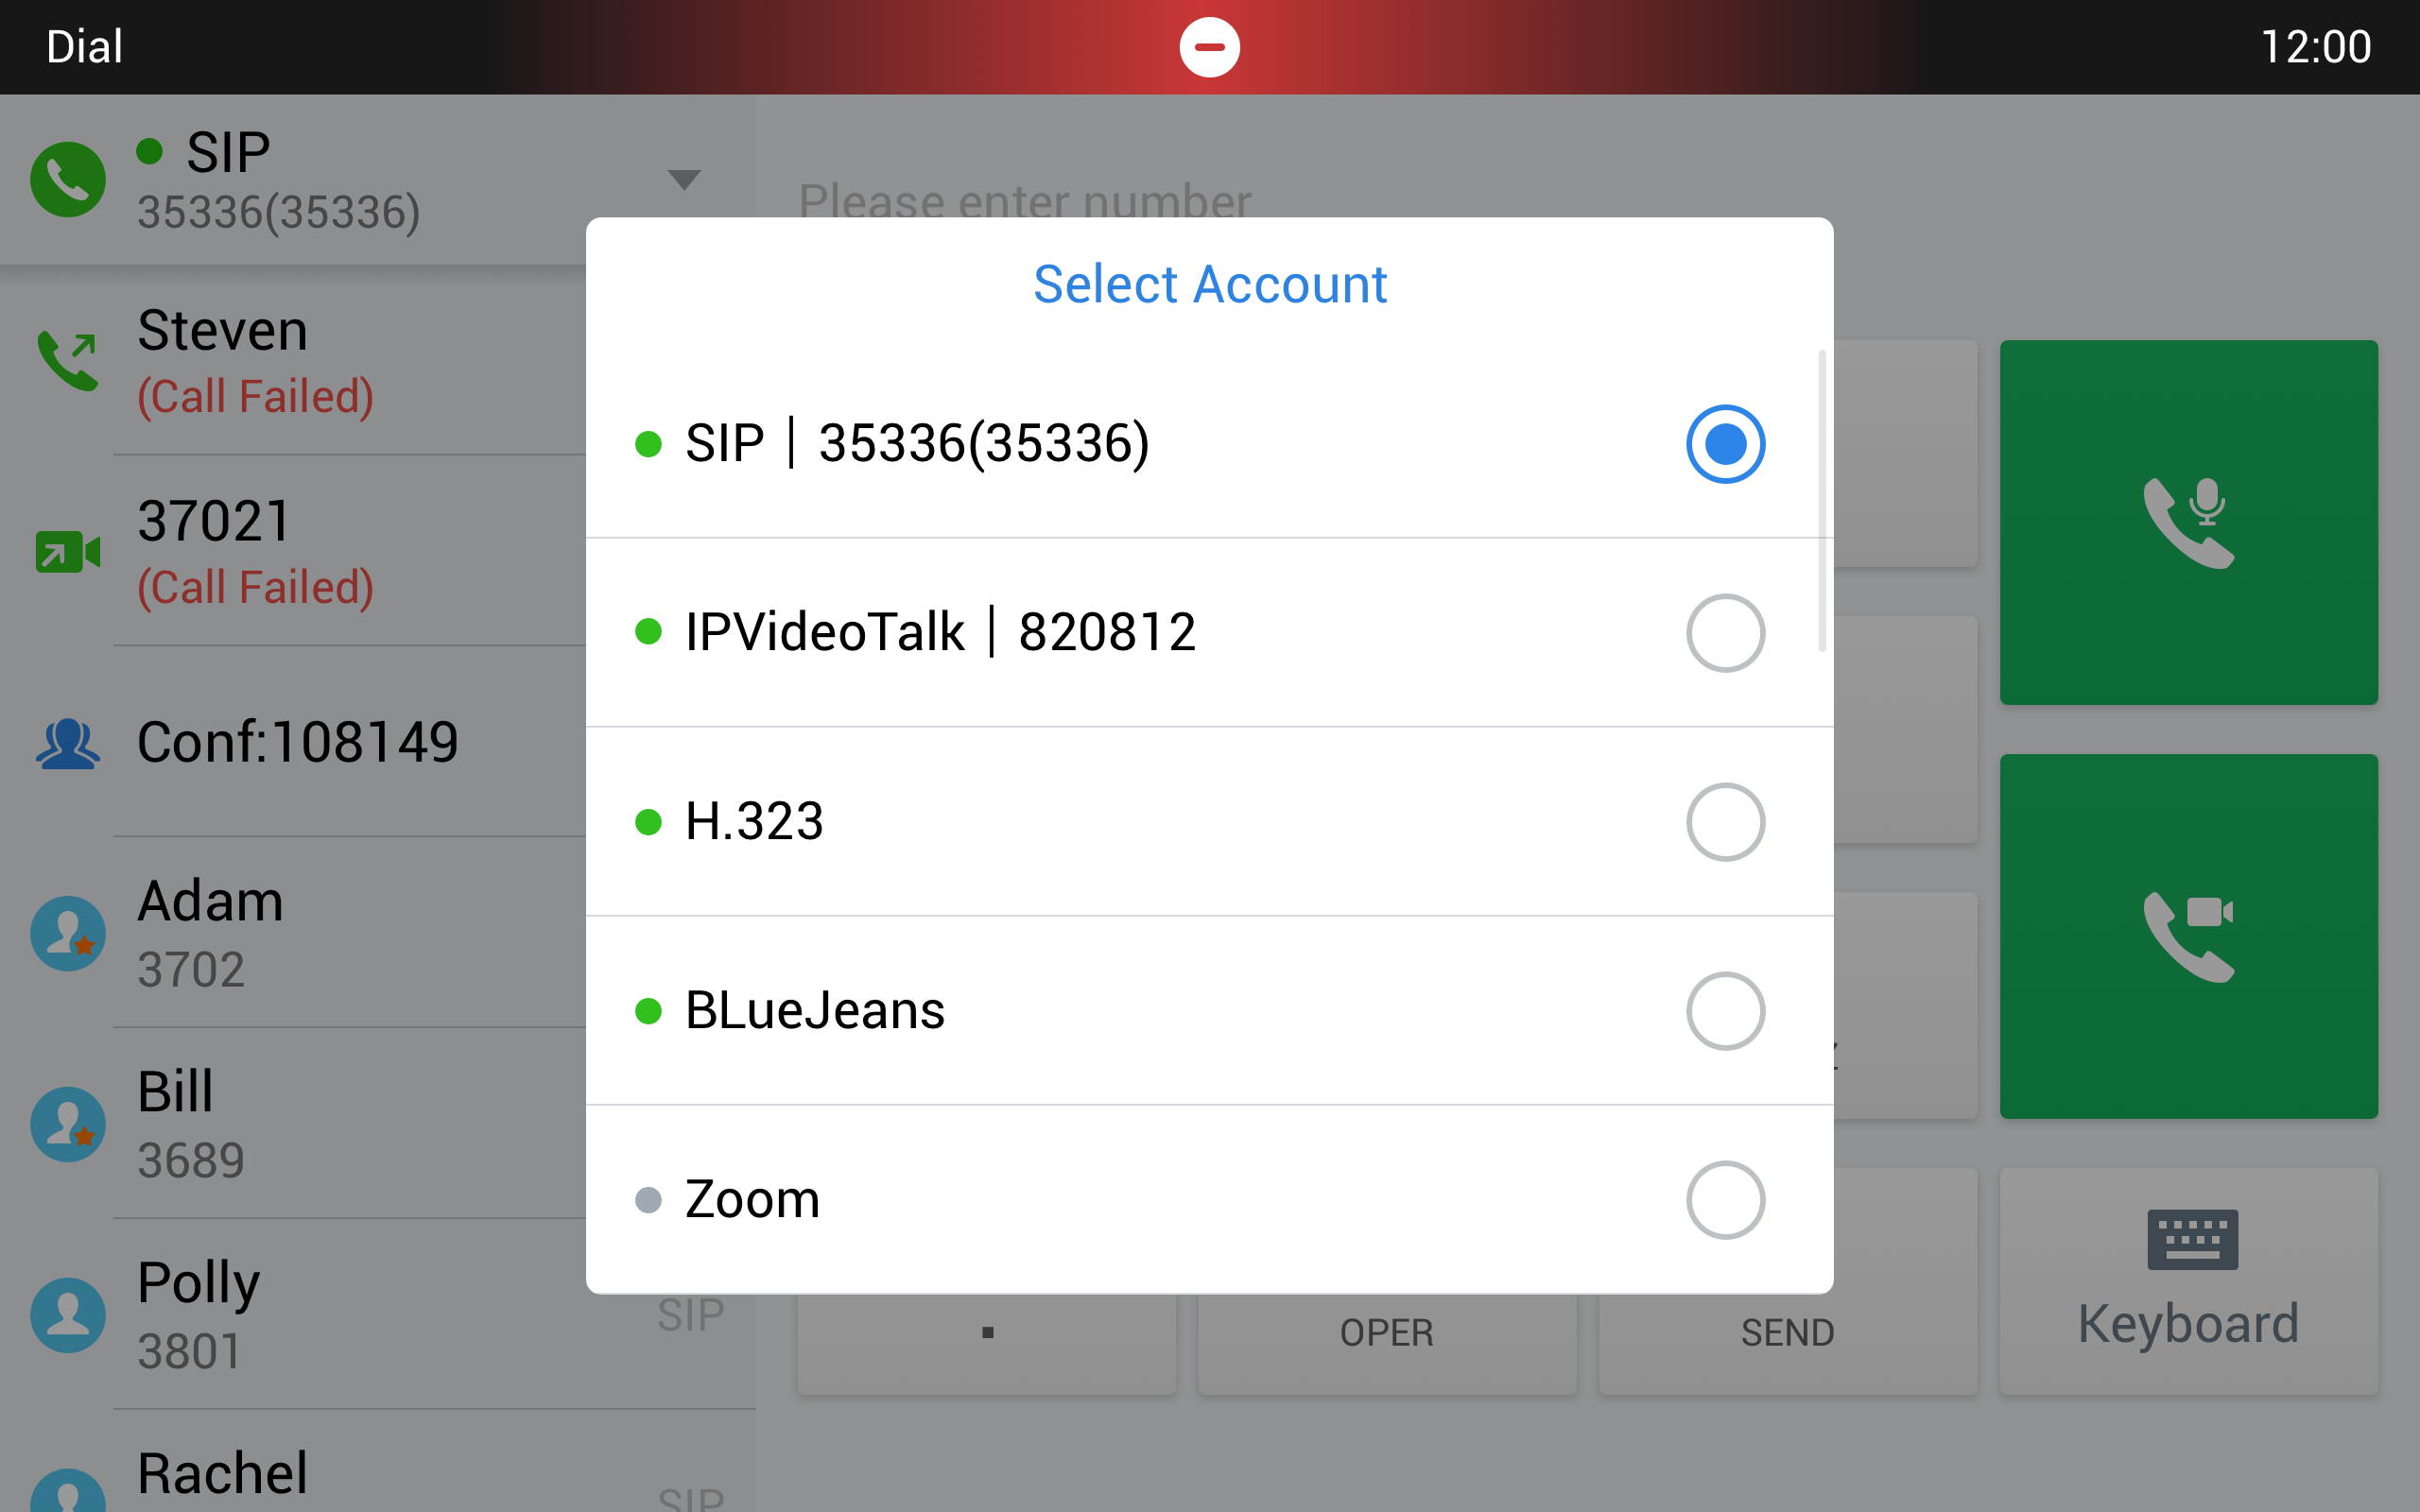
- Select an account from which you want to initiate the call, the available options are SIP, IP VideoTalk, H.323, BLueJeans, or Zoom.
- Enter the extension number(s) you want to dial
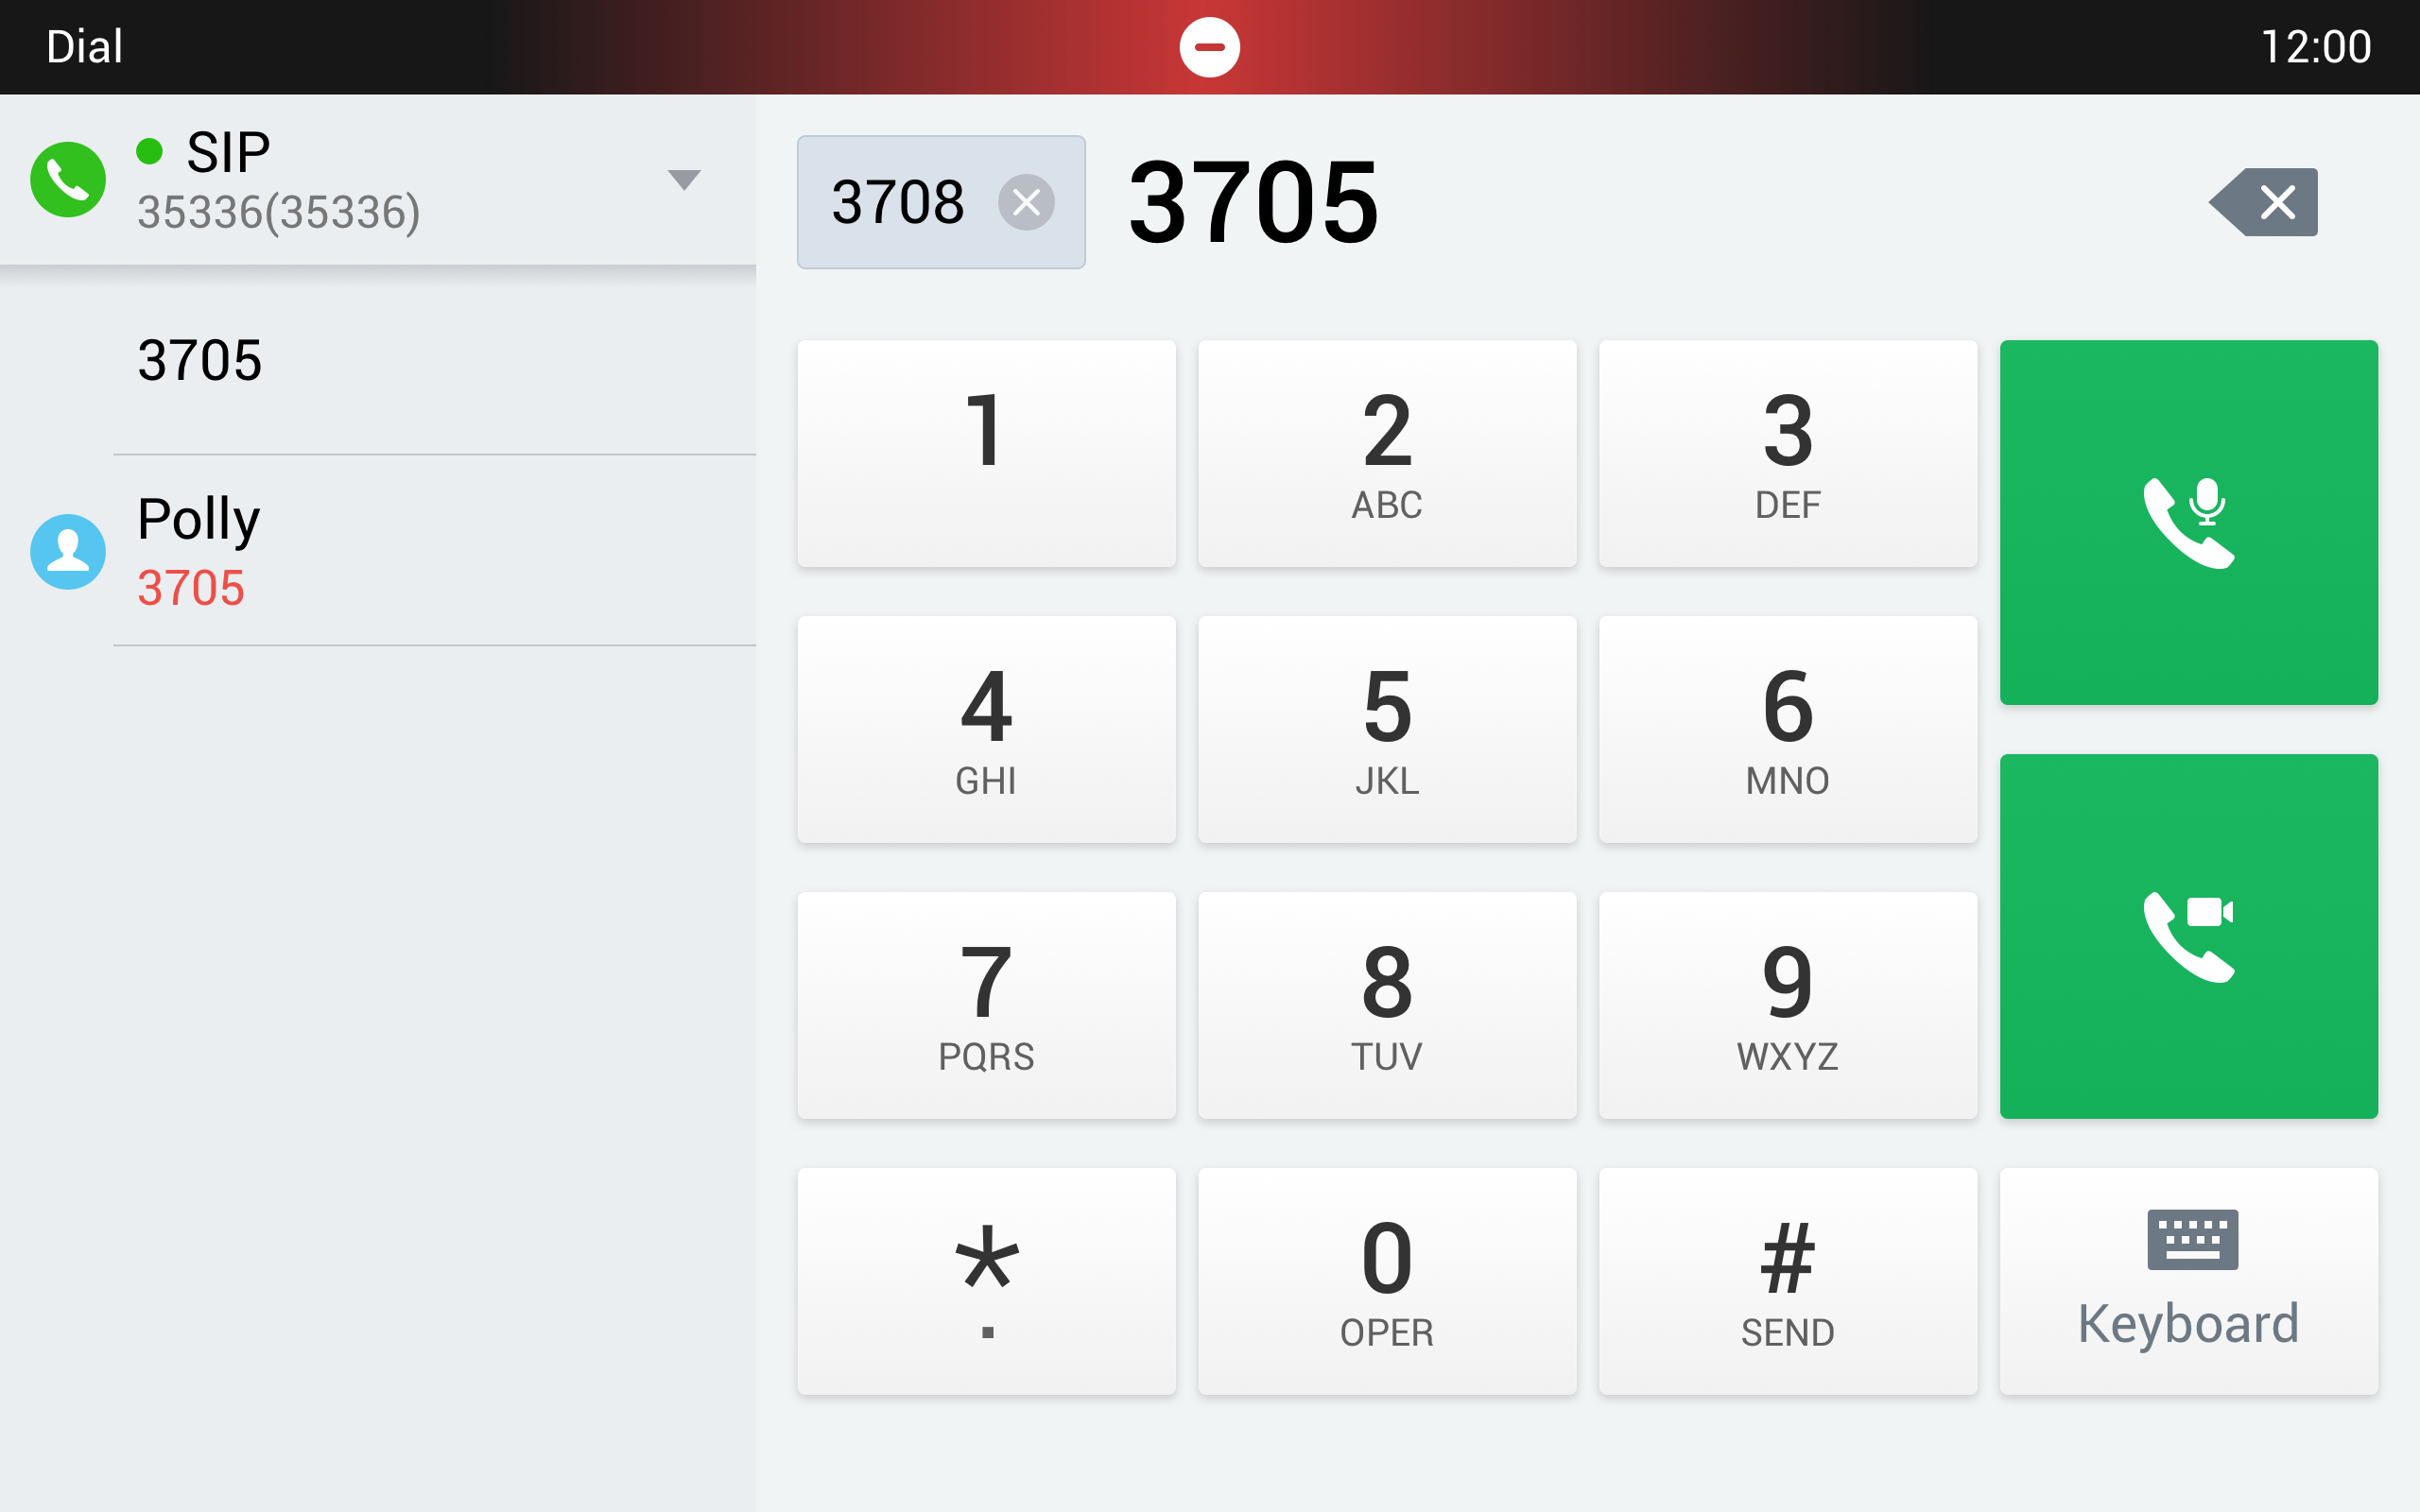
- Click on the icon
 to initiate an audio call or the icon
  to initiate a video call.
 - You can select many participants at once to join the call.
 to initiate an audio call or the icon
  to initiate a video call.
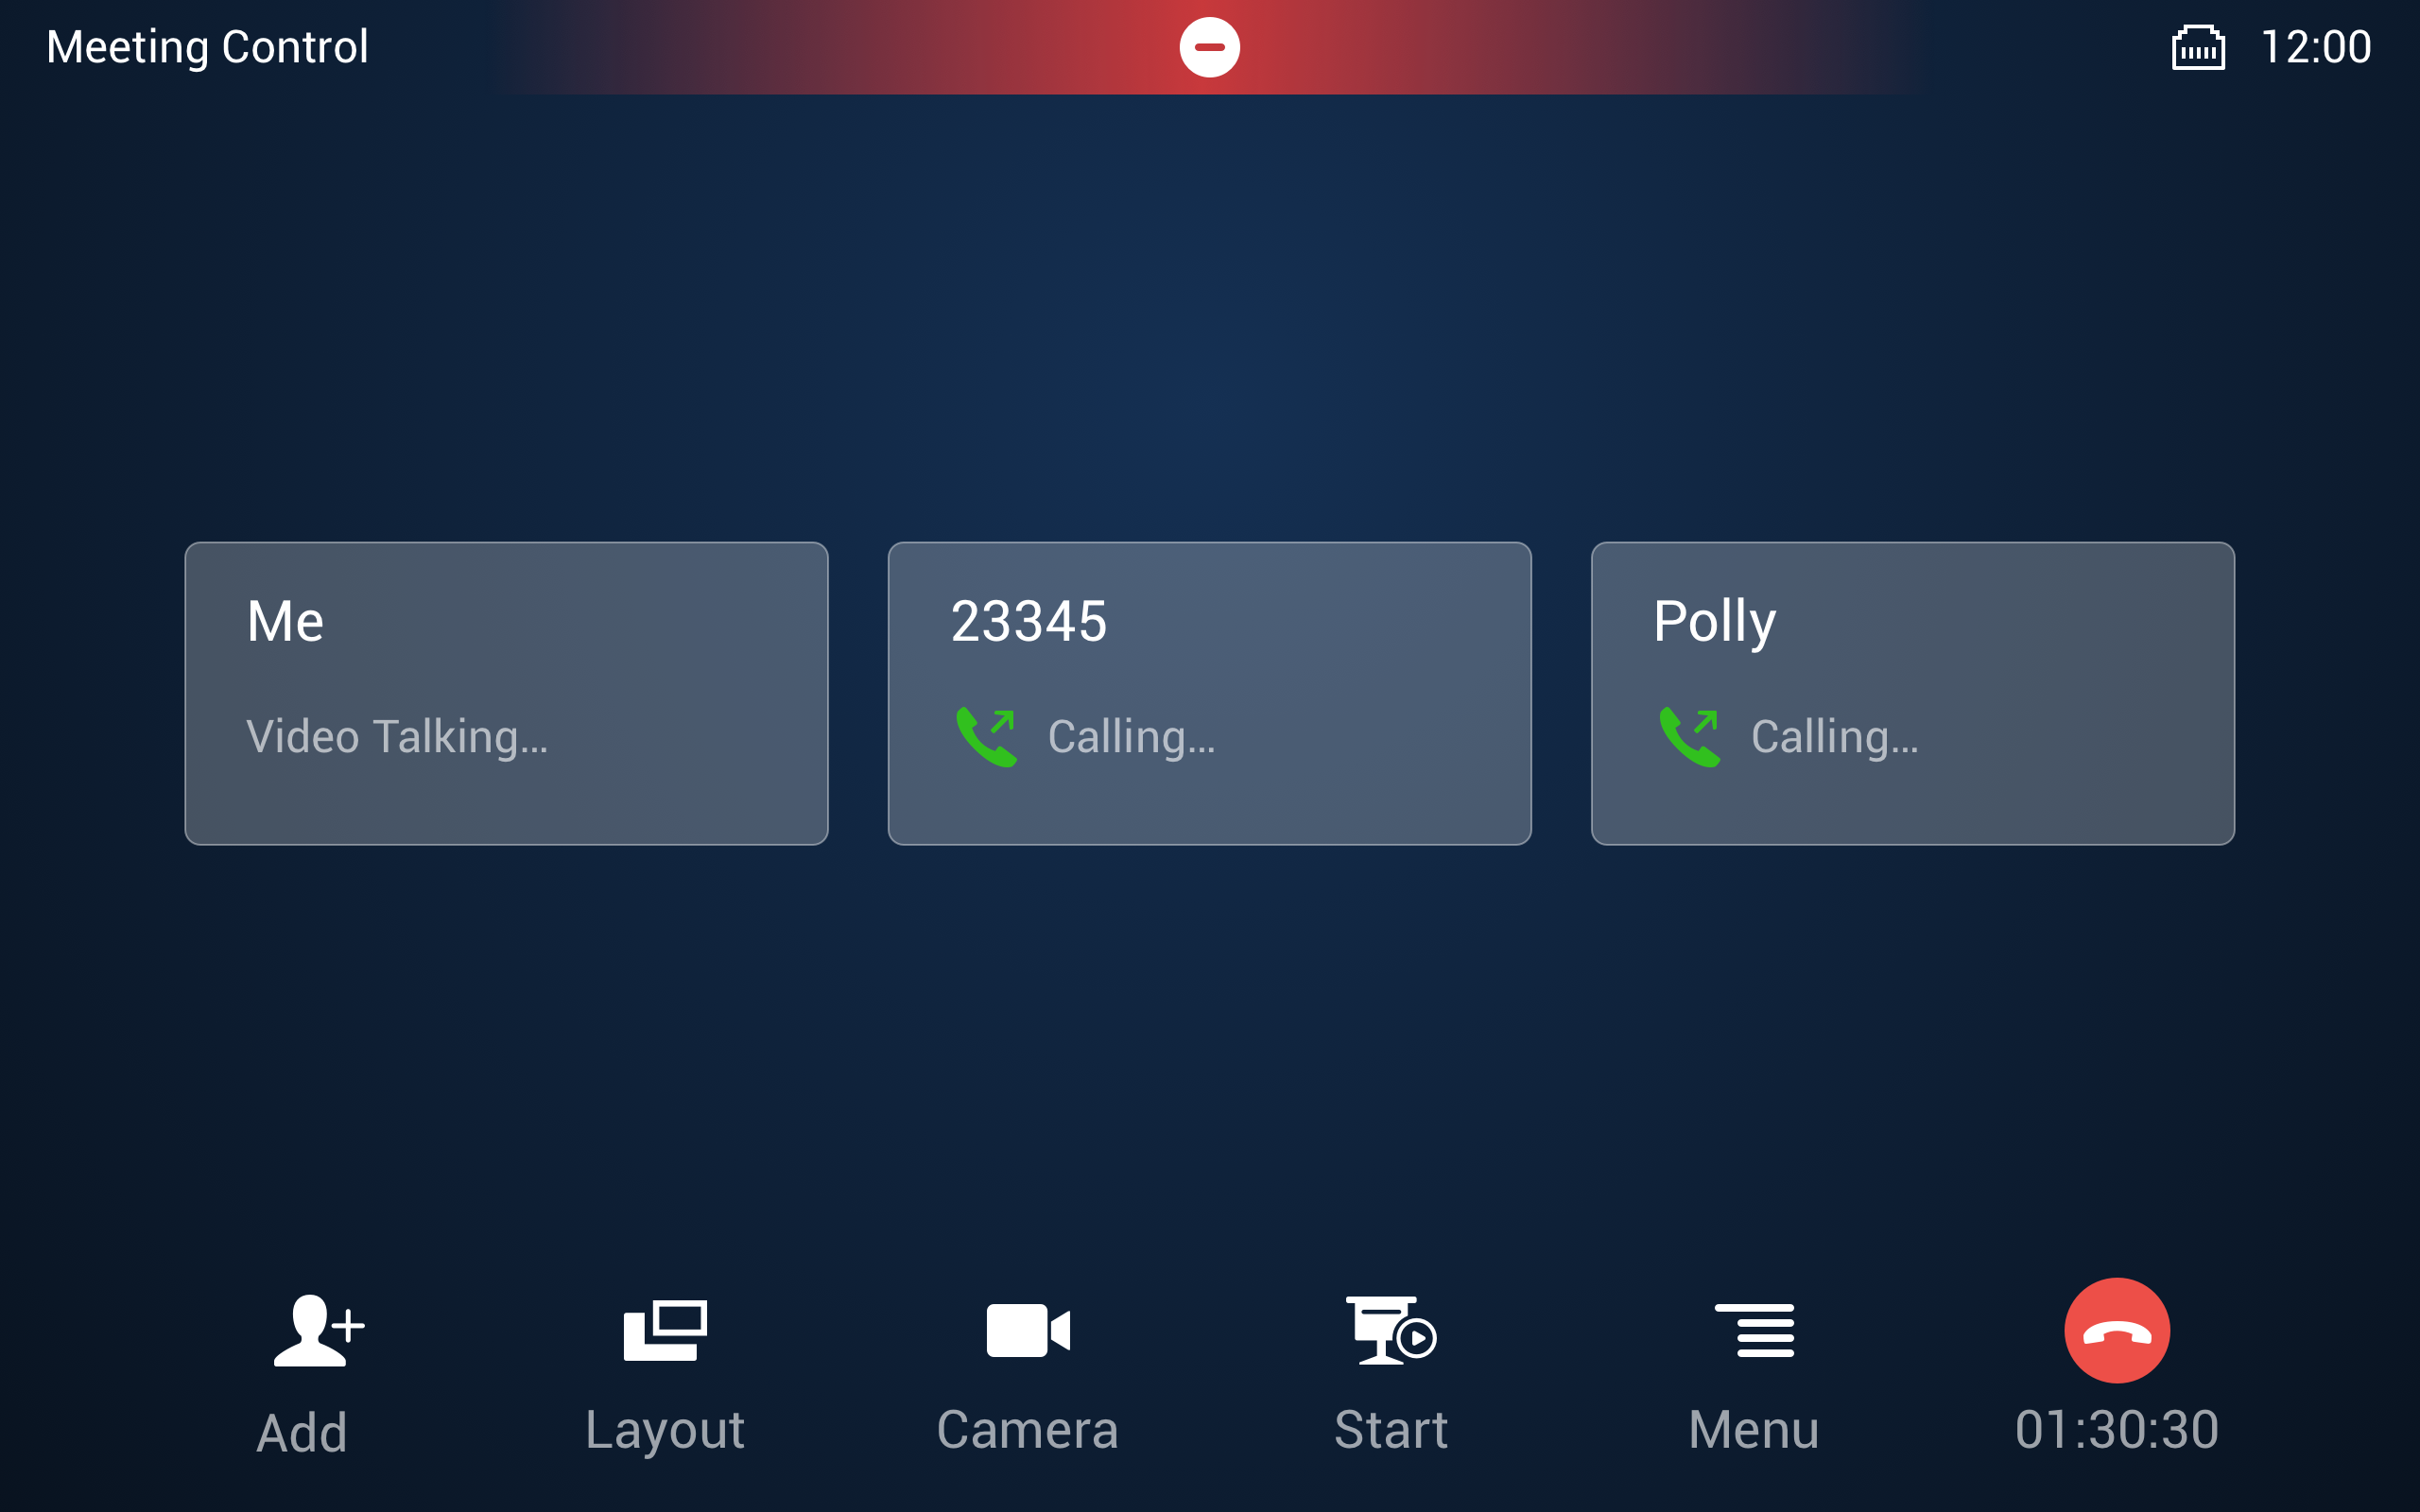
Add participant
To add a participant to an already initiated call:
- Click the icon
 to add a new participant to the call,
 - In case the added participant was available, then it will be displayed as “calling ” with call type ( audio call, or video call)
- In case the added participant was not available, it will display “Invitation failure”.
 to add a new participant to the call,
Remove participant
To remove a participant:
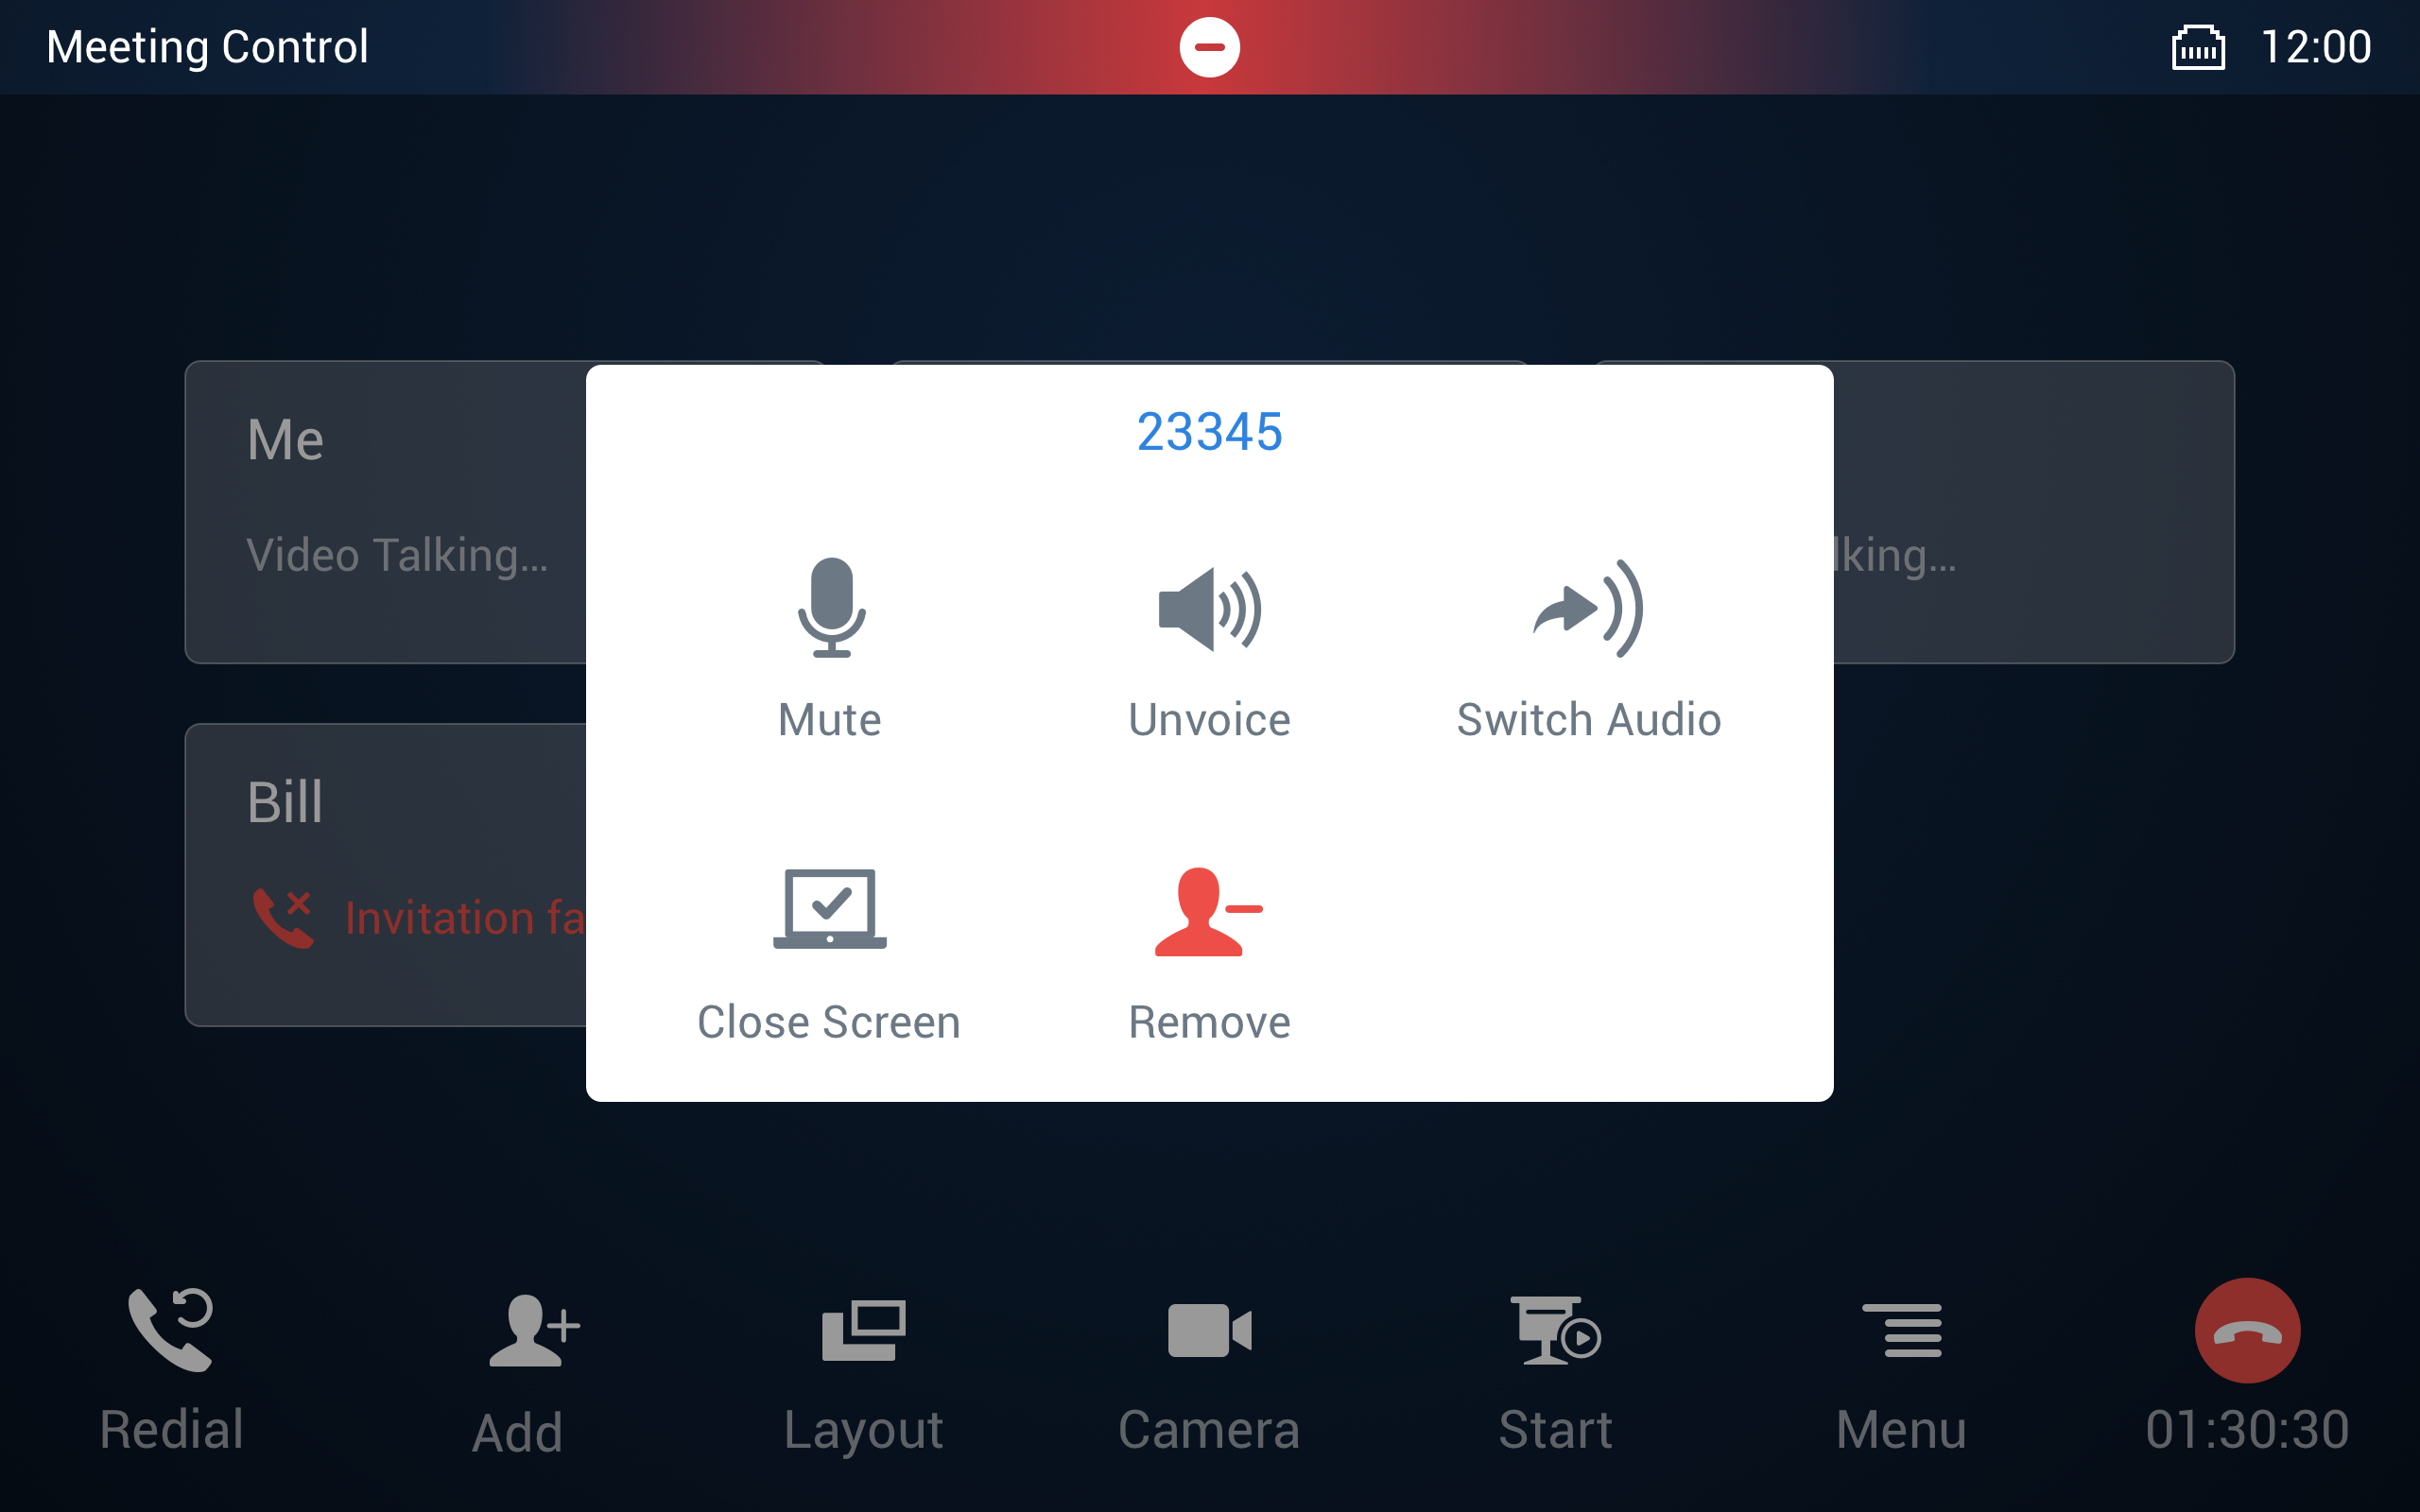
- Click on the party participant that you want to remove, in our case, it will be account 23345

- Click on the “Remove” icon displayed in the pop-up below to remove the party.

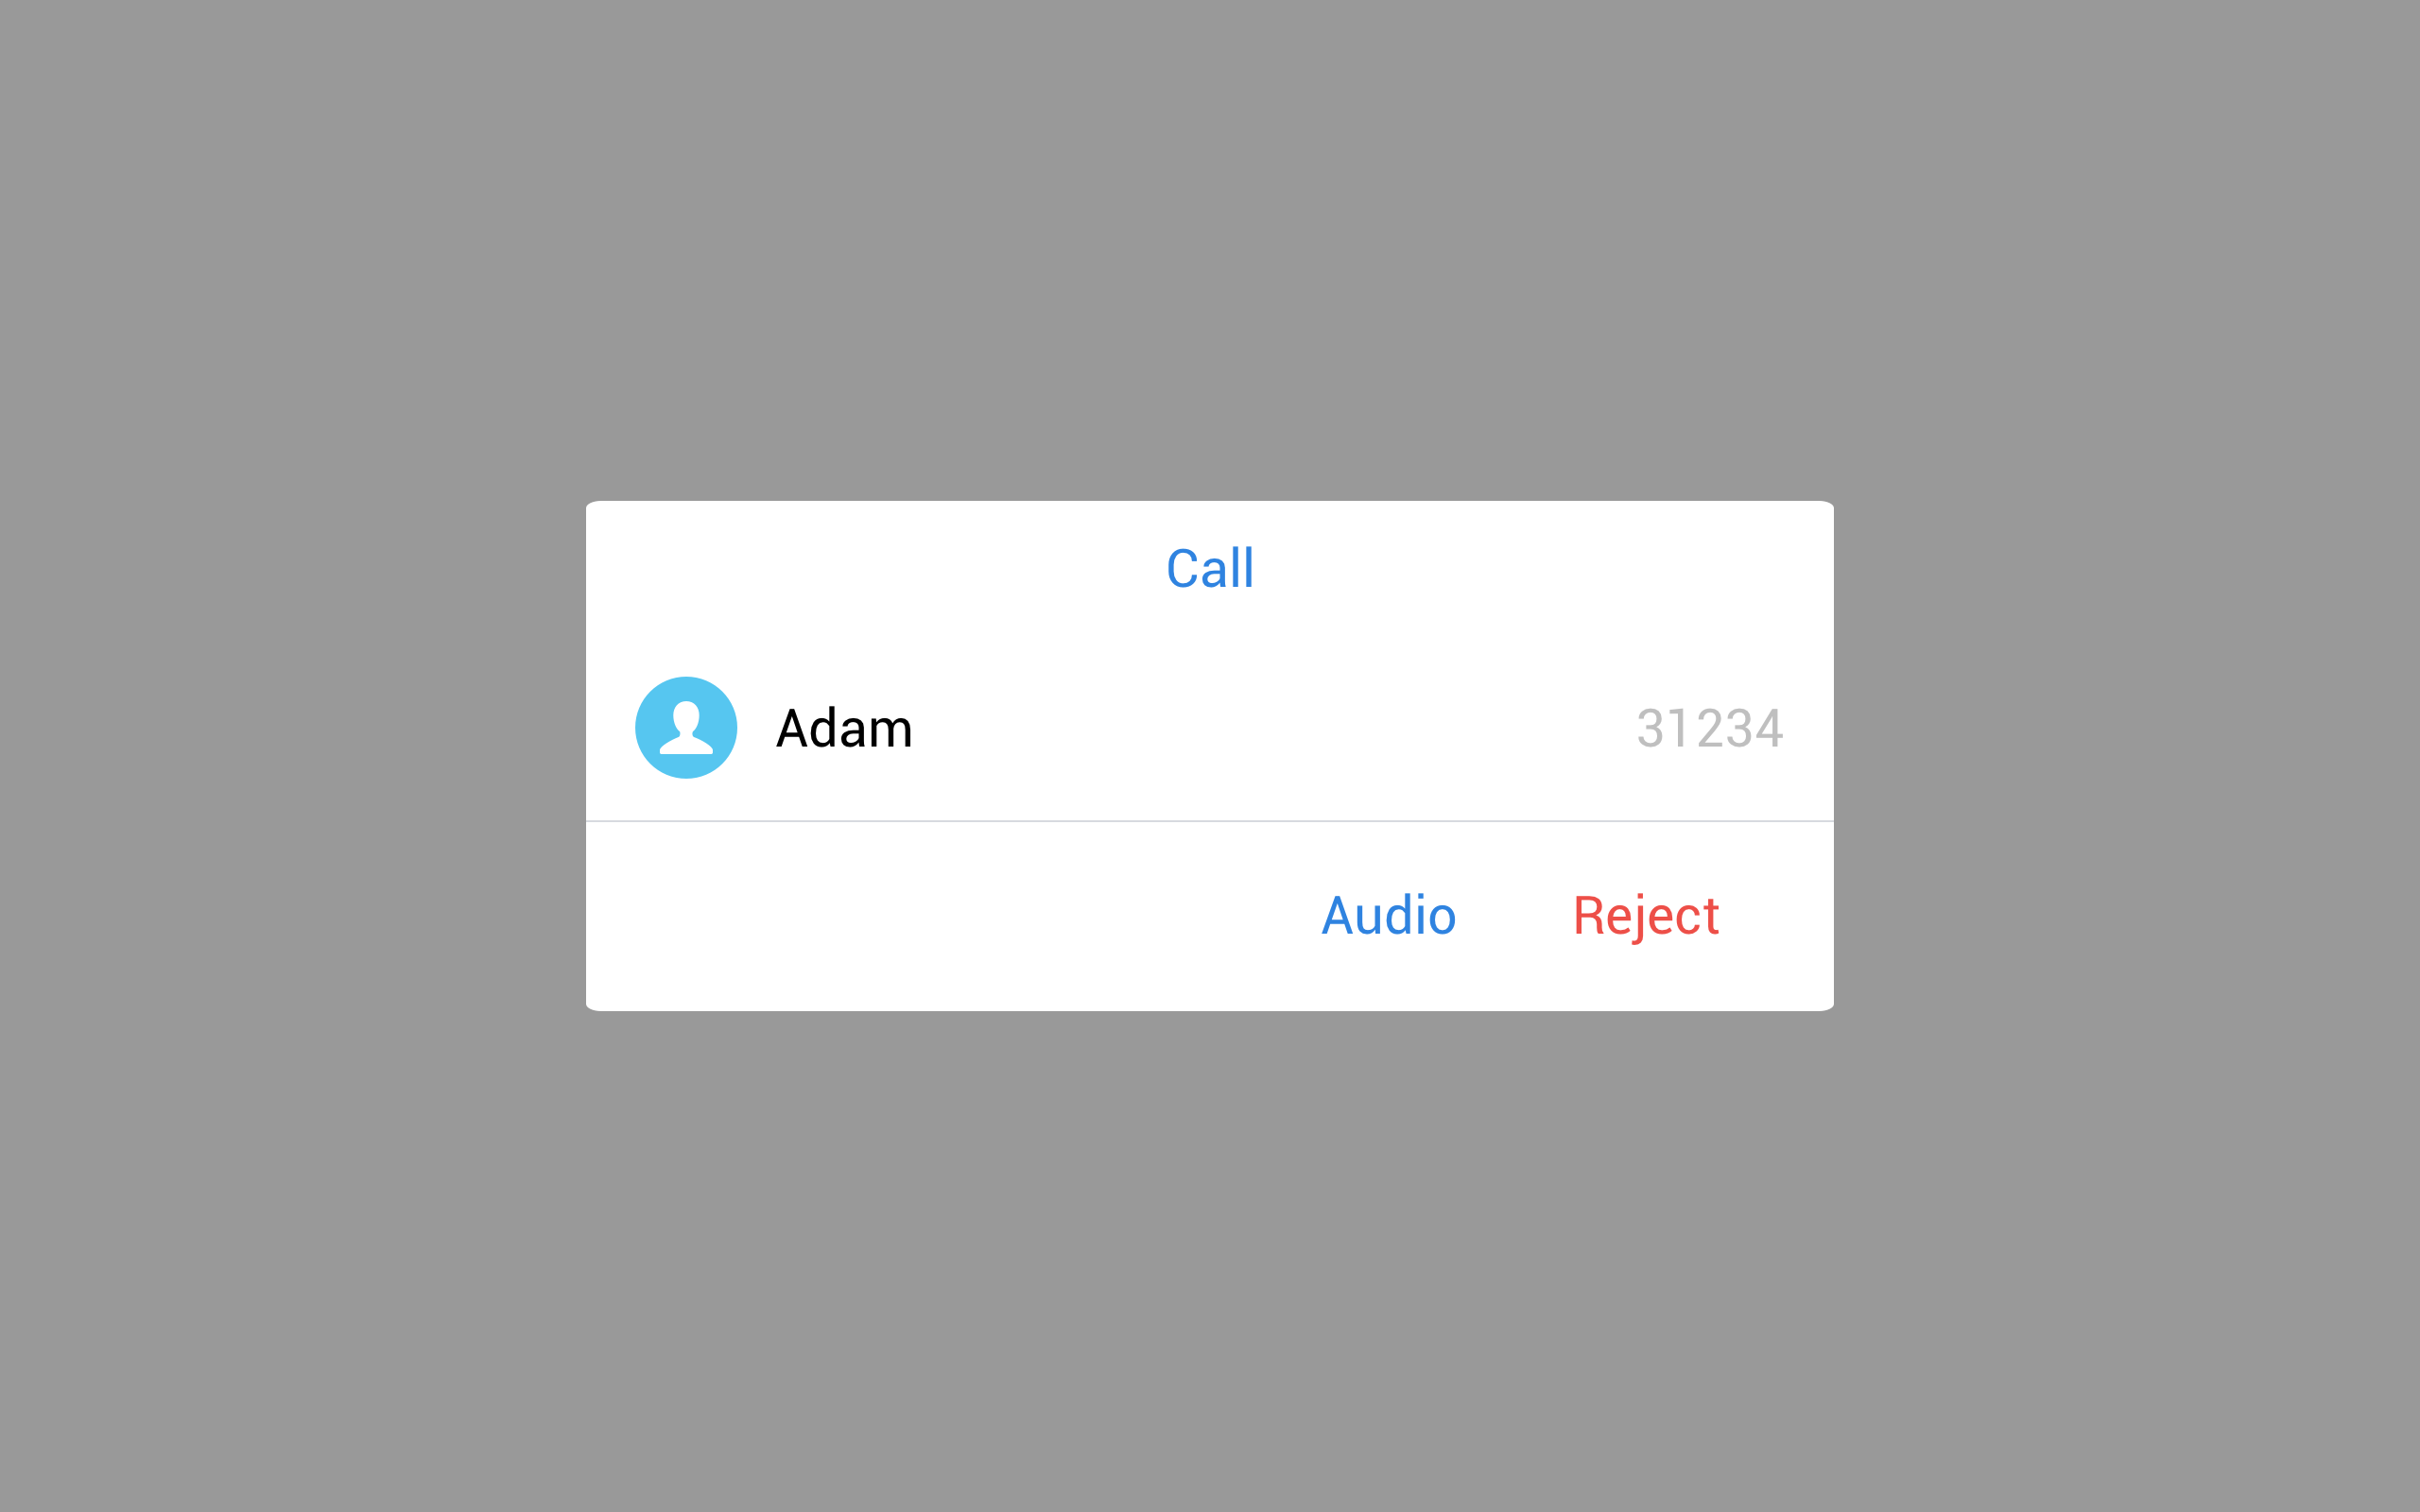
Allow/Decline Incoming calls
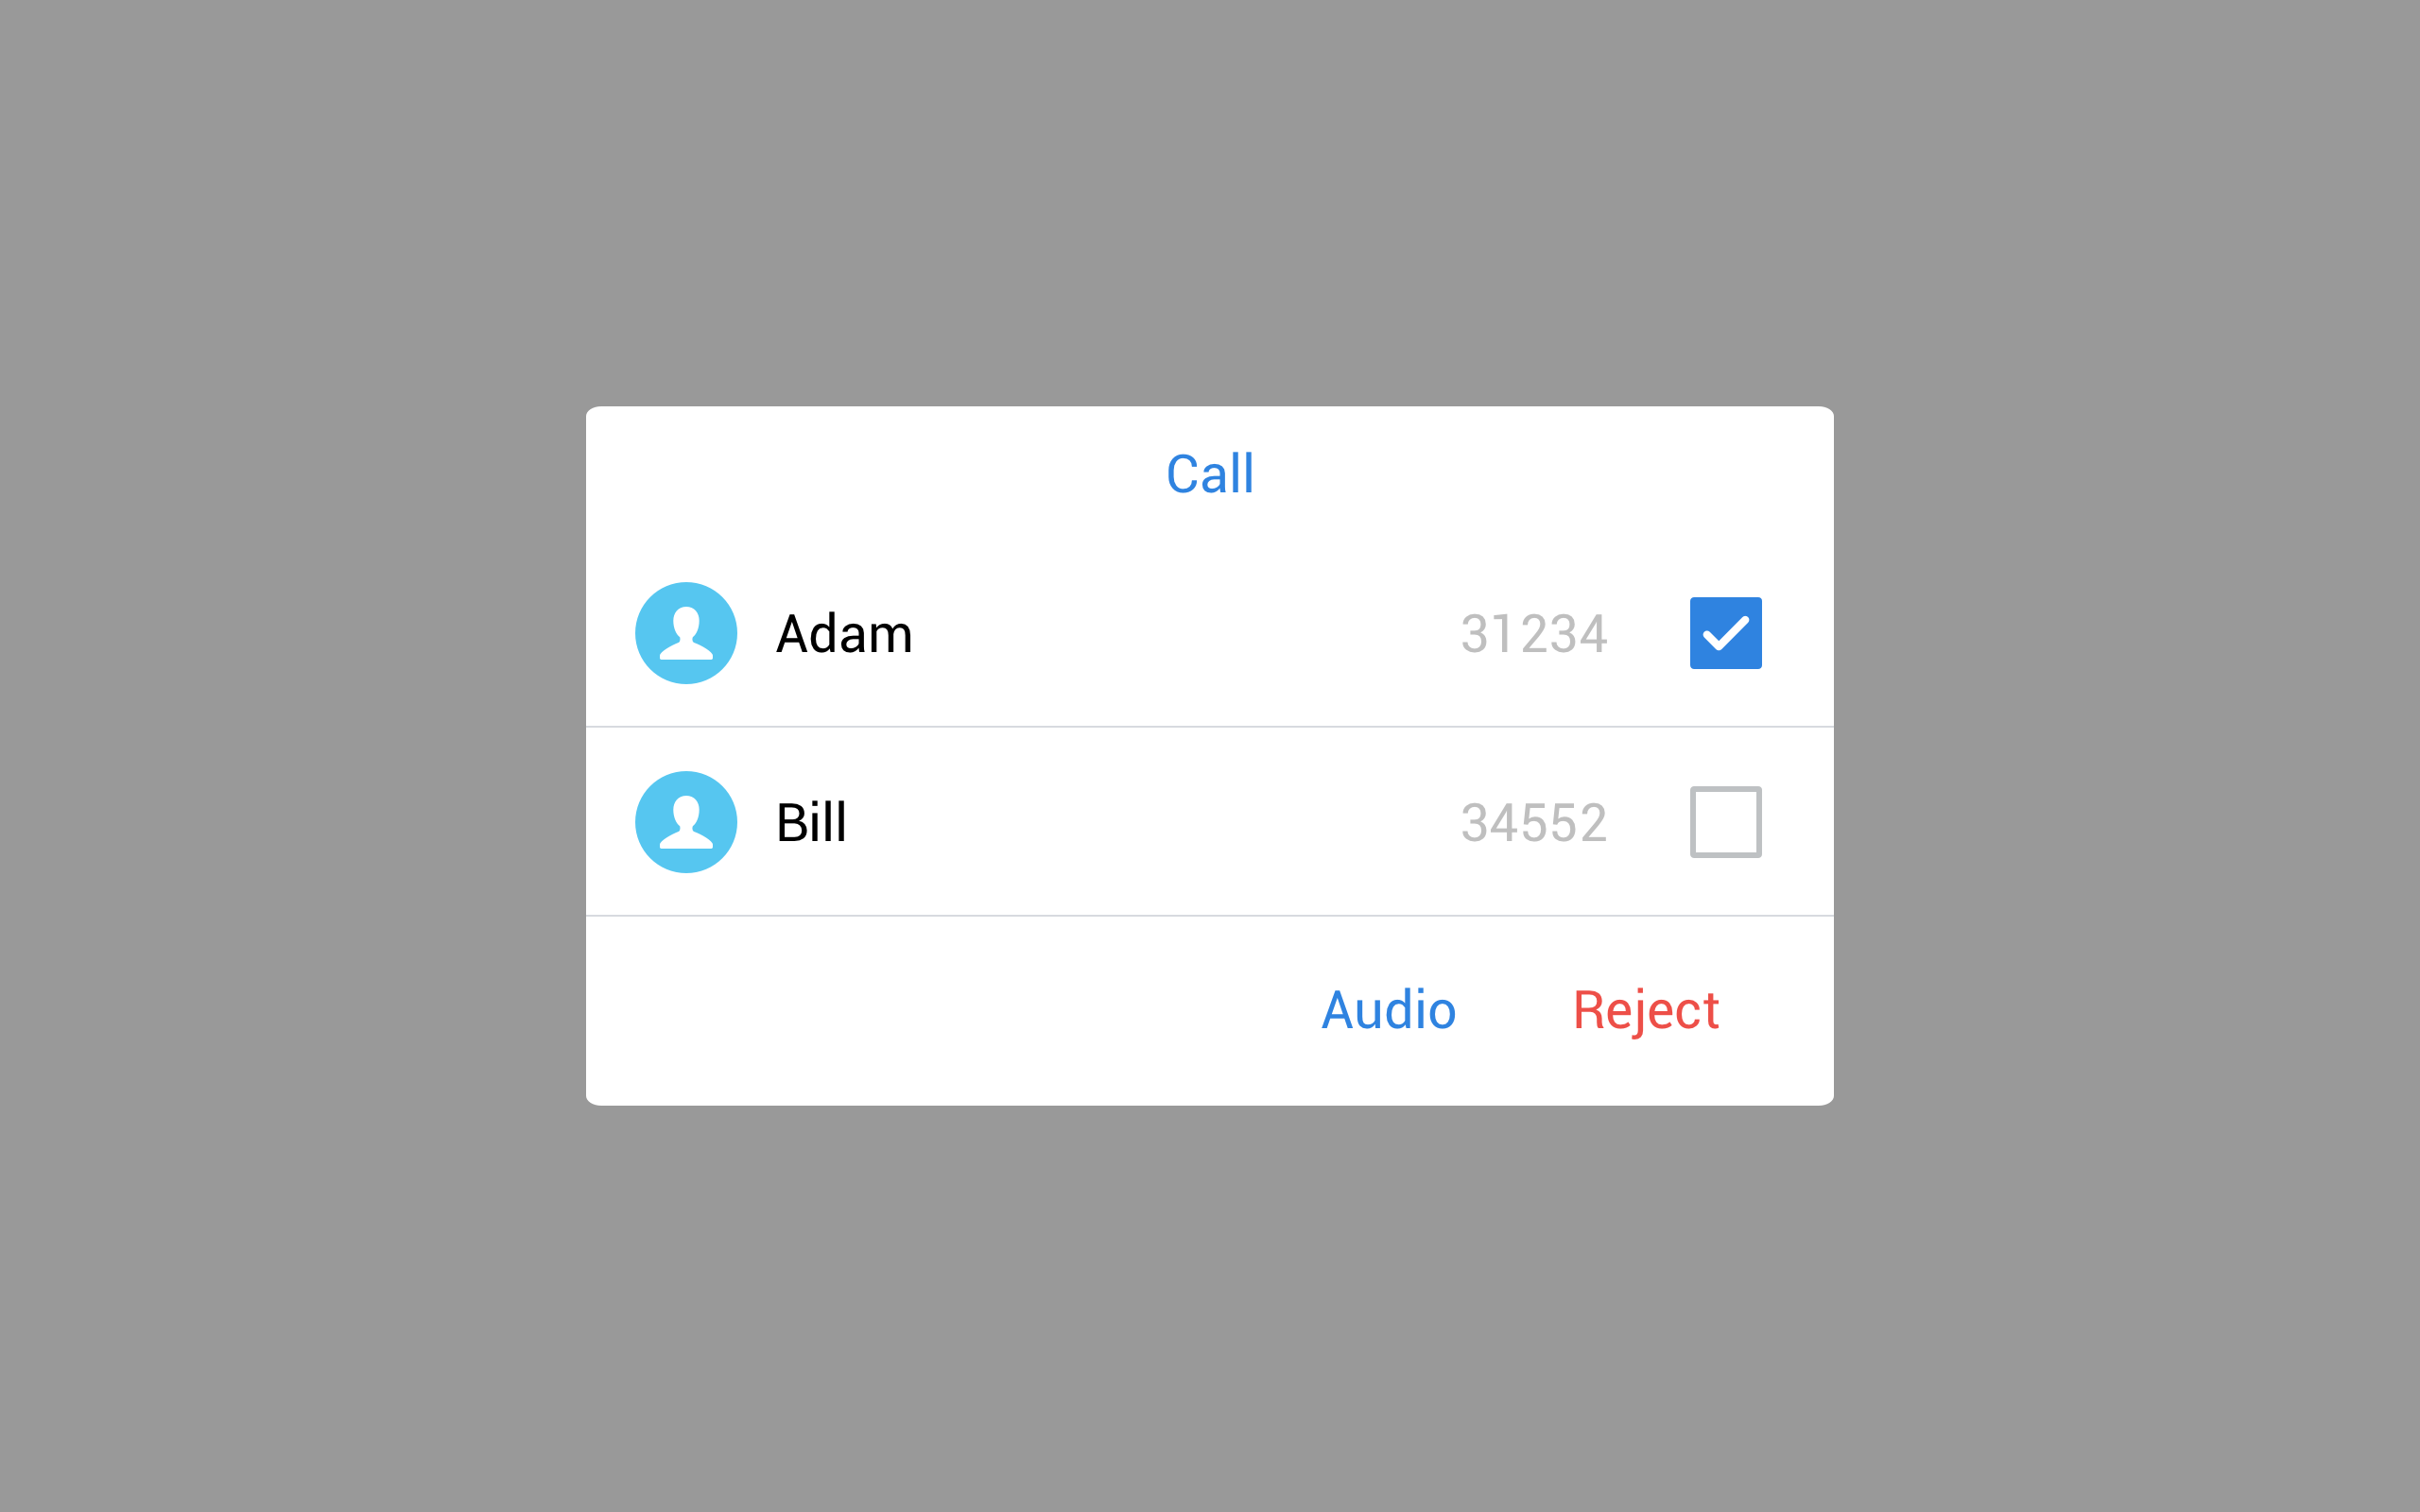
During a conference call, the meeting host has the option to accept or decline requests to join the ongoing conference at any point during the call.
Please follow these steps to manage participant requests during a conference call:
- To enable the participant to join the audio call only, click on “Audio.”
- Click “Reject” to decline a user from joining the conference.
- In cases whercanquest to join the conference, select the relevant user and take the necessary action to either accept or decline their participation in the call.
Redial
To redial a participant or participants whose call you missed:
- Click the icon
 to redial
 - Click the icon
 to ignore the call and redial them later.
 to redial
  to ignore the call and redial them later.
Monitor Participant’s behavior
As the meeting host, you have the ability to carry out various actions on a participant’s account while the call is in progress. These actions include:
- Mute: This option allows you to silence the participant’s audio, preventing them from speaking during the meeting.
- Unvoice: With this option, you can go beyond muting and completely block a participant’s audio, ensuring they cannot transmit any sound.
- Switch Audio: With this option, you can change the call from a video call to an audio call.
- Switch Video: With this option, you can change the call from an audio call to a video call.
- Close Screen: This option enables you to stop the participant from sharing their screen if they were previously doing so.
- Remove: This option allows you to expel a participant from the meeting entirely.
Hold
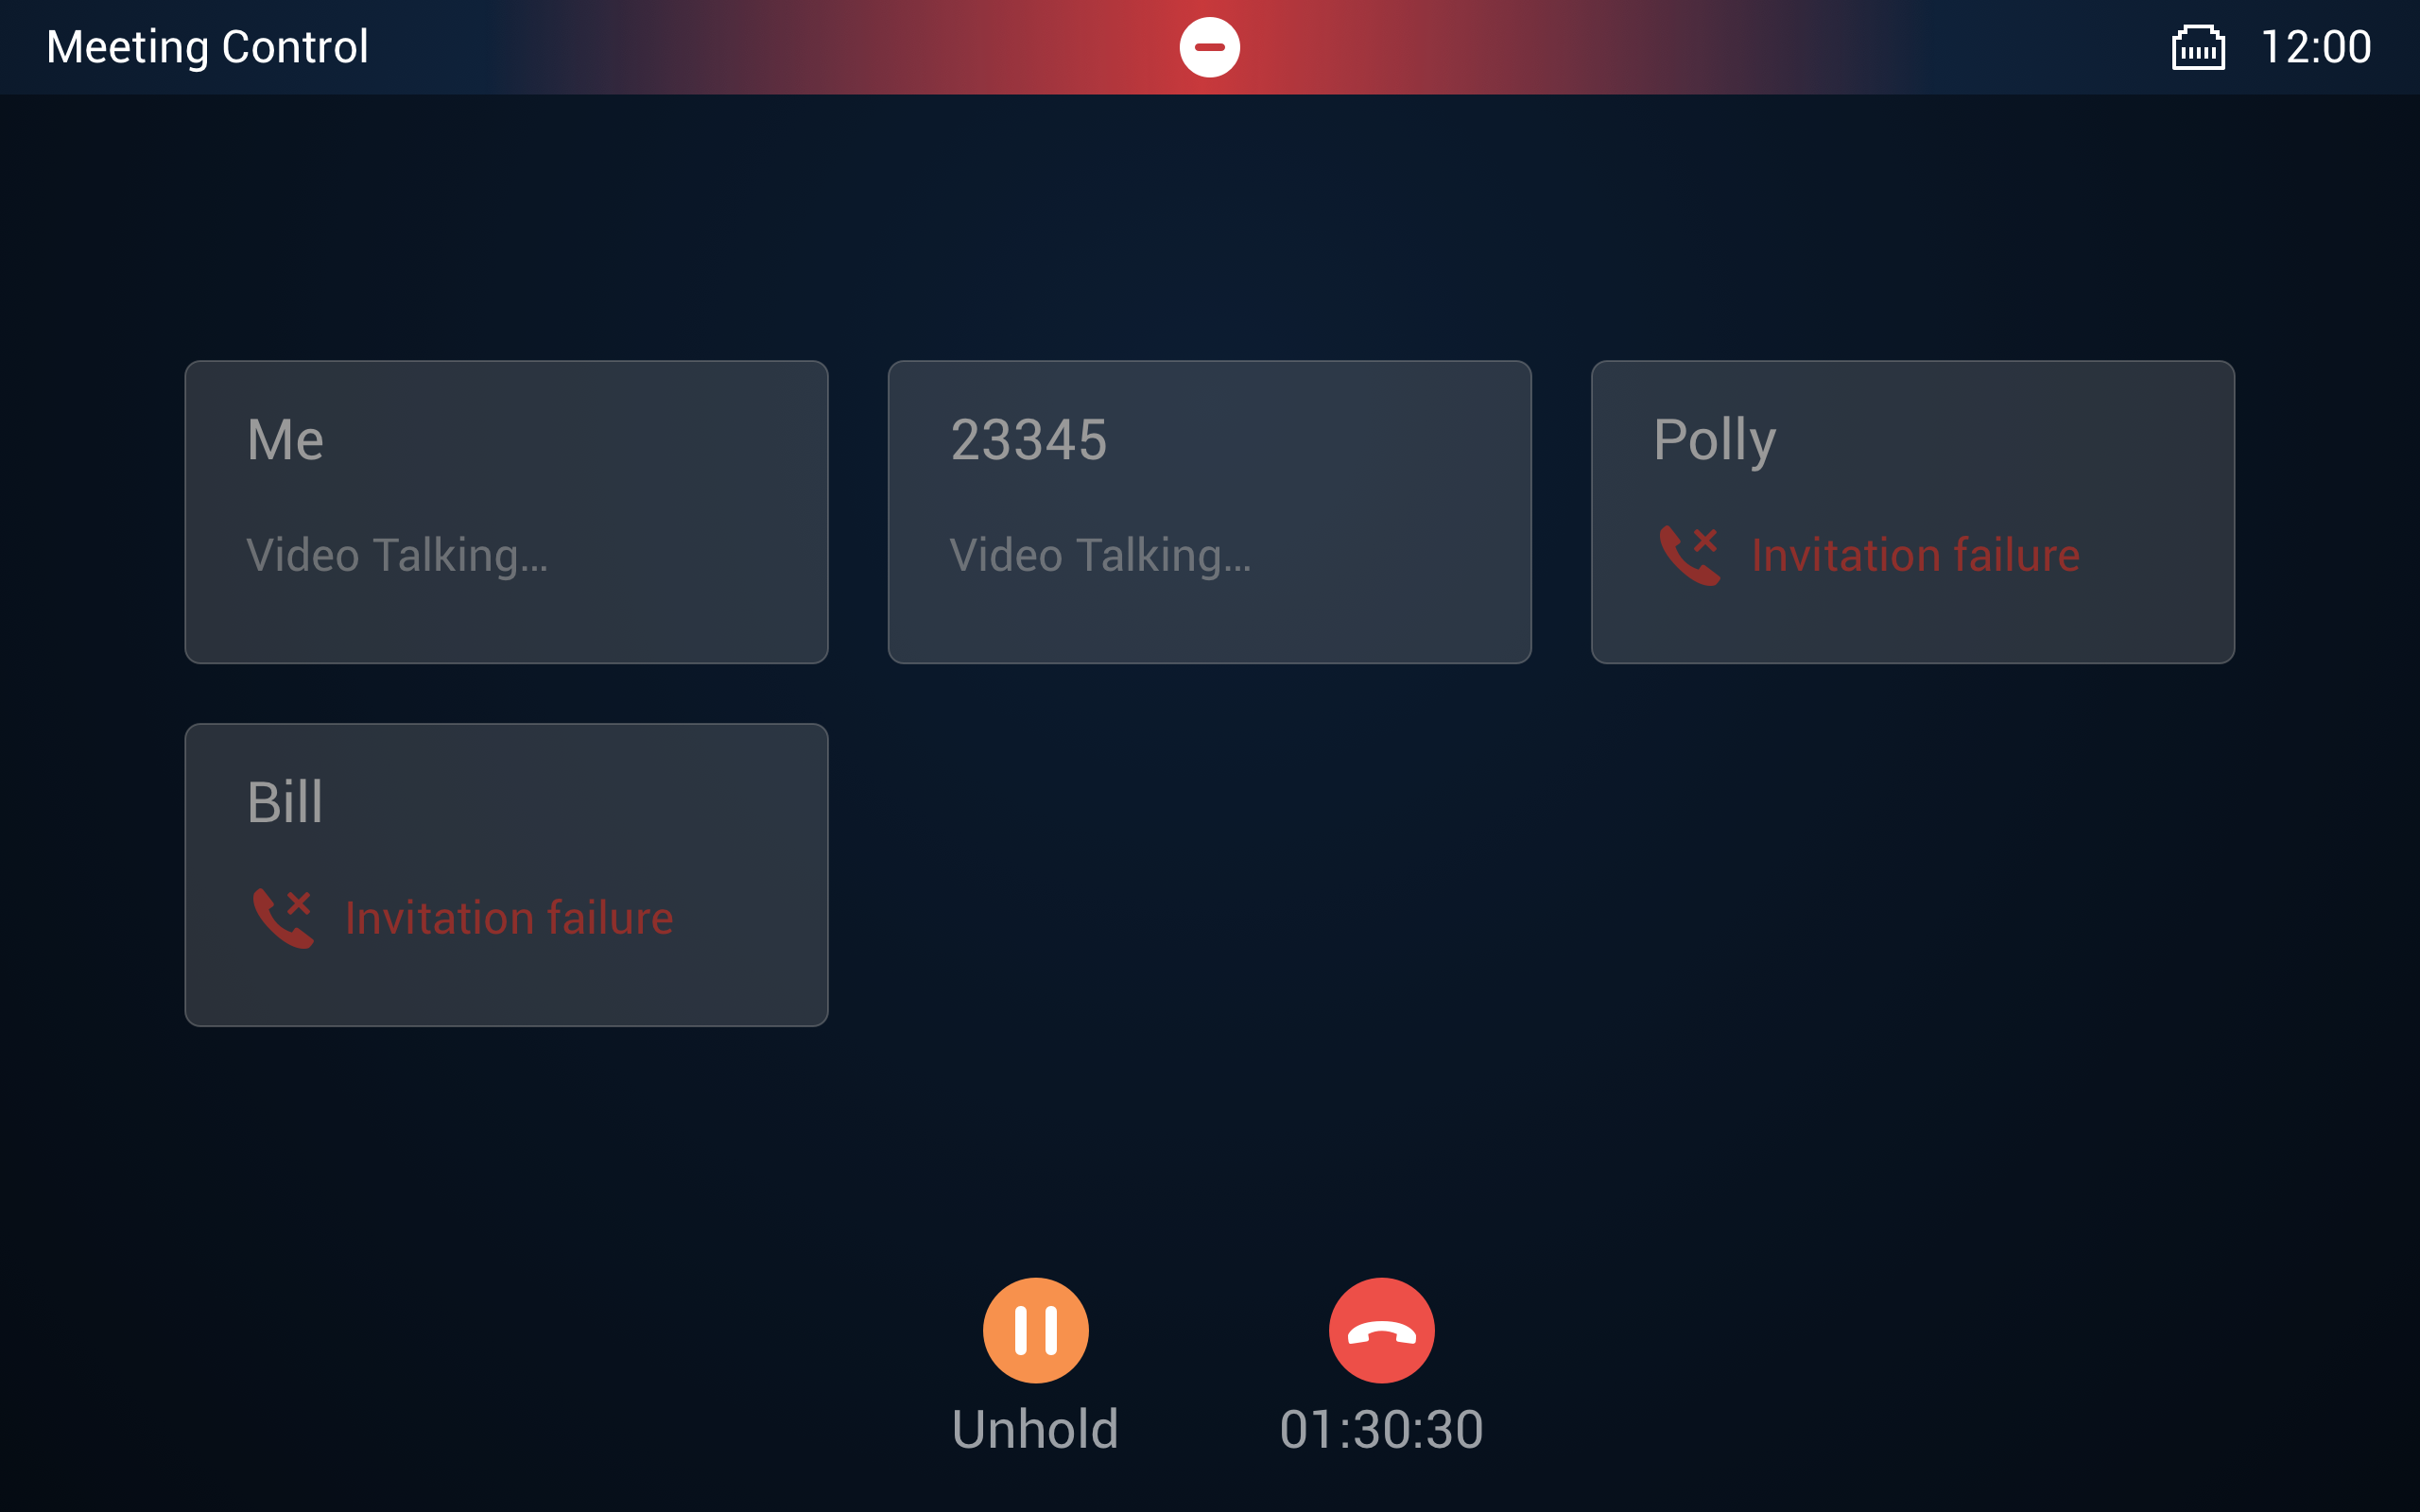
To put the conference on hold for all users :
- Click the icon

- Select the option Hold, by clicking the icon


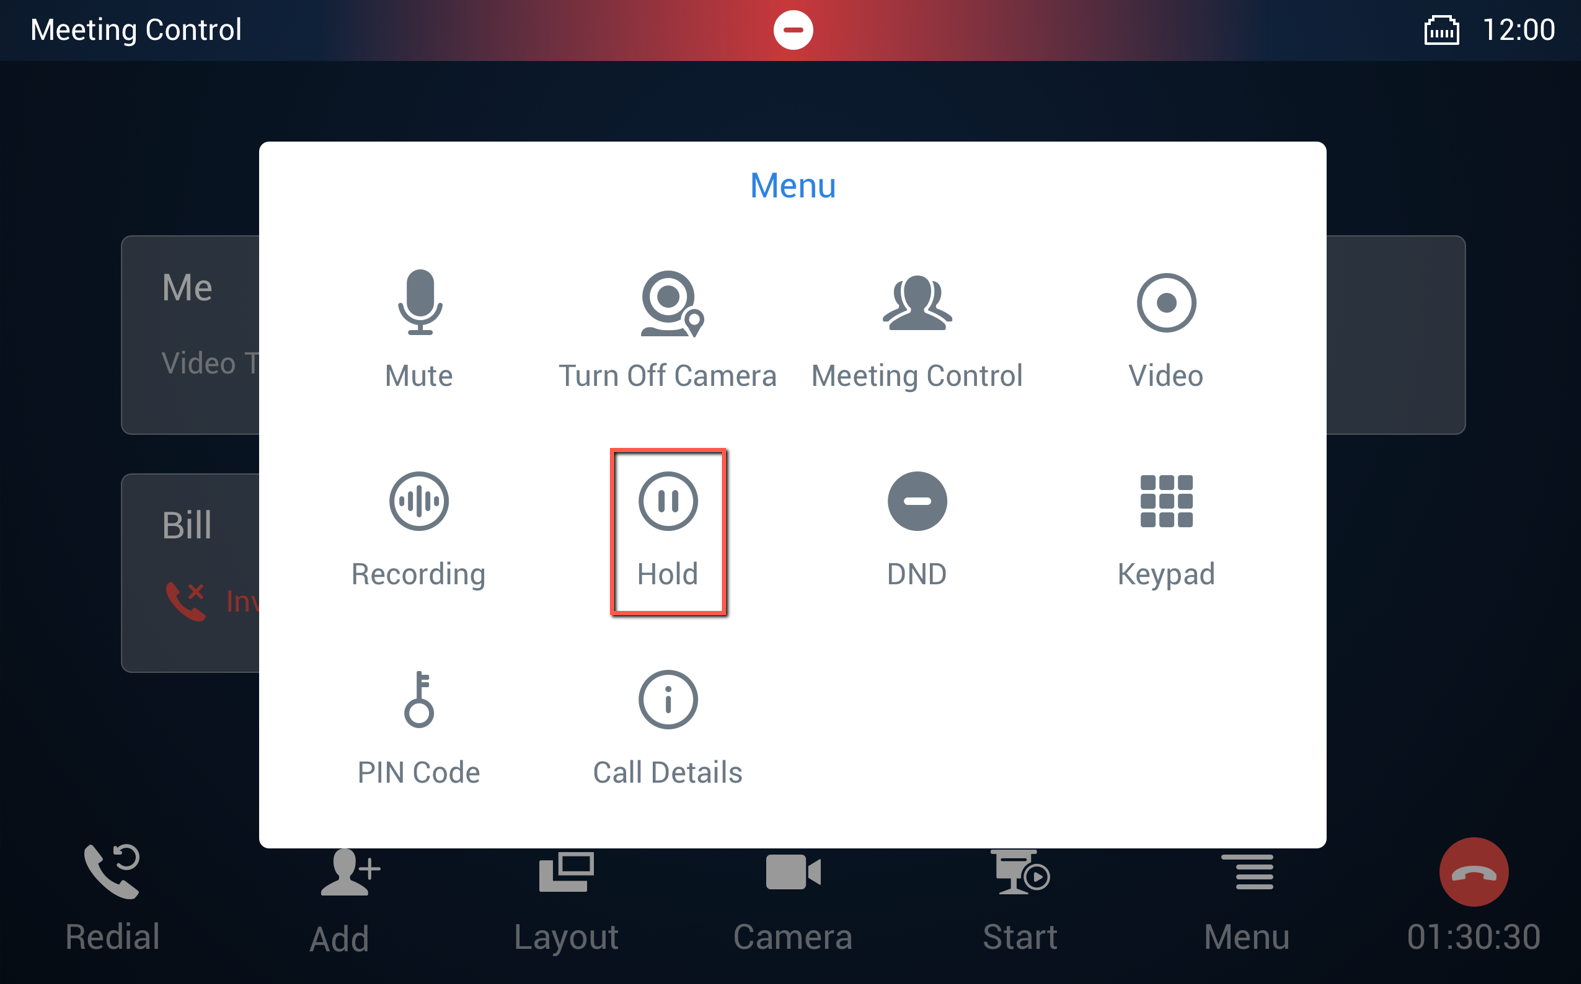
- The call will then be put on hold for all the conference participants
- To unhold, simply click the icon


Mute
To Mute yourself during the conference :

- Click the icon
 displayed below.
 displayed below.
- The call will be muted, to unmute the call, click again on “unlute”.
Turn Off Camera
For Privacy purposes, as a host, you can turn off the camera of the GVC3220 video conferencing device from your GAC2570 Control Panel. To do that :

- Click the icon
- Select the option Turn Off Camera, By clicking the icon


Meeting Control
The Meeting Control Feature allows you to manage the participant’s audio input and output, by giving you the possibility to mute all participants, it can also control the input and output of video images.
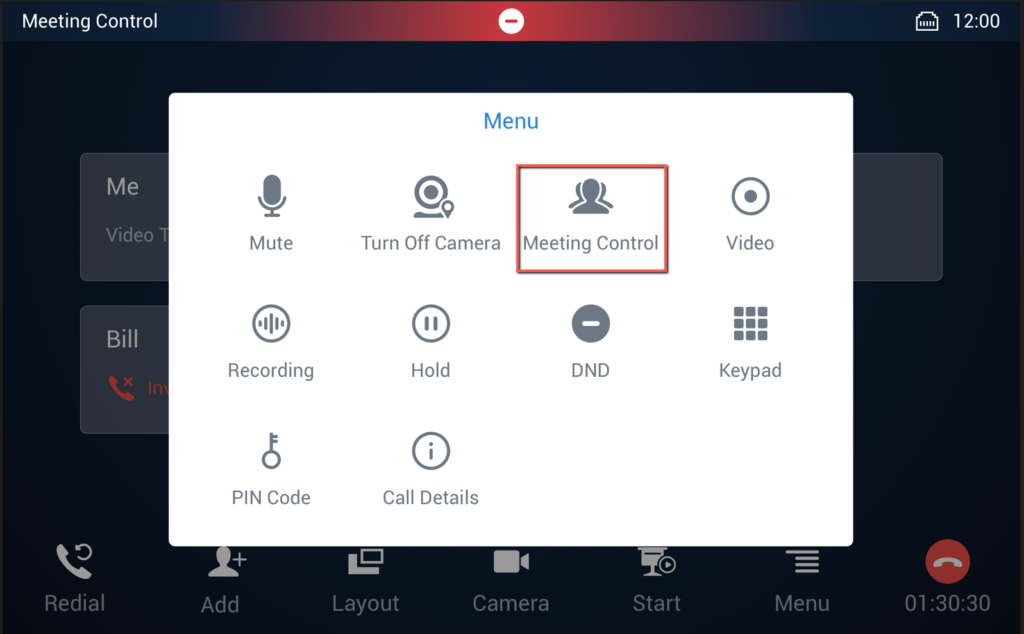
To Control the participants’ audio
- Click the icon
- Select the option Meeting Control Option by clicking the icon
 then choose to either mute all or block audio from all. This can apply to video streams too, if the participants are part of a video call.
 then choose to either mute all or block audio from all. This can apply to video streams too, if the participants are part of a video call.
Record
By enabling conference control, you gain the ability to easily capture your calls. You have the option to record the video content, or alternatively, solely the audio.
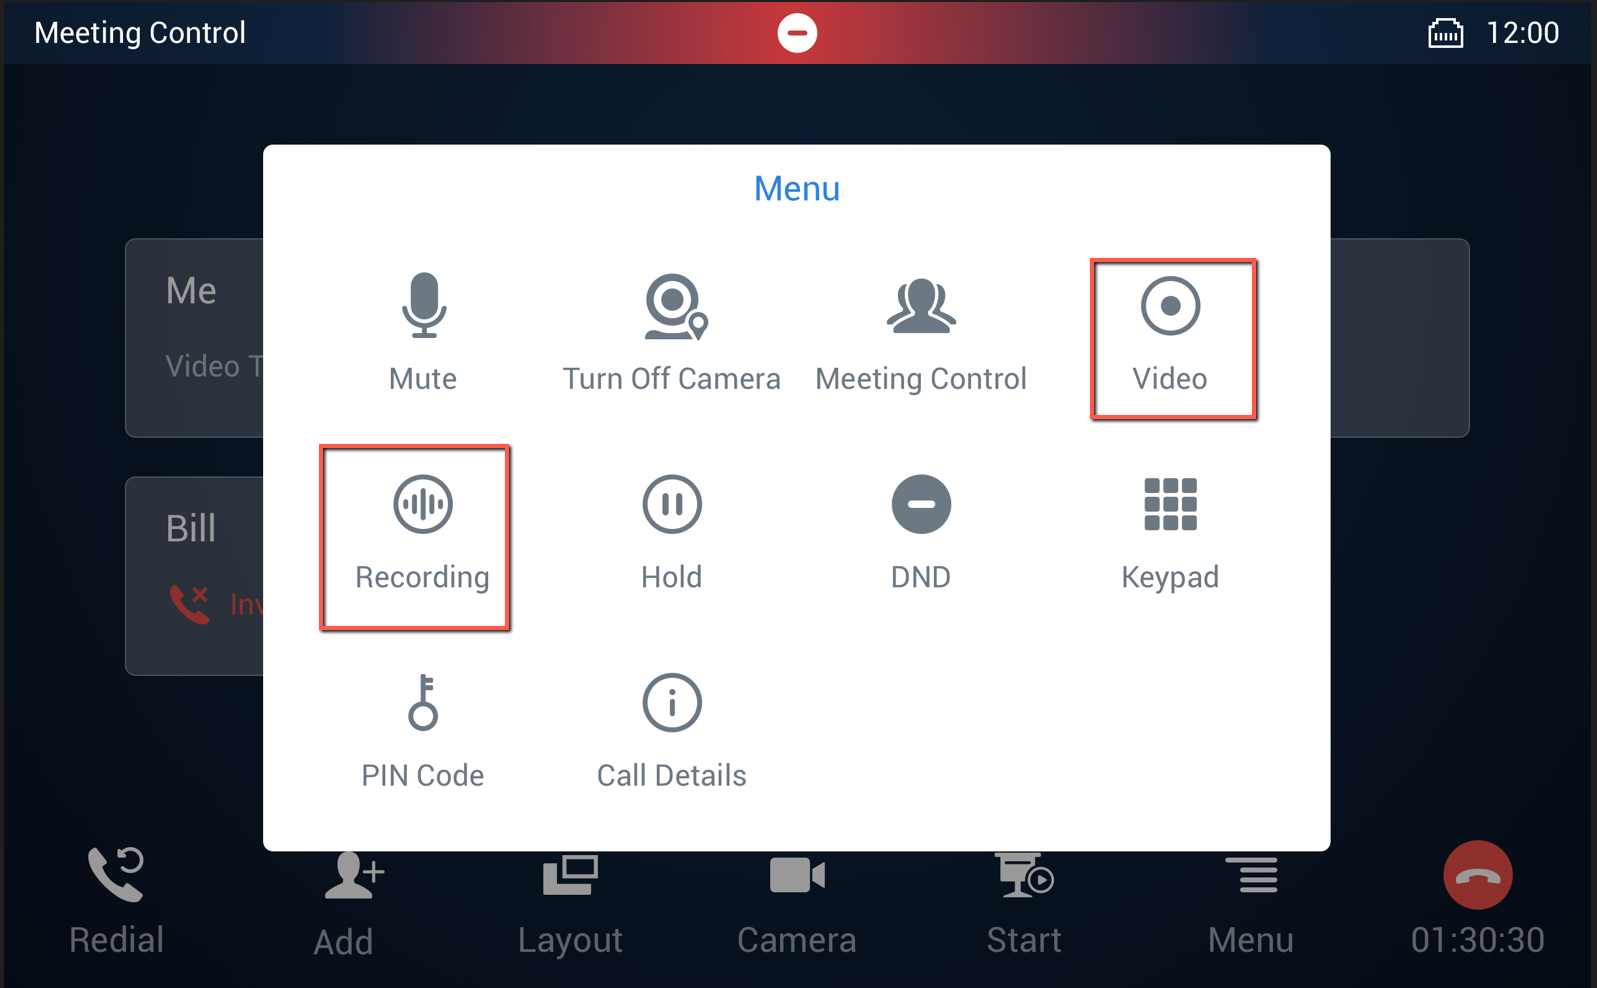
To start Recording :
- Click the icon
- Select the video option by clicking the icon
 to record the video displayed, commonly used when displaying presentations.
 - Select the audio option to record the audio by clicking the icon

 to record the video displayed, commonly used when displaying presentations.
DND Mode
While on a conference call, you have the option to activate the ‘Do Not Disturb’ (DND) mode, which prevents users from sending meeting join requests.
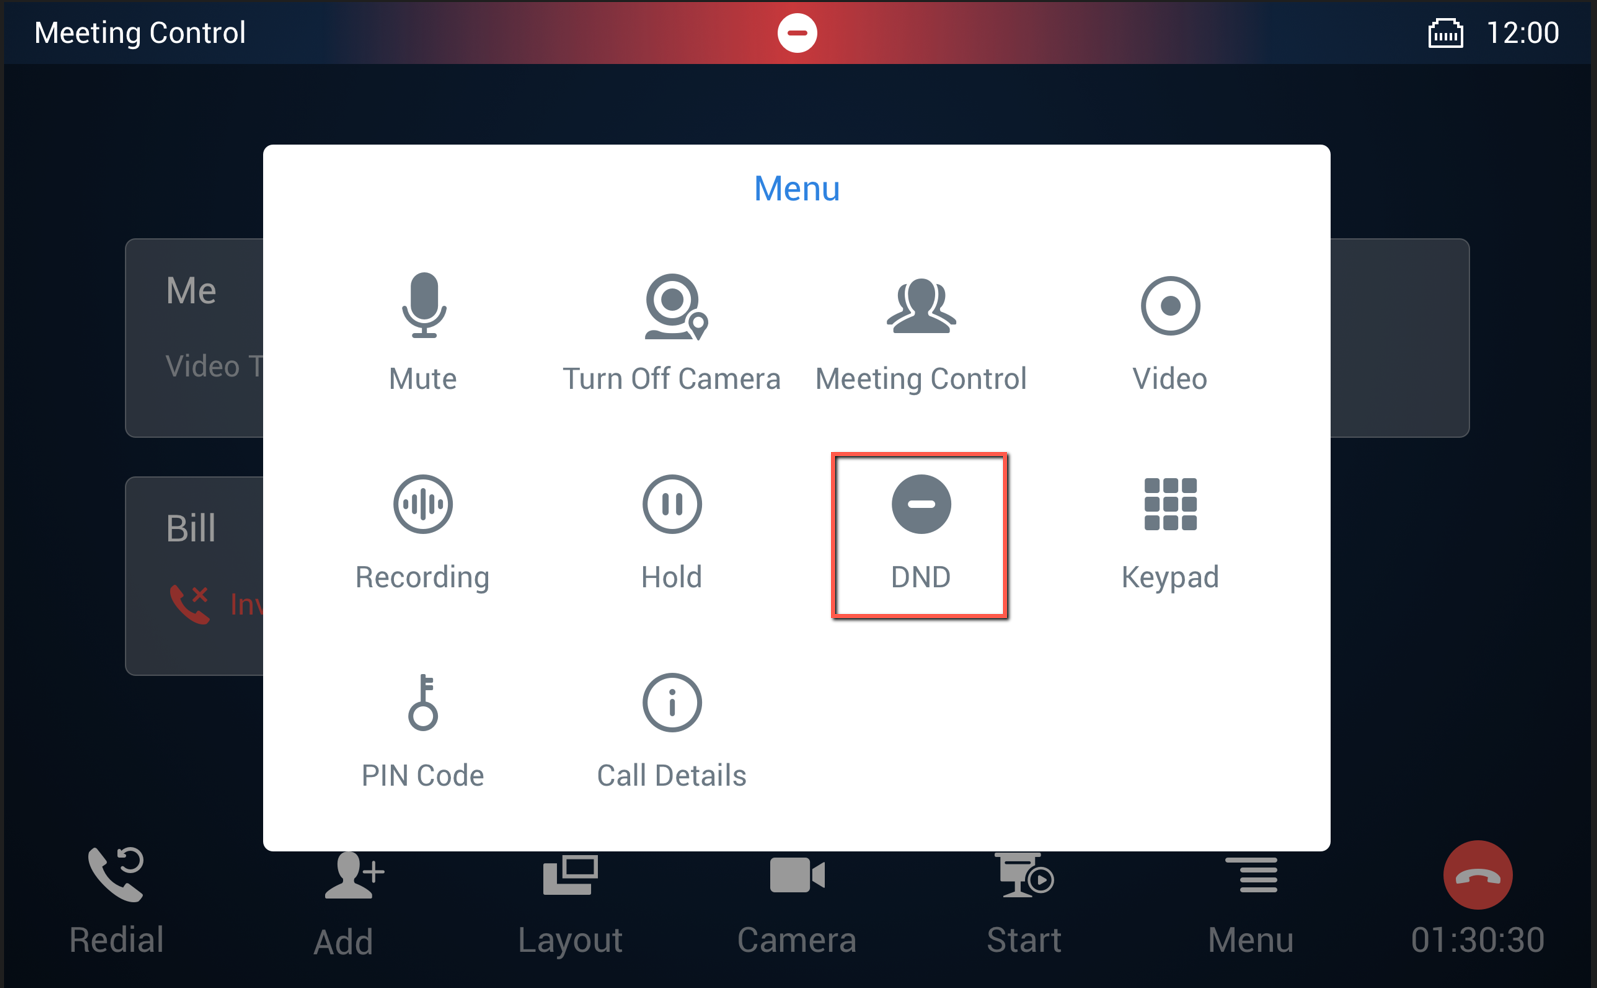
To enable the DND mode
- Click the icon
- Click on the icon
 displayed on the control menu.
 displayed on the control menu.
Set PIN Code
You can set a PIN that new participants can use to join the meeting.
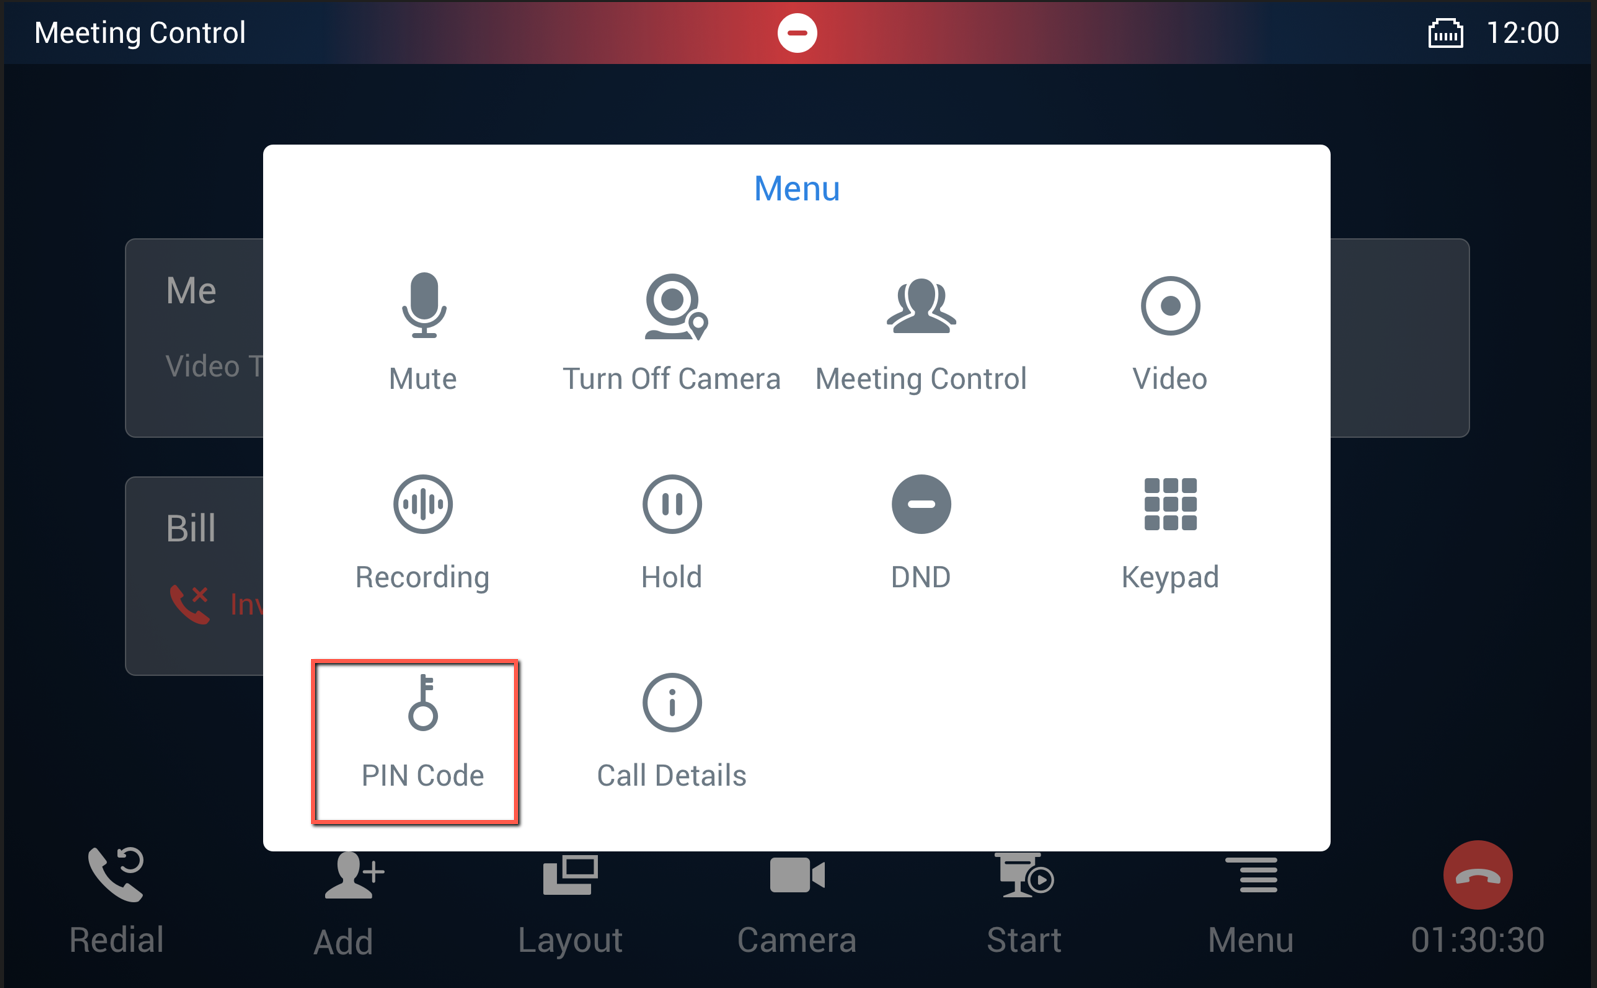
- Click the icon
- Click on the icon
 , and a pop-up will appear to set the password in numeric format.
 - Save the desired PIN code, when new participants want to join the call, they will be prompted to provide a PIN Code
 , and a pop-up will appear to set the password in numeric format.
Call Details
The ‘call details’ feature presents comprehensive information regarding the video and audio quality of the call as well as the web RTC when launching a presentation. It includes various metrics such as packet loss rate, video frame rate, resolution, and speech coding for each user. Additionally, it provides separate details for video and audio aspects.
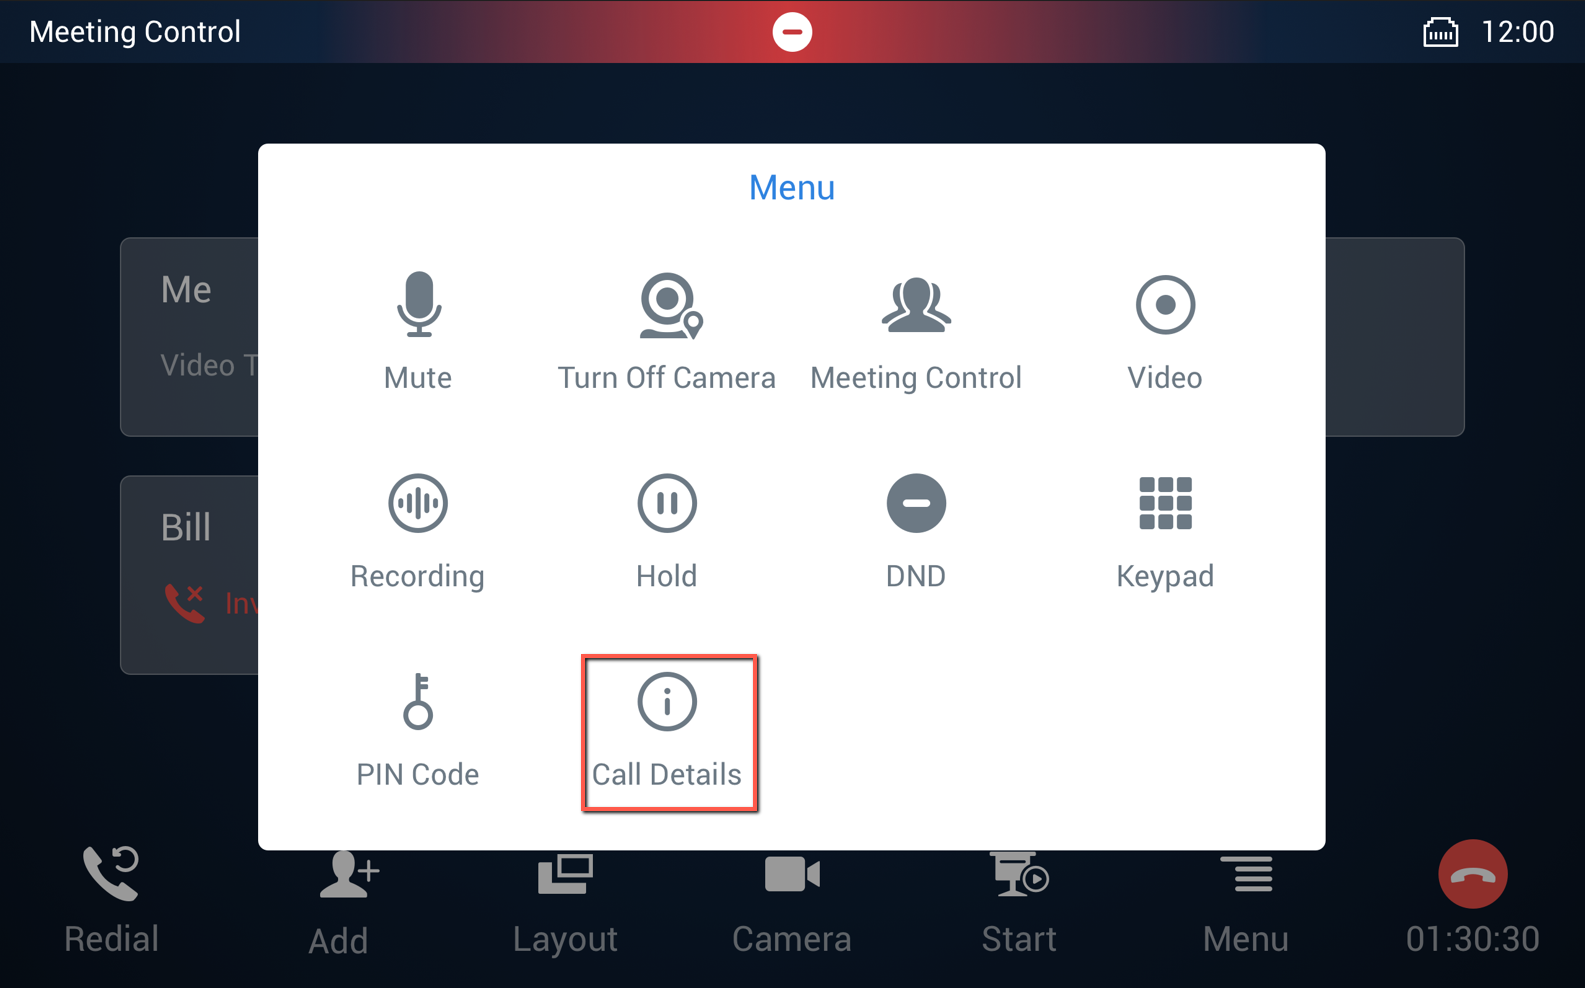
- Click the icon
- Click the icon
 to display information about the call video and audio quality, an example will be as below :
 to display information about the call video and audio quality, an example will be as below :
DTMF Entry
Users can enter DTMF codes to activate a specific feature code.
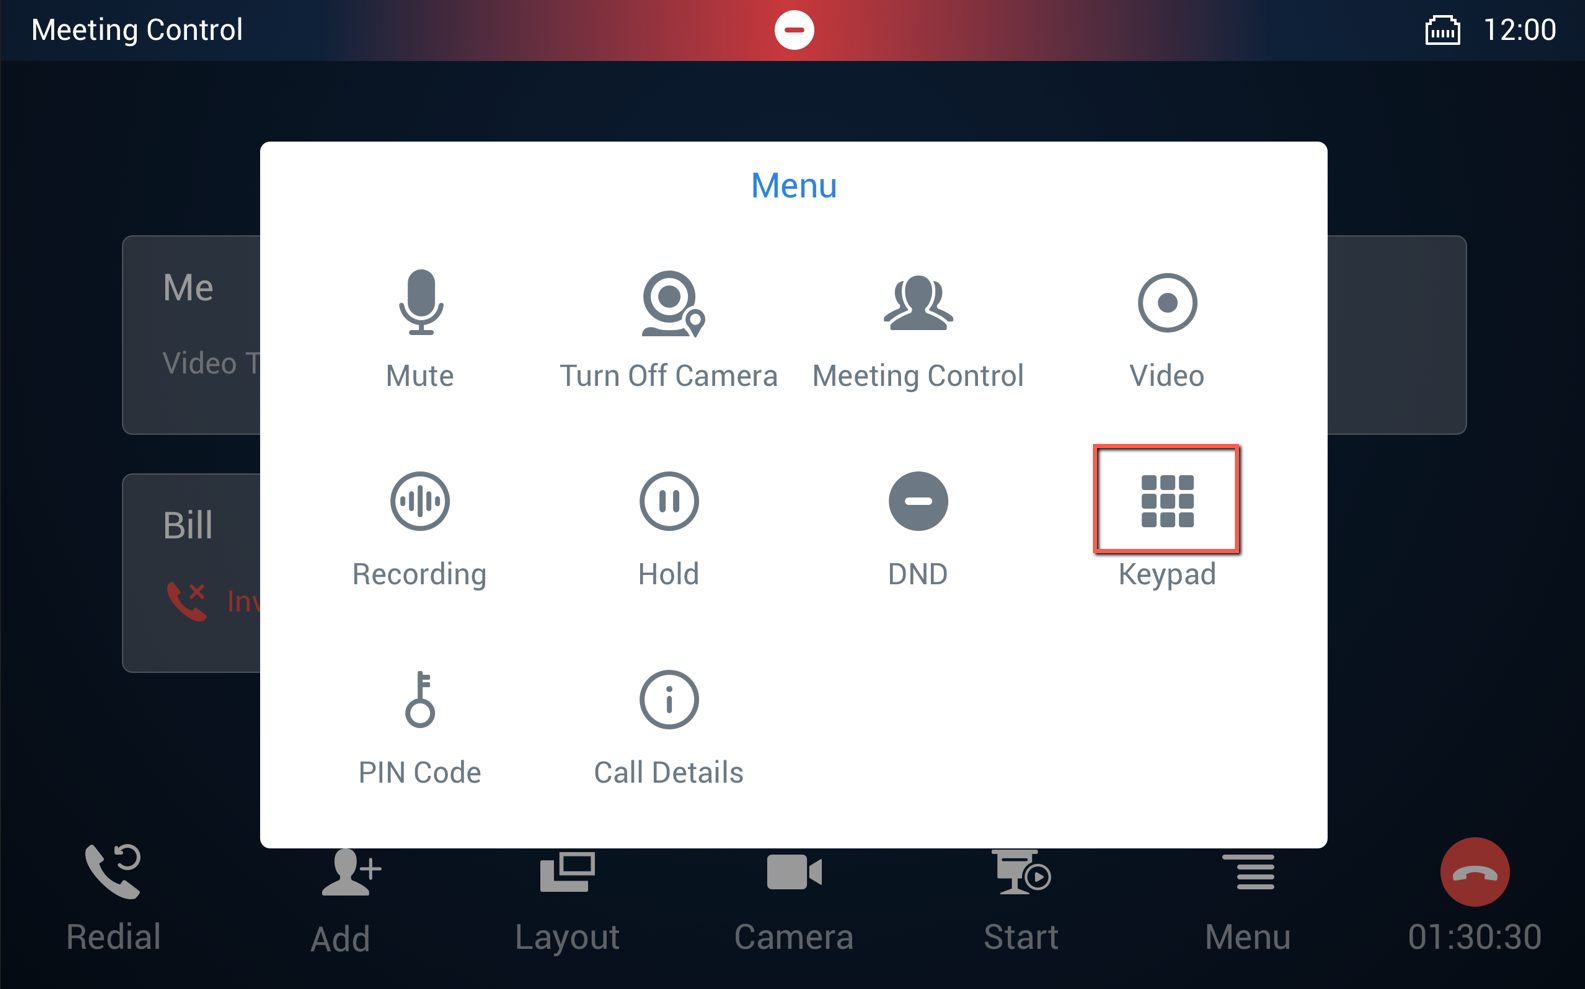
- Click the icon
- Click the icon
 to display the keypad where you can enter the specific feature code.
 to display the keypad where you can enter the specific feature code.
Switch Layout
To change the layout of how party members are organized in a call:
- Click the icon
 to display the layouts
 - the available options are the ones displayed below:
 to display the layouts
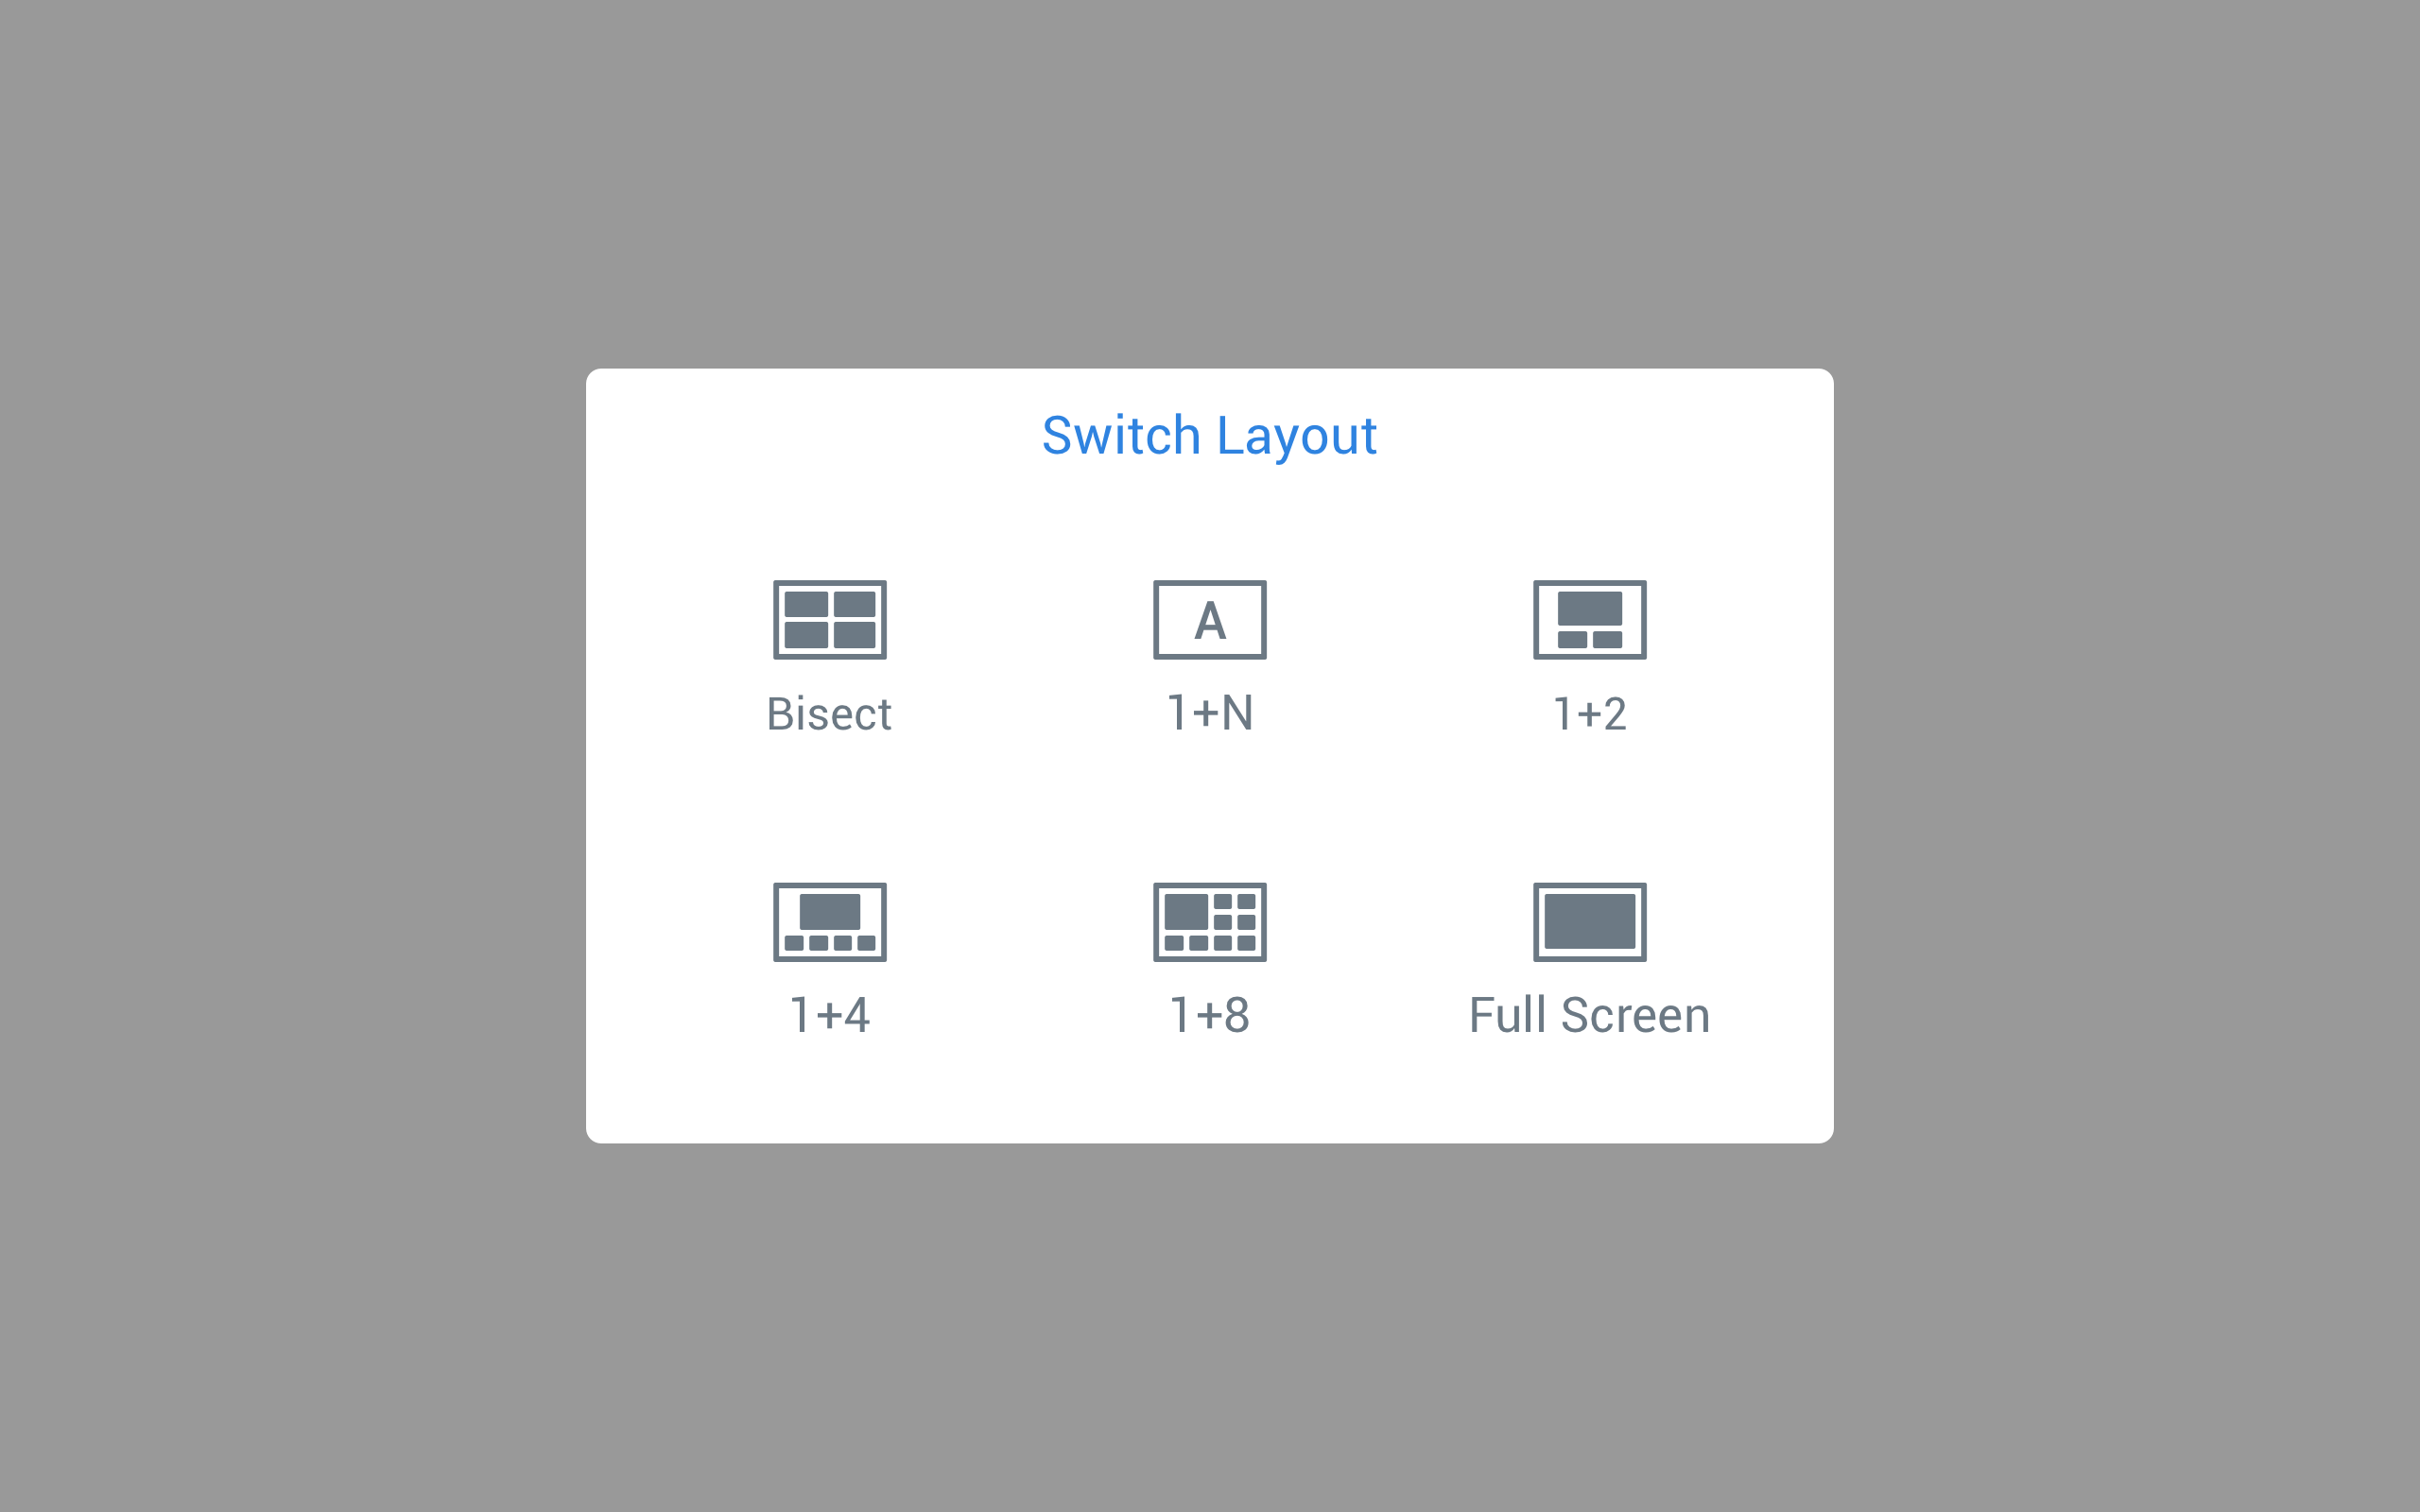
- Select a desired layout, and it will be applied as depicted in the screenshot below::

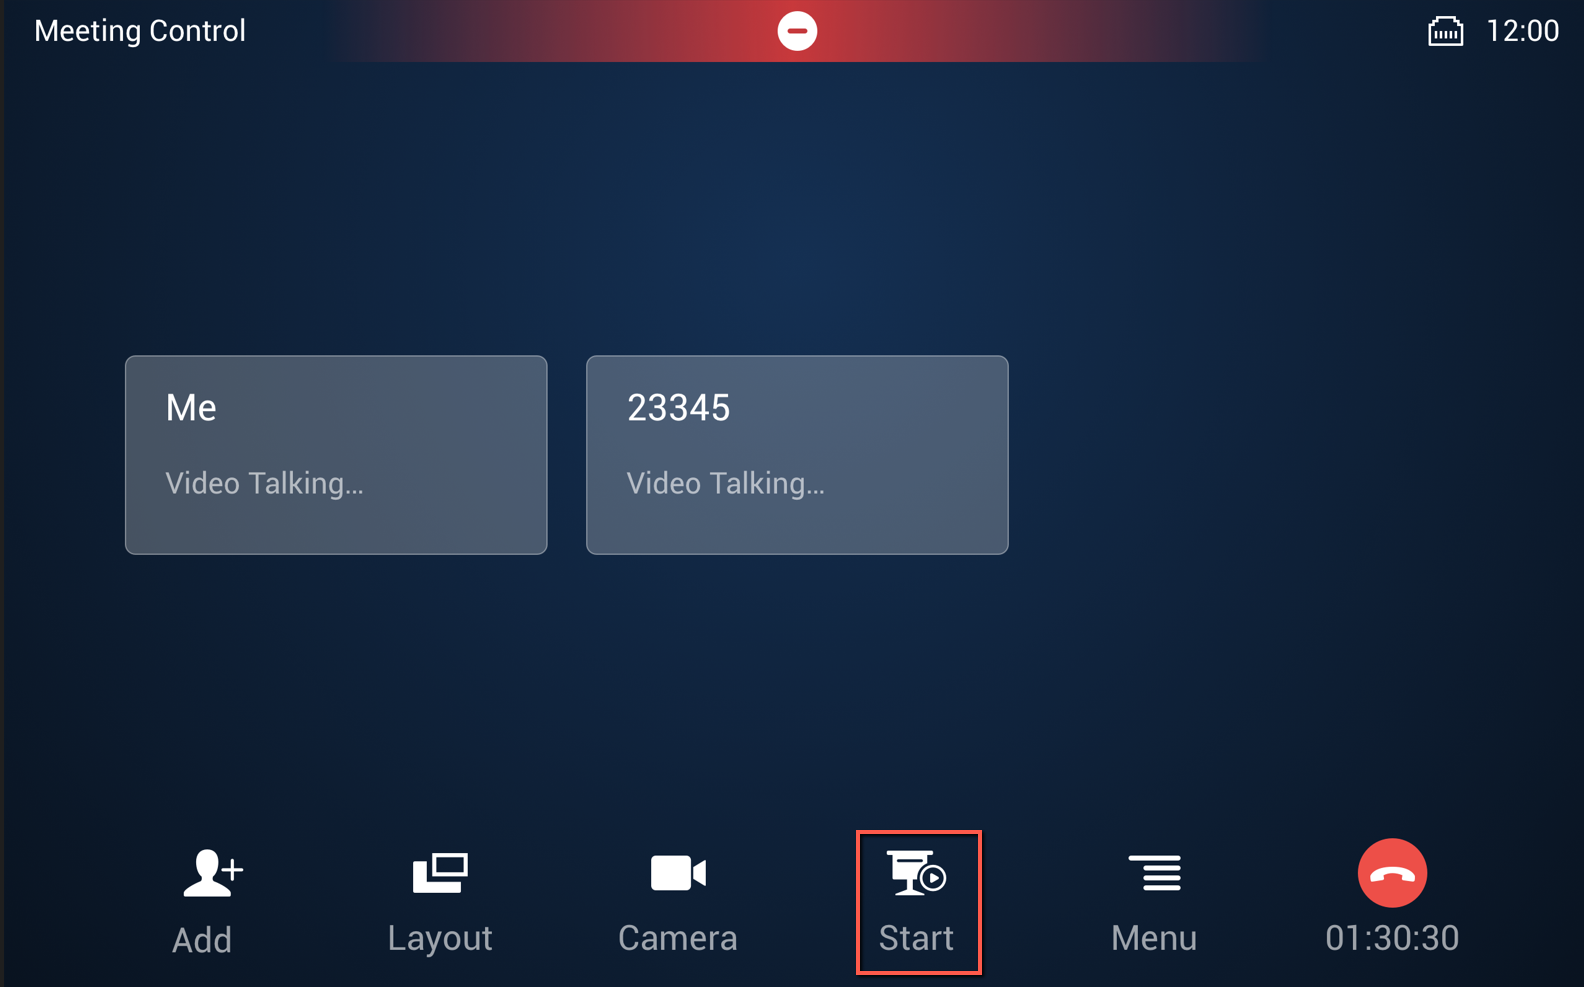
Presentation mode
To activate Presentation mode, you can connect an HDMI IN cable from the GAC2570 or the GVC3220 device to the laptop serving as the presentation source, or use Wi-Fi. Once the connection is established, an additional icon labeled “start” will appear. Clicking on this icon enables the user to initiate the presentation and gives them the option to stop it when needed by re-clicking the icon “stop”.
Once the presentation starts, you can choose a projection source as shown below, it can be a device connected through HDMI directly to a GVC3220 device, a projection screen using “Wi-Fi Display” or “Airplay”, a shared screen from the GVC3220, or a presentation device connected to the GAC2570:

End Call
To End an ongoing meeting or call:
- Click the icon

- A pop-up will appear, asking you to confirm whether you want to end the call, simply click the icon
 to end the conference

 to end the conference
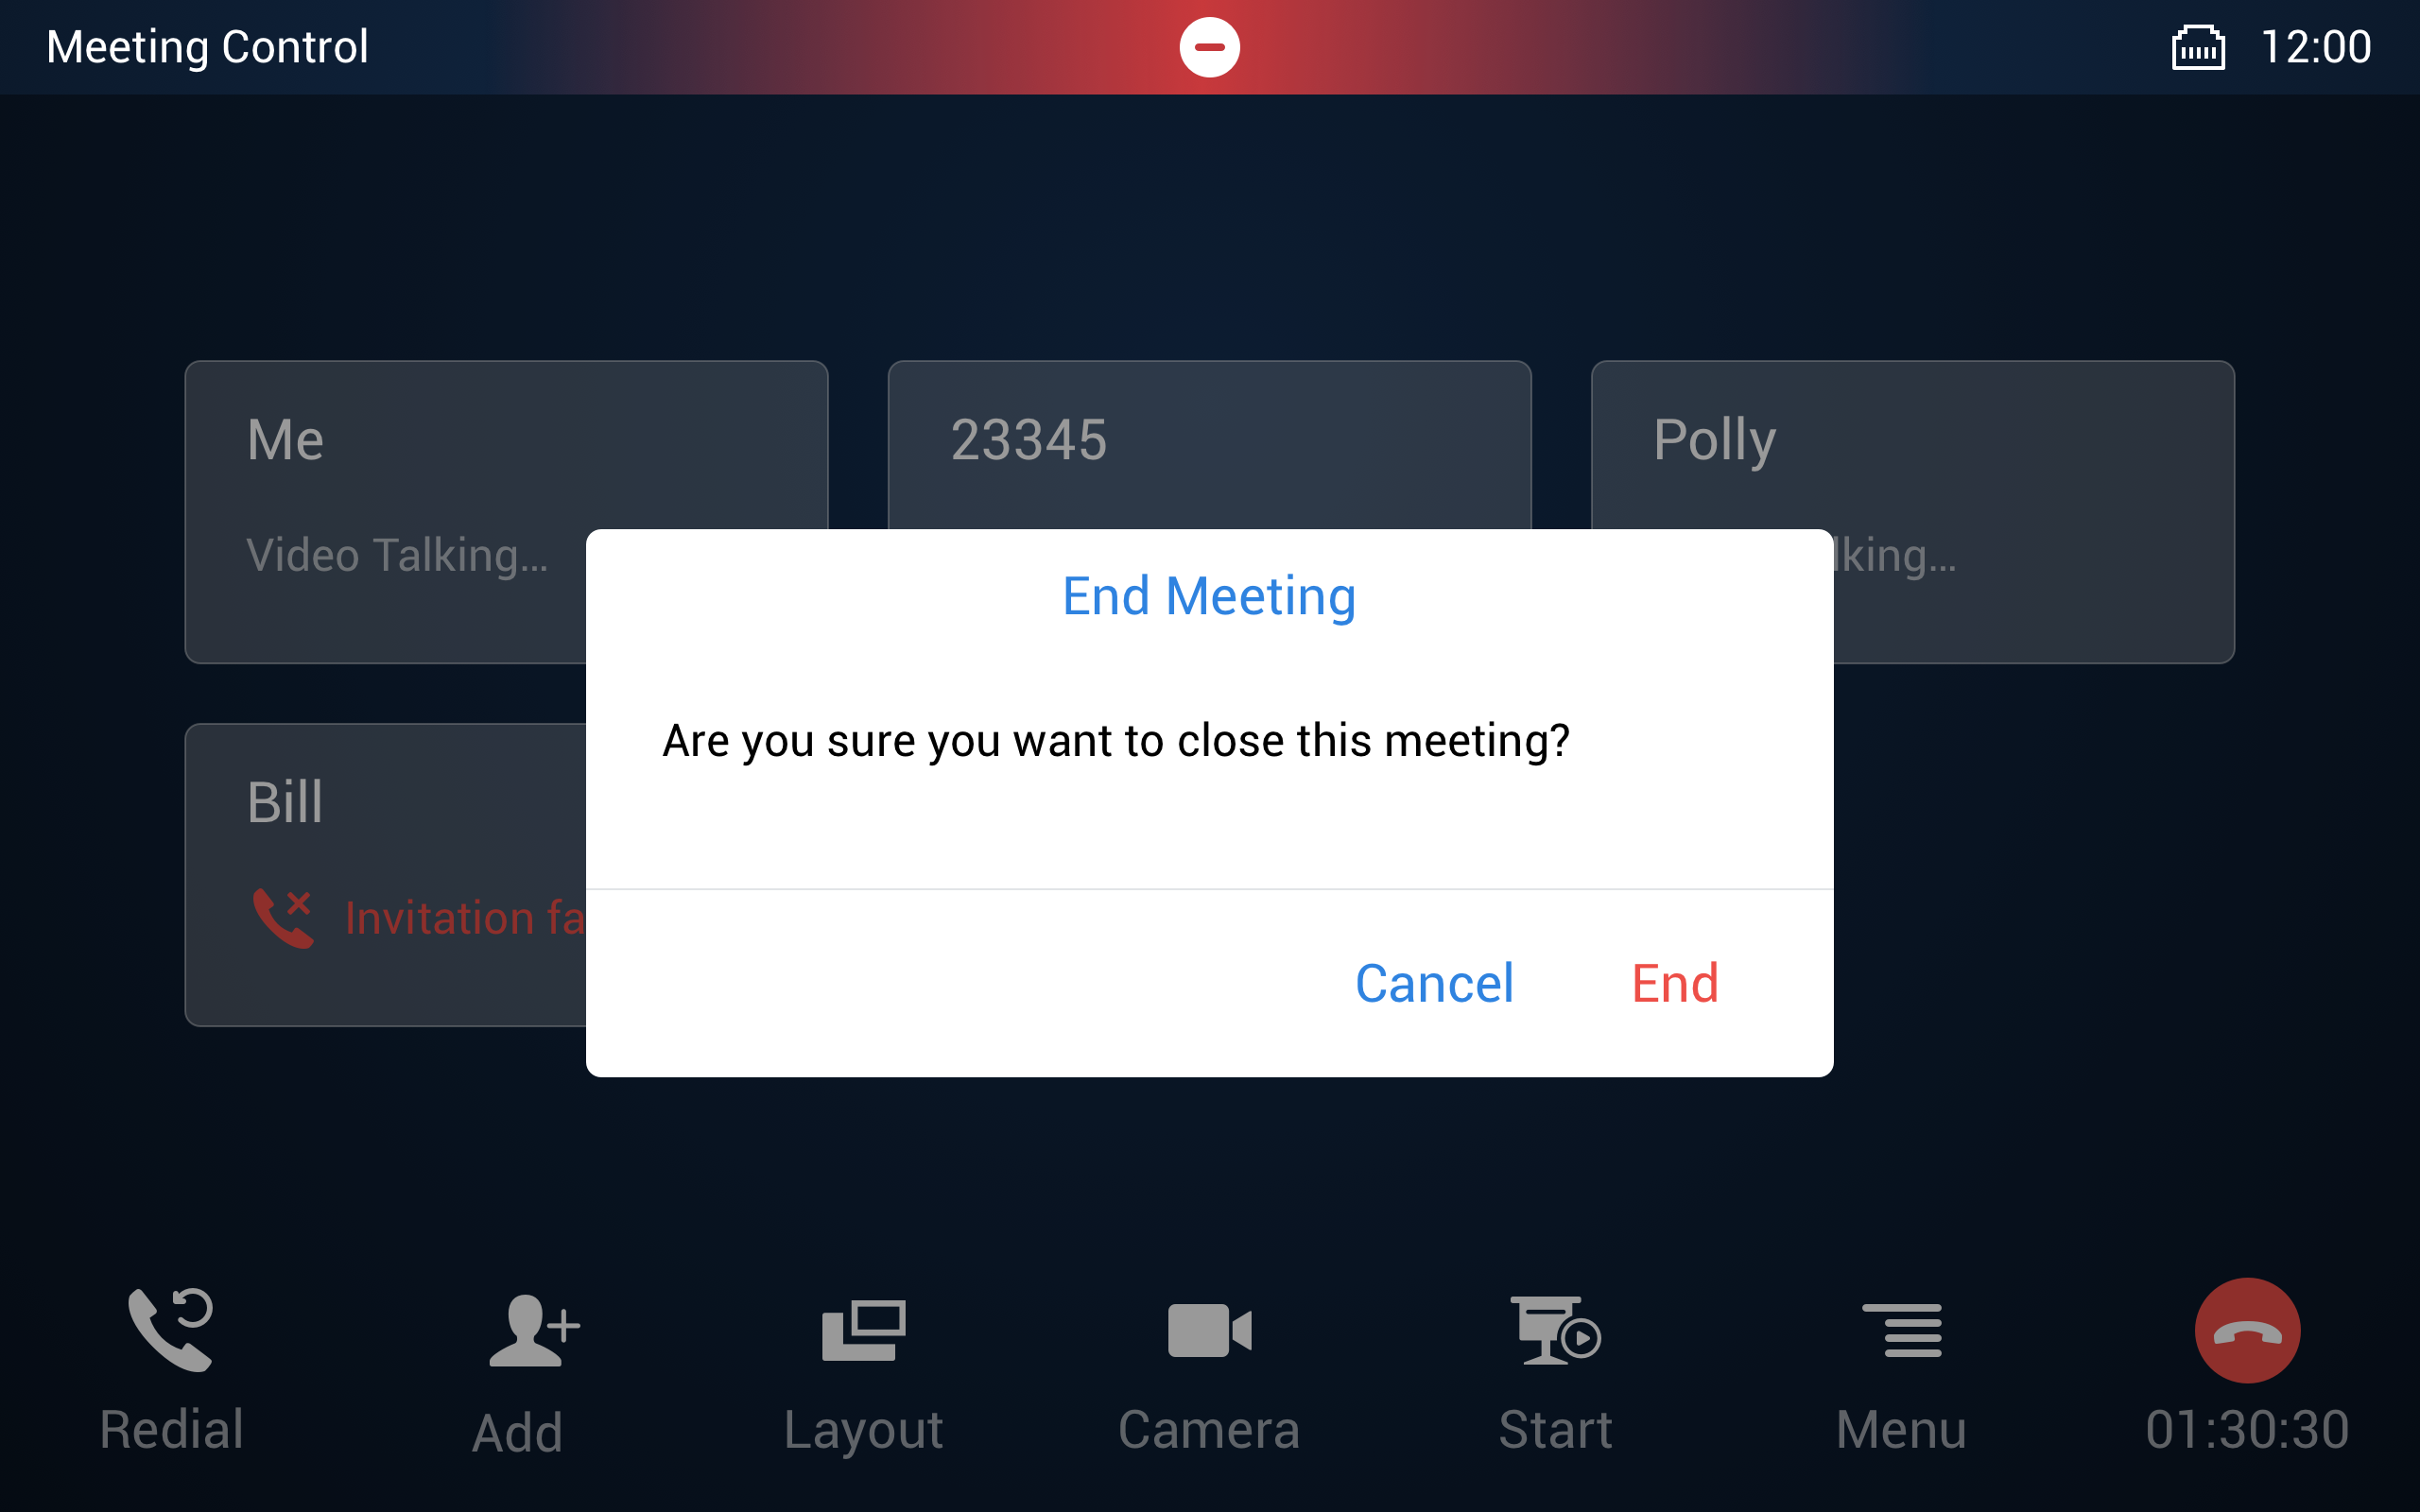
SCHEDULE A CONFERENCE
Scheduling a conference is a crucial feature within the conference control app. You can access it by clicking the highlighted icon below:

This will display a comprehensive list of all ongoing, upcoming, and past conferences, providing details such as conference time, hosts, and subject.
Create a Conference
To create a Conference, please follow the below steps:
- Click on add conference icon
- Choose the subject or theme of a meeting
- Select the start time and end time


- Select the duration

- Select the camera Preset
.png)
- Select the repeat cadence, whether it’s a one-time meeting or a frequent meeting

- Set a password to be entered by the meeting’s members (optional), you can also enable the “No Password Required for Booking Members” option to bypass this step.
- Add the desired members to the meeting.
- Click the icon to save the meeting, it will be displayed with the status “Not started” in the list of scheduled meetings

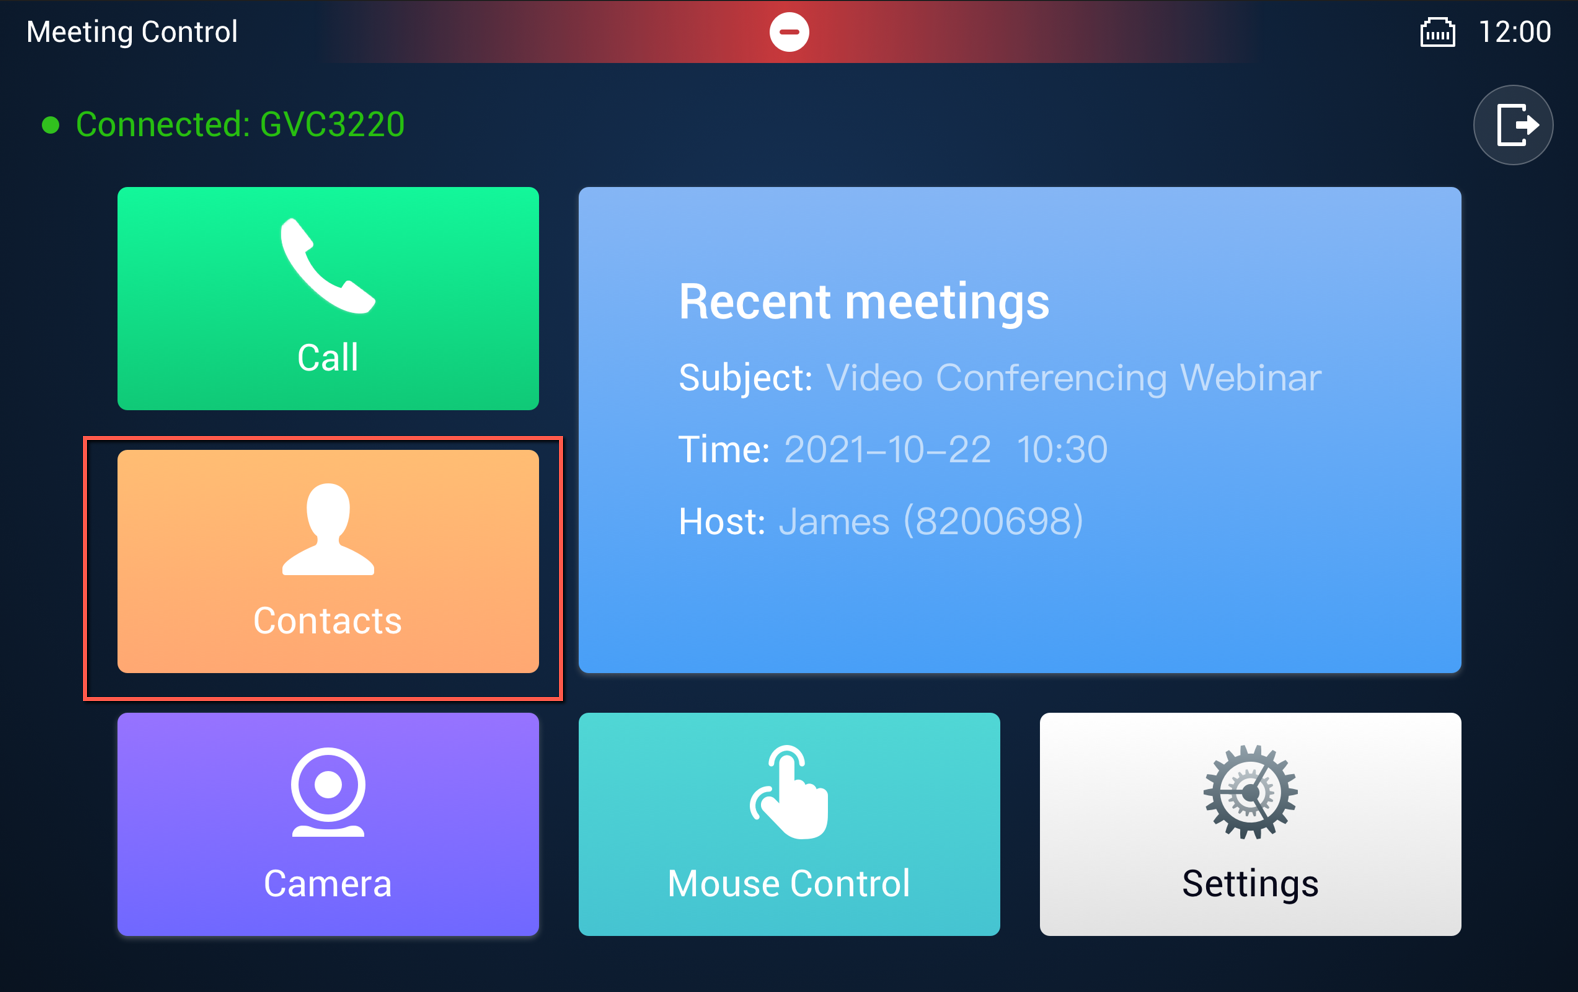
CONTACTS
The contacts panel in the GAC2570 Conference control app offers users various functionalities, including adding contacts, creating local groups, and categorizing contacts into specific groups. You can access the contacts panel by clicking on the icon located below:
Add a Local Contact
To add a local contact, please follow the below steps :
- Click on the contacts icon, this will display a list of already-created contacts

- Click on the icon
 to add a new contact.
 - Enter the contact’s name, extension number, and Account type (SIP, IPVideoTalk…)
 to add a new contact.
- If the user you wish to add has more than one extension you can click on
 to add a new extension related to the user.
 - Click on the icon
 to save the contact.
 to add a new extension related to the user.
 to save the contact.
Call a Group Member
To call an already saved contact:
- Click on the Call Icon

- Choose which contact or contacts you want to call
- Click on the Call icon, the call will be automatically initiated


Add a User to a Group
If you wish to add the user to a specific already created group:
- Click on Select Group
- Choose the group you want to add the user to.

Create a Group
To create a group :
- Access to Local groups on the Contacts Panel.
- Click on the icon to add a new group.
- Set a name to the group, after this, Click on save, the created group will be displayed with the added members to it, as shown in the screenshot below
Make a Group Call
To make a group call :
- Click on the desired group
- Select the members you wish to call.
- Click on the icon to initiate the call.

CAMERA CONTROL
GAC2570 offers the convenience of controlling the camera angles of the GVC3220 Video conferencing device. Acting as a remote camera controller in the PTZ style (Pan-Tilt-Zoom), this functionality is accessible through the LCD menu displayed on the icon below.

When clicking the icon, the interface below will appear, providing you with controls to adjust the camera lens of the GVC3220. You can move the camera left, right, up, and down, as well as zoom in and out as needed.
You can also configure the Manual Focus (MF+, MF-), as well as the assisted focus (AF).
TOUCH CONTROL
The Conference Control app offers a Touch Control feature enabling users to experiment with hand gestures used to control the GVC3220 through the GAC2570. To try out these functions, simply click on the highlighted icon below:

After accessing the Touch Control panel, click on the icon to view instructions on utilizing the available buttons:

GENERAL SETTINGS
Through the GAC2570, you have the capability to efficiently manage and configure the GVC3220. This grants you the authority to adjust various settings, including the following aspects:

- Account Settings: This section allows you to manage and configure the accounts associated with the GVC3220. It includes options to add or modify SIP accounts, H.323 accounts, IPVideoTalk, Blue Jeans, or Zoom accounts. You can set up login credentials, configure server details, and customize preferences for each account.
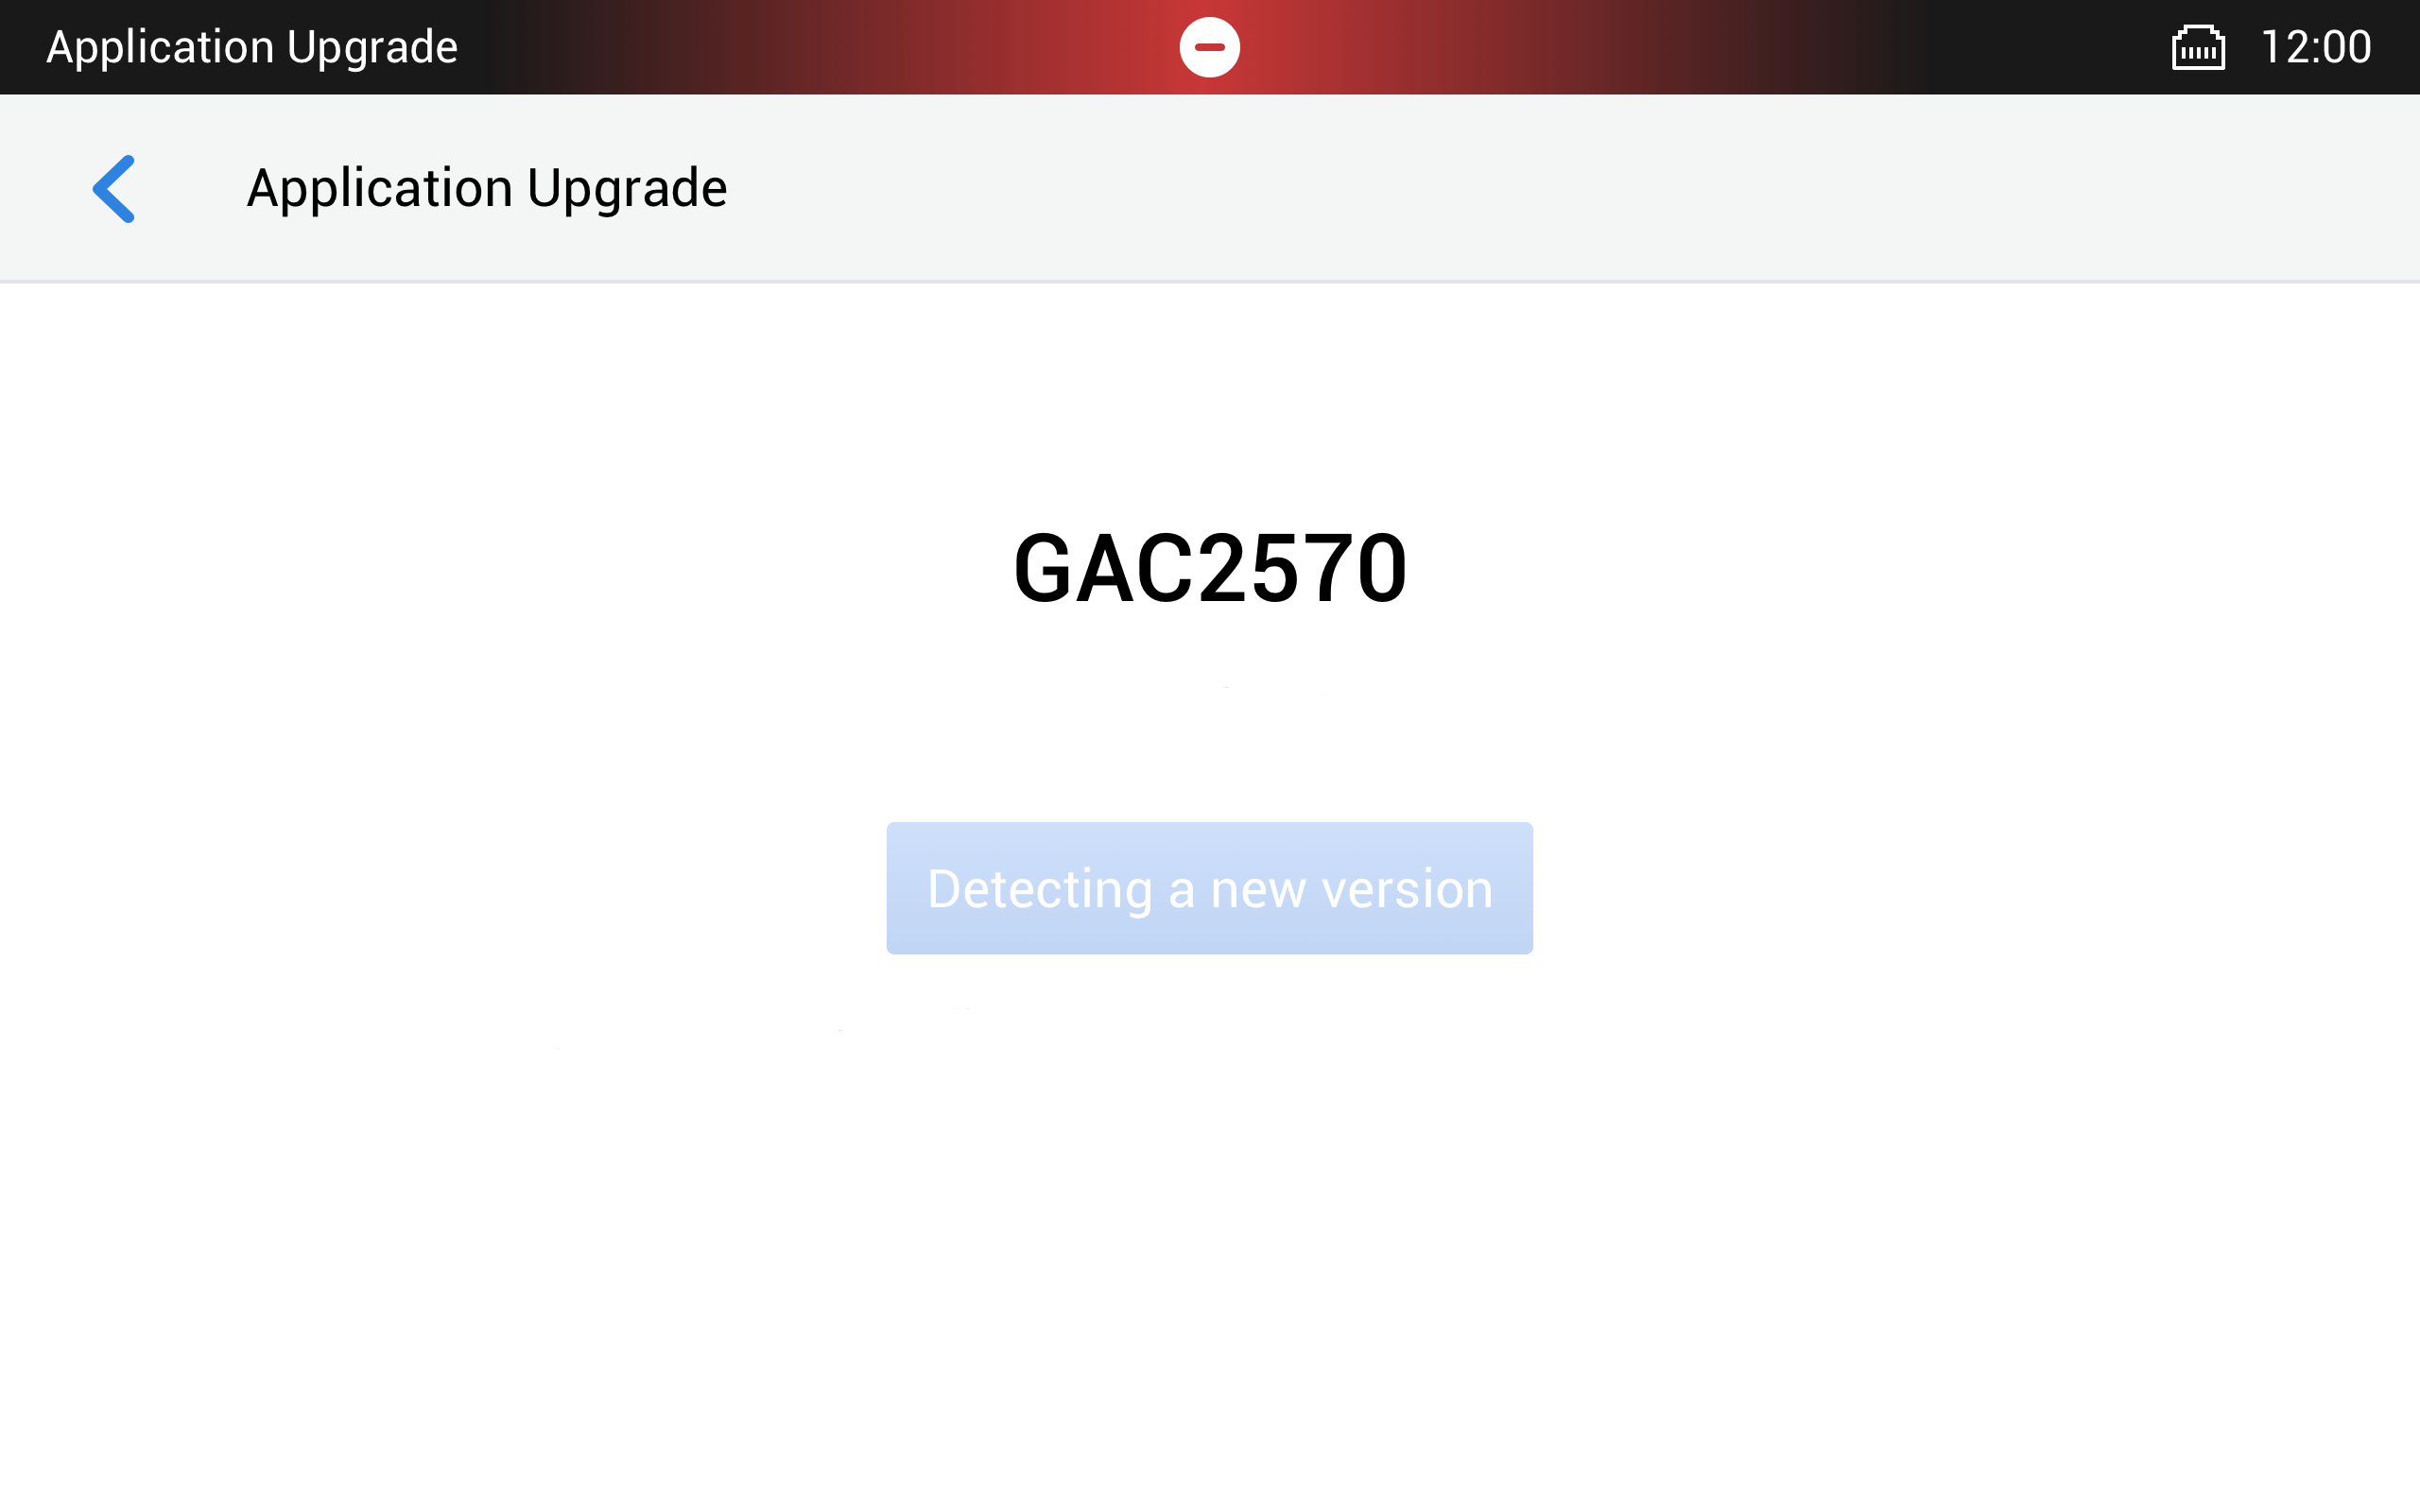
- Application Upgrade: In this setting, you can control the software upgrade process for the GVC3220. You can check for available firmware updates and initiate the upgrade process to ensure the device is running the latest software version, which often includes bug fixes, security improvements, and new features.
- Power Manager: The Power Manager setting lets you customize power-related configurations for the GVC3220. This includes options like scheduling the device’s power on and off times and setting sleep or standby modes.

- GVC3220 Device Information: This section displays the overall configuration of the GVC3220 video conferencing device: including the firmware version, hardware version, IP Address, and Mac Address…
- Local Device Information: While this section displays the same above information for the remote controller of the GVC3220, that is the GAC2570 Audio conferencing device.