


INTRODUCTION
The SecureAccess App is a lightweight cloud-based platform and door-opening application designed for both everyday residents and advanced administrators. It enables users to open doors locally or remotely and to manage temporary visitor access, all directly from their smartphone.
GETTING STARTED
Download the application
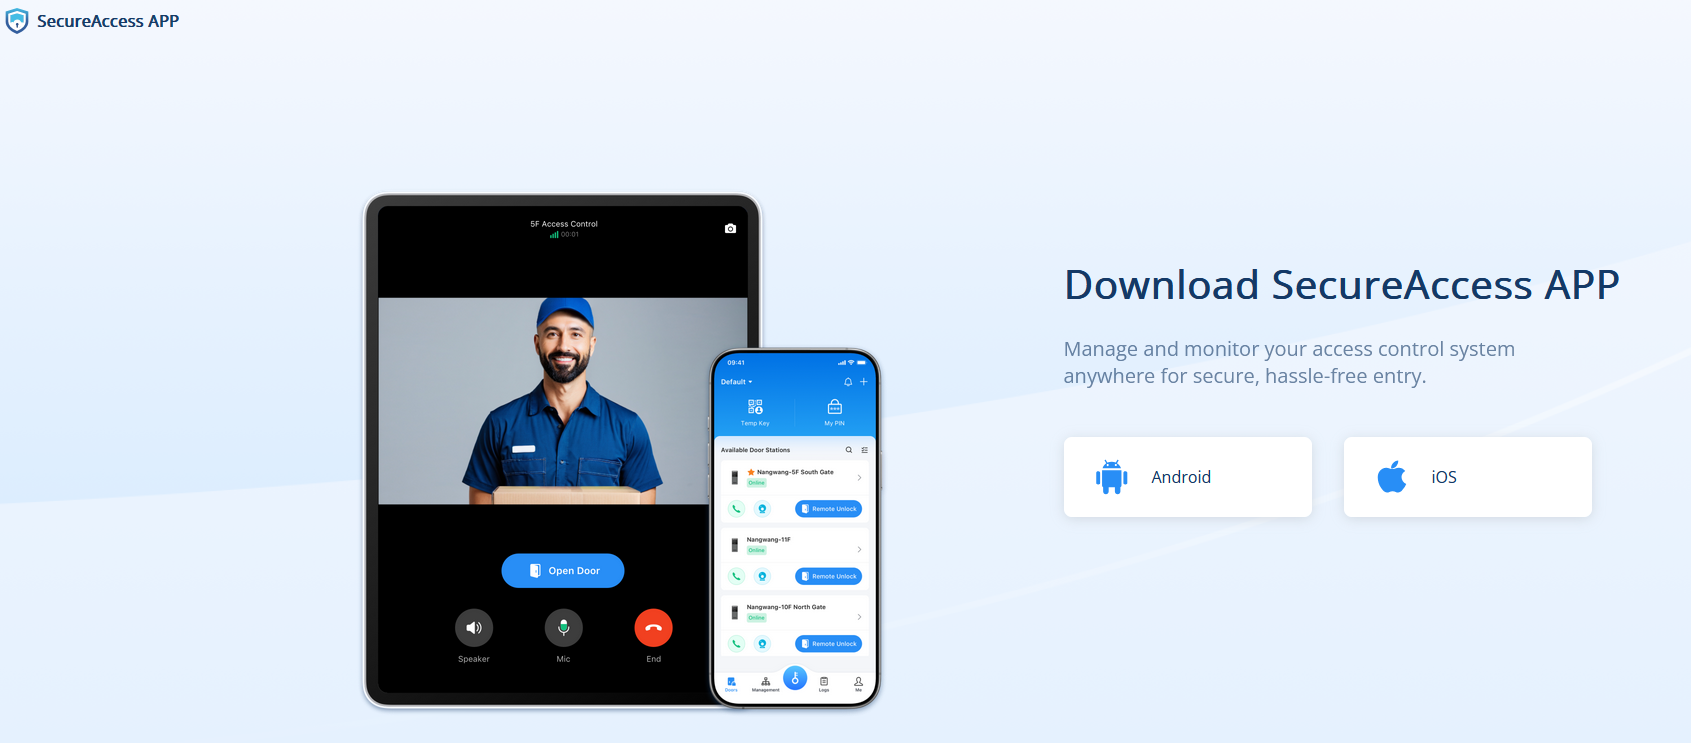
- Download Grandstream SecureAccess from Google Play or App Store.
- Or use the direct link: https://fw.gdms.cloud/gds/download/
- Scan the QR code to install the apk.
Configure an Account
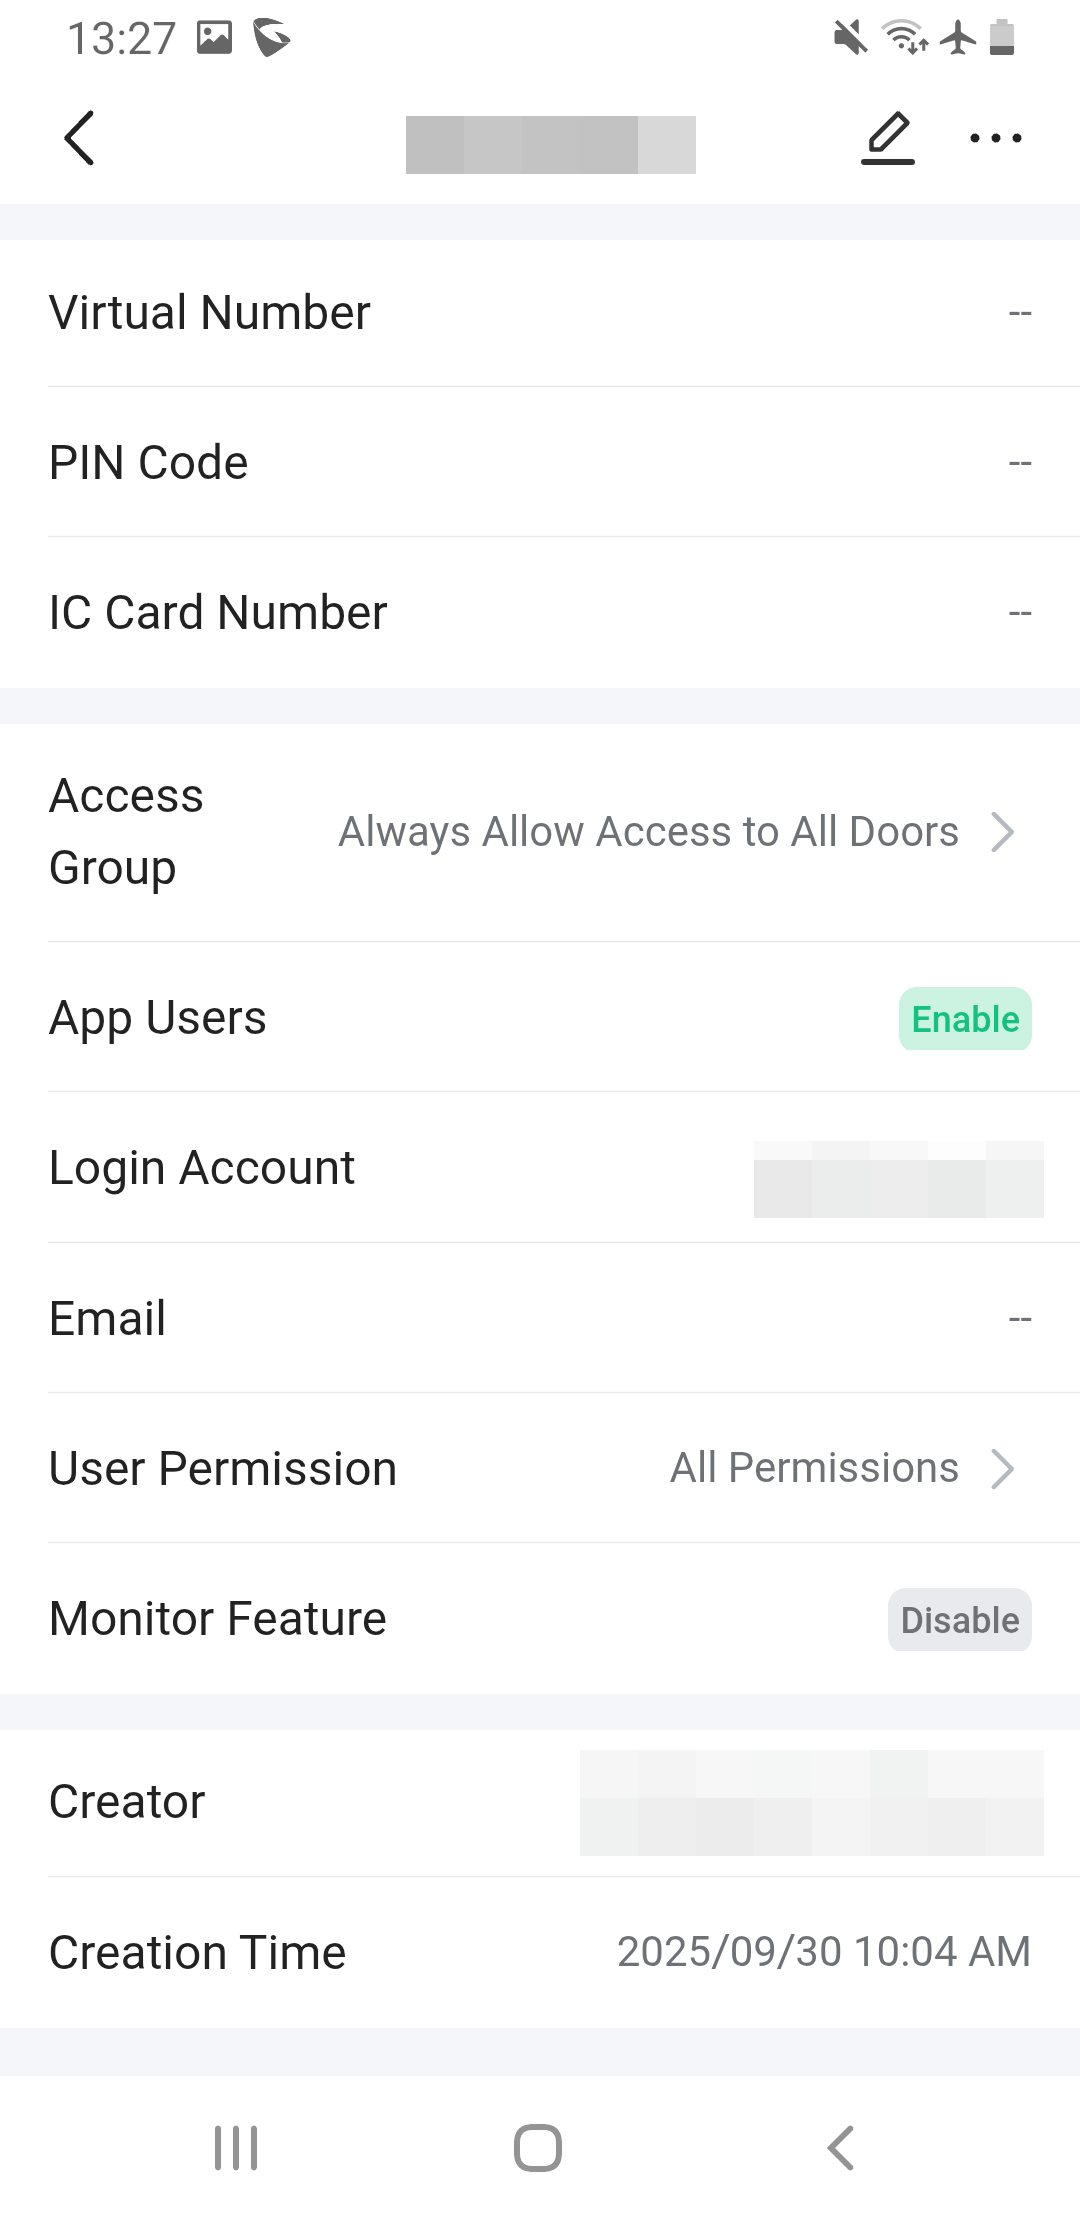
The Super Administrator will create your user account. Once the account is set up, you can log in using the credentials provided by the administrator.
Log In
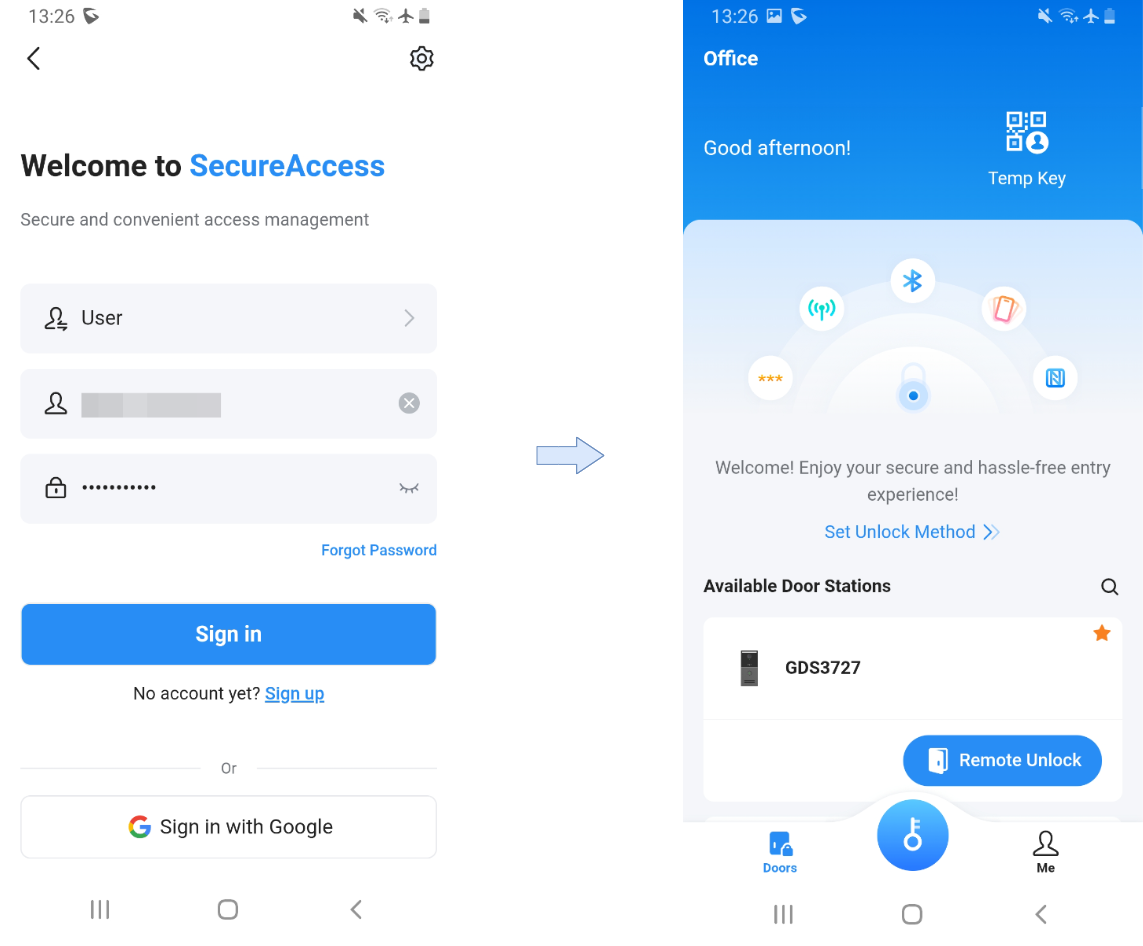
- Open the app.
- Select User.
- Enter the login account and password provided by your administrator.
APP HOME PAGE
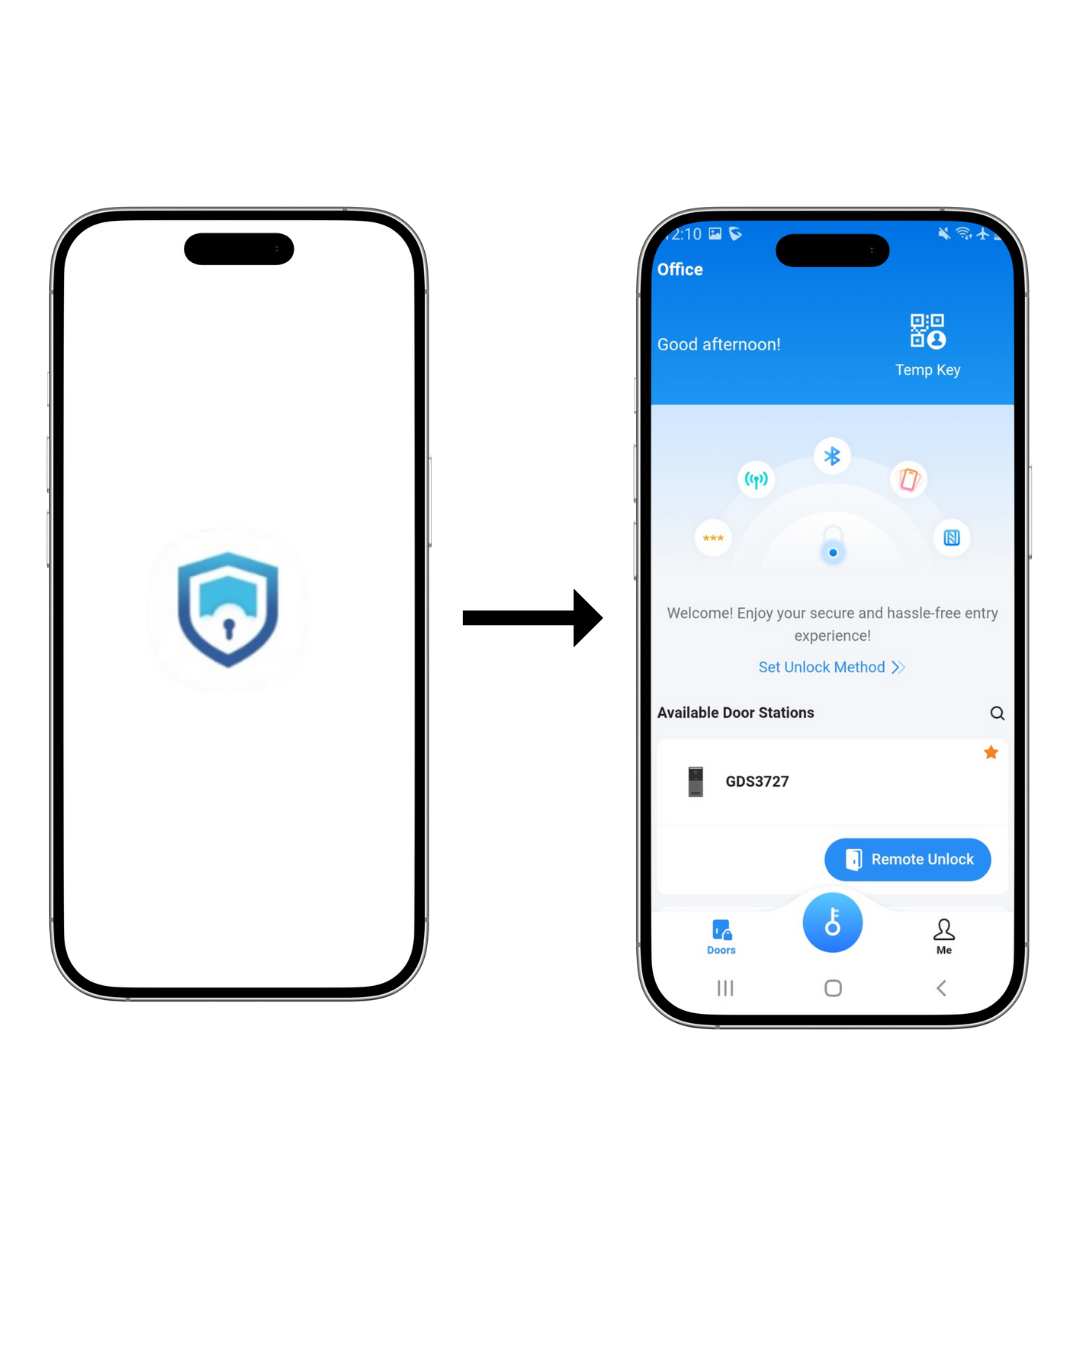
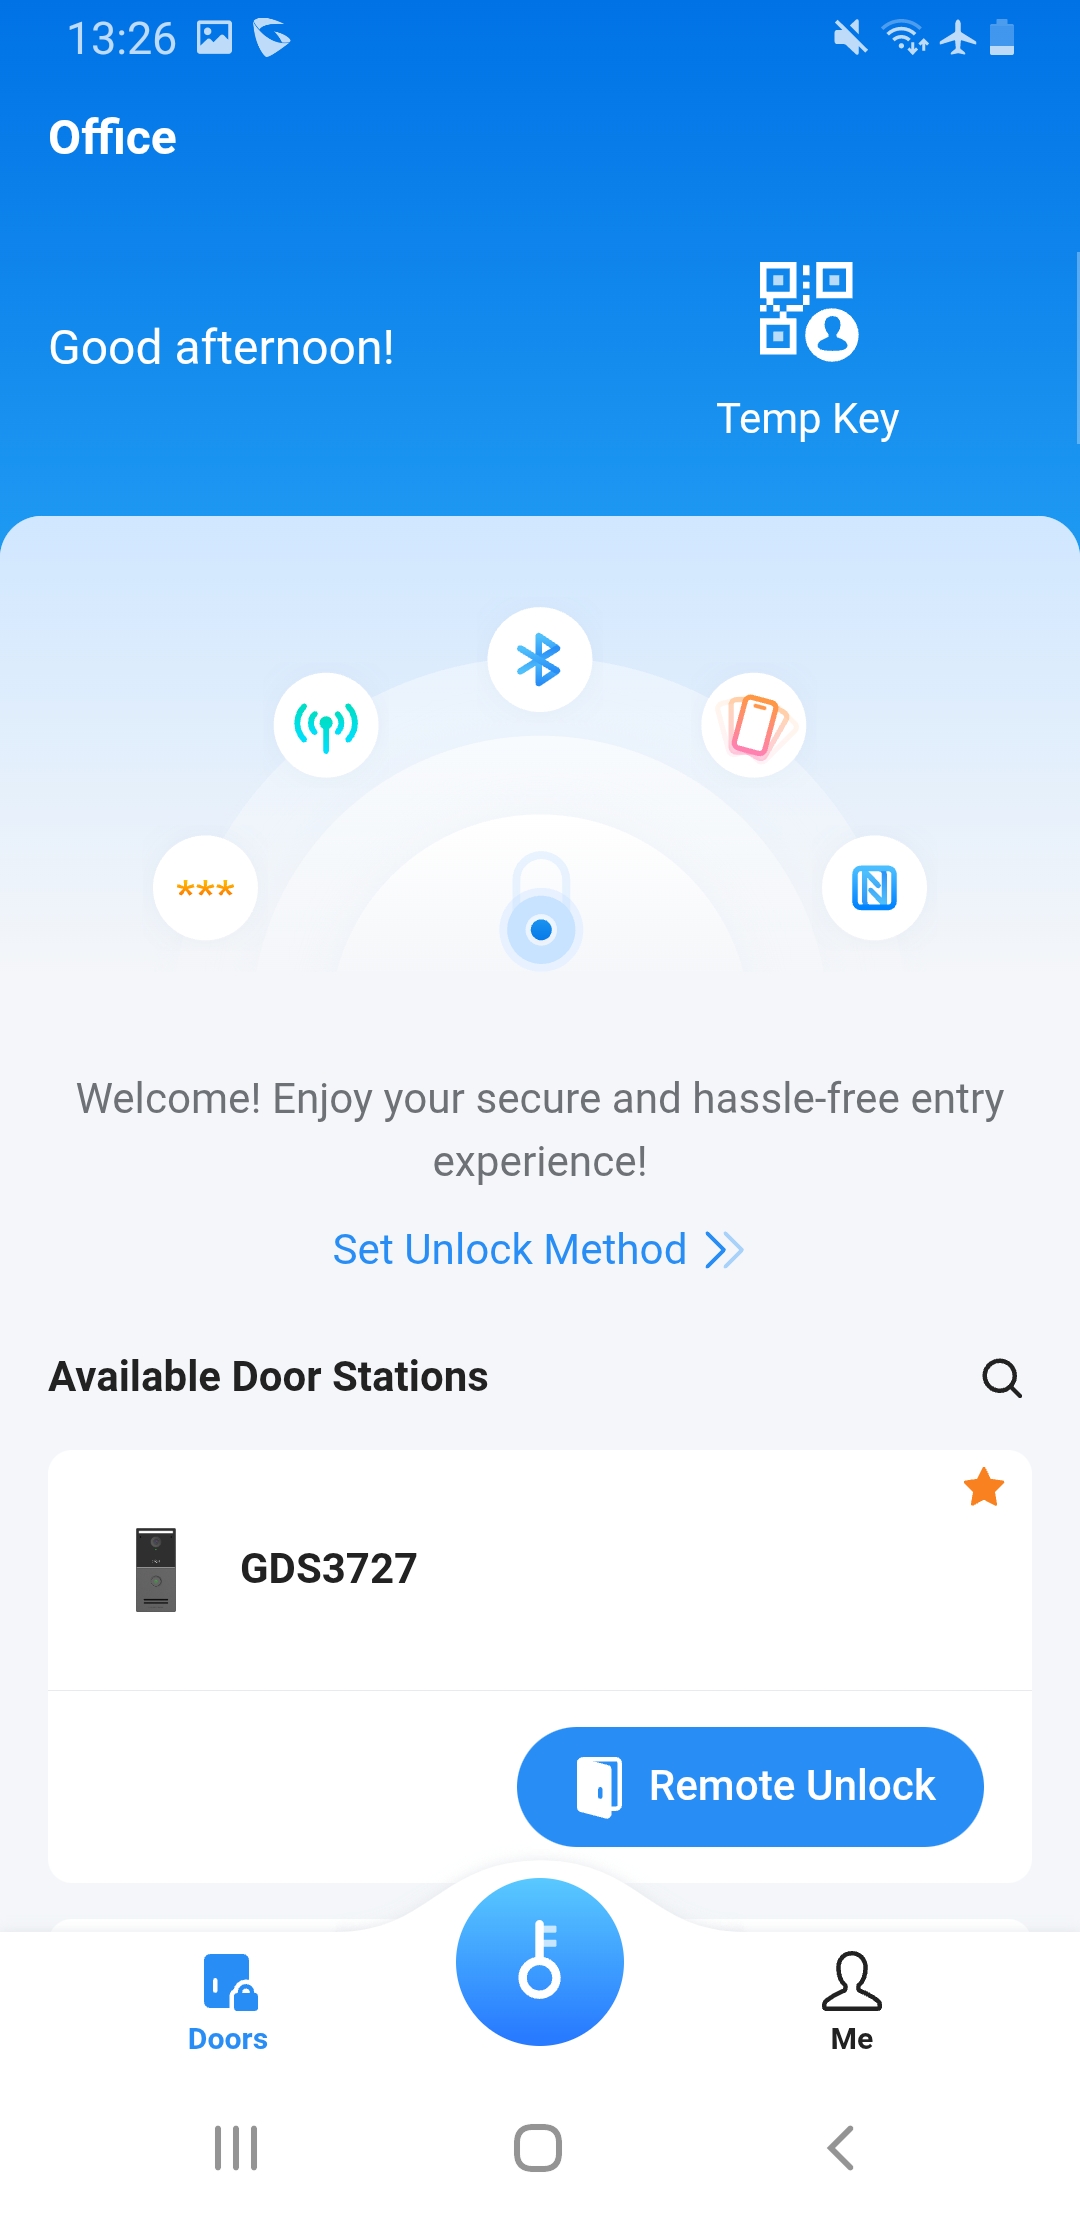
When you log into the SecureAccess app, the home page acts as your main dashboard. At the top, you will see the organization name (e.g., Office) and a personalized greeting.
Key features on this screen include:
- Temp Key – A shortcut in the top-right corner to create and share temporary visitor keys. ( if the user permission is granted)
- Unlock Method Icons – A visual panel showing all supported unlocking methods (Bluetooth, NFC, card, PIN, etc.). You can tap Set Unlock Method to configure your preferred options.
- Available Door Stations – A list of door stations assigned to your account. Each device entry shows its name (e.g., GDS3727) and allows you to:
- Tap the star icon to mark it as a favorite.
- Use the Remote Unlock button to open the door if you have permission.
The home page is designed to give you quick, one-tap access to your most common actions, unlocking doors, managing visitor keys, and viewing available devices, without navigating deeper into the app menus.
UNLOCKING METHODS
SecureAccess supports multiple door‑opening methods. Users may only see the methods enabled by the administrator.
Bluetooth Unlocking
- Enable Bluetooth on your phone.
On iOS, swipe down to open the Control Center and tap the Bluetooth icon; on Android, turn on Bluetooth from the quick settings panel. The door station must have Bluetooth Unlock enabled. - Choose an unlocking mode:
- One-Tap Unlock: Open the app and tap the blue Key icon on the bottom navigation bar to unlock the nearest door station.
- Hands-Free (Approach to Open): Walk toward the door; the app will automatically unlock when the phone is detected within range. This mode requires enabling Hands-Free in Door Unlock Settings and may require permission settings for each door.
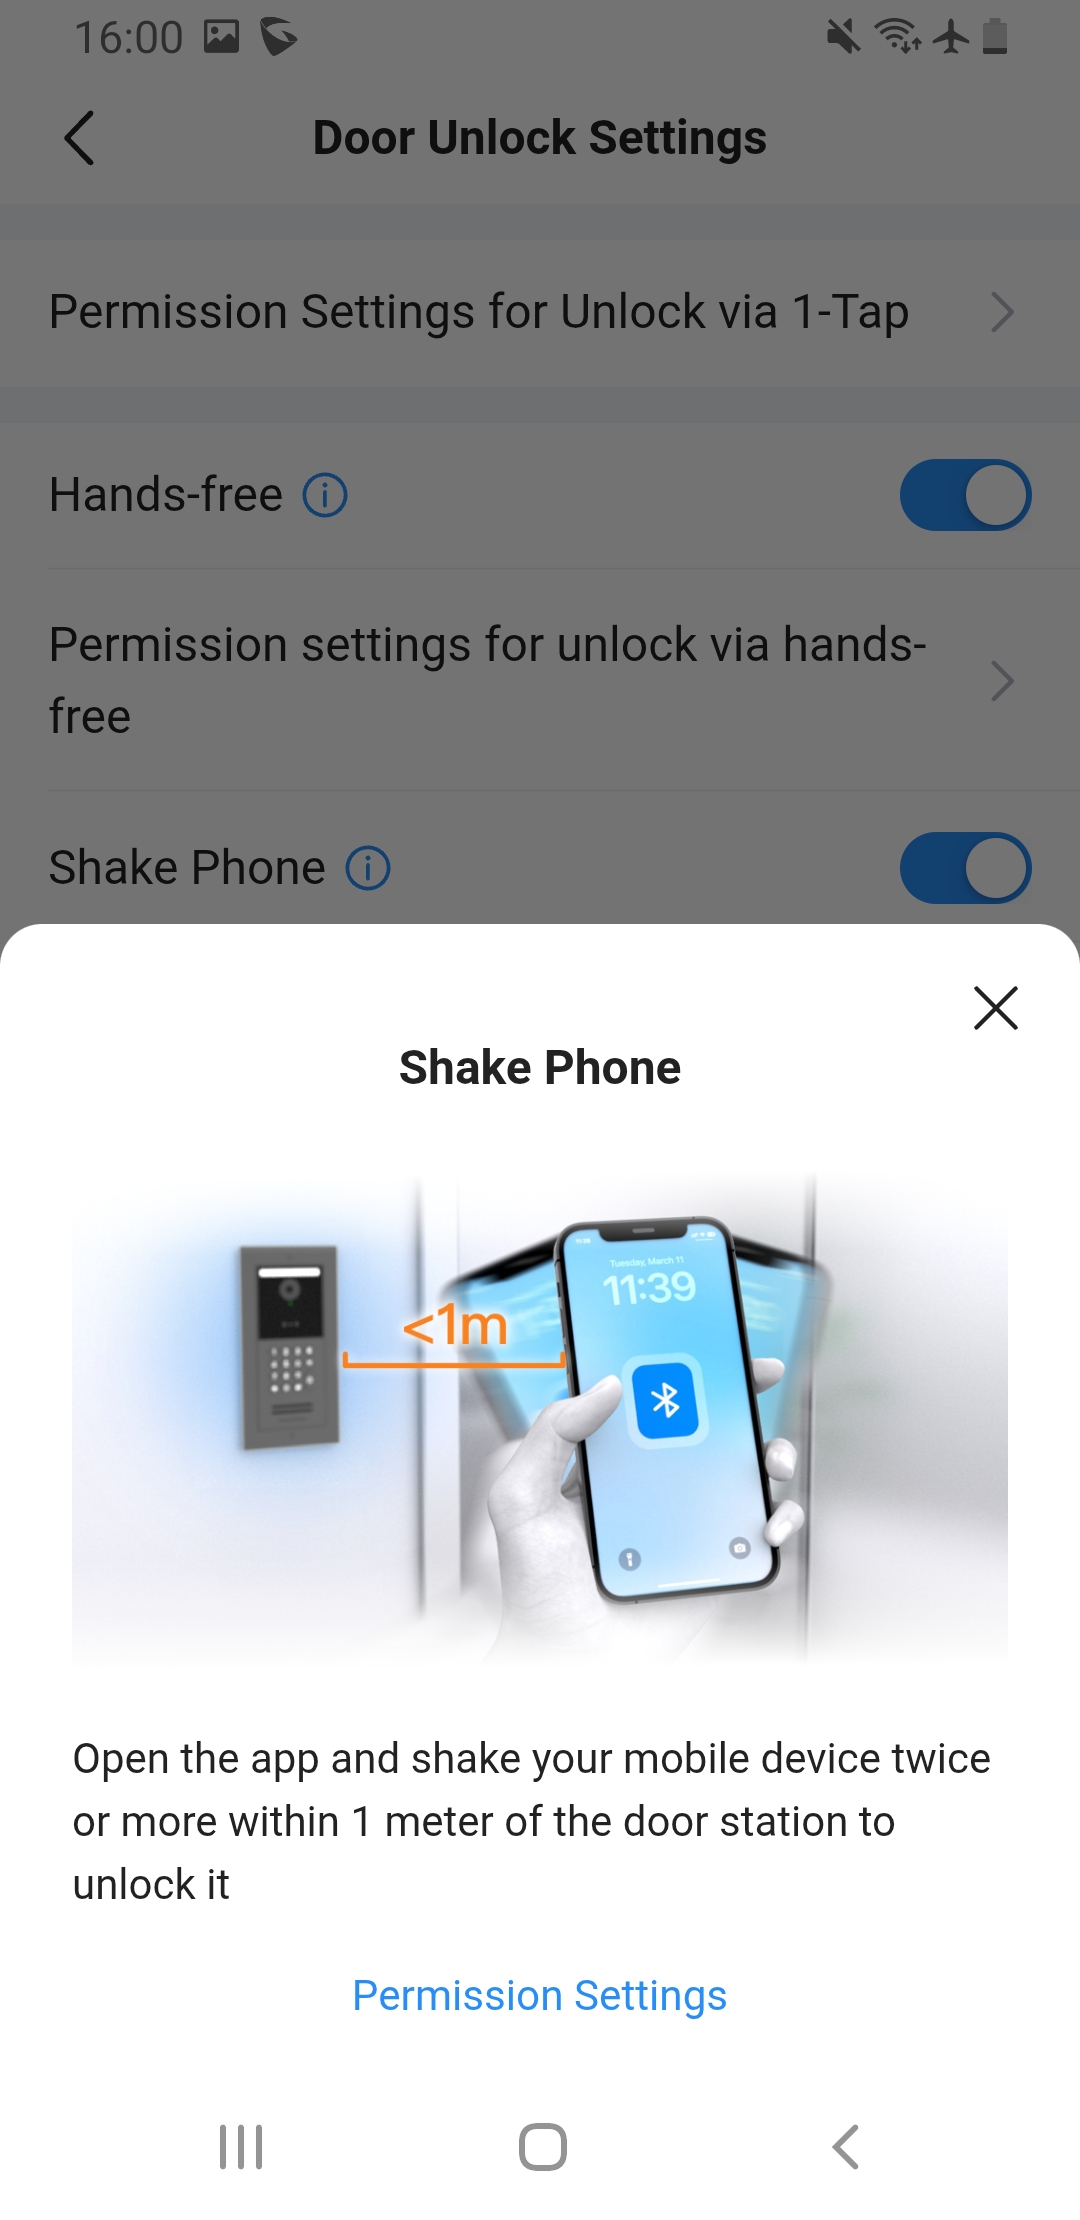
- Shake Phone: Shake your phone to unlock the nearest door station. This requires enabling the Shake Phone unlock option.
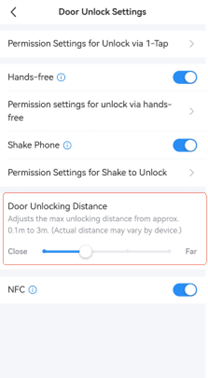
- Door Unlocking Distance: Adjusts the maximum unlocking distance from approximately 0.1 to 3m from the GDS device. This configures the farthest distance that the device needs to be from the door to unlock it.
- Device-specific requirements:
- Android Devices: To unlock the door via Bluetooth, users must manually open the App interface. Once the App is active, the door can be opened either by approaching the door with Bluetooth enabled or by shaking the phone.
- iOS Devices: To unlock the door without manually opening the App (when the App is running in the background), the required permission must be enabled in iOS settings. This ensures the App can use Bluetooth in the background to detect and unlock the door.
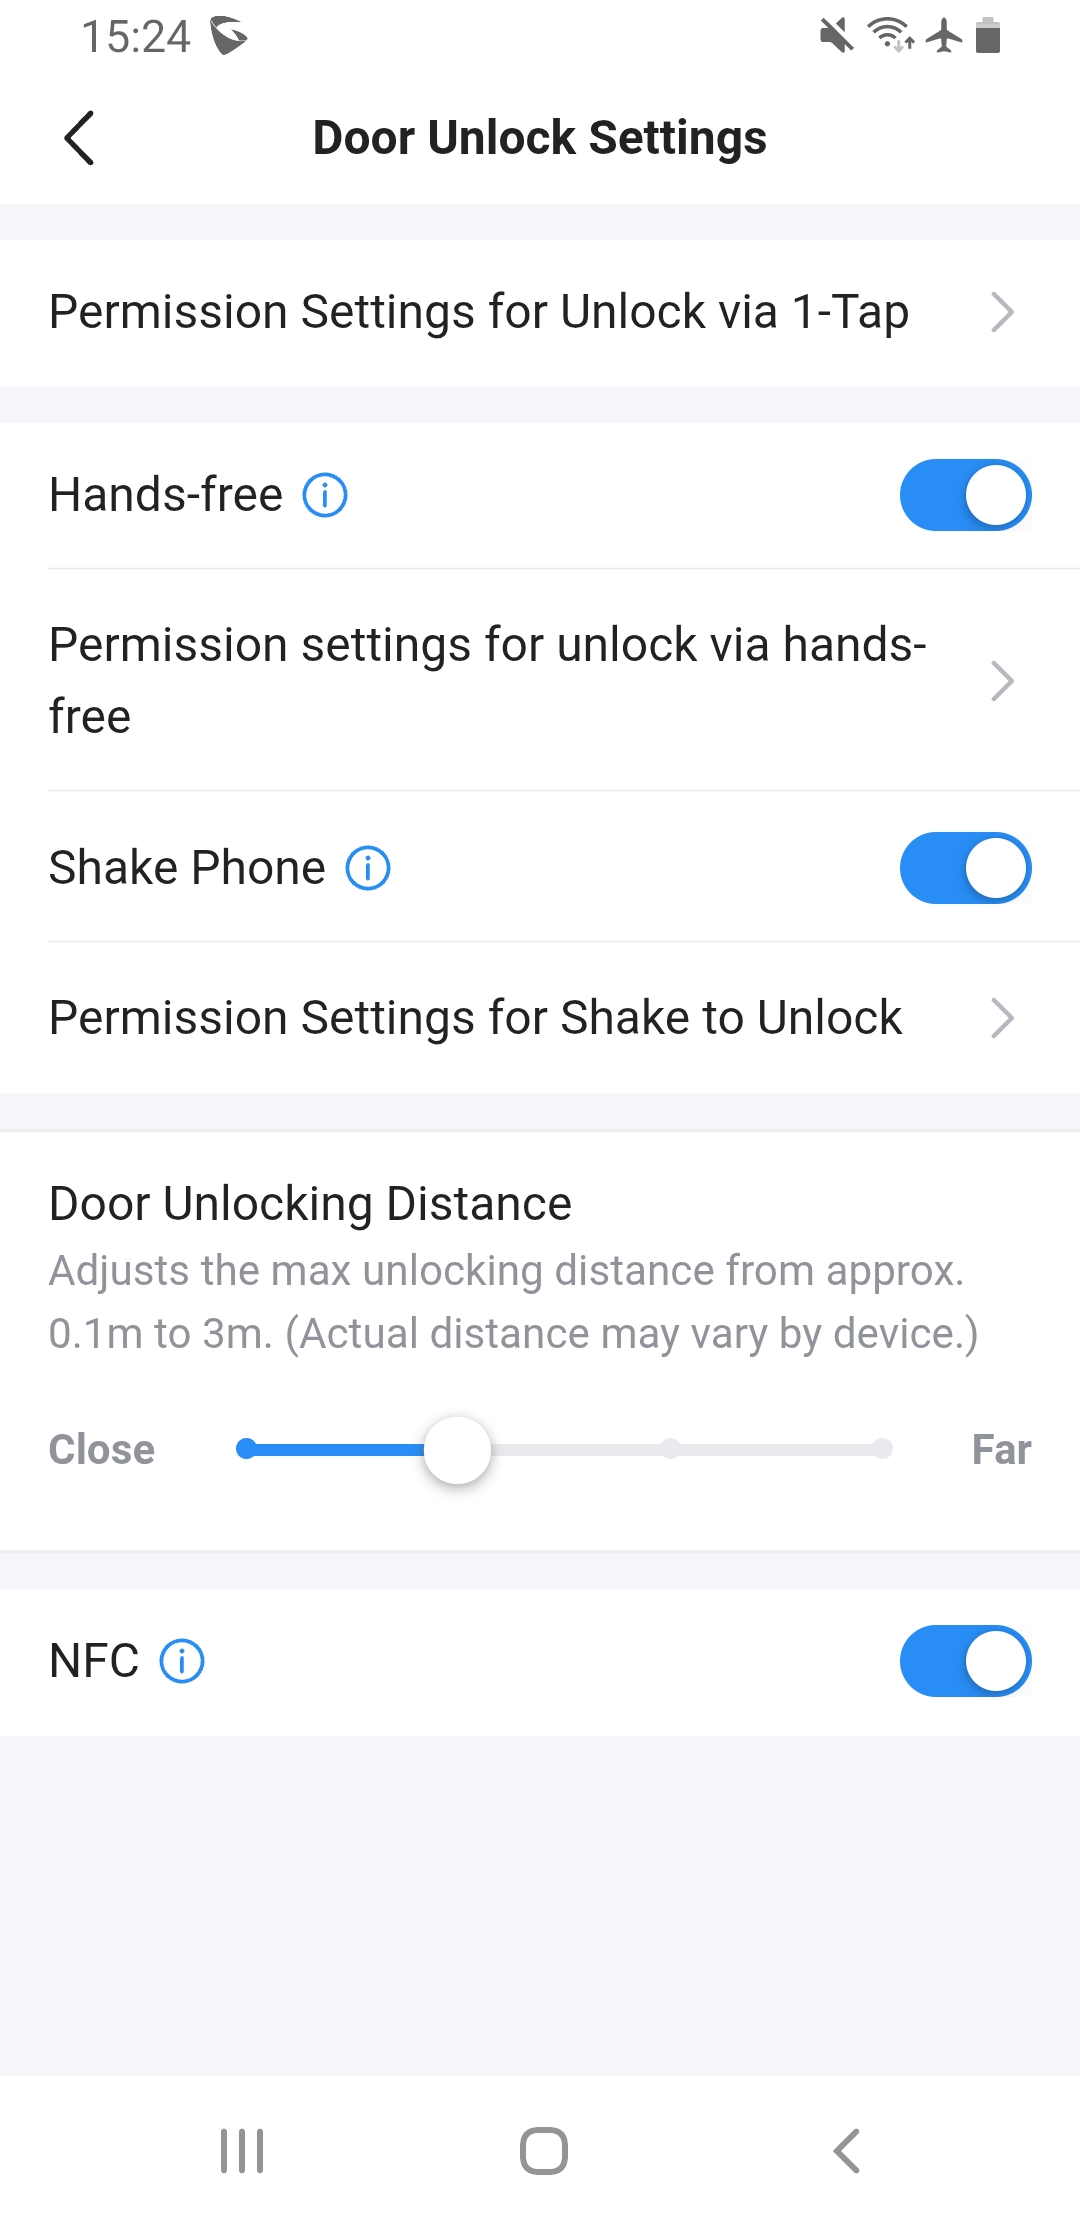
Door Unlock settings can be customized via Me → Door Unlock Settings. You can enable or disable each mode and set the added devices to be opened via 1-tap, hands-free, or shake. The NFC toggle is available on Android for NFC unlocking. An example of the configuration page is shown below.
NFC Unlocking
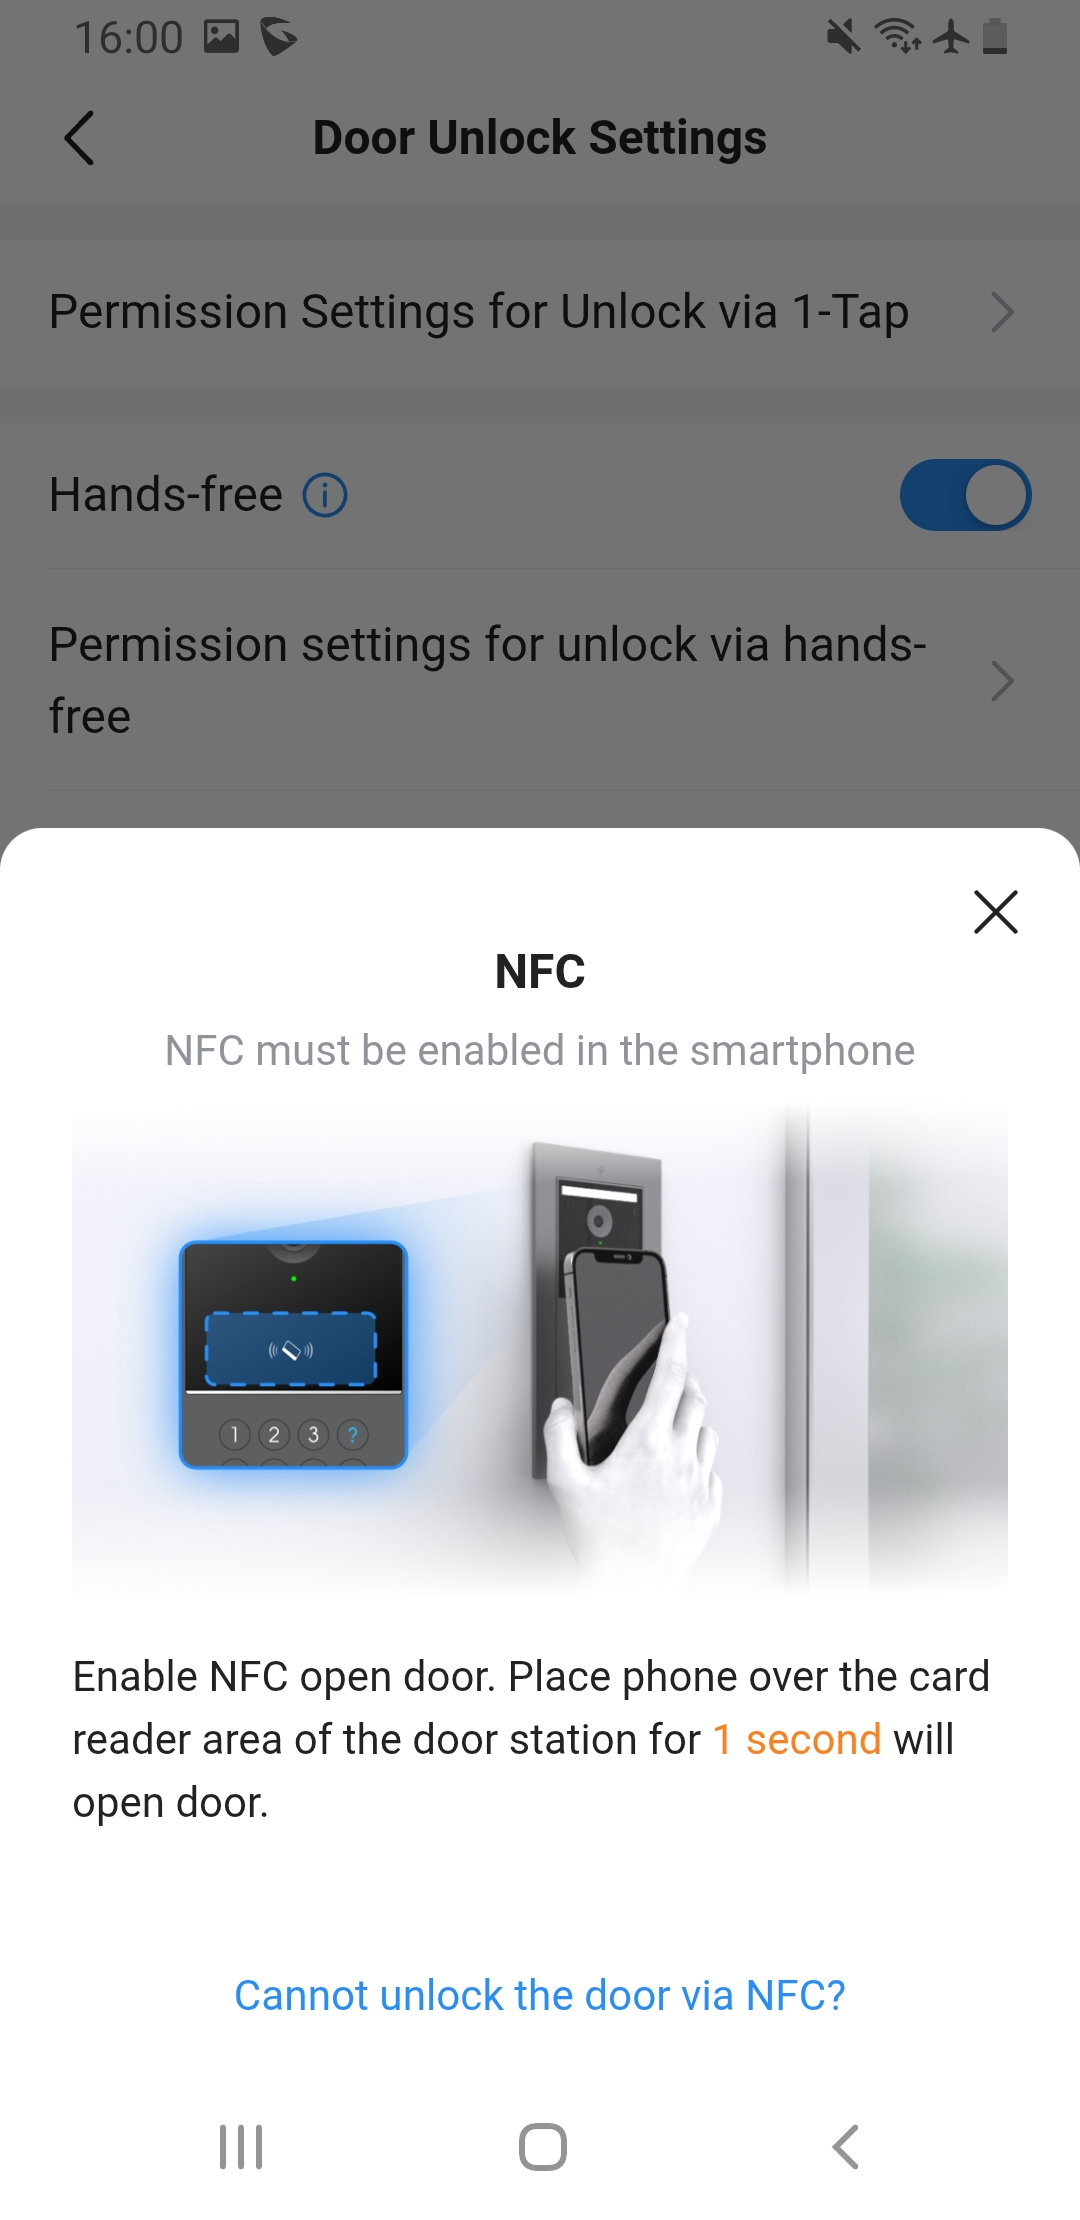
NFC unlocking allows users with Android phones to open the door by tapping the phone near the door station’s reader. To use this method:
- Enable NFC on your phone (usually found in System Settings → Connections). iOS does not support NFC unlocking.
- In Door Unlock Settings, enable the NFC toggle.
- Ensure the door station’s Allow NFC setting is enabled via the administrator interface.
- Approach the door and hold the phone near the NFC reader until the door unlocks. No app interaction is required.
PIN Unlocking (GDS3725 only)
Each user may have a PIN code (4–11 digits). To unlock via PIN, the user or administrator can enter their Virtual Number followed by * and the PIN configured, then press #. For example, if your virtual number is 1001 and your PIN is 1234, enter 1001*1234# on the door station keypad.
Administrators can view and modify their own PIN in the My PIN section of the app.
The PIN code is created and assigned by the administrator, and can then be used by the user to unlock the door.
Shake the Phone and Approach to Open
On Android and iOS, you can enable Shake Phone or Hands‑Free (Approach to Open) to unlock doors when your phone is near a door station. These features require Bluetooth and may be less reliable in noisy RF environments. Adjust the sensitivity in Door Unlock Settings; high sensitivity means the phone will unlock earlier.
VISITOR MANAGEMENT
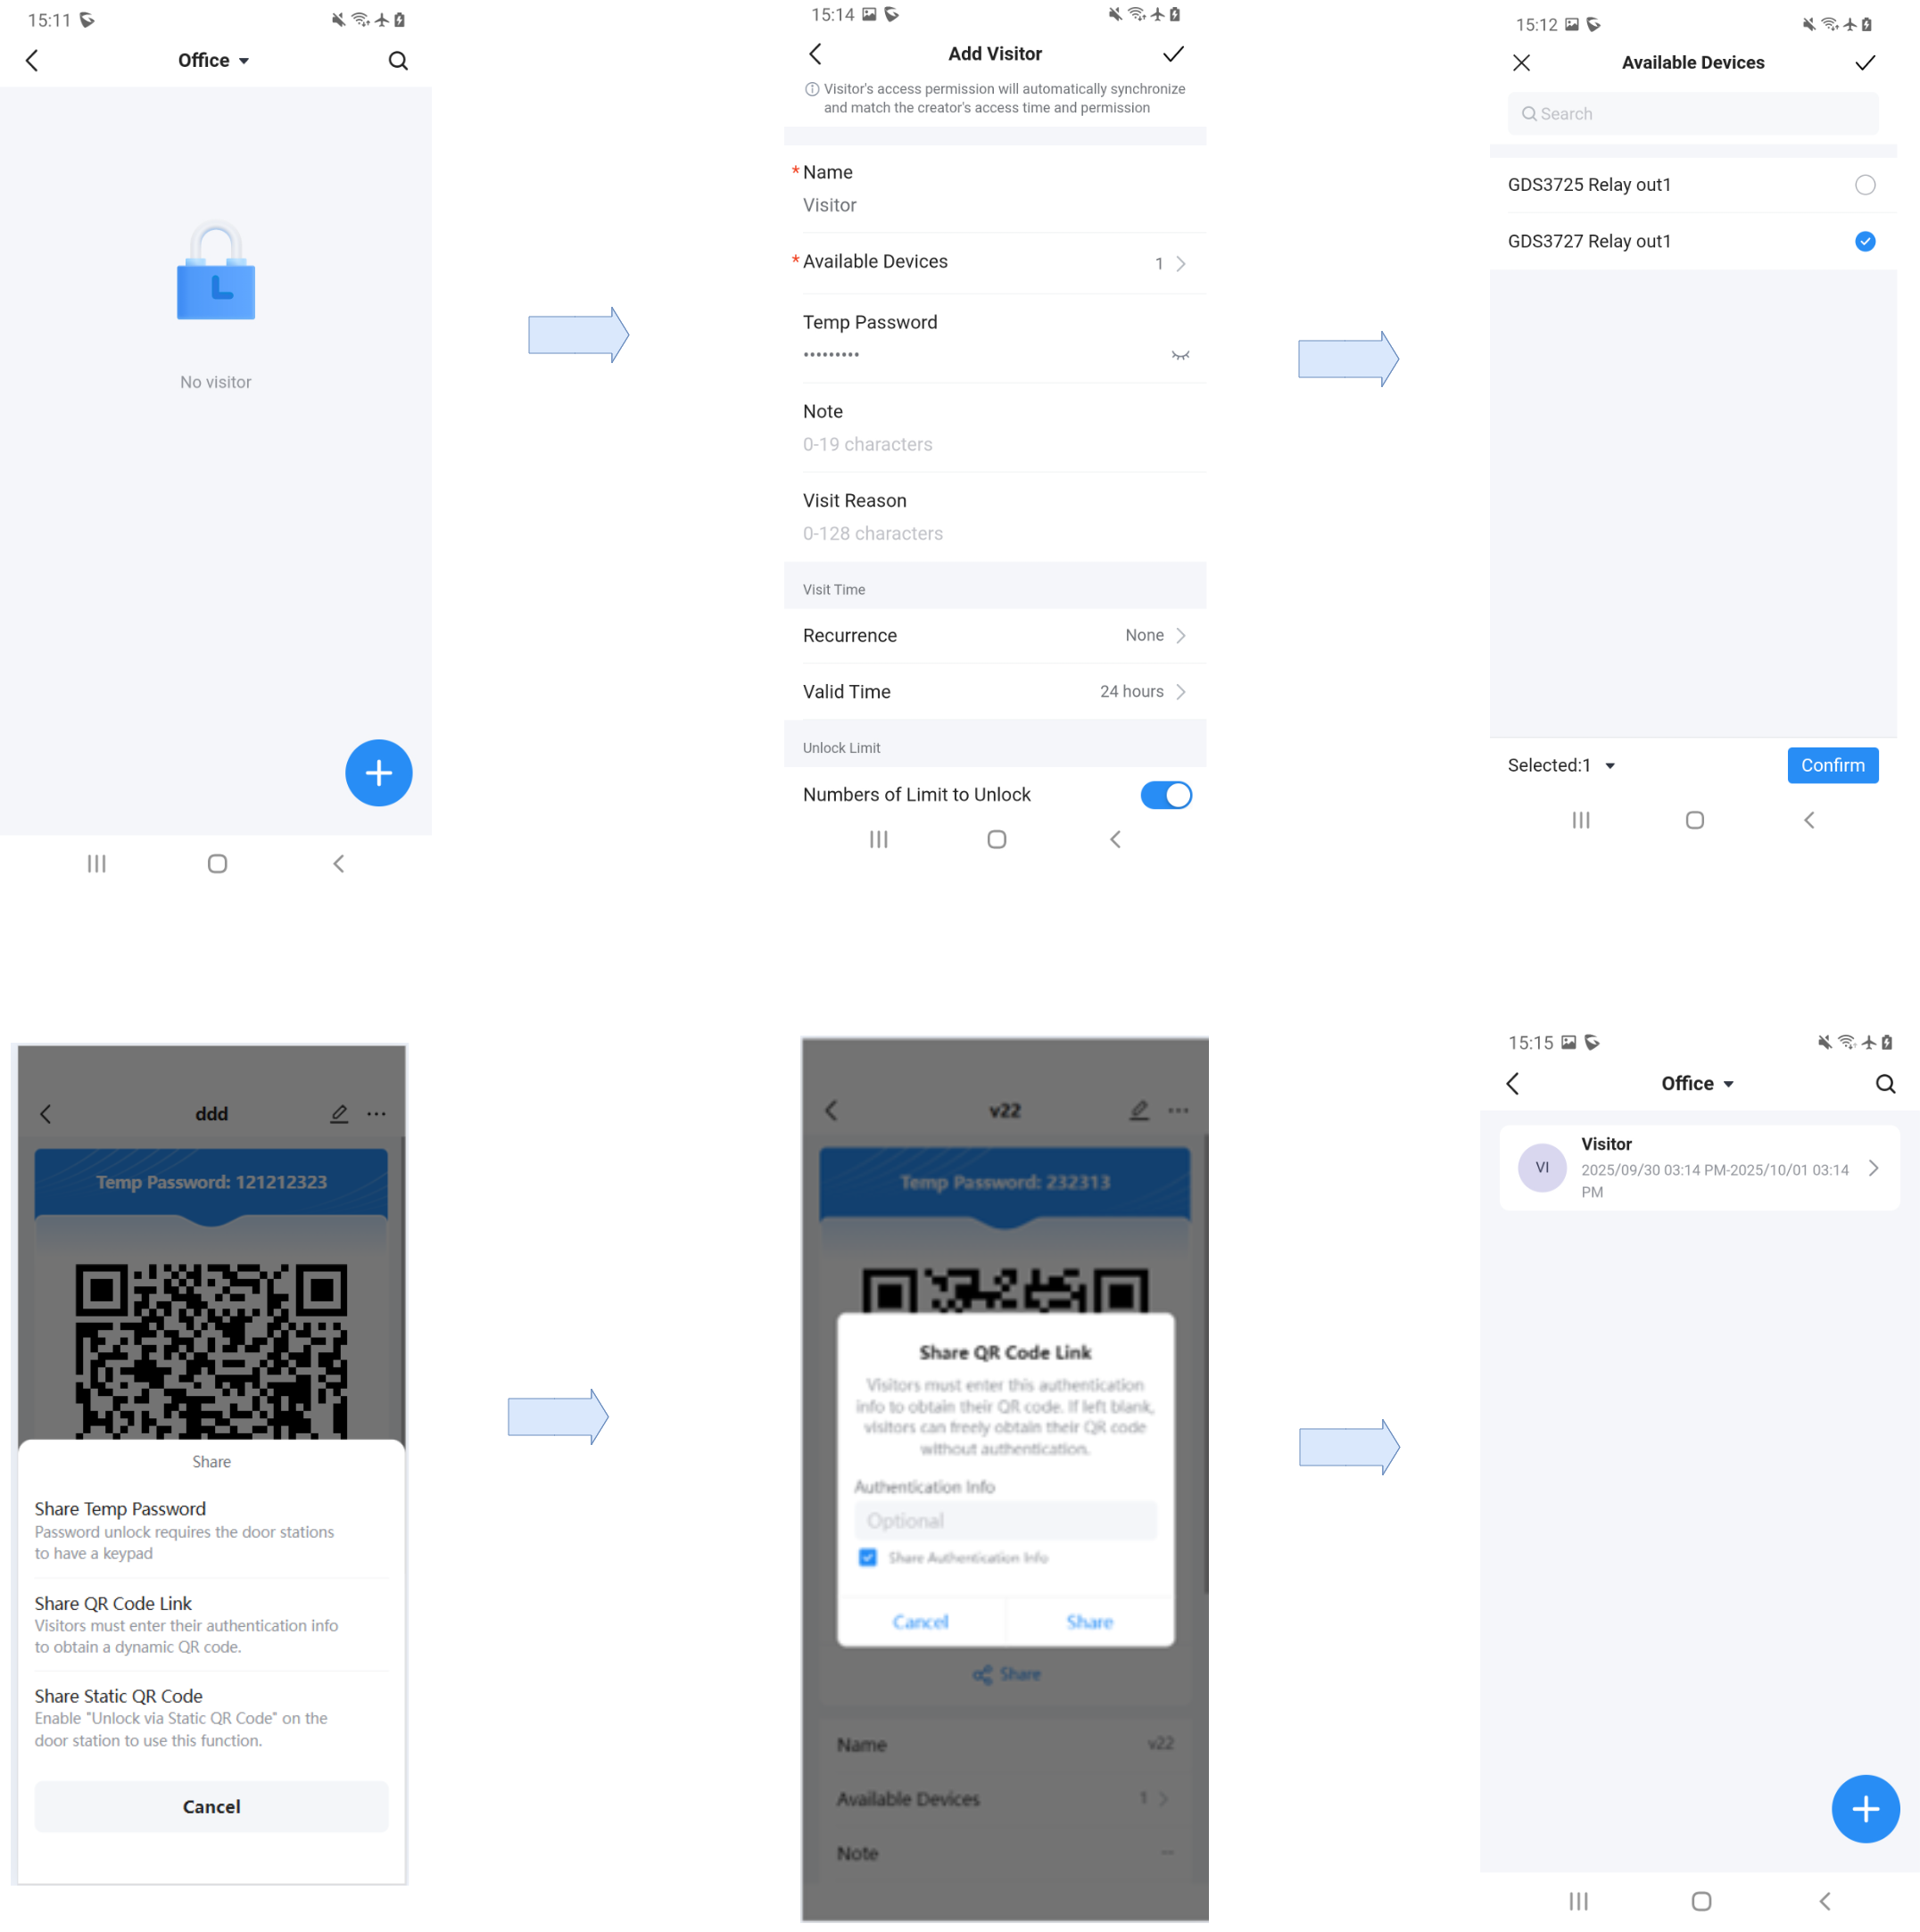
The Visitor Management feature allows residents to temporarily grant access to delivery personnel, guests, contractors, or family members without giving them permanent credentials. Depending on your administrator’s settings, you can create temporary PIN codes or QR codes for visitors, share them securely, and track when they are used. This ensures visitors only have access to the right doors, at the right times, for the right number of visits.
When a QR code is generated, it can be shared in one of three ways :
- Share Temporary Password: this option shares the digital pin created (e.g., 04766999); it requires the door station to have a keypad to enter the pin code
- Share QR Code Link: When this option is enabled, the visitor must enter their authentication details (such as name, phone number, or other required information) before the QR code is shared. If authentication is not required, the visitor can retrieve and use the QR code directly without entering any information.
- Static QR Code: The admin or user with the corresponding rights can share the static image of the QR code that can be used by the visitor to open the door.
CALLING AND VIDEO PREVIEW
When the administrator enables the Preview option for a user, the user gains the ability to view the device’s live video stream, place calls, and receive calls.
Incoming Calls
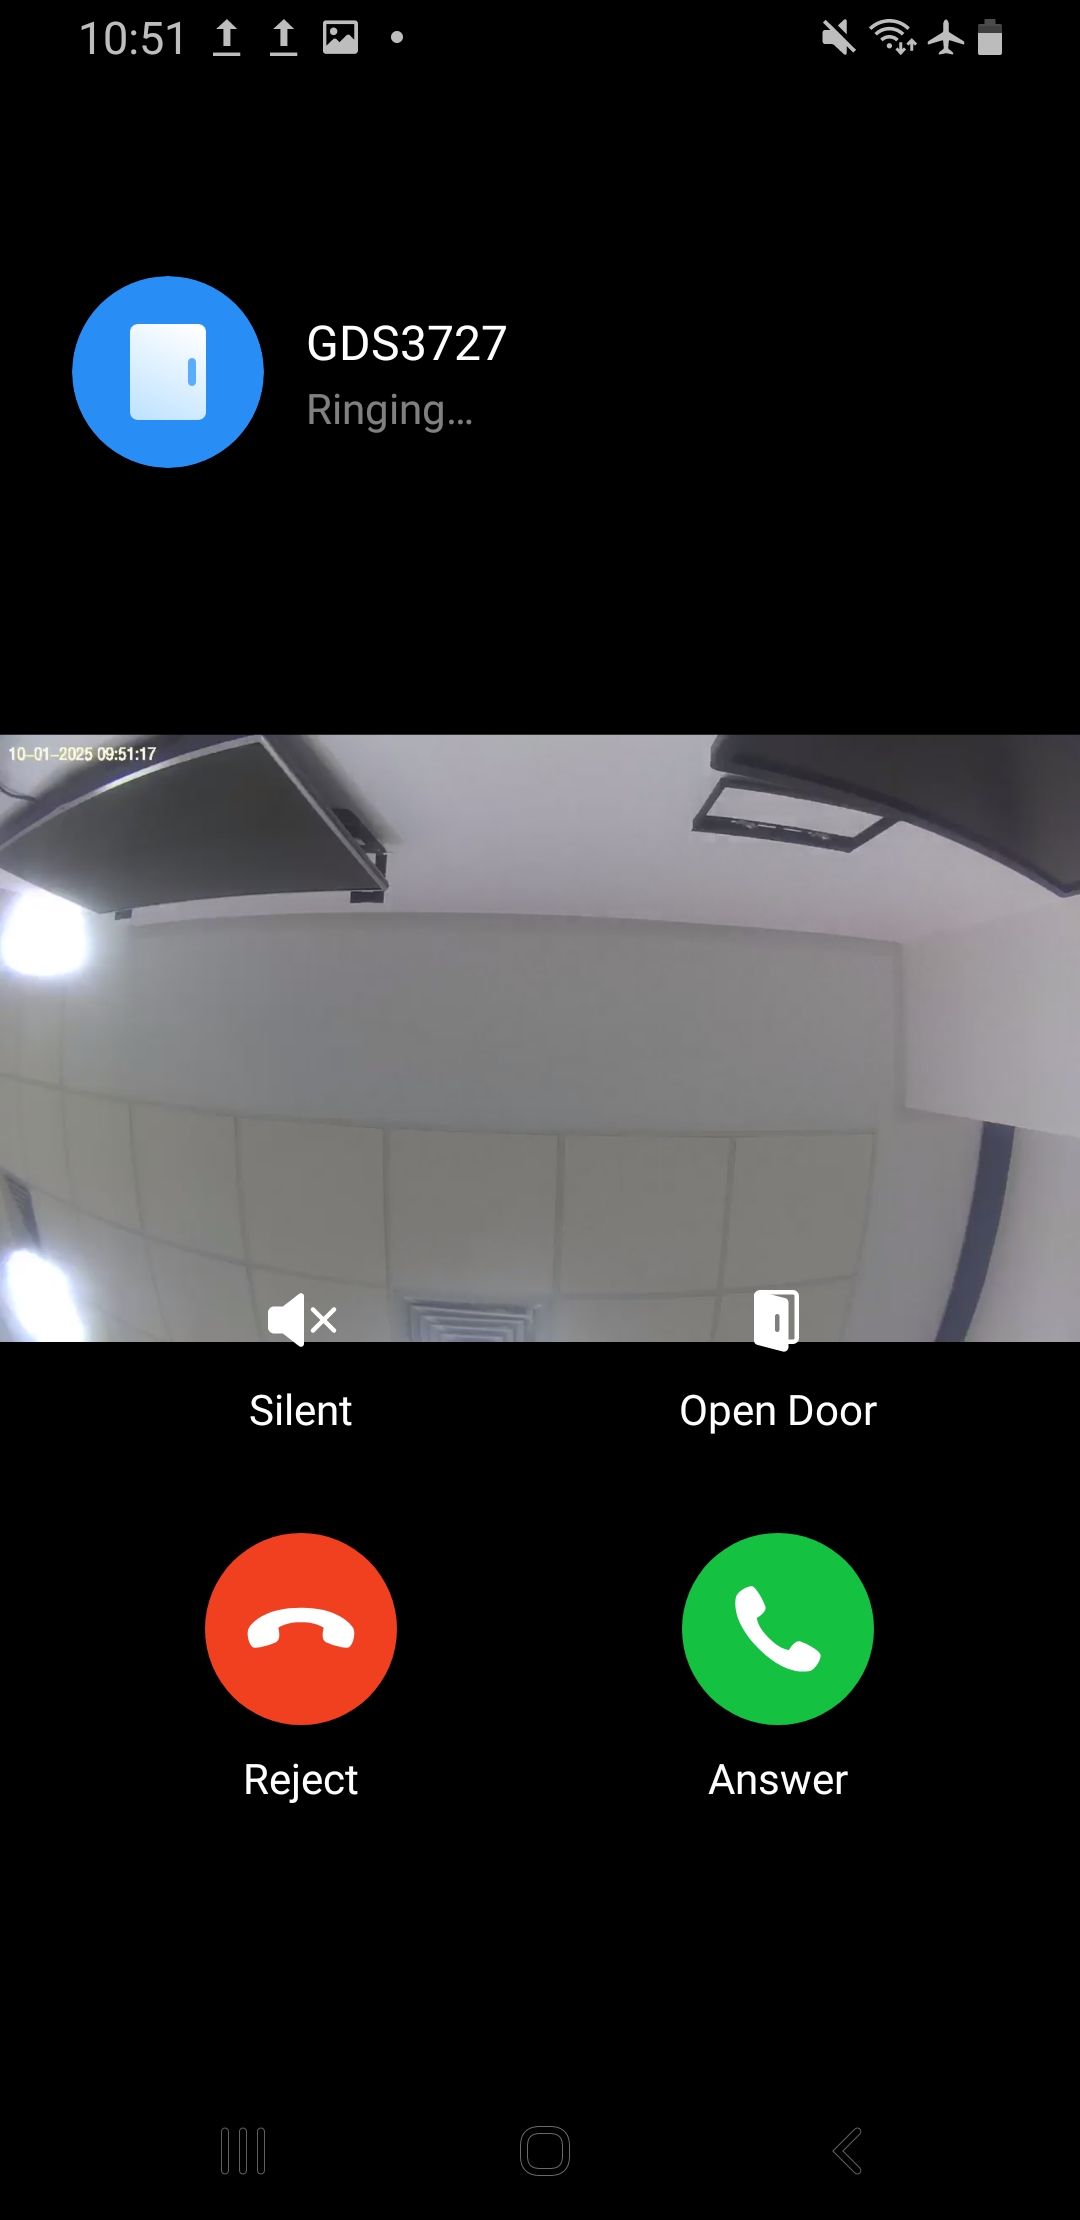
When a visitor presses the doorbell, the app rings and displays a live video preview (if monitor permission is enabled). You can Answer, Reject, Silence the call, or Unlock. If two‑way audio is available, you can talk to the visitor, then tap Unlock to open the door remotely.
If your device has notifications turned off or is in Do Not Disturb mode, incoming calls may not ring. On iOS, missed calls and alert message notifications may not appear on the lock screen unless Message Notification is enabled in My → Message Notifications.
Making Calls
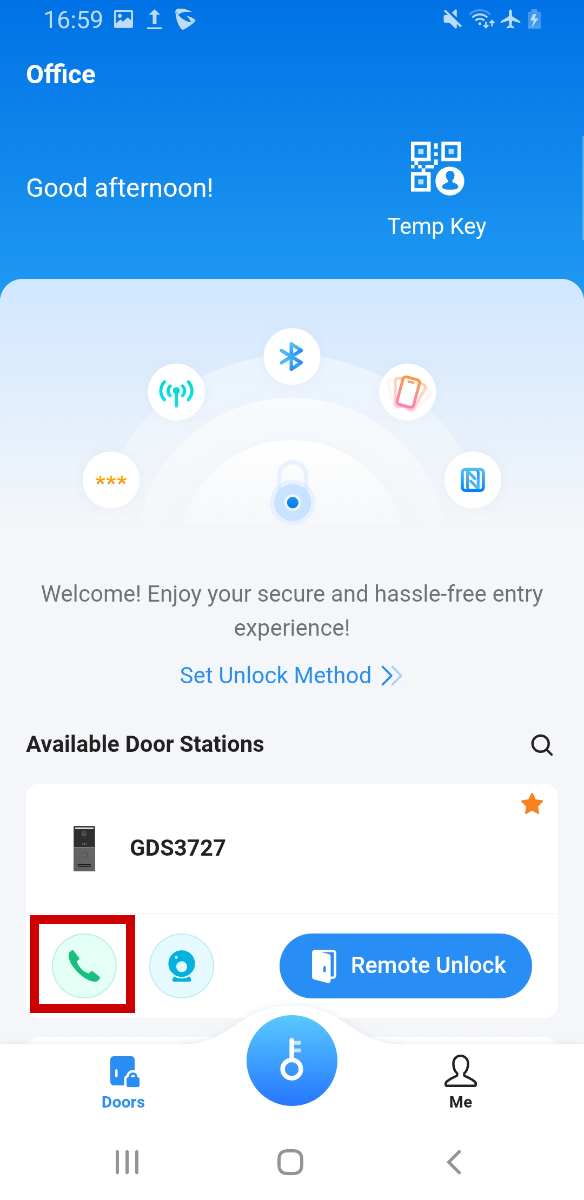
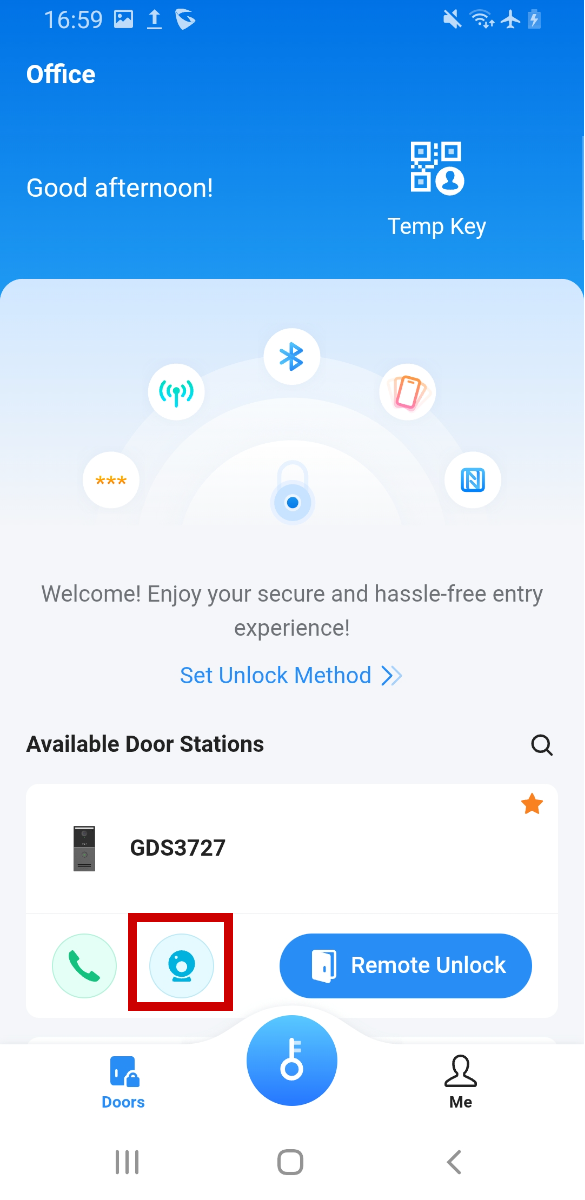
Users can call a door station by tapping the Call icon on the Doors page. If a door station supports extension numbers, you can also dial a user’s virtual number (e.g., call the receptionist). Call quality depends on network conditions.
Call Settings and Notifications
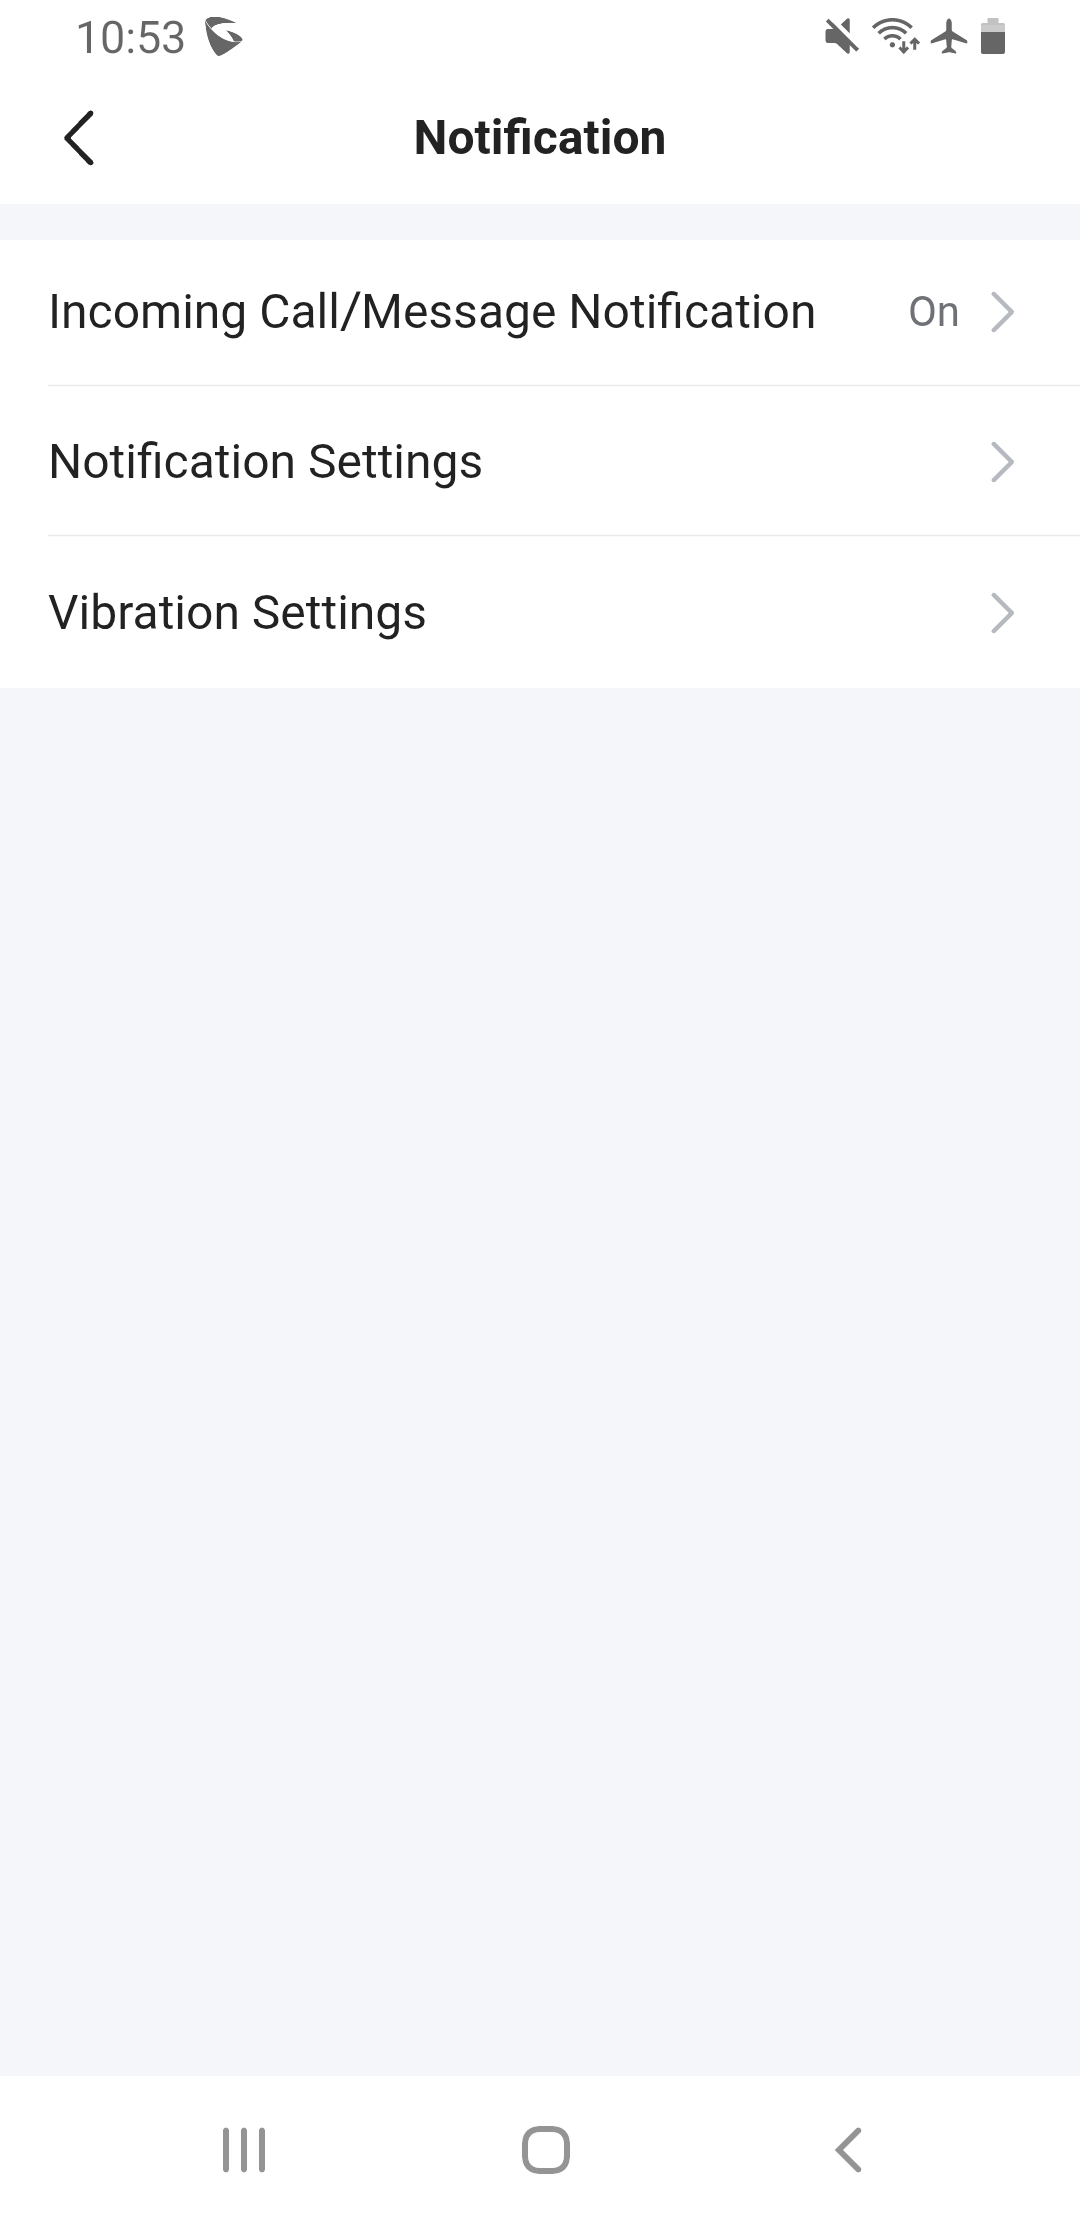
In Me → Notification, you can configure whether the app should display pop‑up notifications for incoming calls, message notifications, and unlock success prompts. On Android, the app can keep running in the background to ensure timely notifications; on iOS, the system may suspend background tasks, so enabling critical alerts may improve call reliability.
Preview Video
Authorized users can preview the door station’s live video by tapping Preview on the Doors page. This requires Monitor Permission to be enabled in the user profile.
LOGS
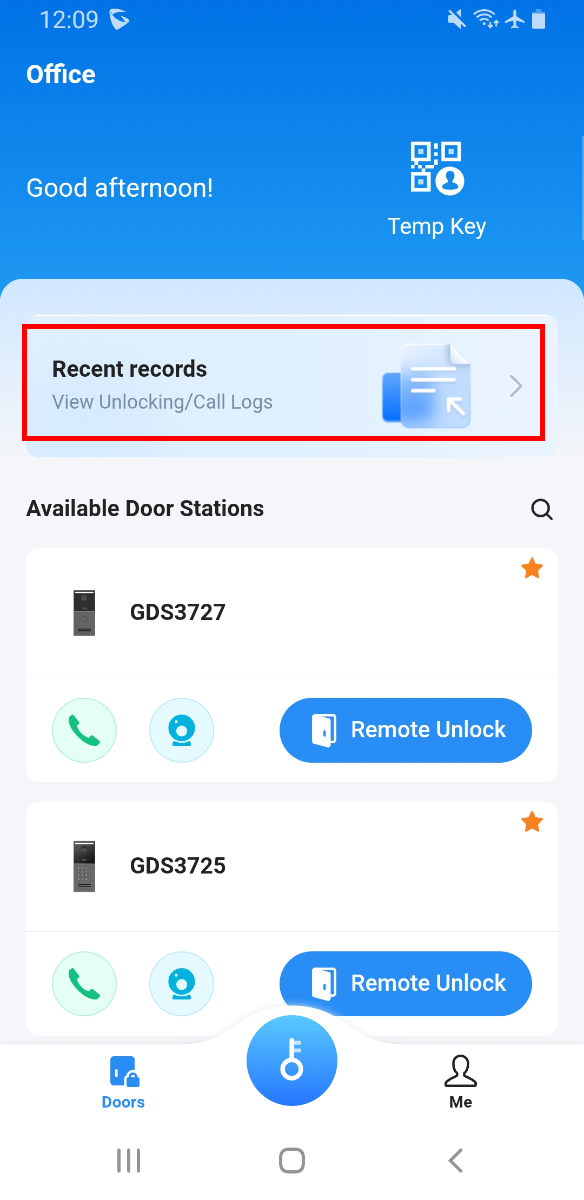
Users can view logs of their own actions directly in the app. Logs are divided into two categories:
- Door Unlock Logs – Record the time of each unlock and the method used (e.g., Bluetooth, NFC, PIN).
- Call Logs – List incoming and outgoing calls, along with their duration.
Logs can be accessed from the app’s main page for easy tracking of personal activity.
SETTINGS
The Settings menu in SecureAccess allows you to personalize how the app behaves on your device and how it interacts with door stations. Here, you can configure which unlock methods are available, adjust personal account details, fine-tune system performance, and control notification behavior. Some settings depend on your phone’s operating system (Android vs. iOS), and a few options may not yet be supported on all platforms.
Door Unlock Settings
Accessible from Me → Door Unlock Settings, these settings allow you to enable or disable unlocking modes (1‑tap, hands‑free, shake phone, NFC), specify which doors can be unlocked via each method, and adjust closure sensitivity. When a mode is disabled, the corresponding option will not appear in the Doors page.
Personal Settings
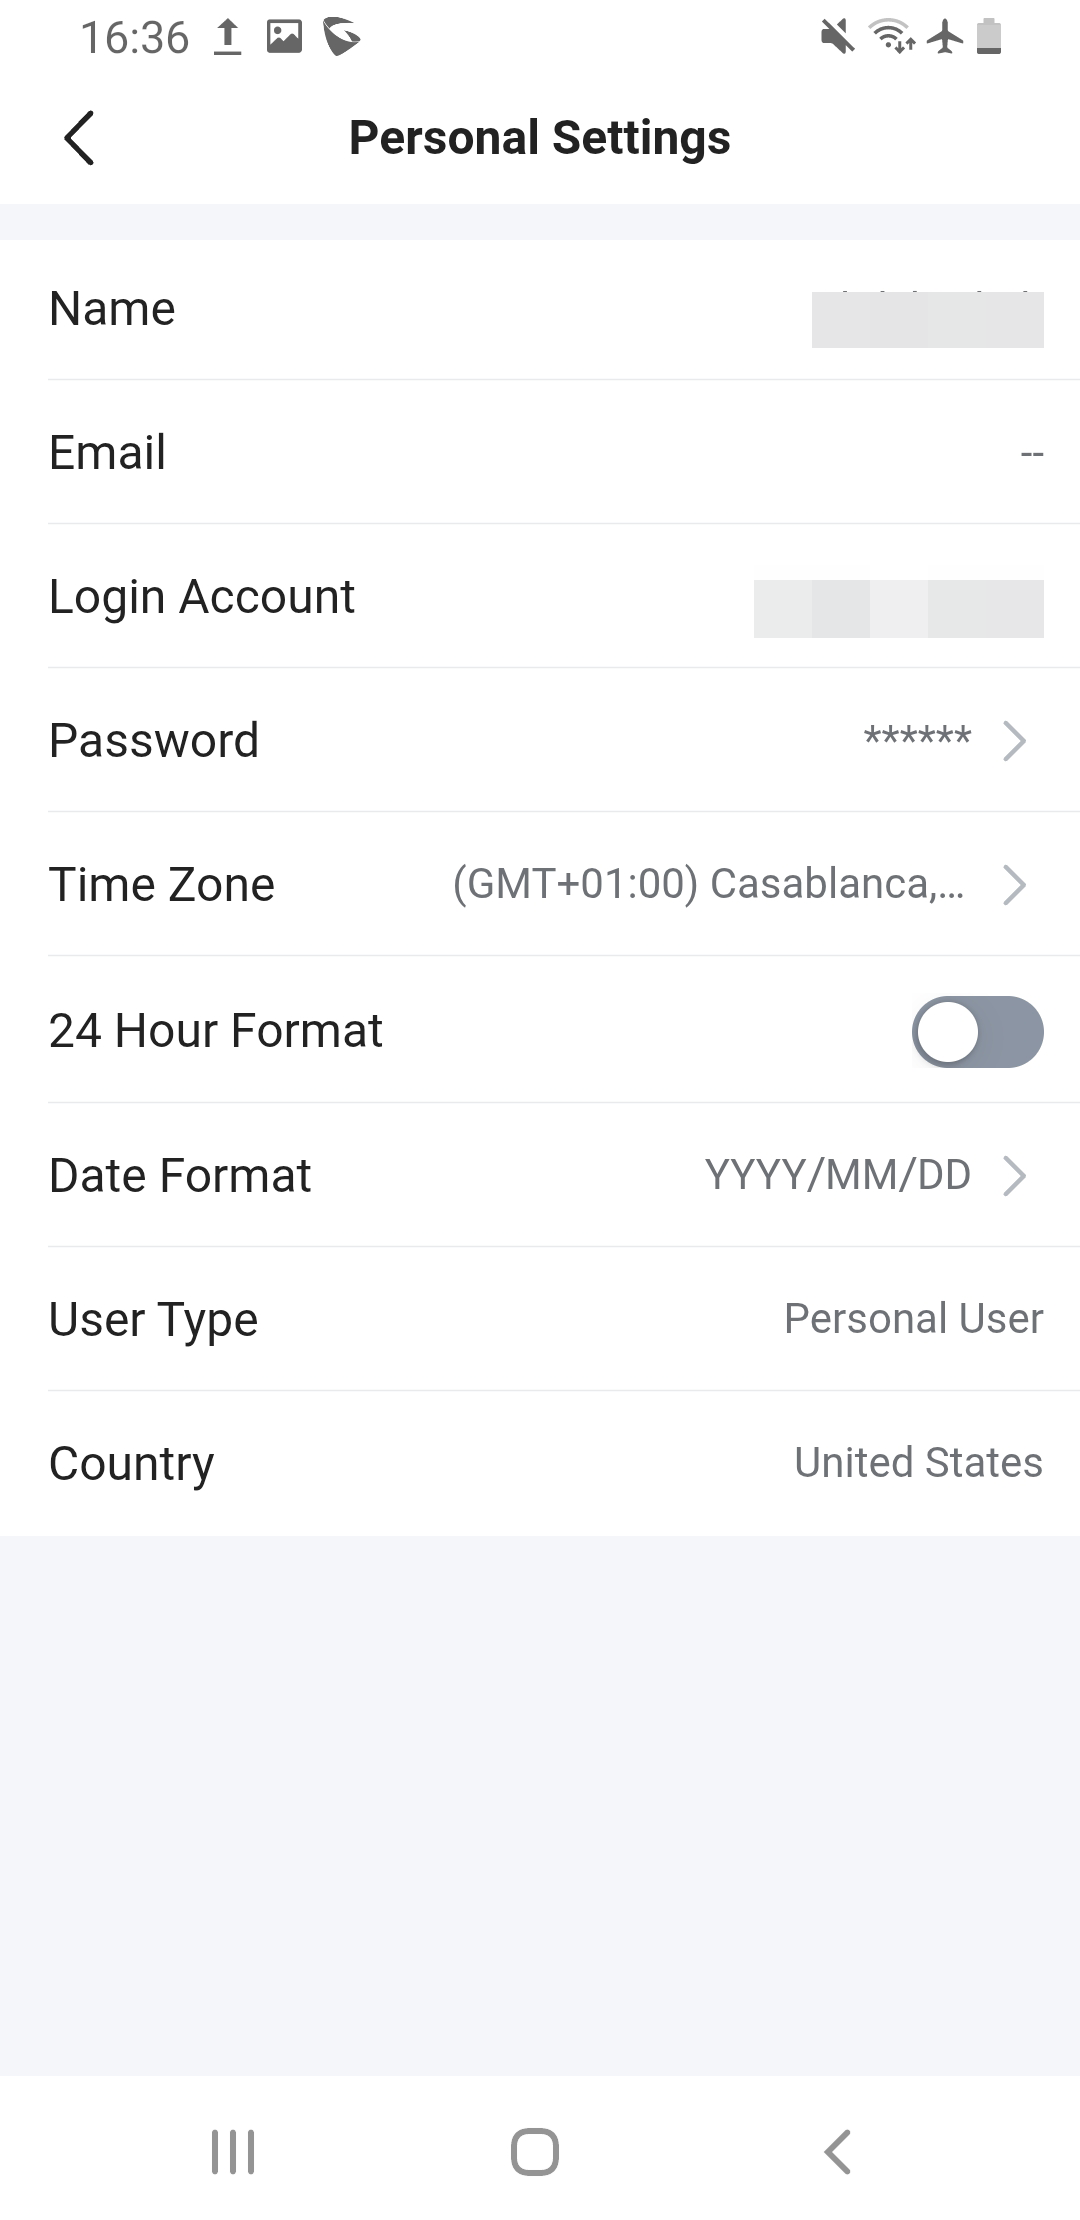
The Personal Settings page allows users to manage their account information and preferences. Here, you can set a nickname, view or update your email and login account, change your password, and adjust regional settings such as time zone, 24-hour clock format, and date format. The User Type indicates whether the account is a personal user or administrator, while the Country field sets the regional profile. Additional login methods, such as linking a Google account, can also be managed from this page.
| Option | Description |
|---|---|
| Name | The display name of the user, shown in the app interface. |
| The registered email address for the account. Partially masked for security. Used for login, notifications, and password recovery. | |
| Login Account | The primary login credential (email or username) linked to the account. |
| Password | The account password (hidden for privacy). It can be changed by editing this field. |
| Time Zone | Sets the account’s time zone. Impacts timestamps for events, logs, alarms, and scheduling. |
| 24 Hour Format | Toggle to switch between 24-hour clock (e.g., 14:30) and 12-hour clock (e.g., 2:30 PM). |
| Date Format | Sets how dates are displayed (e.g., YYYY/MM/DD, DD/MM/YYYY, or MM/DD/YYYY). |
| User Type | The account password (hidden for privacy). It can be changed by tapping this option. |
| Country | Country/region associated with the account. May be used for localization, time zone defaults, or service region compliance. |
System Settings
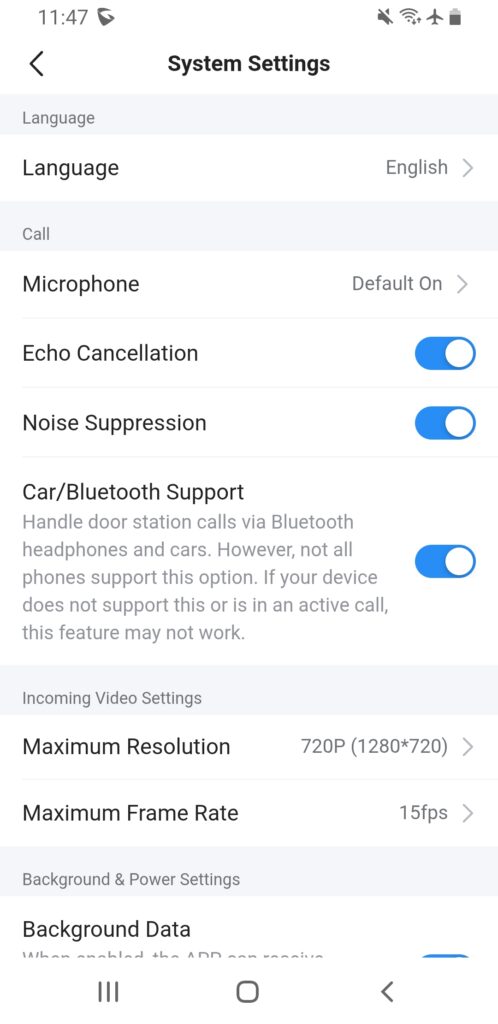
The System Settings menu allows users to configure the language of the application.
The audio call (Microphone, Echo Cancellation, Noise Suppression) and video call (Maximum Resolution, Maximum Frame Rate) settings will also be available for configuration if call permissions are enabled by the administrator.
Notification Settings
The Notification menu allows users to manage how they receive alerts for incoming calls, messages, and app events. These options ensure users are promptly informed while giving flexibility to adjust the style and behavior of notifications.
| Option | Description |
|---|---|
| Incoming Call/Message Notification | Enables or disables notifications for incoming calls and messages. When turned off, the user will not be alerted for new calls or messages. |
| Notification Settings | Opens detailed notification options, such as sound, display style, and whether to allow pop-up or banner notifications. |
| Vibration Settings | Allows customization of vibration alerts for incoming calls and messages. Users can enable, disable, or choose a vibration pattern. |
Help And Feedback
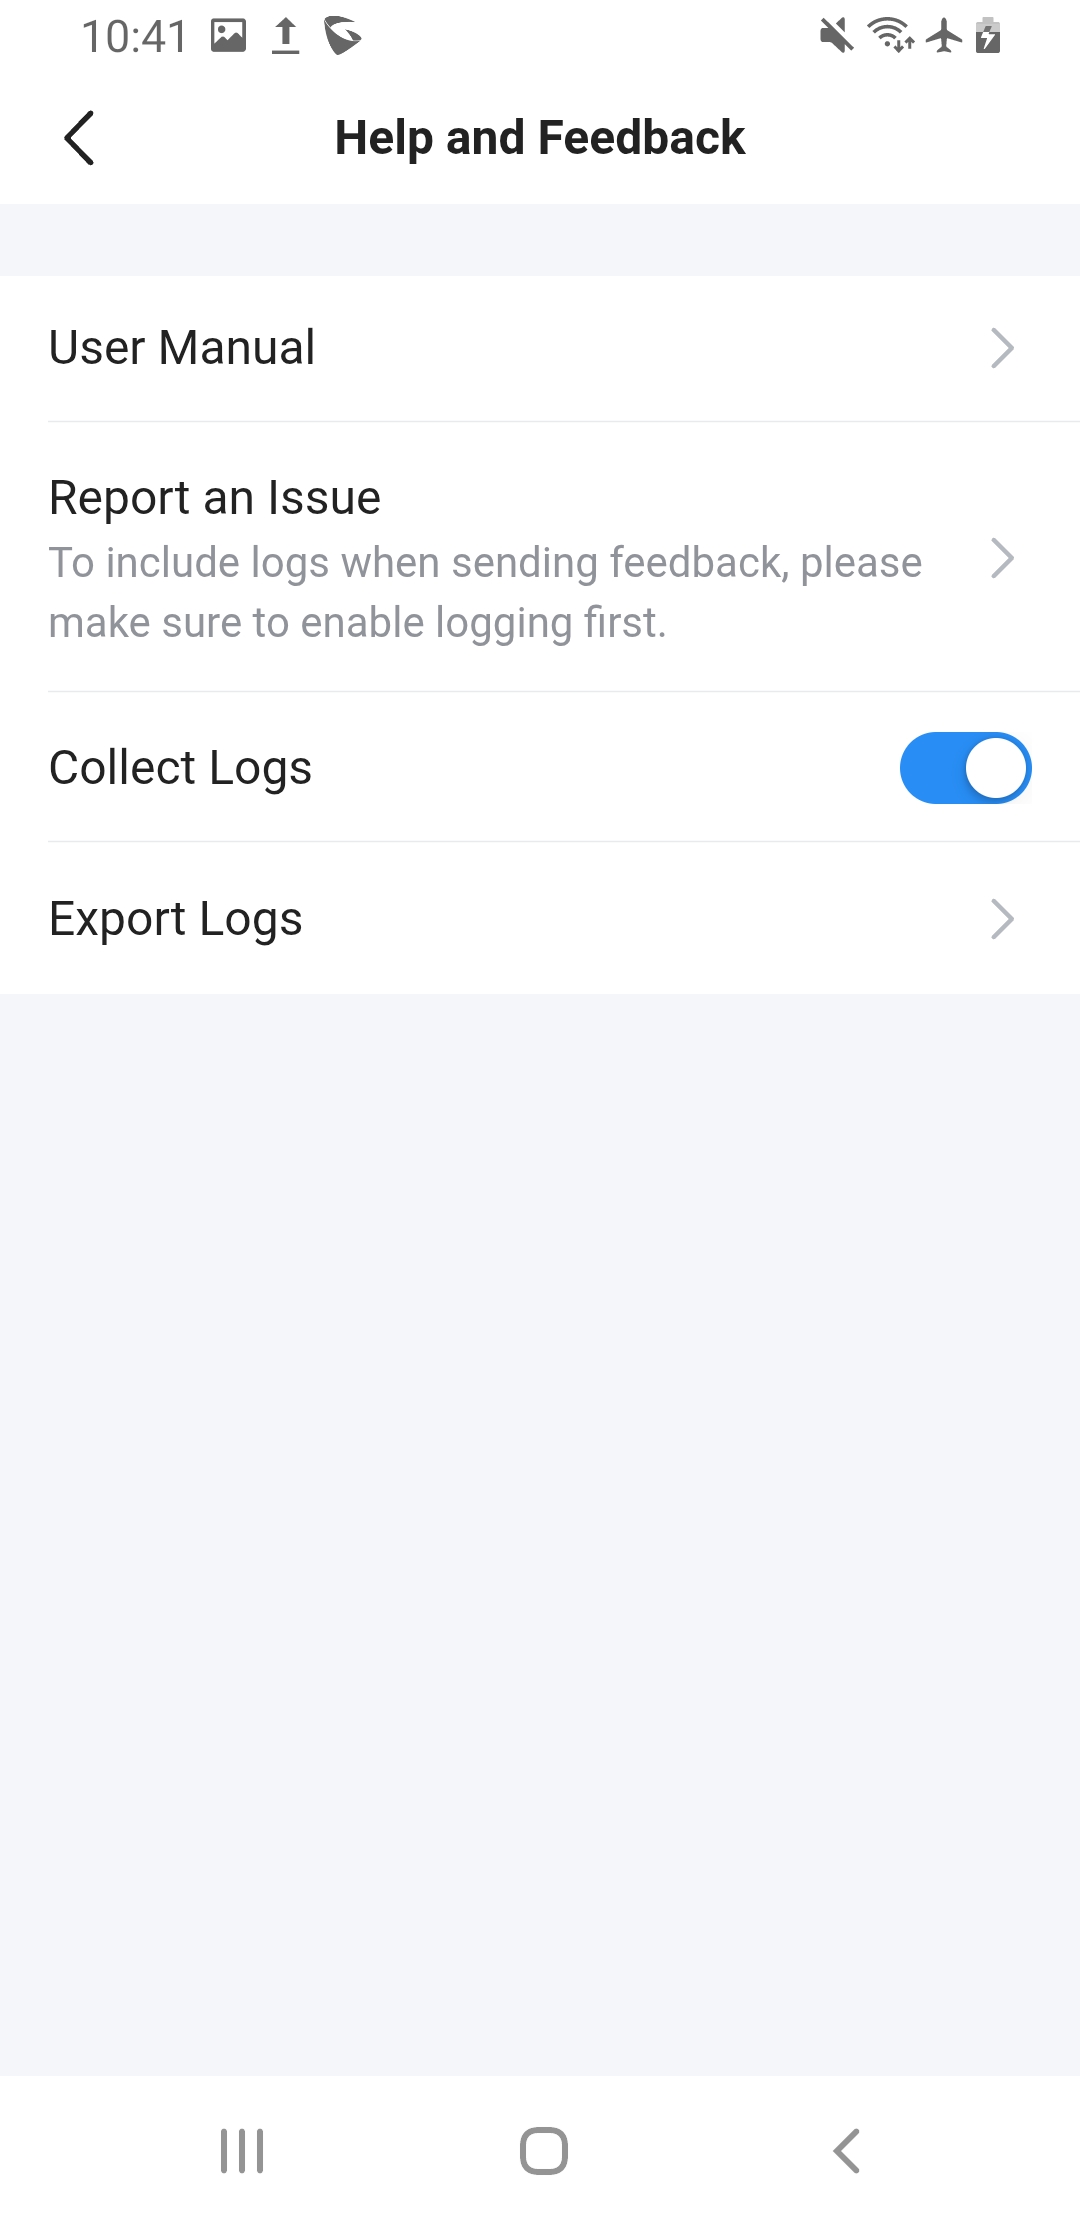
The Help and Feedback menu provides users with access to documentation, support, and troubleshooting tools. It allows you to review the user manual, report issues, and collect or export diagnostic logs to assist in resolving problems.
| Option | Description |
|---|---|
| User Manual | Opens the digital user manual for guidance on using the app and device features. |
| Report an Issue | Allows users to send feedback or report problems directly to support. To include diagnostic data, logging must be enabled beforehand. |
| Collect Logs | When enabled, the app begins recording system logs and activity details. These logs are useful for diagnosing issues. |
| Export Logs | Exports the collected logs for analysis or to send to technical support when troubleshooting a problem. |
About
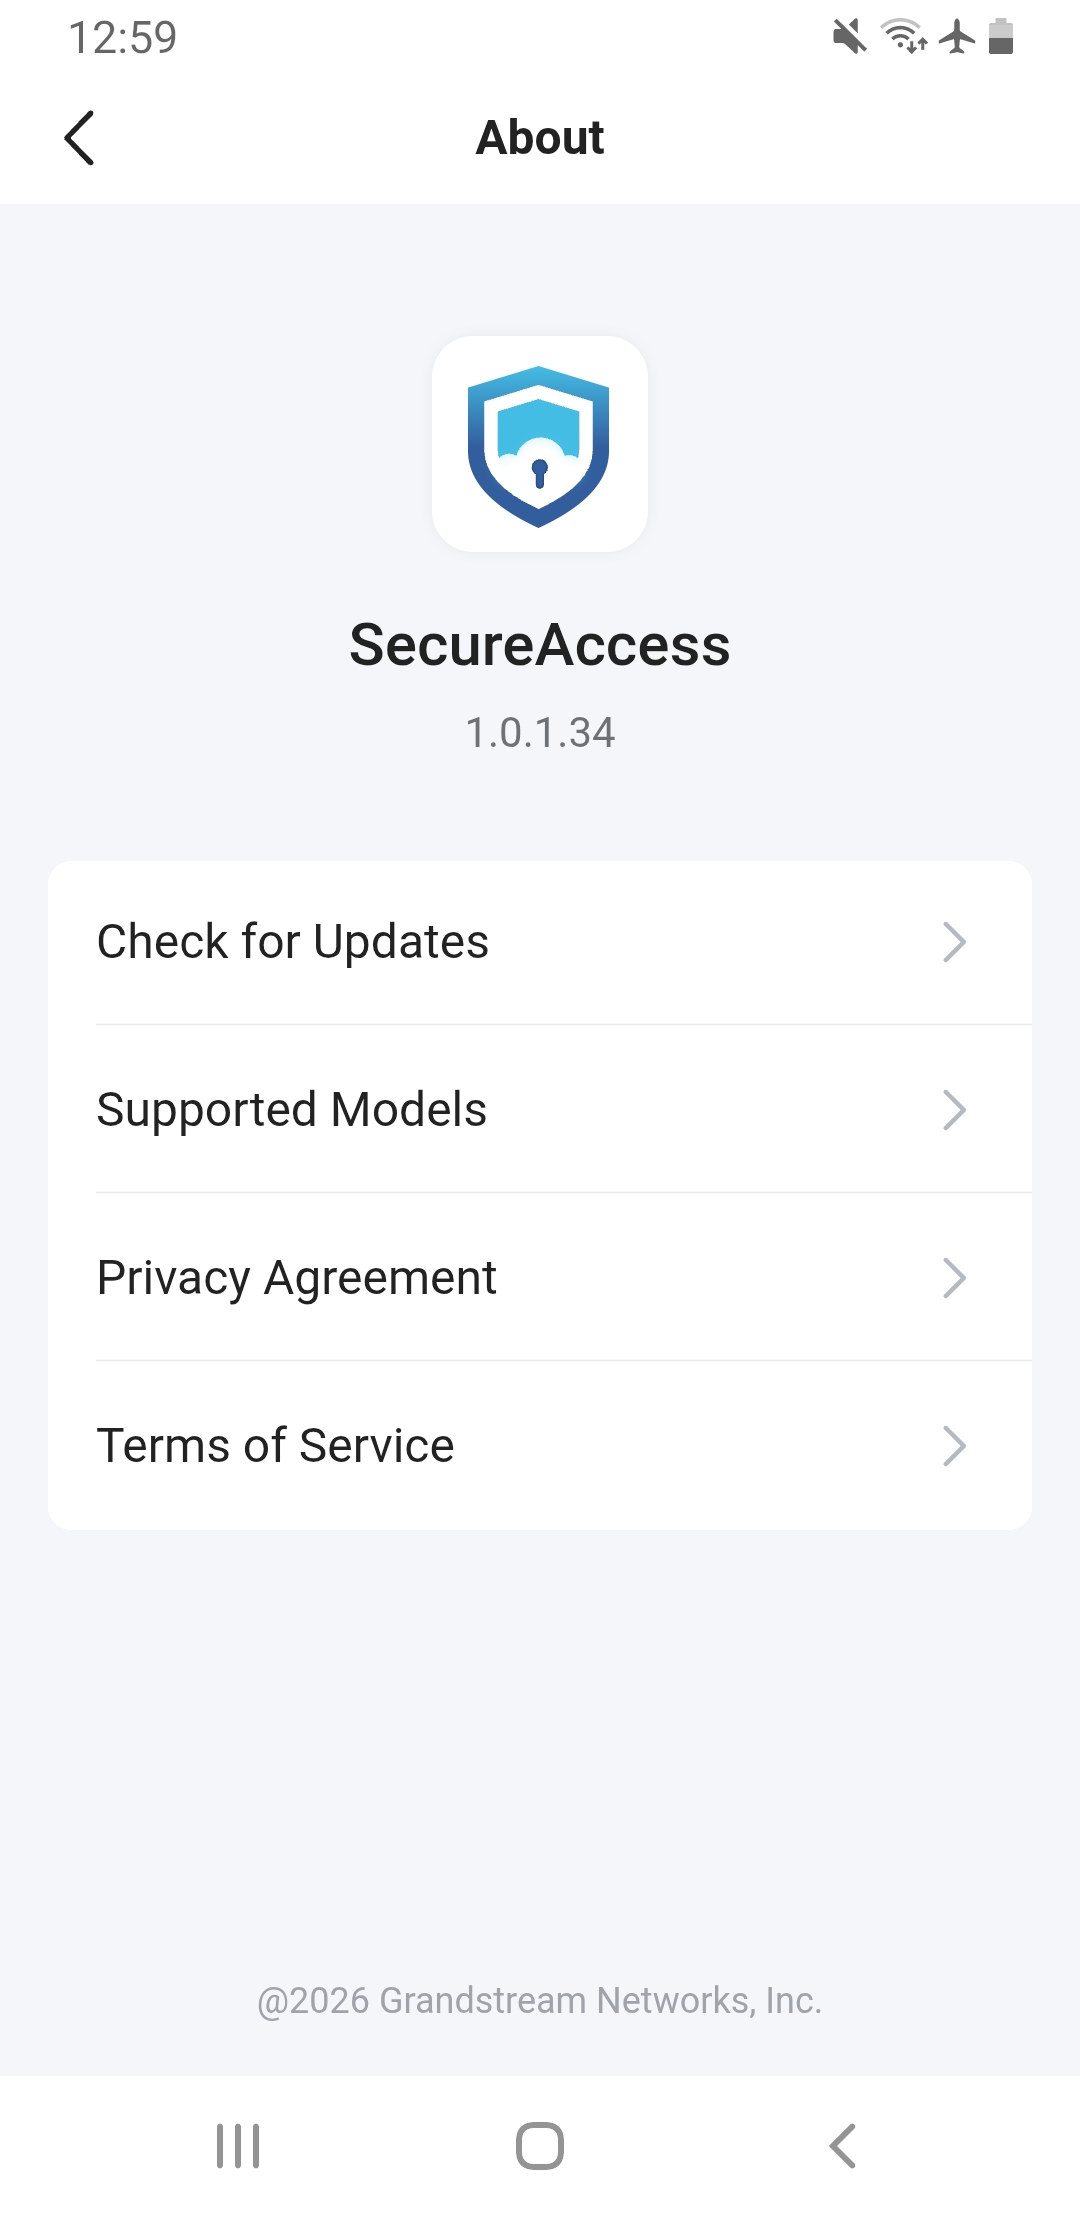
The About page provides general information about the SecureAccess application, including its version number, supported models, legal policies, and update options. This section helps users verify compatibility and stay informed about the app’s usage terms.
| Option | Description |
|---|---|
| App Logo and Version | Displays the application logo and current version number (e.g., 1.0.1.30). Useful for troubleshooting and confirming the latest release. |
| Check for Updates | Allows users to manually check if a newer version of the app is available. |
| Supported Models | Lists the Grandstream door station devices compatible with the SecureAccess app. |
| Privacy Agreement | Opens the app’s privacy policy, explaining how user data is collected, stored, and used. |
| Terms of Service | Provides the legal terms and conditions for using the app. |
SUPPORTED DEVICES
Device | Firmware Required |
GDS3725 | 1.0.1.26+ |
GDS3726 | 1.0.1.26+ |
GDS3726Q | 1.0.3.9+ |
GDS3727 | 1.0.1.26+ |
GSC3565 | 1.0.1.8+ |
GSC3560 | 1.0.1.8+ |
CHANGE LOG
This section documents significant changes from previous versions of the user manual for the SecureAccess App. Only major new features or major document updates are listed here. Minor updates for corrections or editing are not documented here.
Version 1.0.3.19 (Android) / 1.3.19 (iOS)
- Added support for the GDS3726Q model. [GDS3726Q]
- Fixed several known issues and improved overall performance and user experience.
Version 1.0.3.7 (Android) / 1.3.7 (iOS)
- No major changes.
Version 1.0.1.35 (Android) / 1.1.35 (iOS)
- Removed installation restrictions in the Google Play Store for certain Android devices; Bluetooth and NFC are now optional. [Download the Application]
Version 1.0.1.34 for Android® / Version 1.1.35 for iOS®
- No major changes.
Version 1.0.1.30 for Android® / Version 1.1.31 for iOS®
- This is the initial release.