
GWN Manager is an enterprise-grade management platform for Grandstream devices. For private network deployment that requires high security, it’s the ideal choice offering a flexible and scalable solution with an easy-to-use Web interface and simplified configuration and management with good performance. Supports real-time monitoring, alerts, statistics, reports, etc.
This guide describes the steps on how to deploy a GWN Manager Virtual Machine image from an OVA file using VMware Workstation, VMware vSphere, and VirtualBox on different platforms Windows, Ubuntu, and macOS.
OVA file extension is an Open Virtual Appliance file, also known as Open Virtualization Format (OVF), it’s used by virtualization programs to store various files associated with a Virtual Machine (VM).
Prerequisite
Please download the GWN Manager OVA image based on AlmaLinux9, CentOS7 or Ubuntu from the link below and store it locally on your computer.
Link: GWN Manager OVA format

VMware Workstation
Please download first the VMware Workstation from the link below:
VMware Workstation Player: https://www.vmware.com/products/workstation-player.html

Deploying GWN Manager on Windows
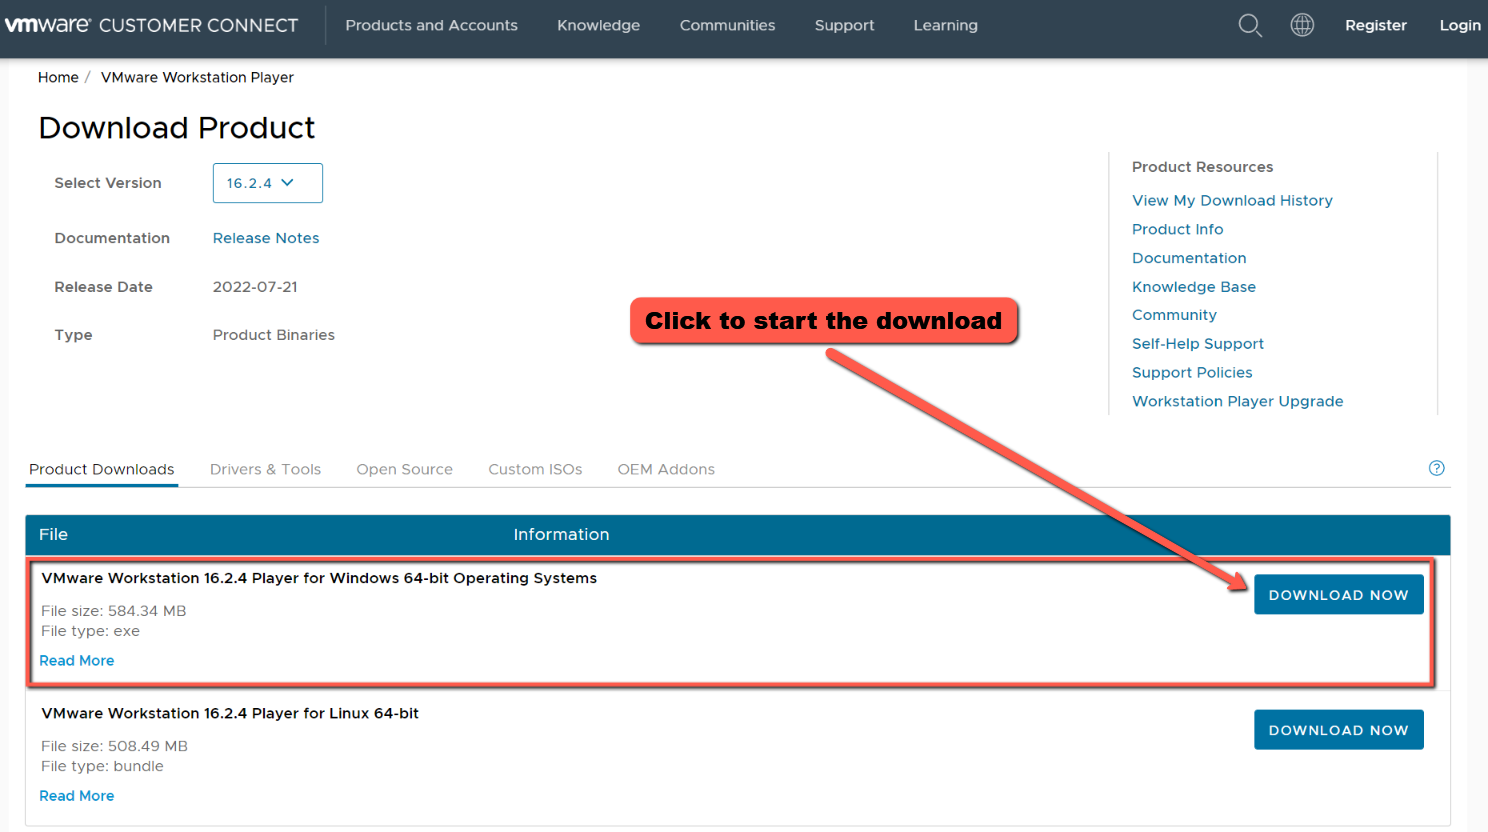
For Windows, choose VMware Workstation Player for Windows 64-bit Operating Systems, and click on “DOWNLOAD NOW” then install it on your computer.
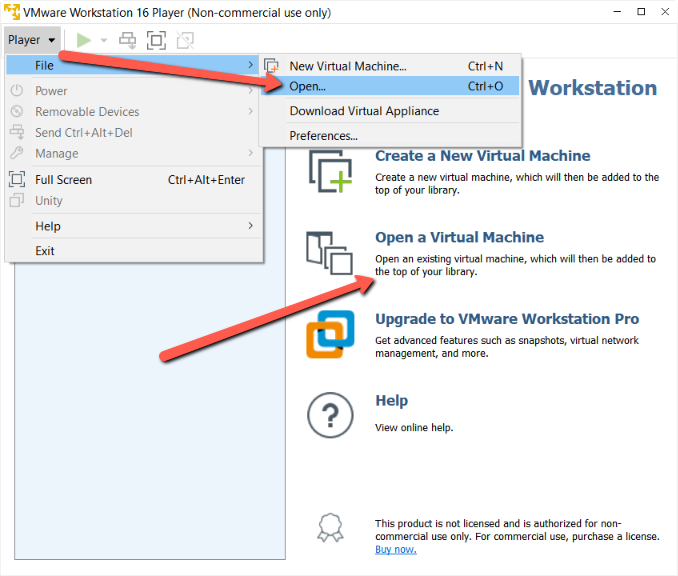
- Open VMware Workstation Player, File > Open to choose the OVA Image.
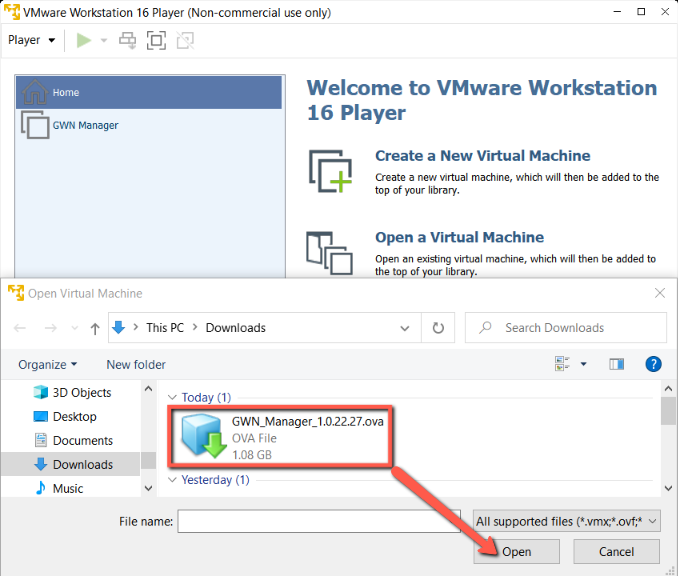
- Choose the OVA file that was downloaded previously.
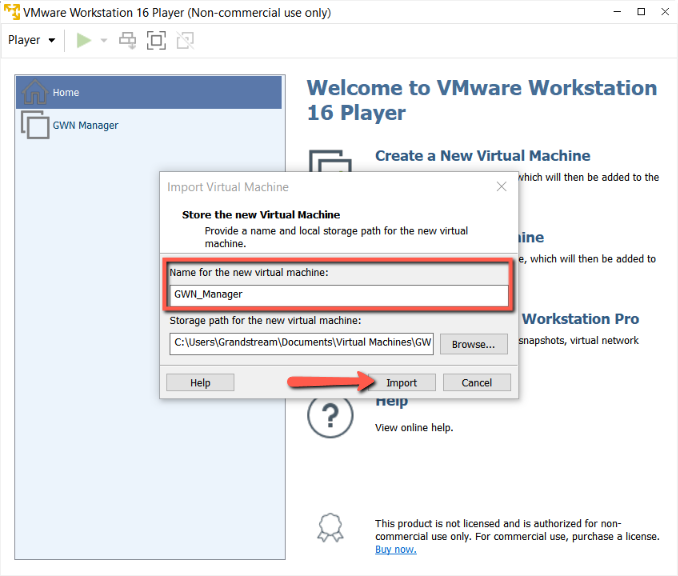
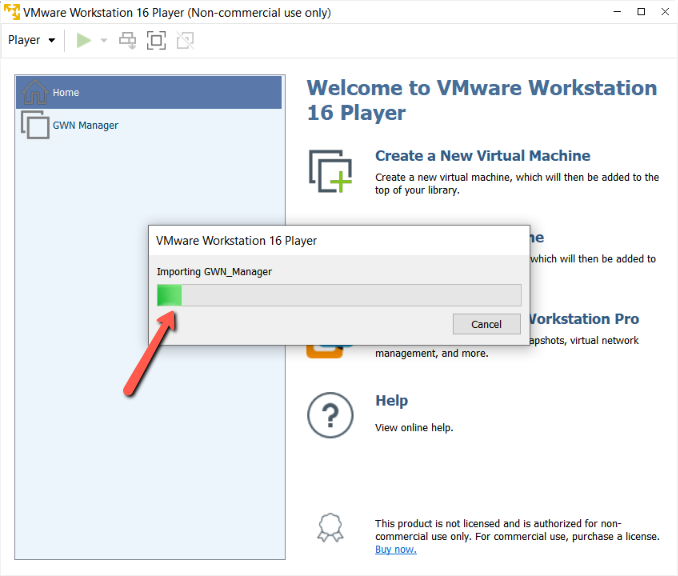
- Specify a name for the new Virtual Machine and storage path, and click Import.
- Wait for the import to complete.
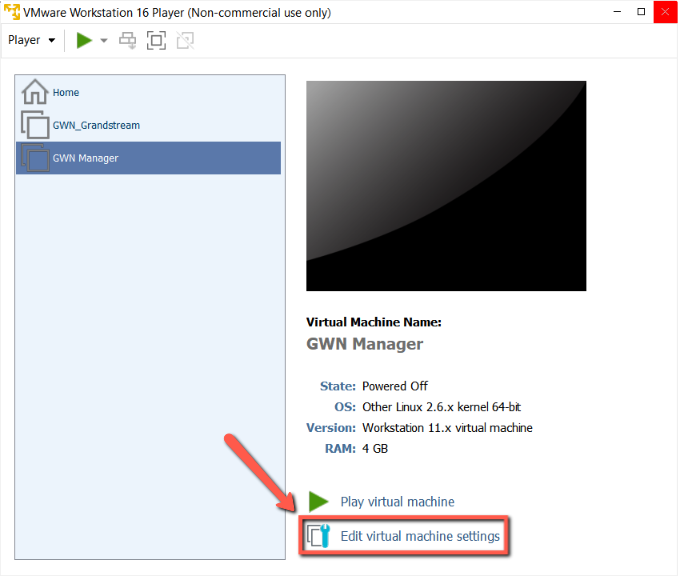
- Click on “Edit virtual machine settings” to change the configuration like RAM, CPU cores, Storage space, Network Adapter, etc.
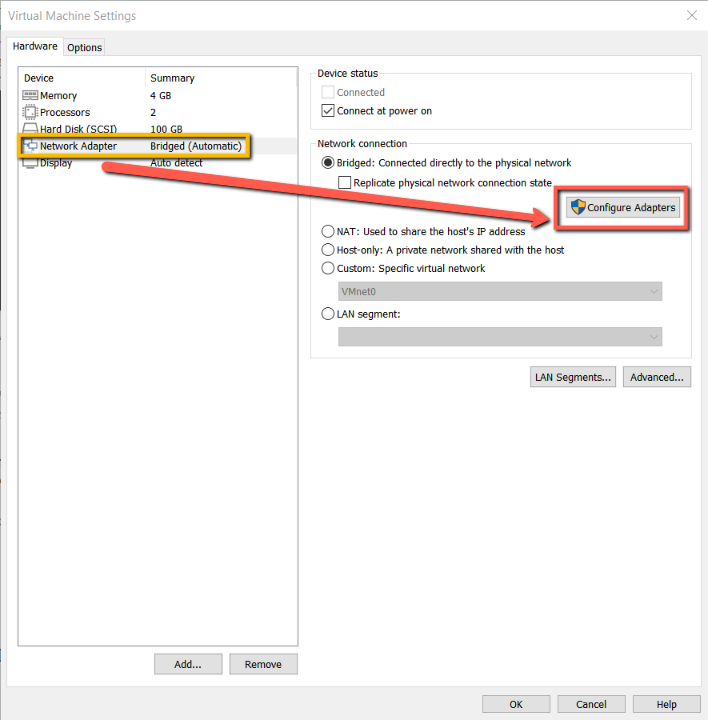
- If your computer has multiple network adapters, you can change the host network adapter(s) you want to bridge by clicking on “Configure Adapters”.

- Start up the newly created Virtual Machine by clicking on “Play virtual machine“.

- Log in with the username and password which is shown on the VM console.
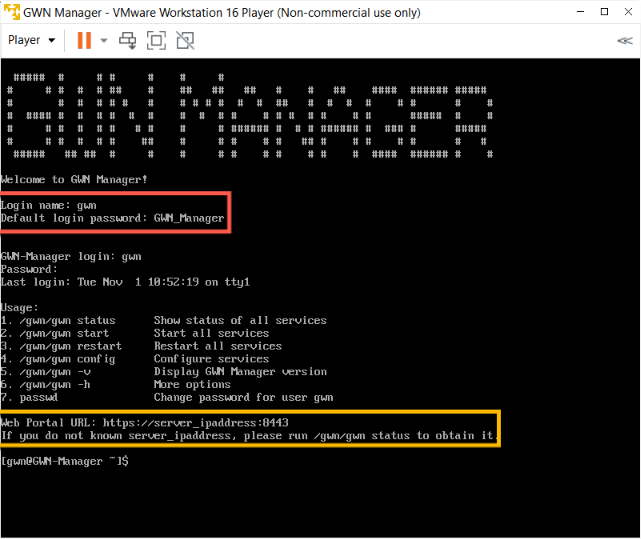
- Type “/gwn/gwn status” on the virtual machine console to check the Access URL and monitor if all the processes are in a running state.
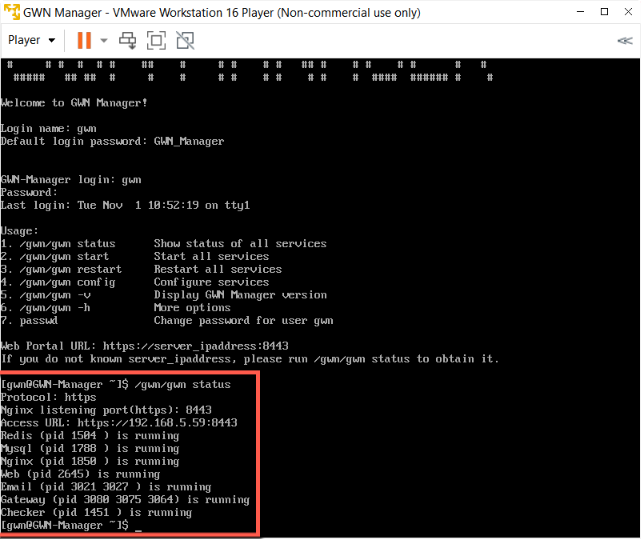
- Make sure all the processes are in a running state, open a browser and input the Access URL.

- Finally, the Simplified Setup wizard will navigate the admin through the minimal steps required to fully configure GWN Manager.

Deploying GWN Manager on Ubuntu (VMware Workstation)
For Ubuntu, choose VMware Workstation Player for Linux 64-bit, and click on “DOWNLOAD NOW”.

- Give execute privileges to the .bundle file and execute it with root privileges and input “yes”.
chmod 755 [bundle file name]sudo ./[bundle file name]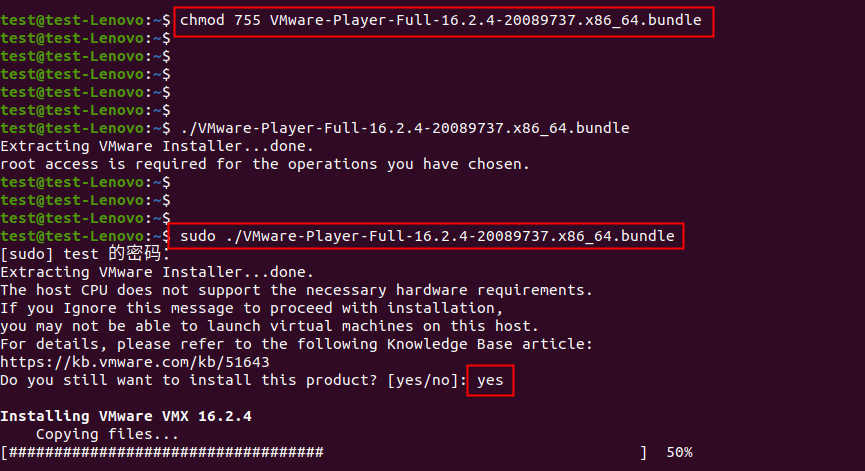
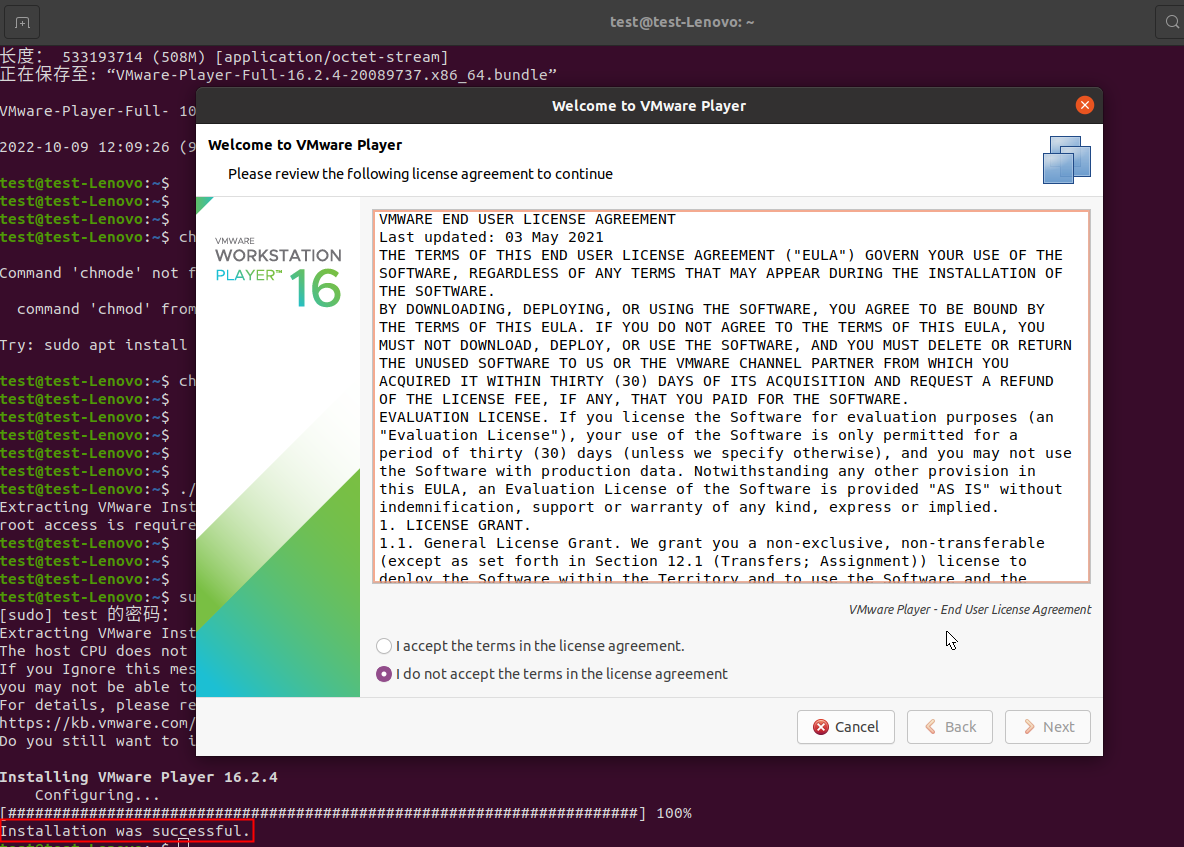
- After the installation is completed, it will pop up a window “Welcome to VMware Player”.
VMware vSphere
Deploying GWN Manager on VMware ESXi
Please download vSphere from the link below and install it.
VMware vSphere: https://customerconnect.vmware.com/en/evalcenter?p=vsphere-eval-7
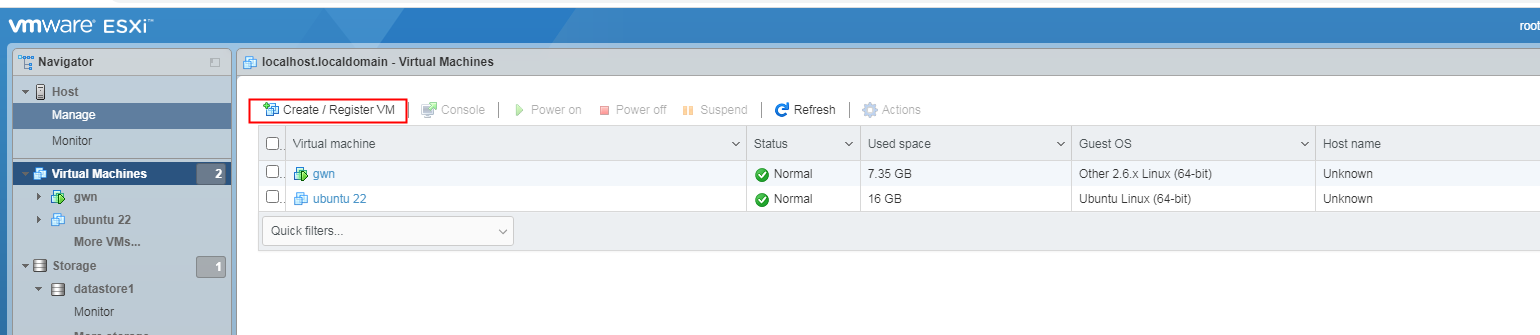
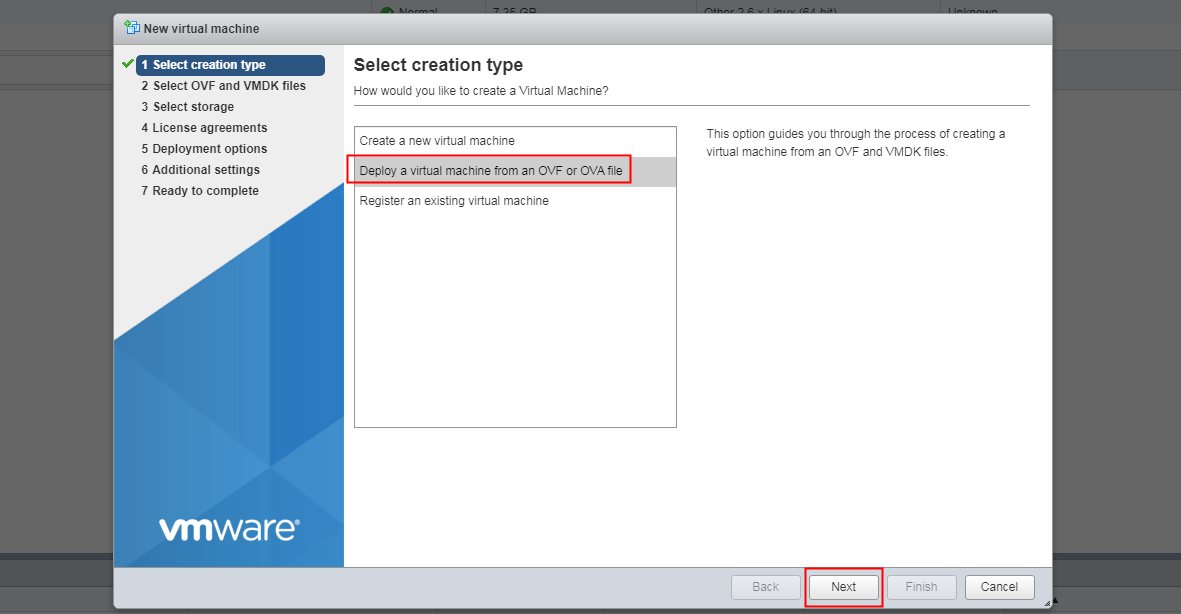
- Login to your VMware ESXi Web UI, and click Create/Register VM.
- Select the second option “Deploy a virtual machine from an OVF or OVA file”, and click NEXT.
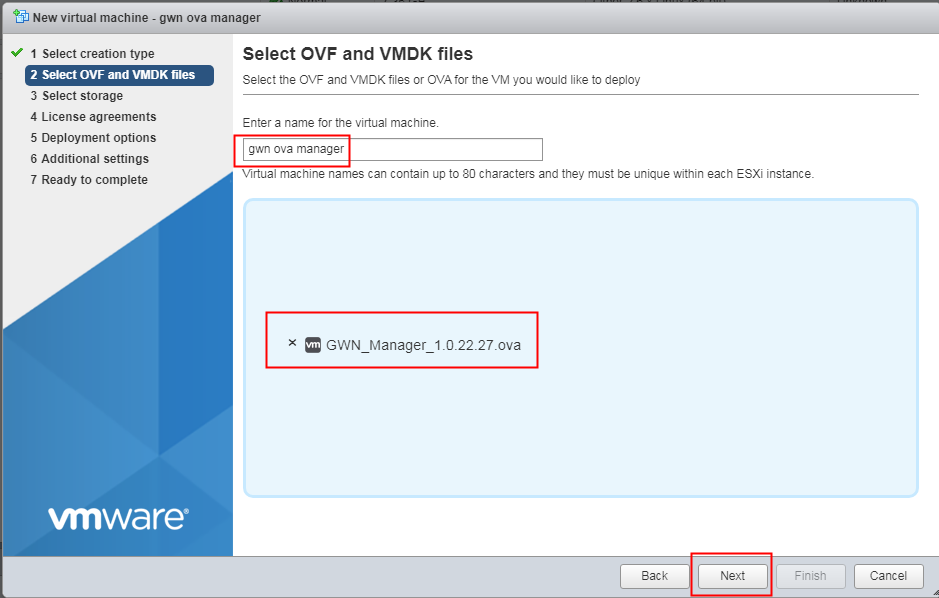
- Specify a name for the newly created virtual machine and import the OVA file which was downloaded previously.
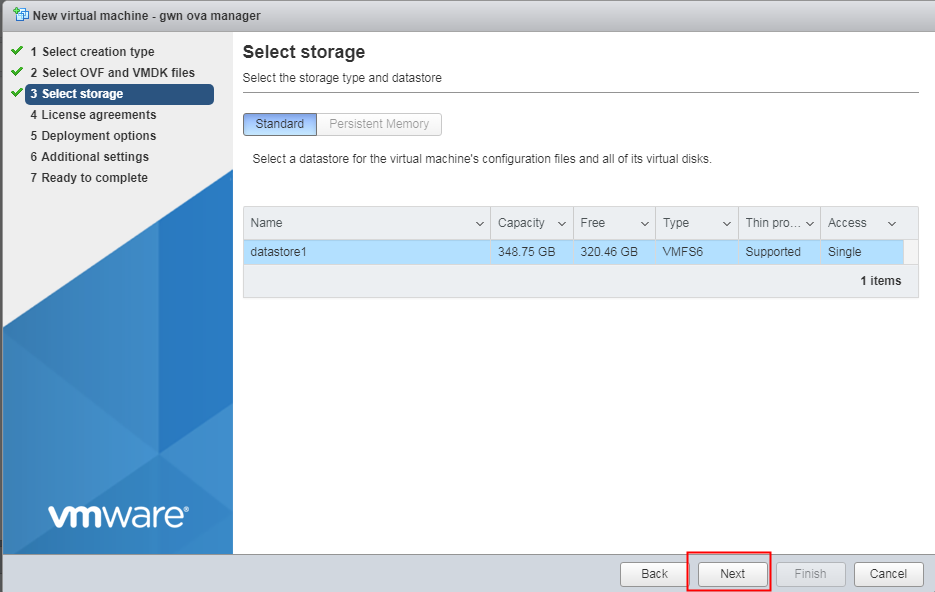
- Select the storage type and datastore, and click Next.
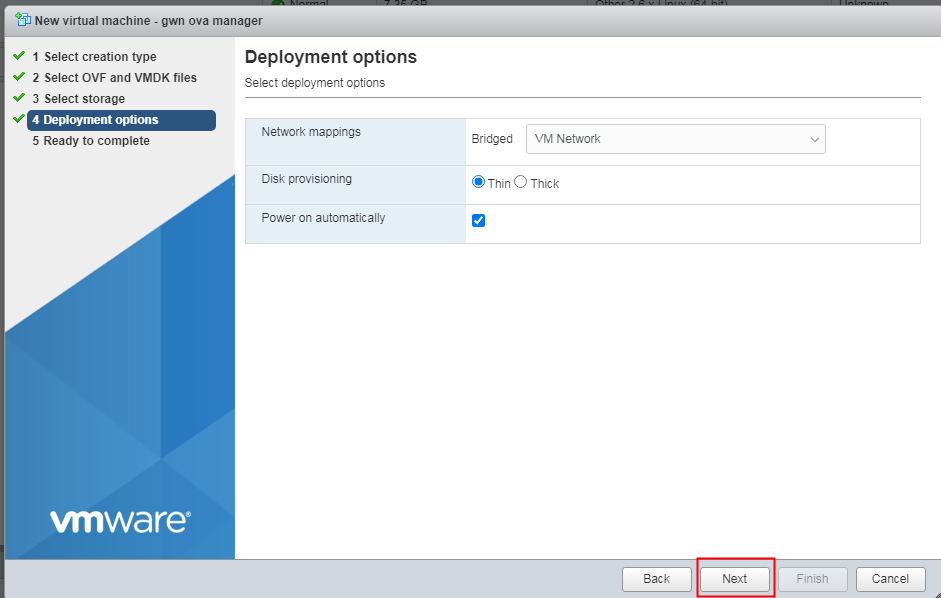
- Select deployment options, and click Next.
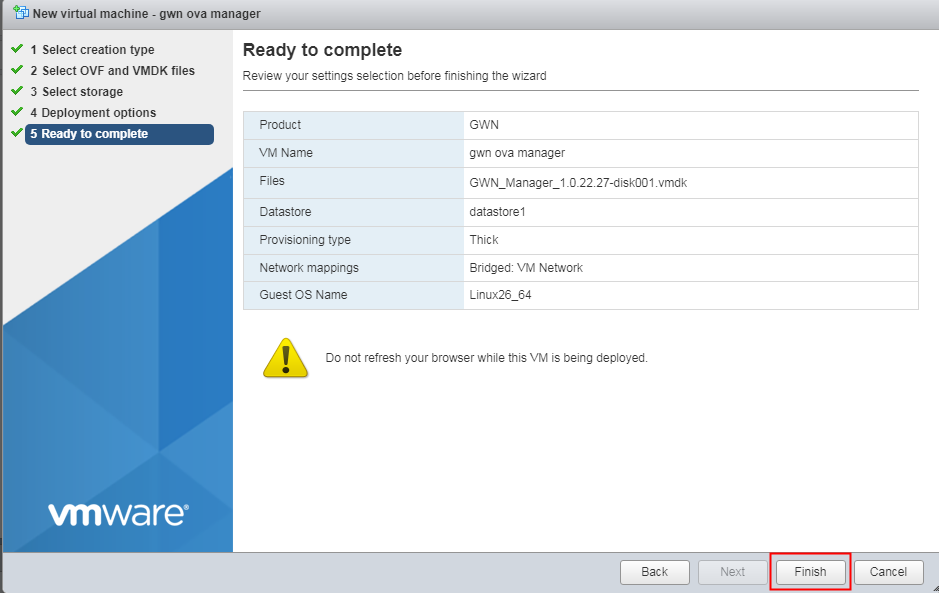
- Review your settings selection, and click Finish.
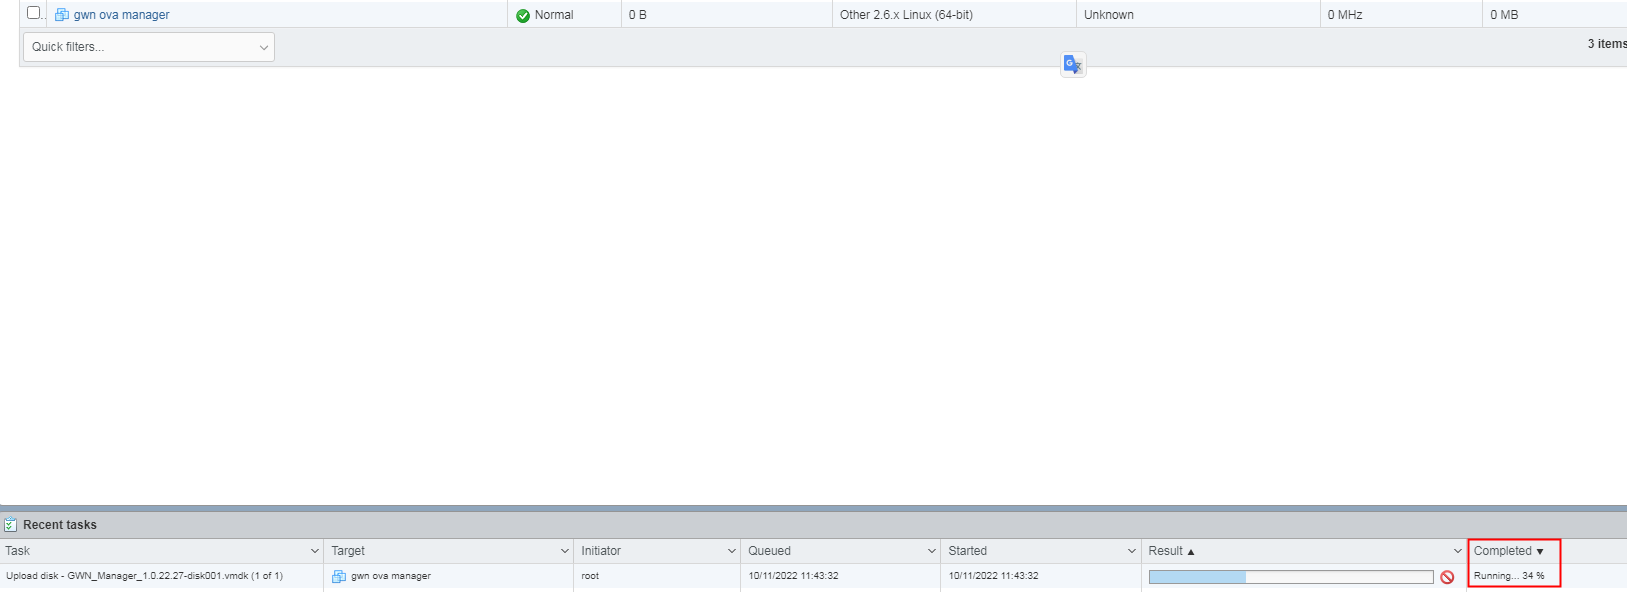
- Wait for the import to be completed.
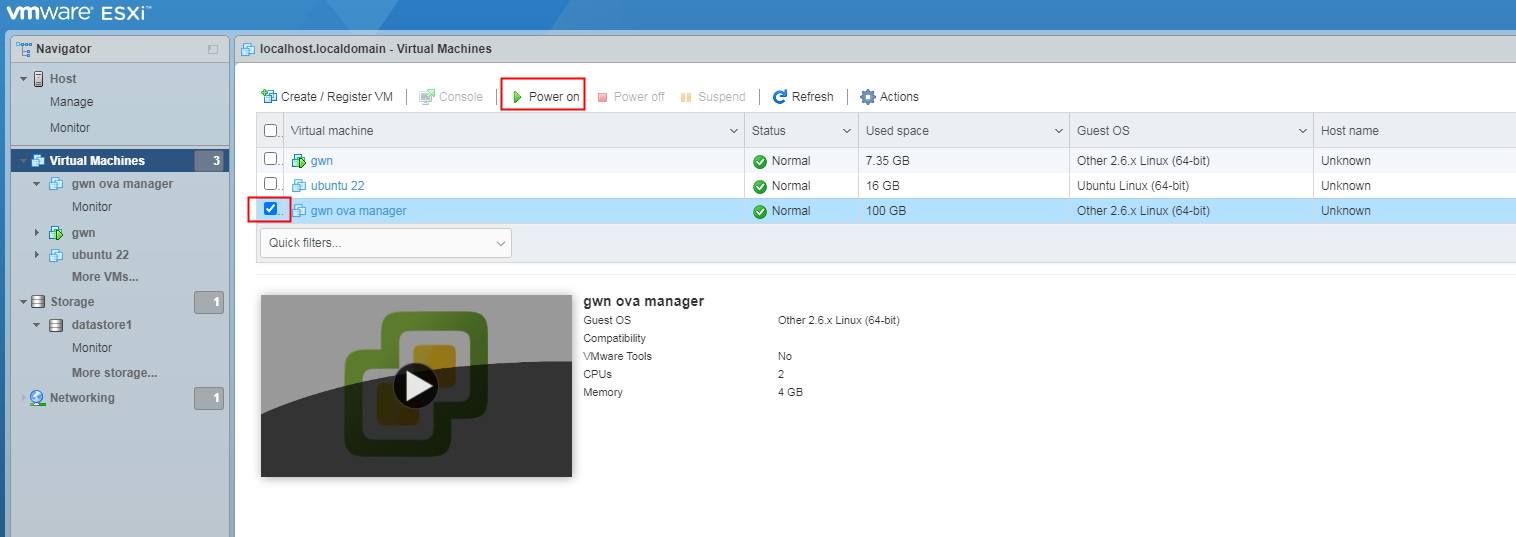
- Select the GWN Manager virtual machine, and click Power on to start up GWN Manager.
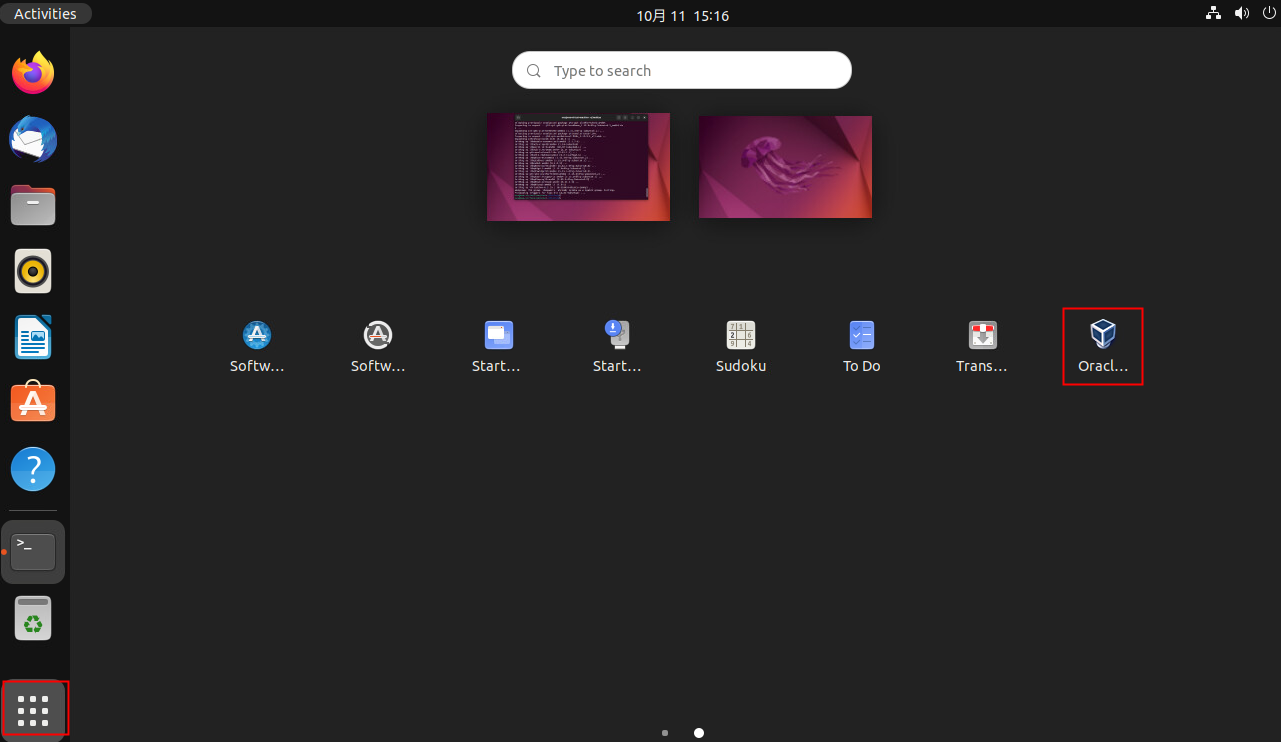
VirtualBox
Deploying GWN Manager on Ubuntu (VirtualBox)
Please download VirtualBox from Ubuntu Software.

You can also download it directly from VirtualBox’s official site, the link is below:
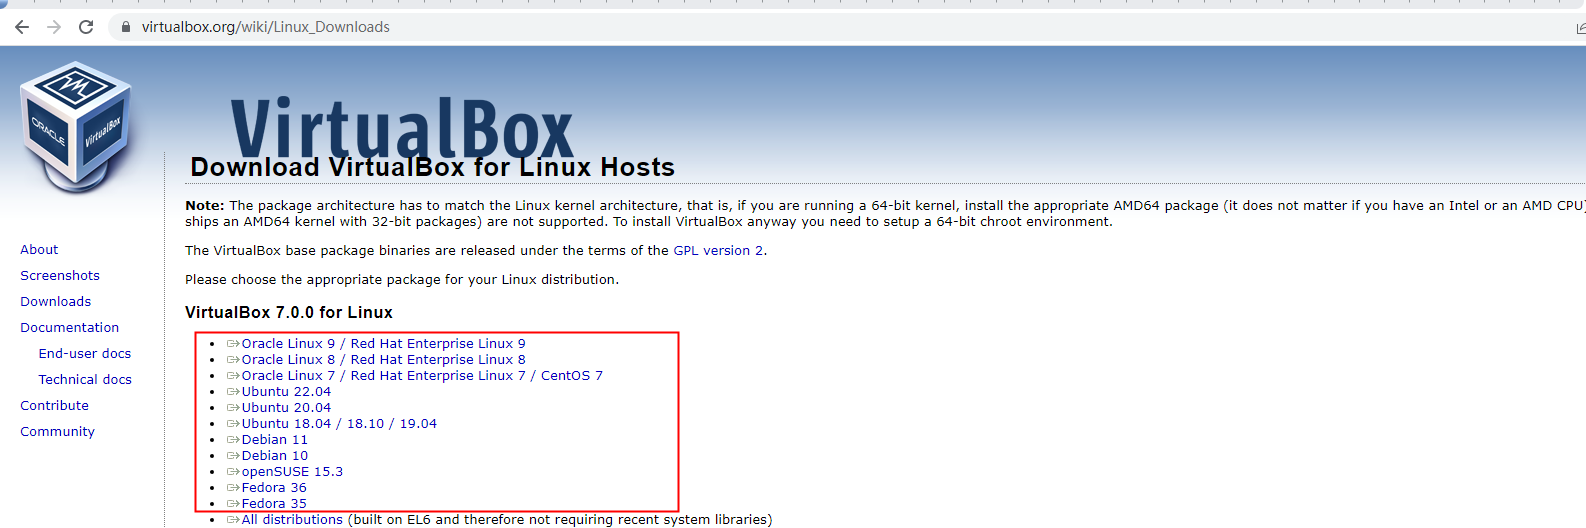
VirtualBox : https://www.virtualbox.org/wiki/Linux_Downloads
For manual installation please follow the steps below:
- Get the VirtualBox deb package:
wget https://download.virtualbox.org/virtualbox/6.1.38/virtualbox-6.1_6.1.38-153438~Ubuntu~jammy_amd64.deb
- Install the VirtualBox deb:
sudo dpkg -i virtualbox-6.1_6.1.38-153438~Ubuntu~jammy_amd64.deb
- Running “apt –fix-broken install”
sudo apt --fix-broken install
- Once the installation is complete, the VirtualBox icon will be shown in the application drawer.
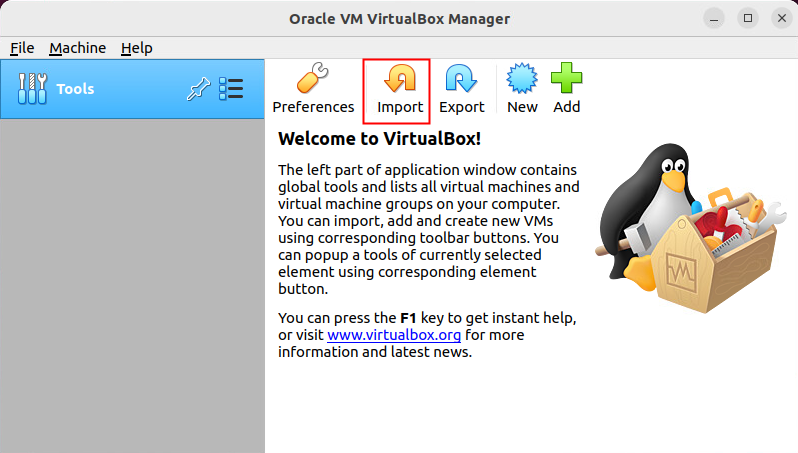
- Open the VirtualBox, Click Import.
6. Before starting up the virtual machine, it’s recommended to enable “Hardware Clock in UTC Time” by clicking on Setting.
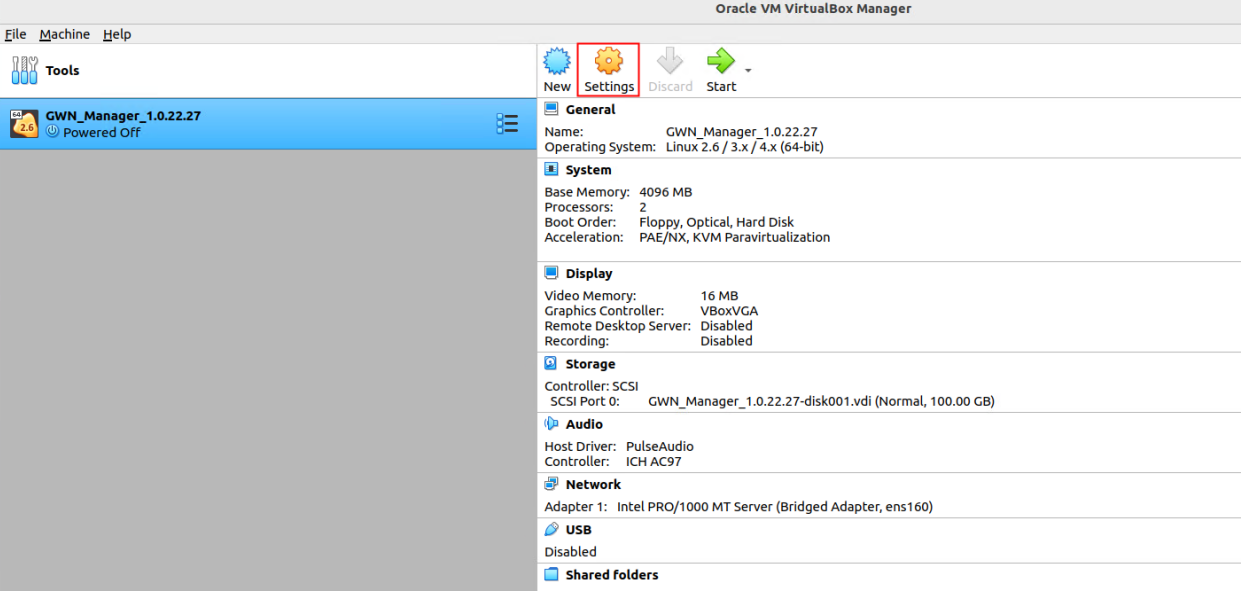
Click on System then check “Hardware Clock in UTC Time”.

Deploying GWN Manager on macOS
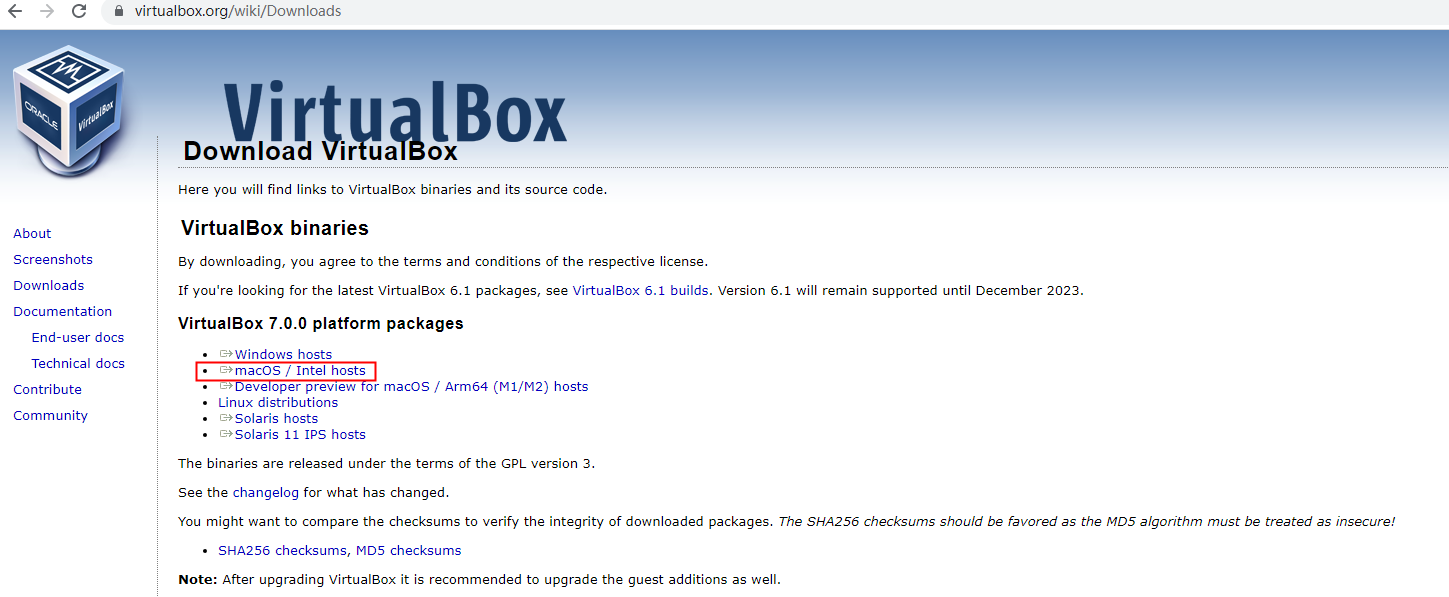
Please download the VirtualBox for MacOS from the link below:
MacOS VirtualBox: https://www.virtualbox.org/wiki/Downloads
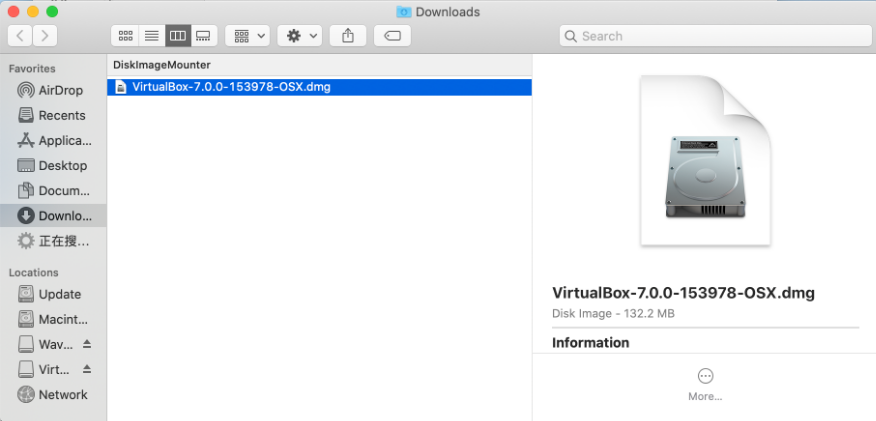
- Open the downloaded “dmg” file.
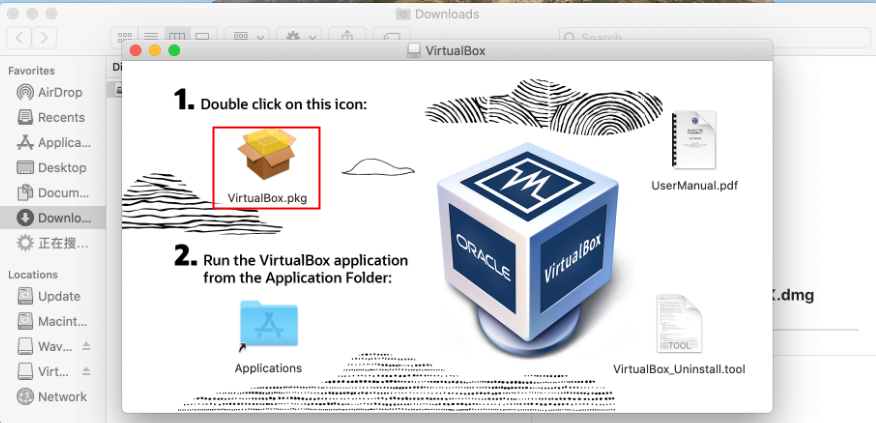
- When the pop-up below appears, click on the “VirtualBox.pkg” icon.
- On the new pop-up window, click Continue.

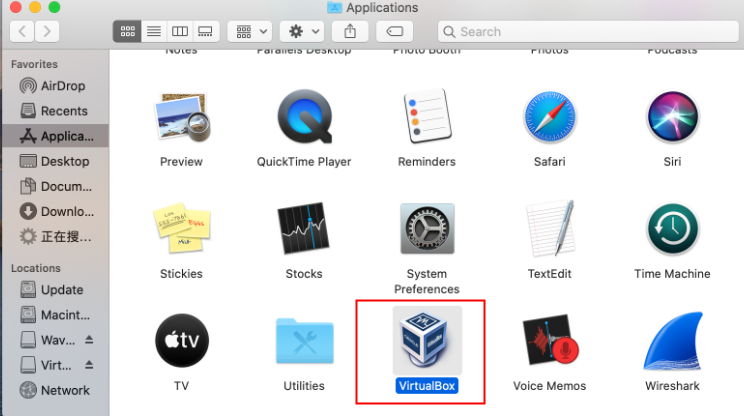
- Run the VirtualBox application from the application folder.
- VirtualBox manager interface will show up.

VMware Workstation & vSphere are a trademark of VMware, Inc.
VirtualBox is a trademark of Oracle.