GWN Manager is a free on-premise enterprise-grade, management platform for Grandstream GWN series devices (Routers, Switches and Access points). Typically deployed on a customer’s private network, this flexible, scalable solution offers simplified configuration and management. Thanks to streamlined monitoring and maintenance, managing your network has never been easier. Keep an eye on the network’s performance with real-time monitoring, alerts, statistics and reports that can be viewed using a web browser or the mobile application.
This guide describes the steps on how to install GWN Manager on CentOS7, AlmaLinux9 or Ubuntu.
GETTING TO KNOW GWN MANAGER
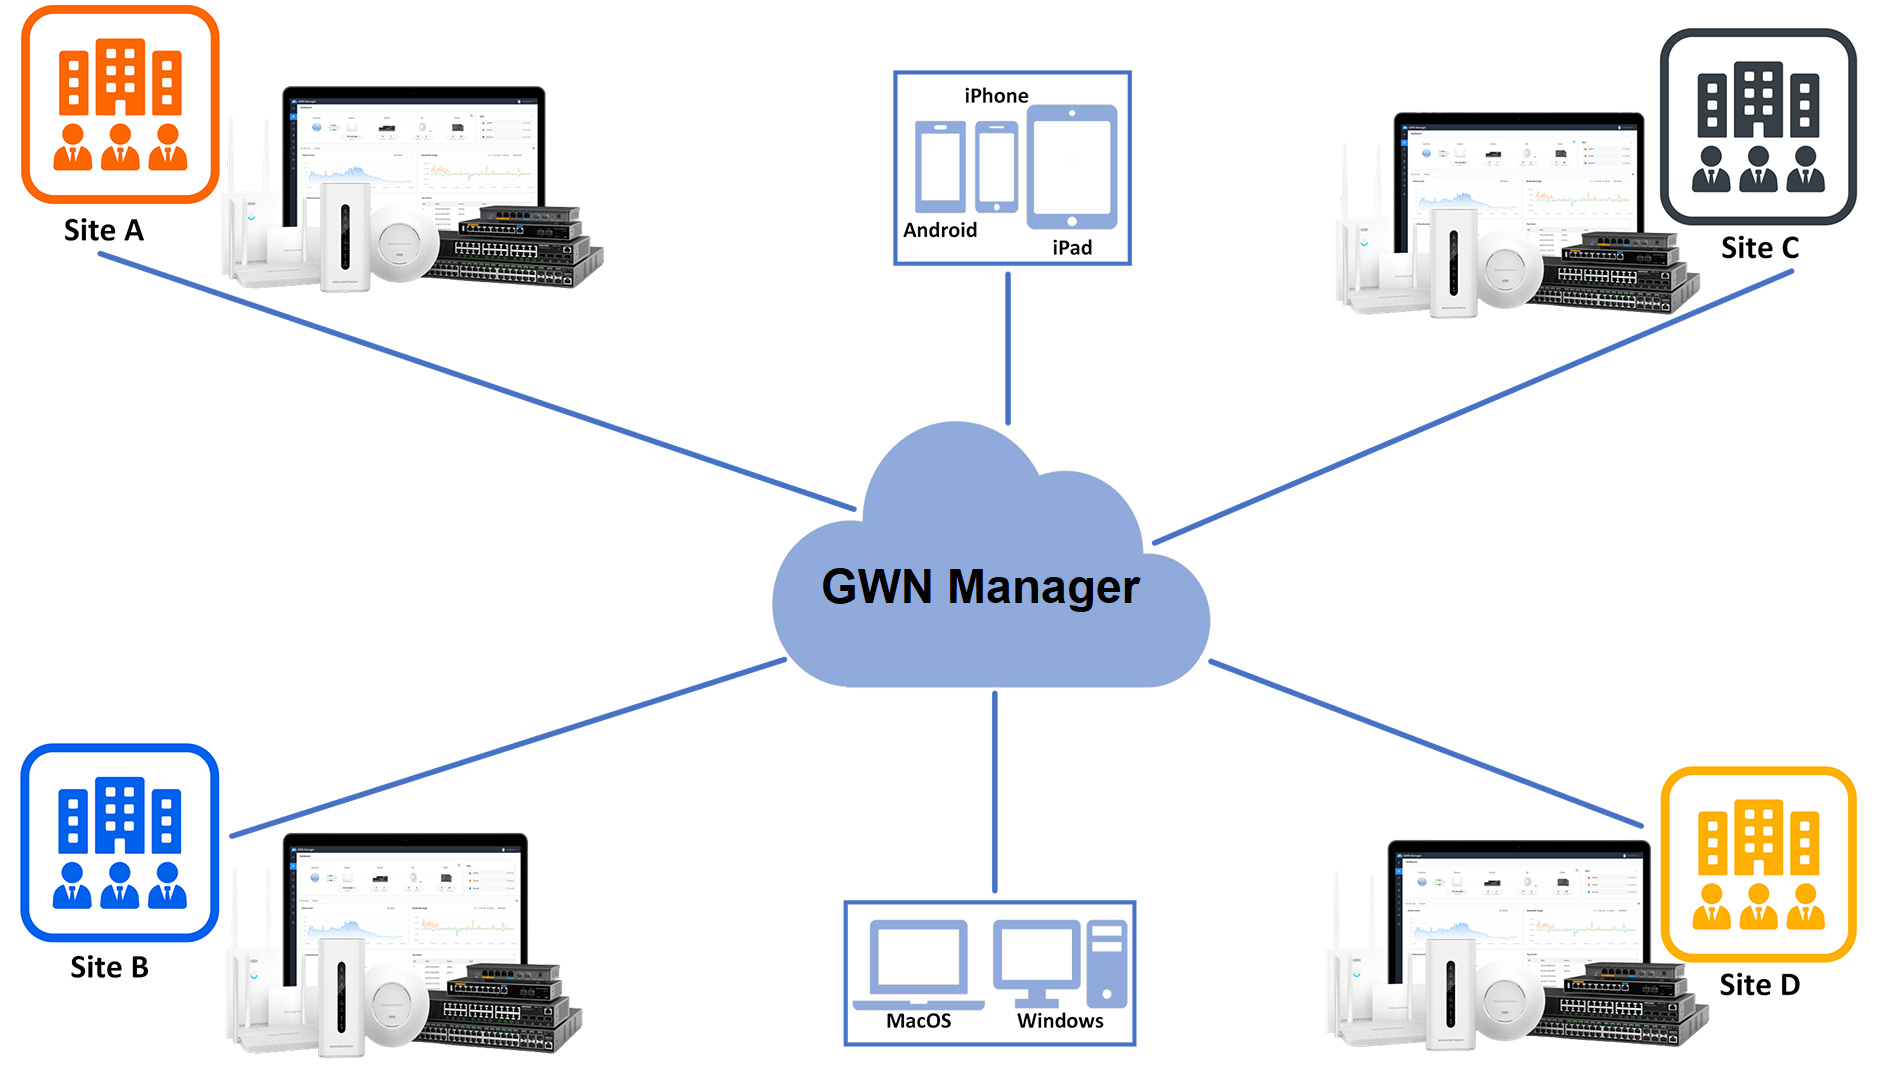
GWN Manager is an On-premise Controller used to manage and monitor GWN devices on your network. It provides an easy and intuitive web-based configuration interface, The GWN Manager can control up to 3000 GWN devices (GWN Routers, GWN Switches and GWN APs). Below is the GWN Manager architecture:
System Requirements
For up to 200 devices and 2000 Clients:
- CPU: Intel® Core™ i3-3240 or above
- RAM: 4GB or above
- Storage: 250GB (SSD preferred, depending on retained data size)
For up to 3000 devices and 30000 Clients:
- CPU: Intel® Xeon® Silver 4210
- RAM: 16GB or above
- Storage: 250GB (SSD preferred, depending on retained data size)
INSTALLING AND CONFIGURING GWN MANAGER
Installing GWN Manager
- First, download the bundled package according to your Linux distribution (CentOS, AlmaLinux or Ubuntu) from the link: https://www.grandstream.com/support/tools.

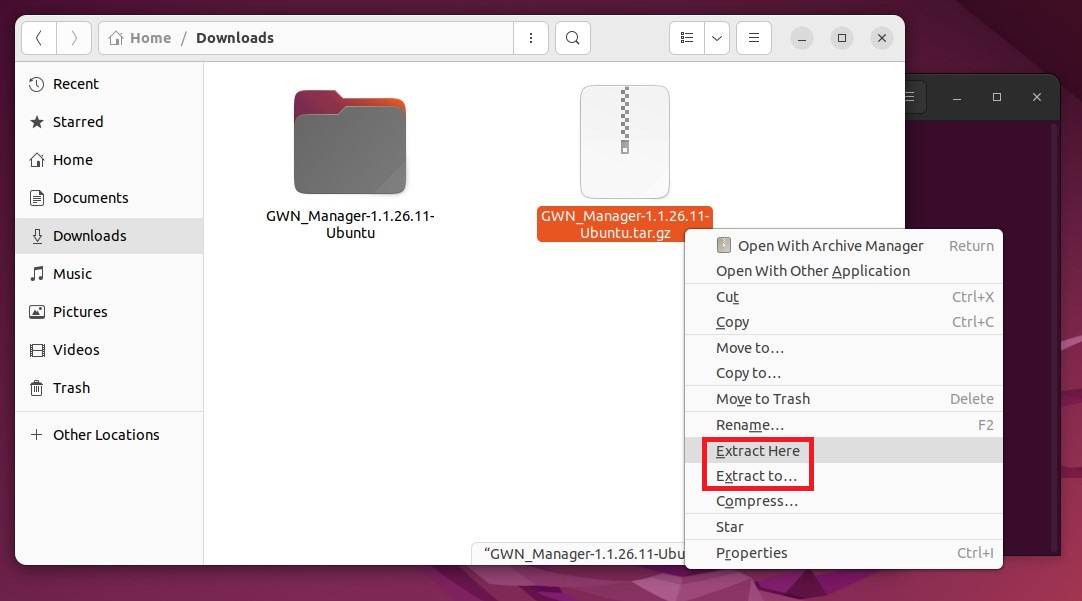
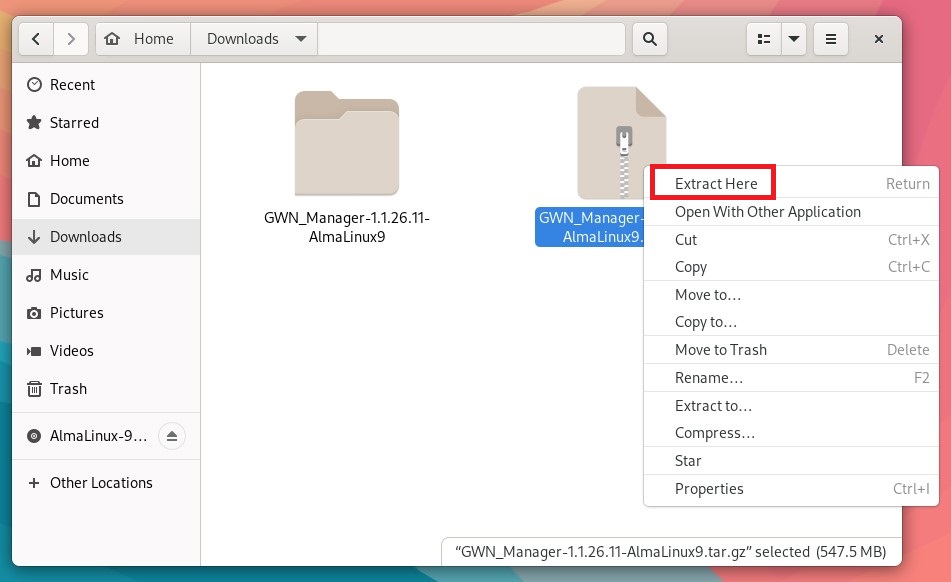
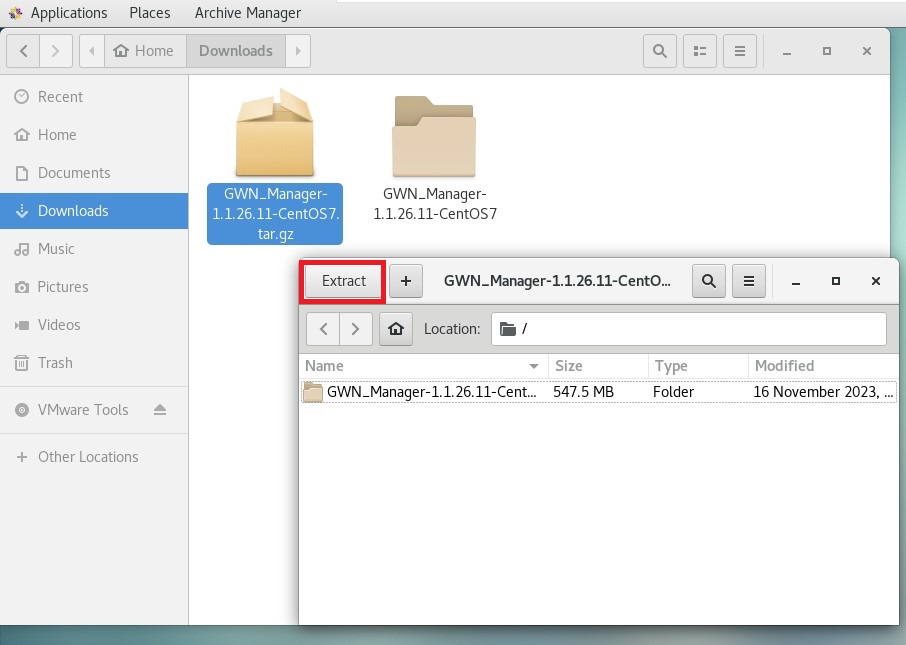
- Then, extract the file.
To extract the file using GUI, please refer to the figure below:
Alternatively, under CentOS7/AlmaLinux9 using terminal run the command below:
tar -zxvf GWN_Manager-1.0.0.13-201912121121.tar.gz

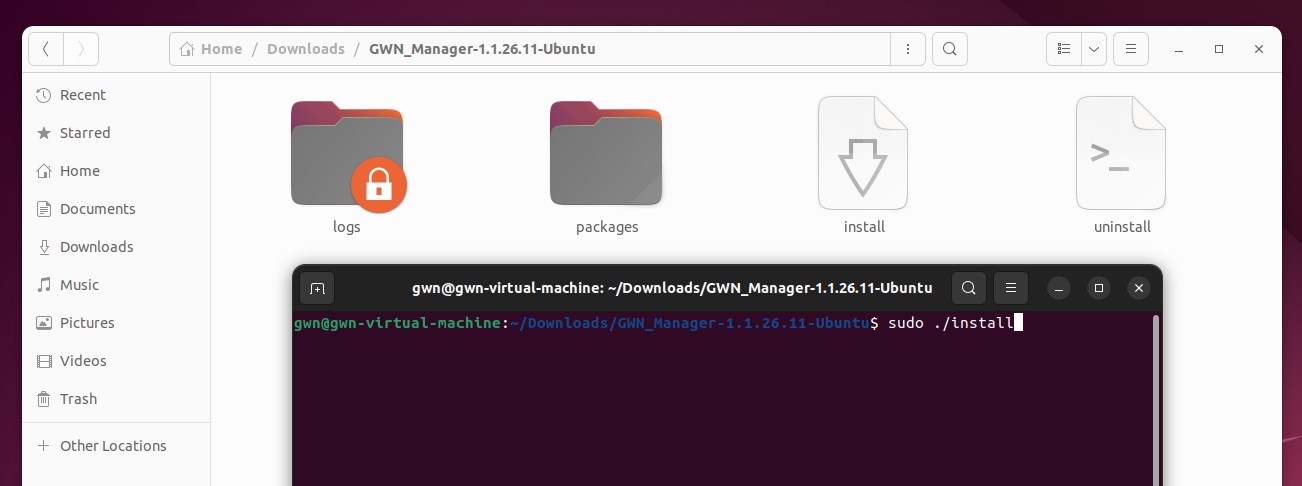
- Finally, run the file “install” to install GWN Manager.
To execute the “install” file, run the following command:
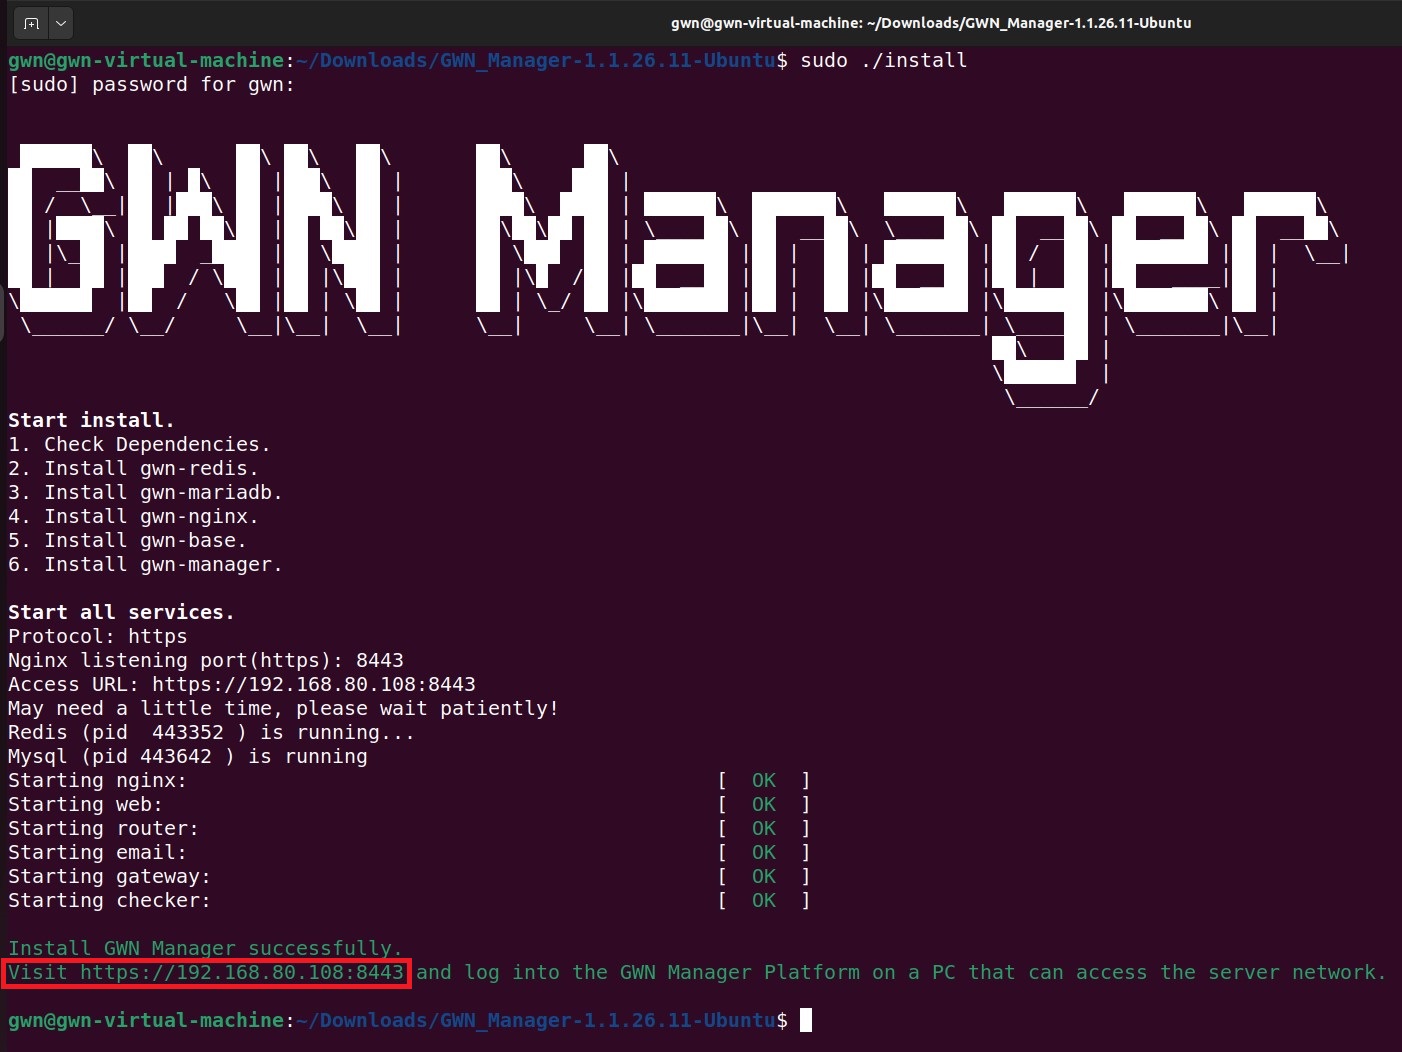
sudo ./install
sudo apt install libaio1
sudo apt install openssh-server
sudo apt --fix-broken install (only if prompted to do so).
Once installed, the current display will be shown with GWN Manager address and port.
Running GWN Manager
- Before running GWN Manager services, you will need to add firewall exceptions (only for CentOS7 and AlmaLinux9) using the following commands:
firewall-cmd --zone=public --add-port=8443/tcp -–permanent
firewall-cmd --zone=public --add-port=10014/tcp -–permanent
firewall-cmd --reload

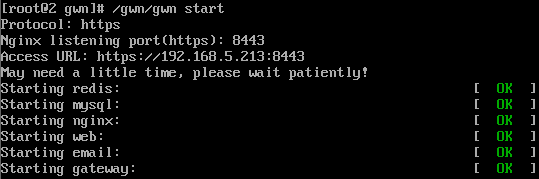
- Run the script to start the services using the below command:
/gwn/gwn start
3. After all services start up, please go to the Web Portal for further configuration.
By default, the Web Portal address is: https://server_ipaddress:8443
In our case it will be as follows:

First Use
The below figures show the initial page after installation. On first use, users need to fill in additional information following the initiation Wizard. Click start to begin. For more detailed information please refer to the GWN Manager User Guide.
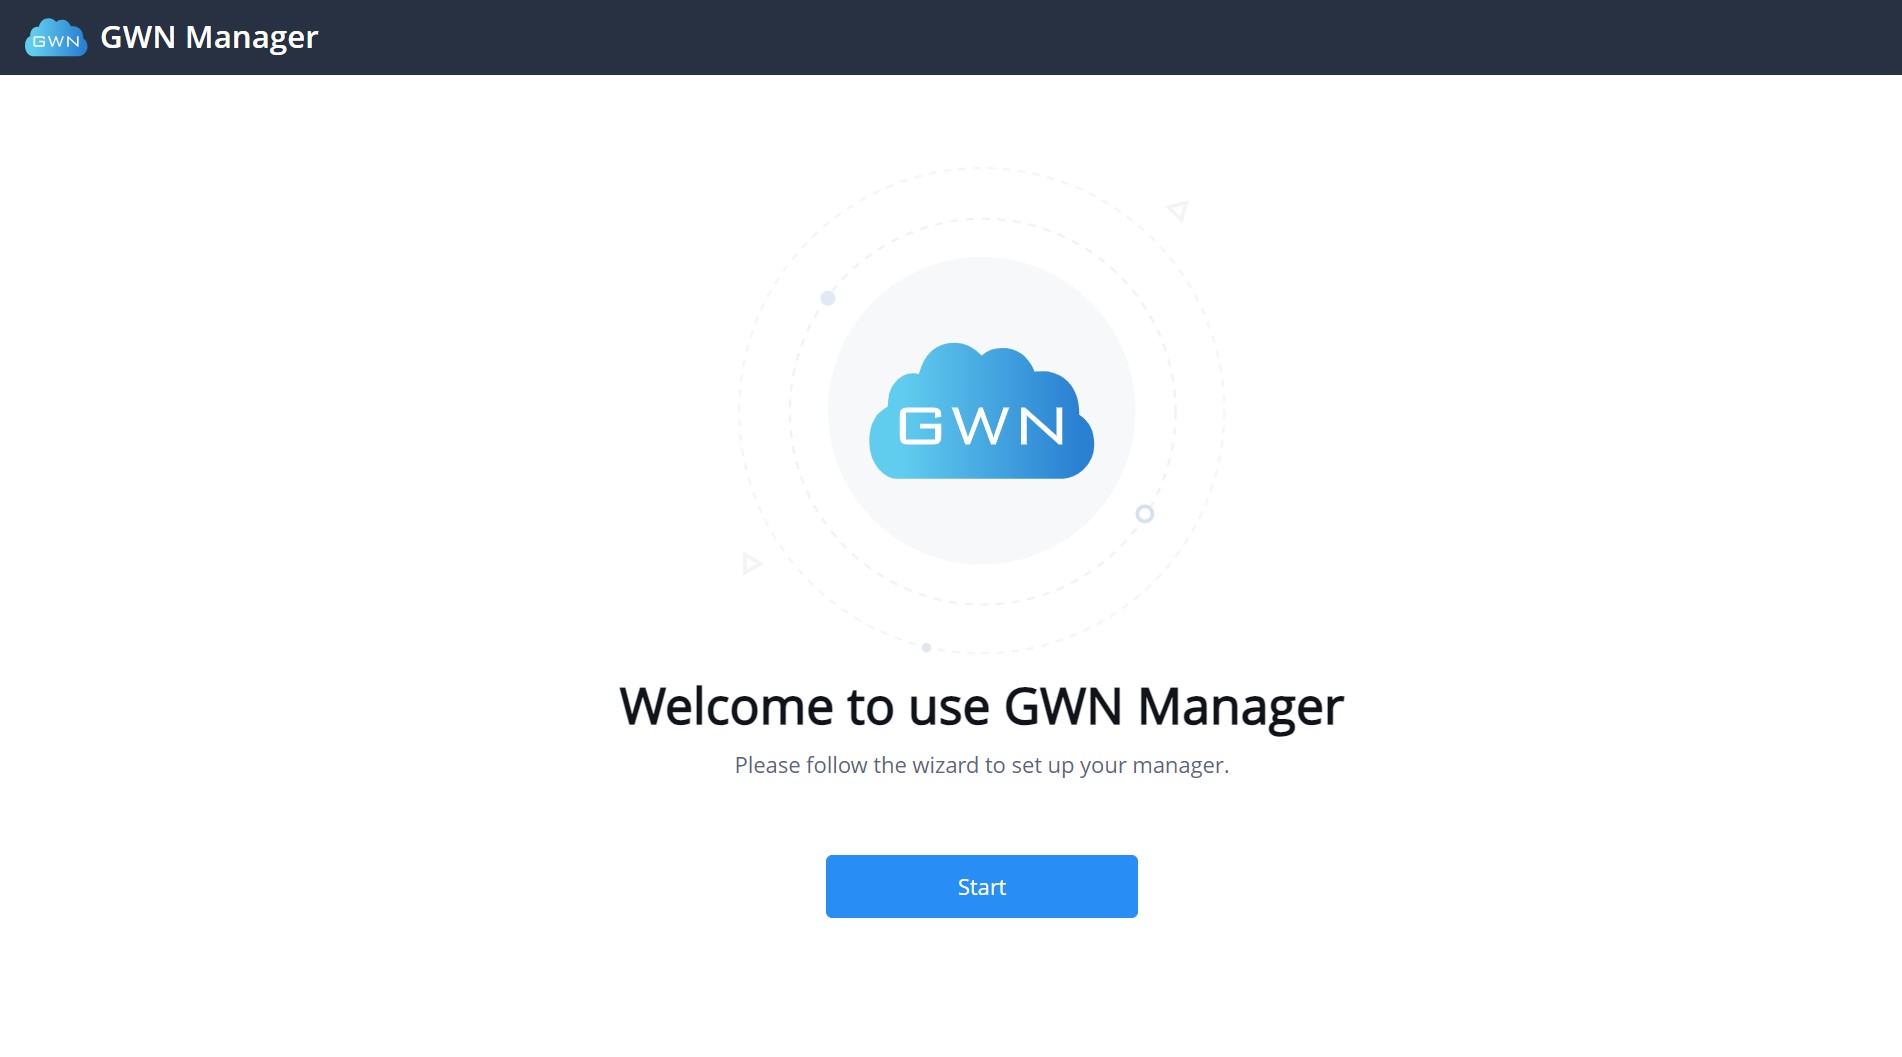
Once finishing the Wizard, the login page of the GWN Manager will be displayed as below:

Configuring GWN Manager
Users can change the Nginx binding protocol, port as well as the access address for communication (You do not need to change the default settings in general)
/gwn/gwn config
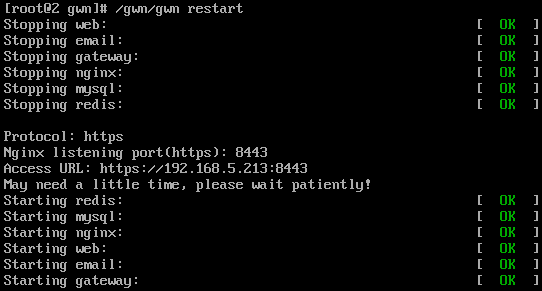
After replacing the two files, restart the GWN service to validate the configuration change:
/gwn/gwn restart
ADDITIONNAL INFORMATION
Configuring GWN Manager to Auto-Start
In case of GWN Manager service is not starting after a reboot, the user can make GWN Manager starts every time the computer boots up, for example in case of a power outage or just a reboot after an update.
sudo echo "/gwn/gwn start > /dev/null &" >> /etc/rc.local
sudo chmod +x /etc/rc.local
Modifying GWN Manager Password
If the user forgets the web login password and didn’t configure the SMTP server as well, he can modify the password from backstage using the below command:
/gwn/gwn modify-password
Upgrading GWN Manager
GWN Manager will check for the new firmware version automatically when you log into web GUI, if a new version is found, a notification will pop up and you may click to complete the upgrade. You can also upgrade manually by running the “install” file of the new version.
sudo ./install
Uninstalling GWN Manager
To uninstall GWN Manager, please execute the “uninstall” file.
sudo ./uninstall
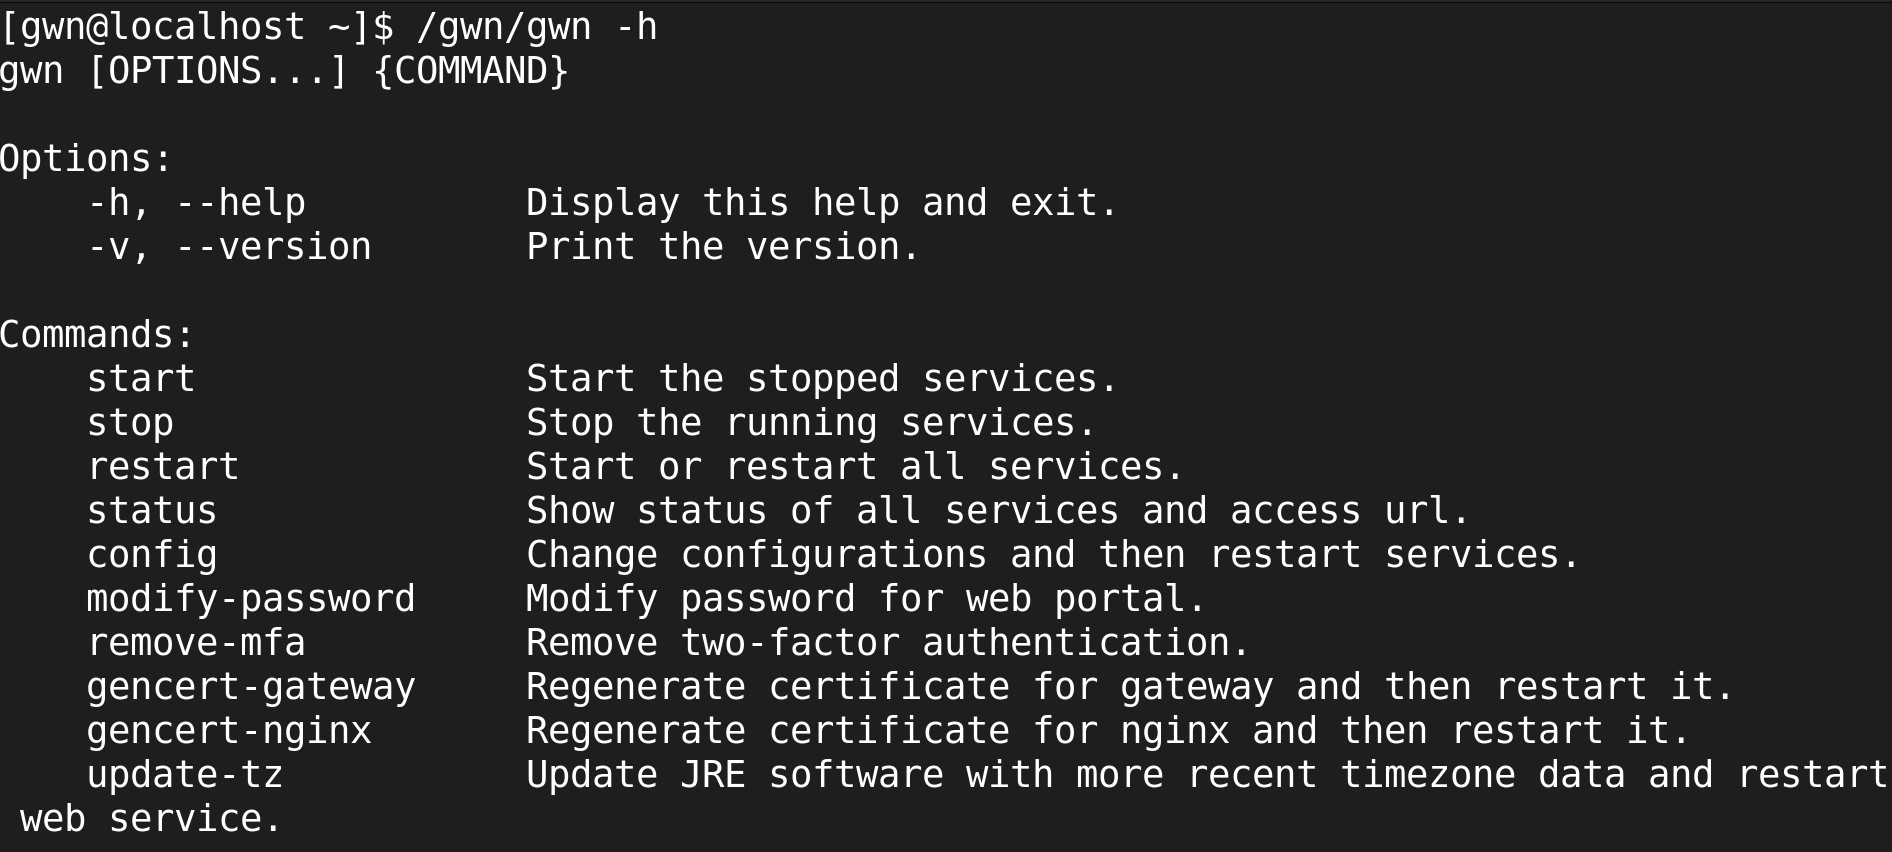
Help
For discover more commands, please run:
/gwn/gwn -h (or help)