


Introduction
The GWN780x Pro series is layer 2++ managed network switches that allow small-to-medium enterprises to build scalable, secure, high performance and smart business networks that are fully manageable. It supports advanced VLAN for flexible and sophisticated traffic segmentation, advanced QoS for prioritization of network traffic, IGMP/MLD Snooping for network performance optimization, and comprehensive security capabilities against potential attacks. The PoE models provides smart dynamic PoE output to power IP phones, IP cameras, Wi-Fi access points and other PoE endpoints. GWN780x Pro series can be managed in a number of ways, including the local Web user interface of the GWN780x Pro series switch and CLI, the command-line interface. The switch is also supported by GDMS Networking and GWN Manager, Grandstream’s cloud and on-premise network management platform, and also GWN router. The enterprise-grade GWN780x Pro series are the ideal managed network switches for small-to-medium businesses.
Package Content
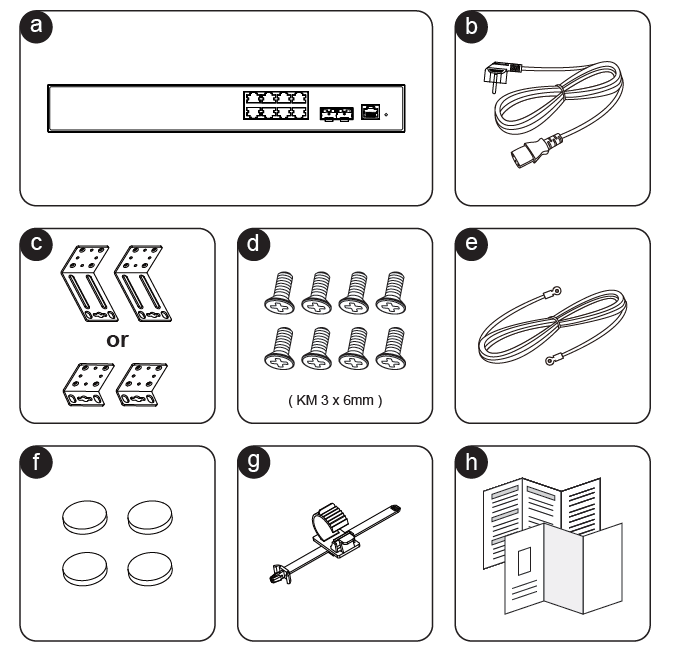
The package content that comes with the GWN780x Pro product contains the following elements
a | GWN780x Pro Series |
b | 1x 1.2m (10A) AC Cable |
c | Rack Mounting Kits or Extended Rack Mounting Kits |
d | 8x Screws (KM 3 x 6mm) |
e | 1x 25cm Ground Cable |
f | 4x Rubber Footpads |
g | 1x Power Cord Anti-Trip |
h | Quick installation Guide and Regulatory Paper |
Fan Ventilation
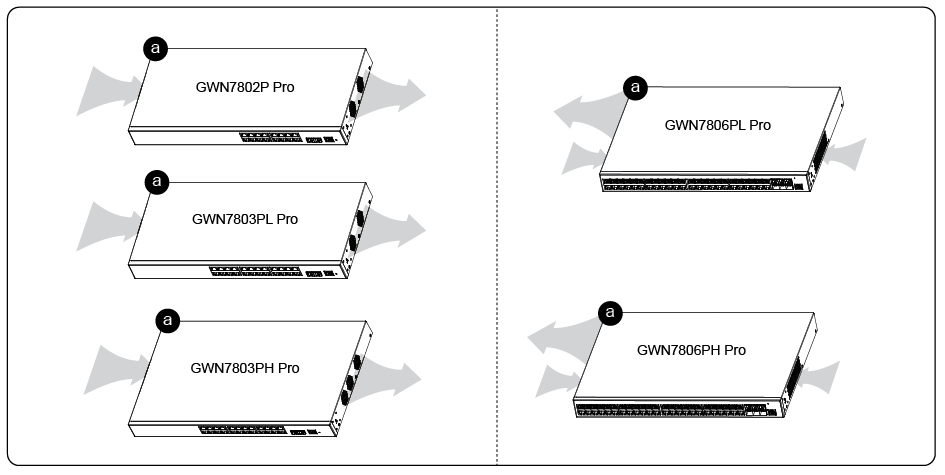
The GWN780x Pro series features a dedicated ventilation system designed to keep the device cool in deployments where it delivers significant power to connected devices. This power delivery increases the device’s workload and internal temperature. Depending on the model, the cooling mechanism and number of fans can vary. The illustration below highlights these differences:
Installation
Install on the Desktop
- Place the bottom of the switch on a sufficiently large and stable table.
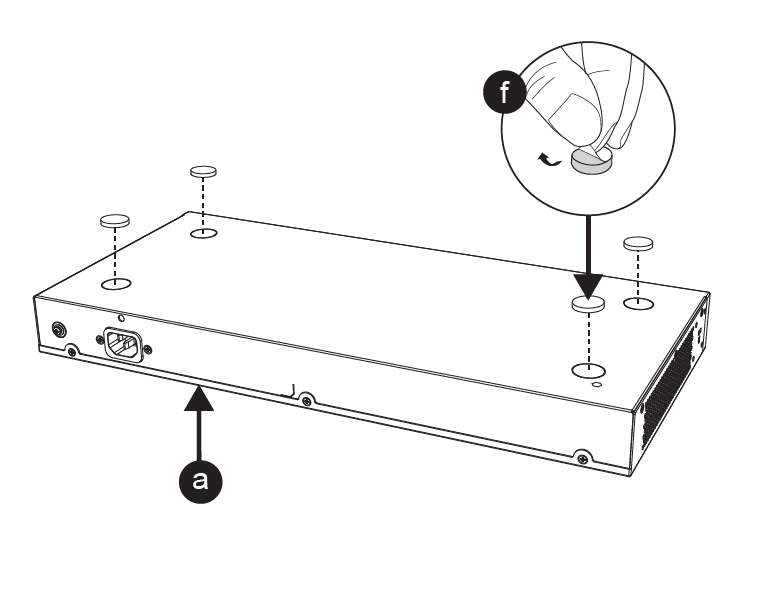
- Peel off the rubber protective paper of the four footpads one by one, and stick them in the corresponding circular grooves at the four corners of the bottom of the case.
- Flip the switch over and place it smoothly on the table.
Install on a 19″ Standard Rack
- Check the grounding and stability of the rack.
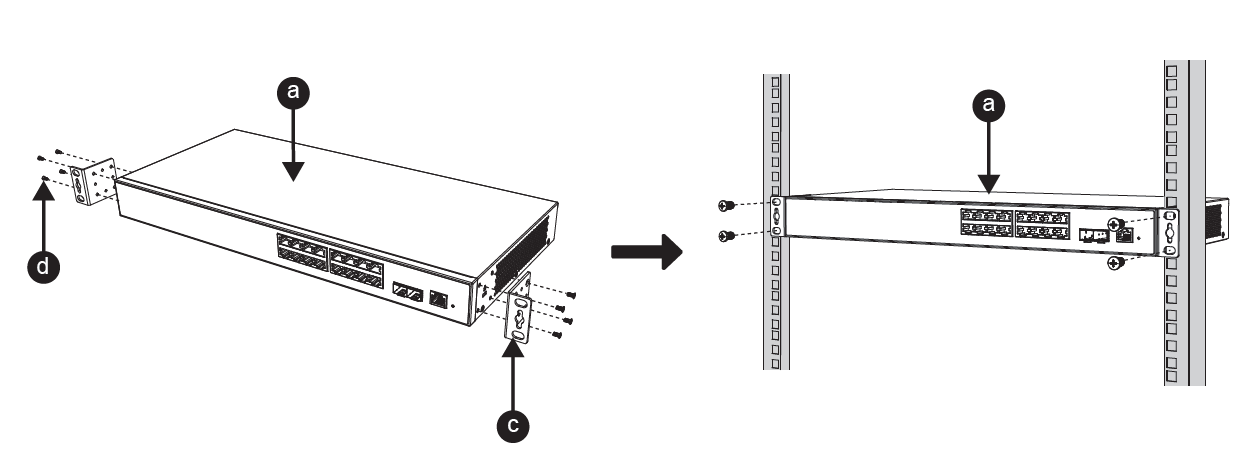
- Install the two L-shaped rack-mounting in the accessories on both sides of the switch, and fix them with the screws provided (KM 3*6).
- Place the switch in a proper position in the rack and support it with the bracket.
- Fix the L-shaped rack mounting to the guide grooves at both ends of the rack with screws(prepared by yourself) to ensure that the switch is stably and horizontally installed on the rack.
Powering and Connecting GWN780X Pro
Connect the power cable and the switch first, then connect the power cable to the power supply system of the equipment room.
In order to protect the power supply from accidental disconnection, it’s recommended to purchase a power cord anti-trip for installation:
- Place the smooth side of the fixing strap towards the power outlet and insert it into the hole on the side of it.
- After plugging the power cord into the power outlet, slide the protector over the remaining strap until it slides over the end of the power cord.
- Wrap the strap of the protective cord around the power cord and lock it tightly. Fasten the straps until the power cord is securely fastened.
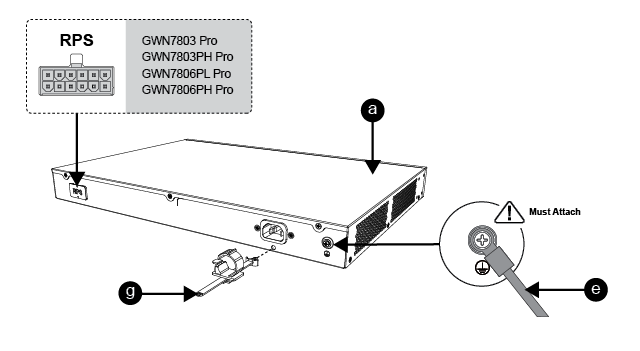
- Connect the RPS for the following models: GWN7803 Pro, GWN7803PH, GWN7806 Pro, GWN7806PL, GWN7806PH Pro
Connect the Grounding cable by following the below steps:
- Remove the ground screw from the back of the switch, and connect one end of the ground cable to the wiring terminal of the switch.
- Put the ground screw back into the screw hole, and tighten it with a screwdriver.
- Connect the other end of the ground cable to another device that has been grounded or directly to the terminal of the ground bar in the equipment room.
Connect to Console Port
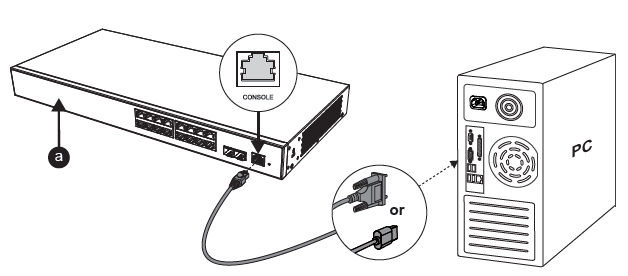
- Connect the RJ45 end of the console cable to the console port of the switch.
- Connect the other end of the console cable to the DB9 male connector or USB port to the PC.
ACCESS AND CONFIGURE
Login using the Console port
- Use the console cable to connect the console port of the switch and the serial port of the PC.
- Open the terminal emulation program of the PC (e.g. SecureCRT), and enter the default username and password to log in. (The default administrator username is “admin” and the default random password can be found on the sticker on the GWN780x Pro switch).
Login Remotely using SSH
- Enter “cmd” in PC/Start.
- Enter ssh <gwn780xPro_IP> in the cmd window.
- Enter the default username and password to log in. (The default administrator username is “admin” and the default random password can be found on the sticker on the GWN780x Pro switch).
Configure using GWN.Cloud
Type https://www.gwn.cloud in the browser, and enter the account and password to login the cloud platform. If you don’t have an account, please register first or ask the administrator to assign one for you.
Login using the Web UI
The GWN780x Pro embedded Web server responds to HTTPS GET/POST requests. Embedded HTML pages allow users to configure the device through a Web browser such as Microsoft IE, Mozilla Firefox, or Google Chrome.
- A PC uses a network cable to correctly connect any RJ45 port of the switch.
- Set the Ethernet (or local connection) IP address of the PC to 192.168.0.x (“x” is any value between 1-253), and the subnet mask to 255.255.255.0, so that it is in the same network segment with the switch IP address. If DHCP is used, this step could be skipped.
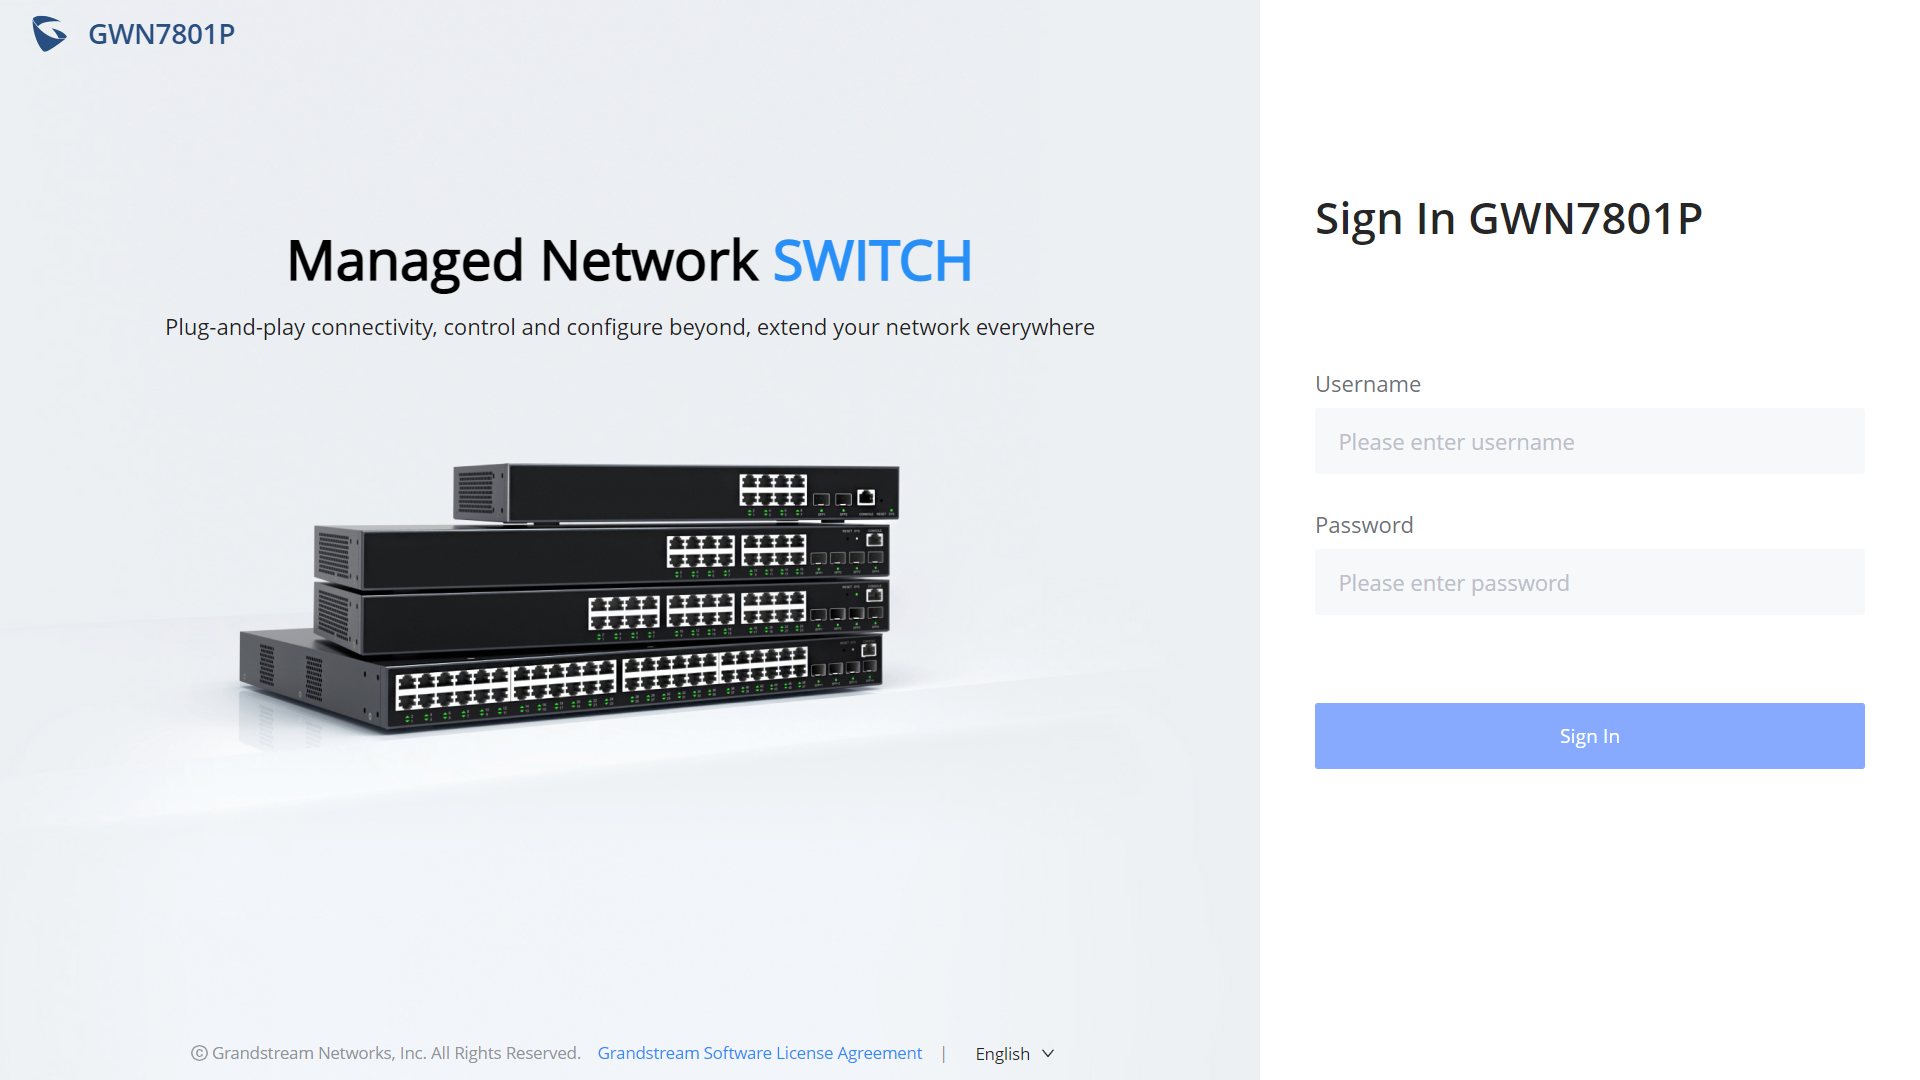
- Type the switch’s default management IP address http://<gwn780xPro_IP> in the browser, and enter the username and password to log in. (The default administrator username is “admin” and the default random password can be found at the sticker on the GWN780x Pro switch).