
OVERVIEW
This document presents a summary of security measures, factors, and configurations that users are recommended to consider when configuring and deploying the GXV3370/GXV3380/GXV3350.
The following sections are covered in this document:
- Web UI/SSH Access
Web UI access is protected by username/password and login timeout. Two-level user management is configurable. SSH access is supported for mainly troubleshooting purpose and it’s recommended to disable it in normal usage.
- Device Control Security
The GXV33XX has multiple ways to limit the use for network settings, apps, and other settings if not necessary for the end user.
- Security for SIP Accounts and Calls
The SIP accounts use specific port for signaling and media stream transmission. It also offers configurable options to block anonymous calls and unsolicited calls.
- Network Security
The GXV33XX supports OpenVPN, 802.1X, Bluetooth and PC port for network access. OpenVPN secures remote connection and 802.1X provides network access control. For Bluetooth and PC port, it’s recommended to turn them off if not used.
- Security for GXV33XX Services
GXV33XX supports service such as HTTP/HTTPS/TFTP provisioning, TR-069, LDAP, as well as allows ADB and FTP access. For provisioning, we recommend using HTTPS with username/password and using password-protected XML file. For services such as ADB and FTP, we recommend disabling them if not used to avoid potential port exposure.
- Deployment Guidelines for GXV33XX
This section introduces protocols and ports used on GXV33XX and recommendations for routers/firewall settings.
This document is subject to change without notice.
Reproduction or transmittal of the entire or any part, in any form or by any means, electronic or print, for any purpose without the express written permission of Grandstream Networks, Inc. is not permitted.
WEB UI/SSH ACCESS
GXV33XX Web UI Access
The GXV3370/GXV3380/GXV3350 embedded web server responds to HTTP/HTTPS GET/POST requests. Embedded HTML pages allow users to configure the device through a web browser such as Microsoft IE, Mozilla Firefox, Google Chrome and etc. With this, administrators can access and configure all available GXV33XX information and settings. It is critical to understand the security risks involved when placing the GXV33XX phone on public networks and it’s recommended not to do so.
Web UI Access Protocols
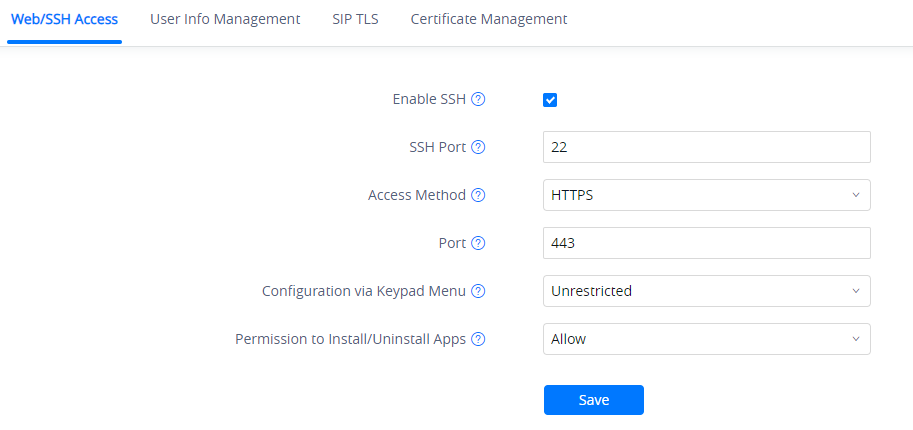
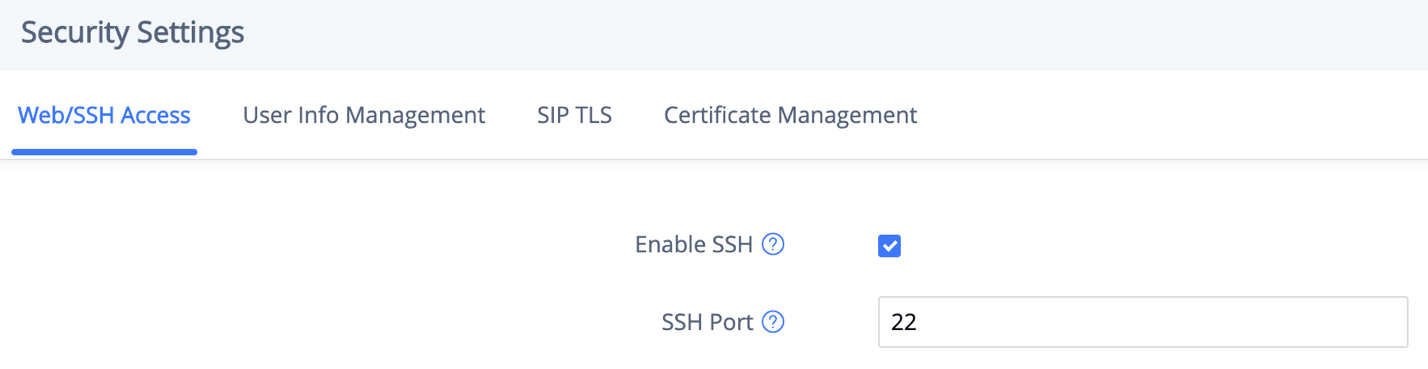
HTTP and HTTPS are supported to access the GXV3370/GXV3380/GXV3350 web UI and can be configured under web UI 🡪 System Settings 🡪 Security Settings 🡪 Web/SSH Access. To secure transactions and prevent unauthorized access, it is highly recommended to:
- Use HTTPS instead of HTTP.
- Avoid using well known port numbers such as 80 and 443.
User Login
Username and password are required to log in the GXV3370/GXV3380/GXV3350 web UI.
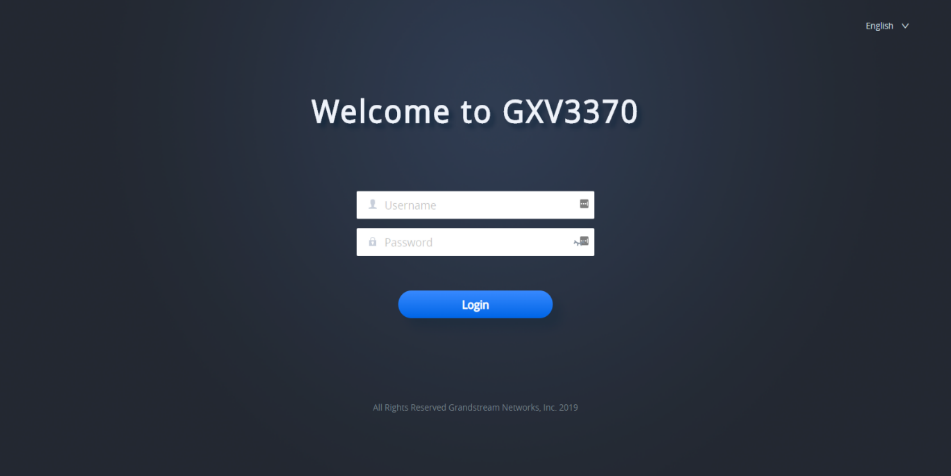
The GXV3370 web UI require to change the default password at first time login.
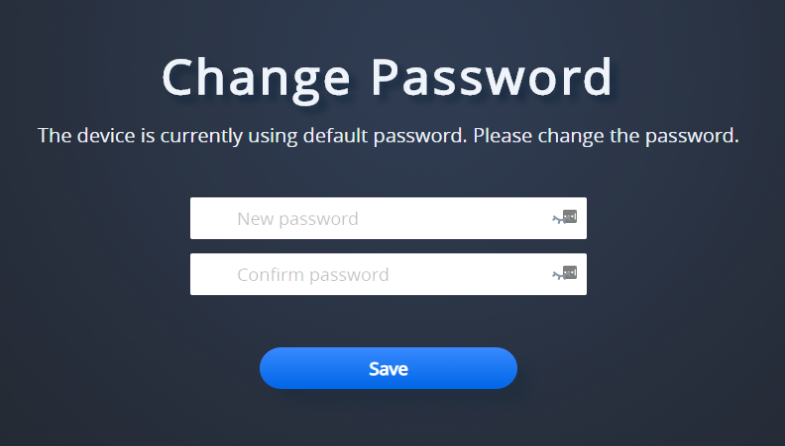
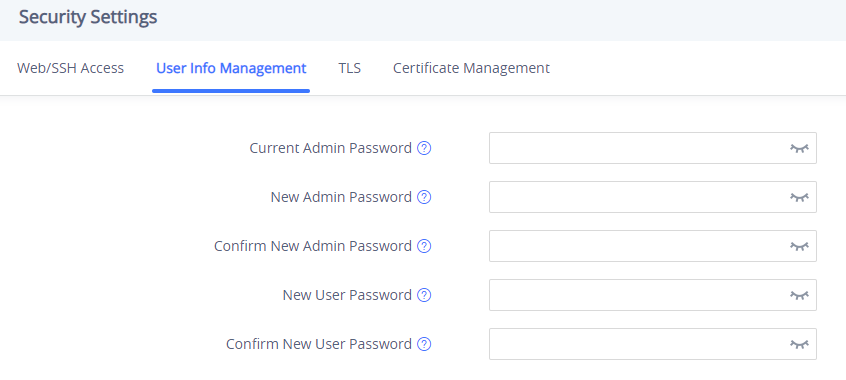
To change the password for default user “admin”, navigate to System Settings 🡪 Security Settings 🡪 User Info Management. The password length must between 6 and 32 characters. Strong password with a combination of numbers, uppercase letters, lowercase letters, and special characters is always recommended for security purpose:
User Management Levels
Two user privilege levels are currently supported:
- Admin
- User
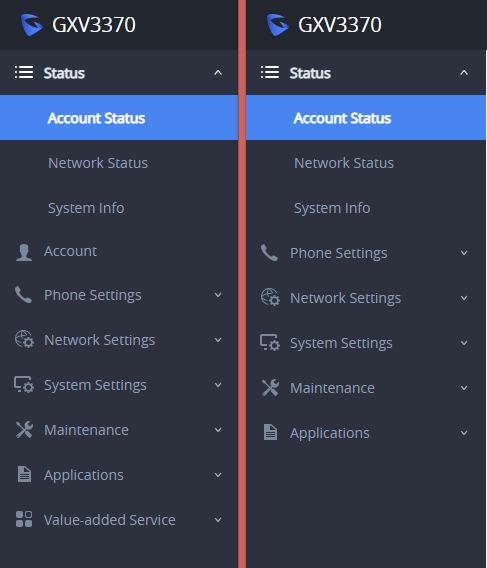
Admin login has access to all of the GXV3370/GXV3380/GXV3350’s entire web UI pages and can execute all available operations. User login has limited access to the web UI pages.
With user login, it is not allowed to configure the following settings:
- Account Settings
- Phone Settings 🡪 General Settings / Ringtone / Video Settings
- Network Settings 🡪 Advanced Network Settings
- System Settings 🡪 TR-069
- Maintenance 🡪 Upgrade / Event Notification
- Value-added Service
Even if user login can access certain web UI pages, it has less options compared to admin login, such as in System Settings 🡪 Security Settings page.
It is recommended to keep admin login with administrator only. And end user should be provided with user-level login only, if ever they need web UI access.
SSH Access
The GXV3370/GXV3380/GXV3350 allows access via SSH. This is usually not needed unless the administrator or Grandstream support needs it for troubleshooting purpose. SSH access on GXV33XX is enabled by default with port 22 used. It’s recommended to disable it for daily normal usage. If SSH access needs to be enabled, changing the port to a different port other than the well-known port 22 is a good practice.
DEVICE CONTROL SECURITY
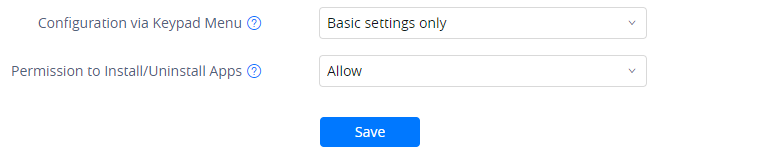
From GXV3370/GXV3380/GXV3350 web UI 🡪 System Settings 🡪 Security Settings 🡪 Web/SSH Access, administrator can set whether the user can use specific features or install apps from LCD, shown as below.
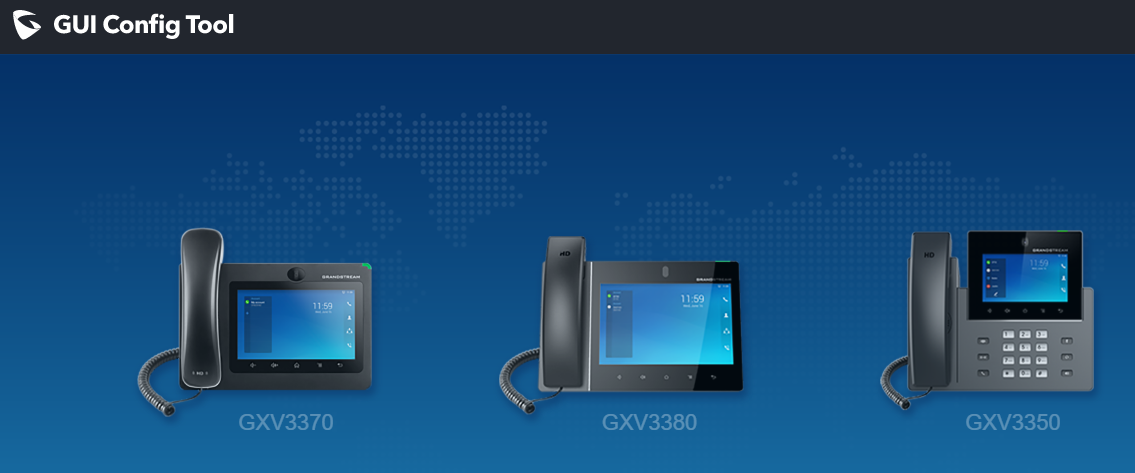
GUI Config Tool Settings
The GUI config tool is an online tool designed to customize the configuration for devices. Here is the link to the GUI config tool: http://tools.grandstream.com:8081
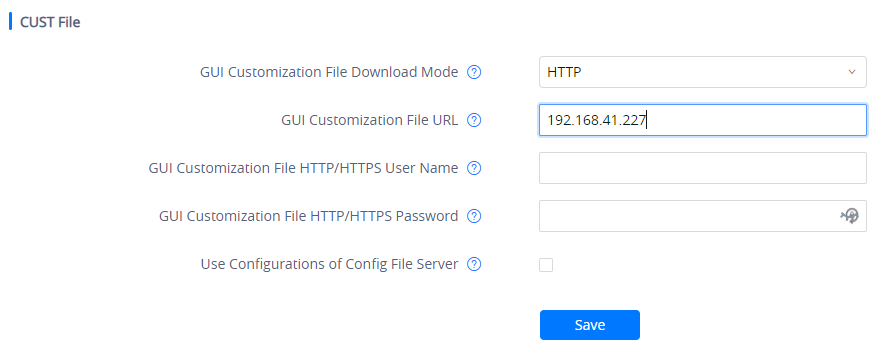
From there, the administrator can build a customized file to remove access for certain apps and task bar features. The tool would generate an XML file ( “gxv3370cust”, “gxv3380cust” or “gxv3350cust”) which should be uploaded to your local HTTP/TFTP server. Then the user needs to configure the server address as GUI Customization File URL under web UI 🡪 Maintenance 🡪 Upgrade 🡪 Config File to allow the file to be uploaded to the GXV33XX.
For more information, please refer to our GUI Customization Web Tool Guide : https://documentation.grandstream.com/knowledge-base/gxv33xx-gxv34xx-gac2570-gui-customization-web-tool-guide/
SECURITY FOR SIP ACCOUNTS AND CALLS
Protocols and Ports
By default, after factory reset, the SIP account 1 is active. Since the default local SIP port is 5060 for Account 1, this allows user to make direct IP call even if the account is not registered to any PBX. If the user is not using any account, it is recommended to uncheck the settings from web UI 🡪 Account 🡪 General Settings 🡪 Account Active to deactivate Account 1.
Note that GXV3370/GXV3380/GXV3350 supports up to 16 SIP accounts.
Below are the ports/protocols used on GXV33XX SIP accounts:
- SIP transport protocol:
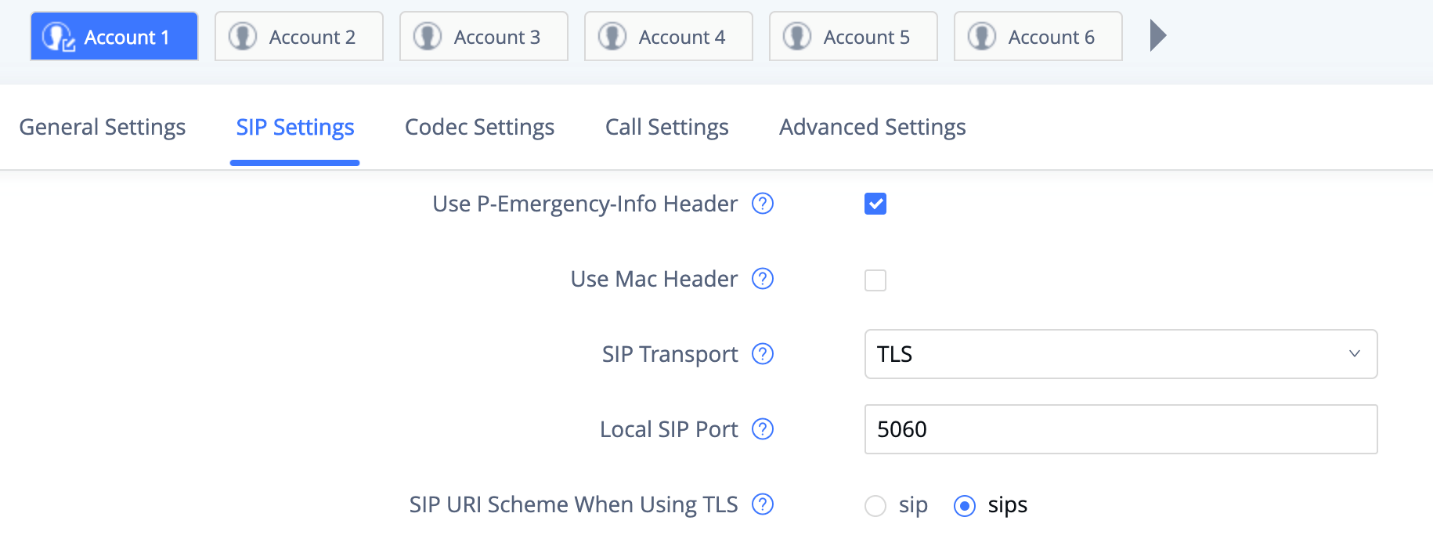
The GXV33XX supports SIP transport protocol “UDP” “TCP” and “TLS”. By default, it’s set to “UDP”. It’s recommended to use “TLS” so the SIP signaling is encrypted. SIP transport protocol can be configured per SIP account under web UI 🡪 Account 🡪 Account x 🡪 SIP Settings. When “TLS” is used, we recommend using “sips” instead of “sip” for SIP URI scheme to ensure the entire SIP transaction is secured instead of “best-effort”.
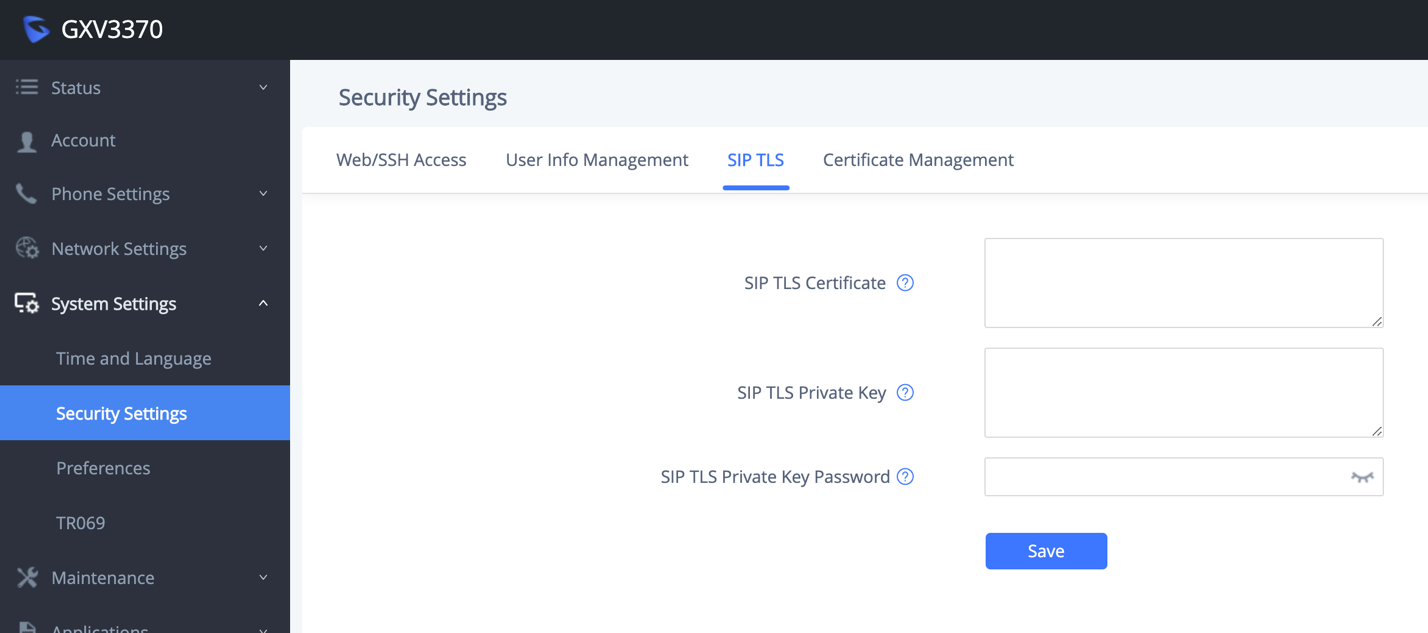
SIP TLS certificate, private key and password can be configured under GXV33XX web UI 🡪 System Settings 🡪 Security Settings 🡪 SIP TLS.
When SIP TLS is used, the GXV33XX also offers additional configurations to check domain certificate and validate certificate chain. These settings can be found under web UI 🡪 Account 🡪 Account x 🡪 Advanced Settings:
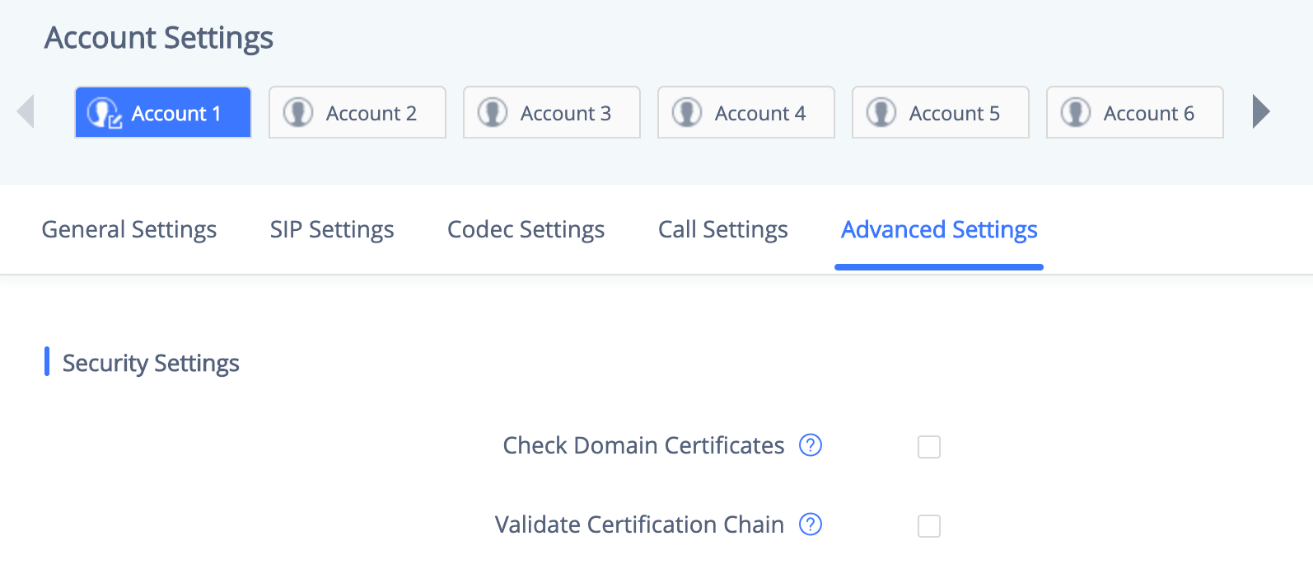
Check Domain Certificates | Set the phone system to check the domain certificates if TLS/TCP is used for SIP Transport. The default setting is “No”. |
Validate Certification Chain | Configure whether to validate certification chain, when TLS/TCP is configured for SIP Transport. If this is set to “Yes”, phone will validate server against the new certificate list. The default setting is “No”. |
- Local SIP port when using UDP/TCP:
Starting from 5060 for account 1, the port numbers increase by 2 for account x. For example, 5062 is the default local SIP port for account 2, 5064 for account 3, etc. The local SIP port can be configured under web UI 🡪 Account 🡪 Account x 🡪 SIP Settings.
- Local SIP port when using TLS:
The SIP TLS port is the UDP SIP port plus 1. For example, if account 1’s SIP port is 5060, its TLS port would be 5061.
- Local RTP port:
The default port value is 50040. The option can be configured from web UI 🡪 Phone Settings 🡪 General Settings.
Below is the range the GXV33XX uses for RTP flow:
(N is from 0 to 15, representing SIP account 1 to 16).
- Audio RTP port : Port_Value+10*N
- Audio RTCP port : Port_Value+10*N+1
- Video RTP port : Port_Value+10*N+2
- Video RTCP port : Port_Value+10*N+3
- FEC RTP port : Port_Value+10*N+4
- FEC RTCP port : Port_Value+10*N+5
- BFCP Protocol port : Port_Value+10*N+6
- BFCP RTP port : Port_Value+10*N+8
- BFCP RTCP port : Port_Value+10*N+9
Anonymous/Unsolicited Calls Protection
If the user would like to have anonymous calls blocked, please go to GXV3370/GXV3380/GXV3350 web UI 🡪 Account 🡪 Account x 🡪 Call Settings and enable option “Intercept Anonymous Calls”. This will automatically block the SIP call if the caller ID is anonymous.

Additionally, the GXV33XX has built-in mechanism that detects and stops the spam SIP calls from ringing the phones. Please see below web UI 🡪 Account 🡪 Account x 🡪 Advanced Settings. It is recommended to enable highlighted options to validate incoming SIP requests.

Only Accept SIP Requests from Known Servers | Answer the SIP request from saved servers when set to “Yes”, only the SIP requests from saved servers will be accepted; and the SIP requests from the unregistered server will be rejected. The default setting is “No”. |
Check SIP User ID for Incoming INVITE | Configure the phone system to check the SIP User ID in the Request URI of the SIP INVITE message from the remote party. If it doesn’t match the phone’s SIP User ID, the call will be rejected. The default setting is “No”. |
Authenticate Incoming INVITE | Configure the phone system to authenticate the SIP INVITE message from the remote party. If set to “Yes”, the phone will challenge the incoming INVITE for authentication with SIP 401 Unauthorized response. The default setting is “No”. |
SIP Realm used for Challenge INVITE & NOTIFY | Configure this item to validate incoming INVITE, but you must enable authenticate incoming INVITE first to make it take effect. You can verify the NOTIFY information for the provision, including check- sync, resync and reboot, but only when SIP NOTIFY authentication enabled first to make it take effect. |
SRTP
To protect voice communication from eavesdropping, the GXV3370/GXV3380/GXV3350 phones support SRTP for media traffic using AES 128&256. It is recommended to use SRTP if server supports it. SRTP can be configured in web UI 🡪 Account 🡪 Codec Settings 🡪 RTP Settings.
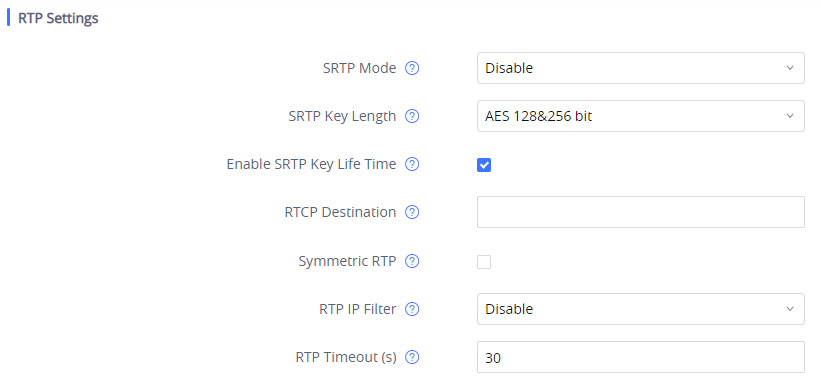
SRTP Mode | Set if the phone system will enable the SRTP (Secured RTP) mode. It can be selected from dropdown list:
SRTP uses encryption and authentication to minimize the risk of denial of service. (DoS). If the server allows to use both RTP and SRTP, it should be configured as “Enabled but not forced”. The default setting is “Disable”. |
SRTP Key Length | Configure all the AES (Advanced Encryption Standard) key size within SRTP. It can be selected from dropdown list:
If it is set to “AES 128&256 bit”, the phone system will provide both AES 128 and 256 cipher suite for SRTP. If set to “AES 128 bit”, it only provides 128-bit cipher suite; if set to “AES 256 bit”, it only provides 256-bit cipher suite. The default setting is “AES128&256 bit”. |
Enable SRTP Key Life Time | Define the SRTP key life time. When this option is set to be enabled, during the SRTP call, the SRTP key will be valid within 231 SIP packets, and phone will renew the SRTP key after this limitation. Default is “Yes”. |
NETWORK SECURITY
OpenVPN®
The GXV3370/GXV3380/GXV3350 supports OpenVPN® and by default it’s disabled. It can be enabled and used for secure remote connection as shown in the figure below:

If the device is using OpenVPN® to access network, it is recommended to use a different port other than the default well-known port 1194 for added security. Please see OpenVPN® related settings shown as below from web UI 🡪 Network Settings 🡪 OpenVPN® Settings.
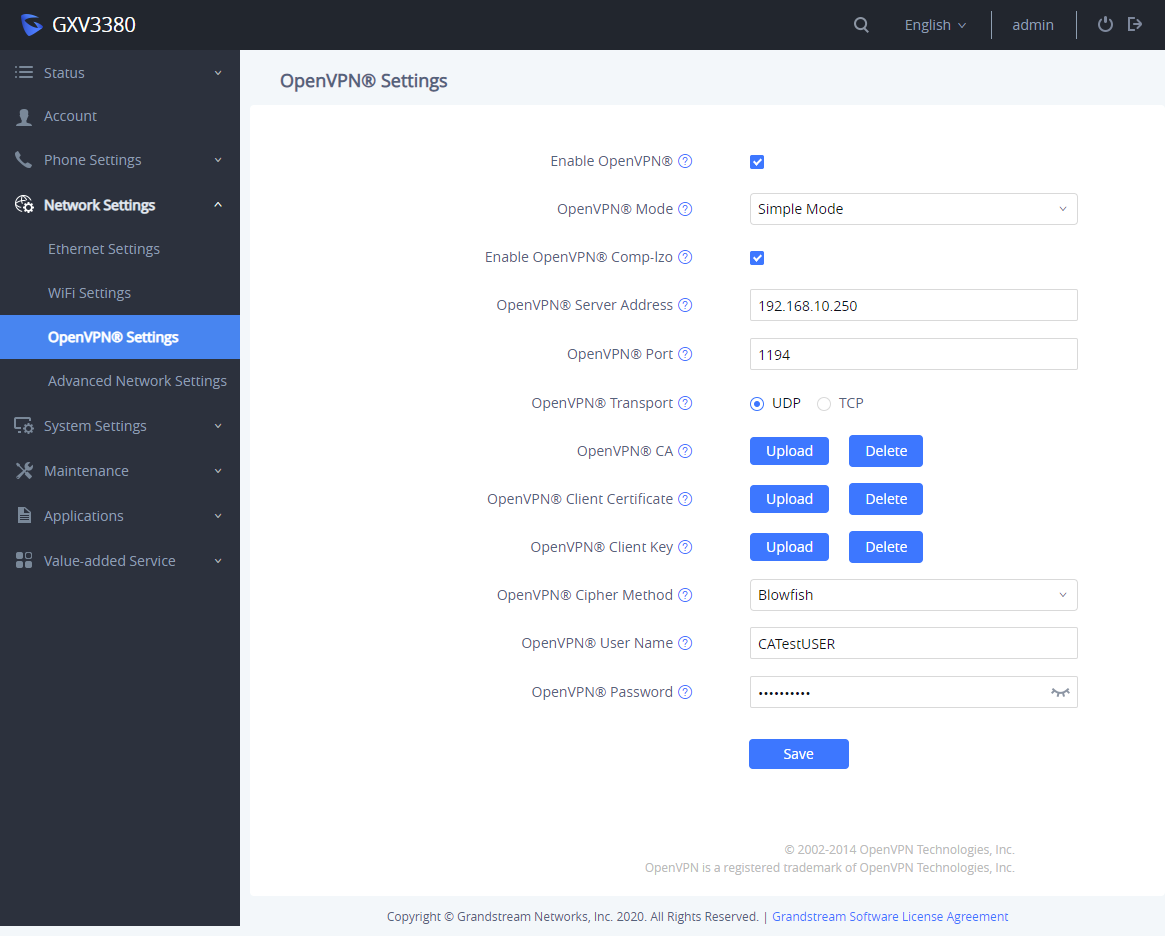
Enable OpenVPN® | This enables/disables OpenVPN® functionality and requires the user to have access to an OpenVPN® server. The default setting is No. NOTE: To use OpenVPN® functionalities, users must enable OpenVPN® and configure all the settings related to OpenVPN®, including server address, port, OpenVPN® CA, certificate and key. Additionally, the user must also set the SIP account to use “VPN” for the “Nat Traversal” (under Account 🡪 Network Settings). |
OpenVPN® Mode | Specify OpenVPN® mode:
Default setting is “Simple Mode”. |
Enable OpenVPN® Comp-lzo | Configure to enable/disable the LZO compression. When the LZO Compression is enabled on the OpenVPN server, you must turn on it at the same time. Otherwise, the network will fail to connect. Default is disabled. |
OpenVPN® Server Address | The URL/IP address for the OpenVPN® server. |
OpenVPN® Port | The network port for the OpenVPN® server. By default, it is set to 1194. |
OpenVPN® Transport | Determine transport protocol (UDP or TCP) used for OpenVPN®. Default is UDP. |
OpenVPN® CA | OpenVPN® CA file (ca.crt) required by the OpenVPN® server for authentication purposes. Press “Upload” to upload the corresponding file to the device. |
OpenVPN® Client Certificate | OpenVPN® Client certificate file (*.crt) required by the OpenVPN® server for authentication purposes. Press “Upload” to upload the corresponding file to the device. |
OpenVPN® Client Key | The OpenVPN® Client key (*.key) required by the OpenVPN® server for authentication purposes. Press “Upload” to upload the corresponding file to the device. |
OpenVPN® Cipher Method | The cipher method of OpenVPN®, must be the same cipher method used by the OpenVPN® server. Available methods are: Blowfish, AES-128 or AES-256. Default is “Blowfish” |
OpenVPN® Username | OpenVPN® authentication username (optional). |
OpenVPN® Password | OpenVPN® authentication username (optional). |
802.1X
The GXV3370/GXV3380/GXV3350 supports EAPOL where access to switchports can be controlled with identity/password and certificate as shown on the figure below:
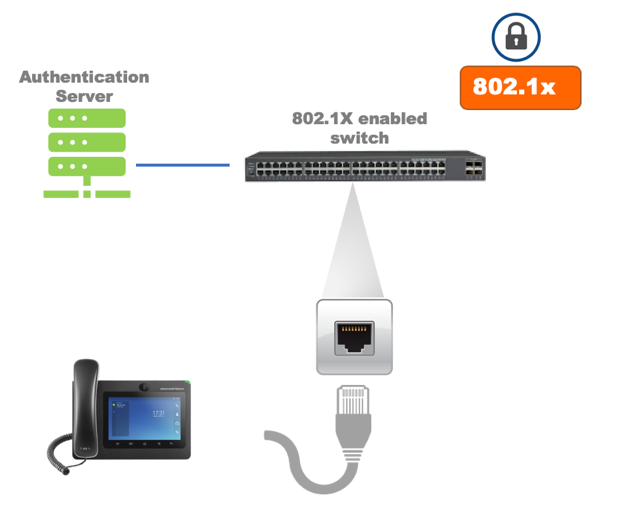
By default, it’s disabled. When it’s enabled, there are 3 different mode for selection: EAP-MD5, EAP-TLS and EAP-PEAP. Network administrators can set this up accordingly for media access control and network security purpose from web UI 🡪 Network Settings 🡪 Ethernet Settings 🡪 802.1X Mode
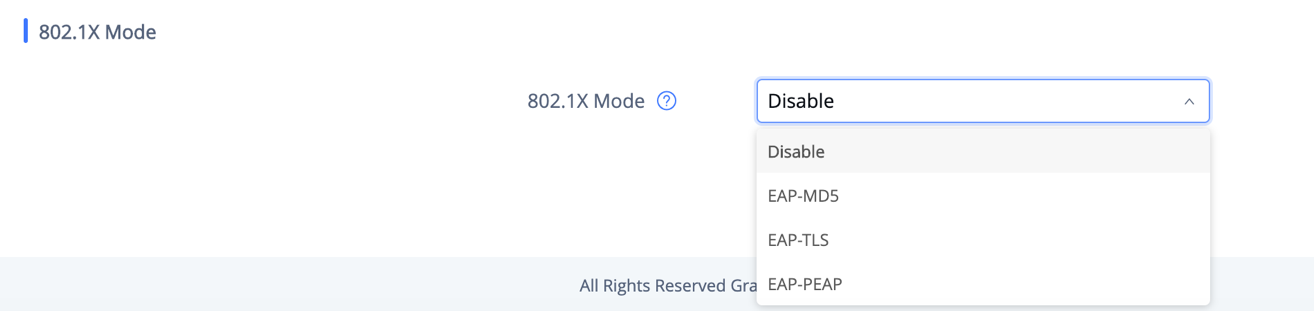
802.1x Mode | Enable and select the 802.1x mode for the phone system. The supported 802.1x modes are: EAP-MD5, EAP-TLS, EAP-PEAP The default setting is “Disable”. |
802.1x Identity | Enter the identity information for the selected 802.1x mode. |
802.1x Secret | Enter the secret for the 802.1x mode. |
CA Certificate | Upload the CA Certificate file to the phone. (This setting will be displayed only if the 802.1x TLS or EAP-PEAP mode is enabled) |
Client Certificate | Load the Client Certificate file to the phone. (This setting will be displayed only if the 802.1 X TLS mode is enabled) |
Private Key | Load the private key file to the phone. (This setting will be displayed only if the 802.1 X TLS mode is enabled) |
Bluetooth
The GXV3370/GXV3380/GXV3350 supports Bluetooth for Bluetooth headset connection, file transferring and handsfree mode for cell phones. By default, Bluetooth is disabled and it can be enabled from LCD. If there is no Bluetooth device used with GXV33XX, it’s recommended to turn off Bluetooth so it’s not discoverable by nearly Bluetooth devices.
PC Port Mode
The GXV3370/GXV3380/GXV3350 has dual switched 10/100/1000Mbps ports. LAN port is for network access and PC port has multiple mode. Assuming GXV33XX has network access, PC port mode has the following setting under web UI 🡪 Network Settings 🡪 Advanced Network Settings 🡪 PC Port Mode
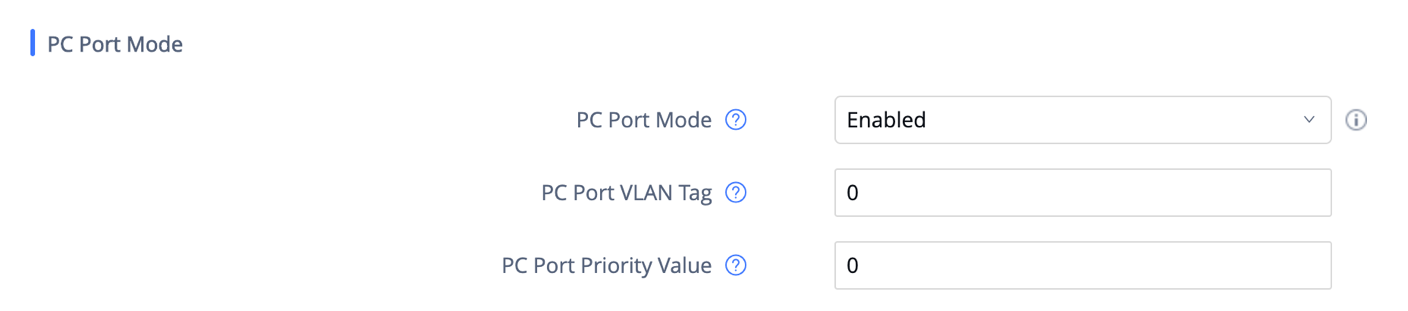
PC Port Mode | Enable and define the PC port mode as below:
A reboot is required to take effect. The default setting is “Enabled”. |
PC Port VLAN Tag | Define the VLAN Identifier of the Layer 2 frame for PC port. This adds the VLAN tag value on the target address received from the LAN port of the phone then sends the value to the device connected to the PC port. Note: VLAN tag value on the device connected to the PC port should be the same as the VLAN tag value assigned to the PC port here. |
PC Port Priority Value | Determine the Priority Code Point within a Layer 2 frame header for PC port. |
SECURITY FOR GXV33XX SERVICES
Provisioning via Configuration File
The GXV3370/GXV3380/GXV3350 supports downloading configuration file via HTTP/HTTPS/TFTP. Below figure shows the options for config file provisioning.
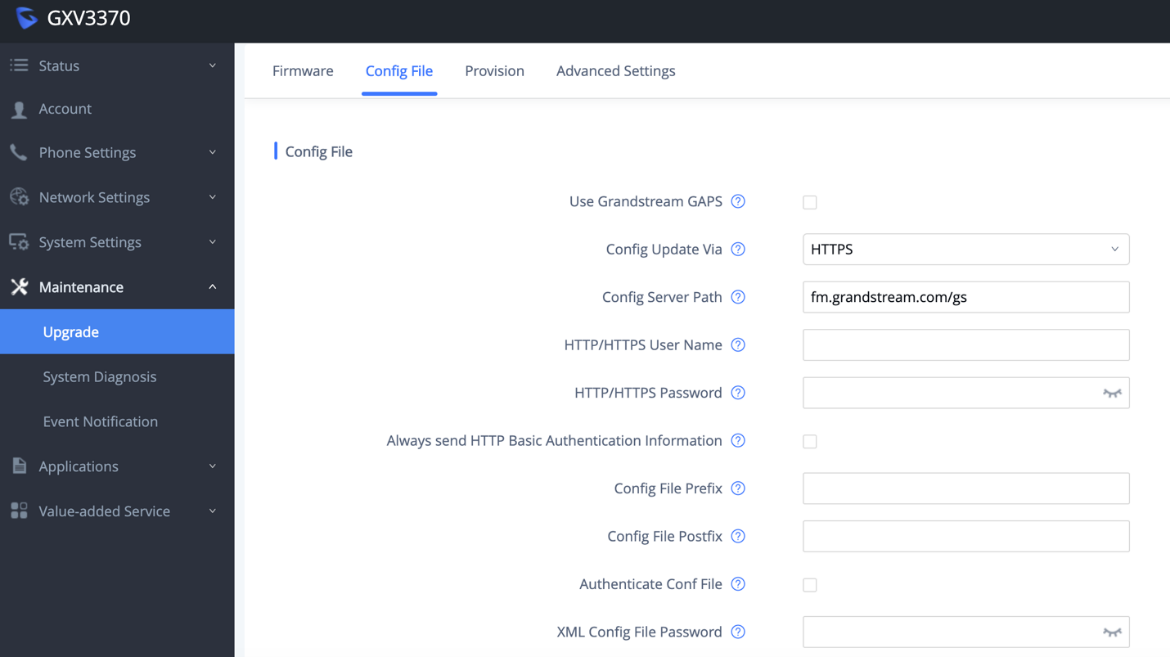
We recommend users to consider the following options for added security when deploying the GXV33XX with provisioning.
- Config Upgrade Via: HTTPS:
By default, HTTPS is selected. This is recommended so the traffic is encrypted while travelling through the network.
- HTTP/HTTPS User Name and Password:
This can be set up as required on the provisioning server when HTTP/HTTPS is used. Only when the GXV33XX has the correct username and password configured, it can be authenticated by the provisioning server and the config file can be downloaded.
- Authenticate Config file:
This sets the GXV33XX to authenticate configuration file before applying it. When set to “Yes”, the configuration file must include P value P1 with GXV33XX’s administration password. If it is missed or does not match the password, the GXV33XX will not apply the config file.
- XML Config File Password:
The GXV33XX XML config file can be encrypted using OpenSSL. When it’s encrypted, the GXV33XX must supply the correct password in this field so it can decrypt XML configuration file after downloading it. Then the configuration can be applied to the GXV33XX. Please note this feature is supported on XML config file instead of the binary config file. Therefore, it’s recommended to use XML config file format and encrypt it with this feature.
- Validate Certificate Chain:
This configures whether to validate the server certificate when downloading the firmware/config file. If set to “Yes”, the phone will download the firmware/config file only from the legitimate server.
GXV33XX supports uploading CA certificate to validate the server certificate and this setting is under GXV33XX web UI 🡪 System Settings 🡪 Security Settings 🡪 Certificate Management.
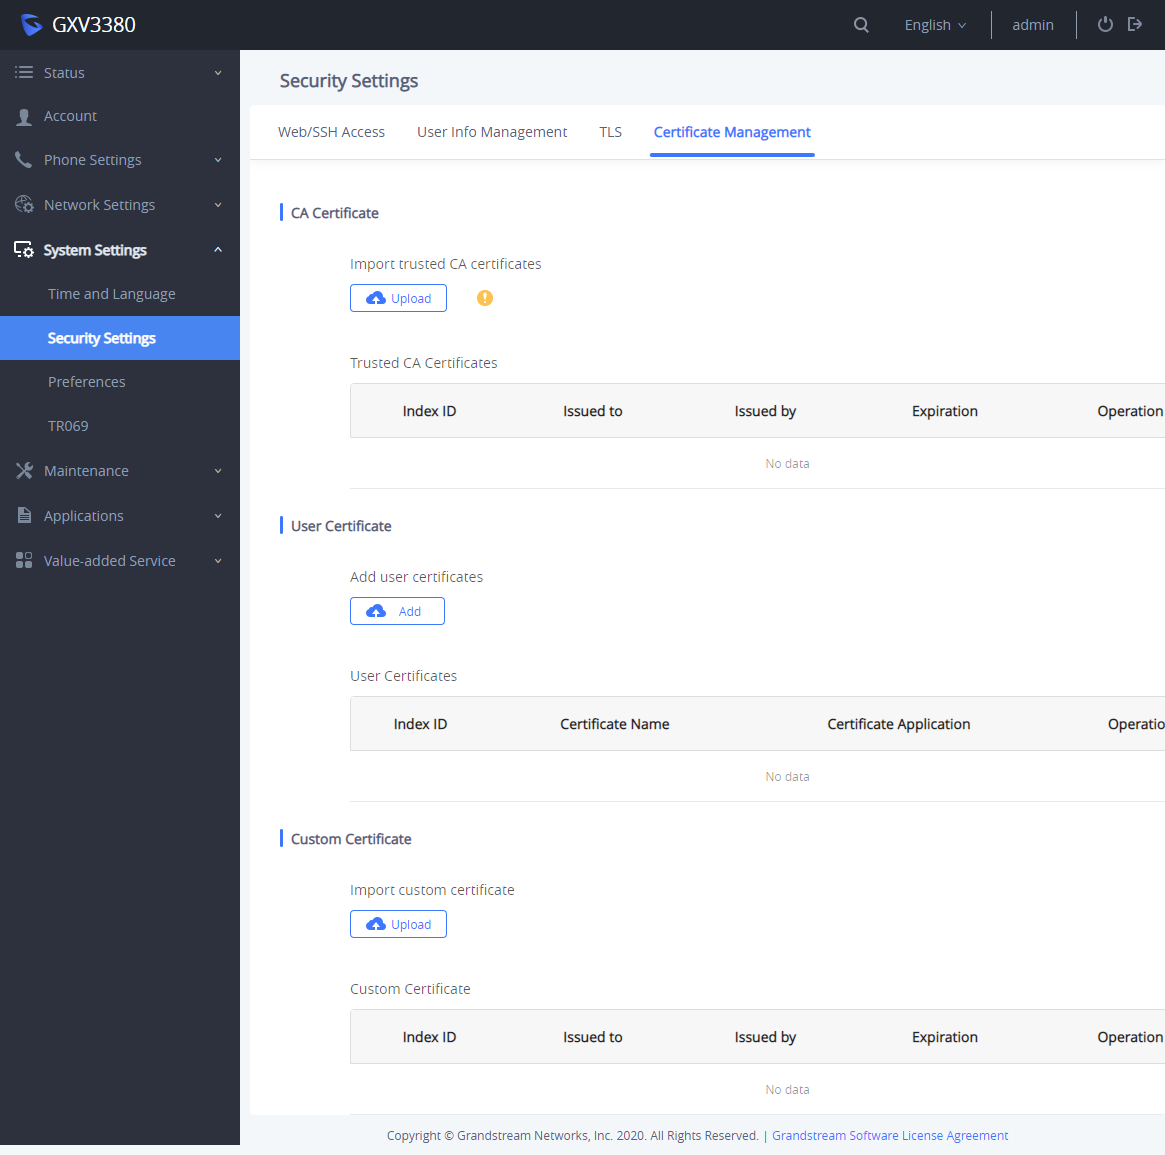
CA Certificate | |
Import Trusted CA Certificates | Allow to upload the CA Certificate file to phone. |
Trusted CA Certificates | List trusted CA certificates previously uploaded. Administrator can delete a certificate from here. |
User Certificate | |
Add Certificate | Allow to upload & Install User Certificate file to phone. |
Custom Certificate | |
Import Custom Certificate | Allow to upload a Custom Certificate file to phone. |
Custom Certificate | List trusted Custom Certificate previously uploaded. Administrator can delete a certificate from here. |
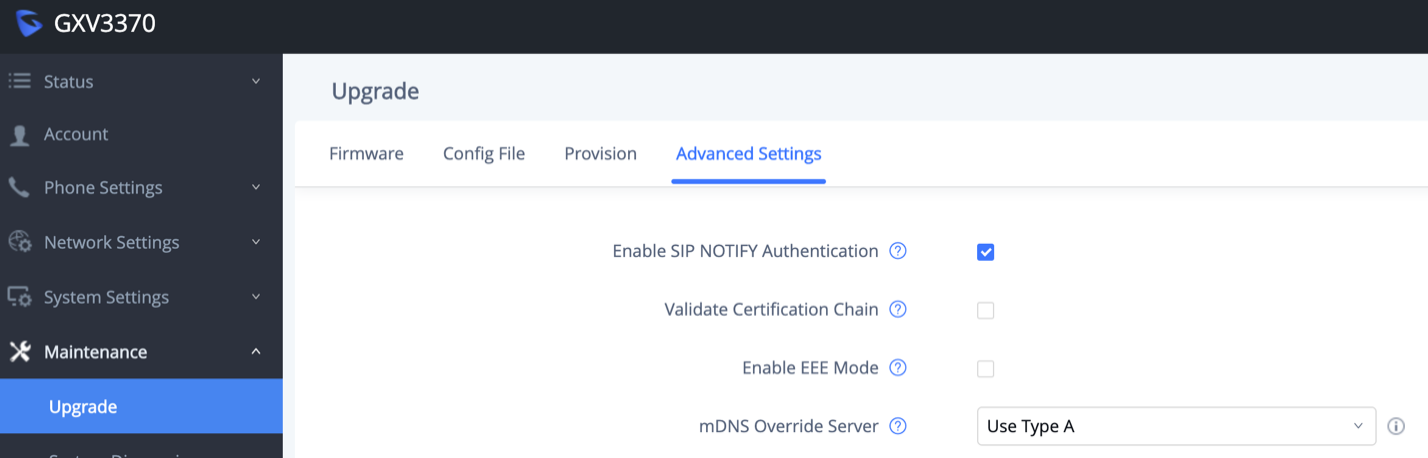
Firmware Upgrading
Similar to configuration file provisioning, GXV3370/GXV3380/GXV3350 supports downloading firmware file via HTTP/HTTPS/TFTP. The firmware file is encrypted and GXV33XX ensures only authentic, signed and untampered firmware file can run. Here are the recommended settings for firmware downloading.
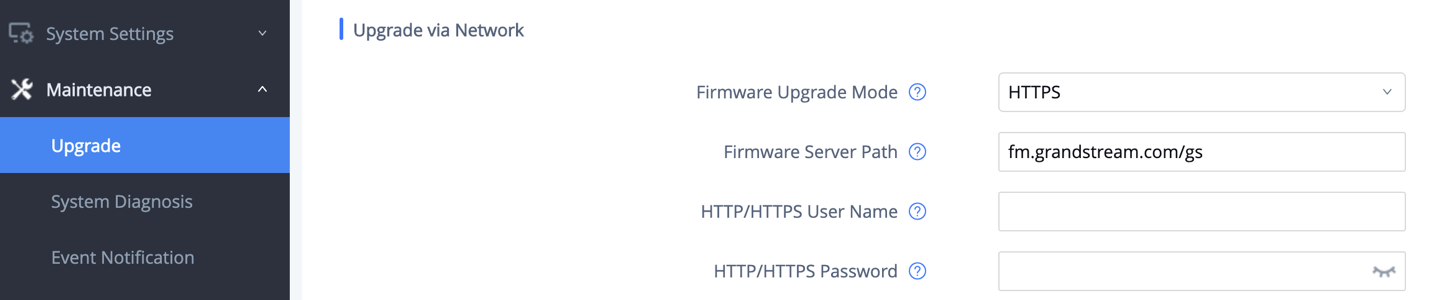
- Firmware Upgrade Mode: HTTPS.
HTTPS is recommended so the traffic is encrypted while travelling through the network.
- HTTP/HTTPS User Name and Password:
This can be set up as required on the provisioning server when HTTP/HTTPS is used. Only when the GXV33XX has the correct username and password configured, it can be authenticated by the firmware server and the firmware file will be downloaded.
- Validate Certificate Chain:
This configures whether to validate the server certificate when downloading the firmware/config file. If set to “Yes”, the phone will download the firmware/config file only from the legitimate server.
TR-069
TR-069 is enabled by default, which means the connection request port 7547 is open for TR-069 session. If the user does not need TR-069 service, it’s recommended to disable it. When TR-069 is enabled and the service is to be used, users can also consider using a different connection request port other than the well-known port 7547 for security purpose.
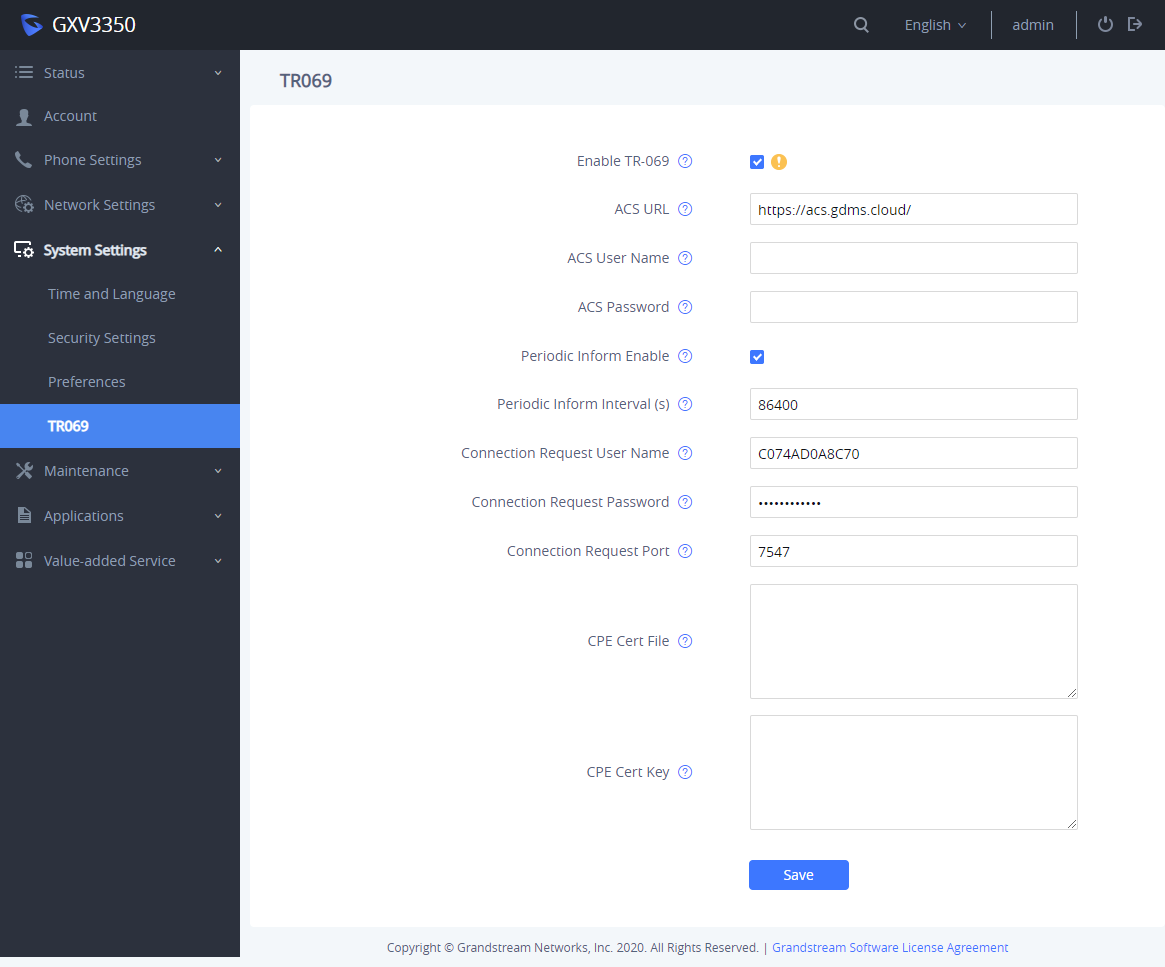
Enable TR-069 | Set the phone system to enable the “CPE WAN Management Protocol” (TR-069). The default setting is “Yes”. |
ACS URL | Specify URL of TR-069 ACS (e.g., http://acs.mycompany.com), or IP address. Default setting is “https://acs.gdms.cloud”. |
ACS User Name | Enter user name to authenticate to ACS. |
ACS Password | Enter password to authenticate to ACS. |
Periodic Inform Enable | Send periodic inform packets to ACS. Default is “Yes”. |
Periodic Inform Interval (s) | Configure to send periodic “Inform” packets to ACS based on specified interval. Default setting is 86400. |
Connection Request User Name | Enter user name for the ACS to connect to the phone. |
Connection Request Password | Enter password for the ACS to connect to the phone. |
Connection Request Port | Enter the port for the ACS to connect to the phone. |
CPE Cert File | Upload Cert File for the phone to connect to the ACS via SSL. |
CPE Cert Key | Upload Cert Key for the phone to connect to the ACS via SSL. |
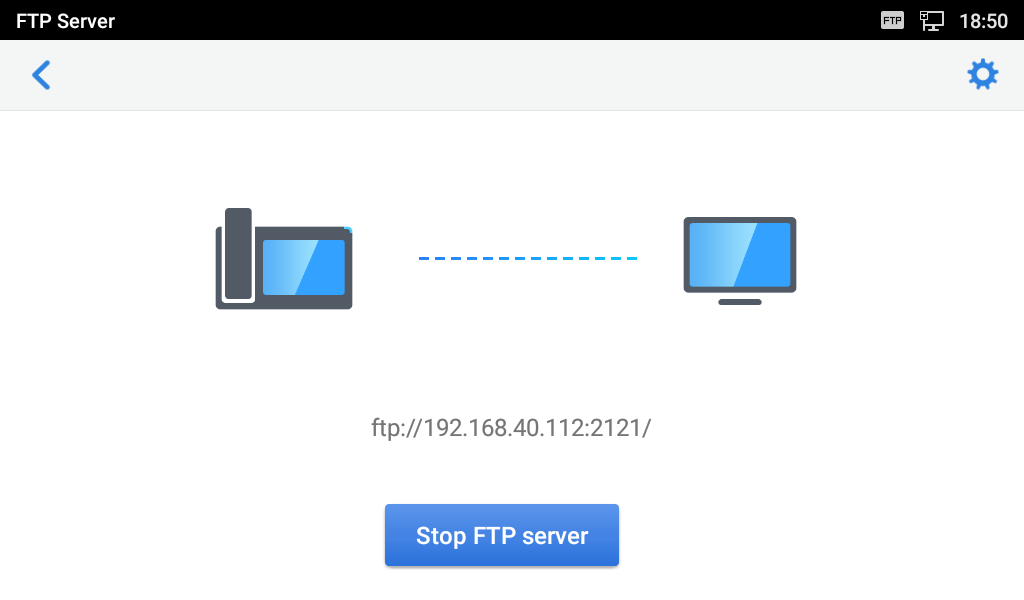
FTP Server
FTP server is disabled by default on GXV3370/GXV3380/GXV3350. It can be enabled from LCD menu 🡪 File Manager app. FTP service on GXV33XX uses port 2121. After the user enables FTP server and connects to it, GXV33XX files can be browsed as screenshots from a remote PC. It is recommended to disable the FTP server during normal usage, and only turn it on for specific purpose. Once done, please disable the FTP server.
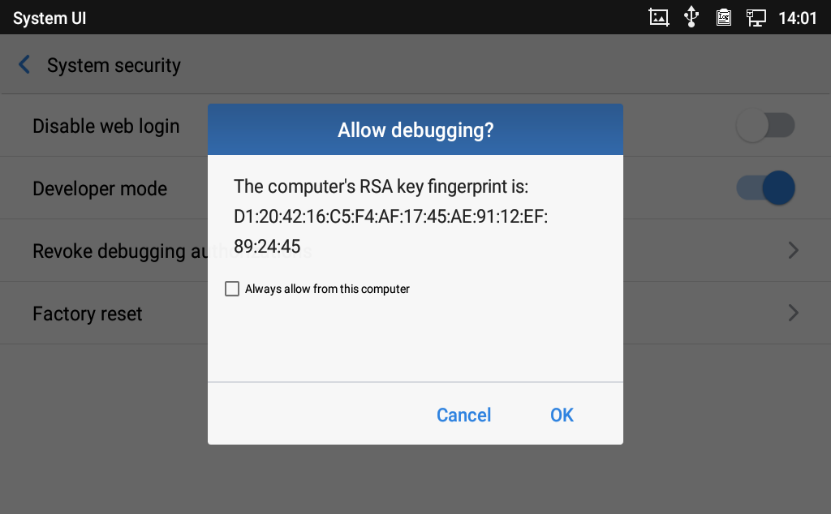
ADB Service
Android Debug Bridge (ADB) is a versatile command-line tool that allows users to communicate with GXV3370/GXV3380/GXV335 for installing apps, debugging apps and running specific commands. To enable ADB connection, users must turn on developer mode under LCD menu 🡪 Settings 🡪 System security first and accept the RSA key from remote device to allow access. The port number used for ADB connection is 5555. It is not recommended to enable developer mode if ADB connection is not needed.
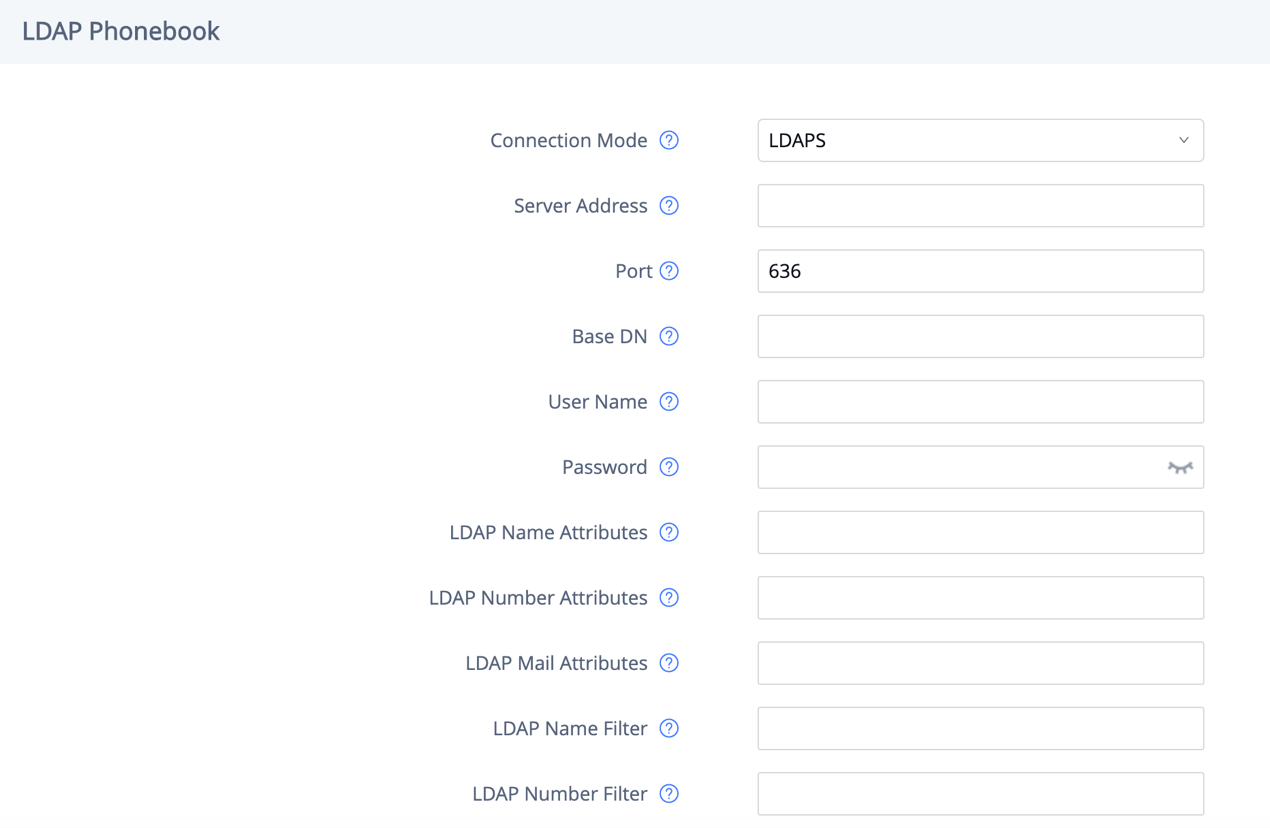
LDAP
The GXV3370/GXV3380/GXV335 supports LDAP to obtain enterprise contacts from LDAP server. It’s recommended to change the default ports and connection mode “LDAP” to “LDAPS” to protect and encrypt LDAP queries and responses using SSL/TLS.
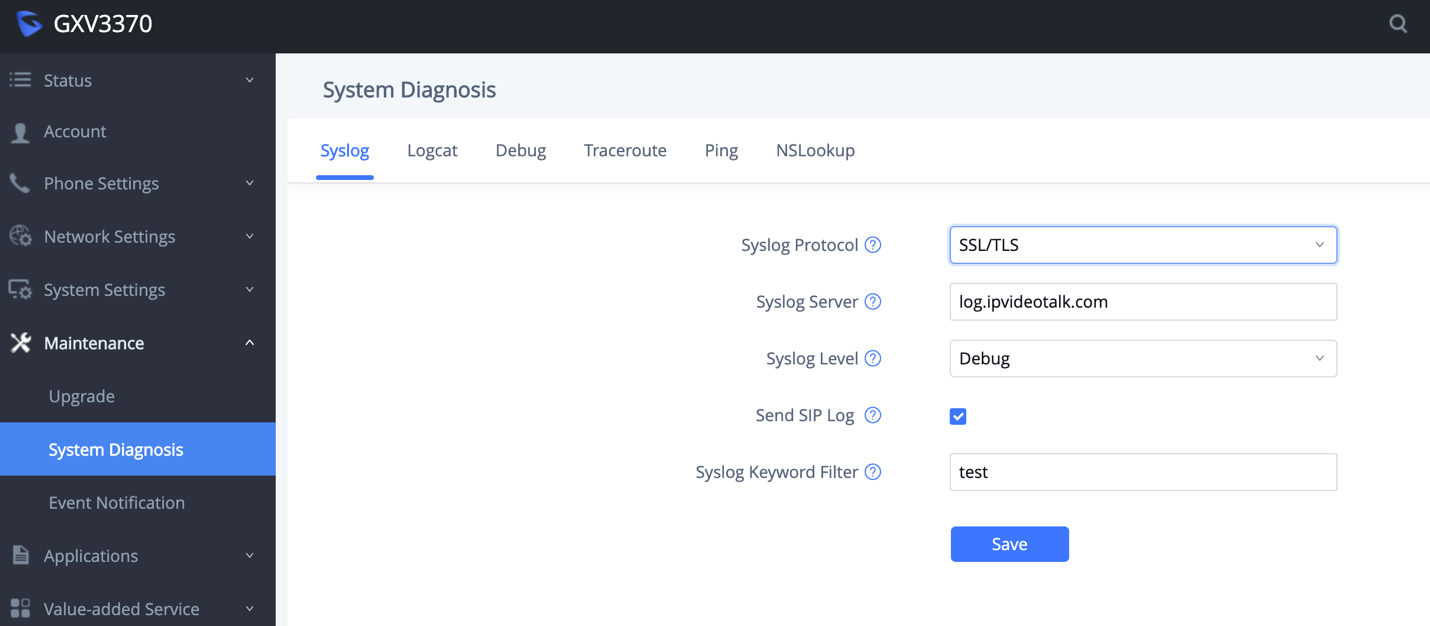
Syslog
The GXV3370/GXV3380/GXV3350 supports sending Syslog to a remote syslog server. By default, it’s sent via UDP and we recommend to change it to “SSL/TLS” so the syslog messages containing device information will be sent securely over TLS connection.
SECURITY GUIDELINES FOR GXV33XX DEPLOYMENT
Often times the GXV3370/GXV3380/GXV3350 phones are deployed behind NAT. The network administrator can consider following security guidelines for the GXV33XX to work properly and securely.
- Turn off SIP ALG on the router
On the customer’s router, it’s recommended to turn off SIP ALG (Application Layer Gateway). SIP ALG is common in many routers intending to prevent some problems caused by router firewalls by inspecting VoIP packets and modifying it if necessary. Even though SIP ALG intends to prevent issues for VoIP devices, it can be implemented imperfectly causing problems, especially in some cases SIP ALG modifies SIP packets improperly which might cause VoIP devices fail to register or establish calls.
- Use TLS and SRTP for SIP calls
On the GXV33XX, it’s recommended to use TLS for SIP transport with “sips” in SIP URL scheme for SIP signaling encryption, and use SRTP for media encryption. Below table lists all the SIP ports and RTP ports used on the GXV33XX if the network administrator needs to create firewall rules.
SIP Account x | Default Local SIP Port | Audio RTP/RTCP Port | Video RTP/RTCP Port | FEC RTP/RTCP Port | BFCP Protocol Port BFCP RTP/RTCP Port |
Account 1 | 5060 for UDP/TCP 5061 for TLS | RTP: 50040 RTCP: 50041 | RTP: 50042 RTCP: 50043 | RTP: 50044 RTCP: 50045 | BFCP Protocol: 50046 |
Account 2 | 5062 for UDP/TCP 5063 for TLS | RTP: 50050 RTCP: 50051 | RTP: 50052 RTCP: 50053 | RTP: 50054 RTCP: 50055 | BFCP Protocol: 50056 |
Account 3 | 5064 for UDP/TCP 5065 for TLS | RTP: 50060 RTCP: 50061 | RTP: 50062 RTCP: 50063 | RTP: 50064 RTCP: 50065 | BFCP Protocol: 50066 |
Account 4 | 5066 for UDP/TCP 5067 for TLS | RTP: 50070 RTCP: 50071 | RTP: 50072 RTCP: 50073 | RTP: 50074 RTCP: 50075 | BFCP Protocol: 50076 |
Account 5 | 5068 for UDP/TCP 5069 for TLS | RTP: 50080 RTCP: 50081 | RTP: 50082 RTCP: 50083 | RTP: 50084 RTCP: 50085 | BFCP Protocol: 50086 |
Account 6 | 5070 for UDP/TCP 5071 for TLS | RTP: 50090 RTCP: 50091 | RTP: 50092 RTCP: 50093 | RTP: 50094 RTCP: 50095 | BFCP Protocol: 50096 |
Account 7 | 5072 for UDP/TCP 5073 for TLS | RTP: 50100 RTCP: 50101 | RTP: 50102 RTCP: 50103 | RTP: 50104 RTCP: 50105 | BFCP Protocol: 50106 |
Account 8 | 5074 for UDP/TCP 5075 for TLS | RTP: 50110 RTCP: 50111 | RTP: 50102 RTCP: 50103 | RTP: 50104 RTCP: 50105 | BFCP Protocol: 50106 |
Account 9 | 5076 for UDP/TCP 5077 for TLS | RTP: 50120 RTCP: 50121 | RTP: 50122 RTCP: 50123 | RTP: 50124 RTCP: 50125 | BFCP Protocol: 50126 |
Account 10 | 5078 for UDP/TCP 5079 for TLS | RTP: 50130 RTCP: 50131 | RTP: 50132 RTCP: 50133 | RTP: 50134 RTCP: 50135 | BFCP Protocol: 50136 |
Account 11 | 5080 for UDP/TCP 5081 for TLS | RTP: 50140 RTCP: 50141 | RTP: 50142 RTCP: 50143 | RTP: 50144 RTCP: 50145 | BFCP Protocol: 50146 |
Account 12 | 5082 for UDP/TCP 5083 for TLS | RTP: 50150 RTCP: 50151 | RTP: 50152 RTCP: 50153 | RTP: 50154 RTCP: 50155 | BFCP Protocol: 50156 |
Account 13 | 5084 for UDP/TCP 5085 for TLS | RTP: 50160 RTCP: 50161 | RTP: 50162 RTCP: 50163 | RTP: 50164 RTCP: 50165 | BFCP Protocol: 50166 |
Account 14 | 5086 for UDP/TCP 5087 for TLS | RTP: 50170 RTCP: 50171 | RTP: 50172 RTCP: 50173 | RTP: 50174 RTCP: 50175 | BFCP Protocol: 50176 |
Account 15 | 5088 for UDP/TCP 5089 for TLS | RTP: 50180 RTCP: 50181 | RTP: 50182 RTCP: 50183 | RTP: 50184 RTCP: 50185 | BFCP Protocol: 50186 |
Account 16 | 5090 for UDP/TCP 5091 for TLS | RTP: 50190 RTCP: 50191 | RTP: 50192 RTCP: 50193 | RTP: 50194 RTCP: 50195 | BFCP Protocol: 50196 |
- Use HTTPS for web UI access
GXV33XX Web UI access should be equipped with strong administrator password in additional to using HTTPS. Also, do not expose the GXV33XX web UI access to public network for normal usage.
- Use HTTPS for firmware downloading and config file downloading
Use HTTPS for firmware downloading and provisioning. Besides that, set up username and password for the HTTP/HTTPS server to require authentication. It’s also recommended to turn on “Validate Certification Chain” so the GXV33XX will validate server certificate when downloading the firmware or config file.
* Android is a trademark of Google LLC.