The GXV3370/GXV3350/GXV3380 have integrated Dual-Band (2.4GHz & 5GHz) Wi-Fi that supports 802.11a/b/g/n, and 802.11a/b/g/n/ac (GXV3380 only) for network flexibility. This User Guide describes how to use the Wi-Fi function to connect the GXV33XX into your local network. To learn more about GXV33XX’s basic and advanced features.
Please visit http://www.grandstream.com/support to download the latest “GXV33XX User Guide” and “GXV33XX Administration Guide”.
CONNECT TO WI-FI
Wi-Fi is supported and built-in on all GXV33XX models. GXV3370/GXV3350/GXV3380 can be connected to network if Wi-Fi is available within the area. By default, Wi-Fi is turned off on the GXV33XX. Users can turn on Wi-Fi from web UI, LCD settings🡪System Settings or provisioning.
Turn on/off Wi-Fi
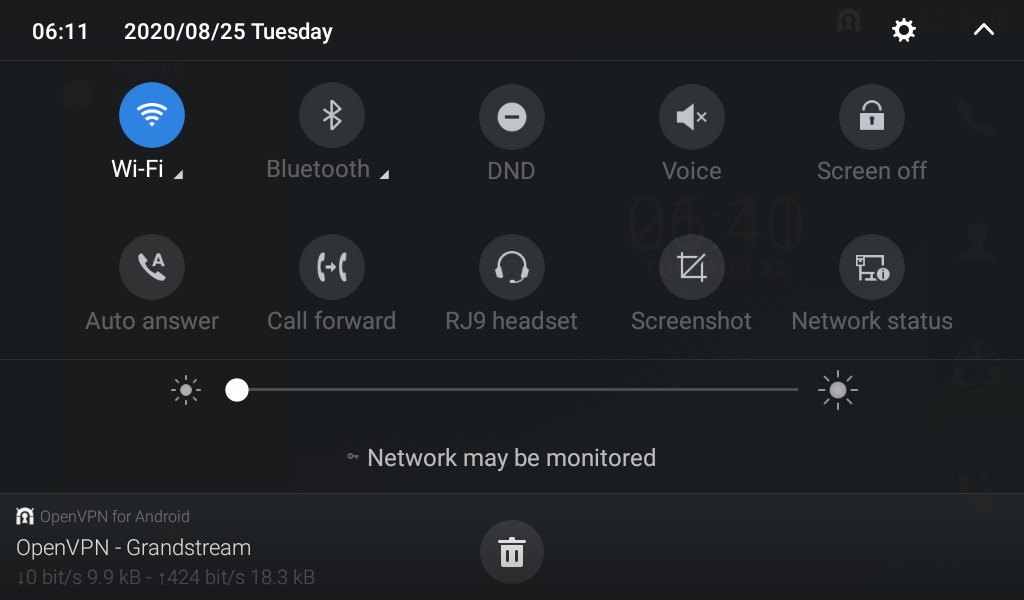
Turn on/off Wi-Fi from Status Bar
- On the top of the LCD screen, slide down the status bar.
- Tap on the Wi-Fi icon
 to turn it On/Off.
Turn on/off Wi-Fi from System Settings
- On the LCD Menu, Select Settings
 .
. - Select Wi-Fi.
- Tap on Wi-Fi to turn it on/off.
Turn on/off Wi-Fi from Web UI
- Log in the GXV33XX web UI.
- Go to Network Settings 🡪Wi-Fi Settings: Wi-Fi Basics.
- Click on to enable or disable “Wi-Fi Function”.
Connect to Wi-Fi Networks
Connect to Wi-Fi Networks from LCD
- Once Wi-Fi is turned on, GXV33XX will automatically start the scanning within the range.
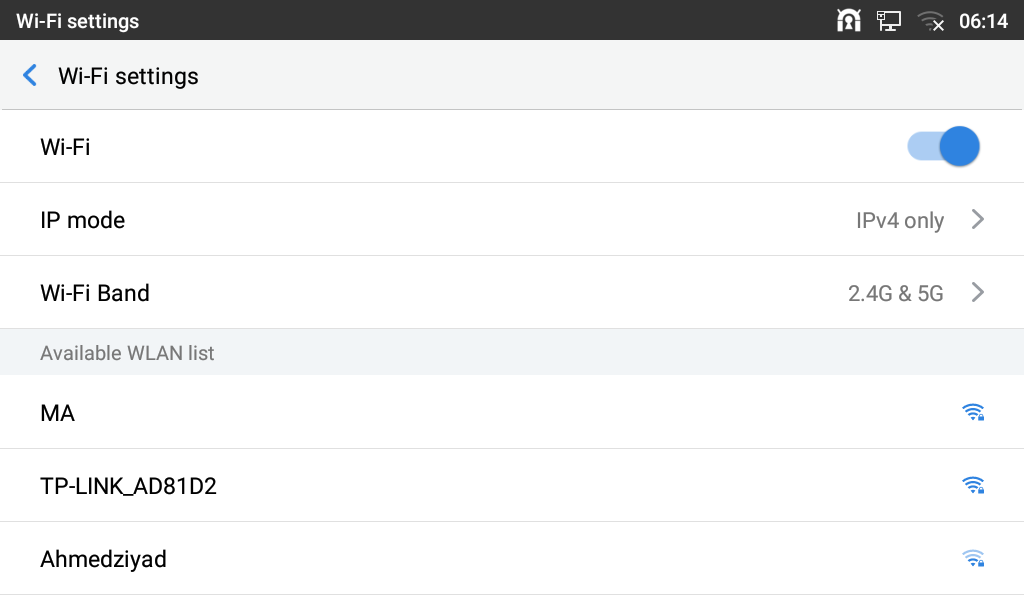
- On GXV33XX LCD Menu, Select Settings .
- Select Wi-Fi.
- A list of nearby available Wi-Fi SSIDs will be displayed under “Available WLAN list”.

- A list of Wi-Fi networks will be displayed as scanning result. Tap on the SSID and enter the correct password information to connect to the selected Wi-Fi network.
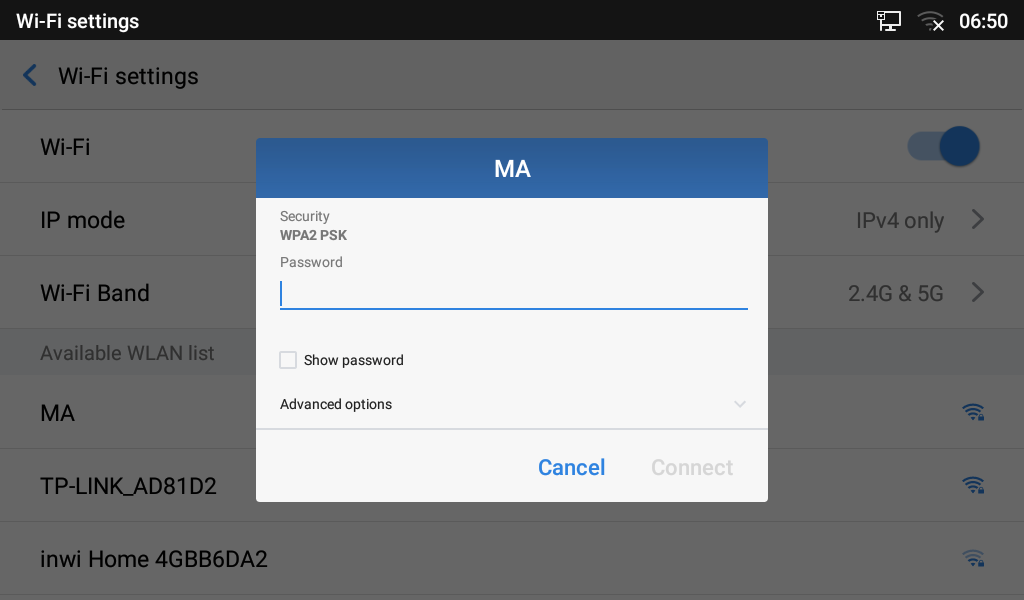
- The phone will start connecting to the Wi-Fi. The status bar will show Wi-Fi signal strength.
- Once authenticated, the phone will obtain IP address via DHCP and connect to the Wi-Fi network.
- After successfully connected, the password will be remembered. When the GXV33XX has Wi-Fi turned on in the future, it will connect to this network if the SSID is within the range.
Connect to Wi-Fi Networks from Web UI
- Log in the GXV33XX web UI.
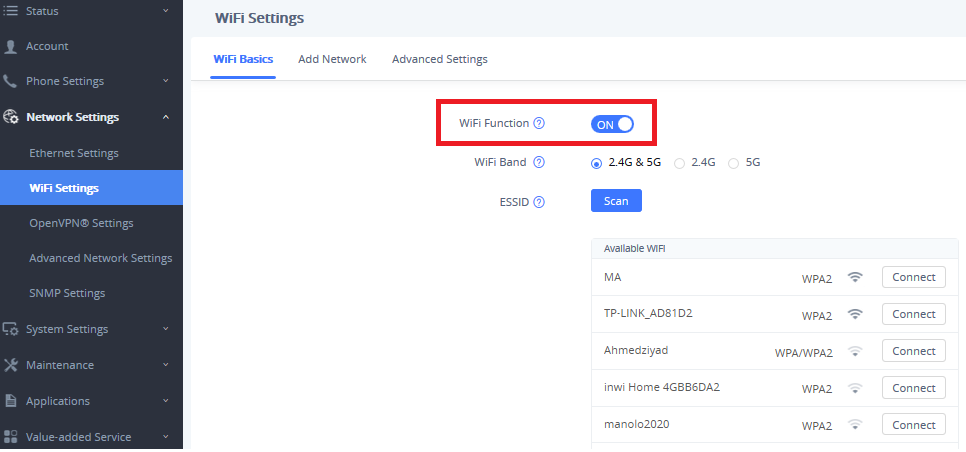
- Go to “Network Settings” → “Wi-Fi Settings” → “Wi-Fi Basics” Click on to enable “Wi-Fi Function”.
- Click on “Scan” to start searching for the Wi-Fi networks within the area. A list of available ESSIDs will be displayed.
- Select the ESSID and click on “Connect”.
- Enter the password for the ESSID.
- Save the change.
- The phone will start connecting to the Wi-Fi network.

Add Wi-Fi Network Manually
If the Wi-Fi network SSID doesn’t show up in the scan list, or users would like to set up advanced options for the Wi-Fi network, users could add the Wi-Fi network manually under “Wi-Fi Settings“.
- Access the Menu from the GXV33XX LCD screen.
- Select Settings .
- Select “Wi-Fi”.
- Tap on “Wi-Fi Settings”.
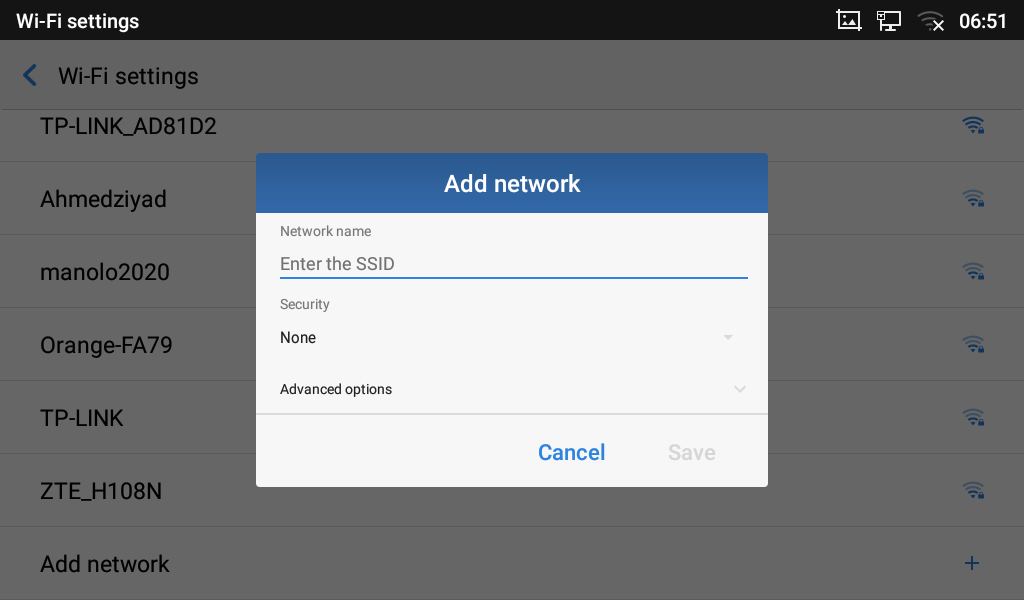
- On the “Wi-Fi Settings” screen, Scroll down and click on “Add network”.
- In the prompt dialog, enter SSID name, security type, password and set up address type (DHCP/Static IP).
- Tap on “Save” to save the settings.
- The phone will reboot with Wi-Fi network connected.
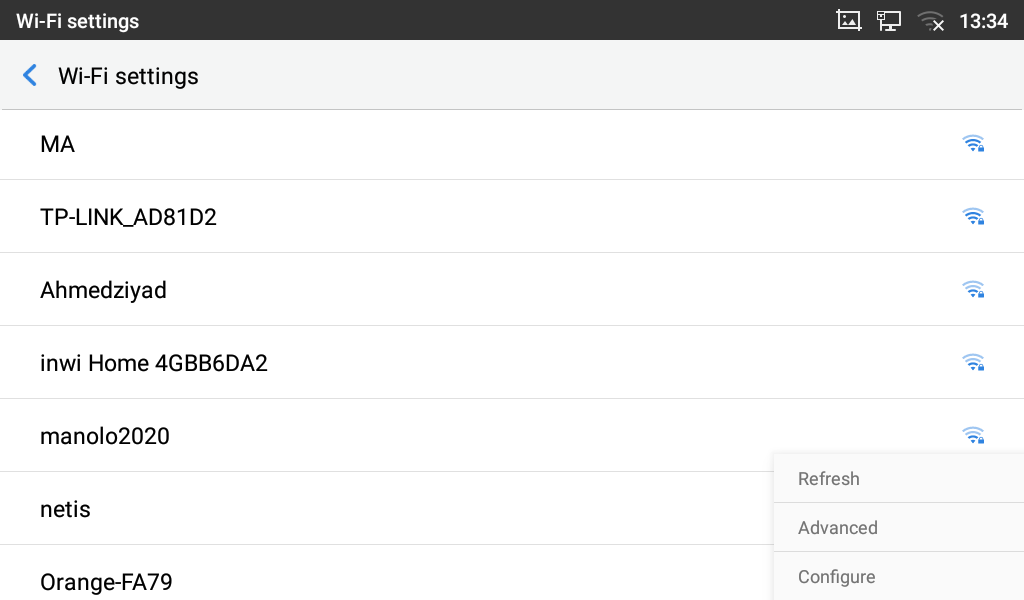
Refresh/Scan
Under “Wi-Fi Settings” menu, press MENU button and select “Refresh” to intitiate a scan for the Wi-Fi networks within the range. The available Wi-Fi networks will be updated and displayed there.
Users can also initiate a Scan for the available nearby Wi-Fi networks via the Web UI by accessing “Network Settings” → “Wi-Fi Settings“ → “Wi-Fi Basics”.

Configuring Wi-Fi from provisioning
Users could configure the P value in the config file to provision the phone to connect to Wi-Fi network. The following are the P values for Wi-Fi configuration.
Option | P-value | Example |
Wi-Fi Function | P7800 | P7800=0 – to “Enable” or P7800=1 – to “Disable” (default value) |
ESSID | P7812 | P7812=OfficeWiFi1 |
Password | P7830 | P7830= 123456 This is the WEP default key. The maximum length allowed is 64. |
Option | Alias | Example |
Wi-Fi Function | wifi.enable | <item name=”wifi.enable”>No</item> No🡪 disabled, Yes 🡪 Enabled |
ESSID | wifi.essidname | <item name=”wifi.essidname”>OfficeWiFi1</item> |
Password | wifi.essidpassword | <item name=”wifi.essidpassword”>123456</item> |
For more details about the GXV33XX configuration template and provisioning, please refer to the configuration tool, templates, and documentation in the following link:
http://www.grandstream.com/support/tools
WI-FI SETTINGS
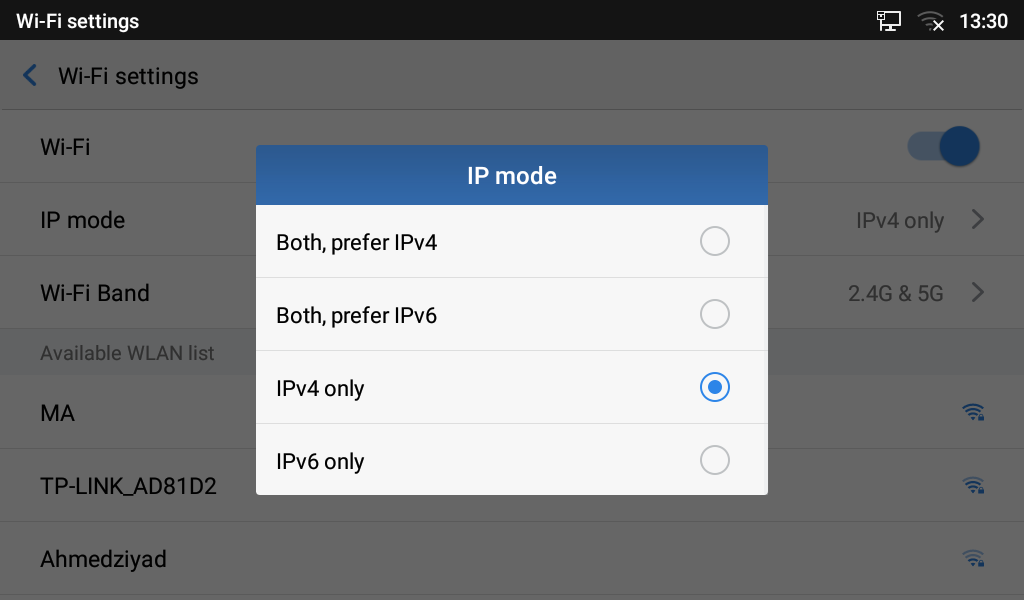
IP Mode
Under “Wi-Fi Settings” LCD menu, users can select which Internet protocol to use.
Note:
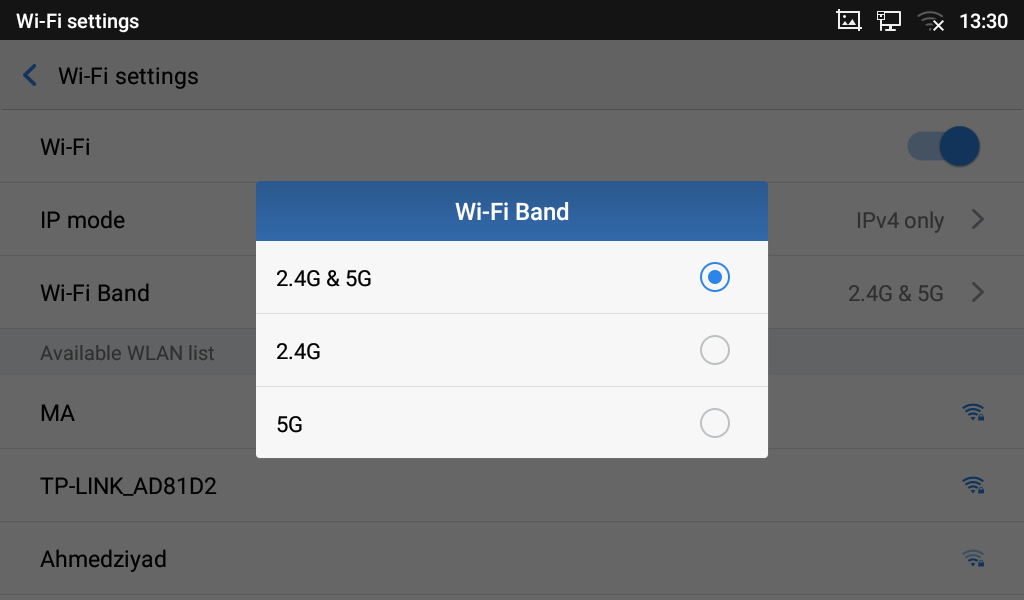
Wi-Fi Band
Wi-Fi Band Selection from LCD
Users can also set the type of Wi-Fi Band from the LCD menu under “Wi-Fi Settings” As shown in below screenshot.
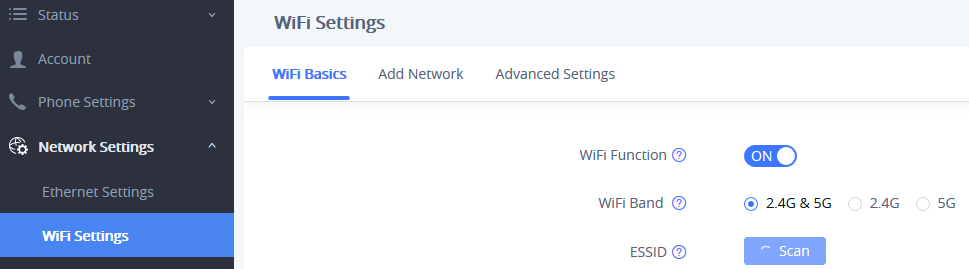
Wi-Fi Band Selection from Web UI
1. Log in the GXV33XX web UI.
2. Go to “Network Settings“→ “Wi-Fi Settings“→ “Wi-Fi Basics“.
Note:
Advanced Settings
Under “Wi-Fi Settings” menu, press MENU button and select “Advanced“. Users will see the following advanced settings related to Wi-Fi connections.
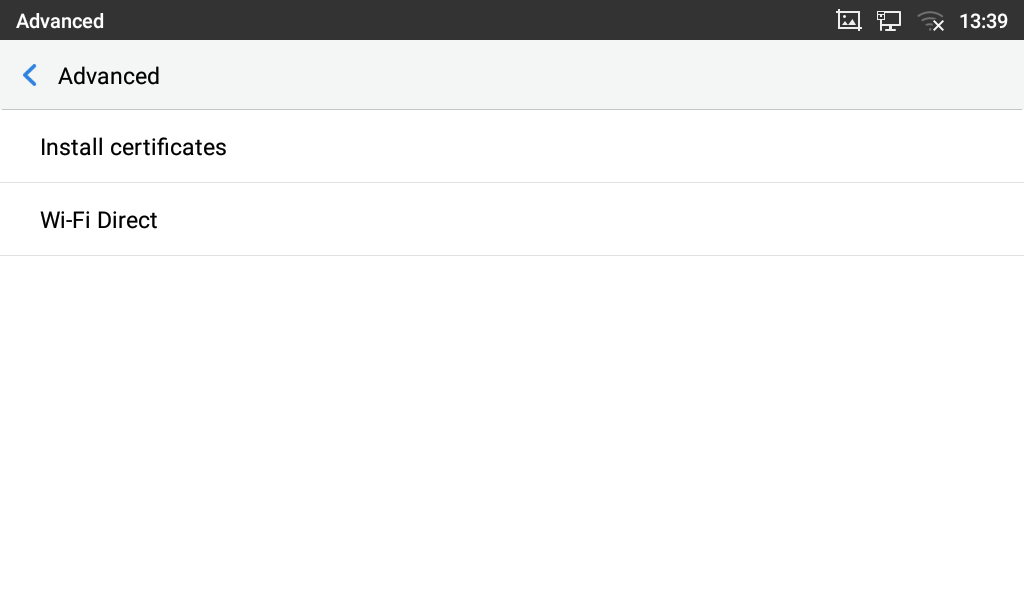
- Install Certificates.
This is to install certificates (previously download/uploaded to the phone) when connecting to Wi-Fi network requesting SSL certificate.
- Wi-Fi Direct
This is to set up peer-to-peer connection between two Wi-Fi Direct devices so that they can share data and sync files.
PORTABLE HOTSPOT
The GXV33XX can be served as a Wi-Fi access point for other devices to connect to wireless network if hotspot is turned on.
- On the GXV33XX LCD Menu, navigate to “Settings” .
- Select “Tethering & Portable Hotspot“.
- In the menu, tap on “Portable Wi-Fi hotspot” to select it.
- Turn on hotpot by tapping on the checkbox of “Portable Wi-Fi hotspot“.
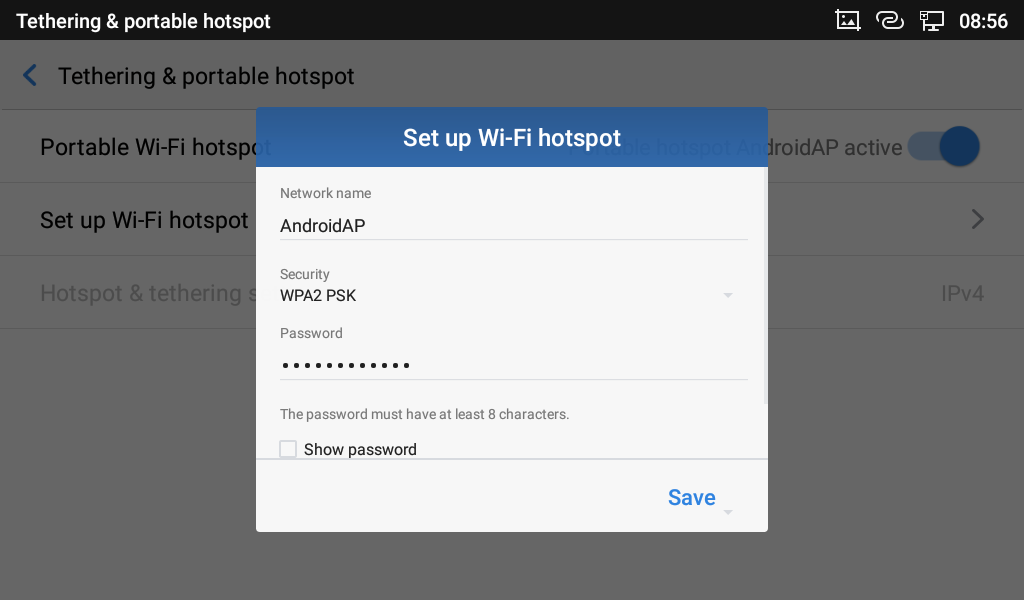
- Tap on “Set up Wi-Fi hotspot” to configure network SSID, security type and password. Please make sure the password has at least 8 characters. Otherwise, users won’t be able to save the setting.
- On the other device that needs Wi-Fi access, turn on Wi-Fi, look for the SSID of the GXV33XX hotspot and enter authentication information to get connected.