IPVideoTalk provides WebRTC or Mobile App clients with Chat option allowing them to send questions or comments during an IPVideoTalk meeting. IPVideoTalk Chat feature supports Group Chat (users send/receive chat messages to/from all participants including the host) and Private Chat (user specifies a participant as single destination to a chat message before submitting).
This document introduces how to use Group Chat option during IPVideoTalk meeting/webinar. For more information about IPVideoTalk usage, please refer to the links below:
- IPVideoTalk https://documentation.grandstream.com/knowledge-base/ipvideotalk-user-guide/
- IPVideoTalk website: http://www.ipvideotalk.com/
HOW TO CHAT
- From WebRTC browsers on the PC, open the IPVideoTalk meeting URL or enter the meeting ID in https://meetings.ipvideotalk.com.
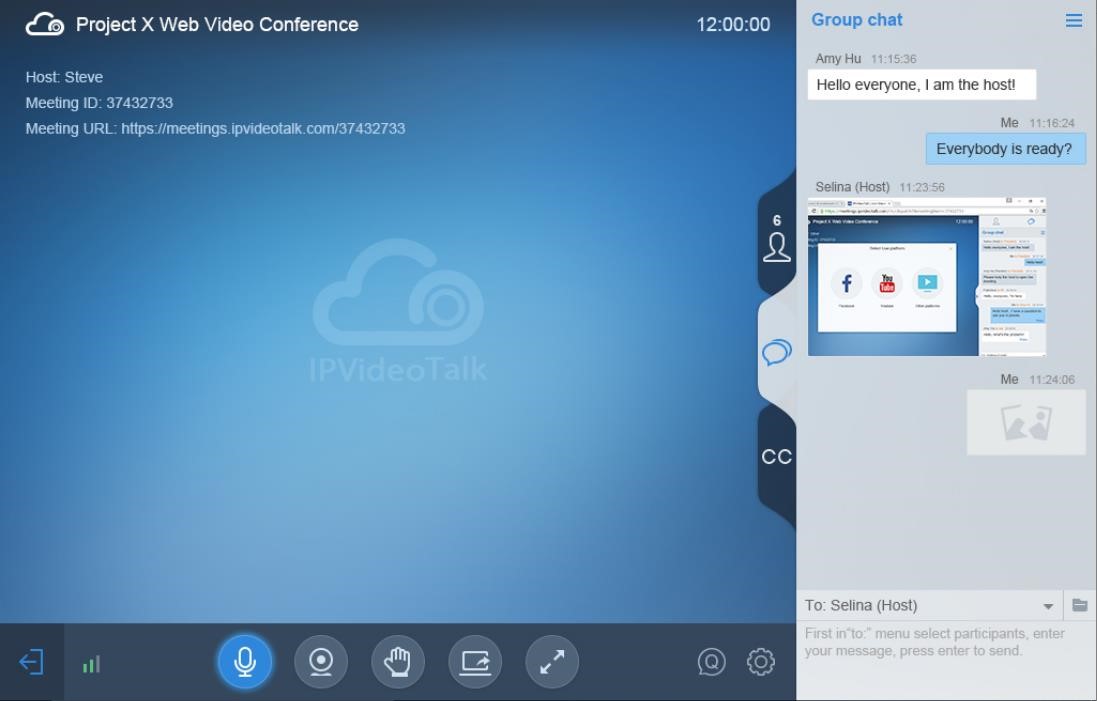
- Once the meeting is started, users can find the chat window at the right side of the web browser.
- If “Allow Chat” is enabled for the meeting, the WebRTC participants could chat in the chat window.
Input messages in chat window and press Enter to send out.
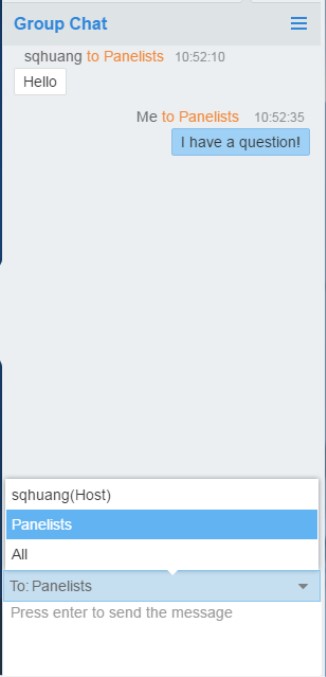
All Group Chat
Group chat is supported on WebRTC. The WebRTC participants can chat in group during the meeting.
- Select to send to “All” in the dropdown list.
- Simply enter message in the chat window and send the message.
-
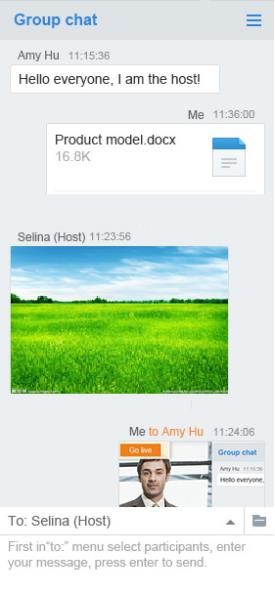
Users can also send pictures or files. Drag the file/picture to the chat area or click on the icon
 to open the file and send it.
- Click on the files in the chat area to download and click on the picture to view the original picture.
To clear chat messages, click on button
![]() at the upper right corner. Please note if the host disables chat, no participant can chat.
at the upper right corner. Please note if the host disables chat, no participant can chat.
Panelists Group Chat
The panelists’ group chat is an internal chat group between the Webinar host and panelists.
Note: This feature is only supported in IPVideoTalk Webinar mode
- The Webinar host and panelists could send messages to this group and receive messages from it.
- The general Webinar participants cannot check the messages in panelists chat group, nor send messages to it.
-
Users can also send pictures or files. Drag the file/picture to the chat area or click on the icon
to open the file and send it.
- Click on the files in the chat area to download and click on the picture to view the original picture.
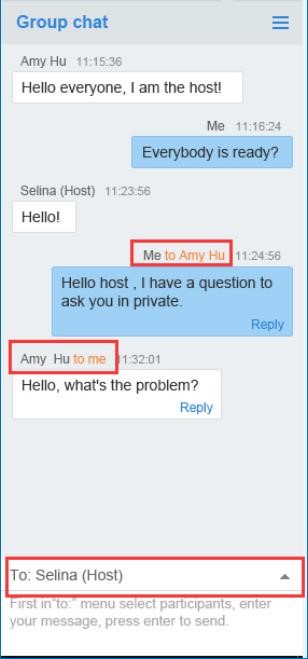
Private Chat
Private chat is supported on WebRTC. The WebRTC participant can send a message to the host or other participants in the group during the meeting.
- Select the person you want to send the message to in the dropdown list.
- Once the message is sent, the message will be marked as “Private”.
- You can click the name to reply private message quickly.
-
Users can also send pictures or files. Drag the file/picture to the chat area or click on the icon
to open the file and send it.
- Click on the files in the chat area to download and click on the picture to view the original picture.
If the host prohibits you to check the participants list, you can only send private message to the host.
If the host prohibits chatting, the participants cannot send private messages to all participants.
CHAT CONTROL
Chat Control before Meeting
- Log in IPVideoTalk Portal http://www.ipvideotalk.com.
- Go to “Meetings” page under “Upcoming” meetings.
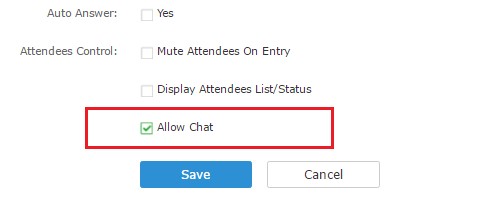
If a scheduled meeting has not started, the user could select the meeting and click on “Edit” to edit the meeting options.

2. On meeting configuration page, click the checkbox for option “Allow Chat” to enable group chat for the meeting. Otherwise, group chat is not allowed during the meeting.

Note:
If an ended meeting does not have “Allow Chat” enabled, and the user would like to reschedule it with chat enabled, on IPVideoTalk Portal->Meetings->History page, select the meeting you would like to reschedule and click on “Reschedule” button.

Then, click the checkbox of “Allow Chat” to enable it.
Chat Control during Meeting
Once the meeting is started, the user cannot edit the meeting control options on IPVideoTalk Portal anymore. To enable/disable chat during a meeting, a WebRTC client must become the meeting host by entering the host code when joining or during the meeting.
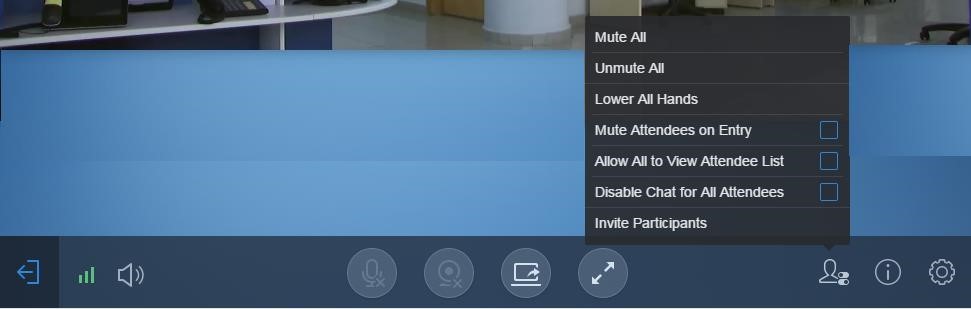
Disable Chat
-
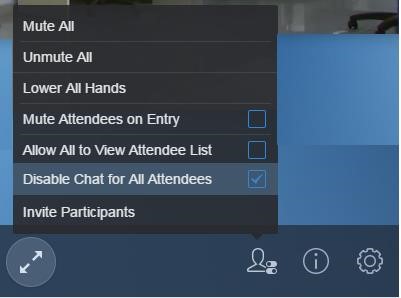
After WebRTC client becomes the meeting host, click on icon
 on the left of the chat window, and then select “Disable Chat for All Attendees”.
Or, click on icon
![]() on the top of chat window, and then select “Disable Chat for All Attendees”.
on the top of chat window, and then select “Disable Chat for All Attendees”.
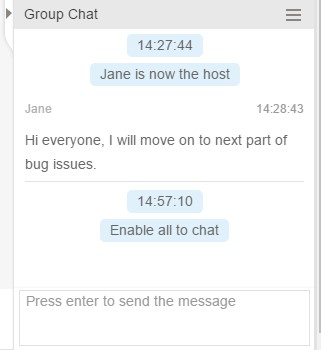
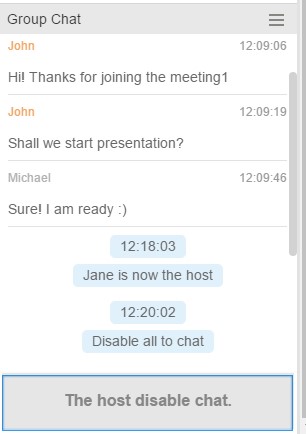
- All WebRTC participants will see prompt notification in chat window about “chat disabled”.
Enable Chat
-
A WebRTC meeting’s host can enable chat by clicking on icon
on the left of the chat window, and uncheck ”Disable Chat for All Attendees”.
Or, click on icon
![]() on the top of chat window, and then select “Enable Chat for All Attendees”.
on the top of chat window, and then select “Enable Chat for All Attendees”.
- All WebRTC participants will see prompt notification in chat window about “chat enabled”.
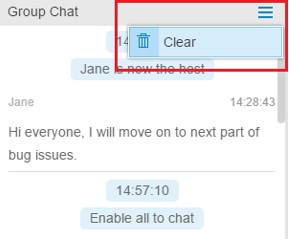
Clear Chat History
The WebRTC clients can clear chat history from his/her own web browser. In the chat window, click on icon
![]() on the top of the chat window. Click on “Clear” to clear the chat history.
on the top of the chat window. Click on “Clear” to clear the chat history.