


OVERVIEW
The HT801 V2 is one port analog telephone adapter (ATA) that allows users to create a high-quality and manageable IP telephony solution for residential and office environments. Its ultra-compact size, voice quality, advanced VoIP functionality, security protection and auto provisioning options enable users to take advantage of VoIP on analog phones and enables service providers to offer high quality IP service. The HT801 V2 is an ideal ATA for individual use and for large scale commercial IP voice deployments.
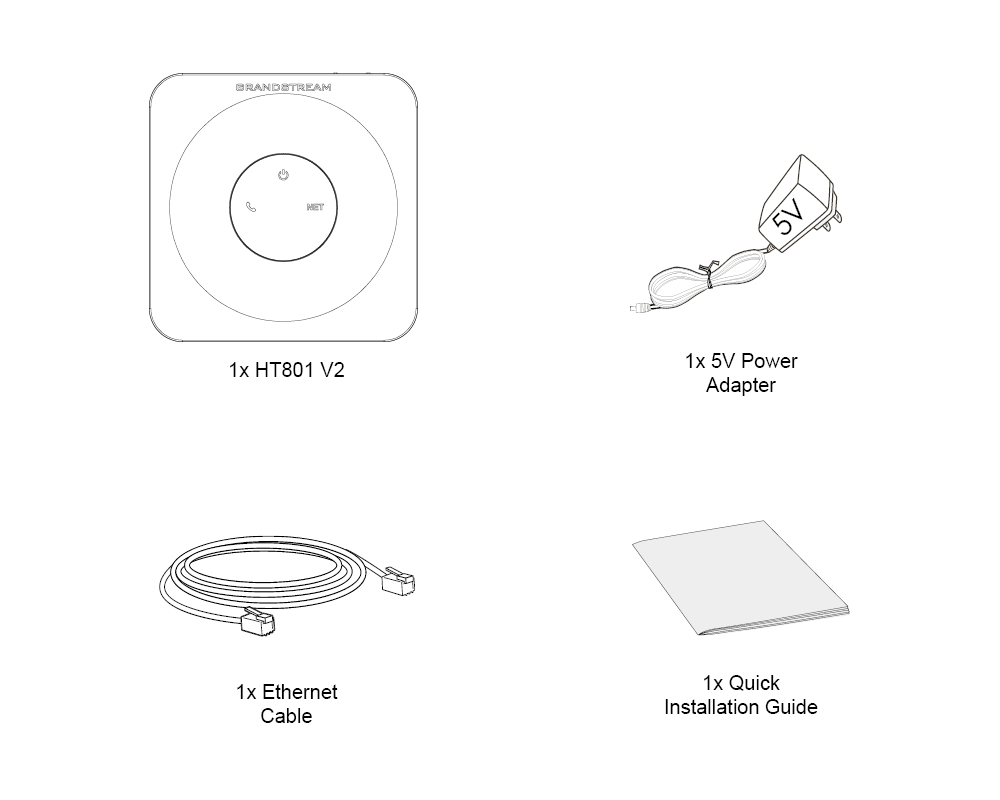
PACKAGE CONTENTS
HT801 V2 PORTS
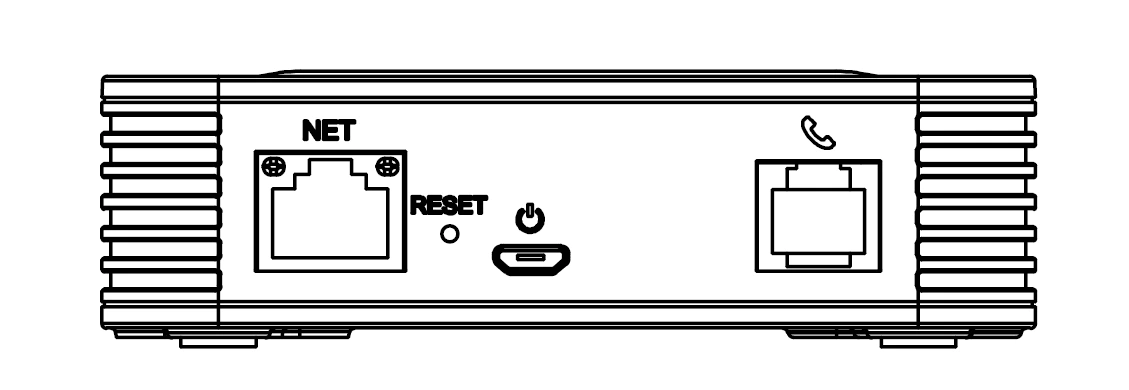
Port | Description |
 | Network port. Used to connect the HT801 V2 to you router or gateway using an Ethernet RJ45 cable. |
 | Micro-USB power socket. Used to power the HT801 V2 (5V – 1A). |
 | FXS port to connect analog phone / fax machine to the phone adapter using an RJ-11 telephone cable. |
 | Factory reset button. |
CONNECTING THE HT801 V2
The HT801 V2 is designed for easy configuration and easy installation, to connect your HT801 V2, please follow the steps below:
- Insert a standard RJ11 telephone cable into the phone port and connect the other end of the telephone cable to a standard touch-tone analog telephone.
- Connect the NET port of the HT801 V2 to a router, switch or modem using an Ethernet cable.
- Insert the power adapter into the HT801 V2 and connect it to a wall outlet.
- The Power, Ethernet, and Phone LEDs will be solidly lit when the Phone Adapter is ready for use.
CONFIGURING THE HT801 V2
The HT801 V2 can be configured either using the embedded Web GUI using PC’s web browser or using the IVR voice prompt menu.
Obtaining the IP address
The HT801 V2 is by default configured to obtain the IP address from DHCP server where the unit is located. In order to know which IP address is assigned to your HT801 V2, you should access to the “Interactive Voice Response Menu” of your adapter via the connected phone and check its IP address mode.
Please refer to the steps below to access the interactive voice response menu:
- Use a telephone connected to phone port of your HT801 V2.
- Press *** (press the star key three times) to access the IVR menu and wait until you hear “Enter the menu option “.
- Press 02 and the current IP address will be announced.
Configure using Web UI
- Connect the computer to the same network as your HT801 V2 and make sure the HT801 V2 is booted up.
- You may check your HT801 V2 IP address using the IVR on the connected phone.
- Open the Web browser on your computer.
- Enter the HT801 V2’s IP address in the address bar of the browser.
- Enter “admin” under the username as well as the administrator’s password to access the Web Configuration Menu (the default password can be found on the sticker located at the back of the unit).

For Certification, Warranty and RMA information,
please visit www.grandstream.com