
OVERVIEW
The GHP series of hotel phones feature the GHP620(W) and GHP621(W), easy-to-use IP phones for any hotel room that can be programmed and customized based on the needs of hotels and their guests. The GHP620W and GHP621W models are equipped with integrated dual-band Wi-Fi. The features of the GHP series include an HD speaker, 2 SIP accounts/lines, 6 programmable keys, 10-speed dial keys, 3-way voice conferencing, full band Opus voice codec, and an advanced jitter-resilience algorithm that tolerates up to 30% packet loss without impacting voice quality. The GHP series is supported by the Grandstream Device Management System (GDMS), which provides a centralized interface to configure, provision, manage and monitor the deployment of Grandstream endpoints. The GHP series IP phones can be installed on a desktop or wall-mounted and can be powered by PoE, power adapter, and USB Type-C charger. Its elegant and compact design makes it perfect for hotels, hospitals, apartments, dormitories, and much more.
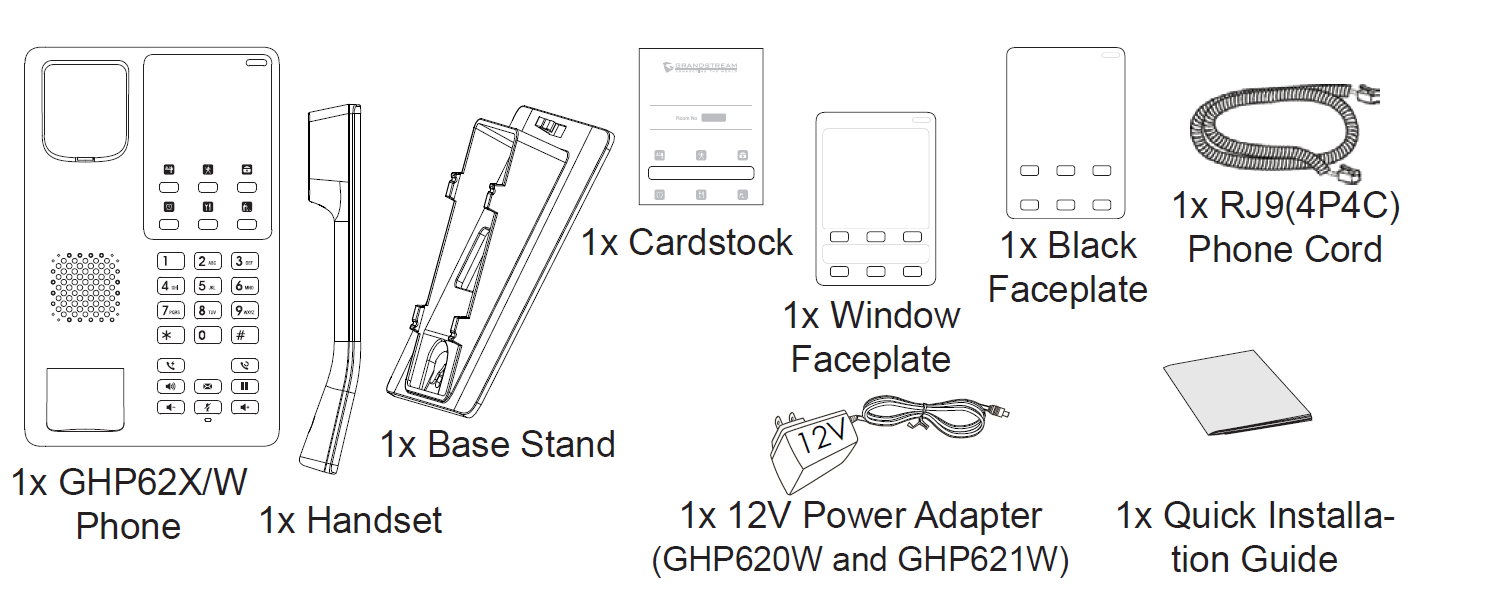
PACKAGE CONTENT
GHP620/W & GHP621/W DESCRIPTION
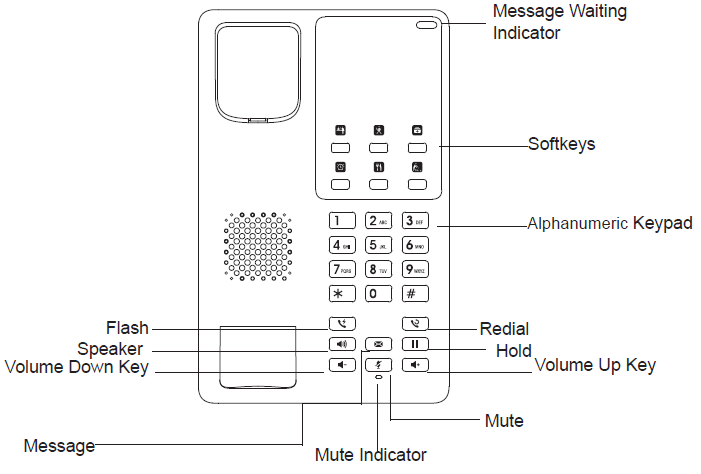
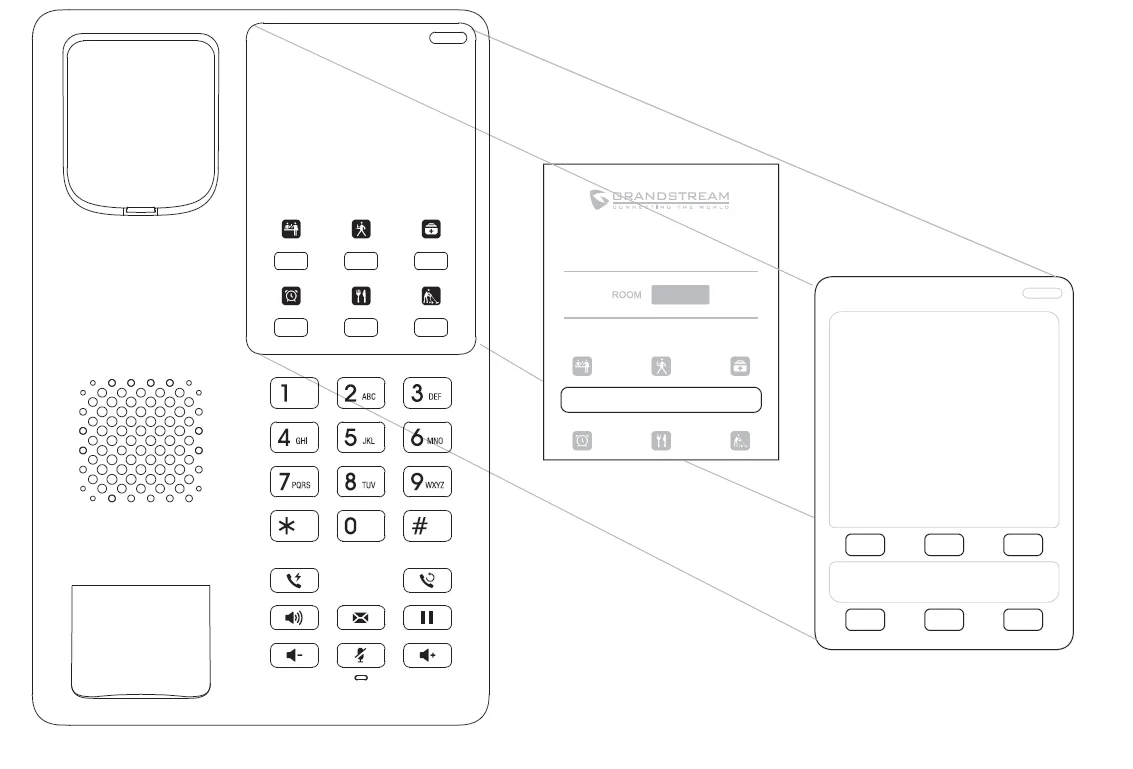
Front panel
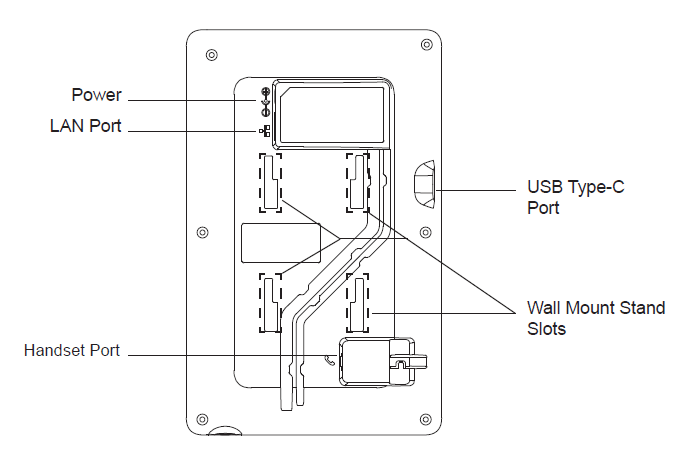
Back panel
PHONE SETUP
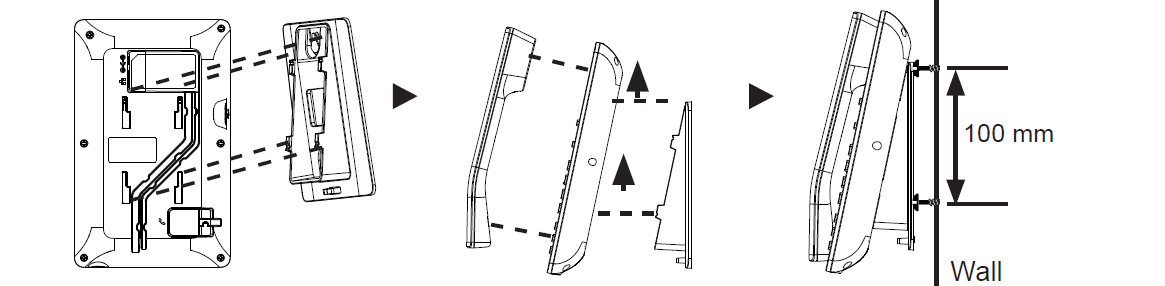
Wall Mount
- On the wall where the GHP620/W & GHP621/W will be mounted, mark two dots with 100mm distance in between vertically.
- Using a drill, make a hole on each marked dot. Put a plastic expansion bolt and screw (not provided) into each hole. Leave enough space on the screws to mount the GHP620/W & GHP621/W.
- Attach the wall mount spacers to the slot for wall mount spacers on the back of the phone.
- Mount the GHP620/W & GHP621/W on the screws using its “Wall Mount Slots”.
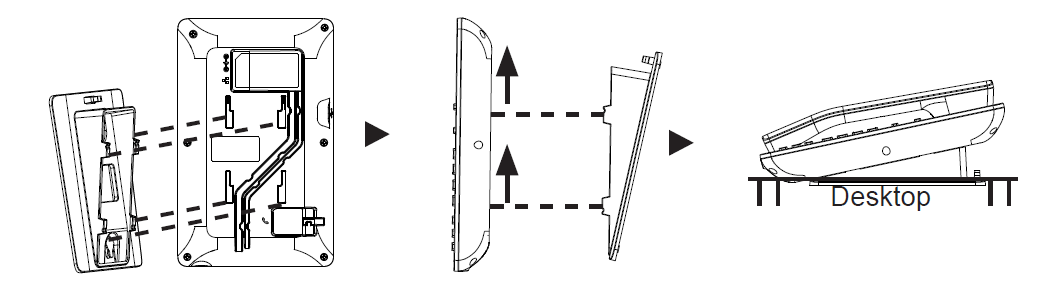
Desktop Installation
For installing the phone on the table with the phone stand, attach the phone stand to the bottom of the phone where there is a slot for the phone stand.
INSTALLING THE FACEPLATE
- Put the customized paper card into the deep groove of the phone surface shell and fix it.
- Remove the release paper from the back of the face plate.
- Stick the face plate on the indicated area. Please refer to the illustration on the right.
CONNECTING THE PHONE
To set up the phone, follow the steps below:
- Plug in the phone cord to the handset RJ9 port and then connect it to the base.
- Connect the LAN port of the phone to the RJ45 socket of a hub/switch or a router (LAN side of the router) using the Ethernet cable. This step can be skipped if using GHP620W & GHP621W with Wi-Fi.
- Power up the phone:
- Option 1: Connect the 12V DC output plug to the power jack on the phone; plug the power adapter into an electrical outlet.
- Option 2: A PoE switch must be used in step 2.
PHONE CONFIGURATION
- Ensure your phone is powered up and connected to the Internet.
- Locate the MAC address on the bottom of the device or on the package.
- From a computer connected to the same network as the GHP62X, type in the following address using the GHP62X’s MAC address on your browser: https://.local
Example: https://c074adffffff.local
Note: The user can also dial **47# and the current IP address will be announced by the IVR. - Enter the admin username and password to access the configuration menu. (The factory default username is “admin” and the default random password can be found on the sticker at the back of the unit).
Refer to online documents and FAQ for more detailed
information: https://www.grandstream.com/our-products

For Certification, Warranty, and RMA information, please visit
www.grandstream.com