
OVERVIEW
Part of the GRP series of Carrier-Grade IP Phones, the GRP2602 is an essential 2-line model designed with zero-touch provisioning for mass deployment and easy management. It features a sleek design and a suite of next-generation features including Wi-Fi support (GRP2602W), 5-way voice conferencing to maximize productivity, integrated PoE (GRP2602P/GRP2602G), full HD audio on both the speaker and handset to allow users to communicate with the utmost clarity, EHS support for Plantronics, Jabra, and Sennheiser headsets and multi-language support. The GRP series includes carrier-grade security features to provide enterprise-level security, including secure boot, dual firmware images, and encrypted data storage. For cloud provisioning and centralized management, the GRP2602 is supported by Grandstream’s Device Management System (GDMS), which provides a centralized interface to configure, provision, manage and monitor deployments of Grandstream endpoints. Built for the needs of on-site or remote desktop workers and designed for easy deployment by enterprises, service providers, and other high-volume markets, the GRP2602 offers an easy-to-use and easy-to-deploy voice endpoint.
PACKAGE CONTENTS

PHONE SETUP
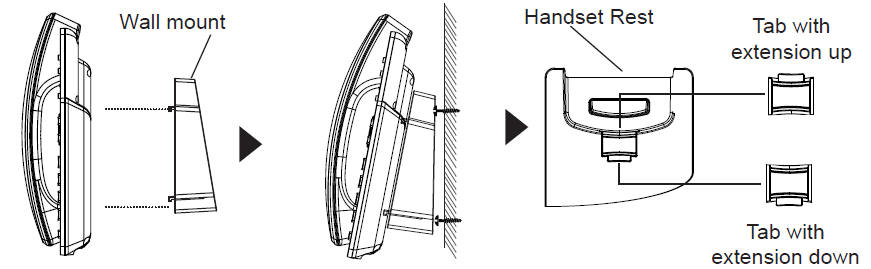
Installing the phone (Wall Mount *sold separately):
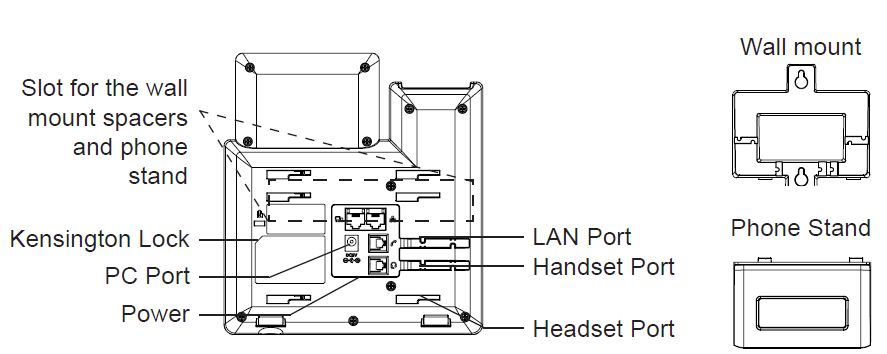
- Attach the wall mount spacers to the slot for wall mount spacers on the back of the phone.
- Attach the phone to the wall via the wall mount hole.
- Pull out the tab from the handset cradle (See figure below).
- Rotate the tab and plug it back into the slot with the extension up to hold the handset while the phone is mounted on the wall (See figure below).
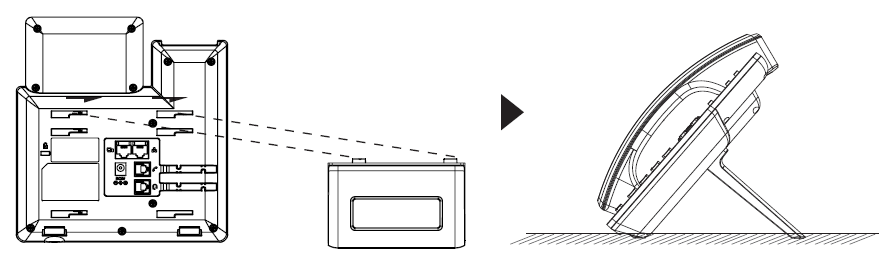
Installing the phone (Phone Stand):
For installing the phone on the table with the phone stand, attach the phone stand to the bottom of the phone where there is a slot for the phone stand. (Upper half, bottom part).
CONNECTING THE PHONE
To set up the GRP2602/P/W/G, follow the steps below:
- Connect the handset and main phone case with the phone cord.
- Connect the 5V DC output plug to the power jack on the phone; plug the power adapter into an electrical outlet. If a PoE switch is used in step 3 (GRP2602P/GRP2602G), this step could be skipped.
- A network connection is possible via two methods which are described below.
- Using Ethernet:
- Connect the LAN port of the phone to the RJ-45 socket of a hub/switch or a router (LAN side of the router) using the Ethernet cable.
- Using Wi-Fi (GRP2602W only):
- On the LCD menu, navigate to “Settings→Wi-Fi settings” and enable Wi-Fi.
- Select “Wi-Fi Network” and GRP2602W will automatically start scanning within the range.
- A list of Wi-Fi networks will be displayed. Select the desired network, and if required, enter the correct password to connect.
- The LCD will display provisioning or firmware upgrade information. Before continuing, please wait for the date/time display to show up.
- Using the phone embedded web server or keypad configuration menu, you can further configure the phone using either a static IP or DHCP.
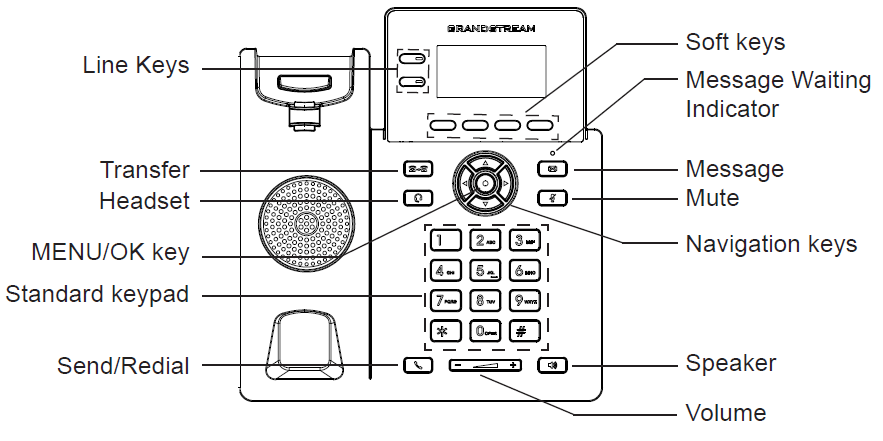
PHONE DESCRIPTION
PHONE CONFIGURATION
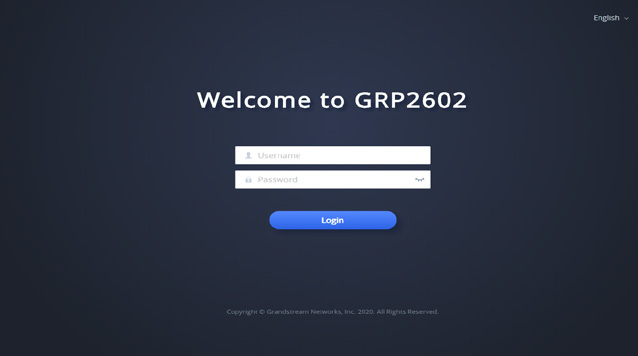
Configure the GRP2602/P/W/G using a Web Browser:
- Ensure your phone is powered up and connected to the Internet.
- Press the “UP” button to display the IP address.
- Type the phone’s IP address in your PC browser.
- Enter the admin’s username and password to access the configuration menu. (The factory default username is “admin” while the default random password can be found on the sticker at the back of the unit).
Configure the GRP2602/P/W/G using the Keypad:
- Make sure the phone is idle.
- Press the MENU key to access the keypad MENU to configure the phone.
- Select MENU → SETTINGS → ACCOUNT SETTINGS to configure settings for SIP Proxy, Outbound Proxy, SIP User ID, SIP Auth ID, and SIP Password.
- Follow MENU options to configure the basic features of the phone. For example: the IP address if using a static IP. For details, please check the GRP260X series User Manual.
- Please contact your ITSP for additional settings that may be necessary to configure the phone.
Refer to online documents and FAQ for more detailed information:
https://www.grandstream.com/our-products

For Certification, Warranty, and RMA information,
please visit: https://www.grandstream.com