All Grandstream products’ firmware are improved and updated on a regular basis. Latest firmware versions are available in http://www.grandstream.com/support/firmware
Published firmware versions in Grandstream official website have passed QA tests and included new enhancements implemented, reported issues fixes for better user experience; all changes are logged in Release Notes documents.
Provided Firmware package is specific to a single product or product series, same as release notes document. For example, Release_GRP260x_1.0.1.50.zip and Release_Note_GRP260x_1.0.1.50.pdf are specific to GRP260X Carrier Grade IP Phones.
Grandstream recommends reading Release Notes document which may include special firmware upgrade notices, and always keep your devices up to date by upgrading their firmware versions regularly.
This document describes steps needed to upgrade the GRP26XX devices firmware version and covers the following scenarios:
- Scenario 1: Upgrade using Grandstream Public HTTP Server.
- Scenario 2: Upgrade using a local Server.
- Scenario 3: Upgrade through Manual Upload .
- Advanced options.
Scenario 1: Upgrade using Grandstream Public Server
Grandstream is hosting latest firmware files in a public HTTP server so customers can use it to directly upgrade their Grandstream devices with latest firmware. The same server also hosts BETA firmware when available.
Follow below steps to successfully upgrade your device:
- Access web interface of your device and go to Maintenance 🡪 Upgrade and Provisioning (For the GRP260X, Go to Provision TAB ).
- Make sure to select “Always Check for New Firmware” for “Firmware Upgrade and Provisioning”.


- Go to “Firmware” Tab and under “Upgrade via Network”,
- Select “HTTP” for “Firmware Upgrade via”
- Enter “firmware.grandstream.com” under “Firmware Server Path”.

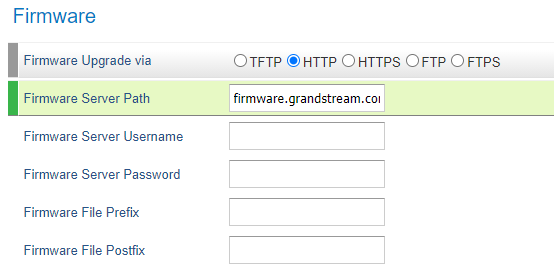
- Click on “Save and Apply” button to apply the new settings.
- Reboot the device and wait until the upgrade process is completed.
Scenario 2: Upgrade using a Local Server
Customers can use their own HTTP/HTTPS, FTP/FTPS or TFTP server to upgrade Grandstream devices.
To achieve this, first download firmware files for the appropriate device model from http://www.grandstream.com/support/firmware. Unzip downloaded package and put extracted files in the root directory of your server.
Local Upgrade via HTTP Server
Please refer to the below steps for a local upgrade using HTTP File Server tool.
Installing HTTP Server and Uploading Firmware File(s)
- Launch the install wizard of the tool once it is fully downloaded.
- Click on Run to launch.
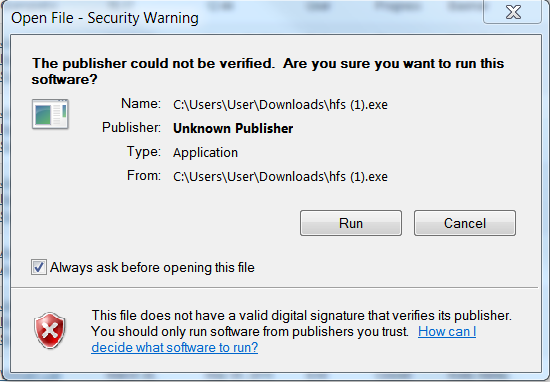
- Once HFS starts, browse and select the firmware files from your local directories.
- To add file to the HTTP File Server, please right-click on the VFS url and then choose Add Files in as shown in the screenshot below.
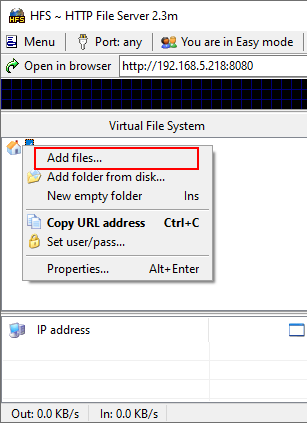
- Select the file(s) and click Open to upload the file(s) to your HTTP server.
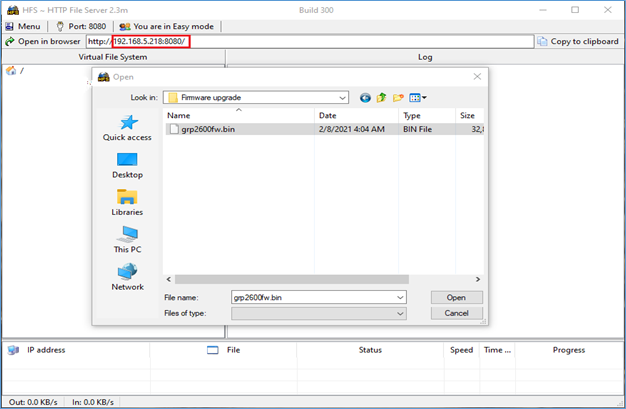
- Once uploaded to the HTTP server, the firmware file should be available on the link: “http://192.168.5.218/grp2600fw.bin“ Next to Open in browser. As shown on the screenshot:
- 192.168.5.218 is the IP address of the computer running the local HTTP server.
Configuring Grandstream devices for local HTTP upgrade
Configure Grandstream devices to upgrade the firmware via HTTP by doing the following:
- Access the Web GUI and navigate to “Upgrade and Provisioning” page.
- Set “Firmware Upgrade and Provisioning” to “Always Check for New Firmware”
- Go to “Firmware” section,
- Select “HTTP” for “Firmware Upgrade via”
- Enter the path (IP address) of your HTTP server containing the firmware file under “Firmware Server Path”.
- Press “Save and Apply” at the bottom of the page to apply the new settings.
- Reboot the device and wait until the upgrade process is completed.
Notes:
- In our example, we have configured the firmware server path as: “192.168.5.218“.
- Make sure to not include leading http:// in HTTP Firmware server path.
- You can verify the upgrade progress on the HFS Server as shown blow:
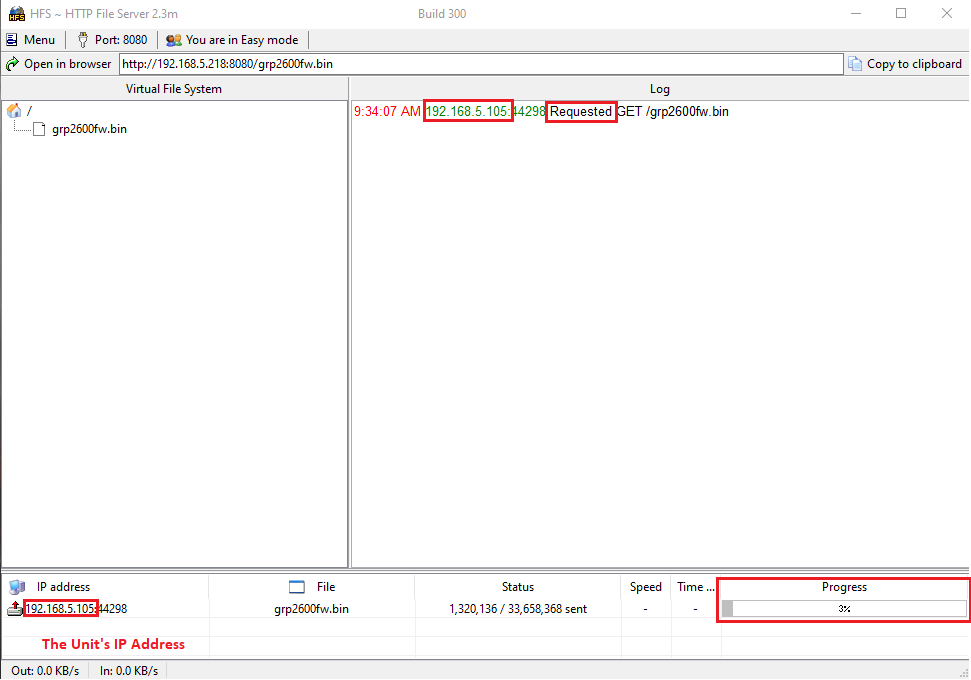
- Once completed, a Fully downloaded log will be registered.

Local Upgrade via HTTPS Server
Please refer to the below steps for a local upgrade using XAMPP (with built in HTTPS server)
Download link: https://www.apachefriends.org/download.html
Installing HTTPS Server
- Download appropriate version depending on your platform.
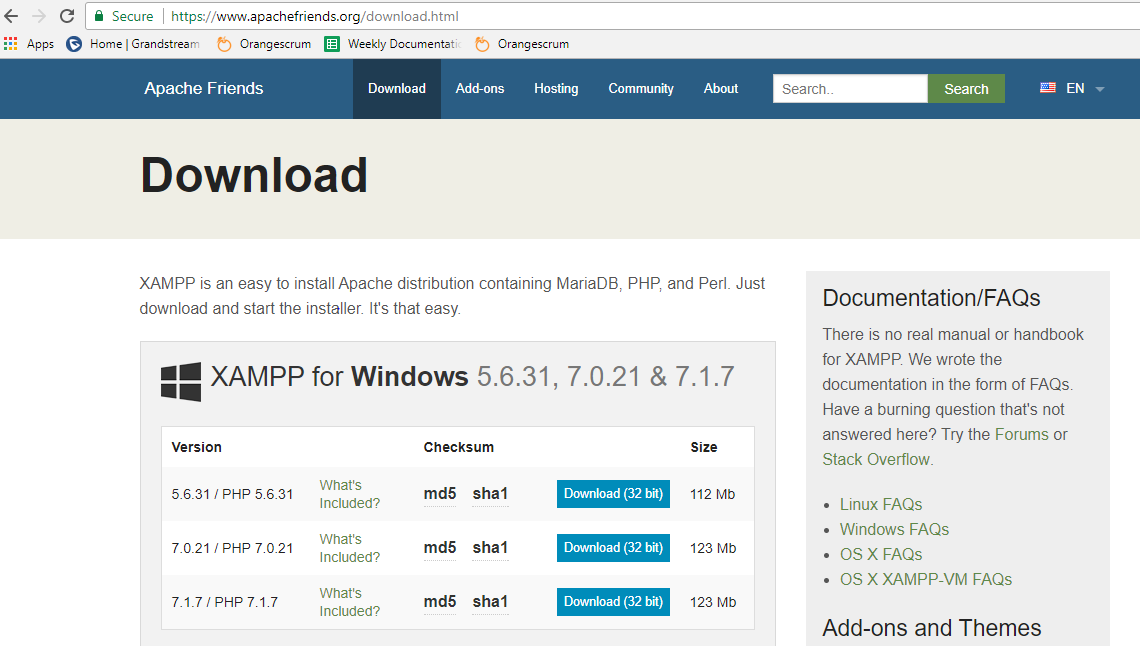
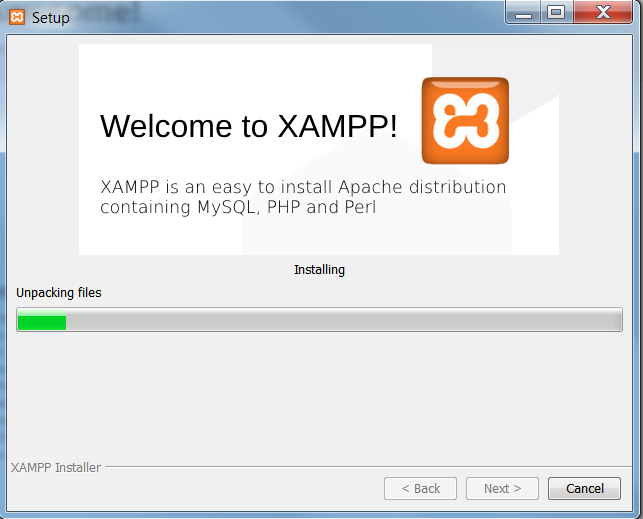
- Launch the install wizard once the file is fully downloaded and follow the installation steps:
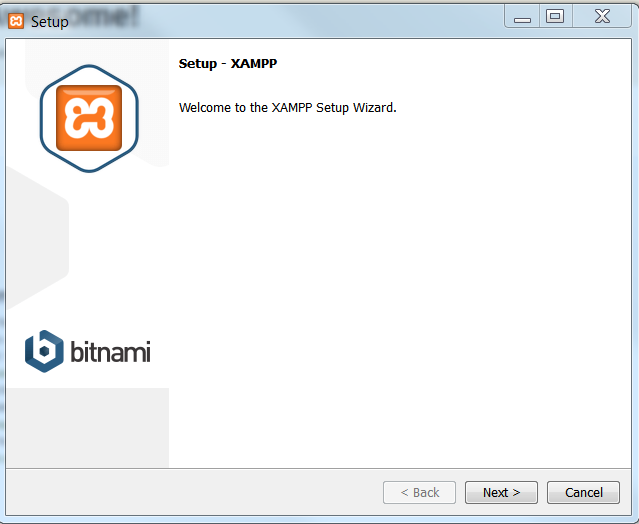
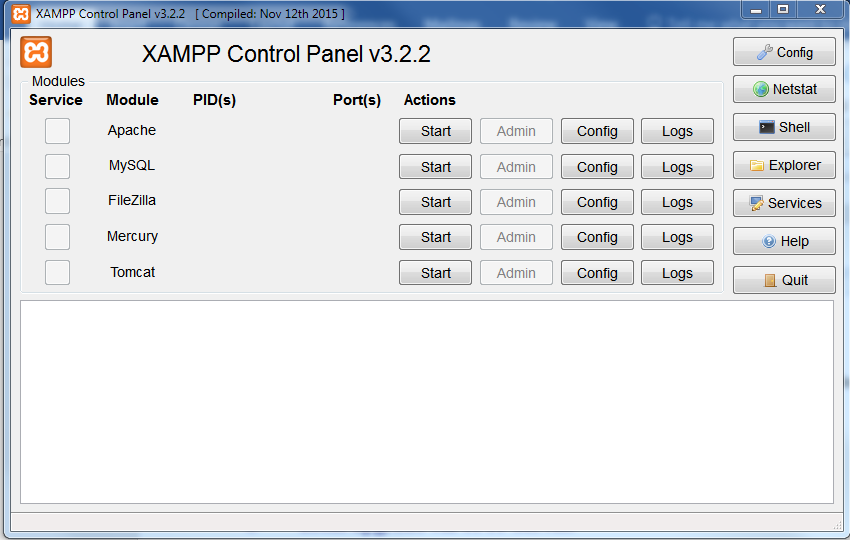
- Launch the XAMPP server. The following interface will be available:
Uploading firmware file(s) to XAMPP HTTPS Server
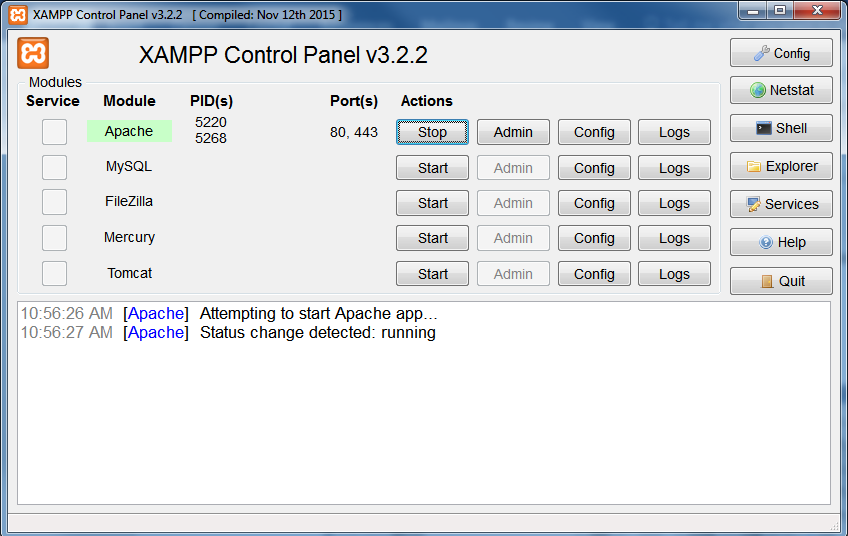
- Start Apache module in order to use the HTTPS server.
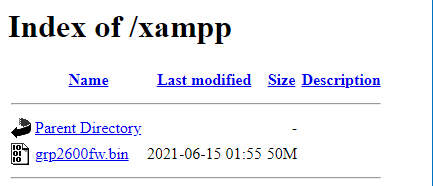
- Access the XAMPP root directory on your computer and put the firmware files on the following path: “C:\xampp\htdocs\xampp“

- To list all available firmware files on the root directory, access the local link address “https://127.0.0.1/xampp/” from the computer running HTTPS server.
Configuring Grandstream devices for a local HTTPS upgrade
Configure Grandstream devices to upgrade the firmware via HTTPS by doing the following:
- Access the Web GUI and navigate to “Upgrade and Provisioning” page.
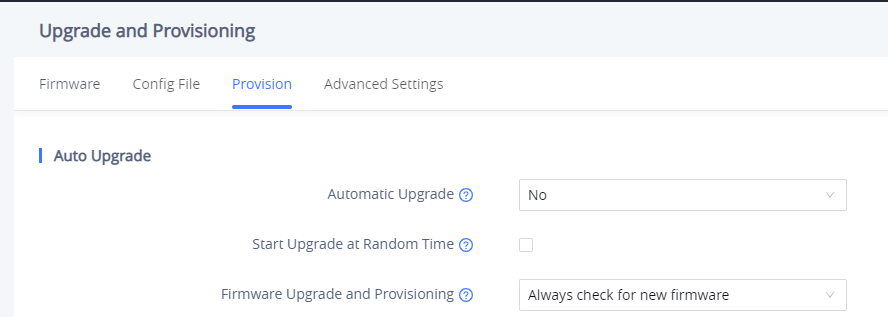
- Set “Firmware Upgrade and Provisioning” to “Always Check for New Firmware”
- Go to “Firmware” section,
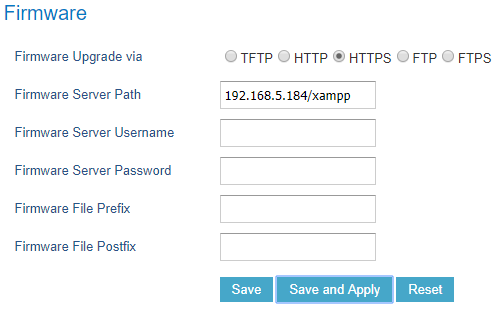
- Select “HTTPS” for “Firmware Upgrade via”
- Enter the HTTPS server URL containing the firmware file in “Firmware Server Path” field.
Example: (x.x.x.x/xampp) where x.x.x.x is the IP address of computer running XAMPP.
- Press “Save and Apply” at the bottom of the page to apply the new settings.
- Reboot the device and wait until the firmware upgrade process is completed.
The following screenshot illustrates the steps mentioned above.

Local Upgrade via TFTP Server
To upgrade locally using TFTP protocol, users can download and install a free TFTP server as described in below steps.
Installing the TFTP Server
A free windows version TFTP server is available for download from following link: http://tftpd32.jounin.net/
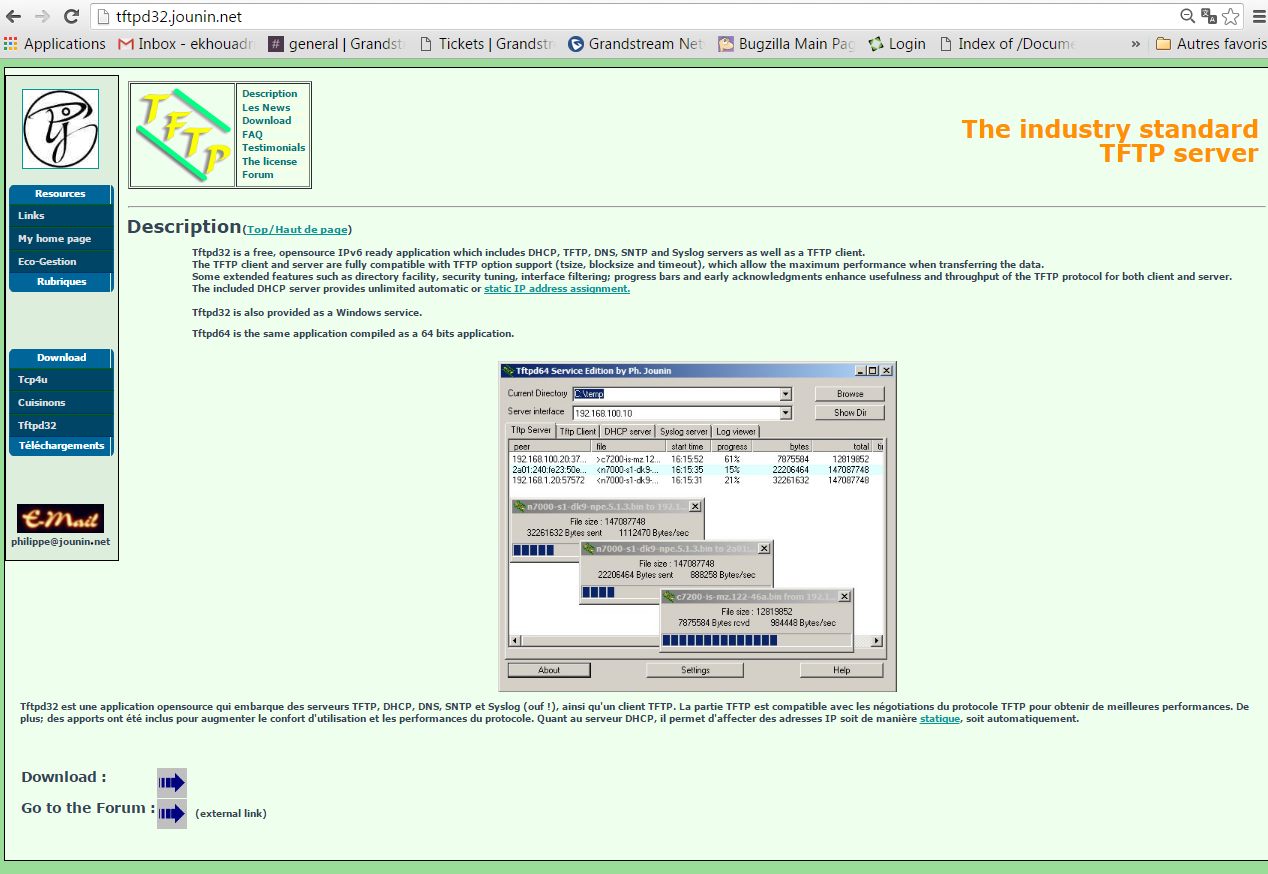
- Select which version is appropriate for your computer, and start downloading it.
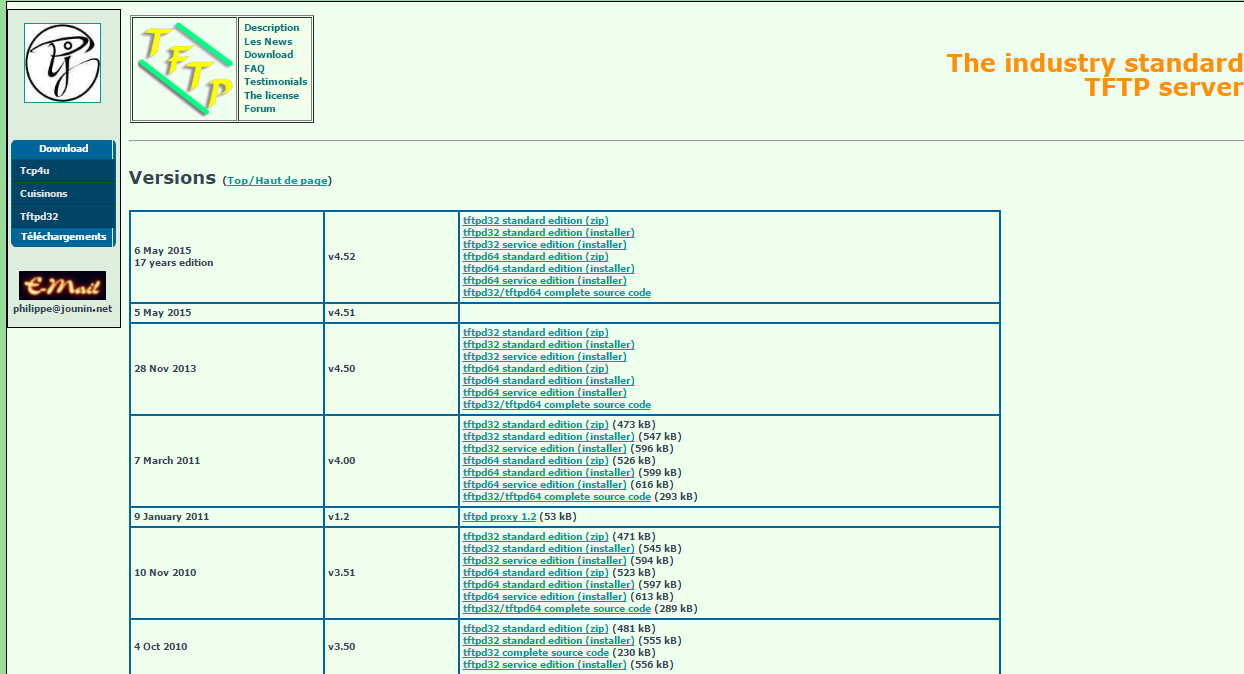
- Launch the TFTP server install wizard.
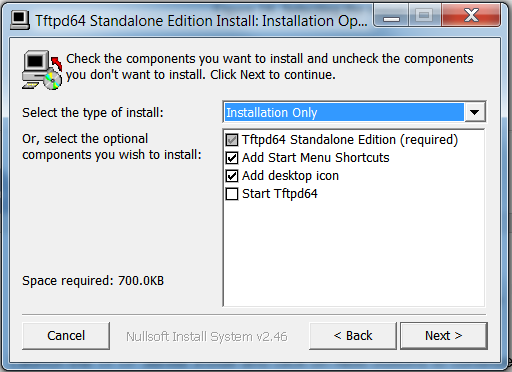
- Once the TFTP server is installed, Open TFTPD64. The following interface will be displayed:
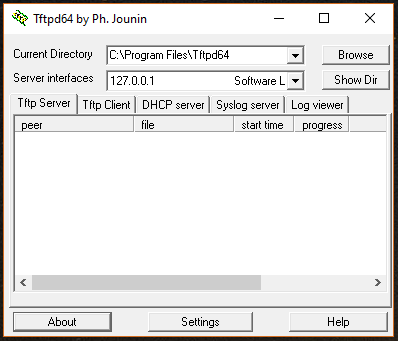
Uploading the firmware file
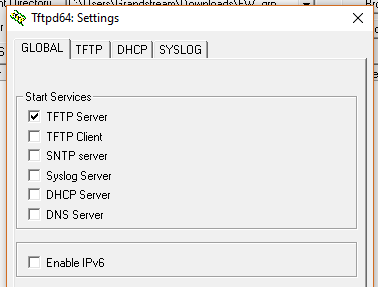
- Make sure that the TFTP service is selected and started under Settings 🡪 Global
- Select “TFTP Server” then click button OK to confirm your configuration.
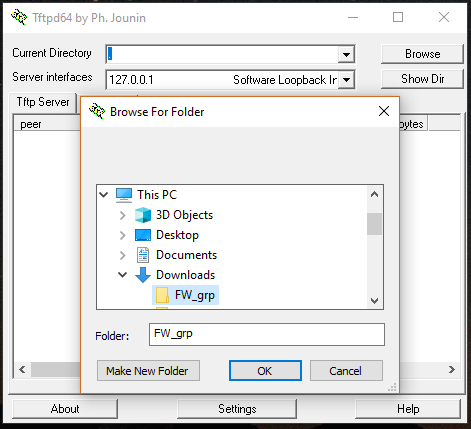
- Browse to locate and select the required firmware file from your local system.
- Press Show Dir to see if the firmware file was successfully linked to the TFTP server.
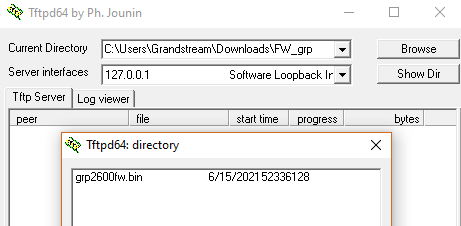
- Select the interface of the computer running the TFTP server on Server Interfaces.
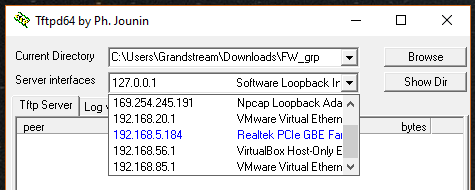
Configuring Grandstream devices for local TFTP upgrade
Configure Grandstream devices to upgrade the firmware via HTTPS by doing the following:
- Access the Web GUI and navigate to “Upgrade and Provisioning” page.
- Set “Firmware Upgrade and Provisioning” to “Always Check for New Firmware”
- Go to “Firmware” section,
- Select “TFTP” for “Firmware Upgrade via”
- Enter the path of your TFTP server containing the firmware file under “Firmware Server Path”.
- Press “Save and Apply” at the bottom of the page to apply the new settings.
- Reboot the phone and wait until the upgrade process is completed.
Scenario 3: Upgrade through Manual Upload
It is also possible to perform the firmware upgrade manually from the GRP260X Web GUI.
To achieve this, first download firmware files for the appropriate device model from http://www.grandstream.com/support/firmware. Unzip downloaded package.
This method can only be done from the Web GUI.
We start by accessing the Web GUI and we navigate to Maintenance >> Upgrade and Provisioning.

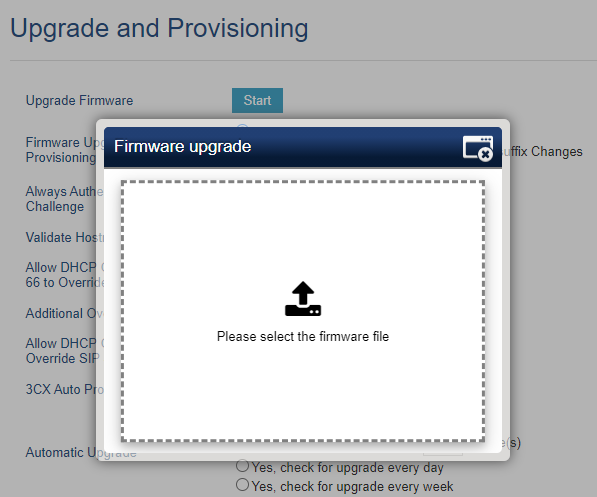
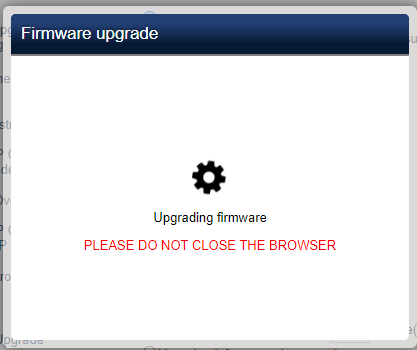
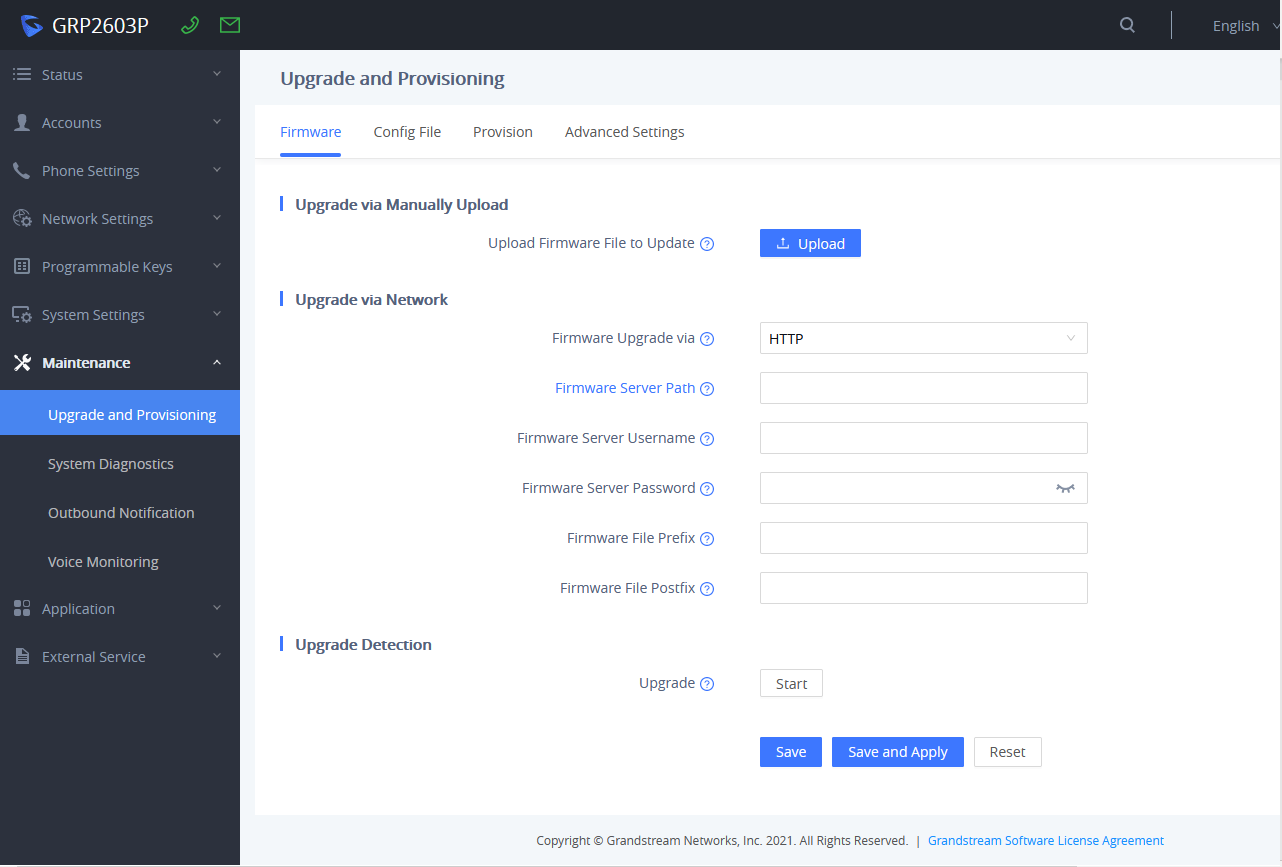
And we click on Upload, and we browse to the firmware file downloaded and unzipped, this file is in BIN format, and we click on Open.
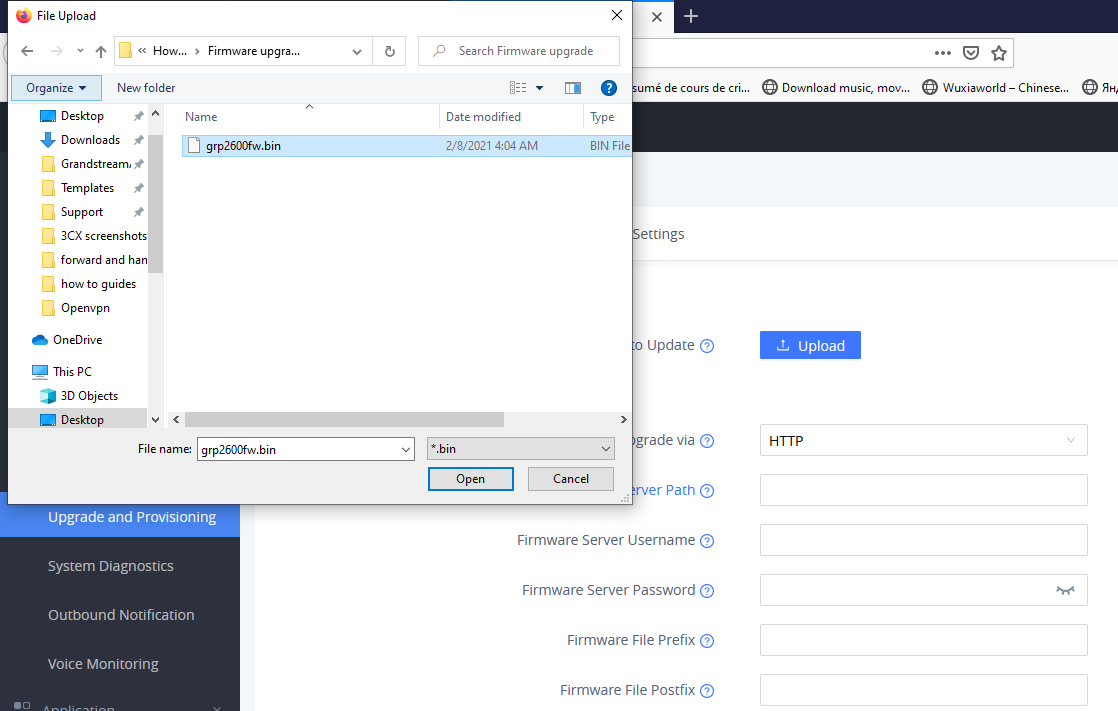
And then the Phone GUI will show a bar describing the progress of the firmware upgrade , wait until the GRP260x finishes the firmware Upgrade, and the phone will automatically reboot showing , once the firmware upgrade is done.

Advanced Options
Automatic Upgrade
Automatic Upgrade allows to periodically check if a newer firmware is available to download and upgrade the device. This option will help to keep the devices up to date. It can be enabled from web GUI 🡪 Maintenance 🡪 Upgrade and provisioning page.
For the GRP260X you need to navigate to Maintenance 🡪 Upgrade and provisioning under Provision Tab.
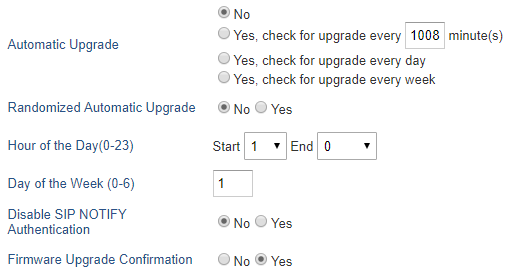
The automatic upgrade can be configured based on following parameters:
- Every [Time interval] in minute(s)
- Every day (“Hour of the Day” should be configured)
- Every week (“Hour of the Day” and “Day of the Week” should be configured, 0 is Sunday)
The device will check the firmware file availability in the specified time interval. If found, it will be downloaded, and the upgrade process will be initiated automatically.
Note:
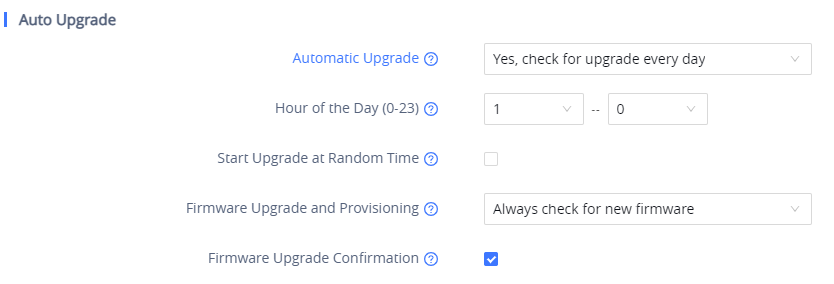
For the GRP260X, in order to have the access to edit the check for the firmware schedule, we will need at first to change the Automatic Upgrade from No to one of the following :
- Yes, check for upgrade every Minute,
- Yes, check for upgrade every Day,
- Yes, check for upgrade every Week.
And then we can adjust the settings according to our deployment and our needs,

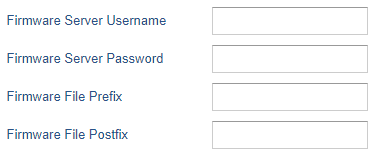
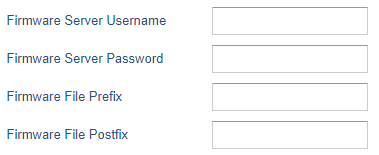
Firmware File Prefix and Postfix
Firmware prefix and postfix are two options which can be configured by users to lock the firmware update, then only the firmware with the matching prefix and/or postfix will be downloaded and flashed into phone.
Firmware file prefix and postfix can be configured from Web GUI 🡪 Maintenance 🡪 Upgrade and provisioning.
For the GRP260x, this can be found under the Firmware Tab.

Use Case Example:
Using firmware prefix and postfix, users store different firmware versions in same folder and only upgrade to specific version.
- If Firmware File Prefix is set to 1.0.9.22 on a GRP26XX series phone, for example, requested firmware file will be 1.0.9.22grp2610fw.bin

- If Firmware File Postfix is set to 1.0.9.22 on a GRP26XX series phone, for example, requested firmware file will be grp2610fw.bin1.0.9.22


HTTP/HTTPS User Name and Password
HTTP/HTTPS User Name and Password need to be configured if HTTP/HTTPS server requires authentication to access and download firmware files.
To begin firmware upgrade process, the phone sends an initial request to download firmware files from the server, the request will be challenged by the server to provide valid credentials, the phone sends same request including configured HTTP/HTTPS User Name and Password, if accepted, firmware upgrade process can start.
If Always Authenticate Before Challenge is set to “Yes”, the phone includes configured credentials in initial request to download firmware files before being challenged by the server. The default setting is “No”.
