
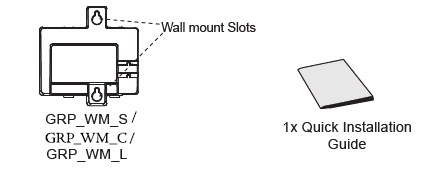
Overview
This guide provides instructions for mounting your GRP261x/GRP2650 series phone to the wall. Provided instructions apply to all GRP261x series models, GRP2650/GRP2670 model, and all GRP_WM bracket models. There are three wall-mount bracket models:
- GRP_WM_S for GRP2612/P/W and GRP2613
- GRP_WM_L for GRP2614, GRP2615 and GRP2616
- GRP_WM_C for GRP2650 and GRP2670
Package Contents
Adjusting Hookswitch Tab
Make sure to adjust the hookswitch tab position up to hold the handset while the phone is mounted on the wall (tab with extension down is recommended for desktop usage).
- Pull out the tab from the handset cradle.
- Rotate the tab to extend up.
- Plug it back into the slot with the extension up.

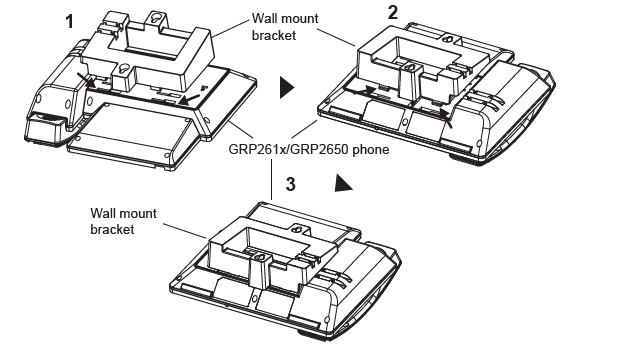
Installing Wall Mount Bracket
- Put the wall mount’s ribs into the unit’s groove.
- Press this position and install the wall mount.
- The wall mount is installed completely.
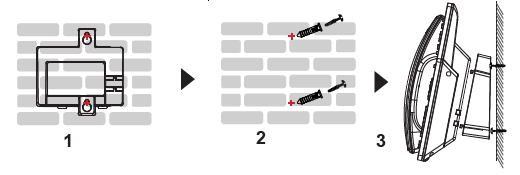
Mounting the Phone to the Wall
- Use the wall mount bracket to mark two vertical dots using “wall mount slots” on the wall where the phone will be installed.
- Using a drill, make a hole on each marked dot. Put a plastic anchor and screw (not provided) on each hole. Leave enough space to attach the wall mount bracket to the wall.
- Mount the GRP261x/GRP262x/GRP263x/GRP2650/GRP2670 phone with a wall mount bracket attached to the wall using wall-mount slots.

For Certification, Warranty and RMA information, please visit www.grandstream.com