
PRECAUTIONS
OVERVIEW
The GVC3210 offers businesses a revolutionary video conferencing endpoint with unprecedented flexibility and the support for multiple popular video conferencing protocols out of the box. Based on Android 6.x Operating System, in addition to Grandstream’s industry leading SIP-based video conferencing platform. The GVC3210 sets a new bar for enterprise class video conferencing solution in terms of flexibility, interoperability, system openness, application richness and ease of use in the modern Internet age.
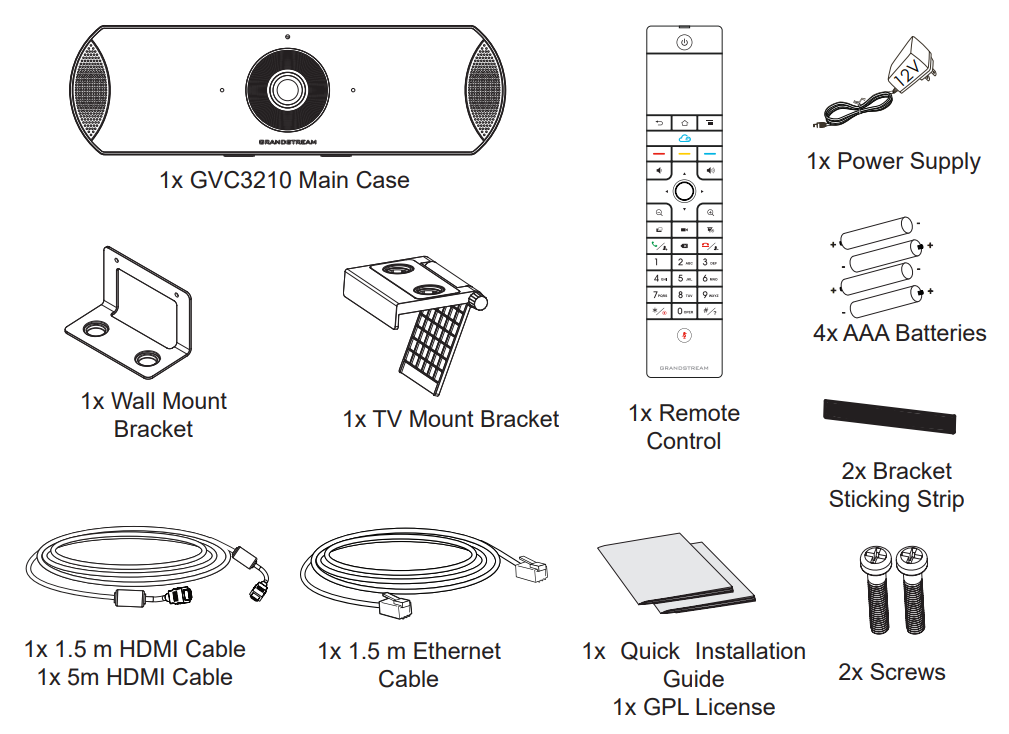
PACKAGE CONTENTS
INSTALLATION
The GVC3210 can be installed in the following two ways:
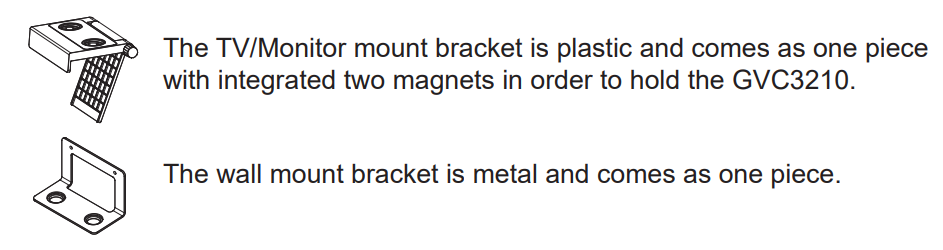
Option 1: Mount on TV/Monitor. TV/Monitor mount bracket is required.
Option 2: Mount on wall. Wall mount bracket is required.
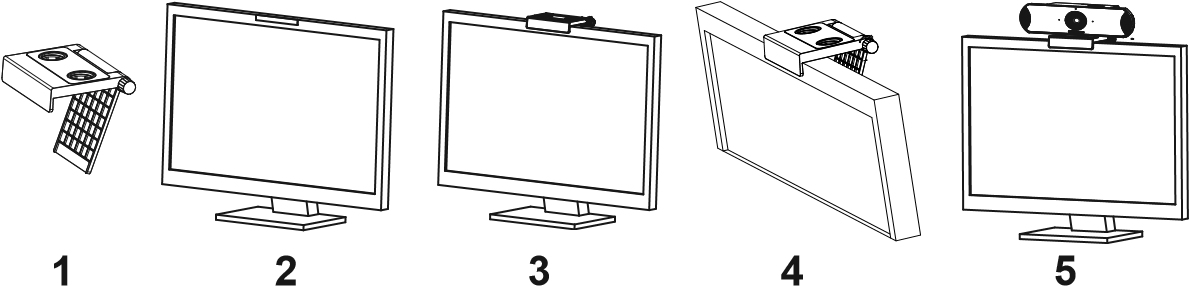
INSTALLING BRACKET TO MOUNT THE GVC3210 ON TV/ MONITOR
- Locate the TV/Monitor mount bracket in the package.
- Put the Bracket Sticking Strip on the frame of the TV.
- Put the bracket on the Bracket Sticking Strip and adjust the angle.
- Lock the bracket and fix it on the TV.
- Put the GVC3210 on the bracket and fix it by the bottom magnet.
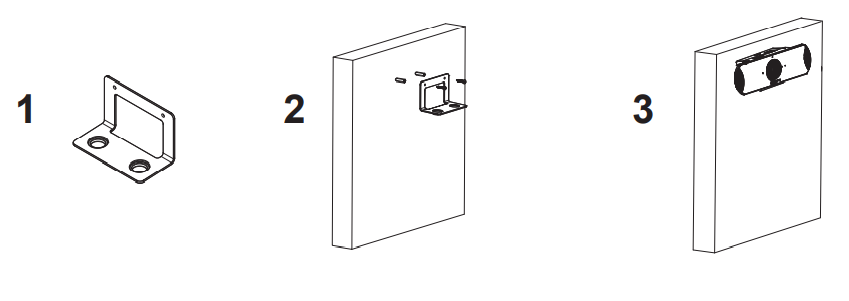
INSTALLING BRACKET TO MOUNT THE GVC3210 ON WALL
- Locate the Wall mount bracket in the package.
- Fix the metal bracket on the wall using two plastic expansion pipes and two screws.
- Put the GVC3210 on the bracket and fix it by the bottom magnets.
CONNECTING THE GVC3210
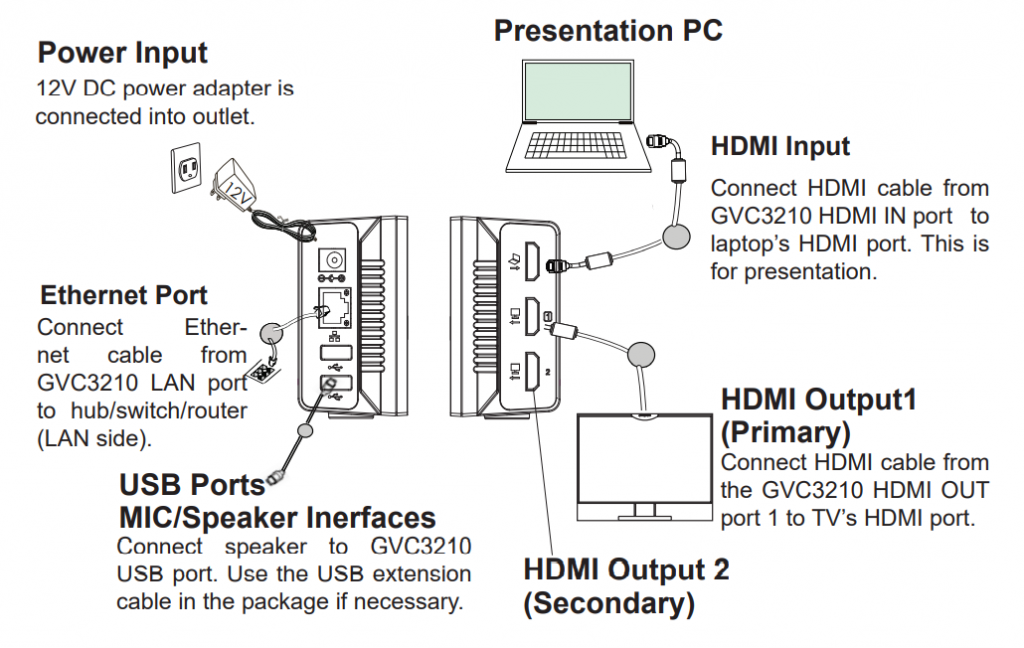
- Connect the LAN port of the GVC3210 to the RJ-45 socket of a hub/switch or a router (LAN side of the router) using the Ethernet cable.
- Connect the HDMI [1] port of the GVC3210 to the HDMI port of the main display device (e.g., TV) using the HDMI cable. Connect HDMI port 2 if you have additional display devices.
- Connect the 12V DC output plug to the power jack on the GVC3210 and then plug the power adapter into an electrical outlet.
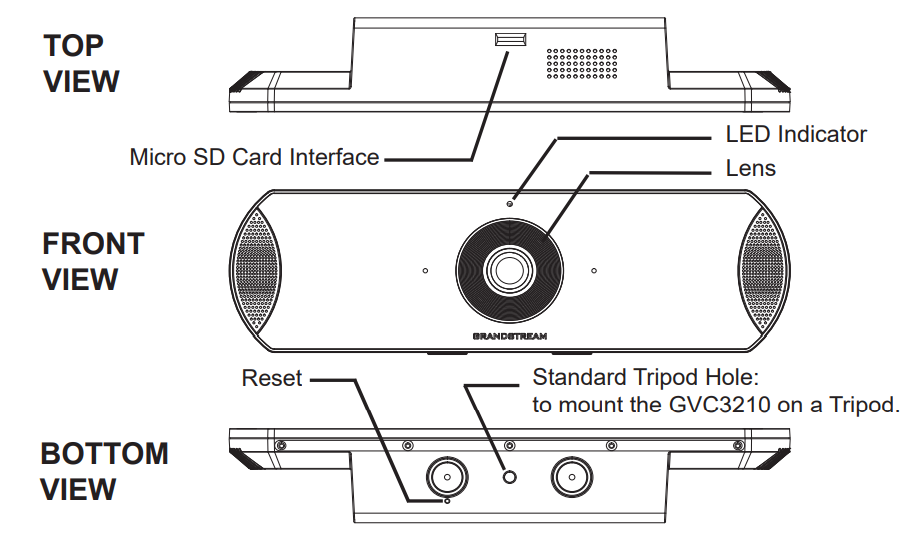
- The LED Indicator in the front of the GVC3210 will show if the device is ready to be used by changing the color from red to green.
- Insert your Micro SD card into the Micro SD card slot. The recording files will be saved in the Micro SD card.
- (Optional) Connect presentation device (e.g., a laptop) to the GVC3210 HDMI IN port for presentation purpose during conference call.
- (Optional) Connect USB accessory (e.g., mouse, keyboard, USB flash drive, … etc) to the USB port.
Connecting example
USING THE GVC3210 REMOTE CONTROL

- Open the battery cover on the back of the remote control. Place four AAA batteries proprely and put the cover back on.
- When using the GVC3210 for the first time, the remote control should be paired and connected to it via Bluetooth or infrared connection already. After the GVC3210 fully boots up, tap on the OK button on the remote control to initiate the connection. Then the remote control can be used normally.
- Infrared connection:
Users need to keep the two devices in front of each other without any substantial obstruction in between.
The LED on the remote control is green when using infrared connection mode.
- Bluetooth connection:
If the remote control is not paired with the GVC3210 anymore (e.g., a factory reset is made), press OK button and number 5 button at the same time for about 4 seconds. This will initiate pairing process on the remote control and it will be paired and connected to the GVC3210 shortly.
CONFIGURING GVC3210 VIA WEB UI
- Ensure your GVC3210 is properly powered up and connected to the Internet.
- The IP address of the GVC3210 will show on the top status bar of the connected display device (e.g., TV) via HDMI.
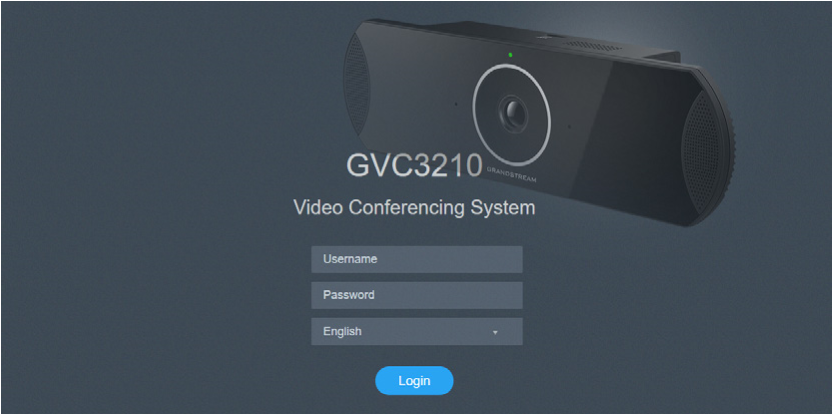
- Type the IP address in your PC’s browser (see figure below).
- The default username and password for administrator are “admin” and “admin”. The default username and password for user are “user” and “123”.
For the detailed user manual, please download from: http://www.grandstream.com/support