
PRECAUTIONS:
OVERVIEW:
The GVC3212 is a compact and affordable HD video conferencing endpoint for TV and desktop mounting. This device pairs with Grandstream’s IPVideoTalk Meeting plans, an online conferencing platform that allows you to host meetings that can be joined on nearly any device including mobile, PCs, and laptops. The GVC3212 comes equipped with integrated dual microphones that offer high quality voice pickup at up to 3-meter distance, advanced echo cancellation, and sophisticated background noise suppression. It supports Miracast for convenient wireless content screen sharing, allowing meeting participants to share presentations, videos, or other content directly from their PC or Android devices without tangling cables. This easy-to-use, easy-to-deploy video conferencing endpoint is the ideal choice for remote workers and small offices who need a pricefriendly option that still provides the features necessary to sustain high quality video communications.
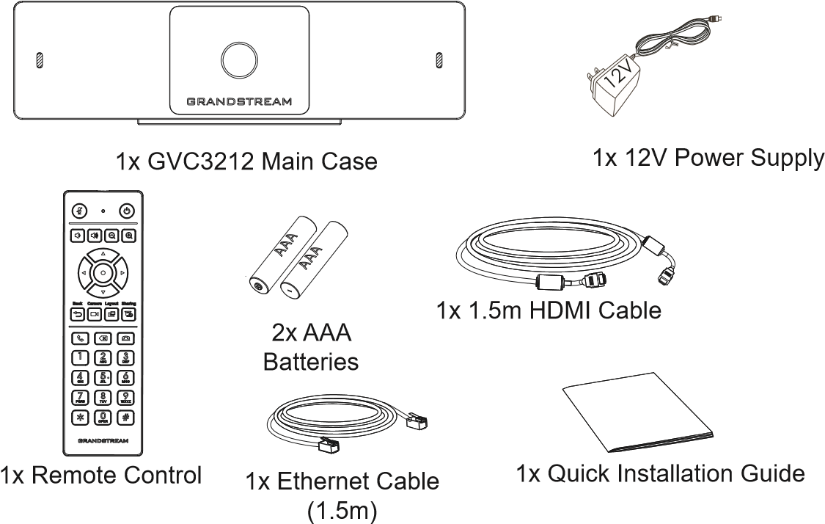
PACKAGE CONTENTS:
INSTALLATION:
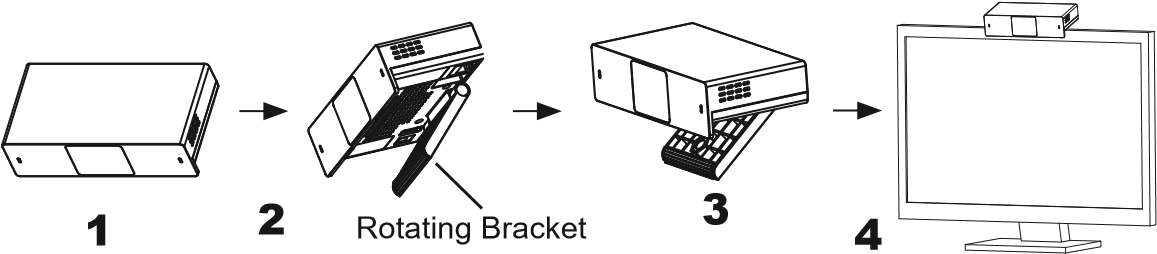
The GVC3212 can be installed on TV screen using its built-in bracket by following the steps below:
- Open the rotating bracket under the main unit, as shown in the following figure.
- Fasten the main unit to the top border of the TV.
- According to the thickness of the display device, adjust the rotating bracket to the most suitable angle and ensure the top of the bracket sits properly.
CONNECTING THE GVC3212:
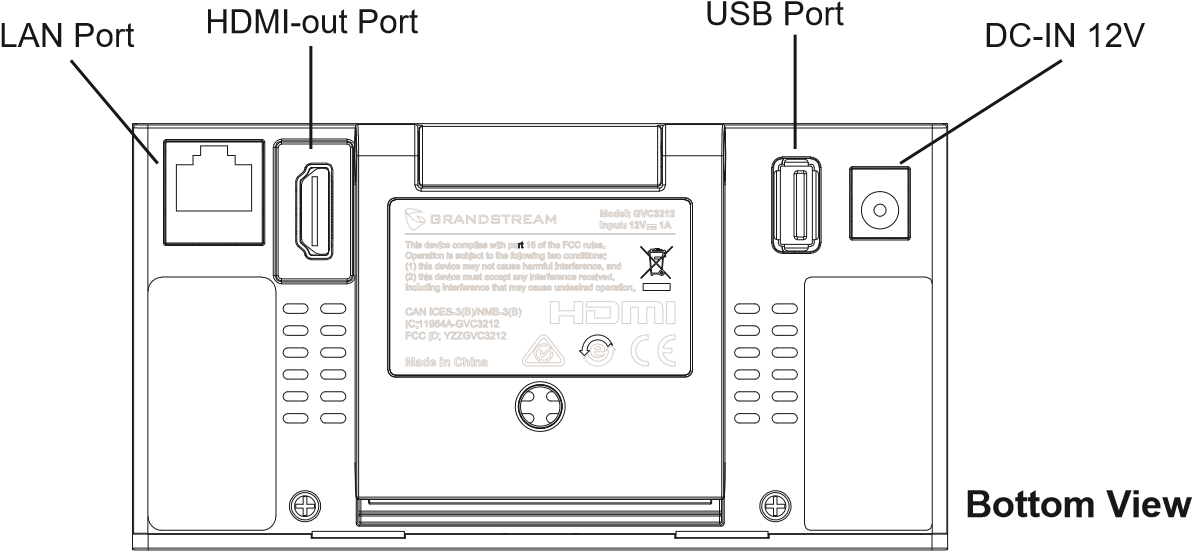
- Connect the LAN port of the GVC3212 to the RJ-45 socket of a hub/switch or a router (LAN side of the router) using the Ethernet cable.
- Connect the HDMI-out port of the GVC3212 to the HDMI port of the main display device (e.g., TV) using the HDMI cable.
- Connect the 12V DC output plug to the power jack on the GVC. Then, plug the power adapter into an electrical outlet.
- The display device (e.g., TV) will show the idle HOME screen with IP address on the top status bar.
- (Optional) Connect USB accessory (e.g., mouse, keyboard, USB flash drive and etc) to the USB port.
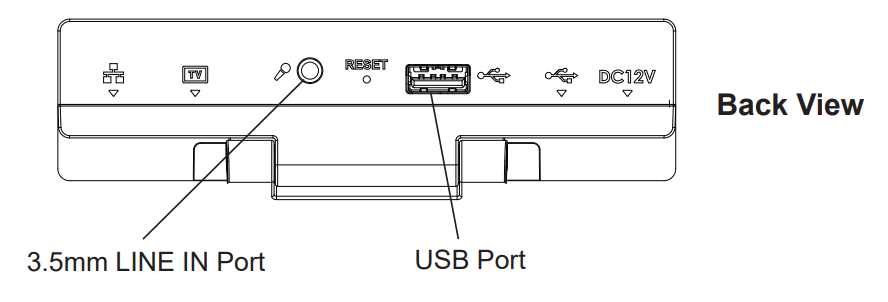
- Use the Line-In port to connect a microphone (external audio input device).
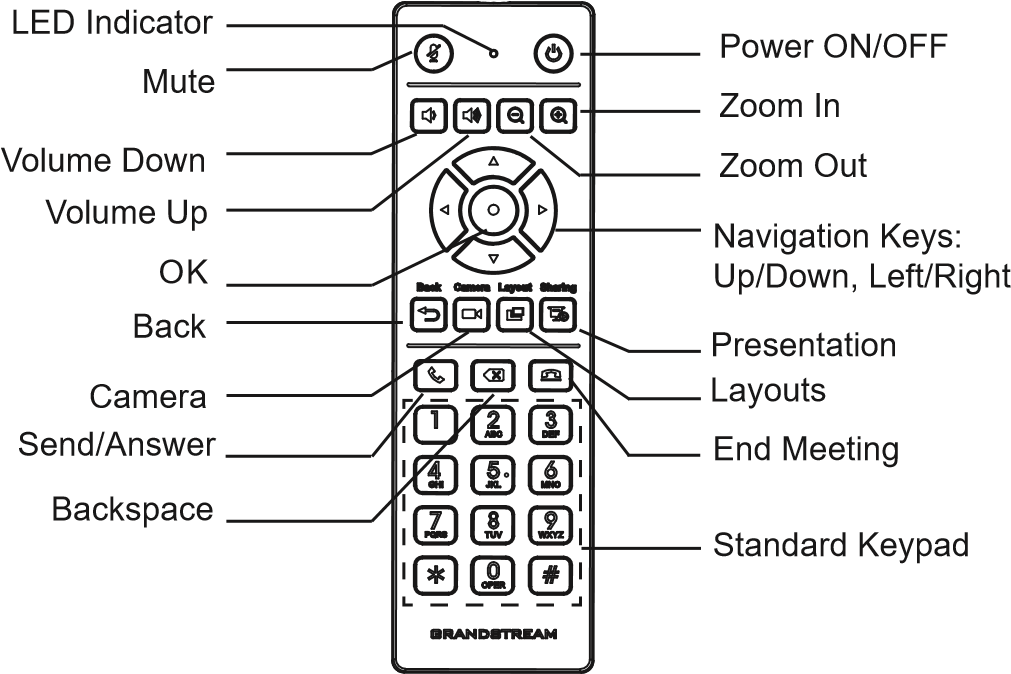
USING THE GVC3212 REMOTE CONTROL:
- Open the battery cover on the back of the remote control.
- Place two AAA batteries properly and put the cover back on.
CONFIGURING GVC3212 VIA WEB UI:
- Ensure your GVC3212 is properly powered up and connected to the Internet.
- The IP address of the GVC3212 will show on the top status bar of the connected display device (e.g., TV) via HDMI.
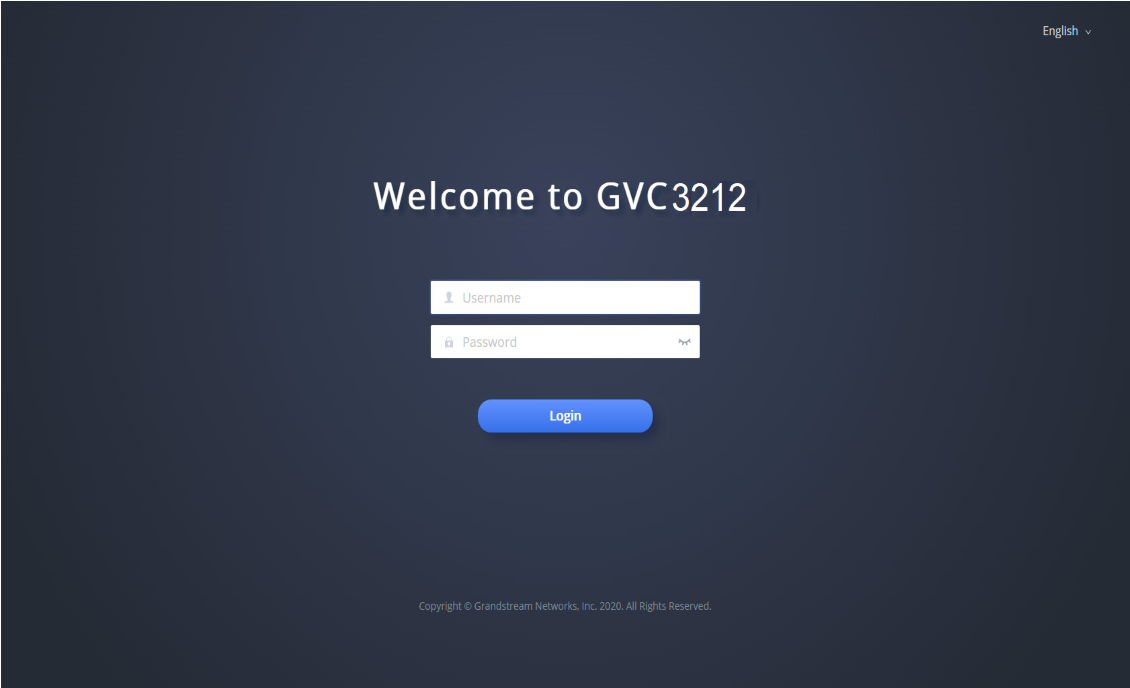
- Type the IP address in your PC’s browser (see figure below).
- Enter username and password to login. (The default administrator username is “admin” and the default random password can be found at the back sticker on the GVC3212).
The GNU GPL license terms are incorporated into the device firmware and can be accessed via the Web user interface of the device at my_device_ip/gpl_license. It can also be accessed here: http://www.grandstream.com/legal/open-source-software
To obtain a CD with GPL source code information please submit a written request to info@grandstream.com
For the detailed user manual, please download from: http://www.grandstream.com/support