Overview
Port forwarding allows redirecting a communication request from one address and port number combination to another while the packets pass through a network gateway or a router. It is used to make services on a protected (internal) network available to hosts on a public network (internet) by remapping the communication’s destination IP address and port number to an internal host.
Configuration
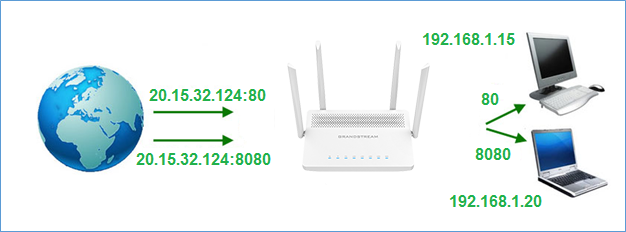
In this guide, we will configure our router to redirect the following:
- Redirect each incoming request to the public IP on port 80 (TCP) to host with internal IP 192.168.1.15
- Redirect each incoming request to the public IP on port 8080 (TCP) to host with internal IP 192.168.1.20.
To achieve this, access GWN7052(F)/GWN7062 web GUI → External Access → Port Forwarding and following the below steps:
- Click
 the following window popup to add a new rule.
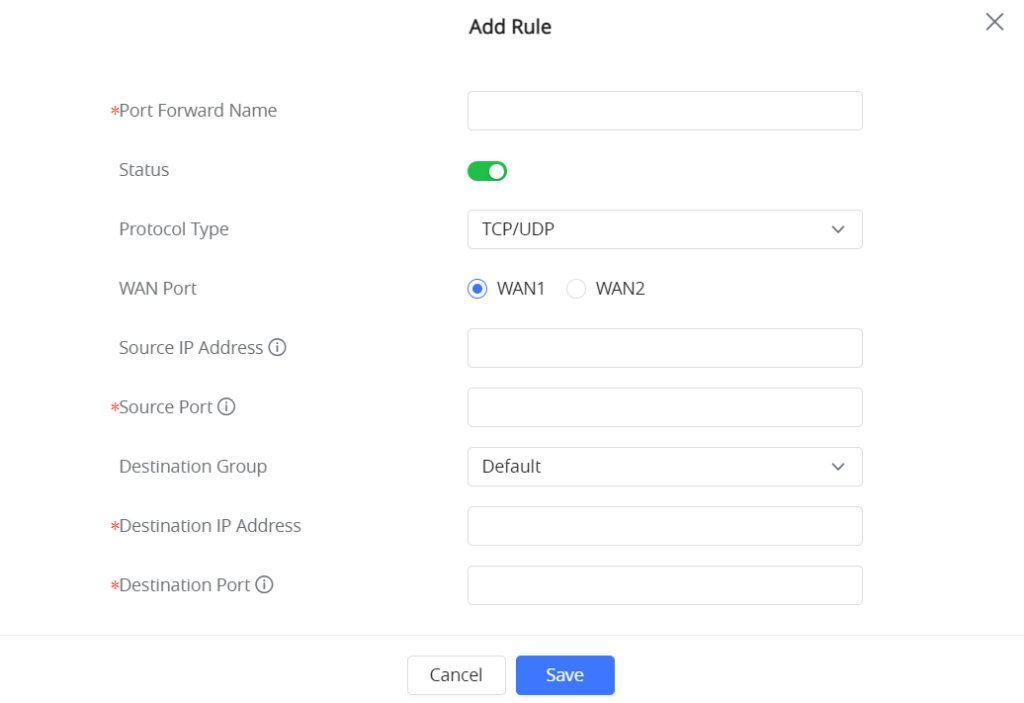
- Set a name to identify the rule in the “Port Forwarding Name” field.
- Switch the Status to “ON“.
- Select the protocol used for incoming requests from the “Protocol” dropdown list (TCP/UDP, TCP, or UDP). In this example: TCP.
- Choose whether the request is incoming from WAN1 or WAN2 from the “WAN Port” options (in the case of using the GWN7052 router model, there will be one WAN port available for configuration).
- Enter the “Source IP Address” if known. If not set, any IP address on the corresponding WAN port can be used.
- Enter the incoming port number on the “Source Port” field. In this example: 80 and 8080 are for rule 1 and rule 2 respectively.
- Select the group to which the destination device belongs using the “Destination Group” field.
- Enter the device’s IP address to which the incoming traffic should be redirected on the “Destination IP” field. In this example: 192.168.1.15 and 192.168.1.20 for rule 1 and rule 2 respectively.
- Choose the port to which the incoming traffic will be redirected for the selected IP address within the selected network group using the “Destination Port” field. In this example: 80 and 8080 are for rule 1 and rule 2 respectively.
- After filling in the fields, click on


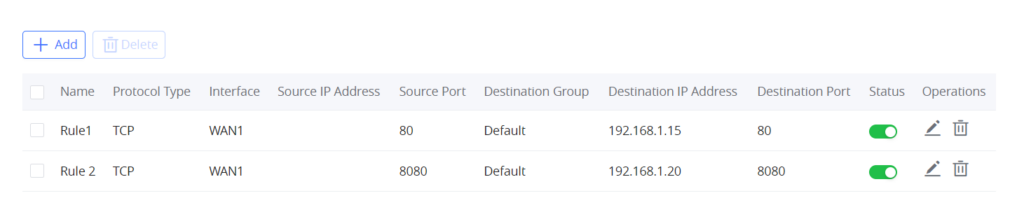
Above is a screenshot from the first rule configuration, on a similar manner, we will create a second rule.
The created rules will be listed as shown below: