


This guide explains how to pair two GWN7062E(T) routers using their physical SYNC buttons to establish a Mesh network. Choose either the wired pairing process, which uses an Ethernet cable during pairing, or the wireless pairing process, which pairs the routers without a cable between them. The router connected to the internet acts as the primary router; the second device acts as the sub-router.
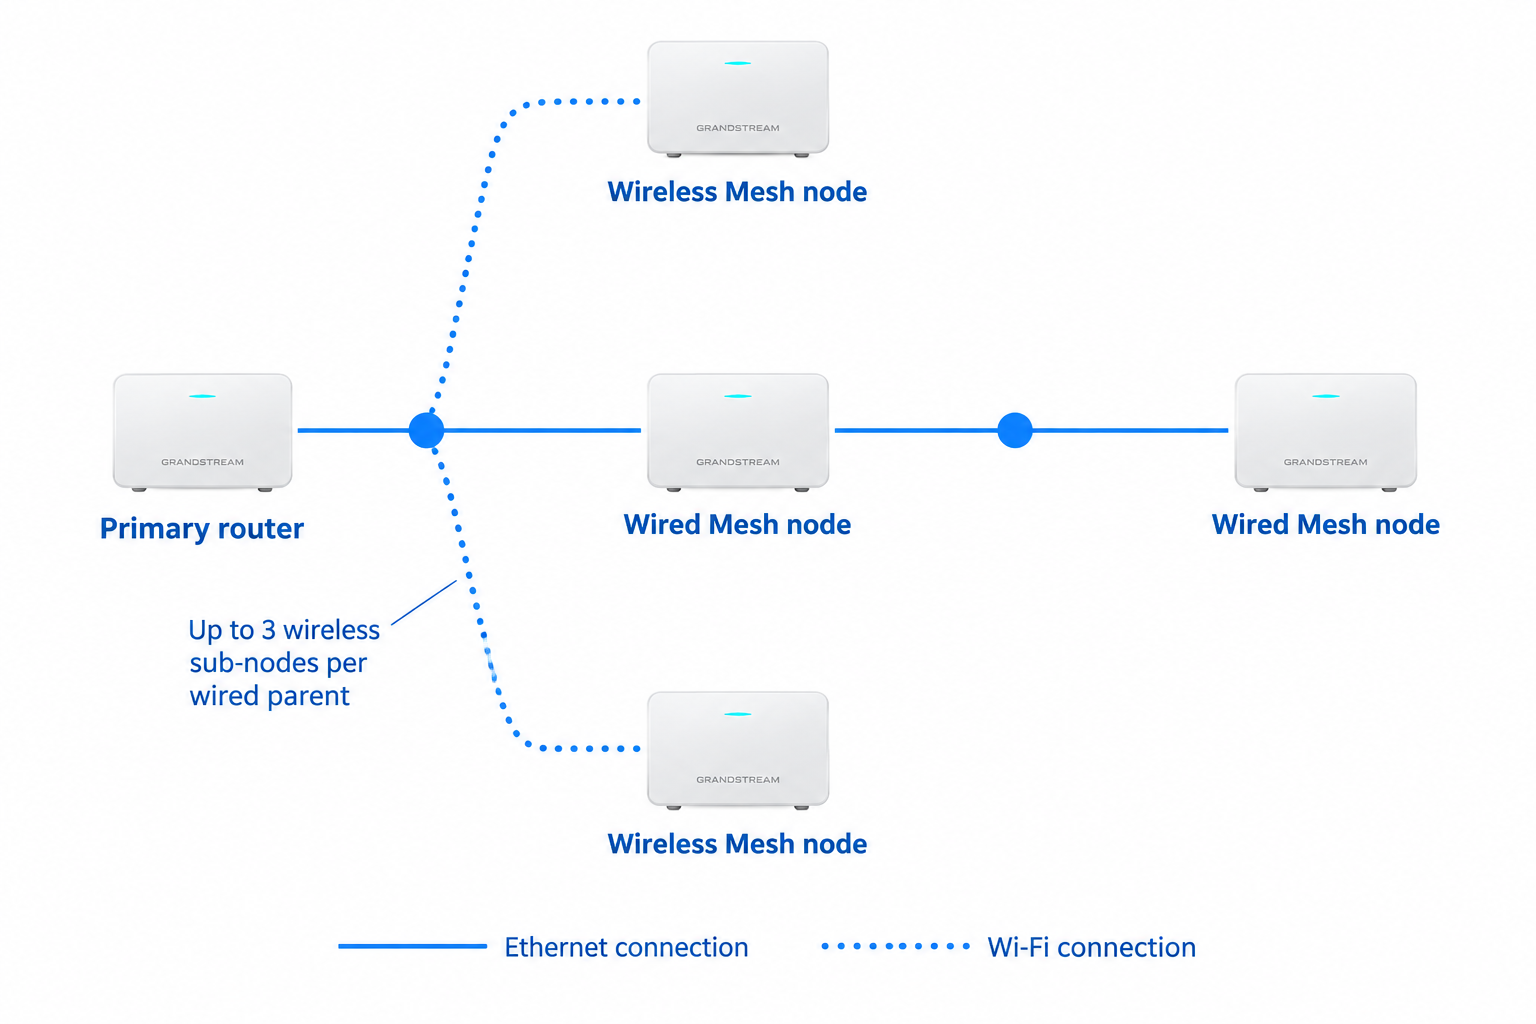
Mesh capacity: The primary router can manage up to 16 Mesh nodes. Wired nodes can act as parent nodes, and each wired parent can support up to three wireless sub-nodes. Wireless sub-nodes cannot act as parent nodes.
Before You Start
- Power on both routers.
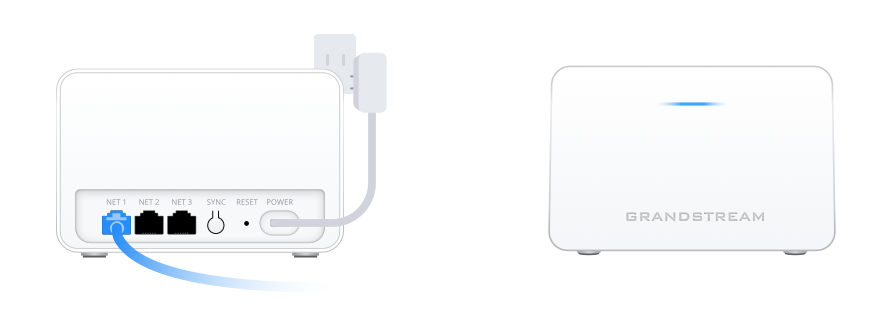
- During initial setup, connect an Ethernet cable from your modem or internet source to any Ethernet port on the primary router. The router automatically detects the WAN connection. Sign in to its Web interface and complete the initial setup. Before pairing, confirm that its LED is solid blue.
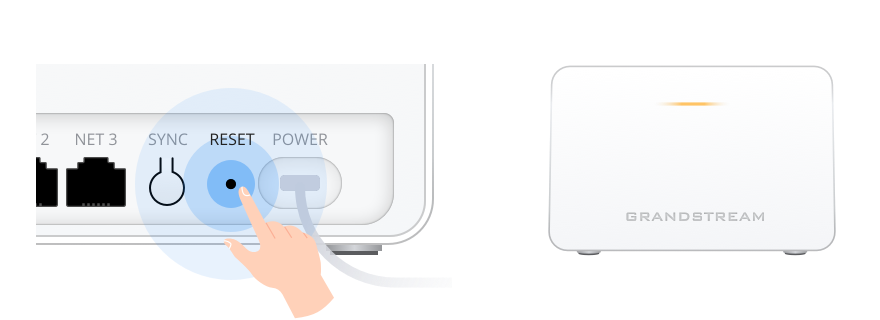
- Reset the sub-router to factory defaults by holding the RESET button for about 10 seconds. The LED turns red after you release the button, followed by solid green and briefly purple. Wait until it starts flashing yellow.
- Choose one of the following SYNC-button pairing methods: wired pairing (recommended) or wireless pairing.
Wired Pairing Process (Recommended)
Follow these steps to pair the routers using an Ethernet cable and their SYNC buttons.
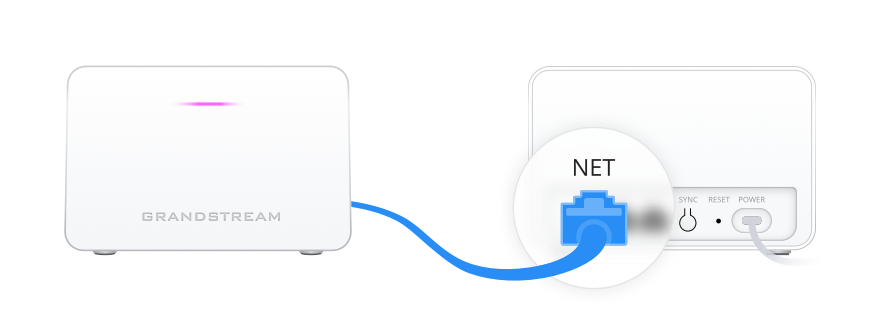
- While the sub-router LED is flashing yellow, double-press its SYNC button. Wait approximately one minute for the LED to turn solid purple.
- Use an Ethernet cable to connect any Ethernet port on the sub-router to an available Ethernet port on the primary router. Leave the primary router’s internet cable connected.
- Press and hold the SYNC button on the primary router for 3 seconds, then release it. Its LED changes from solid blue to purple and begins blinking slowly as it searches for the sub-router.
- When the sub-router is detected, the primary router adds it automatically, and both LEDs blink purple rapidly.
- Both LEDs then turn solid purple while pairing is in progress.
- Wait for both LEDs to turn solid blue. In the primary router’s Web interface, open Advanced > Mesh and confirm that the sub-router is listed as Connected. Allow configuration synchronization to finish before disconnecting the cable or moving the sub-router.
- After synchronization finishes, move the sub-router to the area where additional Wi-Fi coverage is needed. You can keep it connected by Ethernet or let it reconnect automatically over Wi-Fi within range of the primary router. Connect the sub-router to power at its new location and wait for its LED to turn solid blue.
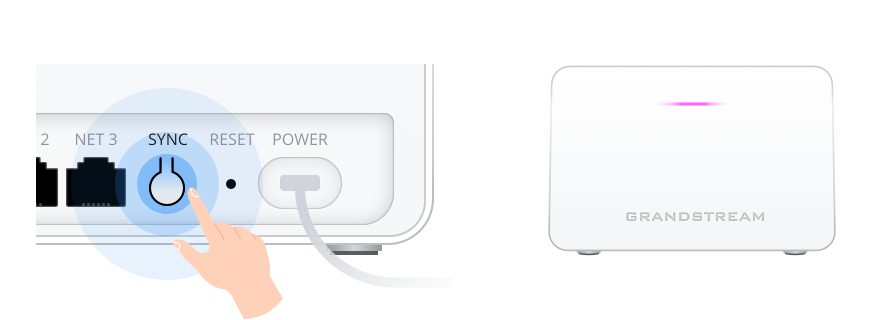
Note: If either router’s LED turns solid red, pairing failed. Verify the Ethernet connection, reset the sub-router to factory defaults, prepare it again, and repeat the wired pairing procedure.
Note: After the Mesh connection is established, the sub-router automatically synchronizes configuration from the primary router, including its wireless settings. Applying the synchronized wireless settings restarts Wi-Fi on the sub-router. The connection between the routers remains active while the Ethernet cable is connected. Allow some time for synchronization while keeping both routers powered on and the Ethernet cable connected.
Wireless Pairing Process
Follow these steps to pair the routers using their SYNC buttons without an Ethernet cable between them.
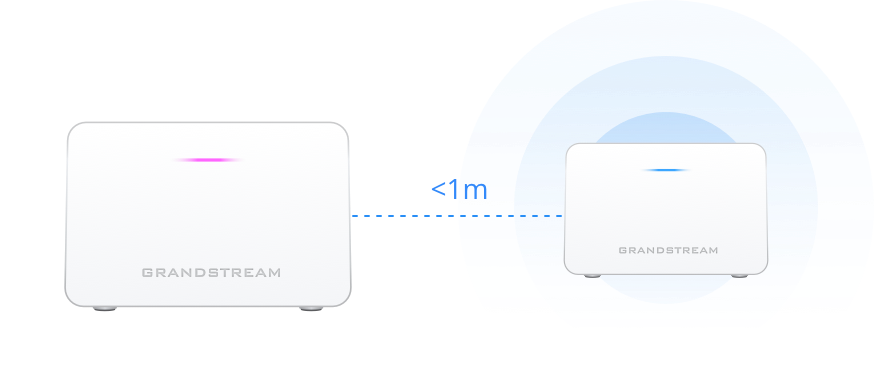
- Place the sub-router within 1 meter of the primary router, with no Ethernet cable connecting them. Confirm that the primary router’s LED is solid blue and the sub-router’s LED is flashing yellow.
- Press and hold the SYNC button on the primary router for 5 seconds, then release it. Both routers begin flashing purple, initially alternating.
- When both LEDs flash purple rapidly at the same time, press and release the sub-router’s SYNC button once, then press and hold it again for 4 seconds and release.
- Wait for both routers’ LEDs to turn solid blue, indicating that pairing is complete.
- In the primary router’s Web interface, open Advanced > Mesh and confirm that the sub-router is listed as Connected. Allow configuration synchronization and any temporary reconnection described below to finish before moving the sub-router.
- After synchronization finishes and the connection is restored, move the sub-router to the area where additional Wi-Fi coverage is needed, within wireless range of the primary router. Connect it to power and wait for its LED to turn solid blue.
Note: If either router’s LED turns solid red, pairing failed. Confirm that the routers are within 1 meter of each other and that no Ethernet cable connects them, reset the sub-router to factory defaults, prepare it again, and repeat the wireless pairing procedure.
Note: After the Mesh connection is established, the sub-router automatically synchronizes configuration from the primary router, including its wireless settings. Applying the synchronized wireless settings restarts Wi-Fi on the sub-router. Because the routers are connected over Wi-Fi, their connection is temporarily interrupted and should be restored automatically once synchronization is complete. This interruption is expected and does not indicate that setup failed. Pairing and synchronization may take some time. Keep both routers powered on and wait for the connection to return without pressing SYNC again or resetting either router.
Mesh LED Indicator Reference
The table below explains the router LED states.
| LED State | Router Role | Description |
|---|---|---|
| Yellow (blinking) | Sub-router | After a factory reset, the sub-router is waiting to be paired. |
| Yellow (solid) | Sub-router | The sub-router is disconnected from the primary router. |
| Purple (solid) | Sub-router | After preparation: the sub-router is in pairing mode. |
| Both routers | During pairing: pairing is in progress. | |
| Purple (blinking slowly) | Primary router | The primary router is searching for the sub-router. |
| Purple (blinking rapidly) | Both routers | The sub-router has been detected. |
| Blue (solid) | Primary router | Before pairing: initial setup is complete and the primary router is ready. |
| Both routers | After pairing: the Mesh connection is established. | |
| Red (solid) | Either router | During pairing: pairing has failed. |