Overview
Access control is used to manage which users can access the network and which network resources can be accessed. AAA is one example of an access control feature, it is short for Authentication, Authorization, and Accounting, and provides a management framework for configuring access control on NAS ( Network Access Server) devices.
How AAA works
As a management mechanism of network security, AAA provides services in a modular manner:
- Authentication: confirming the identity of users accessing the network, and judging whether the visitor is a legitimate network user
- Authorization: giving different users Different permissions limits the services that the user can use;
- Accounting: record all operations during the user’s use of network services, including the type of service used, start time, data flow, etc
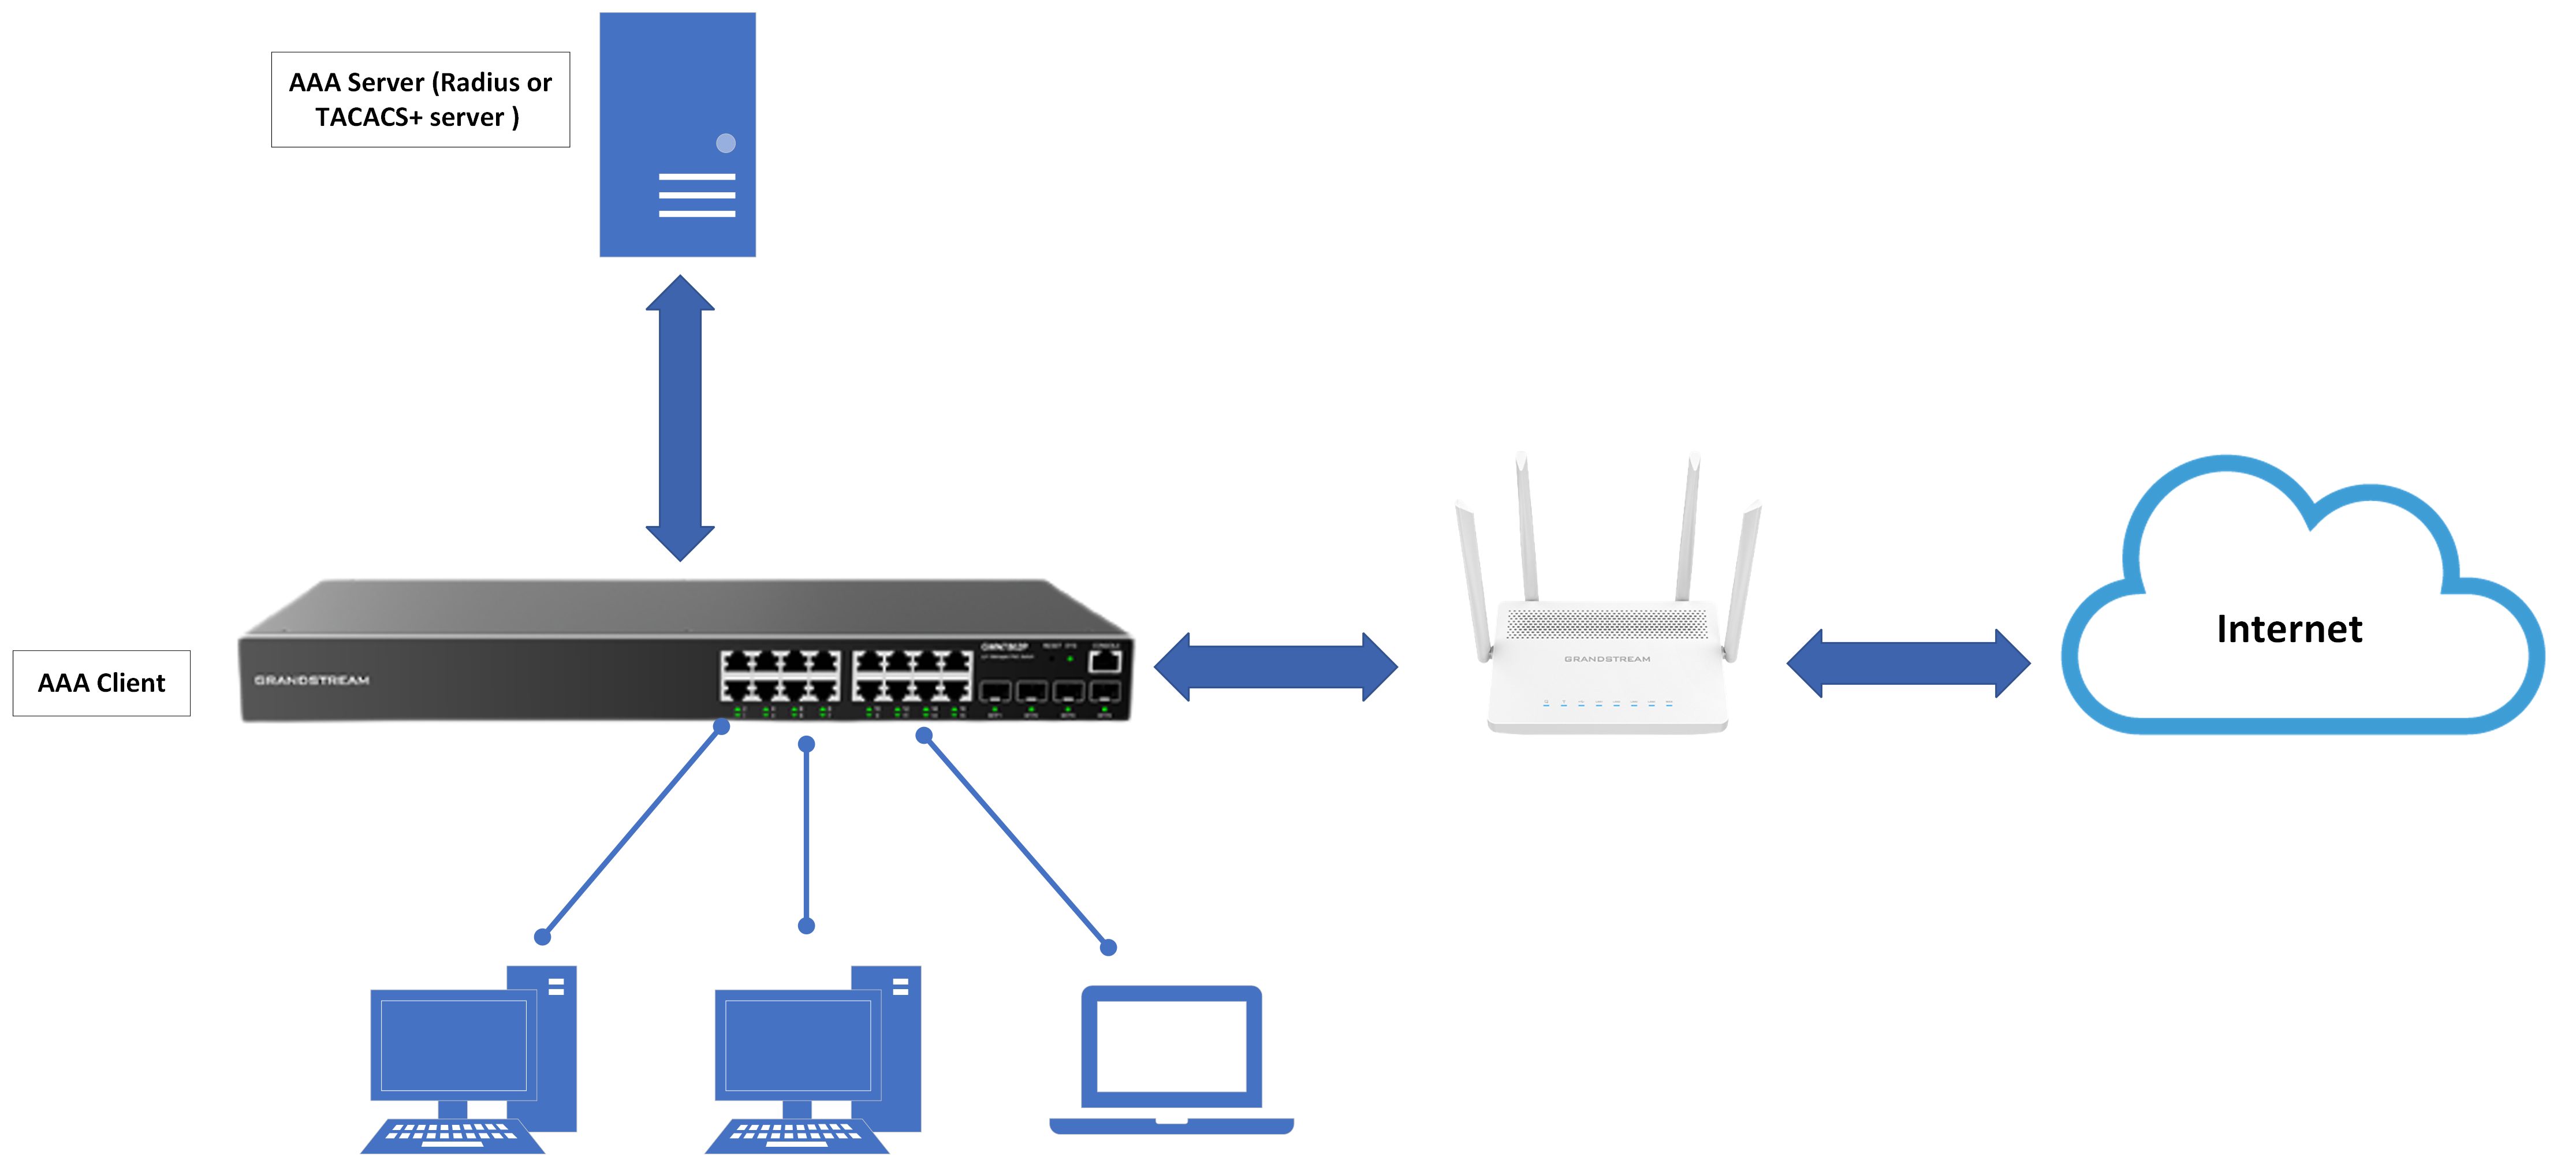
AAA adopts a client /server structure. The AAA client runs on the access device, usually called an AAA client, and is responsible for verifying user identity and managing user access; the AAA server is a collective name for the authentication server, authorization server, and accounting server. Responsible for centralized management of user information. AAA can be implemented through a variety of protocols. Currently, devices support AAA based on RADIUS or TACACS + protocol. In practical applications, the RADIUS protocol is the most used.
Configuration Example
On our GWN78xx switch, we will implement a security measure to block SSH access through the connected device management protocols, this implementation will allow us to permit SSH access control only to users defined on our radius server, to do that we can follow the below steps:
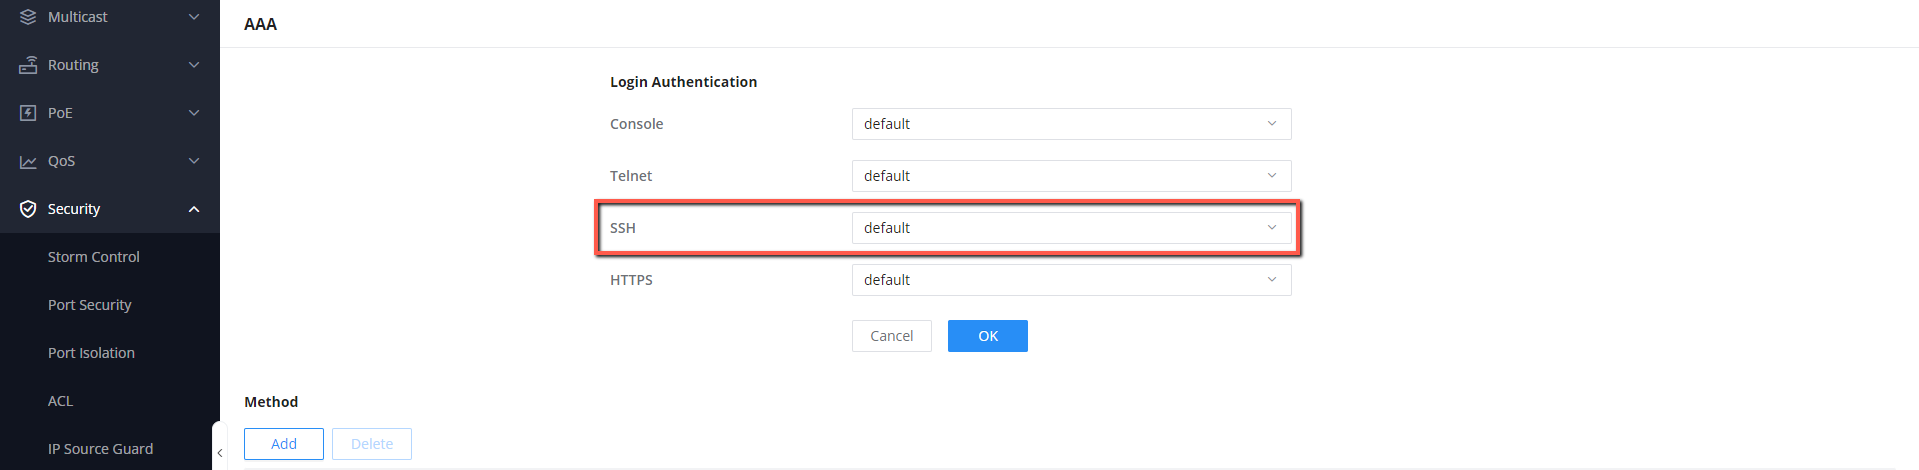
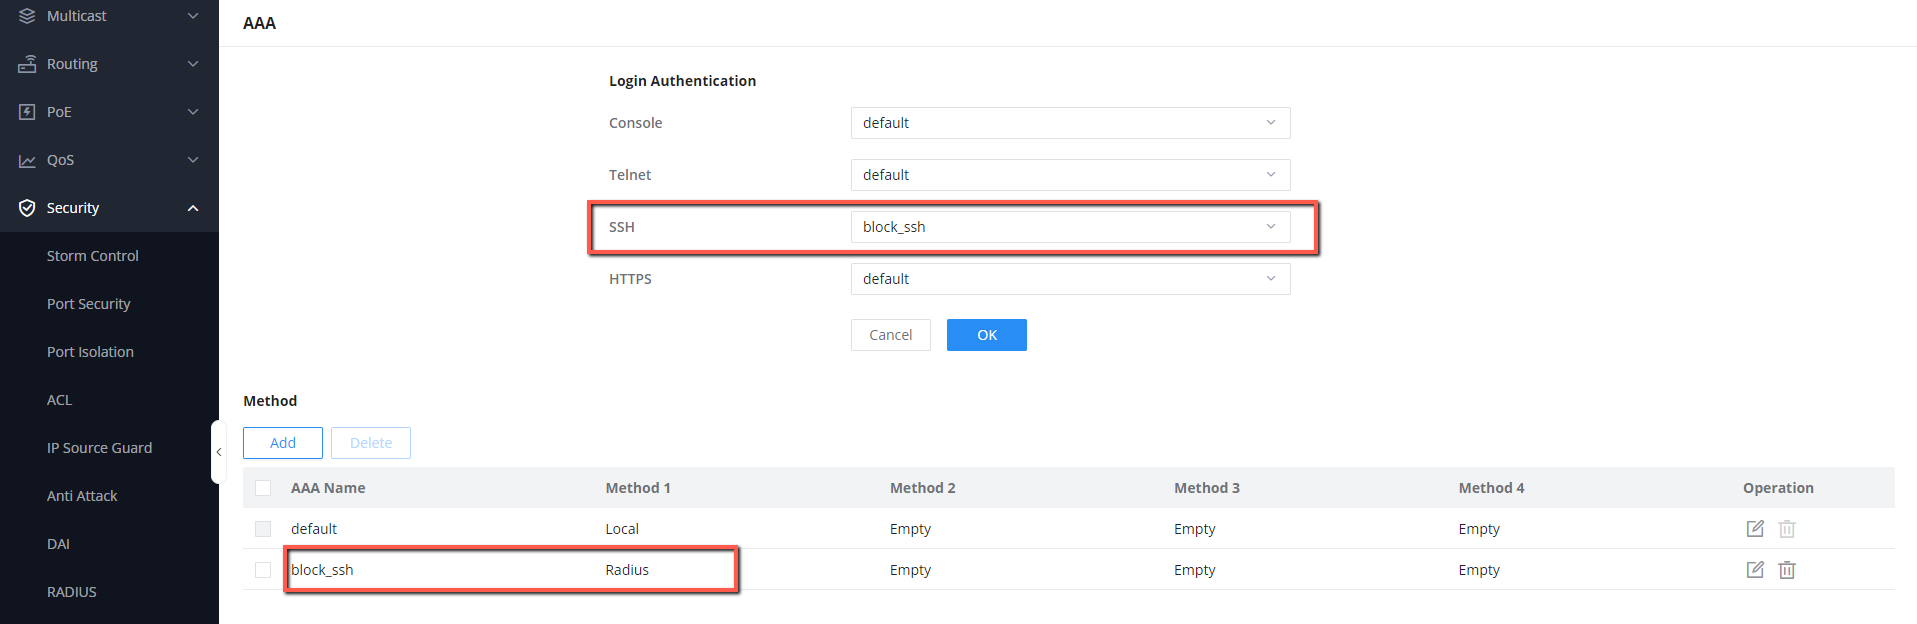
- On the GWN78xx Web UI, Access Security → AAA
- You will be prompted with a list of login authentication methods, what will concern our case is the SSH login authentication method, we can see that by default it is set to the default method that uses the local authentication method.
- Create a new authentication method under the name “block_ssh”, by clicking

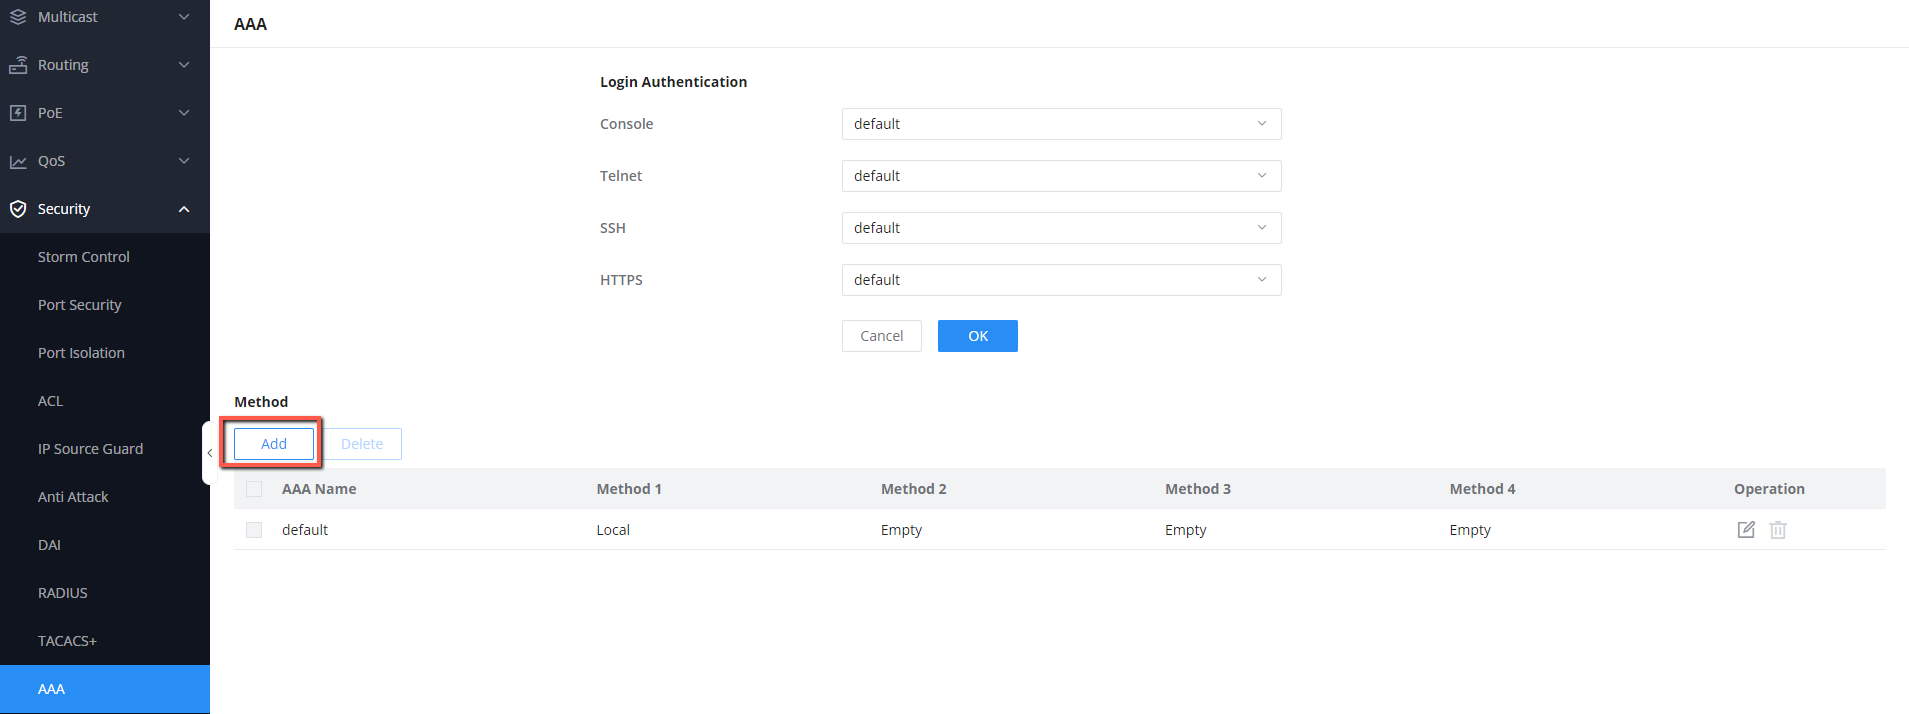
- Define the 4 methods of authentication, Method 1 is the initial method that will be used for authentication, the other methods will be used in an ordered manner as a backup for Method 1
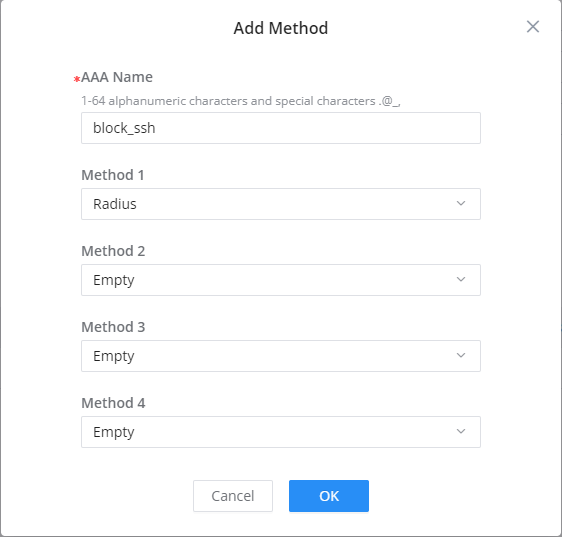
- We will set Method 1 to Radius, and we will keep the rest of the methods empty since we will not need to define an authentication backup.
- Once the auth method is defined, select it as the defined login authentication method for SSH
- Click save to save the settings.
Configuring and installing the Radius server
In our lab, we will be using a radius server installed locally on a virtual machine, to create, authenticate, and store the login information of the users who can access SSH functions of the GWN78xx switch., based on your preference, you can install your radius server locally on a dedicated virtual machine or use an online service where your radius server will be stored on the service’s cloud storage.
Establishing Radius Server
To establish a radius server for testing:
- Download a type-2 hypervisor such as VirtualBox, where your radius server will be hosted and stored, you can download it from its official website using the link.
- Download and install the iso file of an operating system where the radius server will be run, we will be using free radius for this lab, and the OS on which we will run it is Kali Linux, Make sure to download the virtual machine version of the OS.
- Once the OS is running, you can now install the Freeradius server by running the command:
sudo apt-get install freeradius - To verify if the server is installed correctly on your machine, you can run the command below to verify its version.
sudo freeradius -v
- Run the command below, to display all the configuration parameters that you can define on the Freeradius server.
sudo freeradius -CX- Now we want to access the folders on which the configuration files are stored, to do that, we must make sure we have the root privileges, you can access the root privileges by using the command:
su- Then enter the root password defined

- Run the command below, to move to the folder in which the configuration files are stored
cd /etc/freeradius/3.0
- Run the command below to display the list of files stored in the folder.
ls
- We will be interested in the two files clients.conf, where we will define the GWN78xx switch information, and users, where we will add the credentials of the users that will be connected to the radius server
- Open clients.conf file, by running the command:
open clients.conf - Go to the client section, set the name to GWN7803P, which is the switch model name, set ipaddr to the IP Address of the switch, and define a secret key:

- Now, open the users file by running the command:
open users- Once the file is opened define the username and context-Password as shown below:

- Make sure to save both files after configuration.
- Now that the server is configured, you can stop the server using the command
service freeradius stop - Run it again on debug mode to see the log messages when requests are handled by the server, to run the server in debug mode run the command.
freeradius -X
- Lastly, we can run the below command to make sure that our radius server is running correctly
systemctl status freeradius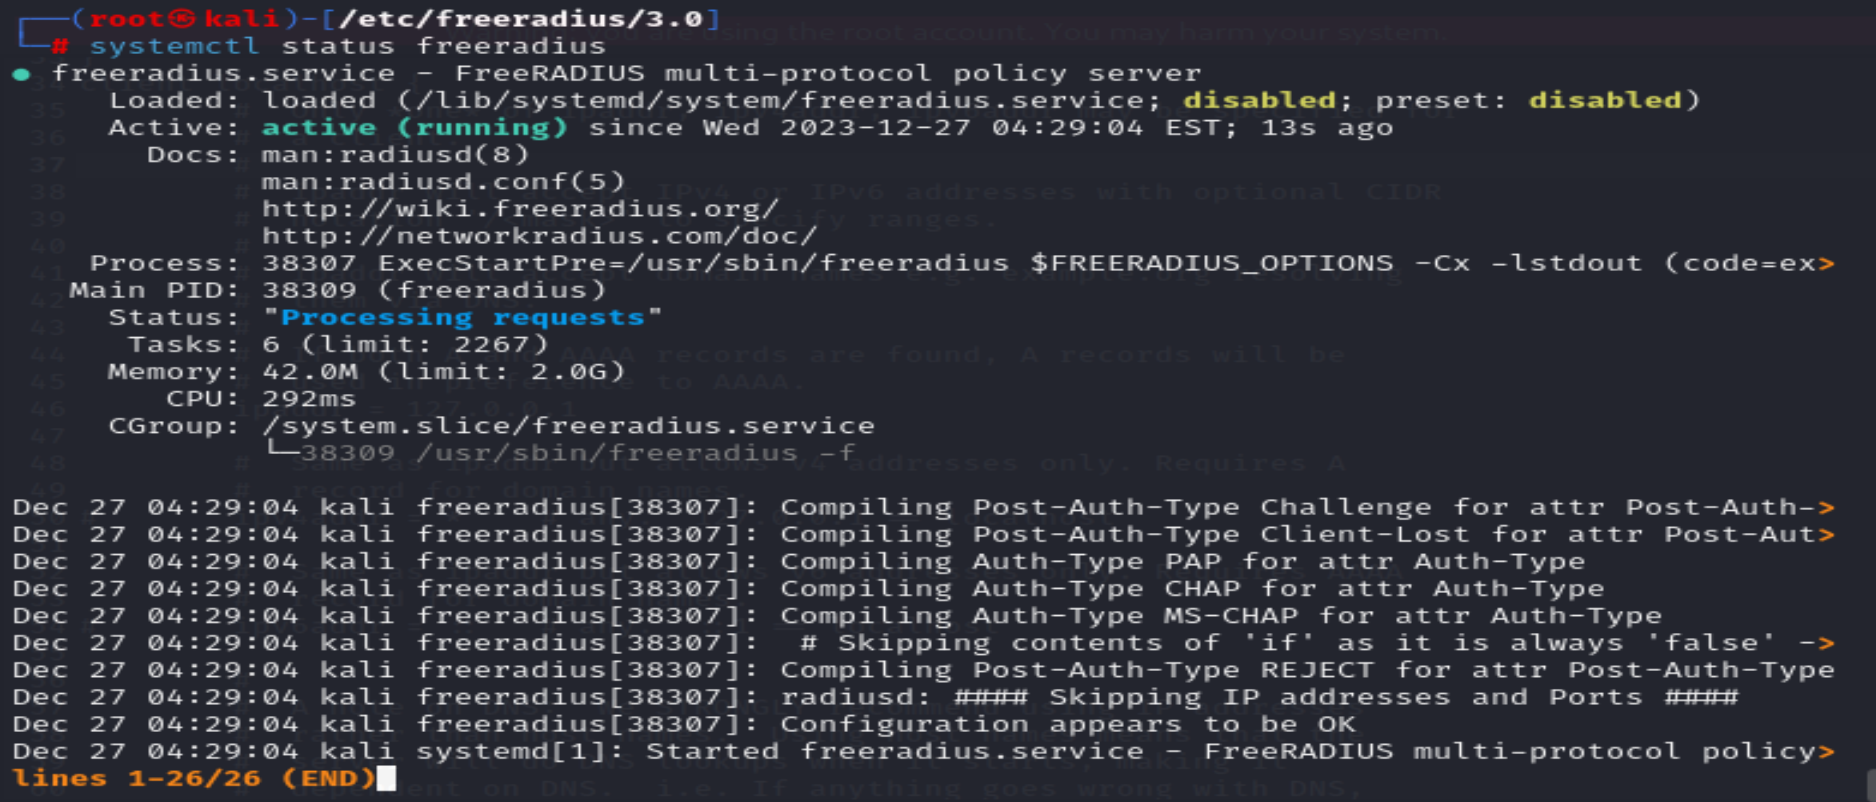
Defining the Radius server on the switch
Once the SSH authentication method is completed, we can now define our radius server that will be used to authenticate the connection, meaning only users defined in the server will be able to access the GWN78xx SSH terminal using their radius username and password. Let’s define the Radius server:
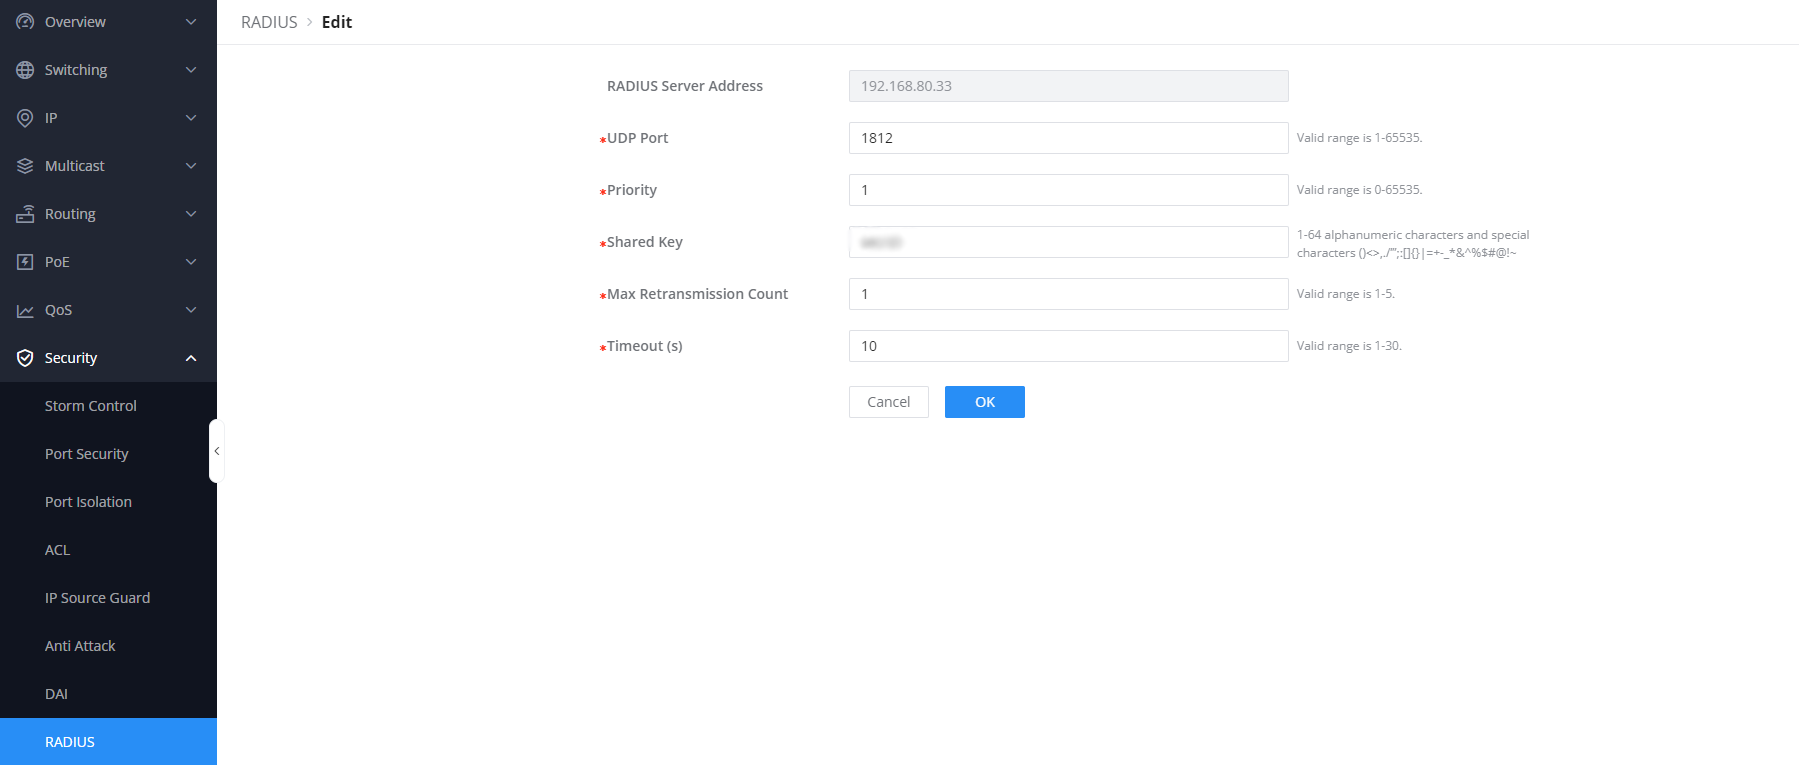
- On GWN78xx Web UI, access security → Radius
- Add a new radius server
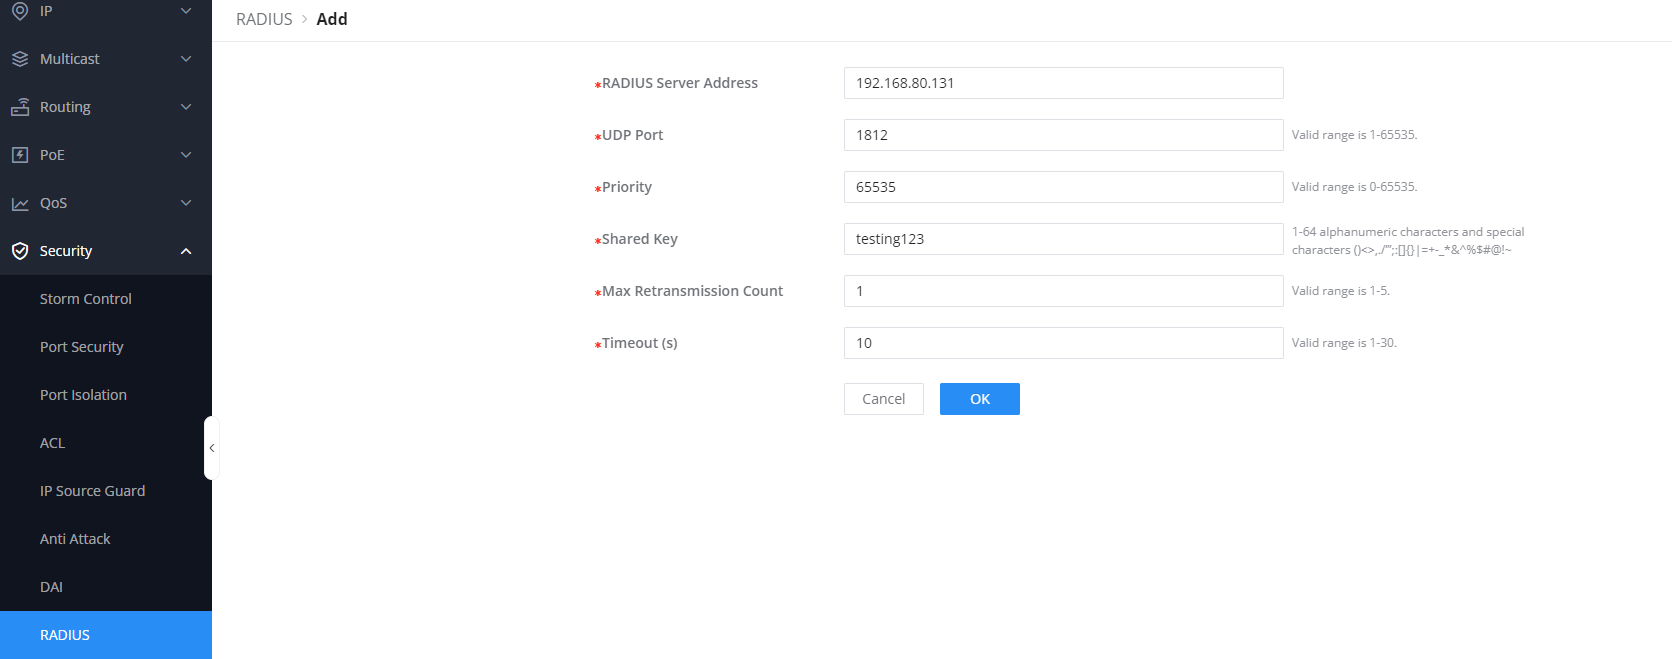
- Define the radius server address, UDP port, shared key, and priority, define the priority only when you have more than one radius server configured, if only one is configured set the value to 1.
- Click OK to save the radius configuration.
Testing the access
Now to be able to test the results, we will test the credentials on a terminal emulator such as Putty :
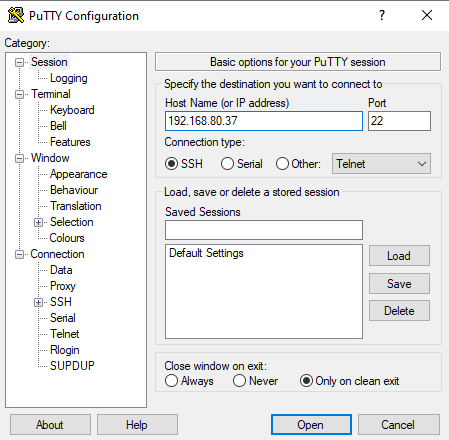
- Open the Putty emulator.
- Set the hostname to the IP address of the GWN78xx, and the Port to 22.
- Set the connection type to SSH.
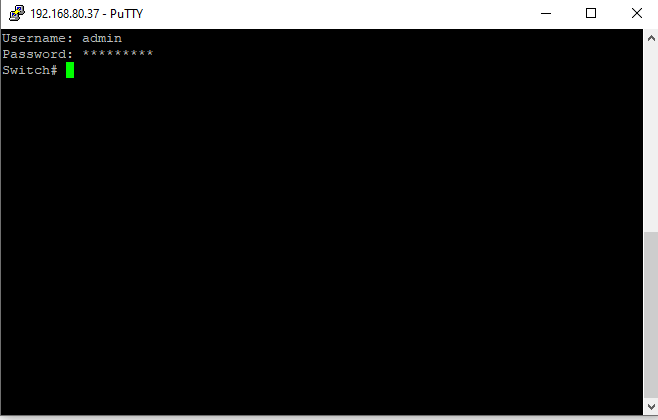
- Once connected enter the credentials of the switch (username and password)
- In the case where the default authentication method is used, you will be able to access the config mode using the SSH terminal
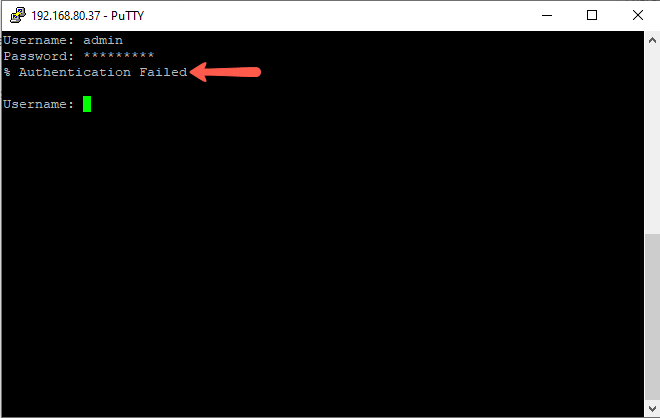
- Since our defined method for authentication is RADIUS the authentication will fail since we did not provide the credentials defined on the radius server, and the goal is achieved since SSH access will be blocked for users not defined on the RADIUS server.
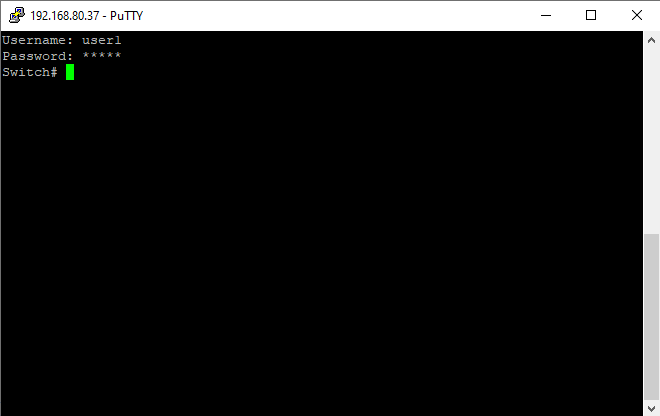
- If we provide the information of user login that we created on the radius server, then the authentication will be complete and the user will be able to access the SSH settings of the switch:
Supported Devices
Device Name | Supported | Firmware Required |
GWN7801 | Yes | 1.0.3.19 or higher |
GWN7801P | Yes | 1.0.3.19 or higher |
GWN7802 | Yes | 1.0.3.19 or higher |
GWN7802P | Yes | 1.0.3.19 or higher |
GWN7803 | Yes | 1.0.3.19 or higher |
GWN7803P | Yes | 1.0.3.19 or higher |
GWN7811 | Yes | 1.0.1.8 or higher |
GWN7811P | Yes | 1.0.1.8 or higher |
GWN7812P | Yes | 1.0.1.8 or higher |
GWN7813 | Yes | 1.0.1.8 or higher |
GWN7813P | Yes | 1.0.1.8 or higher |
GWN7806 | Yes | 1.0.1.14 or higher |
GWN7806P | Yes | 1.0.1.14 or higher |
GWN7816 | Yes | 1.0.3.8 or higher |
GWN7816P | Yes | 1.0.3.8 or higher |
GWN7830 | Yes | 1.0.3.3 or higher |
GWN7831 | Yes | 1.0.3.3 or higher |
GWN7832 | Yes | 1.0.3.3 or higher |