This document introduces the IPVideoTalk service configuration on Grandstream UCM device with IPVideoTalk server.
The document will cover the following sections:
- Peer Trunk configuration between the UCM6XXX and the IPVideoTalk server.
- Configuring Outbound routes on the UCM6XXX.
- Introducing how to join into IPVideoTalk conferencing system for UCM users.
IPVideoTalk Service Configuration on UCM
SIP Trunk configuration on IPVT
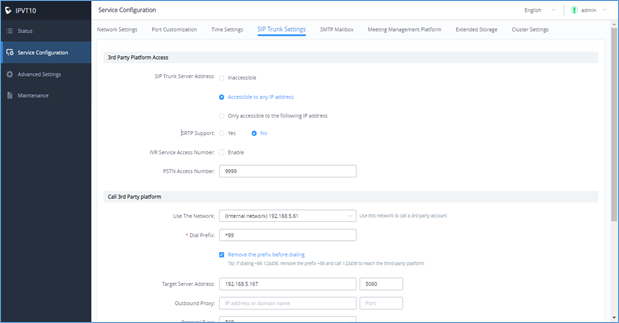
Log into IPVideoTalk portal with the enterprise account, and access to Server Maintenance in order to access the configuration management platform 🡪 Service Configuration 🡪 SIP Trunk Settings page. Fill the UCM server IP address (public IP address) in the Target Server Address field, Make sure the Server is accessible to any IP address or to a specific IP address as the screenshot below shows:
UCM6XXX Configuration
PEER Trunk Configuration
- Login to the UCM6XXX’s Web UI, and access to Extension/Trunk 🡪 VoIP Trunk.
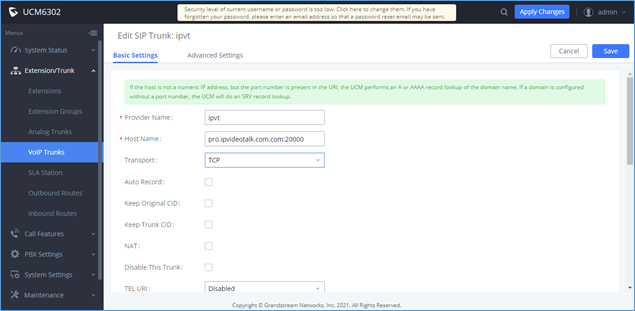
- Select Create New SIP Trunk, and fill the information into option “Provider Name” and “Host Name” as the figure shows below:
The following option needs to be configured on the peer trunk settings:
Provider Name: Users need to fill in the provider’s name, the duplicated name is not allowed. The provider name will be showing during inbound/outbound routing.
Host Name: Fill in the IPVideoTalk server domain name and port. For different protocols, the port numbers are different. (TCP: pro.ipvideotalk.com:20000, TLS: pro.ipvideotalk.com:20001)
SIP Transport: Users could select TCP/TLS as the SIP Transport, and the Port number should correspond to the SIP Transport type.
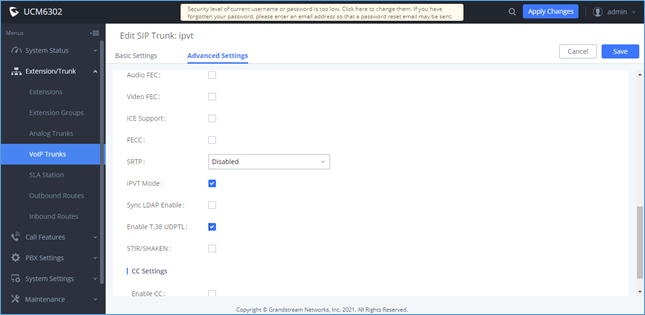
IPVT Mode: This option is necessary. If users do not check this option, the audio/video calls may generate abnormal problems. The IPVT mode can be enabled under the advanced settings of the peer trunk.
UCM6XXX Outbound Route Configuration
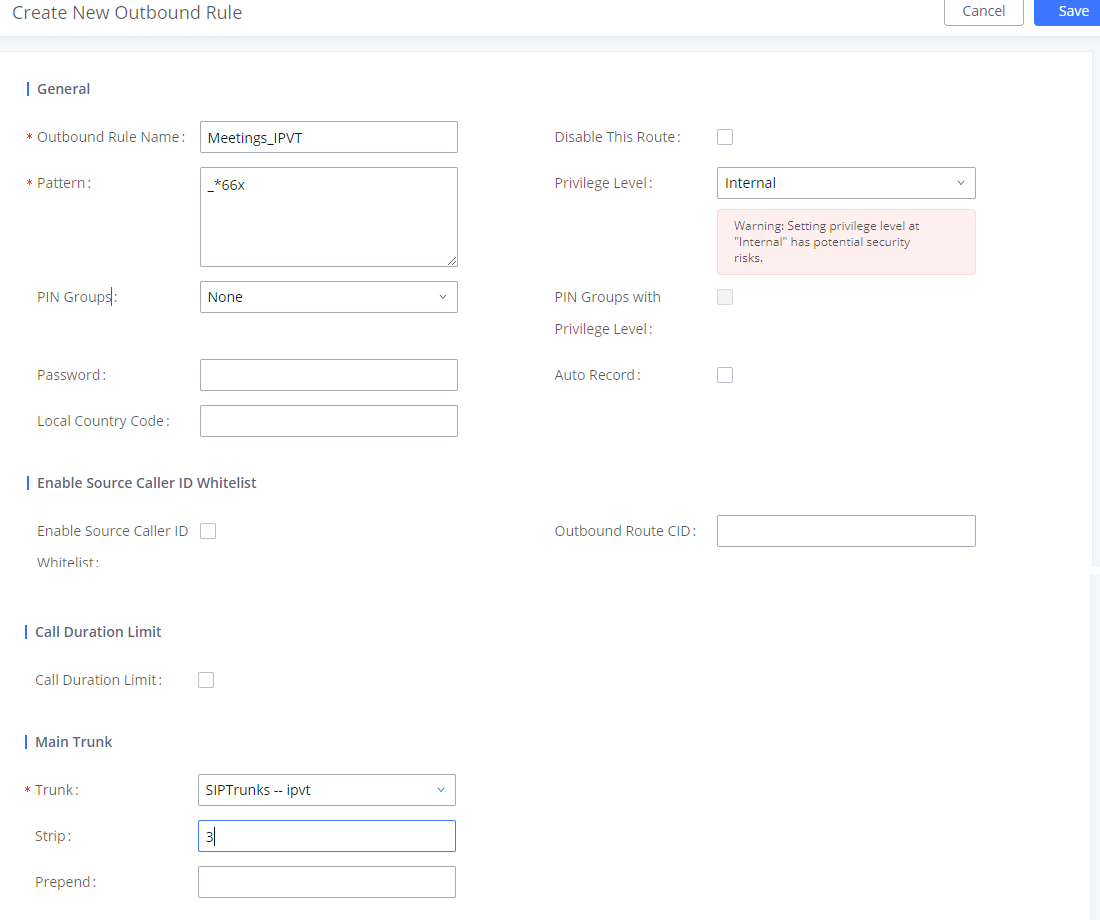
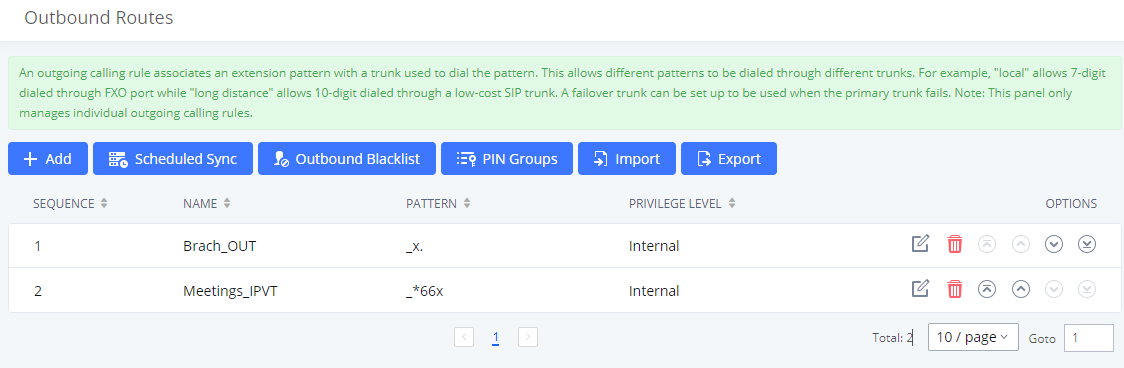
This can be achieved by accessing Extension/Trunk 🡪 Outbound Routes, click on Add to add the Outbound Route. As the figure below is showing:
The following options need to be configured under the outbound route settings:
Configure Calling Rule Name: Users need to fill in the Calling Rule Name for each Outbound Route, and the duplicated Calling Rule Name is not allowed.
Configure Pattern: Users need to configure “Pattern” to recognize the dialing numbers for UCM, and the initial pattern should be “_”. The special characters and wildcard characters are allowed for patterns configuration. For instance, users could configure the pattern as “prefix + meeting ID”, such as “_*99x”. Then, UCM clients could dial “*99 + IPVideoTalk meeting ID” to dial into the meeting. The meeting ID could be 1 or multiple digits, and users may need to configure the “Strip” option, please see the table below:
Parameters | Description |
X/x | 0-9 |
Z/z | 1-9 |
N/n | 2-9 |
[345-9] | 3,4,5,6,7,8,9 |
! | 0 or multiple characters (any character) |
. | 1 or multiple characters (any character) |
Table 1: Pattern Rule
Configure Privilege Level: Users need to configure the VoIP Trunk Privilege Level as “Internal” since the UCM clients’ default privilege level is “Internal”. The privilege level of the clients should be no lower than the Outbound Route privilege level. Otherwise, the server will send 603 error messages to the clients.
Configure Use Trunk: Users need to select the configured VoIP Trunk.
Configure Strip: Users could configure how many characters will be ignored for the prefix. For example, if users want to “*99”, users could set “3” for this option.
Users could click on Save 🡪 Apply changes to create the new Outbound Route, as the figure shows below:
UCM Clients Configuration
This section describes how to register the UCM6XXX’s clients in order to make the calls, we are using the GXV3370 as an example:
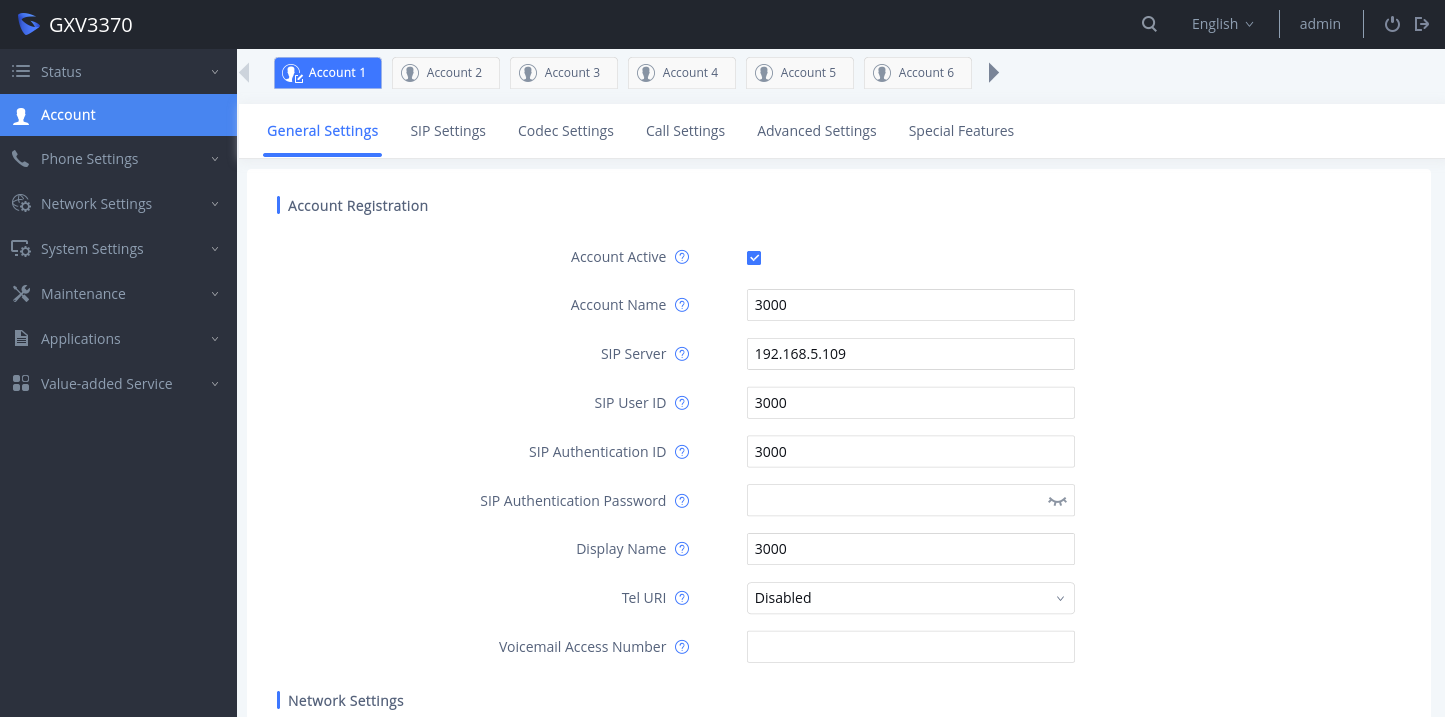
Log in to the device’s Web UI 🡪 Account 🡪 General Settings, and input the extension account information which is in the UCM server.
SIP Server: Fill in the UCM server address and SIP port number. Please note that the port should correspond to the SIP Transport type.
Account and Password: Input the extension account and password which are in the UCM server.
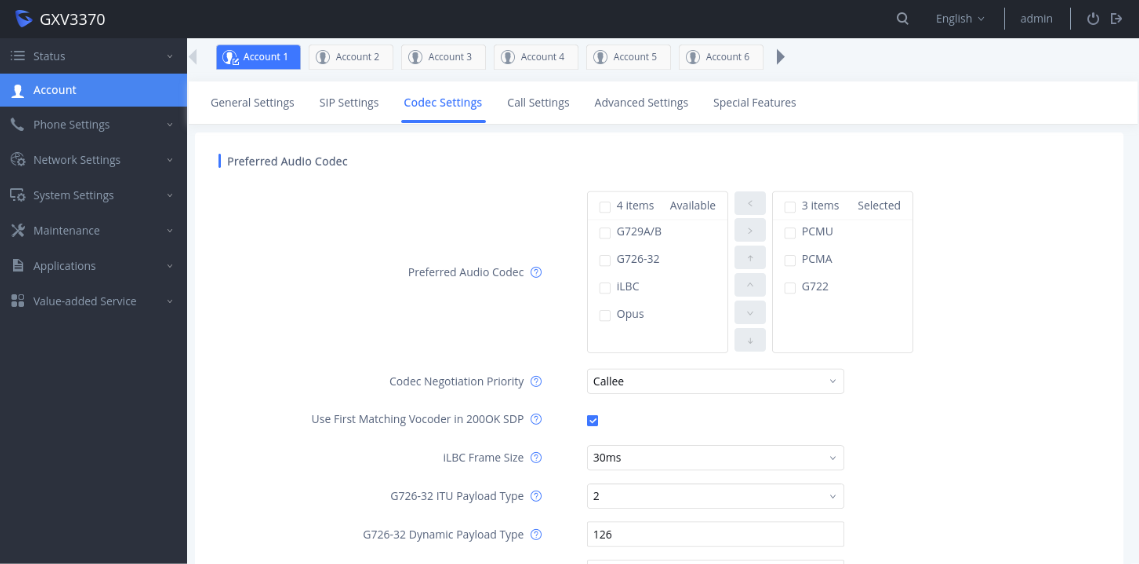
Configure Codecs: Users could go to the UCM client’s Web UI → Account → Codec Settings to select the codecs. Users have to select at least one same codec as the codec for the SIP account configured on the UCM clients.
Preferred Vocoder: There should be at least one audio/video codec that is supported by both the UCM client and the IPVideoTalk server.

Dial into IPVideoTalk Meetings
UCM extension joins into the IPVideoTalk meeting by dialing IPVideoTalk meeting ID via audio call.
Prerequisite:
Active meeting 404844
Operations:
Users could dial IPVideoTalk meeting ID 0986665 (*99404844) to join into the meeting on client B.