OVERVIEW
Grandstream UCM6300 series offers the Onsite Meetings feature, a new way to manage and organize onsite meetings. This feature allows administrators to create onsite meeting rooms, specify meeting room locations, schedule meetings, and add conferencing equipment. Wave users can view the scheduled meetings for each room, and create meetings when the room is available. This guide is a step-by-step walk-through to configure the Onsite Meeting feature and schedule an Onsite Meeting.
CONFIGURE ONSITE MEETING PARAMETERS
To have the Onsite Meeting feature available for the users to use, we need first to configure the office buildings, the meeting rooms, and the equipment. To do that, please follow the instructions below
Create an Office Building
In this tab, create the office buildings and add information like the name, the address, and the floors that the office consists of.
First, log into the UCM user interface using an admin account, then navigate to Other Features → Onsite Meeting → Address Management, then click on “Add”.
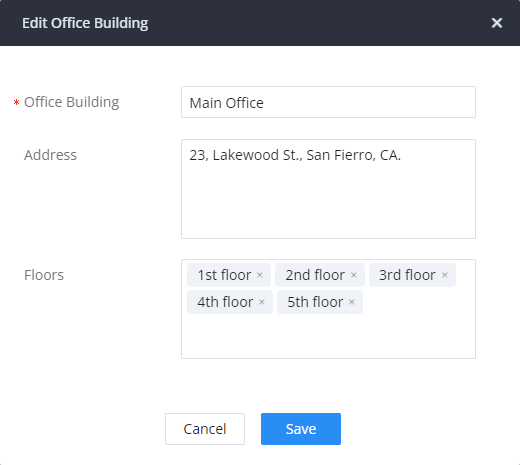
Then click “Save”.
Add Equipment
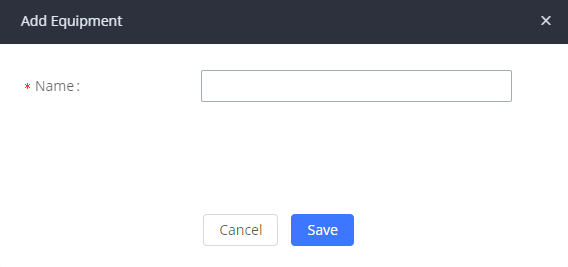
In this tab, add the equipment that each meeting room provides, this will help the user decide which room has adequate equipment for the meeting. To add a piece of equipment, navigate to the Equipment tab, click “Add”, then enter the name of the equipment and click “Save”.
Create a Meeting Room
To create a meeting room, please click navigate to the Room Management tab, then click on “Add“.
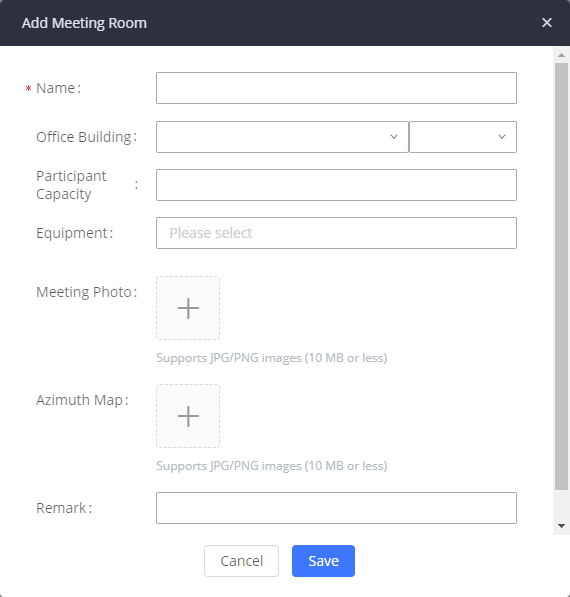
Name | Enter the name of the meeting room. |
Office Building | Select the office building and the floor where the room is located. |
Participant Capacity | Enter the maximum capacity of the room. |
Equipment | Enter the equipment that are available in the room. |
Meeting Photo | Upload the photo of the meeting room. |
Azimuth Map | Upload the Azimuth Map of the building |
Remark | Enter a remark |
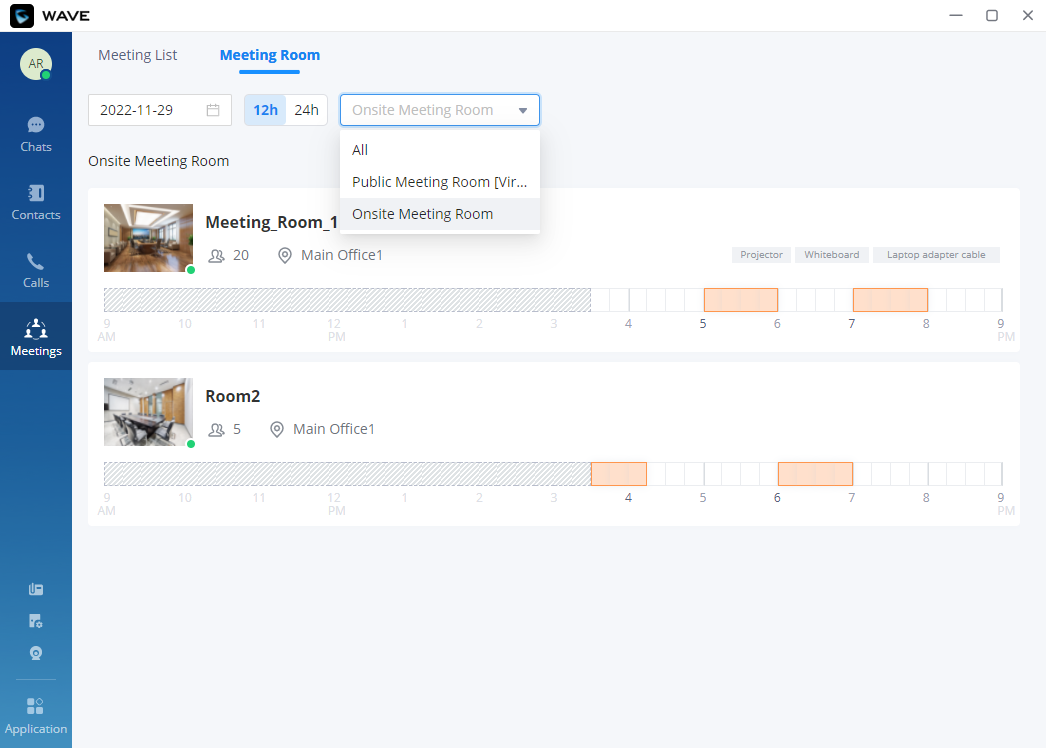
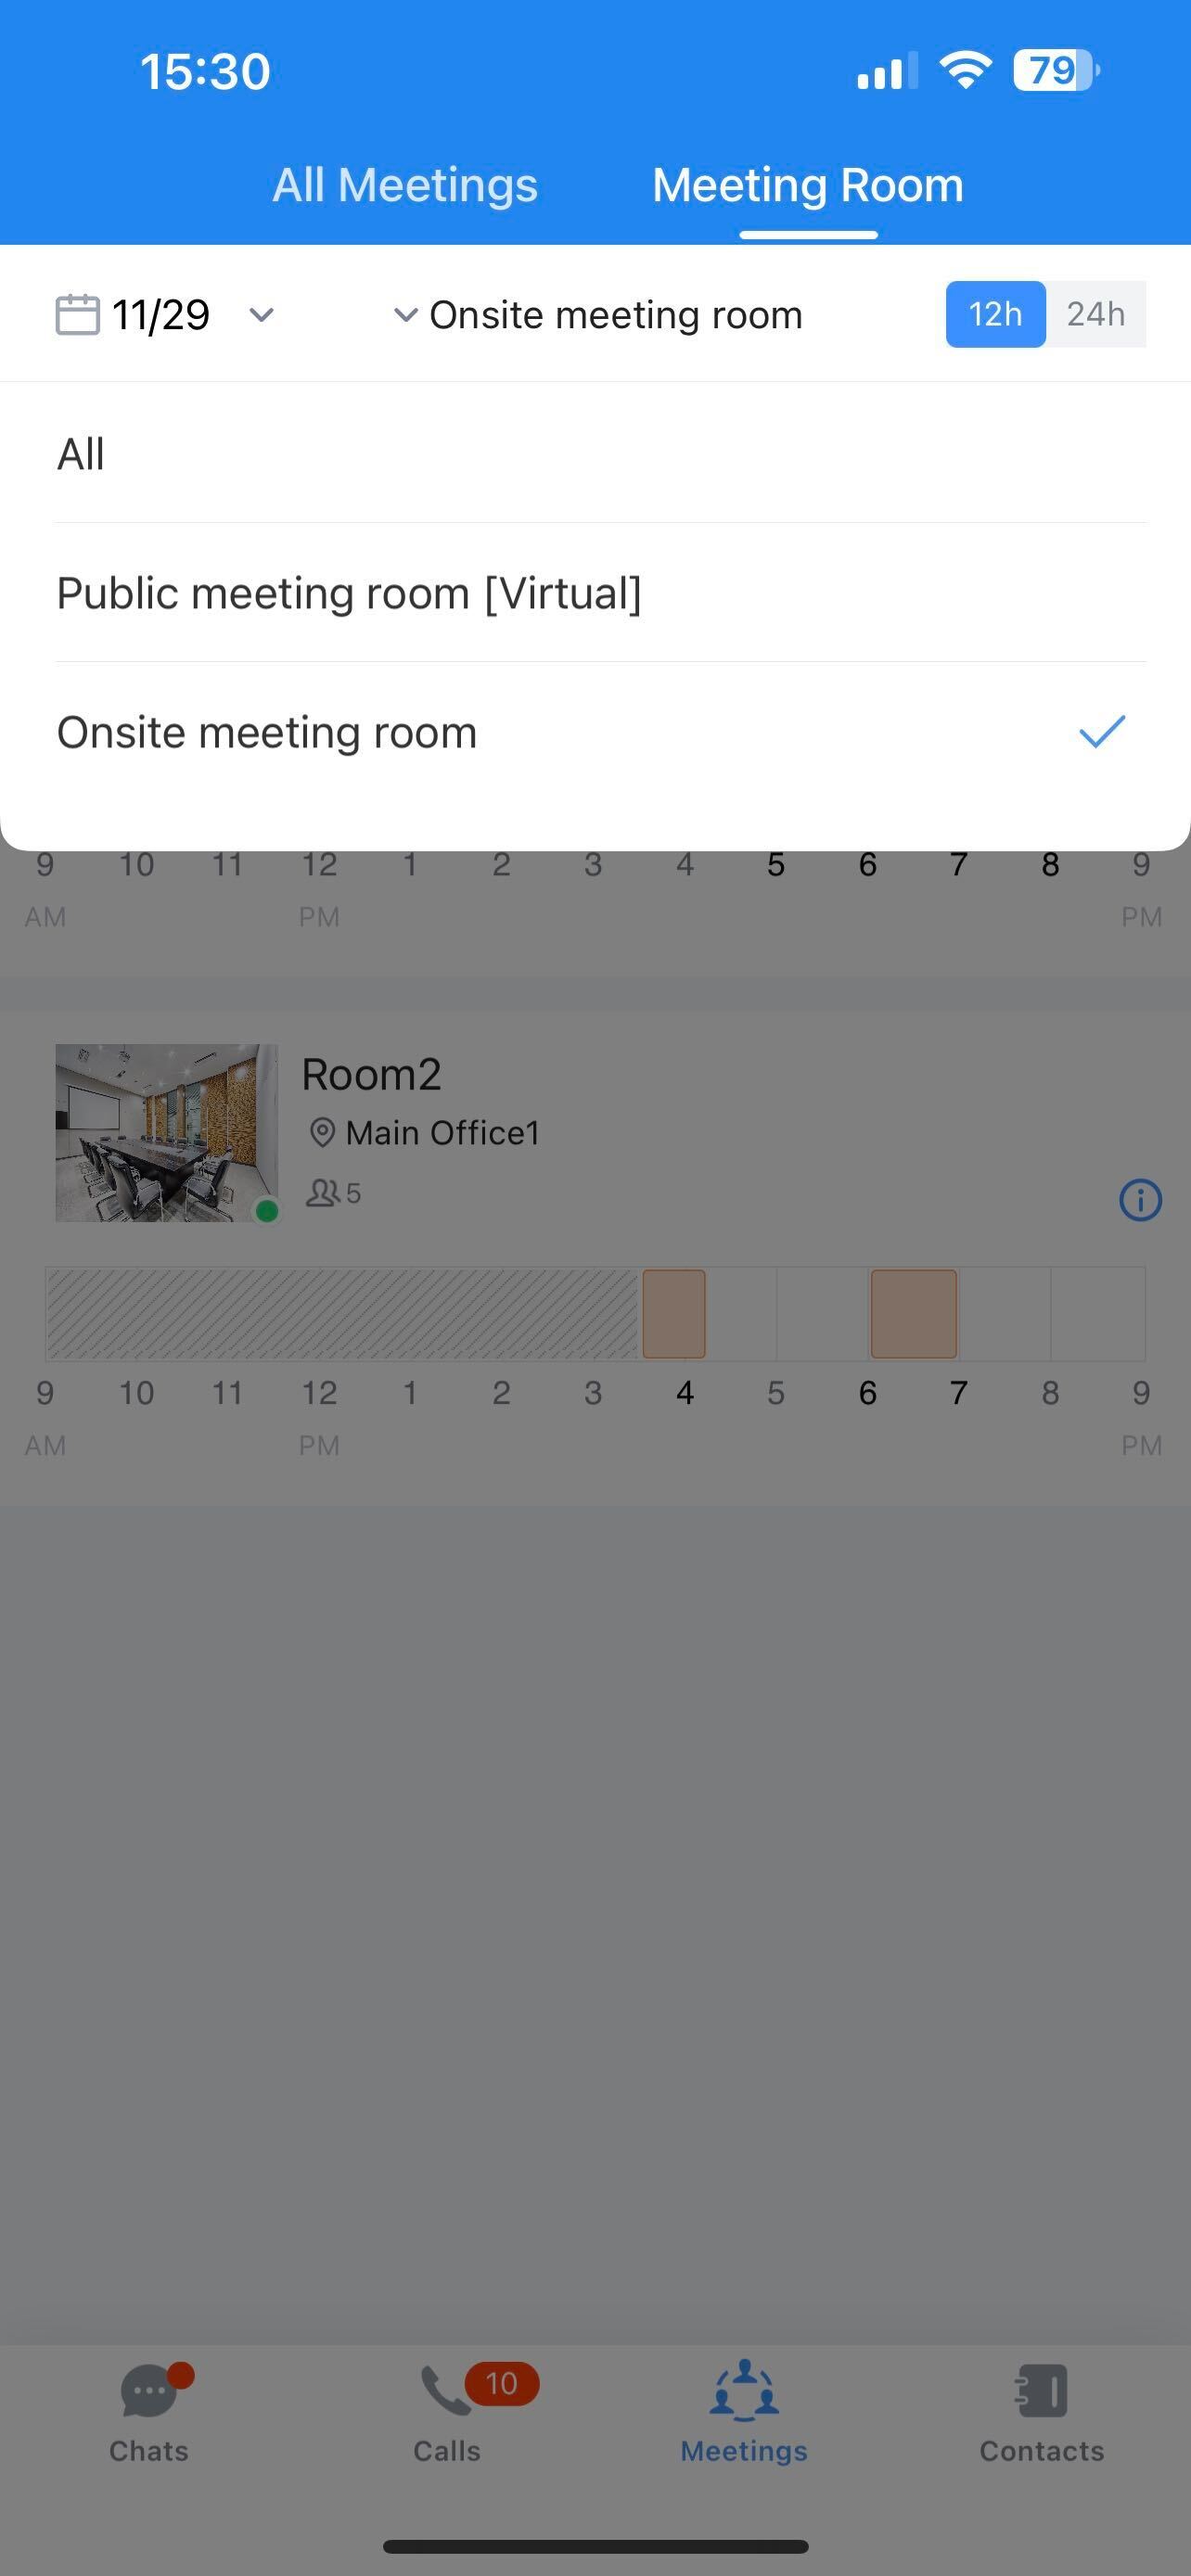
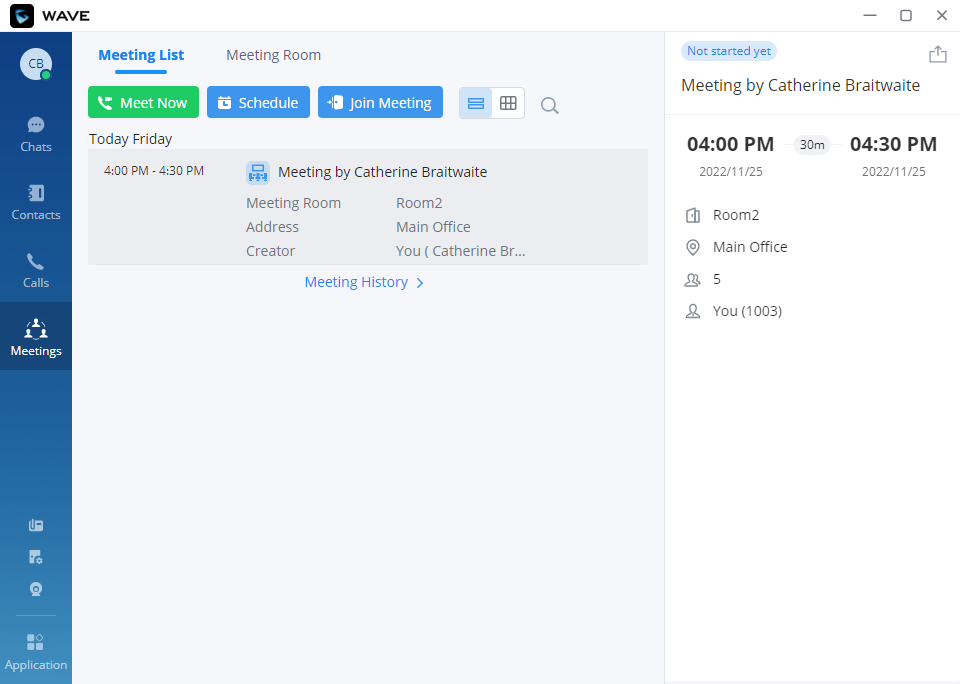
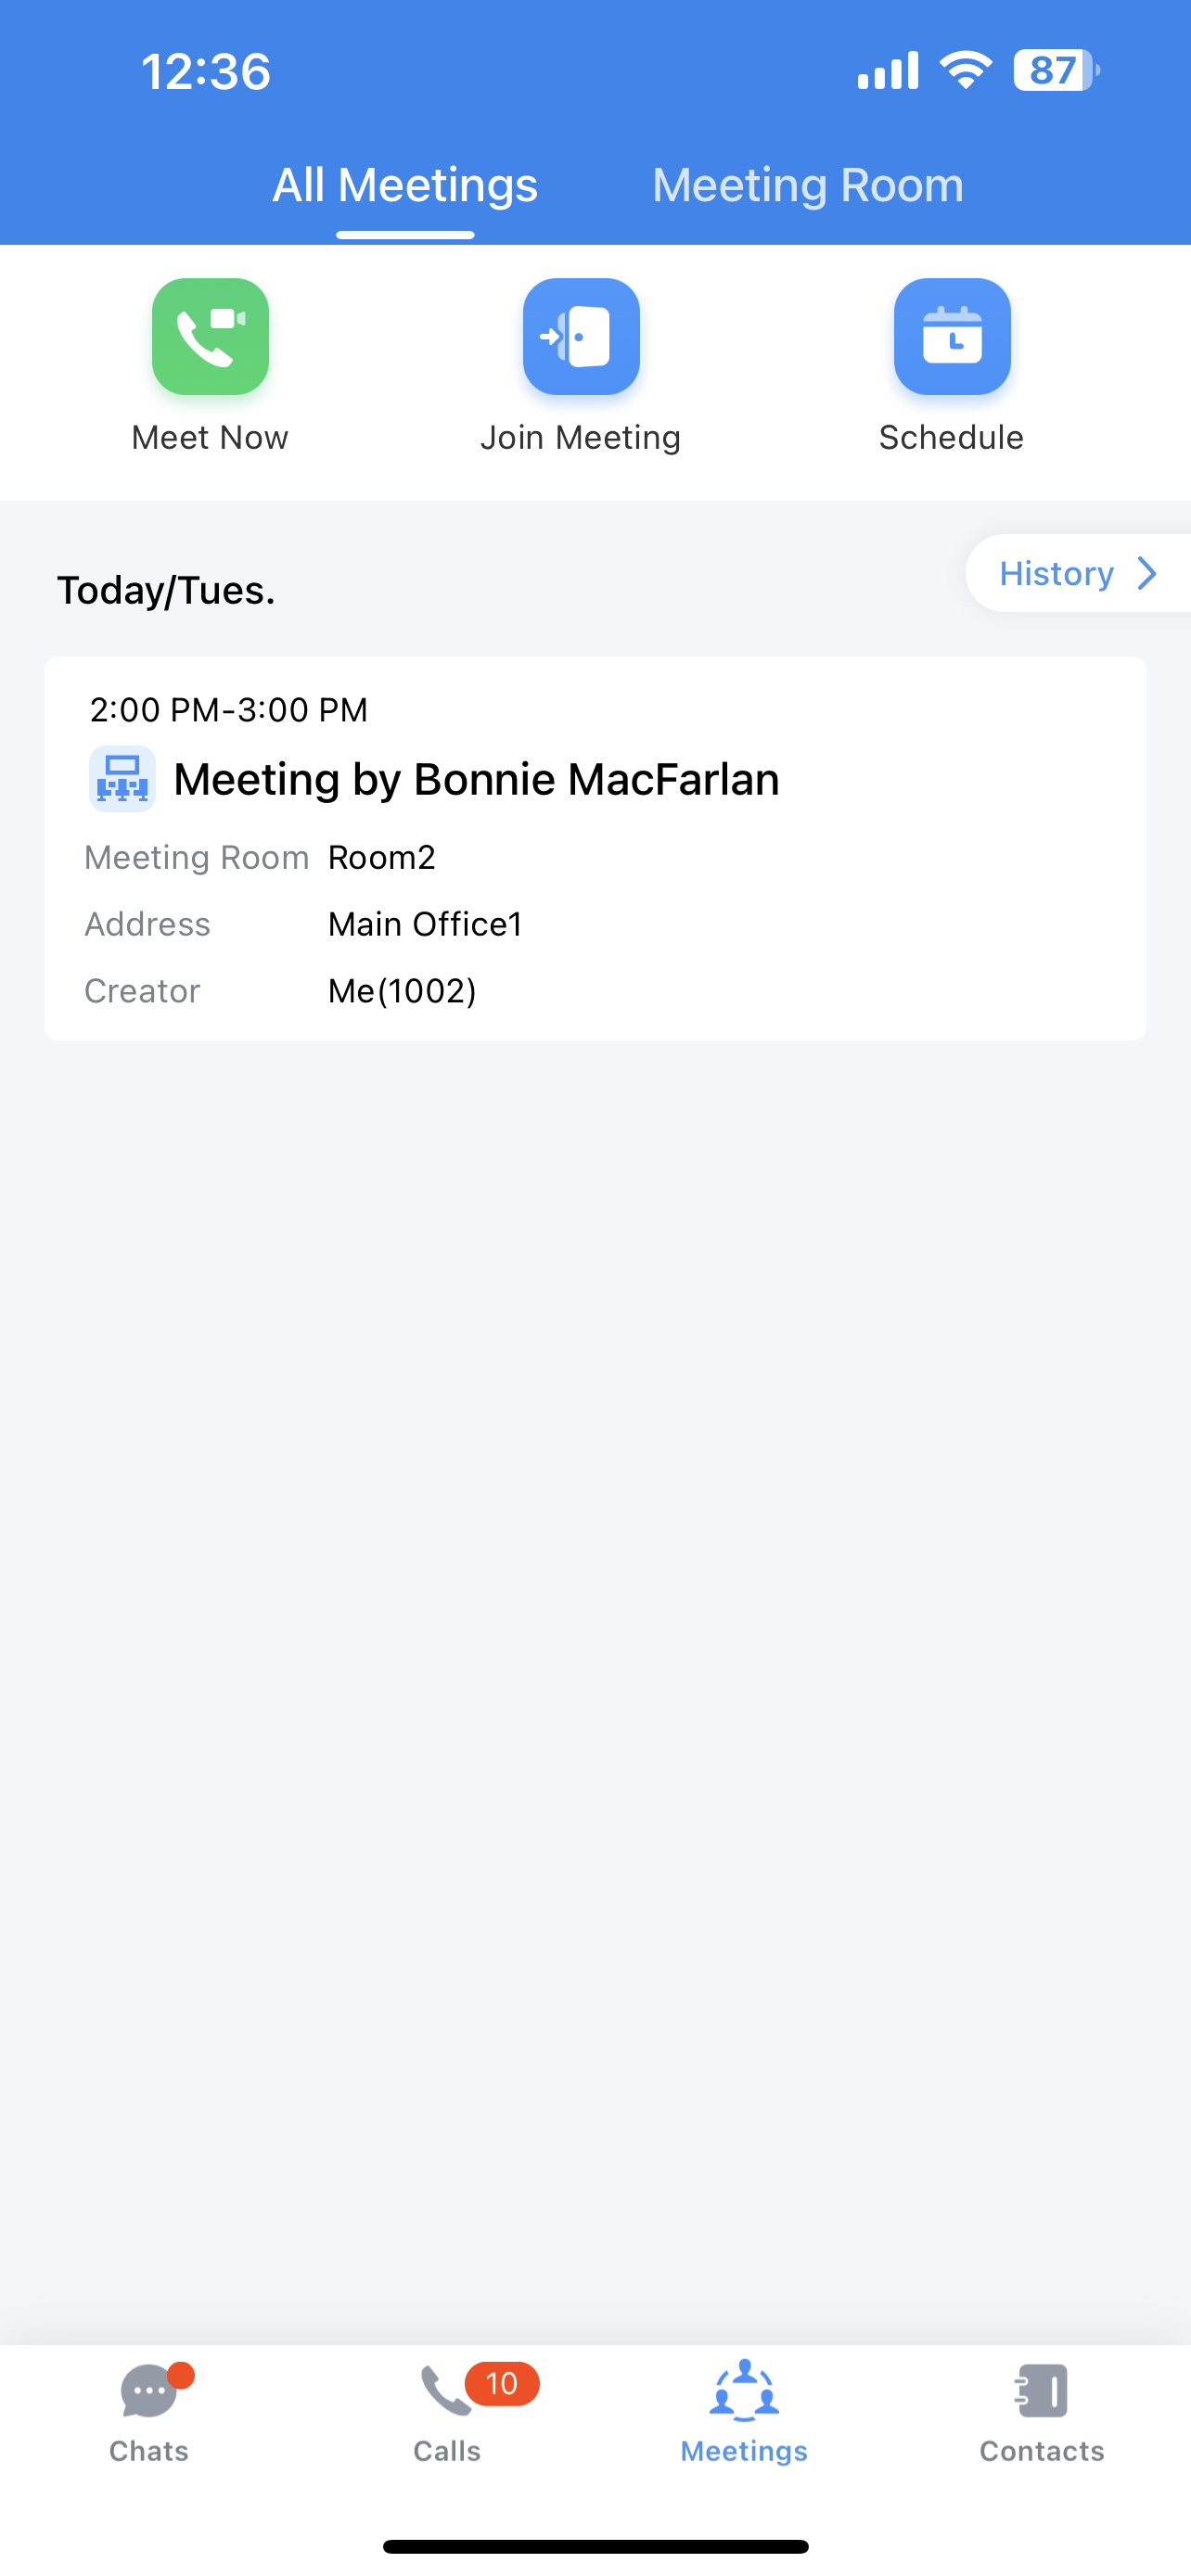
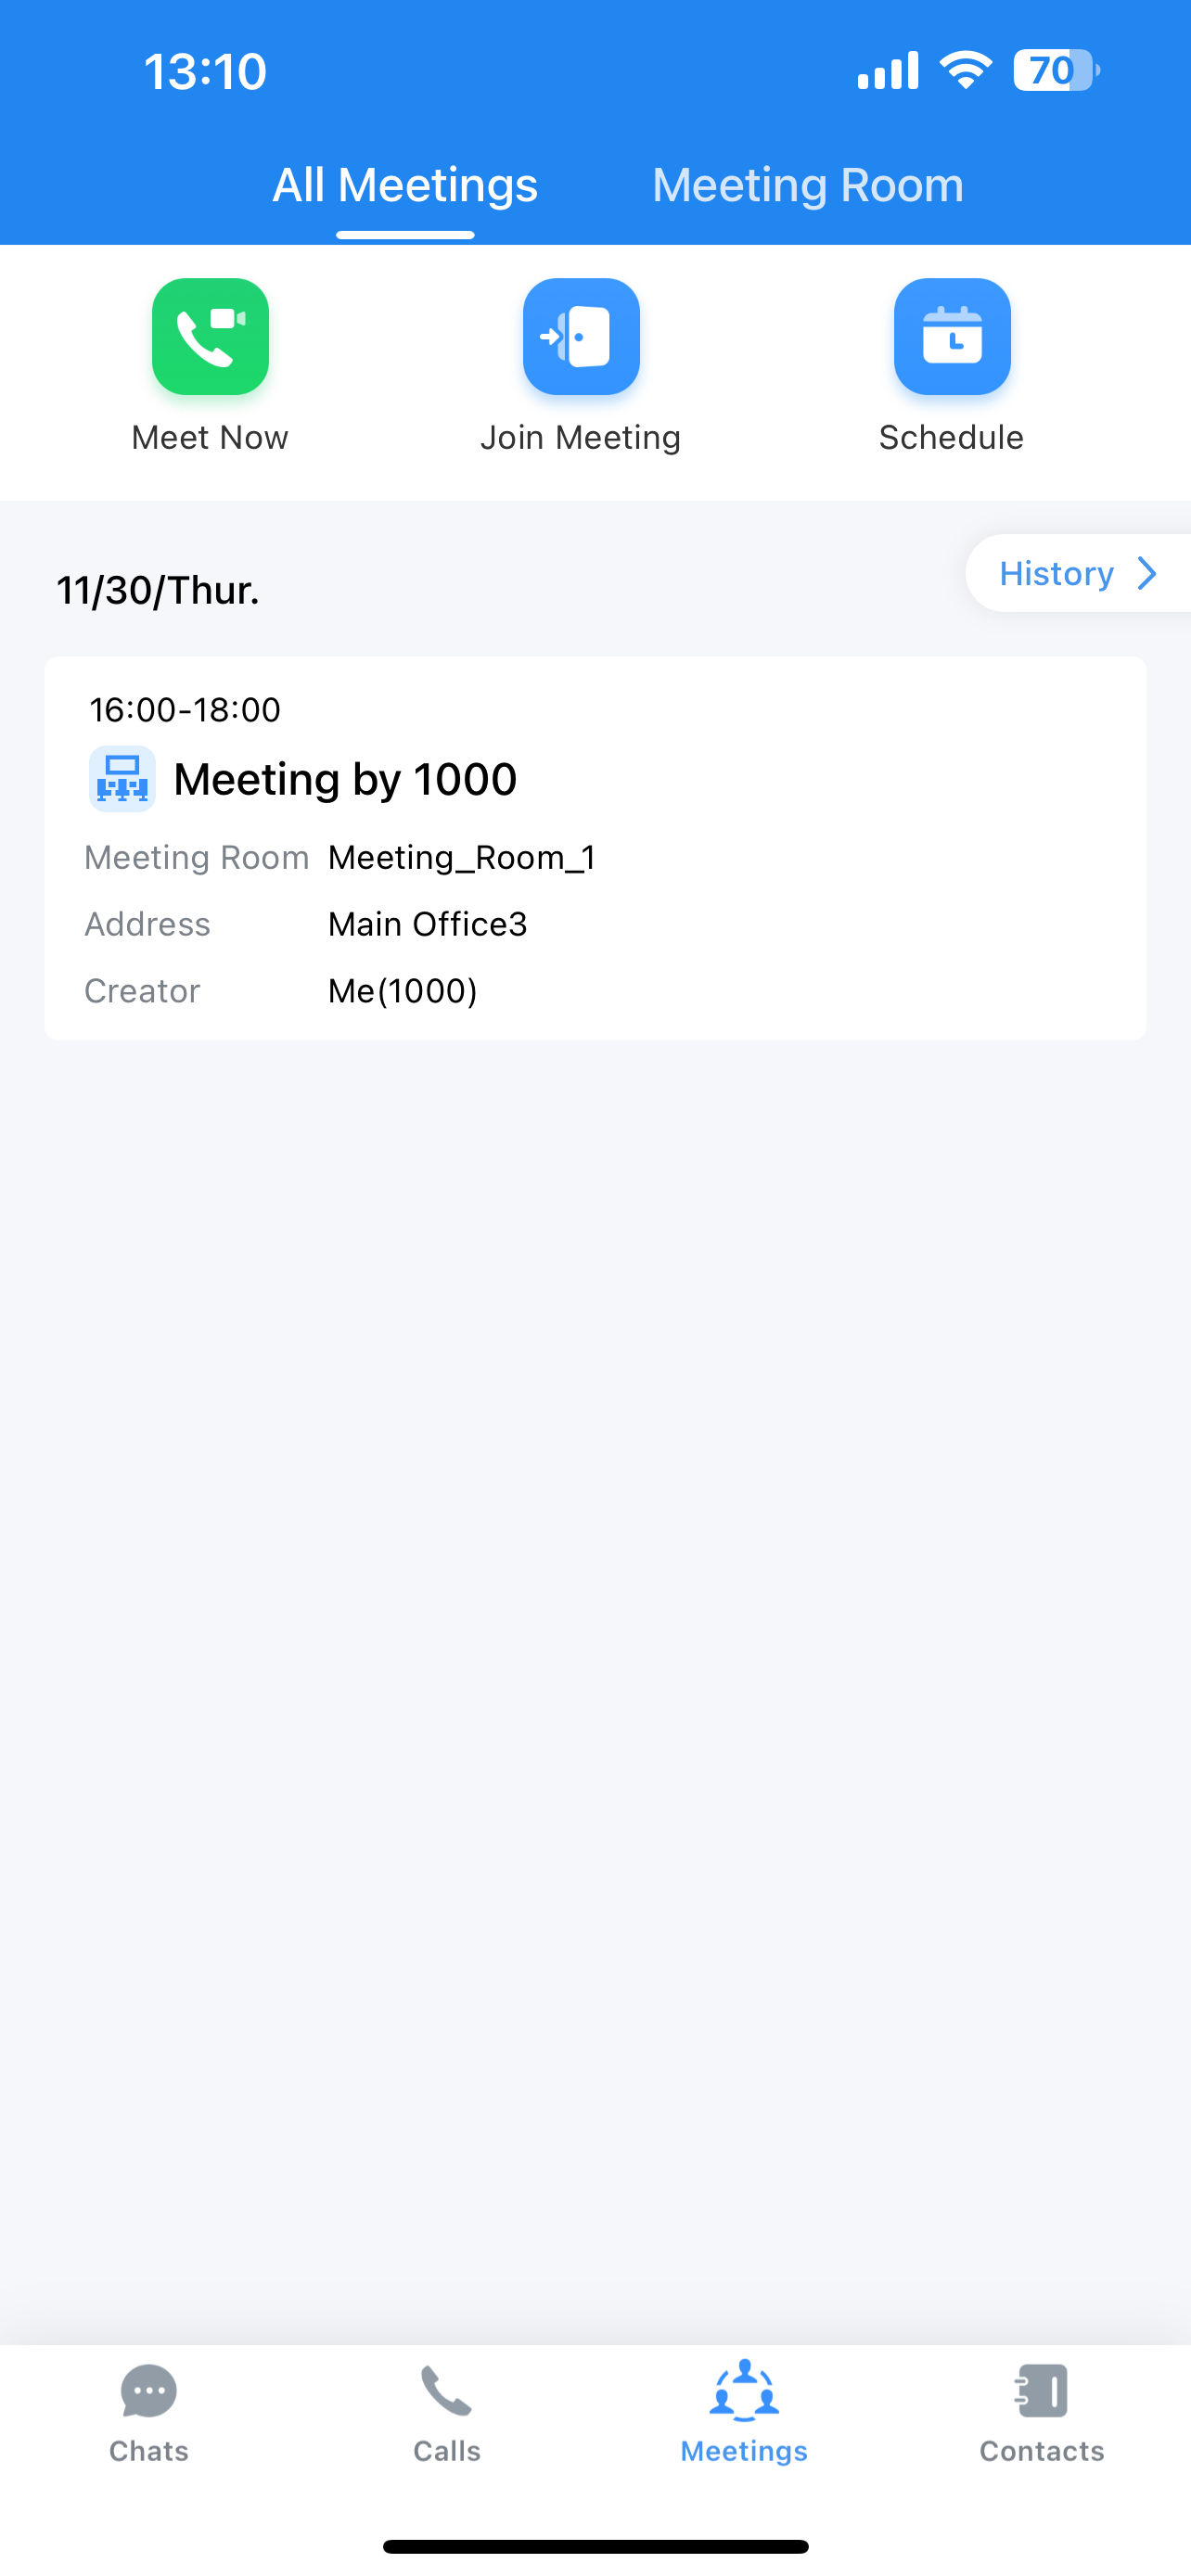
Once an Onsite Meeting room has been created, it can be found in Wave’s interface under Meetings -> Meeting List. Please see the screenshot below of Wave Desktop/Web and Wave Mobile Application.
ONSITE MEETING MANAGEMENT
Using the UCM User Interface
Create an Onsite Meeting:
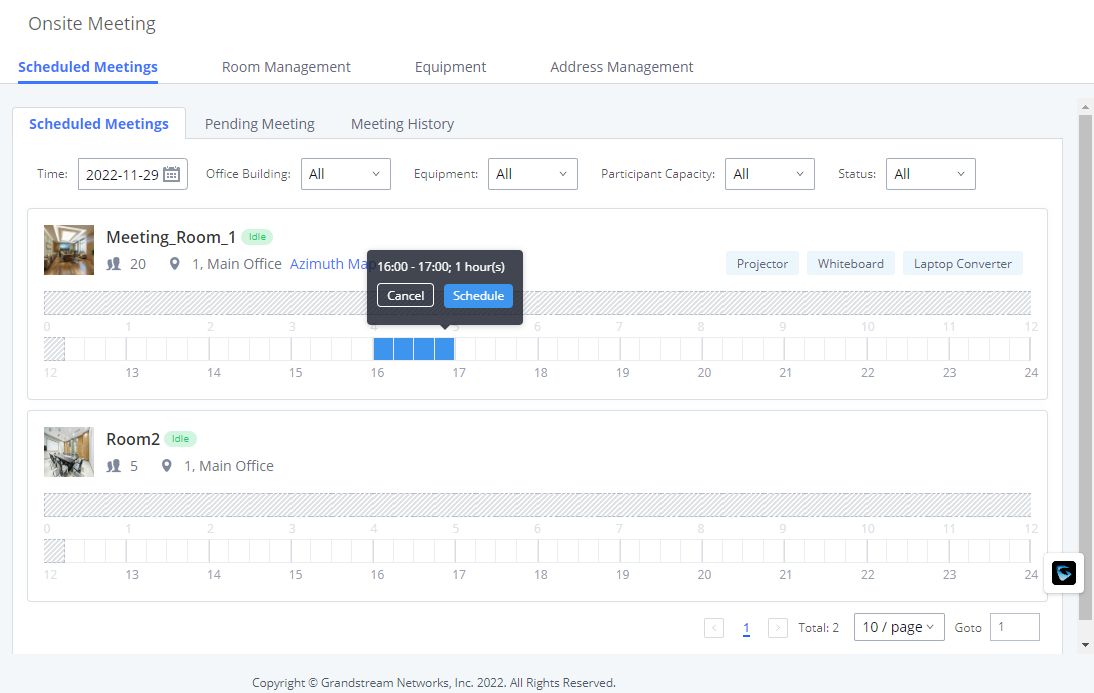
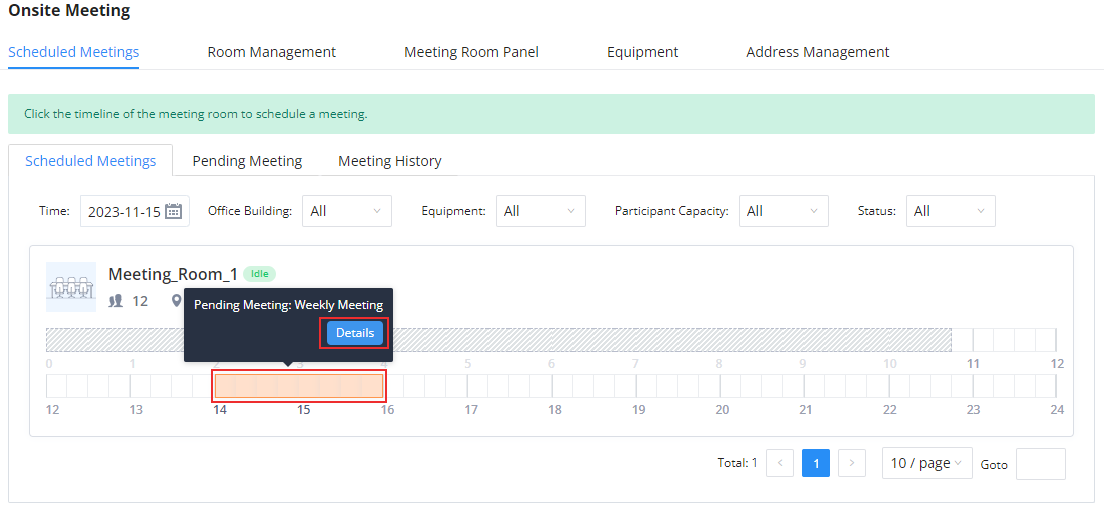
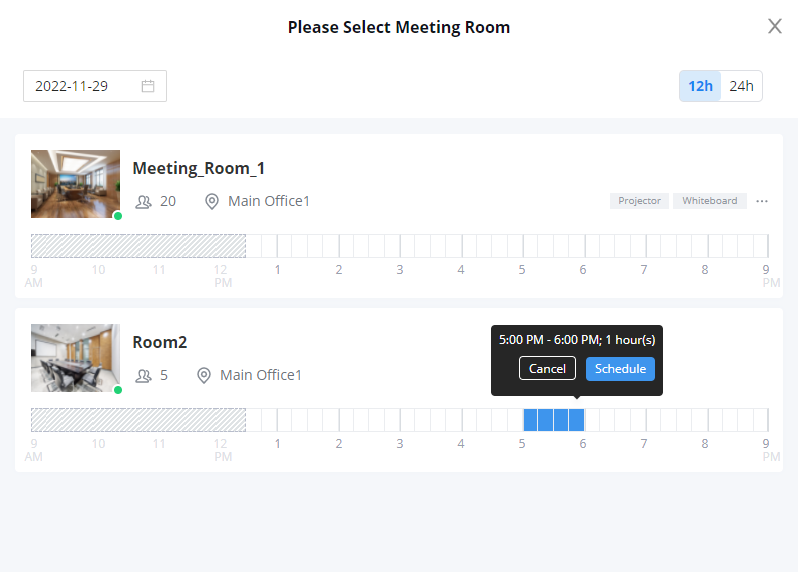
The UCM administrator can schedule an Onsite Meeting directly from the UCM’s web user interface. To do that, navigate Other Features → Onsite Meeting → Scheduled Meeting, on the room you want to use, please select the specific time when the meeting is going to start and when it is going to end, as shown in the screenshot below. The intervals highlighted in orange in the timeline indicate that a meeting has already been scheduled in that time.
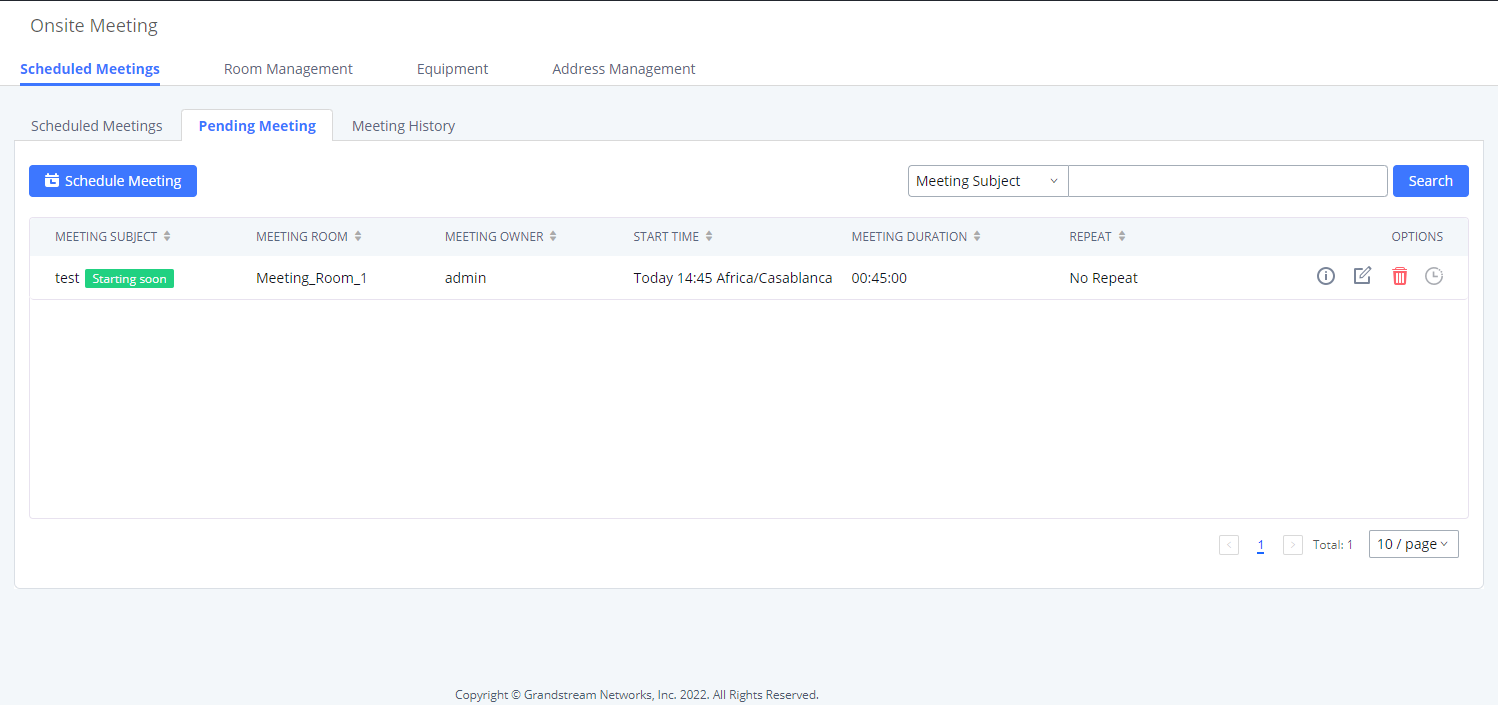
Once the meeting has been scheduled, it can previewed in the Pending Meeting tab
Cancel an Onsite Meeting
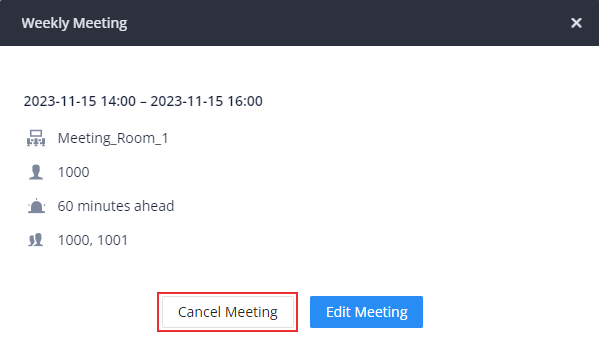
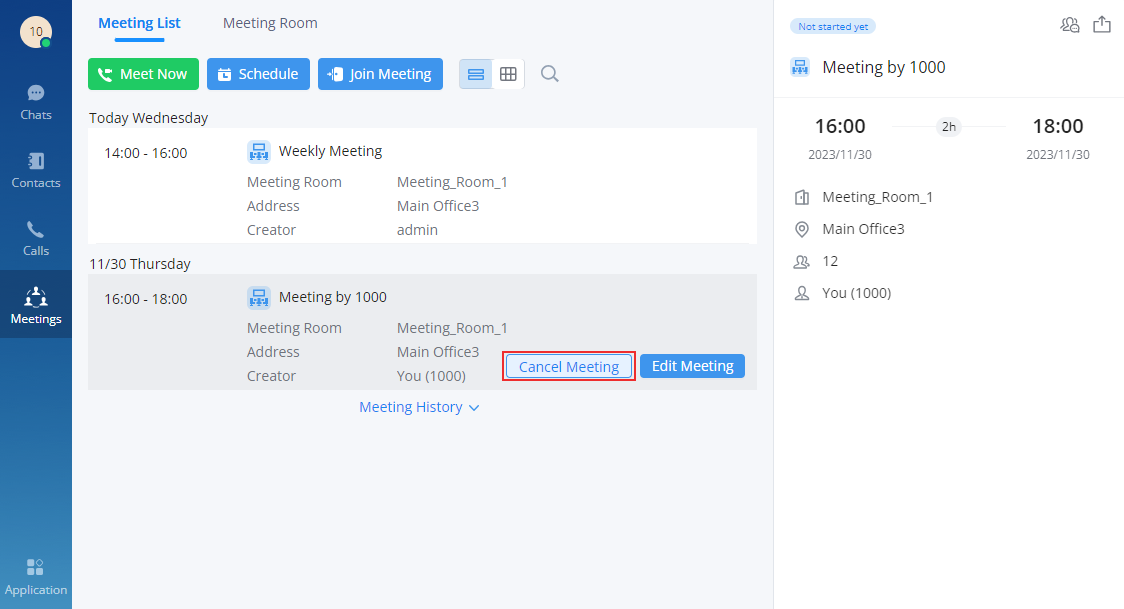
To cancel an onsite meeting, please hover the mouse cursor over the timeline where the meeting is created, then click on “Details” as shown in the screenshot below.
Click on “Cancel Meeting”.
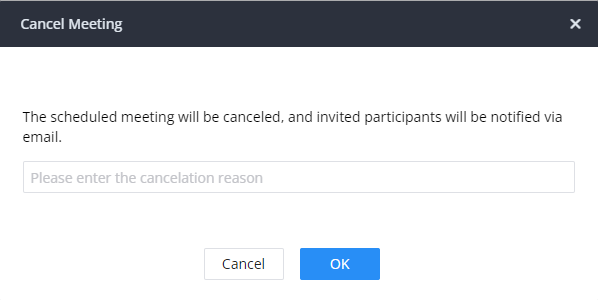
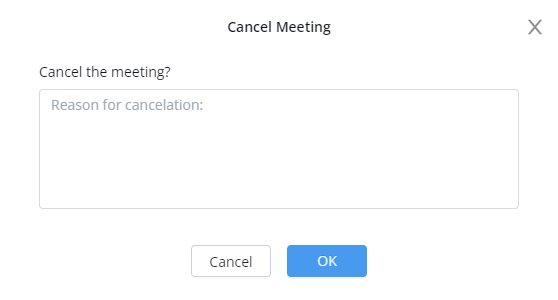
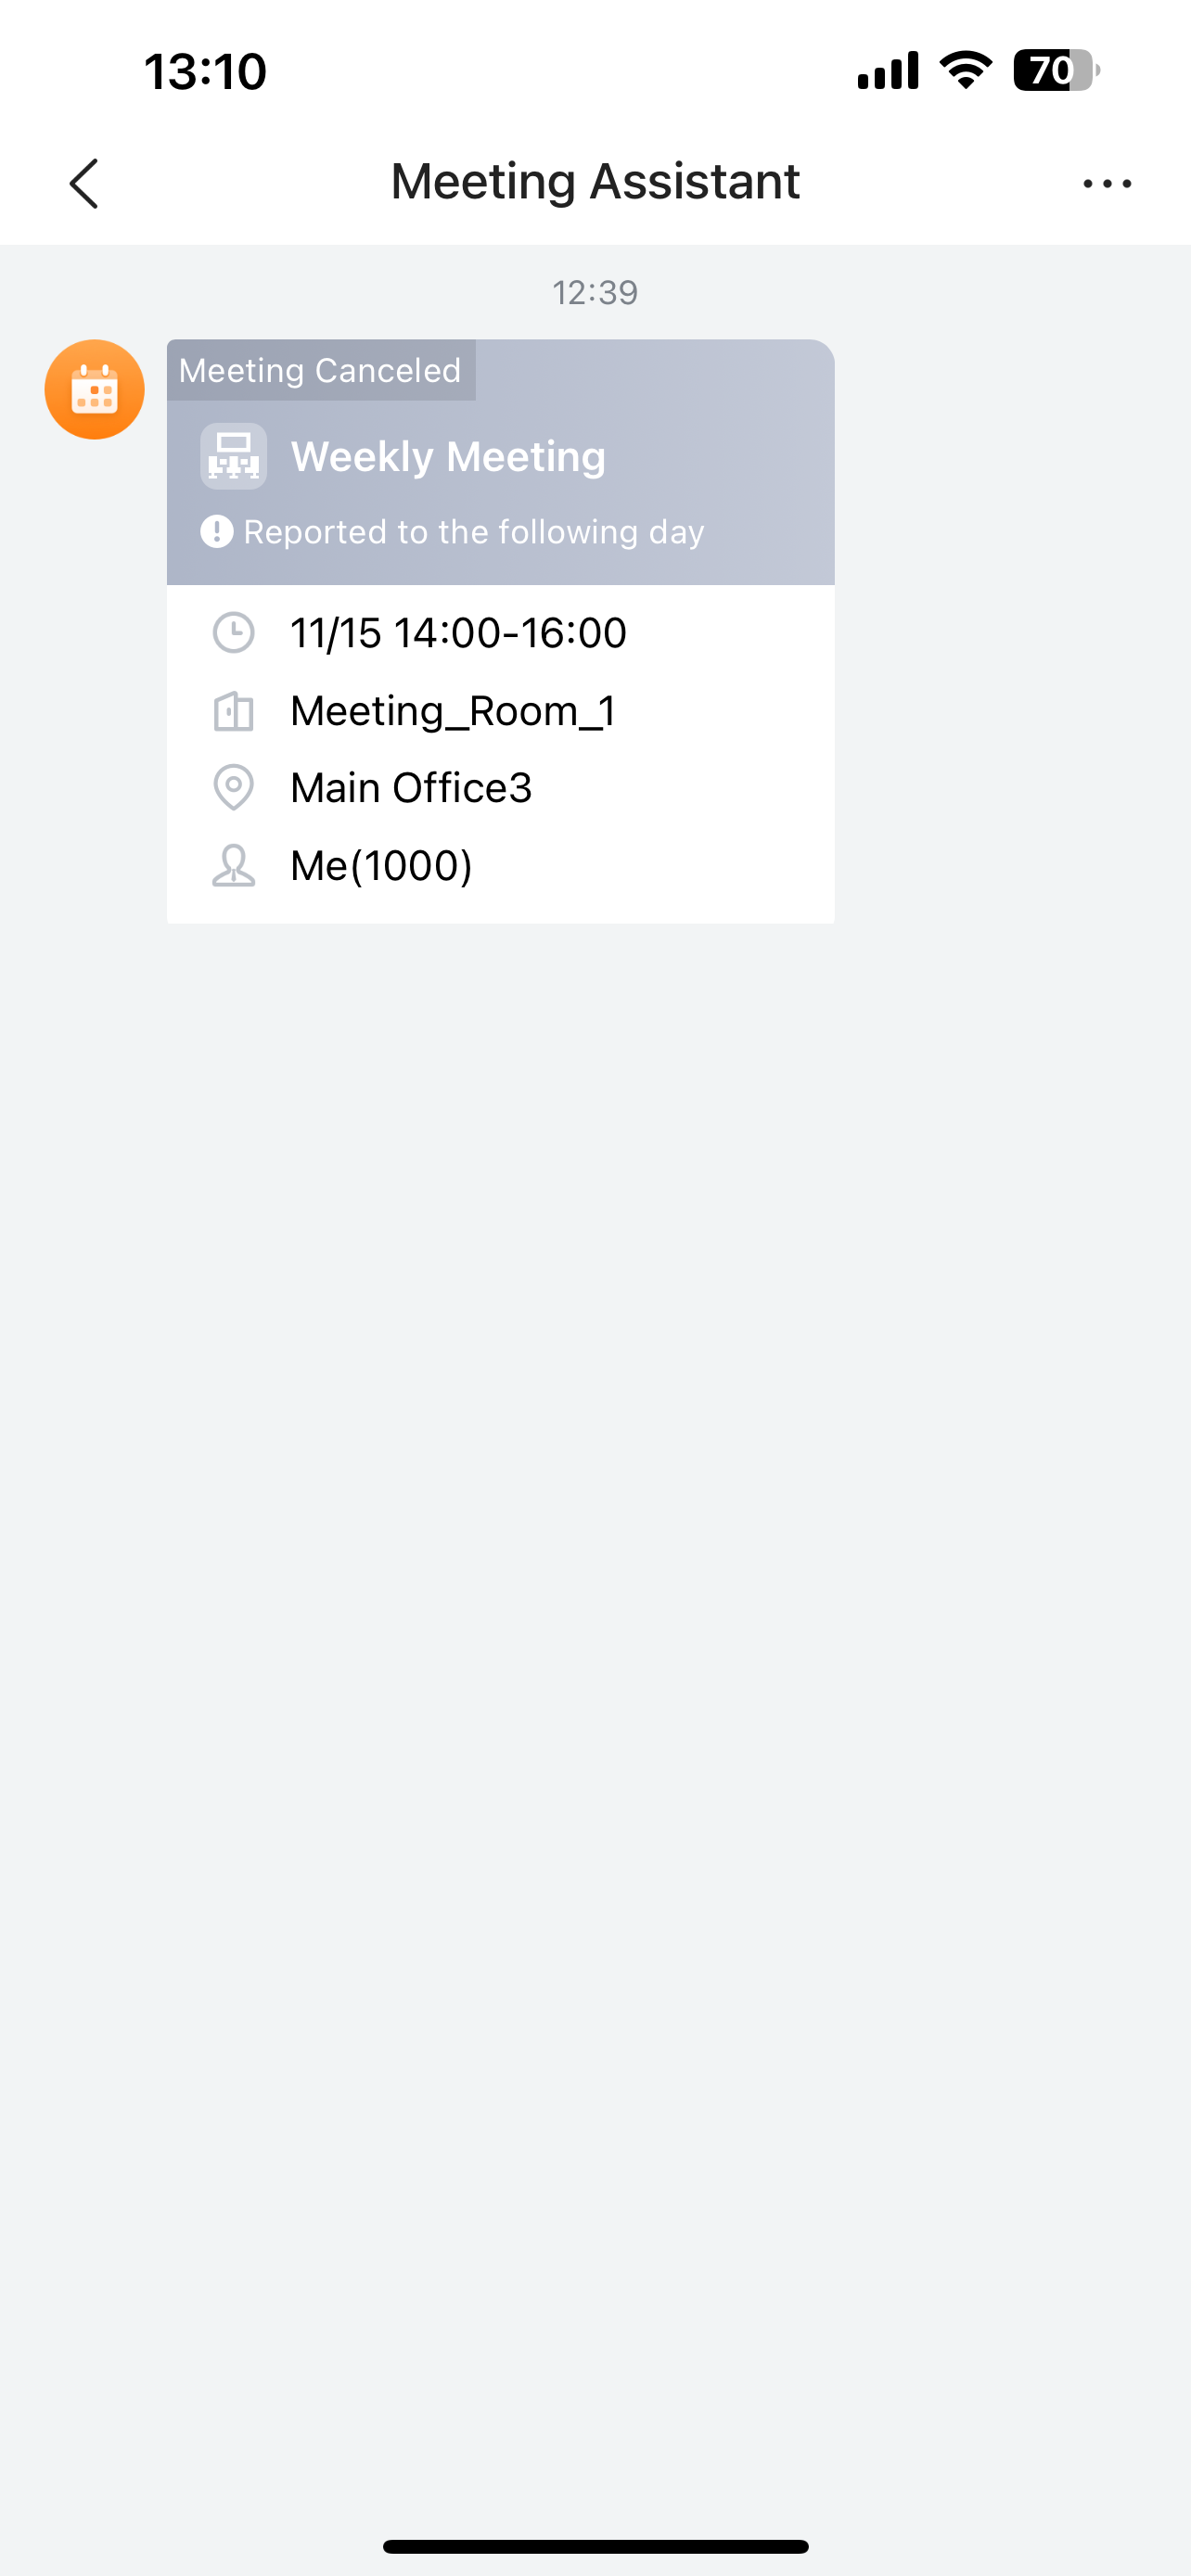
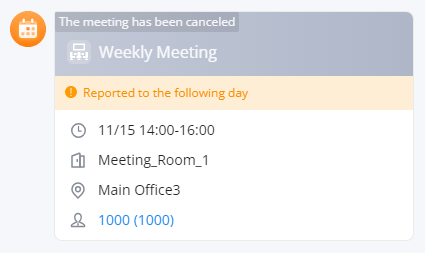
Enter the reason for the cancellation of the meeting, then click “OK”. All the users who have been invited to this onsite meeting before its cancellation have been notified through a message on Wave that the onsite meeting has been cancelled. The message will also state the reason for the cancellation.
Using Wave Desktop/Web
Create an Onsite Meeting
To schedule a meeting using Wave Desktop/Web, please log into Wave using your extension’s credentials, navigate to the “Meetings” tab on the sidebar, and then click “Schedule”.
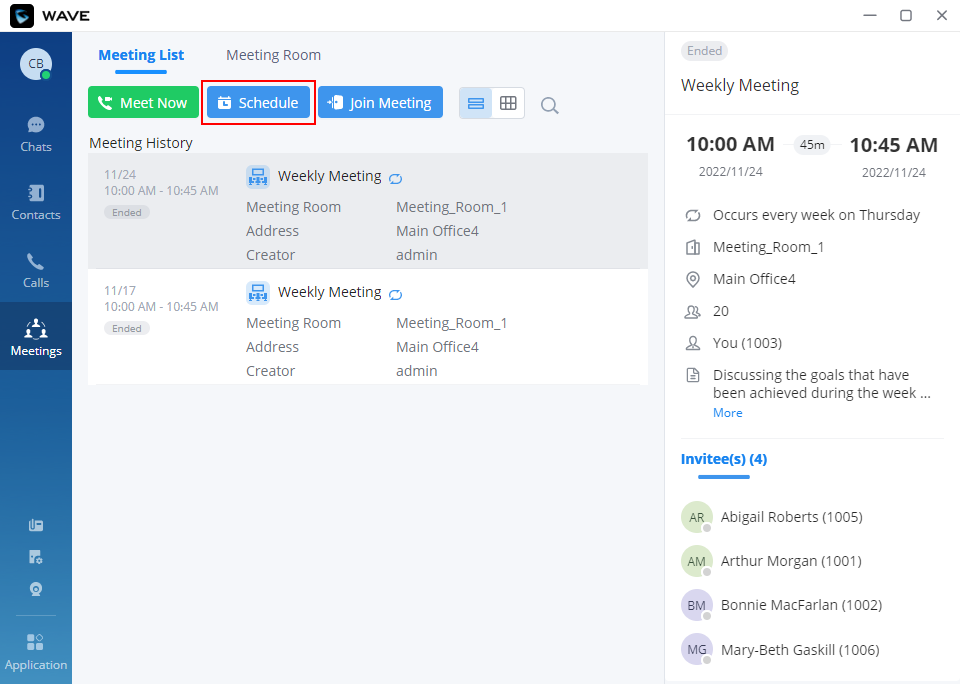
Select the meeting room and the time when the meeting starts and ends:
Cancel an Onsite Meeting
To cancel an Onsite Meeting using Wave Desktop/Web client, please navigate to the “Meetings” tab, then hover the mouse cursor of the meeting created, then click “Cancel Meeting”.
Enter the reason for cancelling the meeting then click “OK”. All the users who have been invited before the cancellation of the meeting will receive a notification with a reason for the cancellation (if stated).
Using Wave Mobile Application
Create an Onsite Meeting
To schedule a meeting using the Wave Mobile Application, make sure that you are logged in first into your account, then select “Meetings”, then tap “Schedule“
Then enter the information of the meeting in their respective parameters.
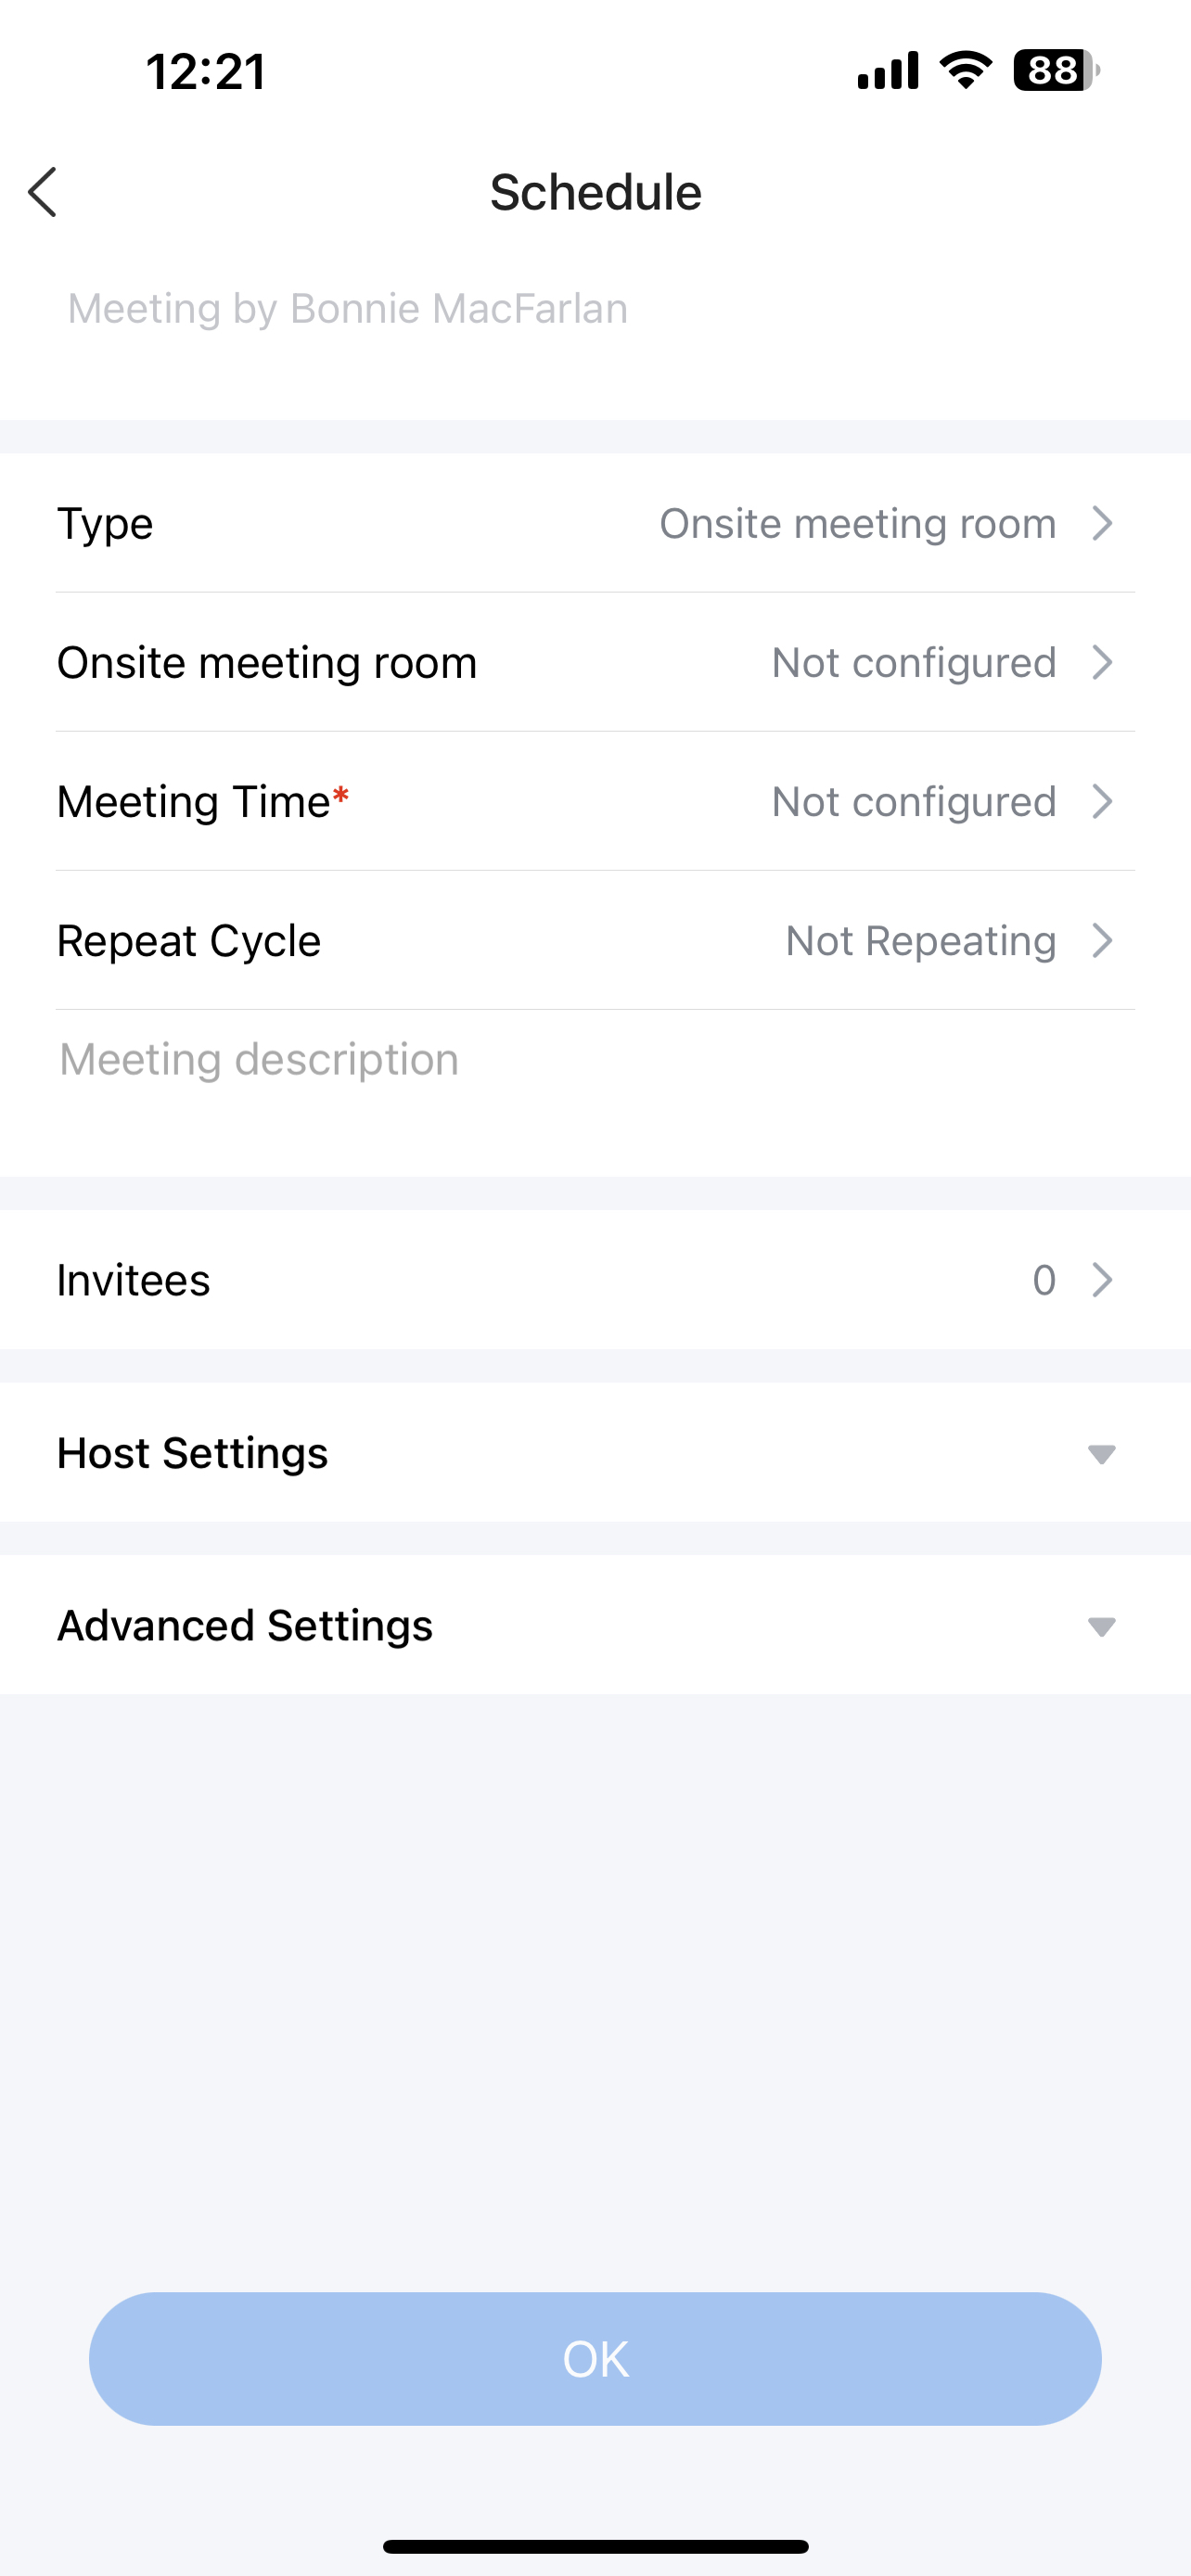
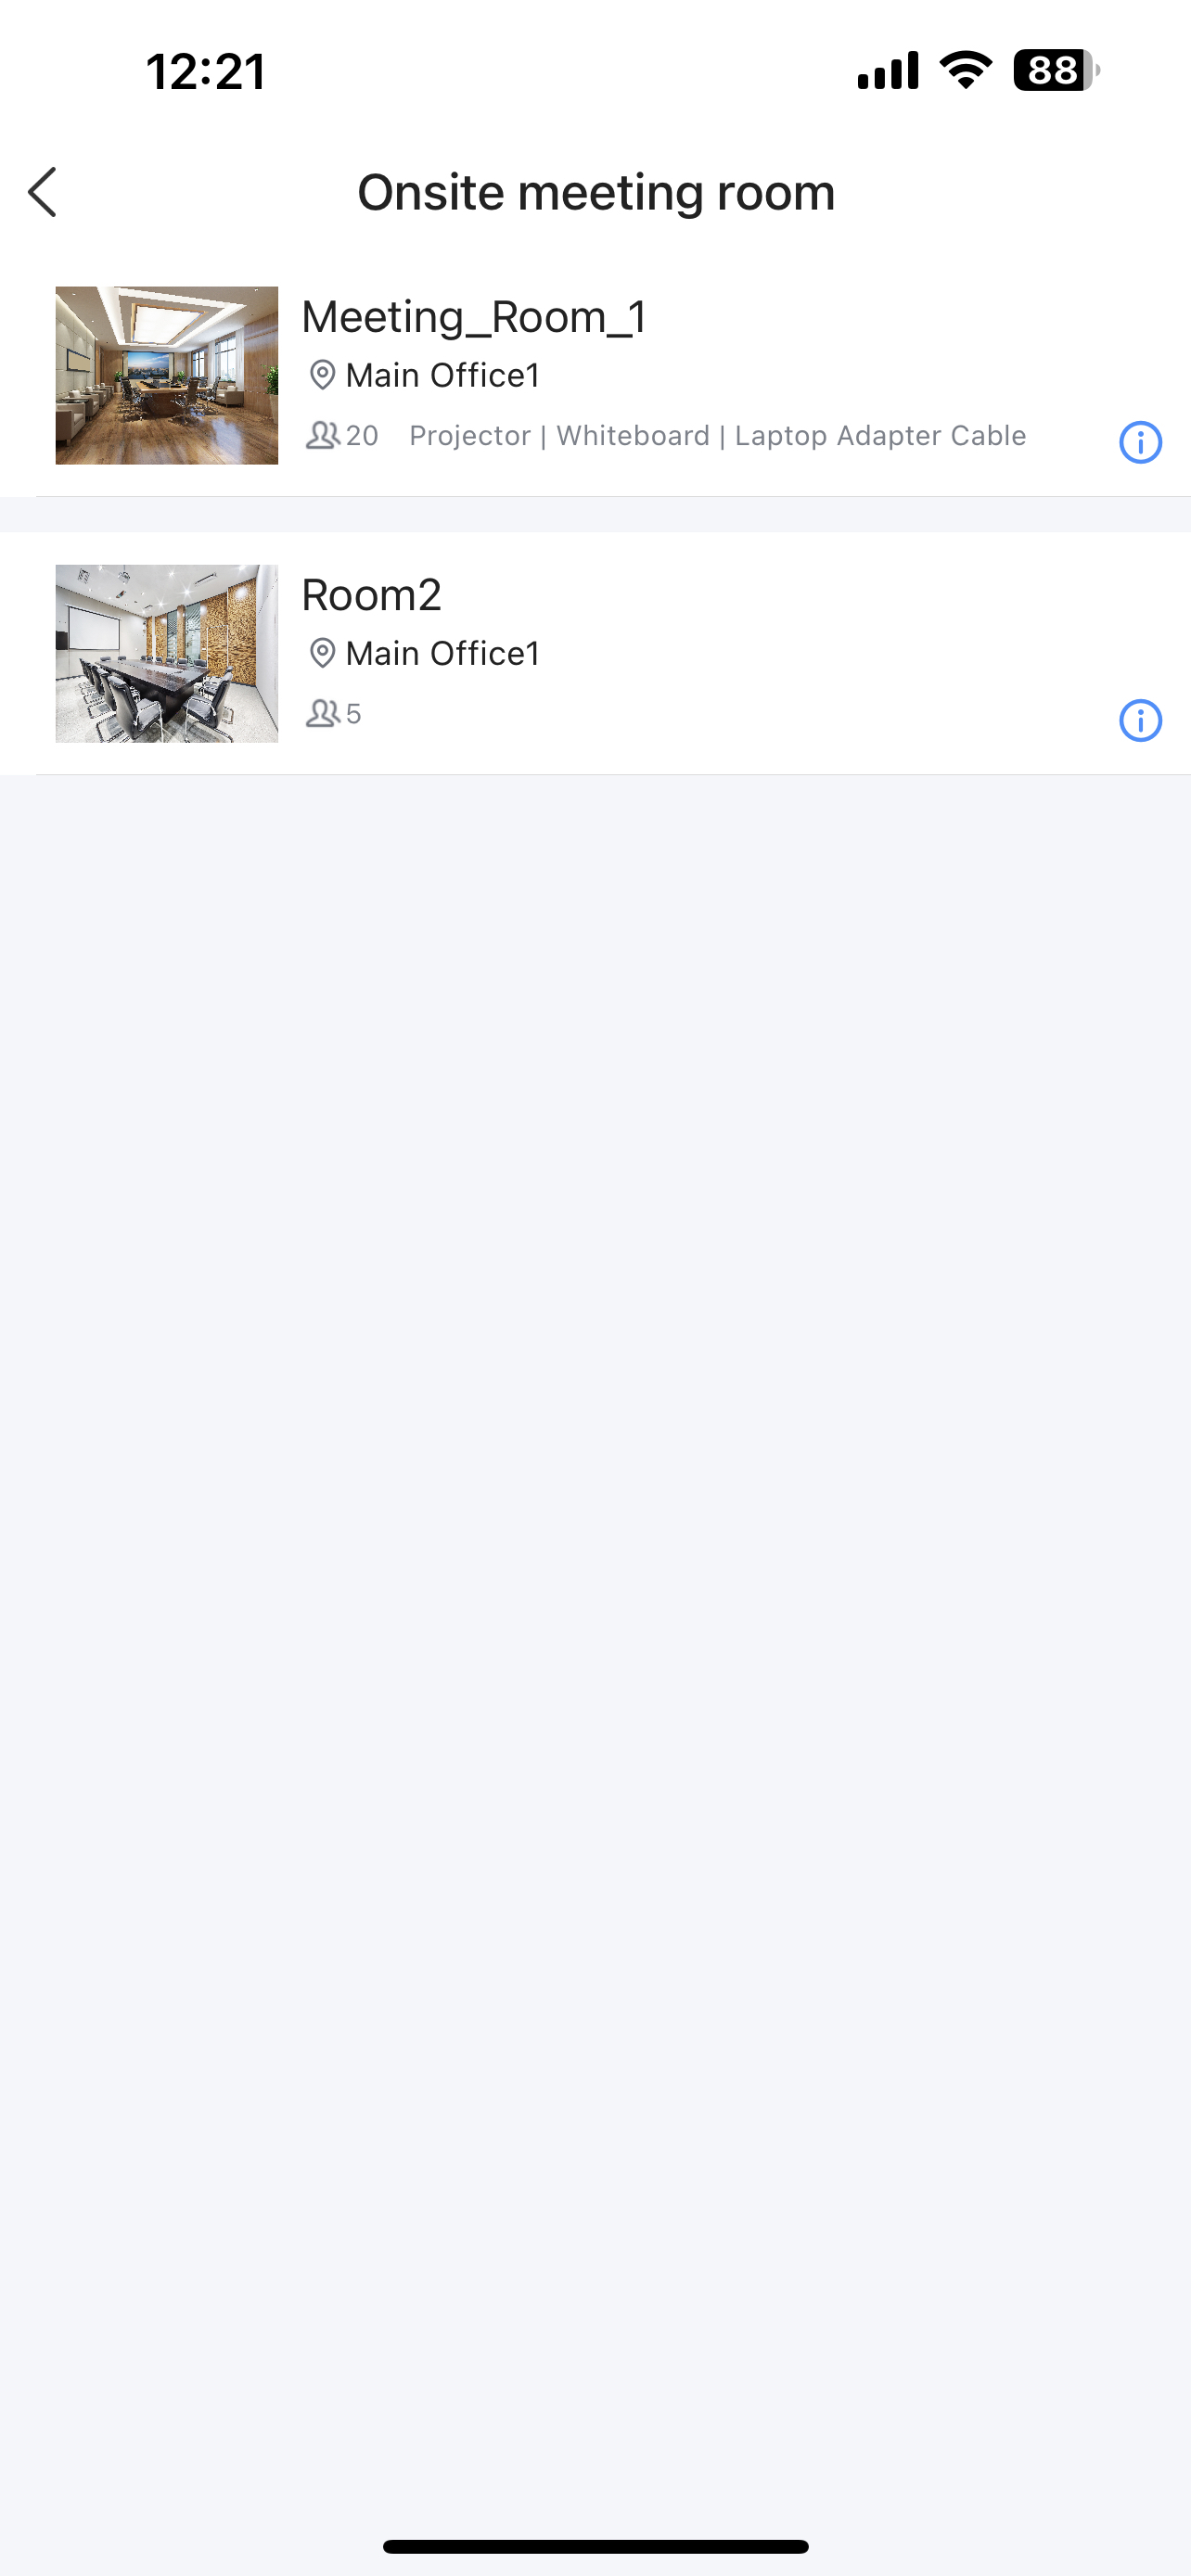
For Type, select “Onsite Meeting”, then tap “Onsite Meeting Room” and select the meeting room.
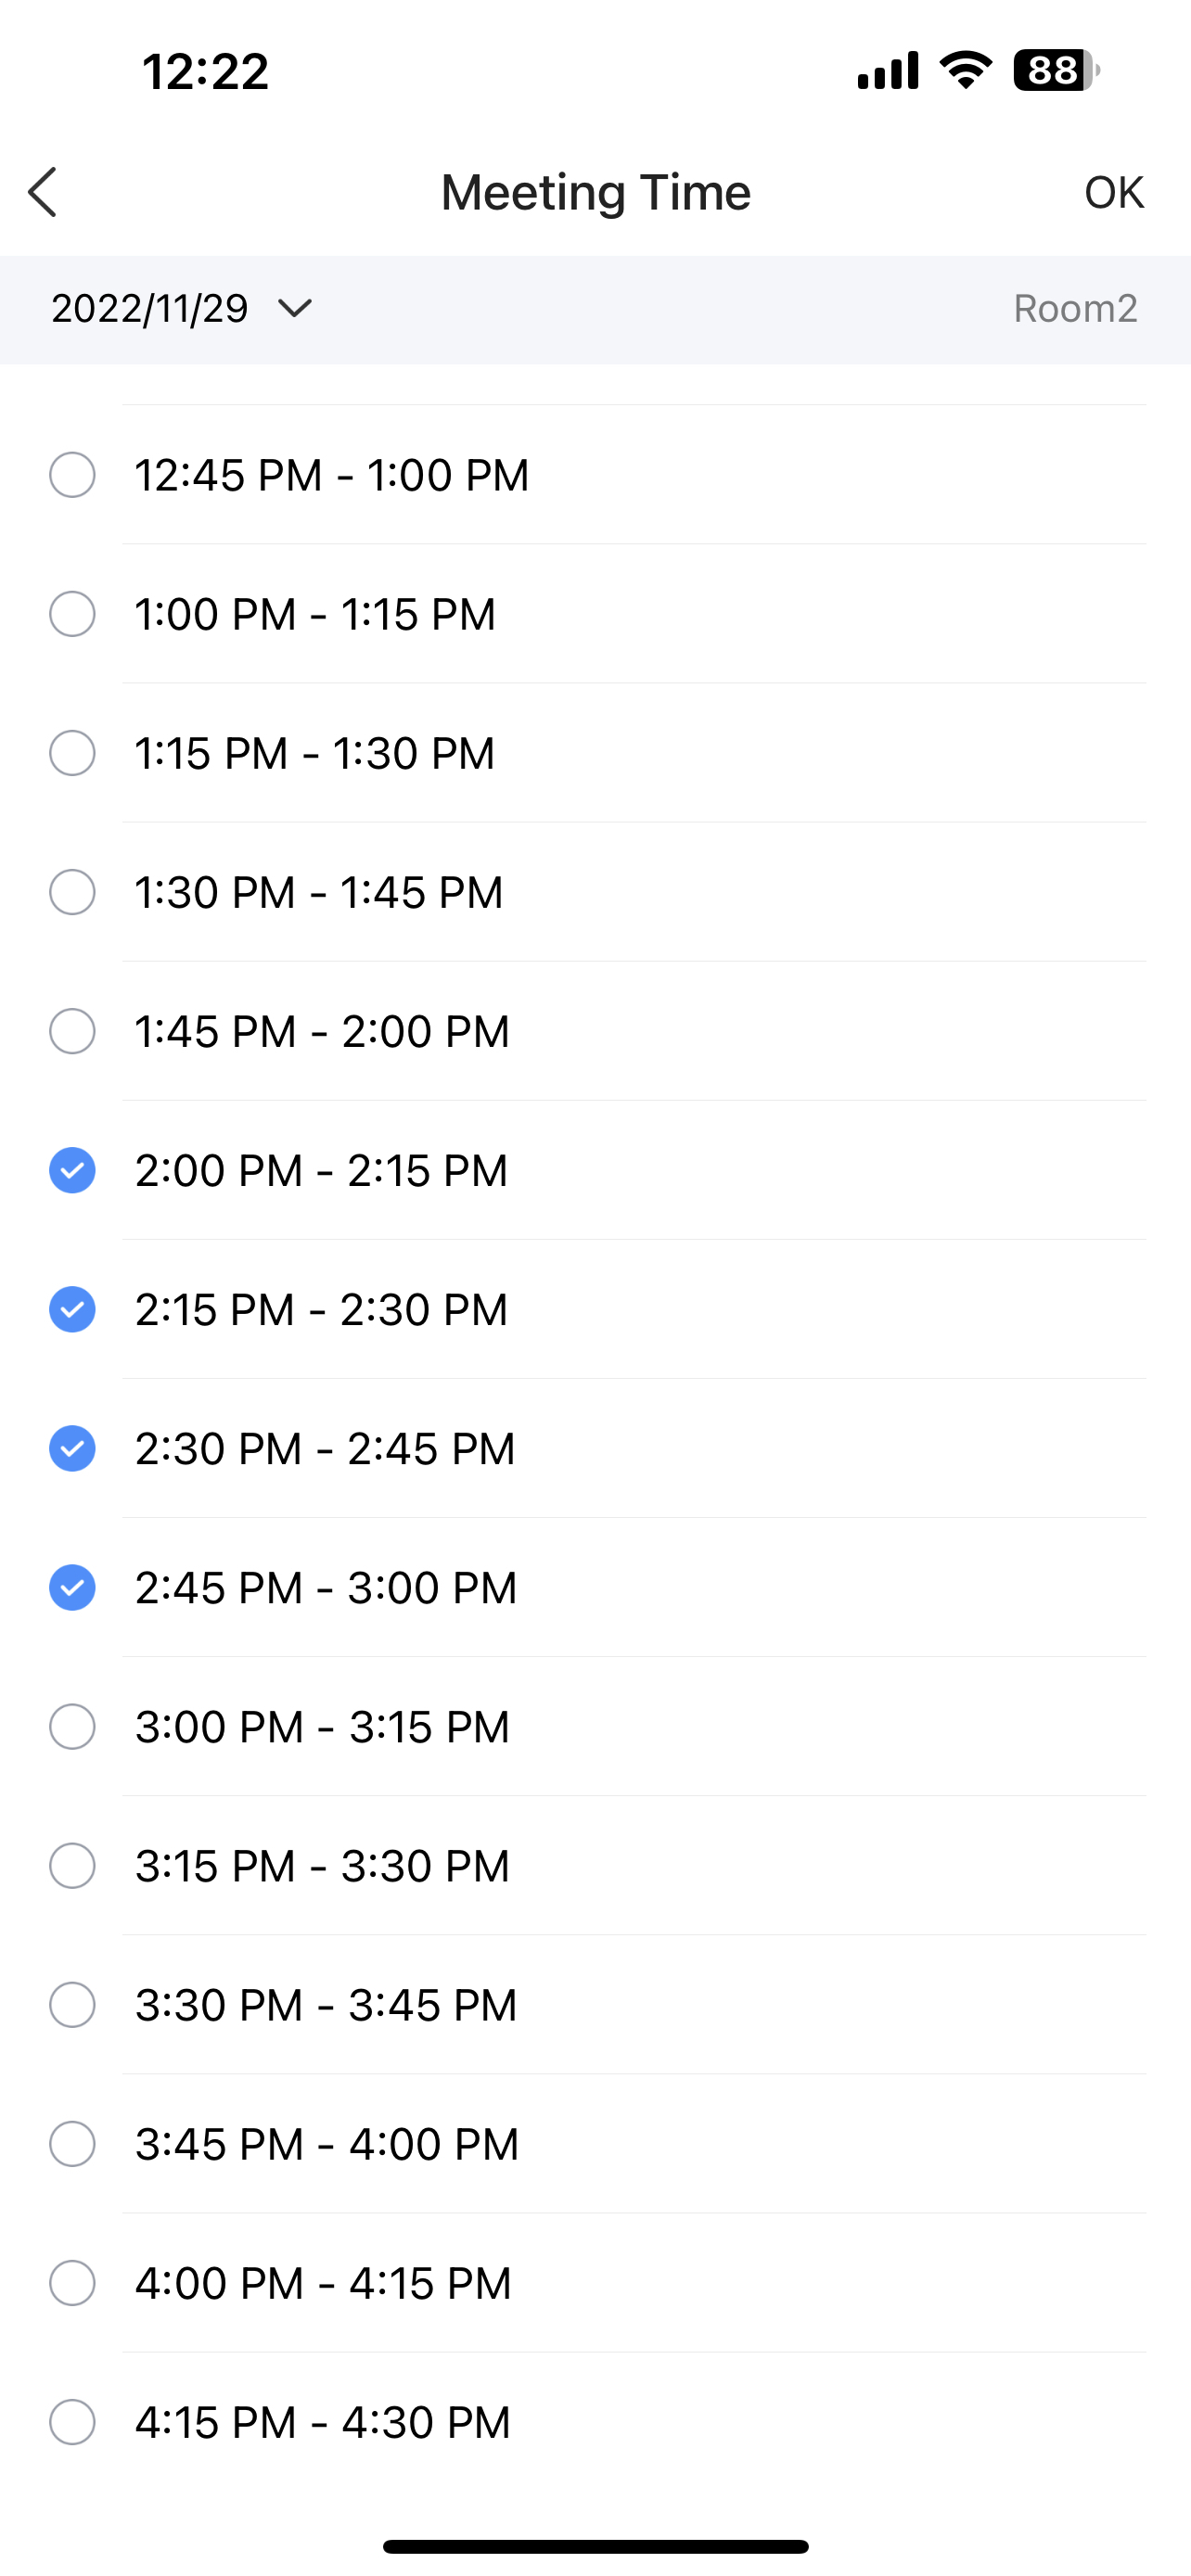
Then select the time at which the meeting is going to start, and which time it is going to end. Then tap “OK”.
Tap OK to create the Onsite Meeting.
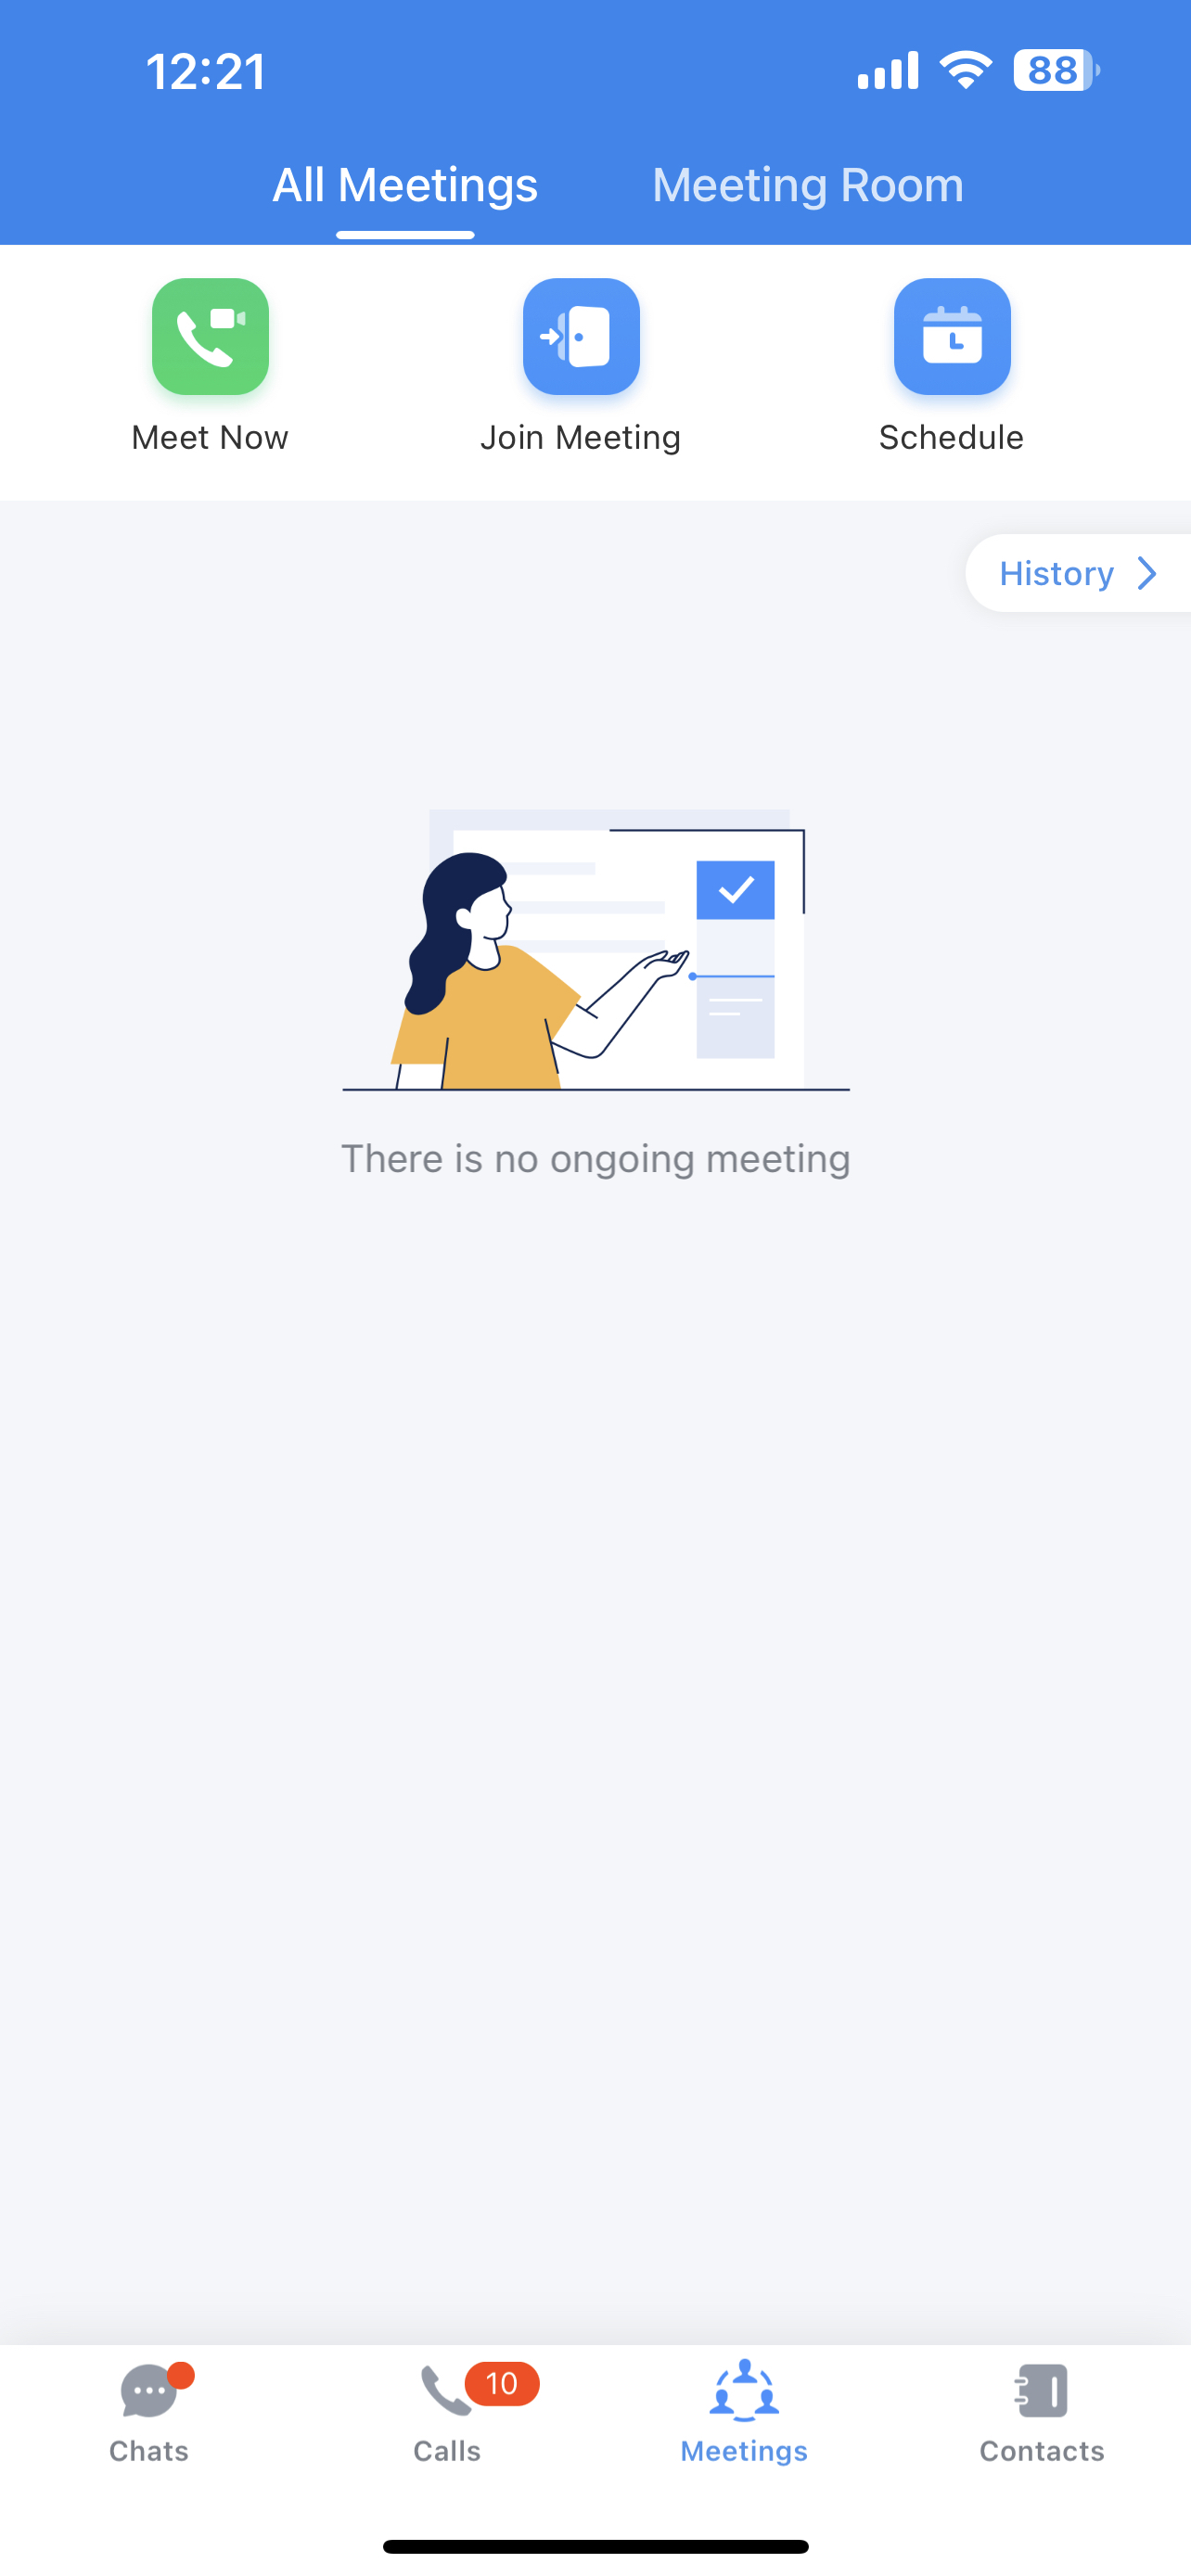
Then the scheduled meeting will appear in All Meetings
If the user wants to check the scheduled meetings or quickly schedule one, he/she can do it through the Meeting Room tab.
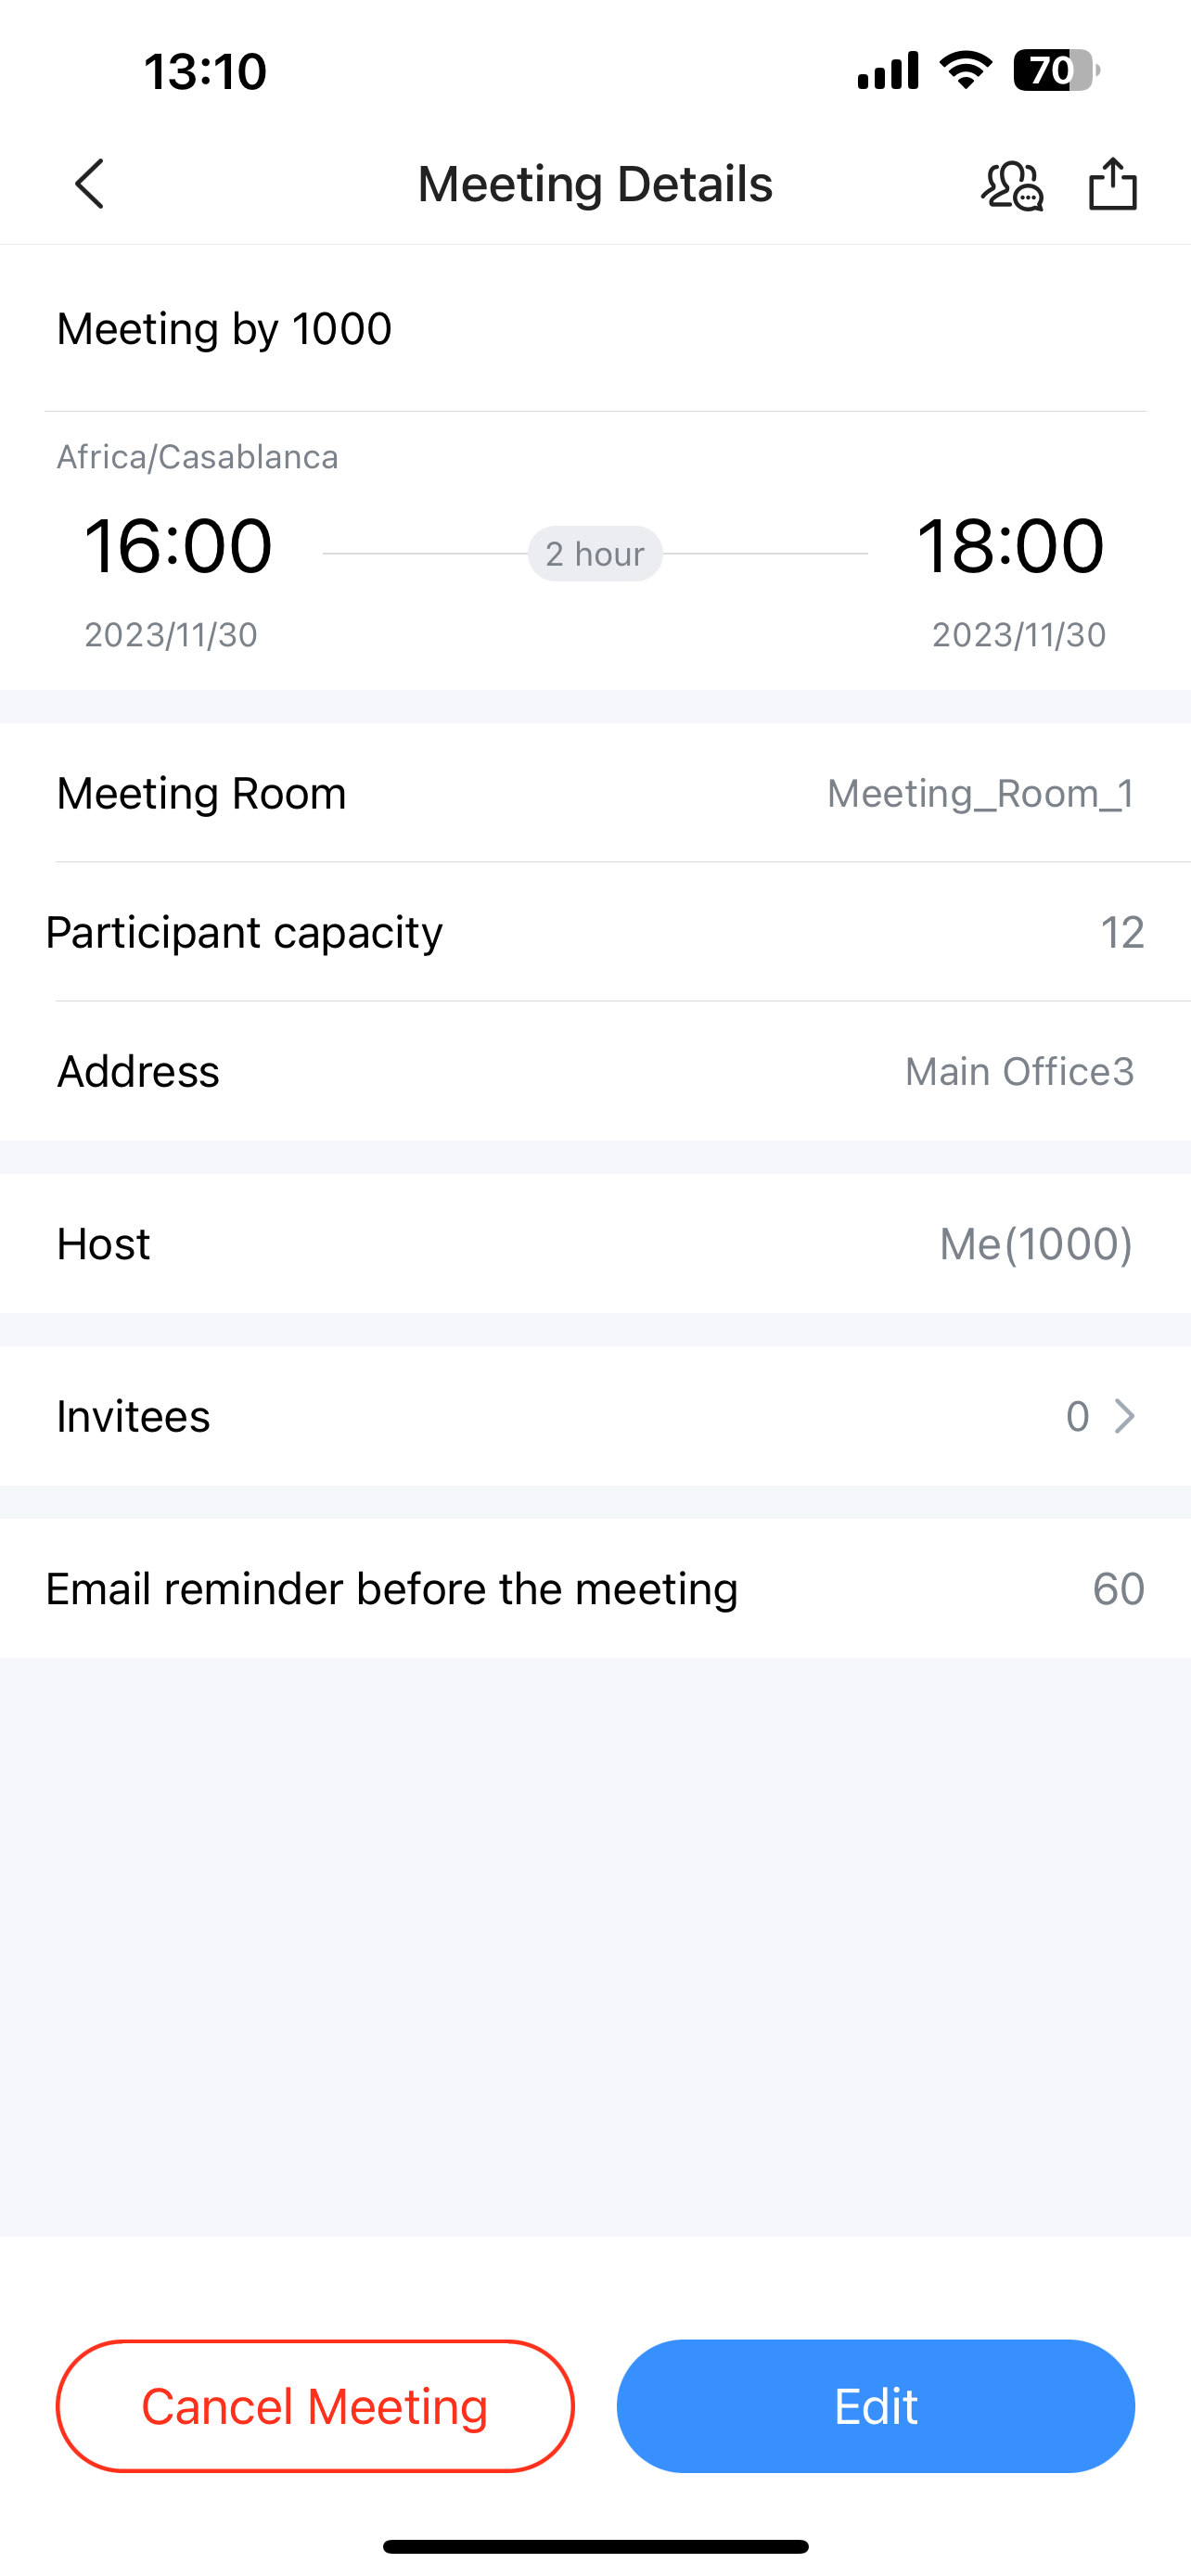
Cancel an Onsite Meeting
- To cancel an Onsite Meeting using the Wave mobile application, please navigate to “Meetings”, and then tap on the onsite meeting that you wish to cancel.
2. Tap the “Cancel Meeting” button.
3. Enter the reason for cancellation, then press “Yes”.
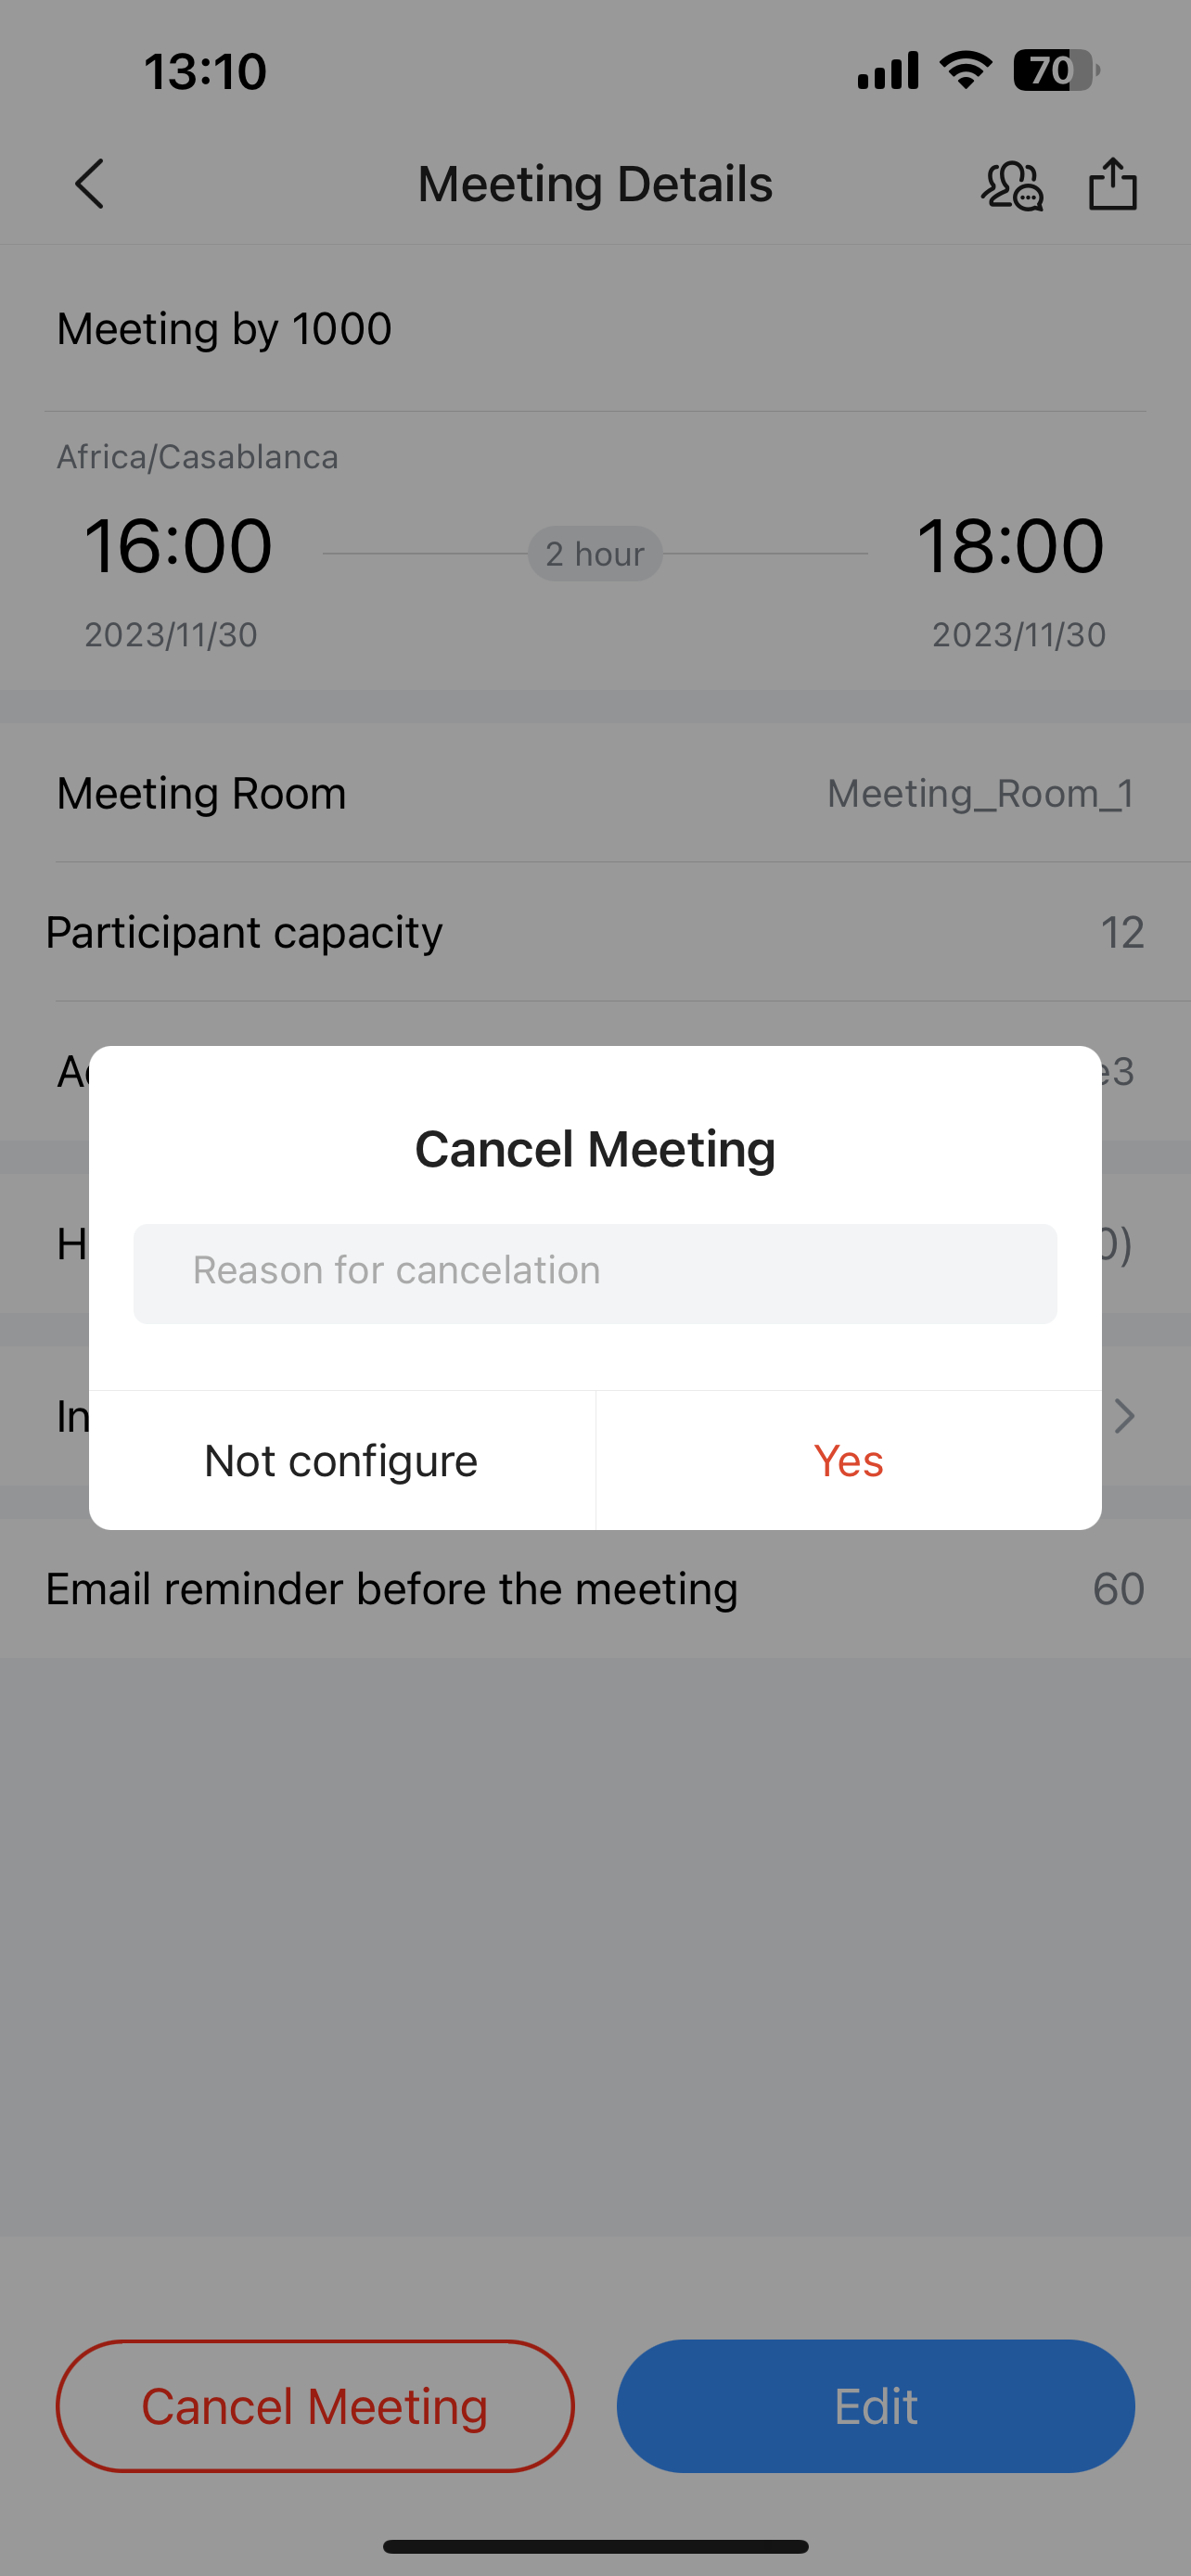
Once the meeting has been cancelled, the assistant will send a notification to the user who had been invited.
ONSITE MEETING NOTIFICATIONS
The UCM manages the notifications for the Onsite Meetings to inform the invited people about the time, the location, and the duration of the meeting. Invitations can be sent over Wave or email.
Wave Notification
When an onsite meeting has been created, a notification will be sent to the invitees as a message by the Meeting Assistant.
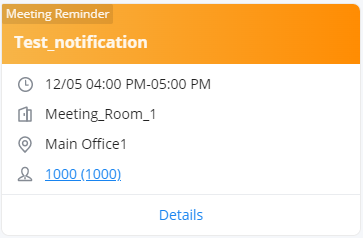
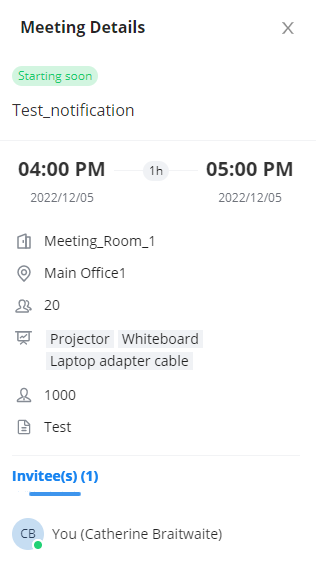
To view more information about the meeting, click on Details.
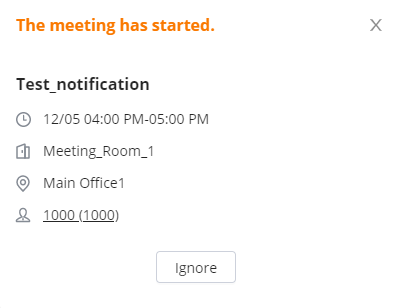
When the meeting starts, Wave will send an alert to the user indicating that the meeting has been added.
Once the meeting has ended, the Meeting Assistant will send a notification indicating that the meeting has ended.

If the creator of the meeting decides to cancel a meeting, the users who had been invited will receive a notification that the meeting has been cancelled, which also states the cancellation reason (if mentioned).
Email Notification
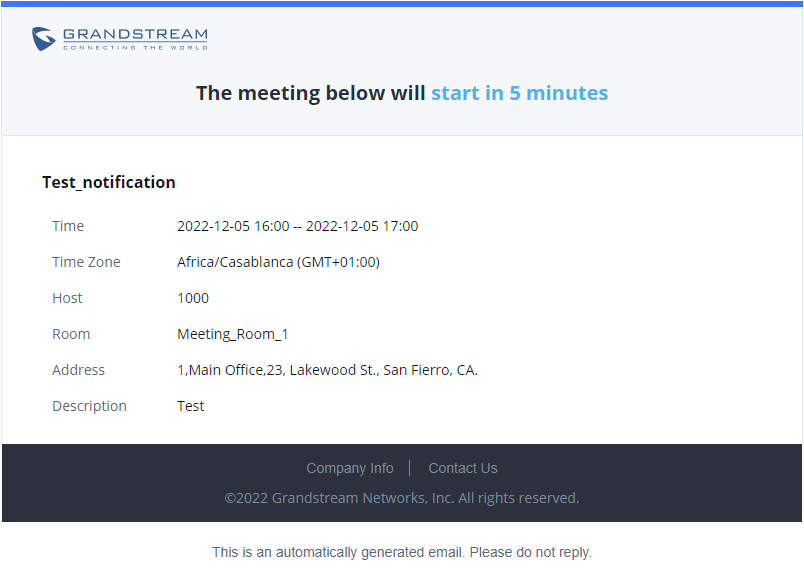
Once a meeting has been scheduled, an email notification will be sent to the invitees with all the details regarding the meeting. Please note to be able to send the email invitations, Email Settings should be configured before the meeting schedule.
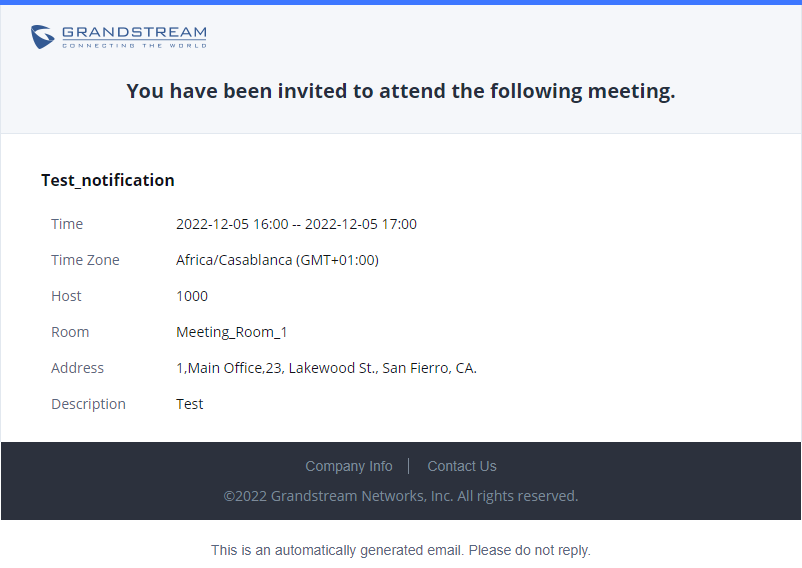
5 minutes before the meeting, the UCM will send a reminder to the user through email, and it will be similar to the example below.