
This document presents a summary of security measures, factors, and configurations that users are recommended to consider when deploying the UCM.
The following sections are covered in this document:
- Web UI Access
Web UI access is protected by username/password and login timeout. Two-level user management is configurable. Admin with limited access can be created by the default super administrator.
- Extension Security
Extension security utilizes SIP/IAX passwords for authentication, IP address whitelisting, and SRTP encryption.
- Trunk Security
Trunk security utilizes privilege levels and source caller ID filters to prevent outbound calls from unintended sources.
- TLS Protocol
TLS is utilized to encrypt SIP signaling.
- Firewall Features
Three different security measures can be configured to protect the UCM against malicious attacks: Static Defense, Dynamic Defense and Fail2ban.
- AMI
AMI feature is used to let the user connect to Asterisk instance to read and track the state of telephony client, it may come with security concerns for UCM administrators that needs to be considered.
Security Bulletins
- Potential Vulnerability Associated With Use of Allow Guest Calls Option Grandstream Security Bulletin GS13-UCM001
- Potential Vulnerability Associated With Misuse of Dial Trunk Option in IVR Grandstream Security Bulletin GS13-UCM002
-
Security Vulnerability Associated With Returned Cookie from WebUI Login Session Grandstream Security Bulletin GS17-UCM003
This document is subject to change without notice. The latest electronic version of this document is available for download here: http://www.grandstream.com/support
Reproduction or transmittal of the entire or any part, in any form or by any means, electronic or print, for any purpose without the express written permission of Grandstream Networks, Inc. is not permitted.
Web UI Access
UCM HTTP Server Access
The UCM embedded web server responds to HTTP/HTTPS GET/POST requests. Embedded HTML pages allow users to configure the device through a web browser such as Microsoft IE, Mozilla Firefox, Google Chrome, etc. With this, administrators can access and configure all available UCM information and settings. It is critical to understand the security risks involved when placing the UCM on public networks.
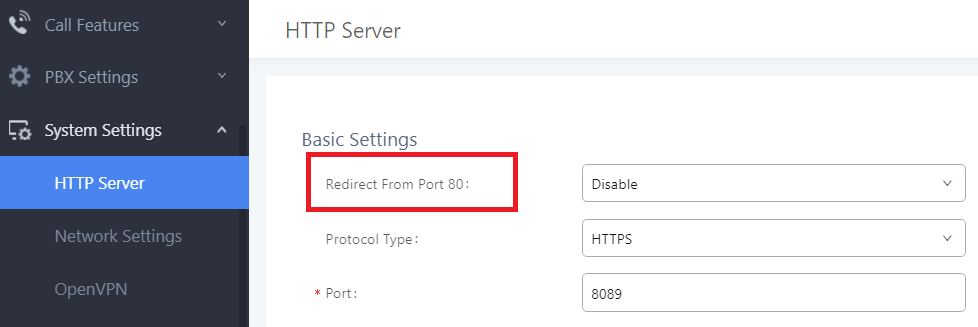
Protocol Type
The UCM63xx/A series only support HTTPS protocol for web access, while the UCM62xx and the UCM6510 series support both HTTP and HTTPS to access the UCM web UI and can be configured under web UI🡪Settings🡪HTTP Server. The selected protocol type will also be the one used for Zero Config when configs are pushed to endpoint devices. To secure transactions and prevent unauthorized access, it is highly recommended to:
- Use HTTPS instead of HTTP. (UCM63xx support only HTTPs protocol by default)
- Disable option Redirect from Port 80 and,
- Avoid using well known port numbers such as 80 and 443.
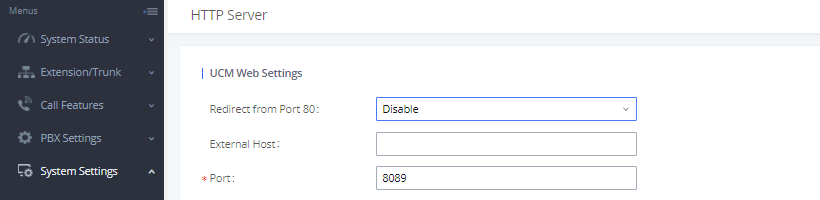
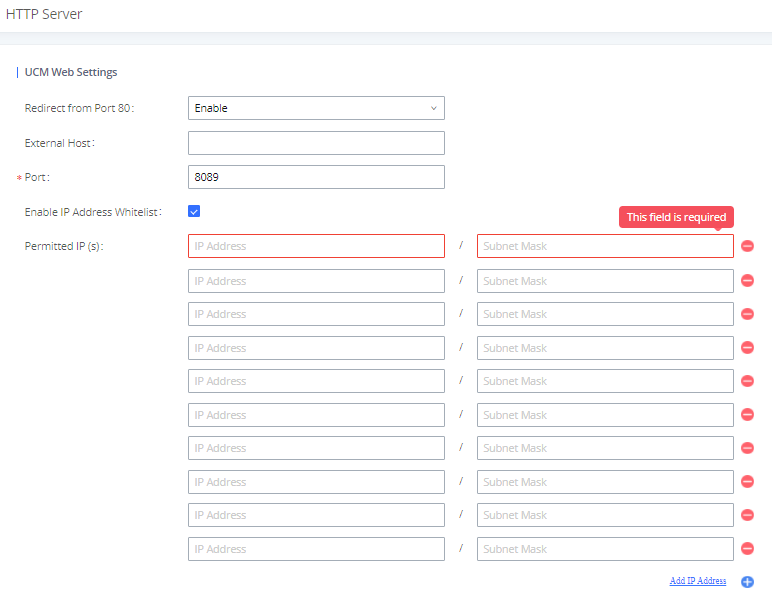
Finally, users have the option to specify a list of up to 10 IP addresses which will be allowed to access the UCM web UI. Addresses not listed will be restricted from accessing the UCM.
To enable and add to the IP address whitelist, navigate to System Settings🡪HTTP Server:
- Check the option “Enable IP Address Whitelist”
- Enter the permitted IP addresses along with the subnet masks.
User Login
Username and password are required to log into and access the UCM web UI.
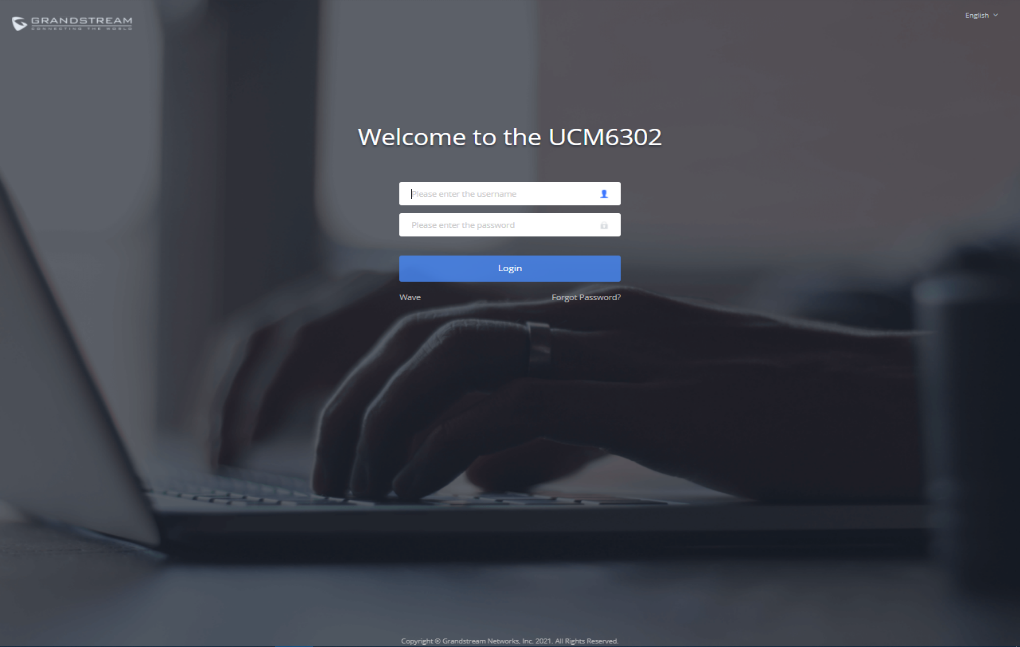
In case the user enters a wrong username or password, the user will have to enter a captcha verification in order to log into the UCM. This secures the UCM from automated attempts to log in.
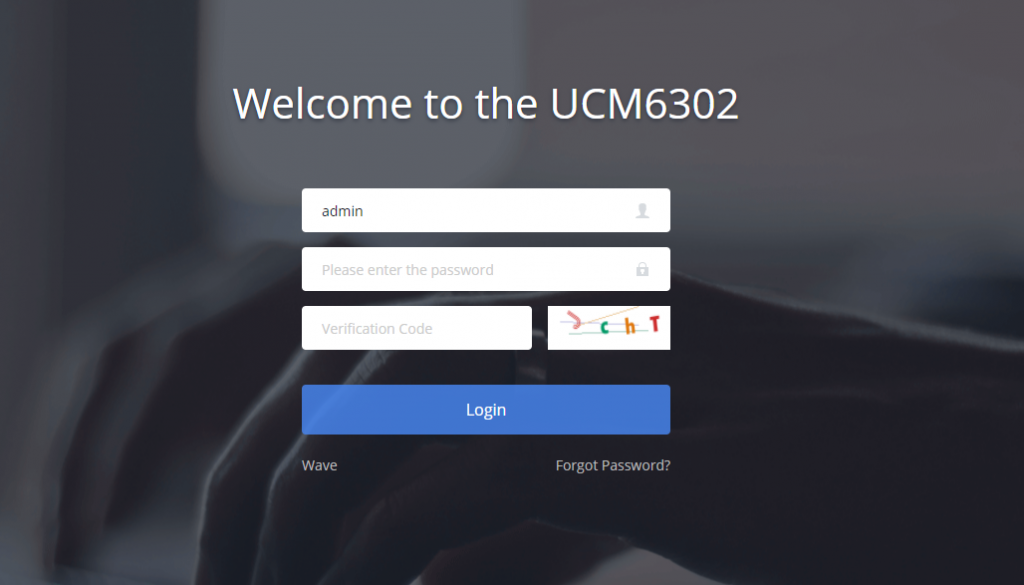
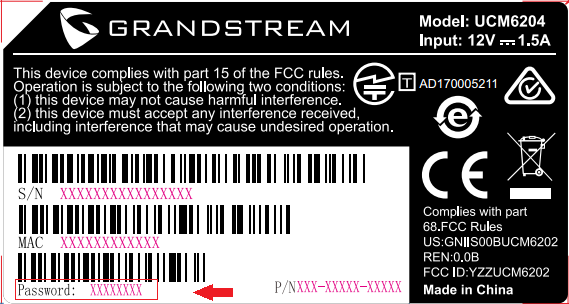
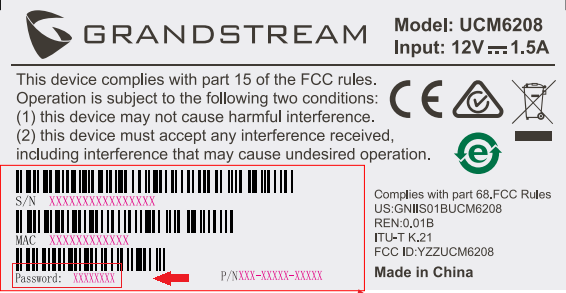
The factory default username is “admin” while the default random password can be found on the sticker at the back of the unit.
Note: Units manufactured starting January 2017 have a unique random password printed on the sticker. Older units.
It is highly recommended to change the password after logging in for the first time.
To change the password for default user “admin”, navigate to System Settings🡪Change Information🡪Change Password/Email. The password length must be between 4-30 characters.
If PBX Settings🡪General Settings🡪Enable Strong Password is toggled on, the minimum password requirements are as follows:
- Must contain at least one number.
- Must contain at least one uppercase letter, lower case letter, OR special character.
Strong passwords with a combination of numbers, uppercase letters, lowercase letters, and special characters are always recommended for security.
Multi-factor Authentication (MFA)
The UCM supports the multi-factor authentication feature that adds a layer of security by presenting a one-time password (OTP) that is generated by either a physical device or a virtual generator, like Google Authenticator app that can be installed on both Android™ and iOS™ mobile phone. It’s worth to note that the UCM supports only Google Authenticator, Twilio Authy 2-Factor Authentication (Android™ and iOS™) as a virtual code generators and Microcosm physical OTP devices. Grandstream has chosen this policy to ensure the highest level of security.
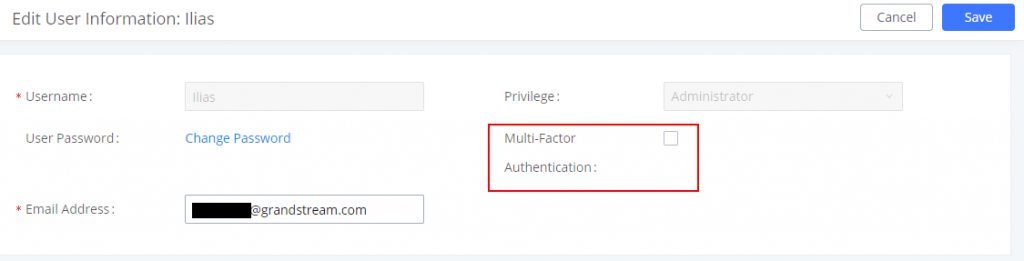
To enable this feature please navigate to Maintenance 🡪 User Management
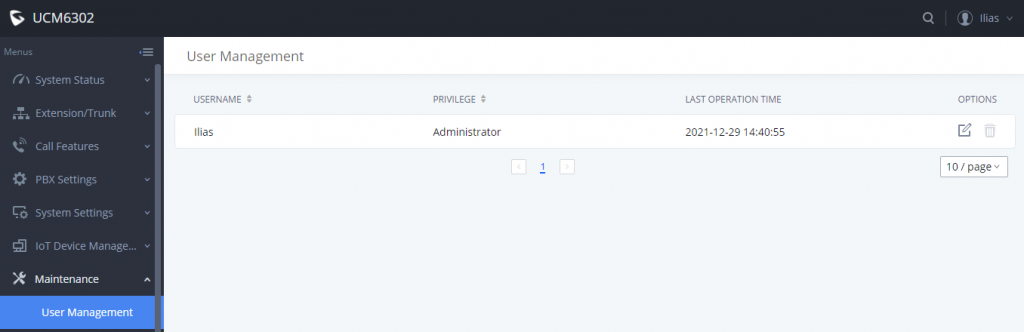
Then click on the edit button ![]() and enable “Multi-Factor Authentication” feature as shown in the screenshot down below:
and enable “Multi-Factor Authentication” feature as shown in the screenshot down below:
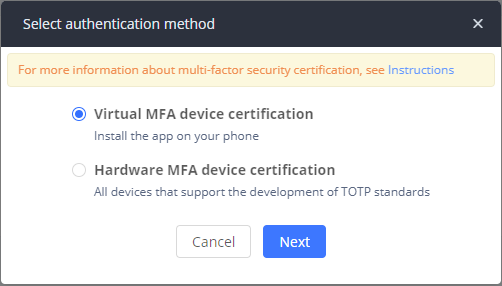
Then choose the type of MFA. If you already have a Microcosm OTP device, choose “Hardware MFA device certification”. If you want to use Google Authenticator instead, choose “Virtual MFA device certification”:
Press ![]()
In case you have selected “Virtual MFA device certification” you’ll encounter this window:
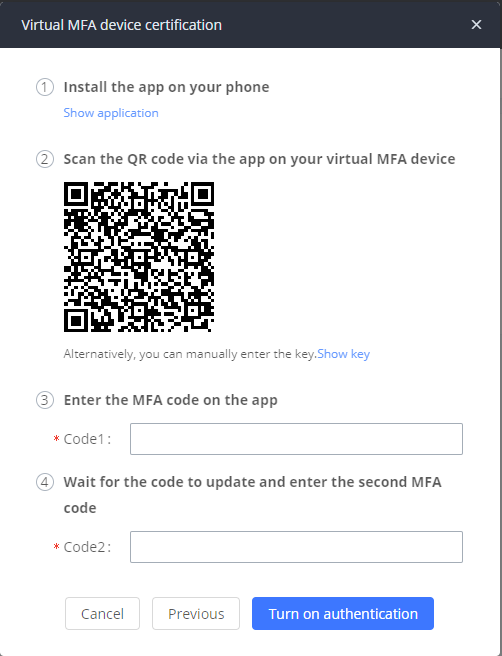
Click on “show application” to find the link to Google Authenticator, then install the application that’s compatible with your smartphone OS. Once installed, open the app and scan the QR code to set up the codes. Enter the first code in the “Code1” text area, then wait until it expires and enter the new code in “Code2” text area. After that click on ![]()
In case you have chosen to use physical MFA devices, this prompt will appear:
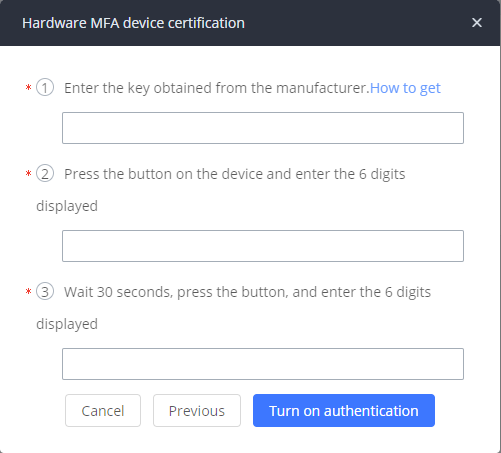
Fairly similar to virtual MFA device configuration, you will have to enter a key that the manufacturer of your MFA devices would have provided with the devices, then enter follow the instructions in the prompt. Click ![]() when both codes are entered.
when both codes are entered.
In either cases, this prompt will appear while you click ![]() to save the settings in the UCM:
to save the settings in the UCM:
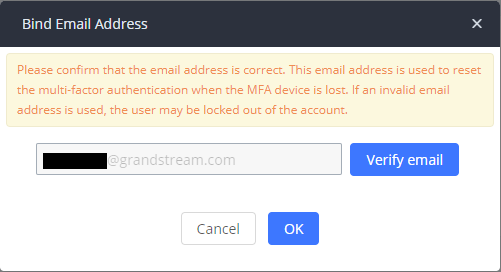
This step is very important as it shows the email that you will use to disable Multi-factor Authentication in case you have lost your physical MFA device or your mobile phone which has the virtual MFA device installed on. Click ![]() and the UCM will send a test email to your email address to verify if the email settings are set correctly. Then click OK. Then click
and the UCM will send a test email to your email address to verify if the email settings are set correctly. Then click OK. Then click ![]()
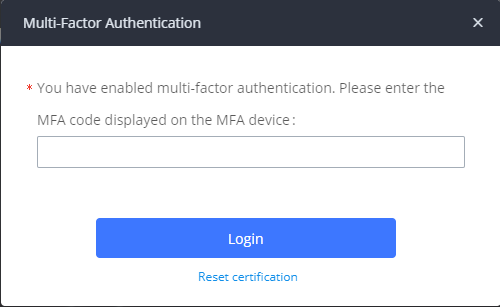
To test if MFA has been set correctly, log out from the UCM then try to log in again. After you have entered the correct username and password, this page will appear where you will have to enter your code, or what can also be called One Time Password that is shown on the authenticator application or on your MFA physical device:
Reset Multi-factor Authentication Certifications
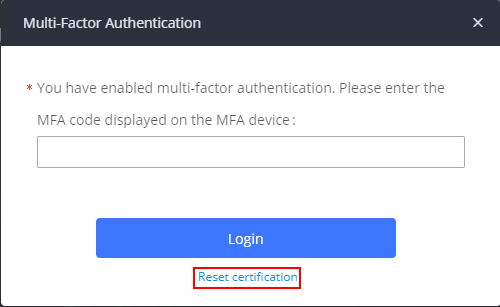
In case you have lost your MFA device, whether physical or virtual, you can easily disable MFA for your UCM account through the email address that is set with your UCM account. To do this, log into the UCM with your credentials and when you are prompted to enter the MFA code, click on “Reset certification” as shown in the screenshot down below:
This message will appear:
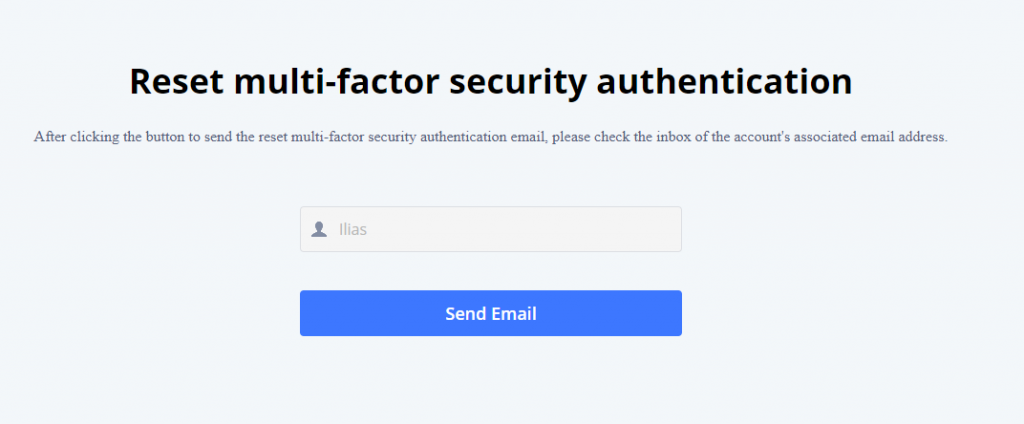
Click on 
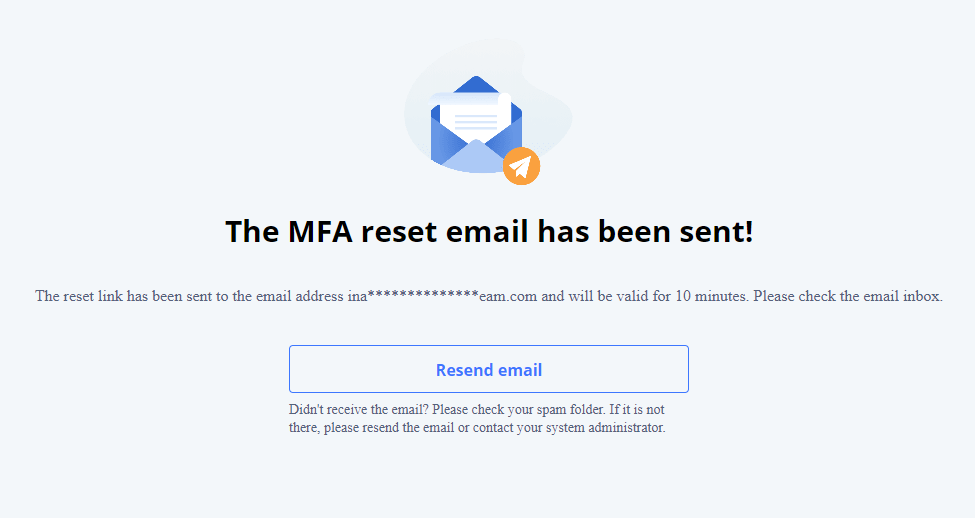
The UCM will confirm that the email containing the link to reset the MFA has been sent
On your email box, you will receive an email that looks similar to this one:
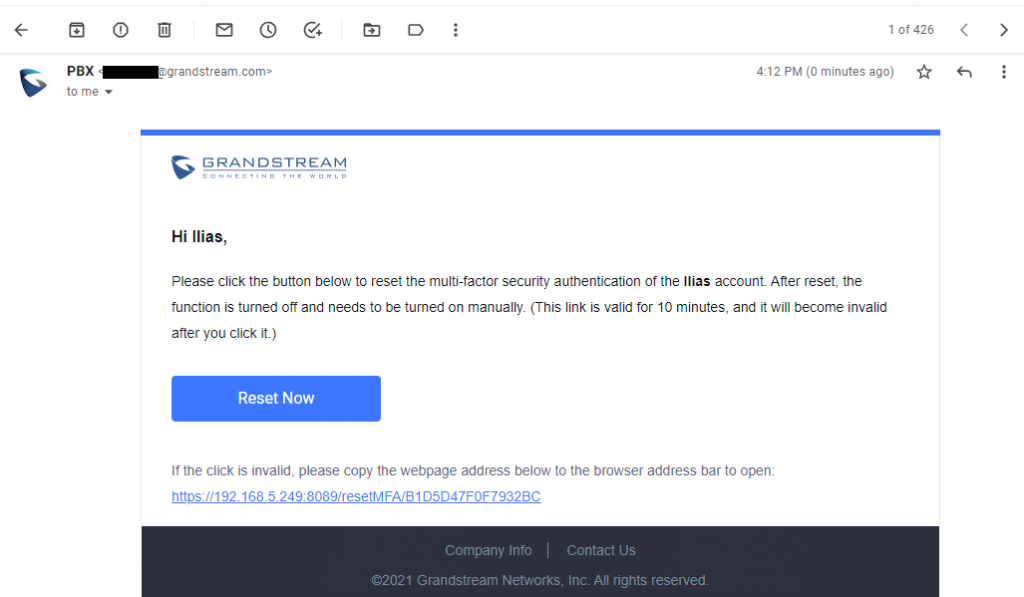
Click on ![]()
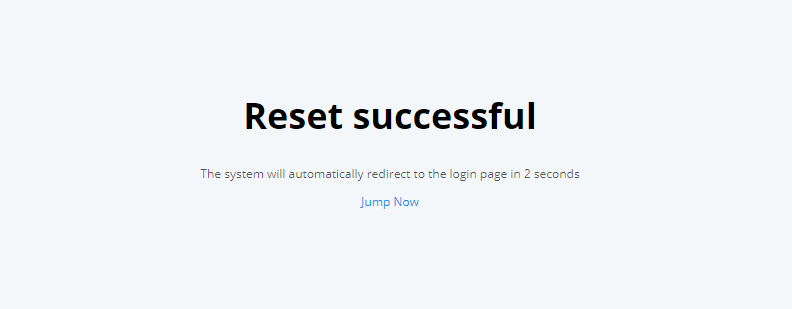
This message will appear and you’ll be automatically redirected to UCM’s log in web page to log in without having to enter the MFA code.
Login Settings
To further prevent unauthorized access to the UCM web UI, users will automatically be logged out after the configured period of inactivity. Username and password will be required to access the web UI again.
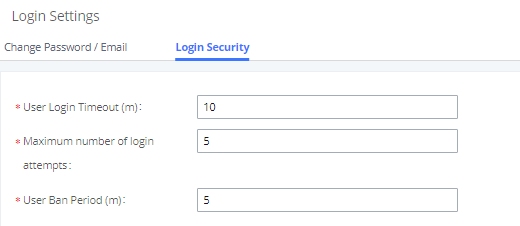
The default login timeout is 10 minutes and can be changed by navigating to Maintenance🡪Login Settings🡪Login Security and modifying the User Login Timeout field.
Additionally, the UCM can also ban users after a specified number of failed login attempts for a specified amount of time. By default, users will be banned for 5 minutes after 5 failed login attempts.
User Management Levels
Four user privilege levels are currently supported:
- Super Admin
- Admin
- Custom level
Super Admin has access to all of the UCM’s pages and can execute any operation. Admin can access most of the UCM’s pages with the exception of the following:
- Maintenance🡪Upgrade
- Maintenance🡪Backup
- Maintenance🡪System Cleanup/Reset
- Maintenance🡪Operation Log
A “Super Admin” user with username “admin” is initially configured on the UCM with factory settings. It is the only allowed “Super Admin” account and cannot be deleted and changed. This super administrator could create, edit and delete new user accounts with lower privileges “Admin” and “Custom”.
Only Super Admin has the authority to view the activity of all users via the Operation Log.
If there is more than one PBX administrator managing the UCM, it is highly recommended to create Admin level users instead of giving out Super Admin access.
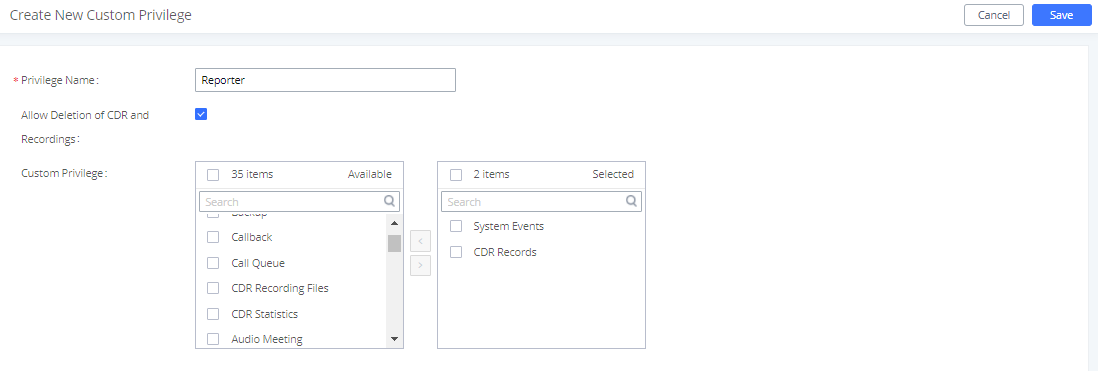
Custom privilege user levels can also be created and modified to have specific permissions including but not limited to:
- Status
- Conference
- System Events
- Feature Codes
- CDR
- PMS-Wakeup Service
To create a new custom privilege level, navigate to Maintenance🡪User Management🡪Custom Privilege, name the new custom user level and assign the desired modules as shown in the figure below.
Extension Security
SIP/IAX Password
When creating a new SIP/IAX extension, the UCM administrator is required to configure “SIP/IAX Password” which will be used for account registration authentication.
If “Enable Random Password” (PBX Settings🡪General Settings) is enabled, “SIP/IAX Password” is automatically filled with a randomly generated secure password when creating the extension on the UCM. “Passwords must contain 1) at least one number and 2) at least one lowercase letter, uppercase letter, special character and at least 8 characters”.
ACL Policy
The UCM administrator could control what IP address(s) is allowed to register to a certain extension by editing “ACL Policy” option under extension configuration dialog🡪“Media” tag. Make sure to configure the “ACL Policy” option to the smallest set to block registration attempts from anyone that doesn’t need to register to the account.
The ACL Policy options are:
- Allow All: Any IP address can register to this extension.
- Local Network Address: Only IP addresses in the configured network segments can register to this extension.
Example: Local Network Address
- Assuming there are multiple subnets within the office and the devices in all subnets can reach each other, the network administrator would like to allow only devices in 192.168.40.x network to register to this UCM.
- Under UCM web UI extension dialog, configure “Local Network Address” for “ACL Policy” option and 192.168.40.0 for “Local Subnet”.
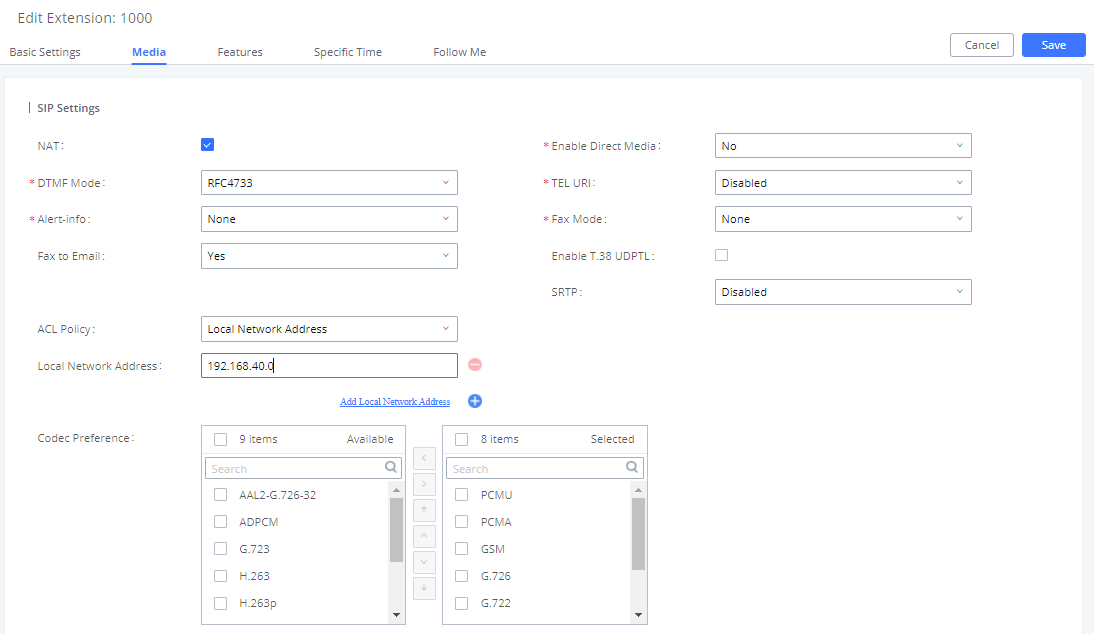
- Save and Apply changes.
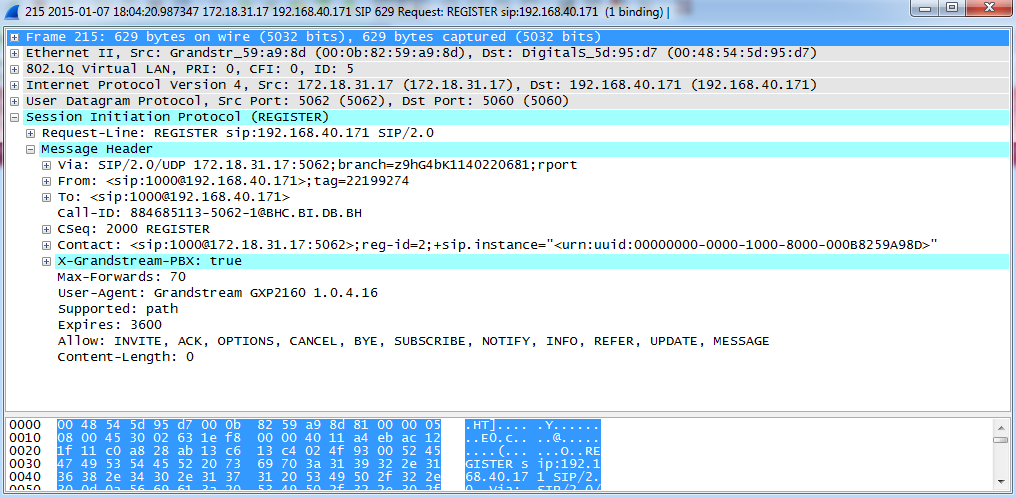
Now if the SIP end device is in the subnet other than 192.168.40.x, e.g., 172.18.31.x subnet, the UCM will not allow registration using this extension. The following figure shows the SIP device IP address is 172.18.31.17. The UCM on IP 192.168.40.171 replies 404 Not Found for the registration request.

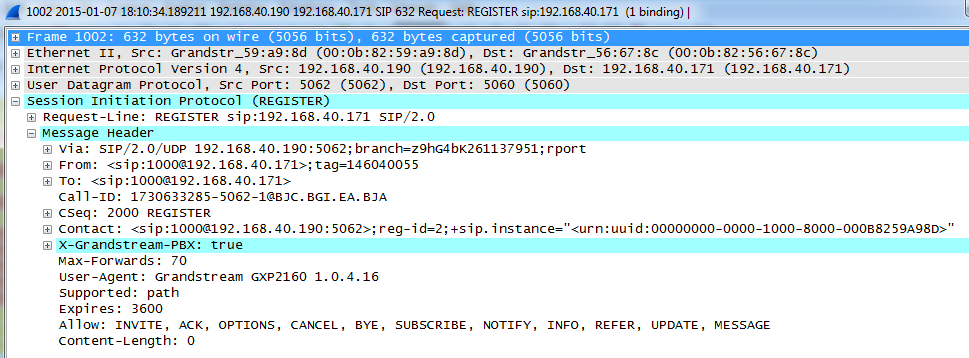
Once the device is moved to the 192.168.40.x subnet, registration will be successful. The following figure shows the IP address for the same SIP endpoint is 192.168.40.190. The UCM on IP address 192.168.40.171 replies 200 OK to the registration request.

SRTP
UCM supports SRTP for encrypted audio streams. It is disabled by default. To enable it, navigate to Extensions🡪Edit Extension🡪Media and select the desired SRTP option.
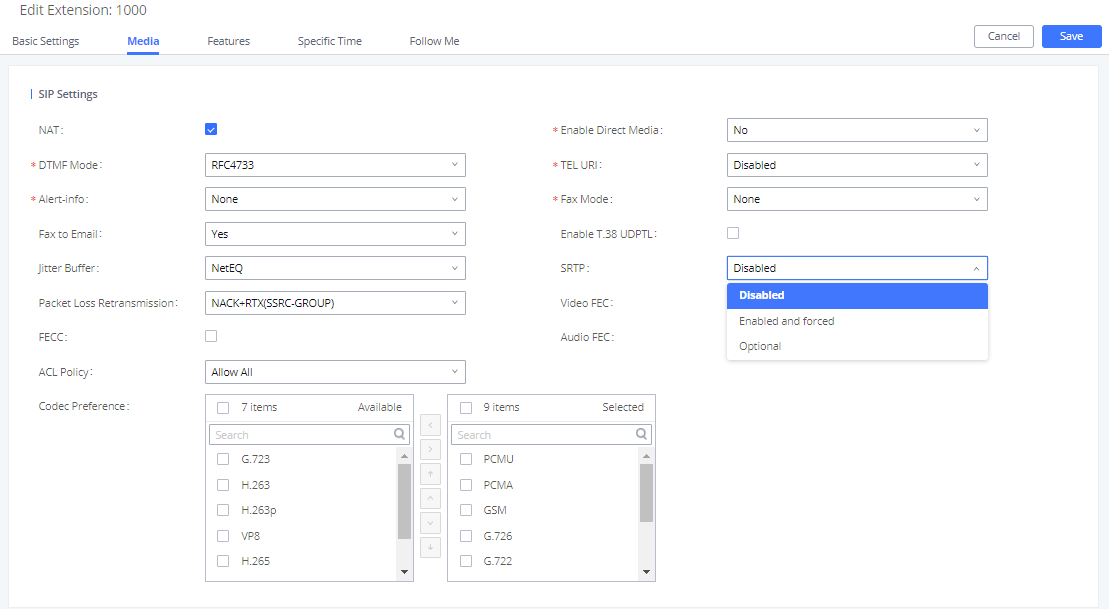
As shown above, users have two options while enabling SRTP under extension parameters:
- Enabled and forced: Extension will support SRTP and will not allow any calls without it.
- Optional Extension will support SRTP and will allow negotiation with calls without SRTP.
Trunk Security
A potential risk for trunks is unauthorized international and long-distance calls, which can result in unexpected high charges before the issue is noticed. Therefore, administrators must take special care when configuring trunks that would be charged for placing certain calls such as long-distance calls and international calls.
Outbound Rule Permissions
Users can apply one of four security measures on the UCM to control outbound calls.
- Privilege Level
- Enable Source Caller ID Whitelist
- Password protection
- PIN groups
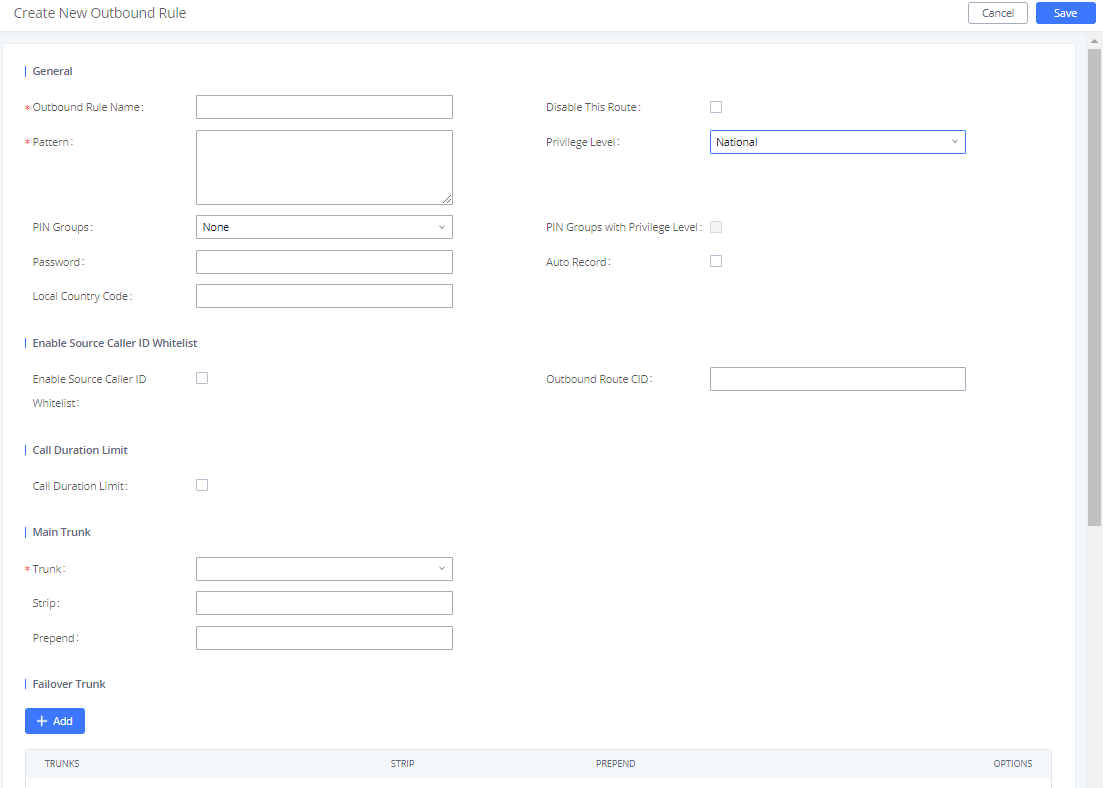
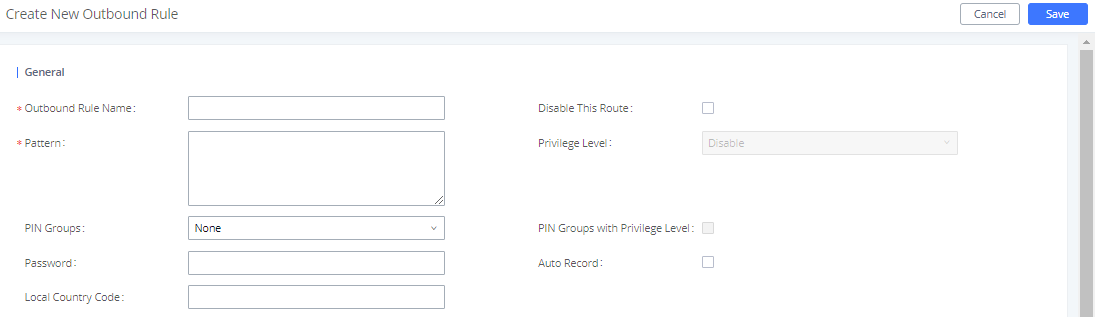
Privilege Level
On the UCM, the supported 4 privilege levels are “Internal”, “Local”, “National” and “International” from the lowest to the highest. Outbound calls through trunk can be placed only if the permission level assigned to the caller is higher or equal to the privilege level of the outbound rule. Outbound call requests from users with privilege lower than the outbound rule will be rejected.
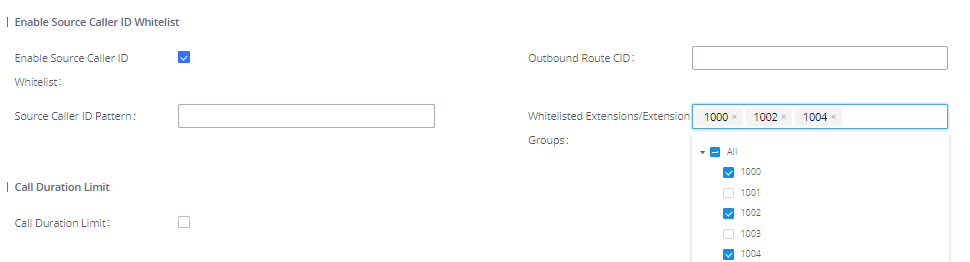
Source Caller ID Filter
UCM administrators can specify the extensions/extension groups that can use the outbound rule. This can be done by selecting extension/extension groups or defining pattern for the source caller ID in “Source Caller ID pattern” field. The extension allowed to make outbound call will either need to be an extension in the selected list or match the defined pattern.
For detailed configuration instructions, please refer to MANAGING OUTBOUND ROUTE section in white paper: How to manage inbound/outbound route on UCM6xxx
Password Protection
Administrators can protect outbound rules with passwords that would be requested by the UCM when callers try to use the configured routes.
PIN Groups
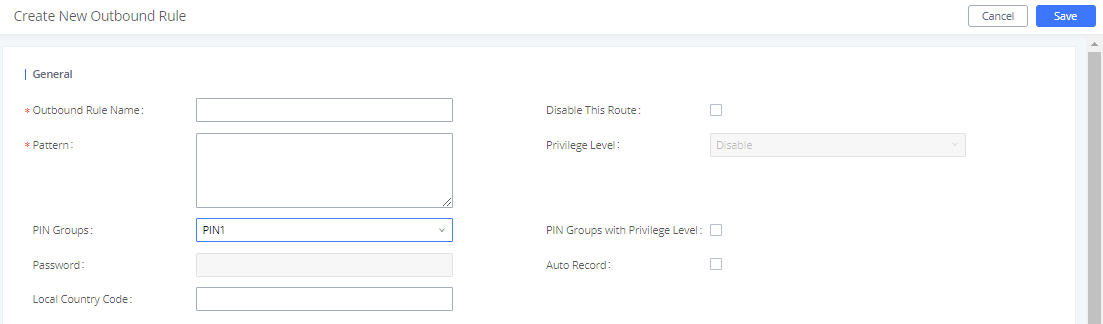
In the scenario where multiple users share the same phone, and the phone is used to make outbound calls, outbound routes can be set to require PIN entry to use. To set up a PIN group:
- Navigate on to Extension/Trunk🡪Outbound Routes🡪PIN Groups
- Click Add to create a new PIN group and enter the user names and passwords.
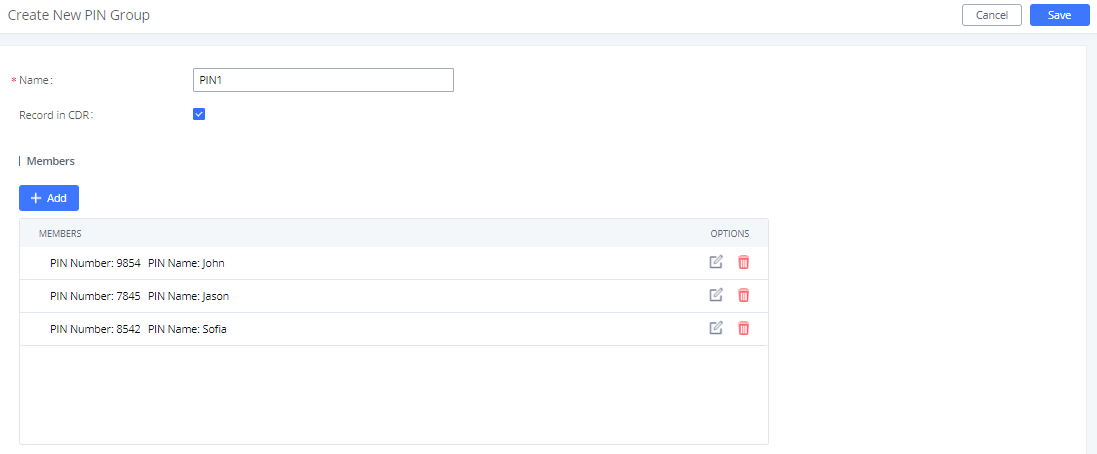
- Save and apply. The PIN Group can now be selected in Outbound Routes. Each time one of the PIN Group members makes an outbound call, he/she will be requested to enter their PIN.
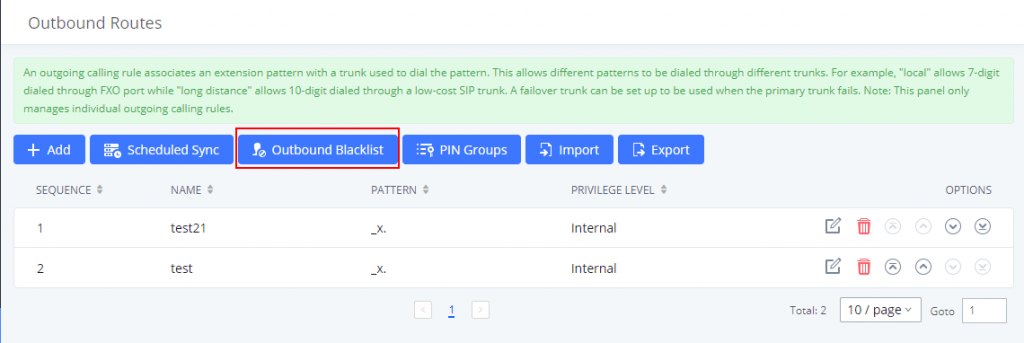
Outbound Blacklist
Another way to secure your outbound routes is by setting a blacklist for the destinations that you do not want to allow to be dialed. It can be configured to prevent calls to certain countries which might result in additional financial charges. To set a blacklist for your outbound route, navigate to Extension/Trunk 🡪Outbound Routes
Then select the countries that you want to include in the list of the countries that you don’t want the users to dial to.
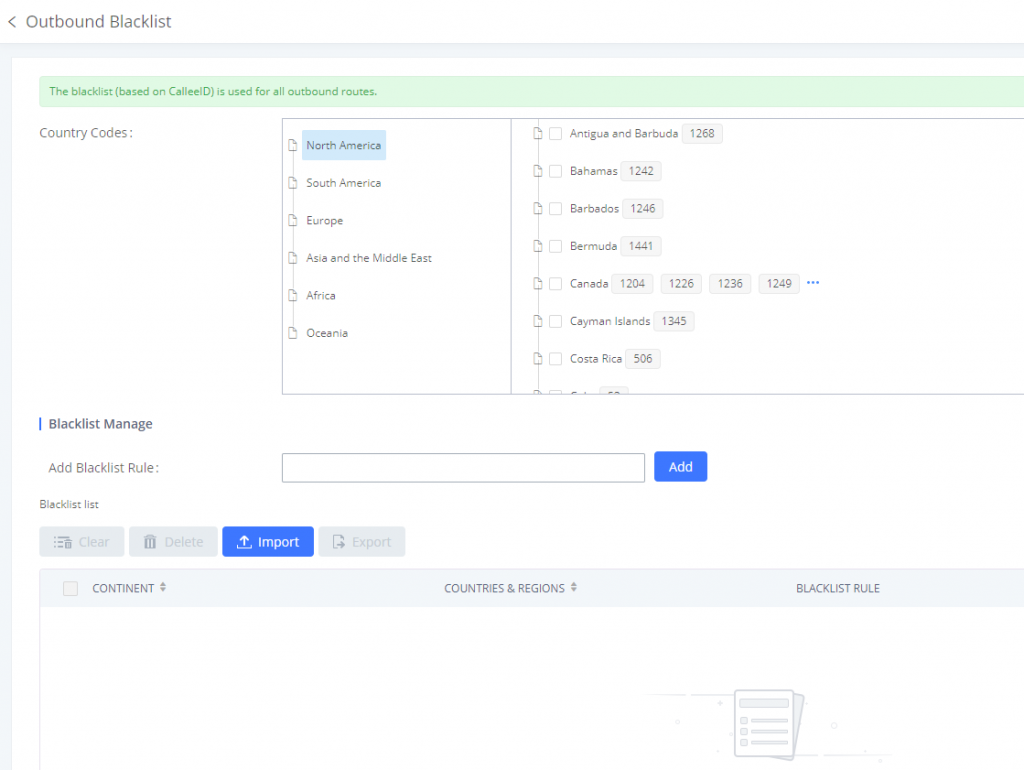
You can also export the list to use on another UCM, or import one that you have already exported.
IVR Dial Trunk
When creating/editing an IVR, the administrator can decide whether or not to allow the calls entering the IVR to make outbound calls through trunks by configuring “Dial Trunk” and “Privilege”. If “Dial Trunk” option is enabled, the caller calling into the IVR will be able to dial external numbers through a trunk if the IVR’S permission is higher than or equal to the privilege of the trunk. The potential risk here is that unwanted users may call into IVR and then dial external numbers. This could possibly generate unexpected high charges especially if an IVR is configured as the destination of an inbound route of a PSTN trunk, in which case, anyone can call into the IVR and then dial long distance or international calls.

We recommend disabling “Dial Trunk” option unless the risk associated with it is clearly understood or the PBX administrator intentionally configures it to do so for specific reasons.
For more information about IVR permissions, please refer to IVR PERMISSION section in white paper:
How to manage inbound/outbound route on UCM6xxx
TLS
UCM has the option to secure SIP packets with TLS encryption, allowing for safe transactions over untrusted networks and with authenticated parties.
TLS can be configured in PBX Settings🡪SIP Settings🡪TCP/TLS.
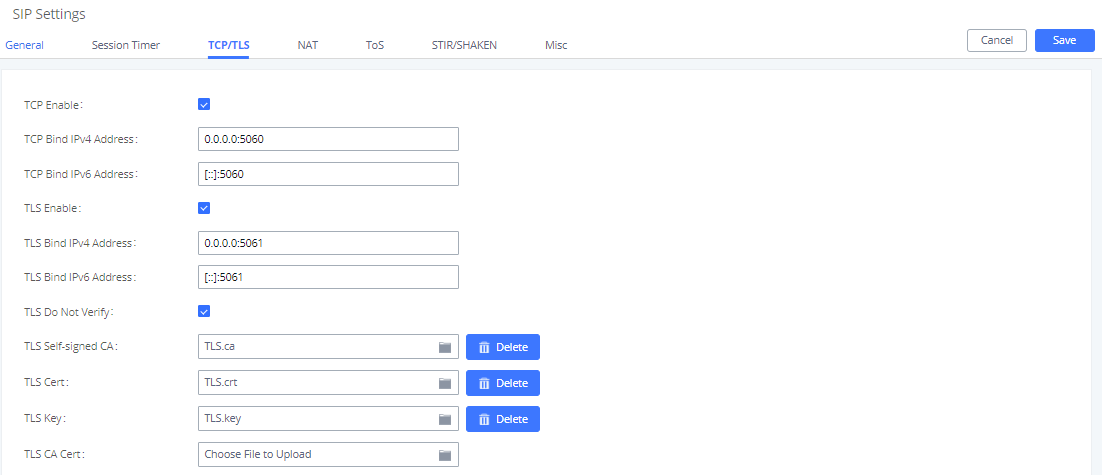
- Tick the “TLS Enable” box to activate TLS. (Enabled by default in the UCM63xx/A series).
- Configure “TLS Do Not Verify”, “TLS Self-Signed CA” and “TLS Cert” to achieve basic TLS authentication and encryption.
- TLS Self-Signed CA
Used when UCM is acting as the client to authenticate a server. If the server uses a self-signed certificate, that certificate should also be installed on the UCM for successful verification. If it is signed by a CA, then a copy of the CA server certificate should be installed.
- TLS Cert
Used when UCM acts as the server. TLS Cert is sent is sent to the client during the TLS handshake and includes the key and server certificate. The “common name” field in the server certificate should match the server host (either by IP address or domain name). This is required if the client is another UCM (not a standard, as some clients do not have this requirement for server authentication). If the common name does not match, authentication on the client side will fail, and the TLS connection will fail to establish.
- TLS Do Not Verify
Effective only when the UCM is acting as the client. If enabled, the certificate sent by the server will not be verified. This is useful for authentication between two peered UCMs using the factory certificate, which has “common name” configured with the value “localhost”, which is not a valid host and will result in authentication failure. Skipping verification will not have any effect on the encryption itself. If disabled, the client will verify the server certificate with the “TLS Self-Signed CA”.
Firewall
The UCM firewall functionality consists of three components: Static Defense, Dynamic Defense, and Fail2ban. Each can be configured for specific types of malicious attacks.
Static Defense
Static Defense uses pre-configured filtering rules to protect the UCM. Three filtering rule types are supported: ACCEPT, REJECT, and DROP. These rules can be applied to specific source/destination IP addresses and ports. Static Defense can be configured in System Settings🡪Security Settings🡪Static Defense.
When creating or editing rules, the following options are available:
- Rule Name: A name to easily identify the rule and its purpose.
- Action: The action to perform for this rule. Accept, Reject, or Drop the connection if criteria is met.
- Type: The direction of the network traffic. IN for inbound traffic. OUT for outbound traffic.
- Interface: Select network interface where the traffic will go through (this option is only available for devices with both WAN and LAN ports).
- Service: The specific services to affect. FTP, SSH, Telnet, HTTP, and LDAP are available. Custom allows administrators to specify source/destination IP addresses and ports and the protocol.
Additionally, the following features are also available to further increase security:
1. Ping Defense
Protects against ping floods by not responding to ICMP echo requests.
2. SYN-Flood Defense
Protects against SYN floods by limiting the amount of SYN requests accepted per second.
3. Ping-of-Death defense
Protects against ping packets larger than 64 KB.
These settings can be enabled under System Settings🡪Security Settings🡪Static Defense 🡪”Typical Firewall Settings”.
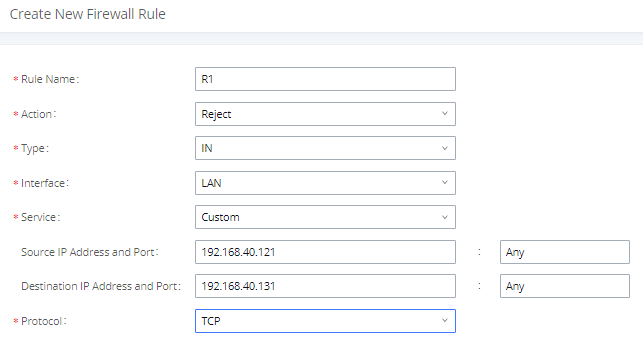
Static Defense Example: Blocking TCP Connection from a Specific Host
This example demonstrates how to set up a new rule to block a host with a specific IP address to connect to UCM using TCP connection. In the following figure, 192.168.40.121 is the host IP address and 192.168.40.131 is the UCM’s IP address. Port 8089 on UCM is used for HTTP server/web UI access. This setting will block host on 192.168.40.131 to access UCM port 8089 using TCP connection.

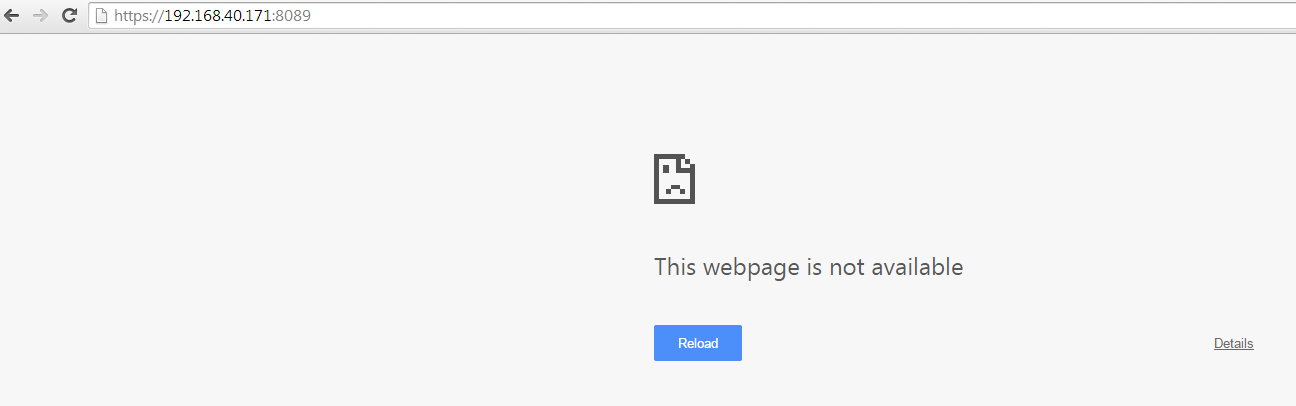
After saving and applying the change, host 192.168.40.121 will not be able to access UCM web UI anymore.


Dynamic Defense
Dynamic Defense protects the UCM by blacklisting individual hosts that send excessive connection attempts or brute force attacks. On UCM6102/6202/6204/6208/6510 devices, this requires Network Settings🡪Basic Settings🡪Method to be set to “Route”. Dynamic Defense can be configured in Security Settings🡪Dynamic Defense, it will try to blacklist massive connection attempts or brute force attacks made by individual host.
Dynamic Defense’s connection threshold and blacklist update interval can be adjusted in accordance to administrator preferences. Whitelist entries can be added to prevent specific IP addresses and ports from getting blocked.
For more configuration details, please refer to https://documentation.grandstream.com/knowledge-base/ucm630x-series-user-manual/
Fail2ban
Fail2ban protects the UCM by detecting excessive failed login attempts and SIP requests and blocking any further attempts from the same host.
Fail2Ban can be configured in System Settings🡪Security Settings🡪Fail2Ban. By default, Fail2Ban is disabled (see figure below).

- Enable Fail2ban: Tick the box to enabled Fail2ban.
- Banned Duration : The amount of time in seconds that a host is banned for. A value of “0” means an permanent ban. Set to 600 seconds by default.
- Max Retry Duration : The maximum amount of failed attempts allowed within this window of time. Set to 600 seconds by default.
- Fail2ban Whitelist: The list of hosts that would not be blacklisted even if the number of failed SIP and login attempts exceeds the allowed limit.
- MaxRetry : The maximum number of failed attempts allowed before the host is banned. Set to 5 attempts by default. On UCM62xx/UCM6510 this setting can be configured under the global settings as well (Priority to the value configured under the local setting) , While on the UCM63xx/A series this can be configured under the local settings only.
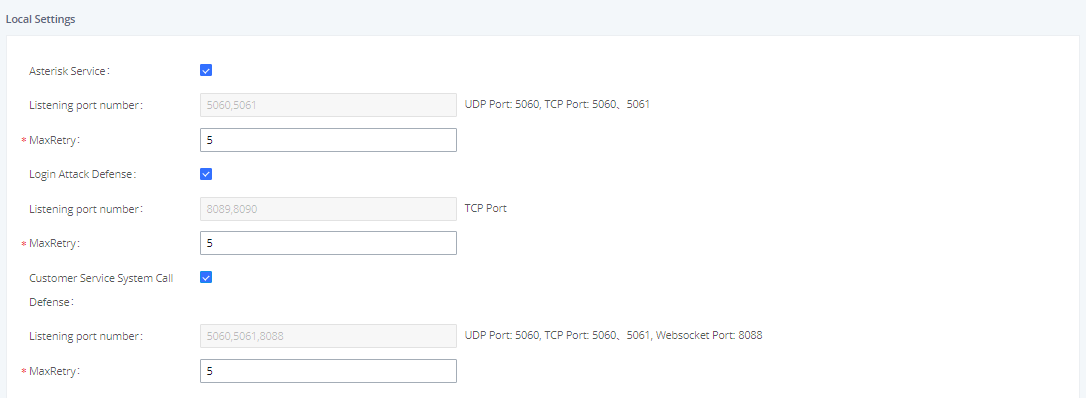
If Enable Fail2ban is ticked under the Global Settings section, either Asterisk Service, Login Attack Defense,Customer Service System Call Defense or all must be enabled under the Local Settings section. The MaxRetry values under these options will override the value set in the Global Settings section.
Asterisk Service – Protects against excessive failed SIP REGISTER, INVITE, and SUBSCRIBE requests. If the retry limit has been reached, the UCM will not respond to any more SIP requests from the same host. The Listening port number value will match the configured SIP port number in the PBX Settings🡪SIP Settings.
Login Attack Defense – Protects against excessive failed login attempts. If the retry limit has been reached, the UCM will prevent the host from accessing the UCM web UI. The Listening port value will match the configured port number in System Settings🡪HTTP Server🡪Port.
Customer Service System Call Defense (UCM63xx/A only) – Enable call defense in the customer service system. It Protects against excessive call generation when Click2Call feature is enabled. If the retry limit has been reached, the UCM will not respond to any more SIP requests from the same host.
AMI
Asterisk Manager Interface (AMI) is supported on UCM with restricted access. Please refer to the following link for detailed documentation on the feature:
https://documentation.grandstream.com/knowledge-base/ami-asterisk-management-interface/
It is highly recommended to not enable AMI on a UCM that is placed on a public or untrusted network unless precautions have been taken to prevent unauthorized access and restrict permissions. AMI access allows users to originate calls and view sensitive information on the UCM.
* Asterisk is a Registered Trademark of Digium, Inc.