
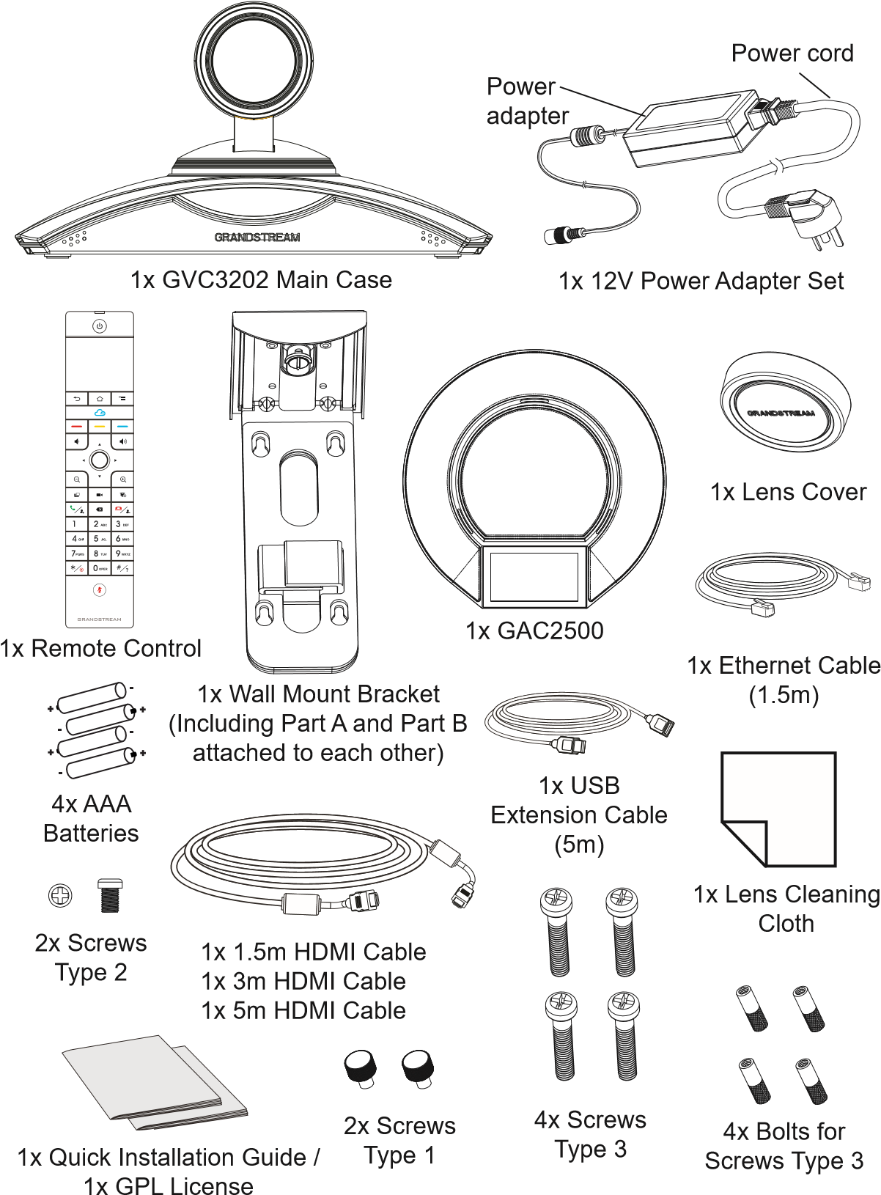
PACKAGE CONTENTS:
PRECAUTIONS:
OVERVIEW:
The GVC3202 offers businesses a revolutionary video conferencing system with unprecedented flexibility and the support for multiple popular video conferencing protocols out of the box. Based on Android 4.4™, in addition to Grandstream’s industry leading SIP-based video conferencing platform. The GVC3202 sets a new bar for enterprise class video conferencing solution in terms of flexibility, interoperability, system openness, application richness and ease of use in the modern Internet age.
INSTALLATION:
The GVC3202 can be installed in the following three ways:
Option 1: Place on desktop.
Option 2: Mount on TV/Monitor. Wall mount bracket is required.
Option 3: Mount on wall. Wall mount bracket is required.
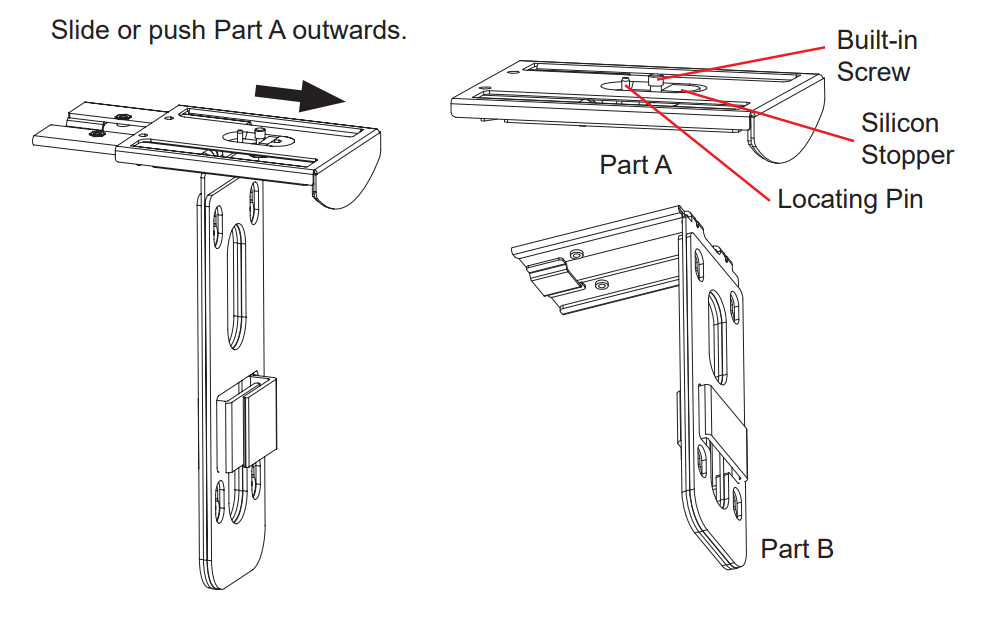
The wall mount bracket comes assembled as one piece. It can be separated into two parts by sliding/pushing Part A outwards from Part B.
INSTALLING BRACKET TO MOUNT THE GVC3202 ON TV/MONITOR:
- Locate the wall mount bracket in the package and identify Part A and Part B. Please DO NOT detach part A from part B when mounting the bracket on TV.
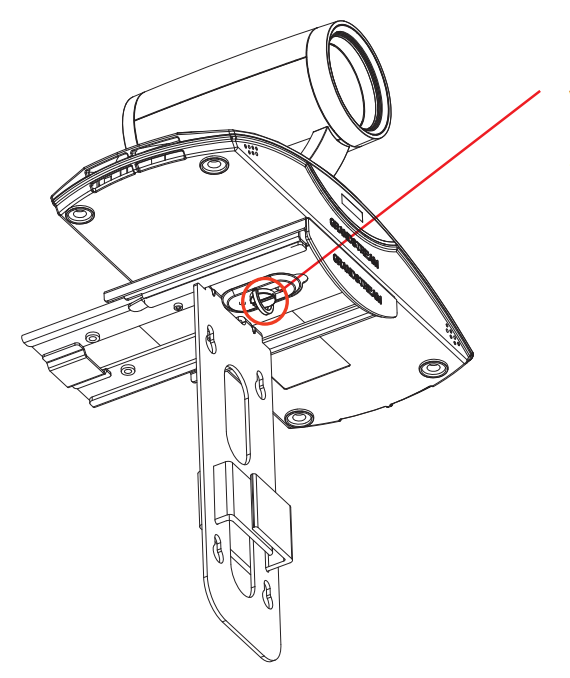
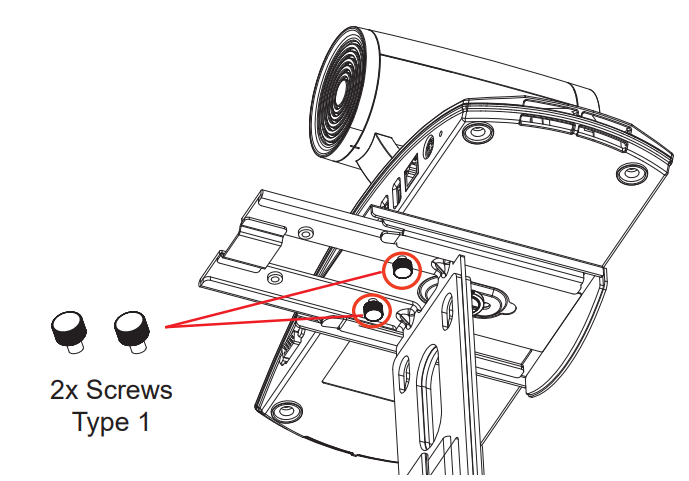
- Place GVC3202 on the top of the wall mount bracket Part A. See figure below. The locating pin on Part A should fit into the hole on the bottom of the GVC3202.
- Tighten the built-in screw on wall mount bracket Part A to make sure the GVC3202 fits securely.
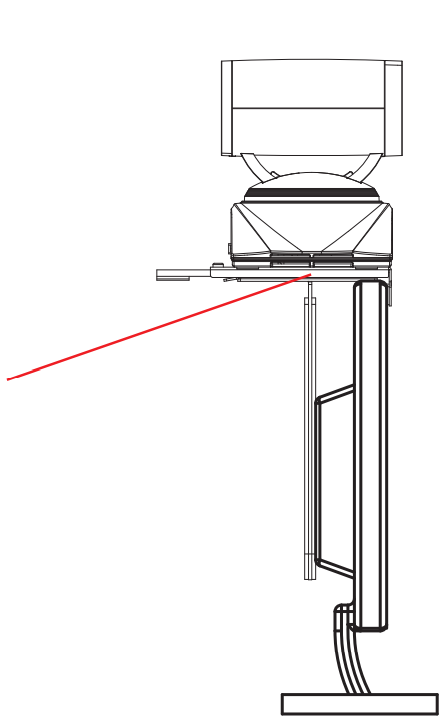
- Mount the wall mount bracket on top of the TV from behind the TV. Slide wall mount bracket Part B on Part A carefully to adjust the space until the TV can be clamped in properly.
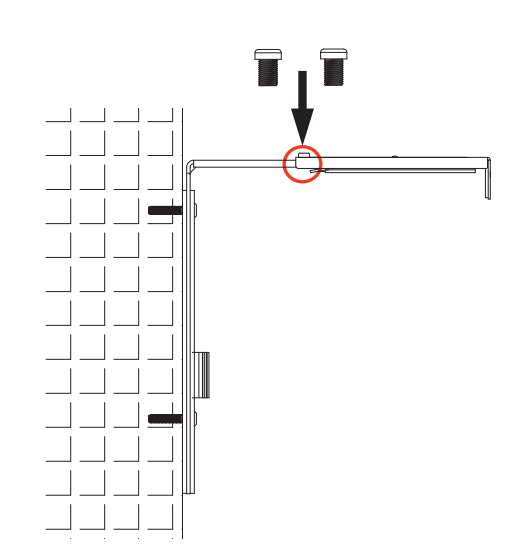
- Install screw Type 1 to each of the two holes on Part B, as highlighted on the right.
- Manage the wire harness with the Hook-and-loop fastener on wall mount bracket Part B.
INSTALLING BRACKET TO MOUNT THE GVC3202 ON WALL:
- Locate the wall mount bracket in the package and identify Part A and Part B. Detach Part A from Part B by sliding Part A out.
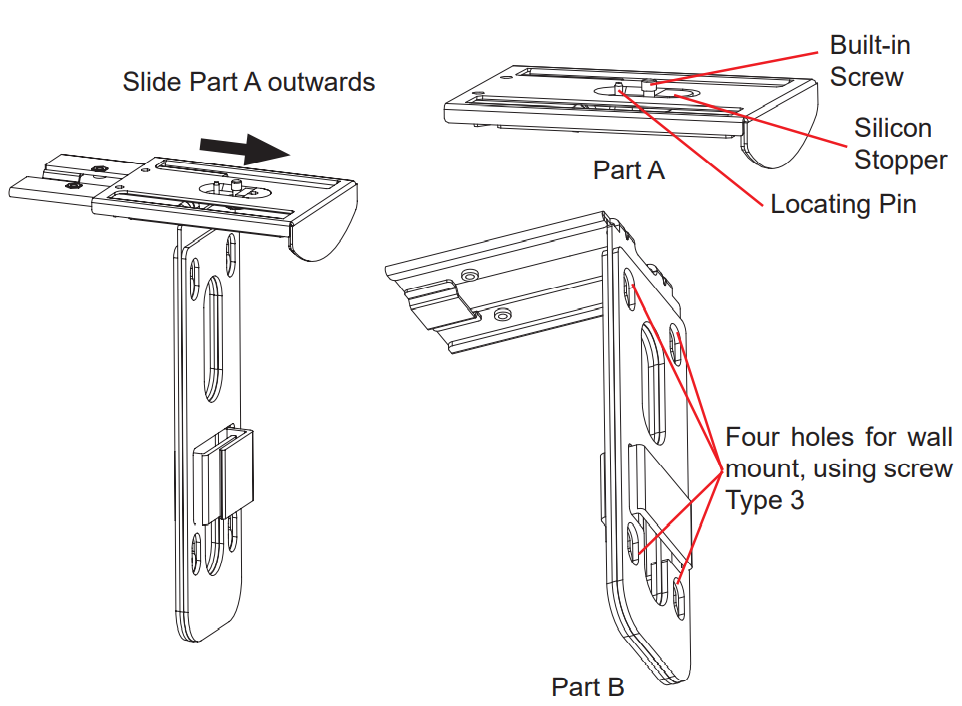
- On wall mount bracket Part B, there are four holes on it for screw Type 3. Align Part B against the wall where you would like to place the wall mount.
- According to the position of the four holes on Part B, locate the corresponding spots on the wall and drill the holes.
- Fit the four bolts into each hole on the wall. Please make sure the glossy side is placed outwards. See figure below.
- Mount the wall mount bracket Part B to the wall. Then put the four screws Type 3 into each bolt.
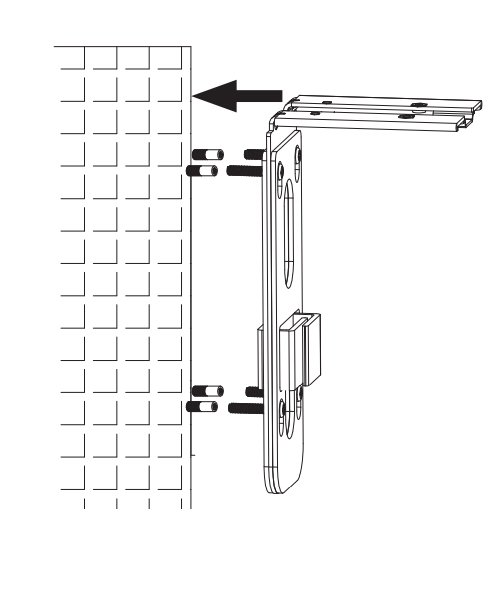
- Tighten the screws so that Part B can be securely placed against the wall.
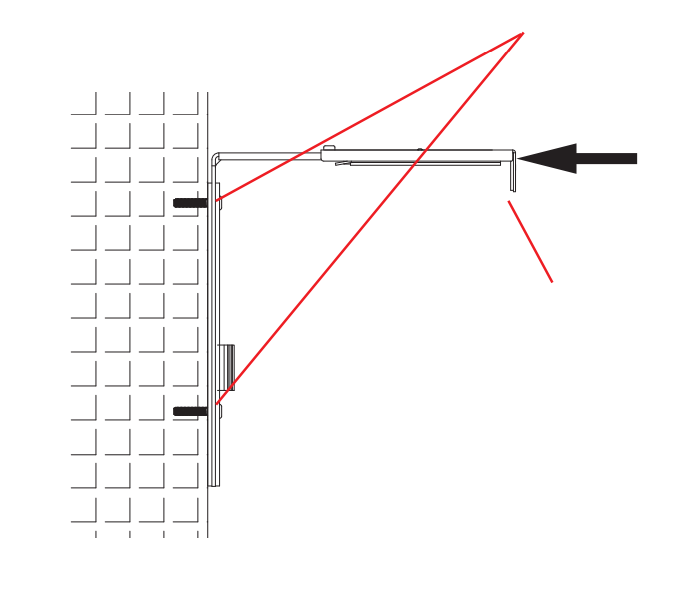
- Slide the wall mount bracket Part A into Part B, as indicated in the above arrow.
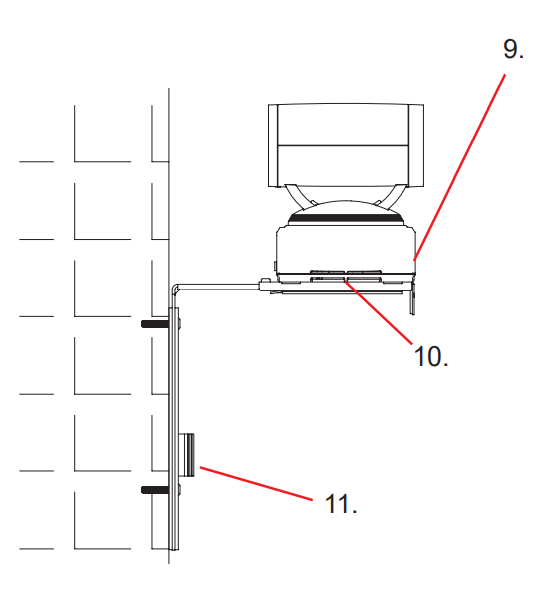
- Align Part A and Part B at the 2 holes as highlighted below. Install screw Type 2 to each of the hole and tighten it.
- Place GVC3202 on the top of the wall mount bracket Part A. On the wall mount bracket Part A, the locating pin should fit into the hole on the bottom of the GVC3202.
- Tighten the built-in screw on wall mount bracket Part A to make sure the GVC3202 fits securely.
- Manage the wire harness with the Hook-and-loop fastener on wall mount bracket Part B.
CONNECTING THE GVC3202
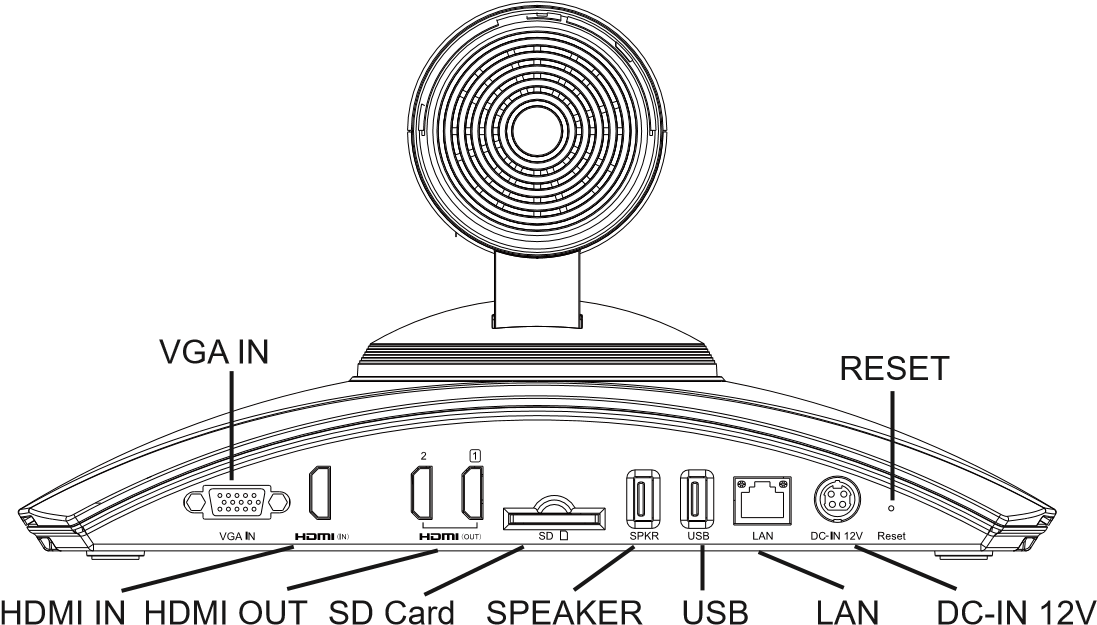
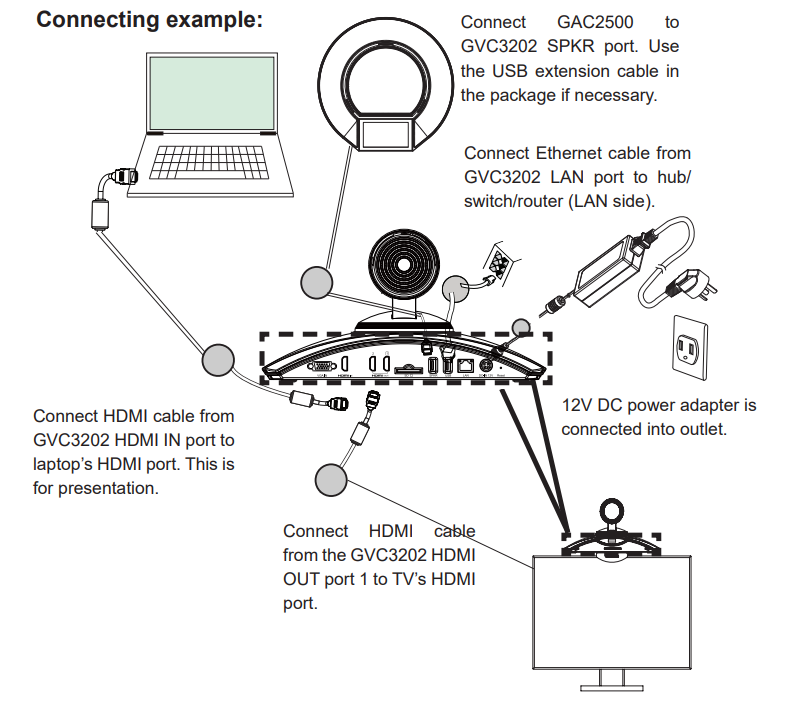
- Connect the LAN port of the GVC3202 to the RJ-45 socket of a hub/switch or a router (LAN side of the router) using the Ethernet cable.
- Connect the HDMI [1] port of the GVC3202 to the HDMI port of the main display device (e.g., TV) using the HDMI cable. Connect HDMI port 2 if you have additional display devices.
- Connect the USB cable of the GAC2500 to the “SPKR” port of the GVC3202.
- Connect the 12V DC output plug to the power jack on the GVC3202; plug the power adapter into an electrical outlet.
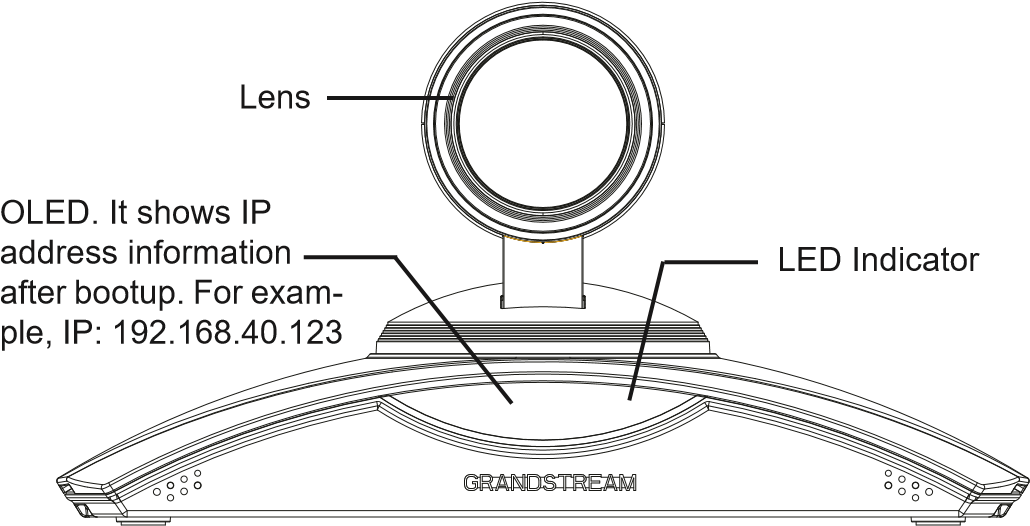
- The OLED in the front of the GVC3202 will display booting up information. Before continuing, please wait for the IP address information to show up on the OLED. The display device (e.g., TV) will show the idle HOME screen with IP address on the top status bar as well.
- Insert your SD card into the SD card slot. The recording files will be saved in SD card.
- (Optional) Connect presentation device (e.g., a laptop) to the GVC3202 HDMI IN port or VGA IN port for presentation purpose during conference call.
- (Optional) Connect USB accessory (e.g., mouse, keyboard, USB flash drive and etc) to the USB port.
Connecting Example:
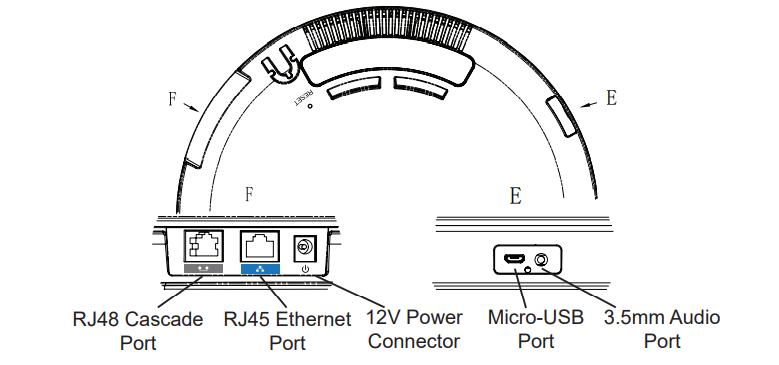
GAC2500 INTERFACES
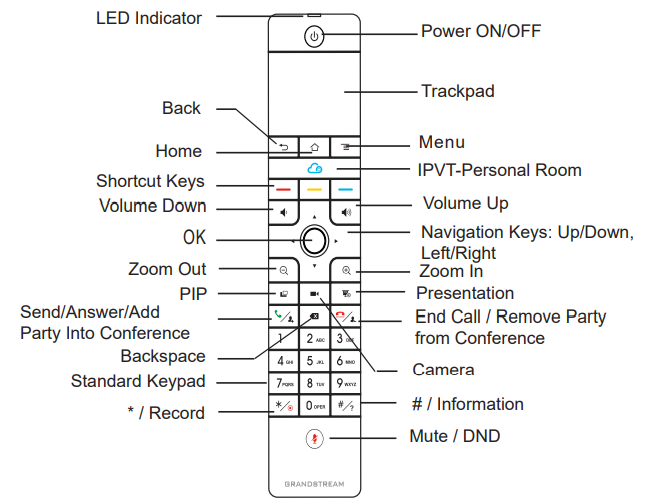
USING THE GVC3202 REMOTE CONTROL
- Open the battery cover on the back of the remote control. Place four AAA batteries proprely and put the cover back on.
- When using the GVC3202 for the first time, the remote control should be paired and connected to it via Bluetooth already. After the GVC3202 fully boots up, tap on the OK button on the remote control to initiate the connection. Then the remote control can be used normally.
If the remote control is not paired with the GVC3202 anymore (e.g., a factory reset is made), follow the steps below to pair and connect the remote control:
- Connect a USB mouse to the GVC3202 USB port. Or, log in the GVC3202 web UI and click on “Remote Control” on the upper right corner to bring up the virtual remote control.
- Use the USB mouse or the virtual remote control to navigate to the idle screen Menu→Settings→Network→Bluetooth on the TV.
- Select
 and click on “Search for devices”.
 - On the remote control, press OK button and number 5 button at the same time for about 4 seconds. This will initiate pairing process on the remote control.
- The remote control MAC address will show in the new device list on your TV. Select it and it will be paired and connected to the GVC3202 shortly.
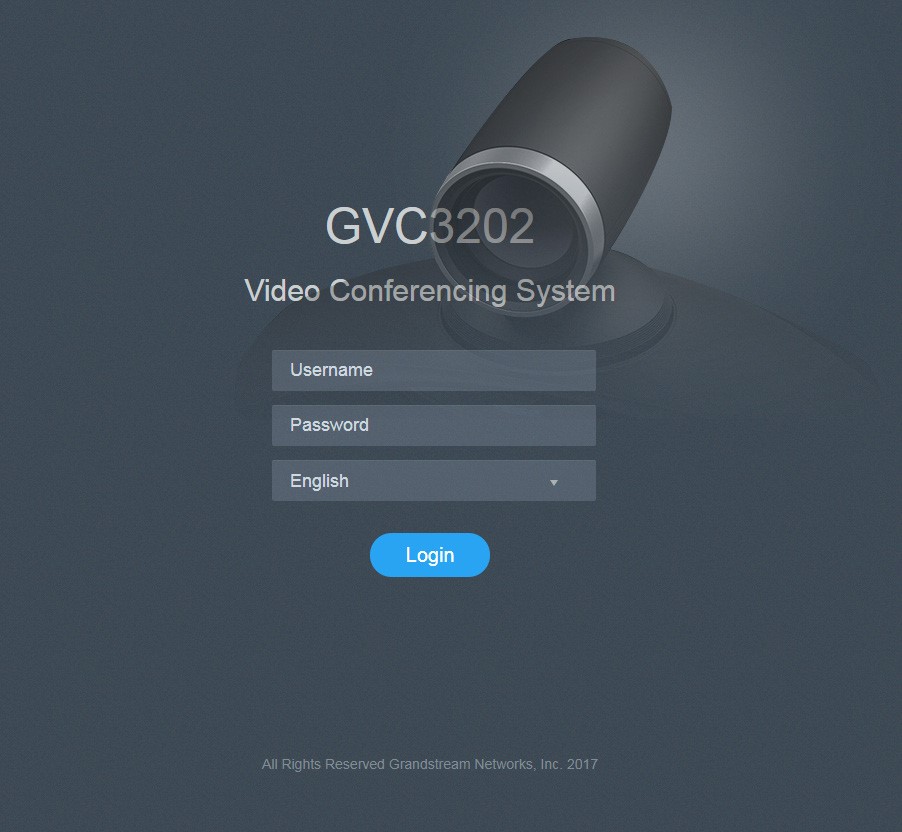
CONFIGURING GVC3202 VIA WEB UI:
- Ensure your GVC3202 is properly powered up and connected to the Internet.
- The IP address of the GVC3202 will show on the OLED in the front of the GVC3202. It will also show on the top status bar of the connected display device (e.g., TV) via HDMI.
- Type the IP address in your PC’s browser (see figure below).
- The default username and password for administrator are “admin” and “admin”. The default username and password for user are “user” and “123”.
- In the web GUI, select Settings→Account→General Settings page to configure Account name, SIP Server, SIP User ID, Authenticate ID and Authenticate Password to register the account on the GVC3202.
- The network settings can be configured under web UI→Settings→Network Settings page; PTZ Control and Preset Settings can be accessed under web UI→Device Control→Video Control page.
- Please contact your ITSP (Internet Telephony Service Provider) for additional settings that may be necessary to configure the GVC3202.
For the detailed user manual, please download from: http://www.grandstream.com/support