
The UCM6xxx series support monitoring remote extensions using Eventlist BLF and LDAP sync features between peered UCM6xxx systems in different locations.
This feature allows phones supporting Eventlist BLF to check the status (Idle, Busy, In-Call) of remote extensions on peered UCM6xxx.
Peered UCM6xxx systems collect status information of monitored extensions and send them to monitoring phone(s) as a list in a single SIP NOTIFY message, instead of generating an individual SUBSCRIBE / NOTIFY request for each resource status, reducing network traffic and bandwidth usage.
The UCM6xxx event list feature supports the following:
- Add local extensions to the event list for the local users to monitor the extensions’ status.
- Remote extensions are detected automatically, if UCM6xxx are peered and synchronized correctly using LDAP sync feature.
- Add remote extensions from peered UCM6xxx to local Eventlist BLF allowing local users to monitor remote extensions.
This document introduces the configuration of the BLF list and LDAP sync feature on the UCM6xxx series to monitor remote extensions and how to apply them on Grandstream devices.
Peering Setup Scenario
The following diagram illustrates a typical peering scenario between two UCM6xxx IPPBX series.
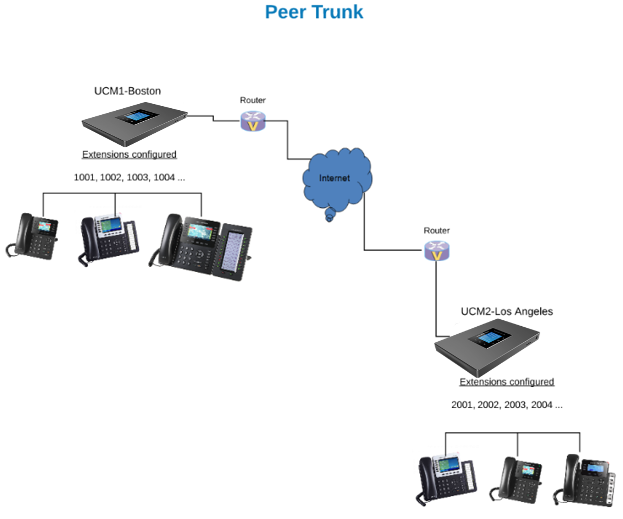
We will assume the following:
- A peer trunk is created between UCM1-Boston and UCM2-LA.
- Inbound and outbound routes are configured based on peering scenario for both UCMs.
UCM6xxx Configuration
The following chapter provides needed steps to be able to use remote extension monitoring via the Eventlist BLF feature.
The first step is to enable and configure the “LDAP Sync” feature on both UCM6xxx peered, then Eventlist BLF needs to be created on UCM6xxx(s) where the phones are registered to monitor remote extensions.
Configure LDAP Sync
-
 Access UCM6xxx Web GUI 🡪 Extension/Trunk 🡪 VoIP Trunks.
- Locate peer trunk used to connect UCM-1 to UCM-2 and press to edit trunk settings.
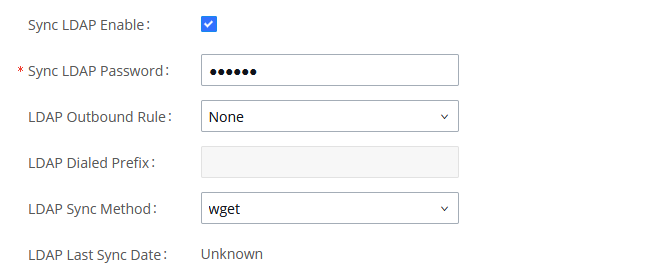
- Access to Advanced Settings tab and check “Sync LDAP Enable”.
- Define a password in Sync LDAP Password field.
This password is used for LDAP contact file encryption and decryption. The password should be the same for both peers (UCM-1 and UCM-2) to ensure successful connection and synchronization.
-
 Press Save button to store the configuration.
- Click on under Extension/Trunk 🡪 VoIP Trunks to start LDAP Sync.
LDAP Last Sync Date feature will display the date and time of the last synchronization (as shown in the previous figure) if successful.
Configure Eventlist BLF
- Access UCM6xxx web GUI 🡪 Call Features 🡪 Event List.
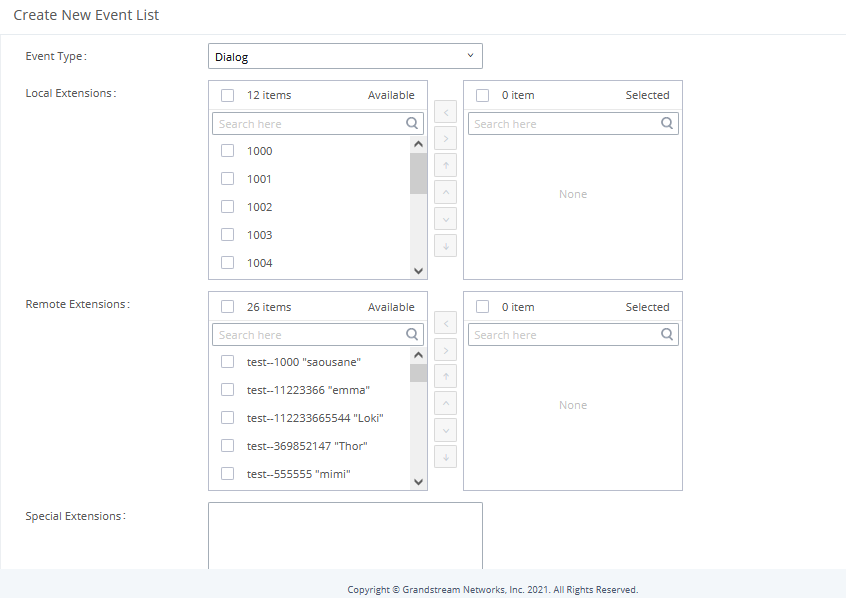
- Click on “Create New Event List“.
- Specify an URI for the Eventlist BLF (for example: UCM_Remote). URI name cannot be the same as any extension number on the UCM6xxx.
- Select available extensions from Remote Extensions and/or Local Extensions.
Available Remote Extensions will be displayed only if the local UCM6xxx and the remote UCM6xxx are successfully synchronized via LDAP sync feature.
- Press Save and Apply Changes.
Monitoring Phones Configuration
We will assume that a SIP account from UCM-1 is correctly registered on the phone’s Account 1.
- Access the phone’s web GUI under Accounts 🡪 Account(x) 🡪 SIP Settings 🡪 Advanced Features.
- Specify Eventlist BLF URI (in this guide: UCM_Remote).
- Set Auto Provision Eventlist BLFs to Enabled or Disabled.
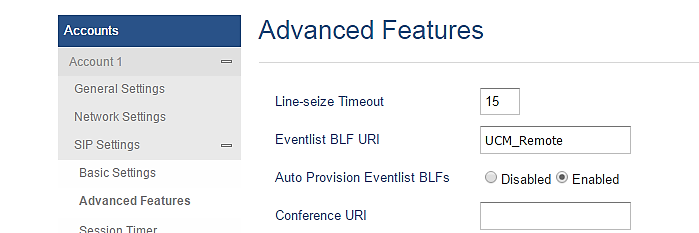
- If Enabled: Monitored extensions will be automatically provisioned on non-configured MPKs/VPKs available on the phone following extensions order as defined in the Eventlist BLF created on UCM6xxx.
- If Disabled: Users should manually configure MPKs or VPKs on the phone(s) following below steps:
- Access phone’s web GUI:
Settings 🡪 Extension Boards to use EXT module; or
Settings 🡪 Programmable Keys 🡪 Virtual Multi-Purpose Keys to use VPKs; or
Settings🡪Programmable Keys🡪Programmable Keys to use integrated MPKs (if supported on used phone).
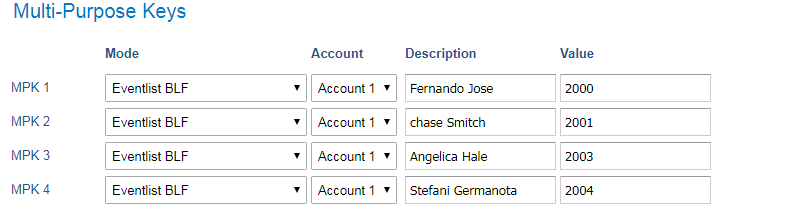
- On each MPK, set the following:
- Mode: “Eventlist BLF”.
- Account: Set the account to be used. (Account 1 in this example).
- Description: Specify a description for this MPK (optional).
- Value: Enter extension number from created Eventlist BLF (for instance: “2000”).
- Press Save and Apply and start getting monitored extensions statuses.