
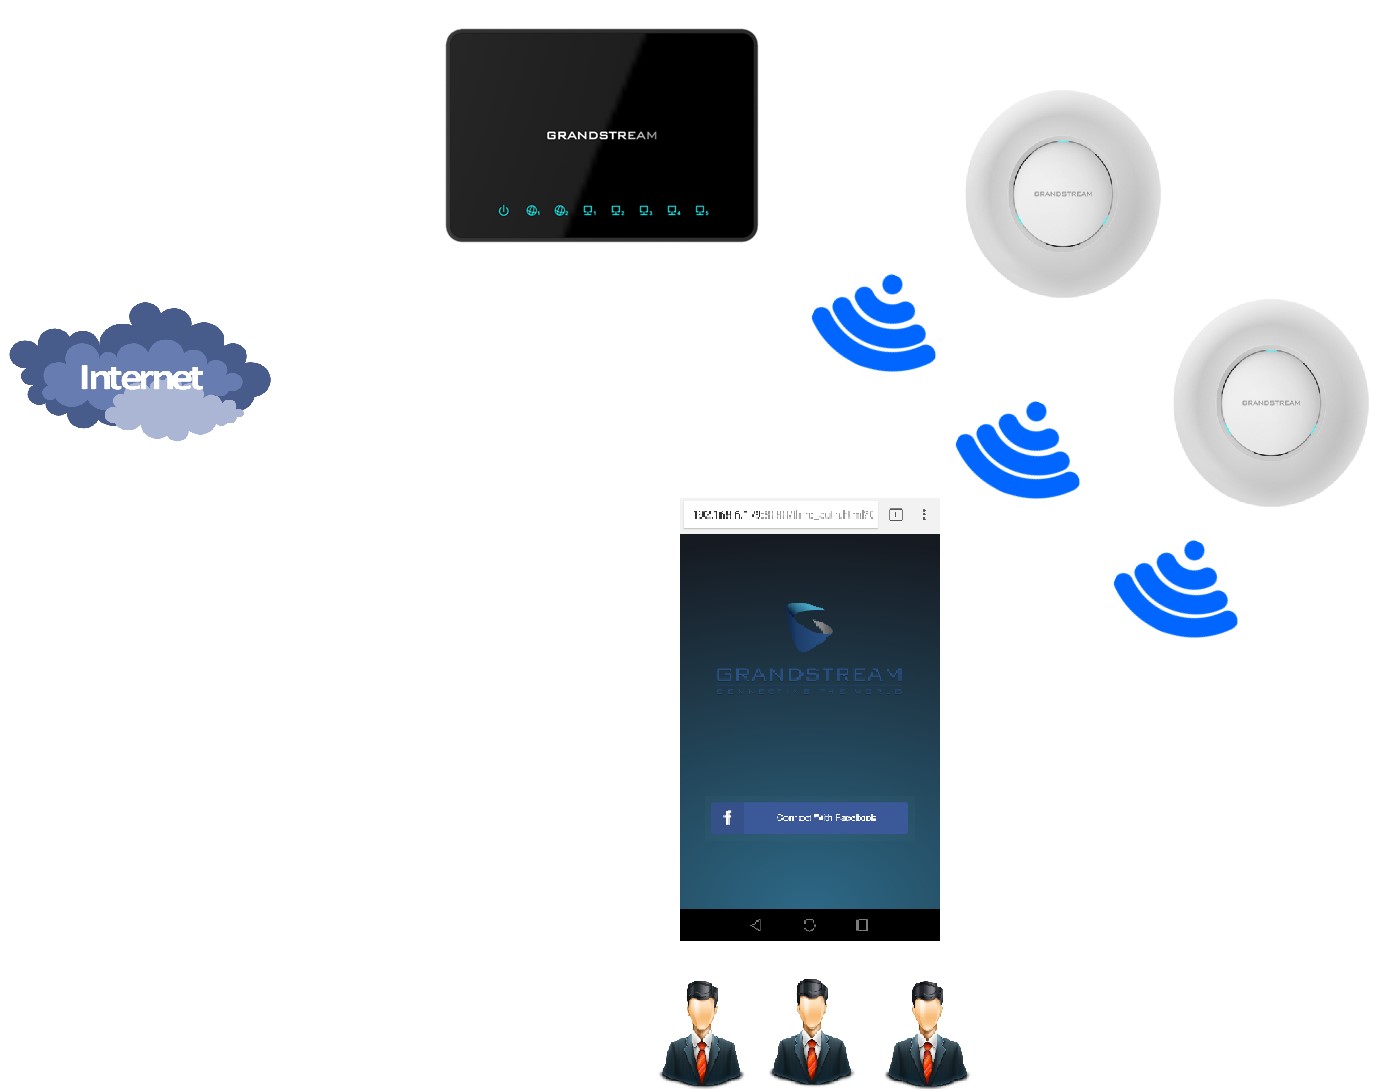
Captive Portal feature on GWN76XX Access Points allows to define a Landing Page (Web page) that will be displayed on Wi-Fi clients’ browsers when attempting to access Internet.
Once connected to GWN76XX AP, Wi-Fi clients will be forced to view and interact with that landing page before Internet access is granted.
Captive portal can be used in different environments including airports, hotels, coffee shops, business centers and others offering free Wi-Fi hotspots for Internet users.
This guide describes how to setup the captive portal feature on the GWN76XX series using Facebook Authentication.
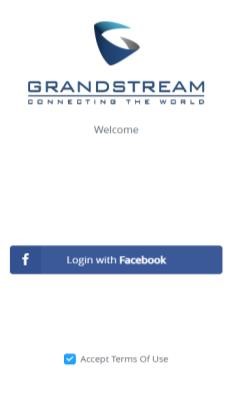
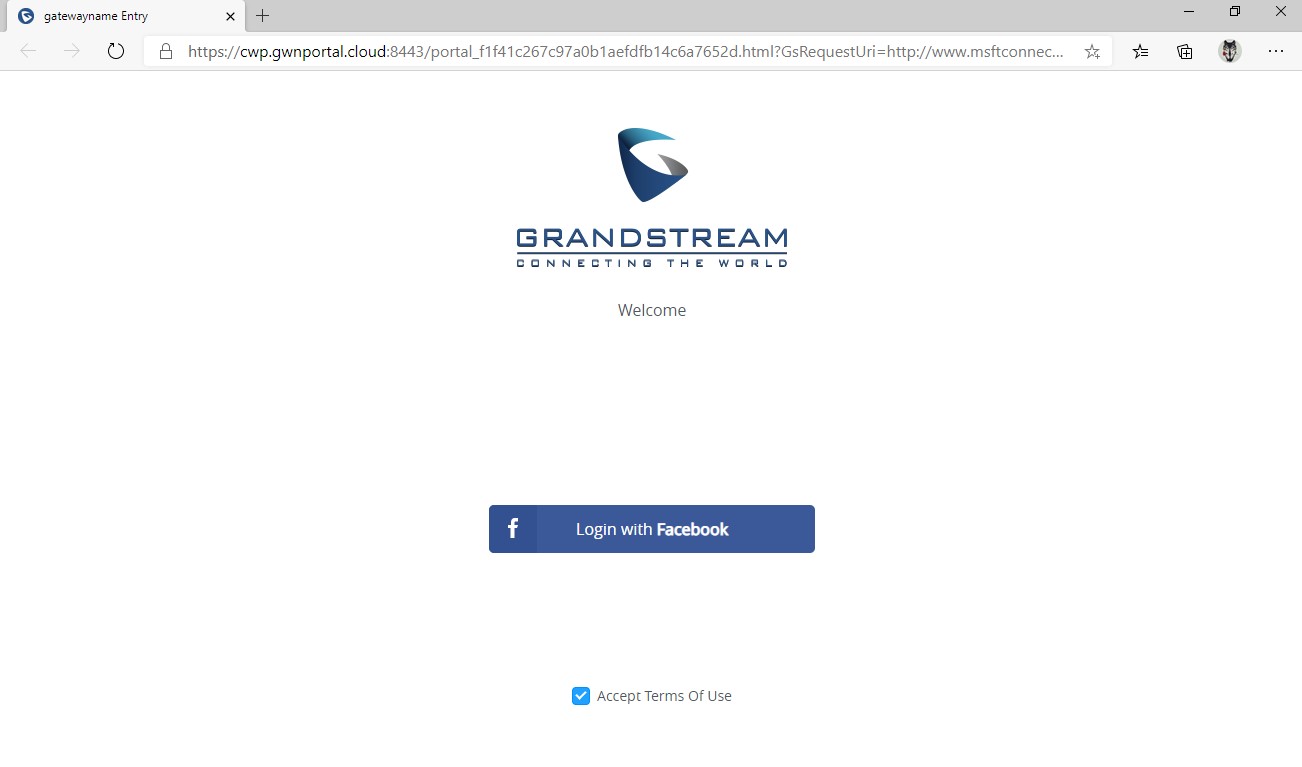
The following figure illustrates an example of the landing page feature using Facebook authentication.

CAPTIVE PORTAL SETTINGS
The Captive Portal feature can be configured from the GWN76XX web page, by navigating to “Captive Portal” section.
This section contains four subsections: Guest, Policy List, Splash Page and Vouchers.
- Guest: This section lists the authenticated clients MAC addresses.
- Policy List : In this section, users can configure multiple portal policies which then can be
assigned to specifc SSIDs under the menu “SSIDs”. (For example having non-authentication
based portal for temporary guests and setting up an authentication based portal policy for the
internal staff).
- Splash Page: Under this tab, users could download and upload customized portal landing page
to display to the users when they try to connect over the Wi-Fi.
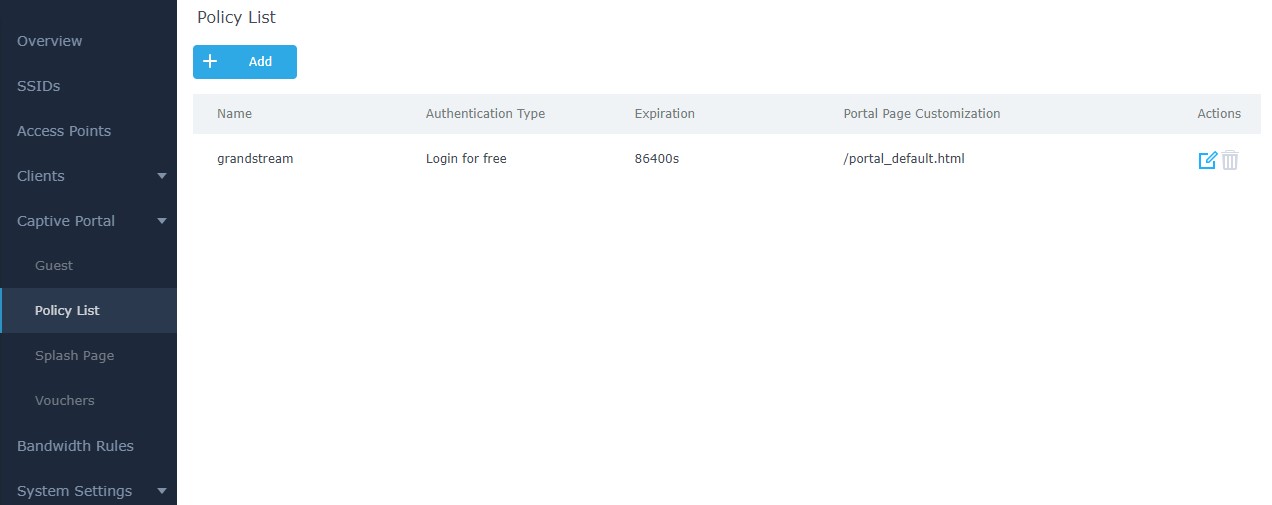
Policy Configuration Page
The Policy configuration allows users to configure and customize different captive portal policies which then can be selected on SSID configuration page, giving the admin the ability to set different captive portals for each SSID, in this guide, we will be using Internal Splash Page for Facebook Authentication.
The following table describes all the settings on this page:
|
Field |
Description |
|
Name |
Enter a name to identify the created policy (ex: Guest Portal). |
|
Splash Page |
Select Splash Page type, Internal or External. |
|
Authentication Type |
Following types of authentication are available:
RADIUS server to authenticate connecting clients.
Vouchers.
authentication via a password. |
|
Expiration |
Configures the period of validity, after the valid period, the client will be re-authenticated again. |
|
Facebook Authentication |
Check this box to enable Facebook Authentication. |
|
Facebook App ID |
Enter the app ID to use Facebook Login API. |
|
Facebook App Secret |
Enter the app secret to use Facebook Login API. |
|
Use Default Portal Page |
When enabled, the default portal page will be used, otherwise users can upload their custom page. |
|
Portal Page Customization |
Select the customized portal page (if “Use Default Portal Page” is unchecked).
|
|
Landing Page |
Select page where authenticated clients will be redirected to.
|
|
Redirect External Page URL |
Once the landing page is set to redirect to external page, user should set the URL address for redirecting. This field appears only when Landing Page is set to “Redirect to an External Page”. |
|
Enable Daily Limit |
If enabled, captive portal will limit user connection by times of one day. |
|
Enable HTTPS |
Check this box to enable captive portal over HTTPS. |
|
Pre-Authentication Rules |
From this menu, users can set matching rules to allow certain types of traffic before authentication happens or simply allow the traffic for non-authenticated end points. |
|
Post Authentication Rules |
This tool can be used to block certain type of traffic to authenticated clients, anything else is allowed by default. (Ex: Settings a rule that matches HTTP will ban all authenticated clients to not access web server that are based on HTTP). |
Landing Page Redirection
This feature can be configured using the option “Redirect External Page URL” under the policy settings, and could be useful in the case the network admin wants to force all connected guest clients to be redirected to a certain URL (ex: company’s website) for promotion and advertisement purposes.
Pre-Authentication Rules
Using this option, users can set rules to match traffic that will be allowed for connected Wi-Fi users before authentication process. This can be needed for example to setup Facebook authentication where some traffic should be allowed to Facebook server(s) to process the user’s authentication. Or simply to be used to allow some type of traffic for unauthenticated users.
Post-Authentication Rules
On the other hand, post authentication rules are used to match traffic that will be banned for Wi-Fi clients after authentication. As an example, if you want to disallow connected Wi-Fi clients to issue Telnet or SSH traffic after authentication then you can set post authentication rules to match that traffic and once a connected client passes the authentication process they will be banned from issuing telnet and SSH connections.
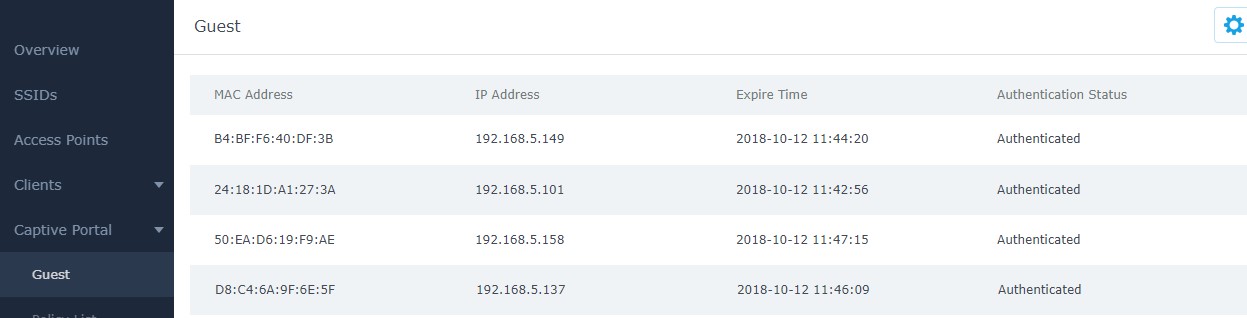
Guest Page
For Information Purposes Guest section lists MAC addresses of authenticated devices using captive portal. As we can see on the below figure, four Wi-Fi clients have been authenticated and granted internet access from the GWN7610 access points:
- Client 1 → 24:18:1D:A1:27:3A
- Client 2 → 50:EA:D6:19:F9:AE
- Client 3 → B4:BF:F6:40:DF:3B
- Client 3 → D8:C4:6A:9F:6E:5F
CONFIGURATION STEPS
In this section, we will provide all steps needed to use Captive Portal with Facebook authentication.
Create Facebook App
To use Facebook Login API, users need first to create an APP under developers’ platform and set some
OAuth settings to allow login authentication between GWN Access Points and Facebook servers.
We summarize in the following section the required steps:
- Go to Facebook developers’ platform: https://developers.facebook.com/apps
- Login using your account and enter your phone number to receive verification code.
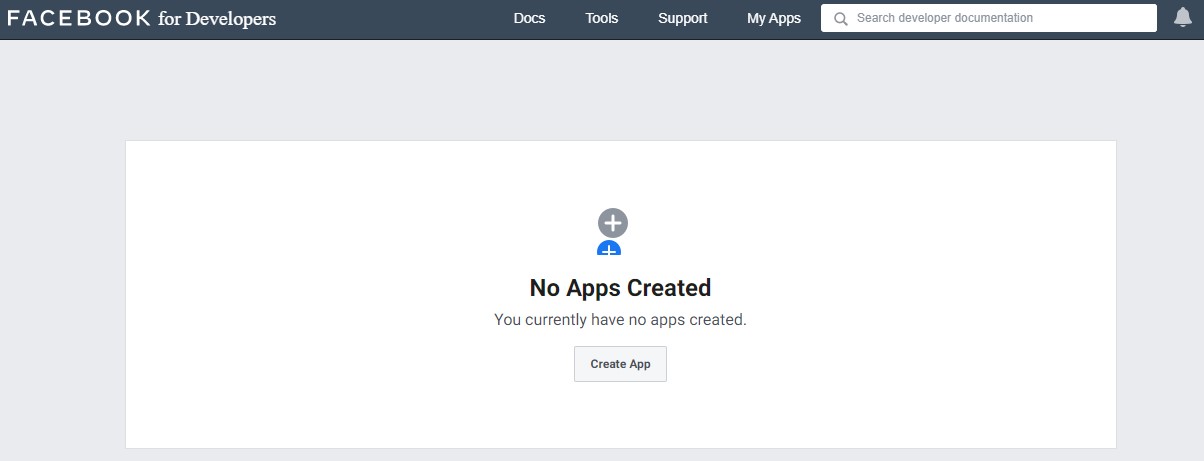
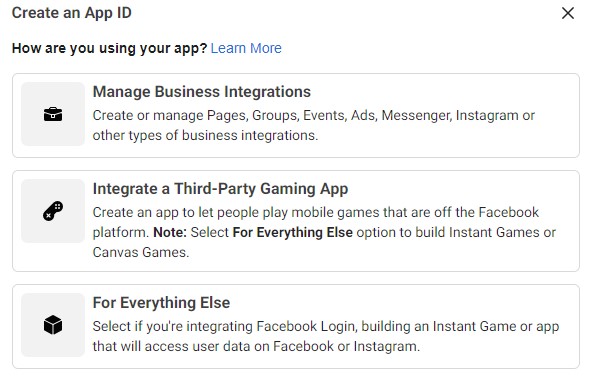
– Click “Create APP” and choose the first option.
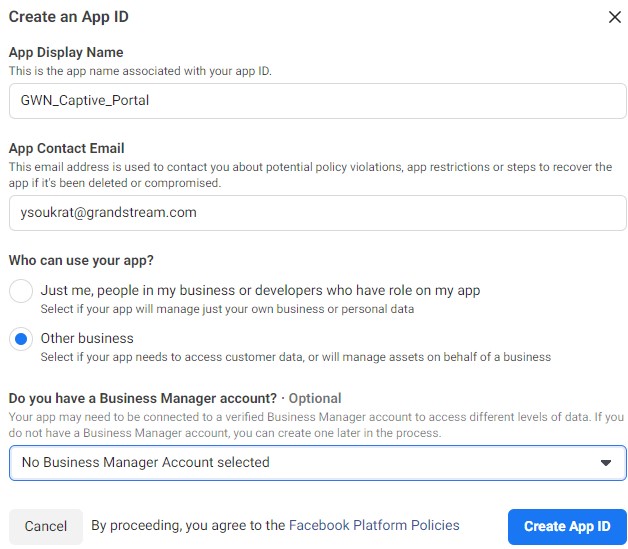
3. Create an App ID:
This step prompts you to choose a display name for your application. Choose a name that will represent your Wi-Fi portal. Users will see this when authenticating. For this example, we’ll use the name “GWN_Captive_Portal” and keep the default email, which is the email linked to your Facebook account. For who can use this App, we’ll use “Other business”.
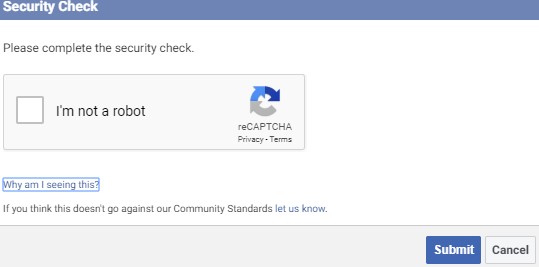
– Then, Submit the security check
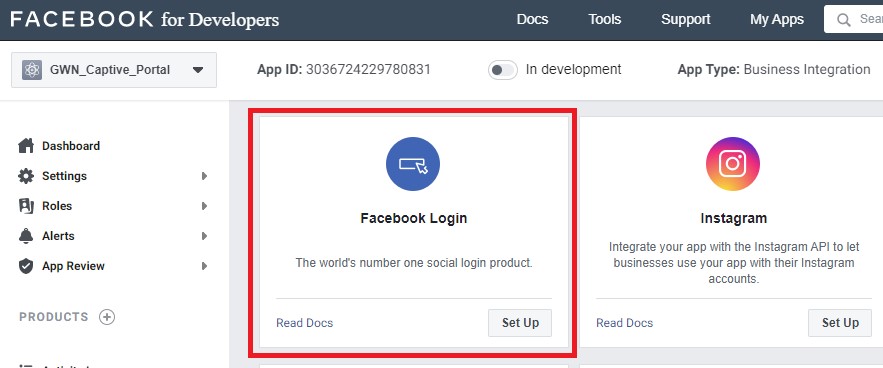
4. Add “Facebook login” product to your App:
– Facebook for Developers will display all the available products – Click to set up “Facebook login” feature, as shown below:
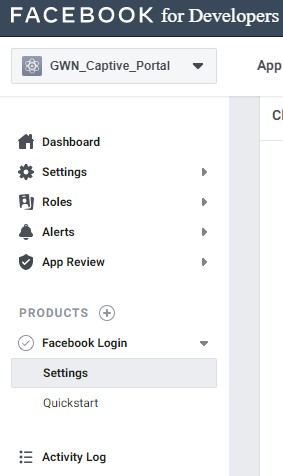
- Locate the left barre and click on Facebook Login > Settings:
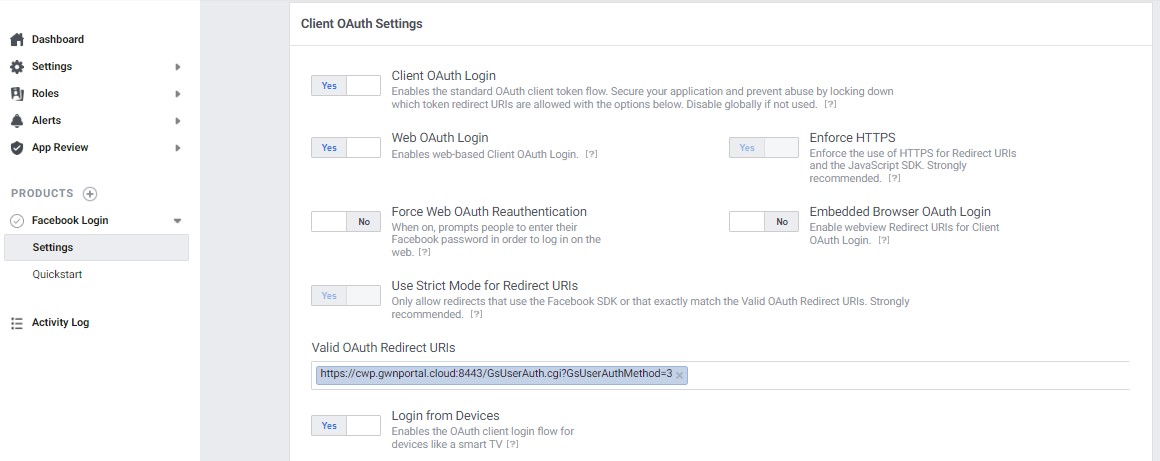
- Add Controller Redirect URI and Port:
Under Facebook Login settings, include the following URL under “Valid OAuth redirect URIs“.
– Enable option “Login from Devices”
Use the toggle options
as shown in
the below image:
7. App ID and App Secret:
- Navigate to Settings Basic: App ID and App Secret will be automatically assigned to your app. Choose a Display Name and Namespace for your app – these can be anything, but users will see them when authenticating. For Category, we’ll use Business and pages. Category isn’t critical here, so feel free to use a different category if it better represents your business.
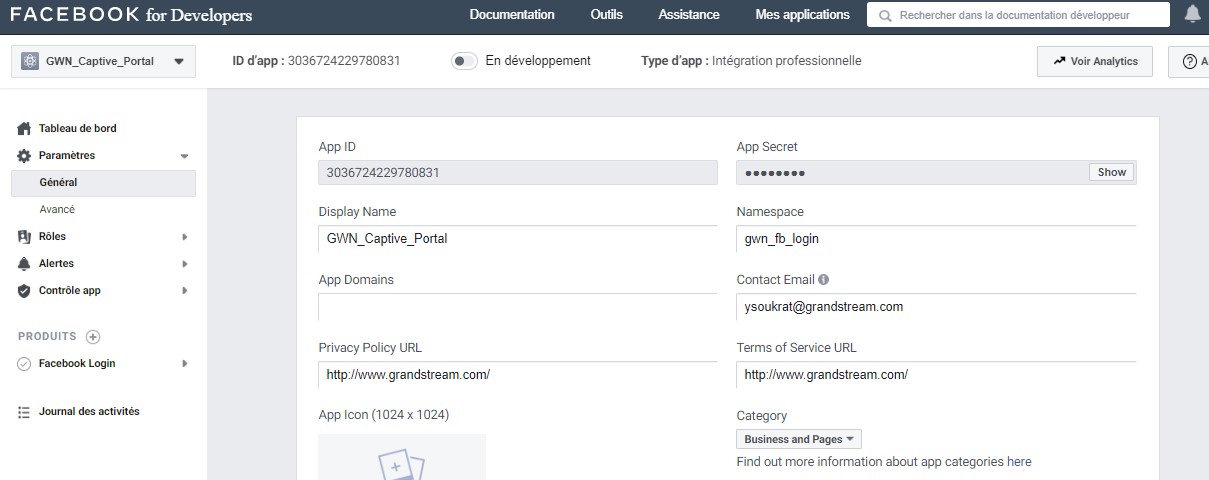
- Under both “Privacy Policy URL” and “Terms of Service URL”, enter the domain :
http://www.grandstream.com/ as shown on the figure above.
- Take note of the APP ID and App Secret (press Show to display it) since these two credentials will be used on the GWN configuration as shown on the following sections.
- Press “Save Changes”.
8. Publish App:
Finally, publish the app to live, by clicking the switch at the top of the “Facebook for developers” page to change status from “In development” to “live”.

- Confirm to Switch Mode

- Your Facebook Login App is now Live

Configure Captive Portal Policy with Facebook Authentication
Using GWN Master GUI (Standalone mode)
1. Captive Portal
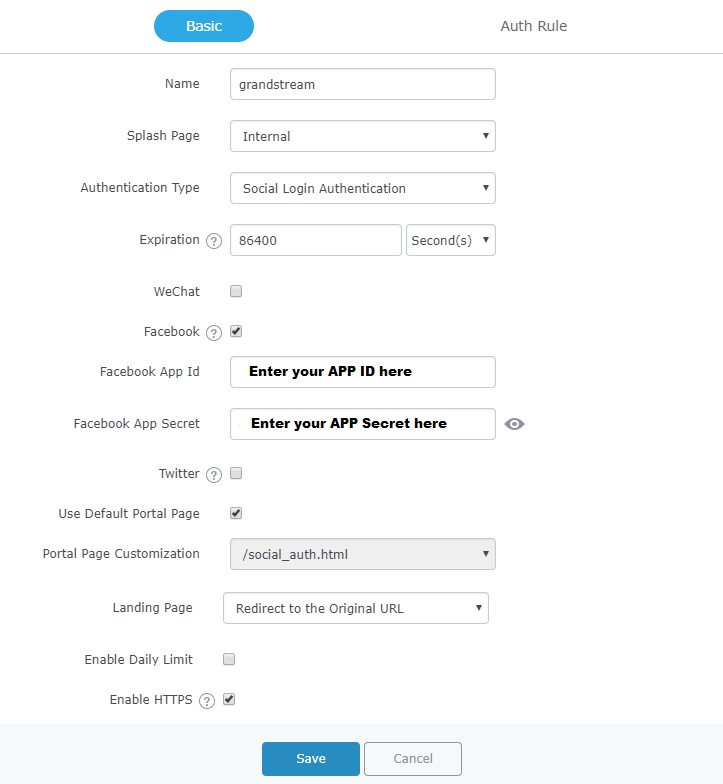
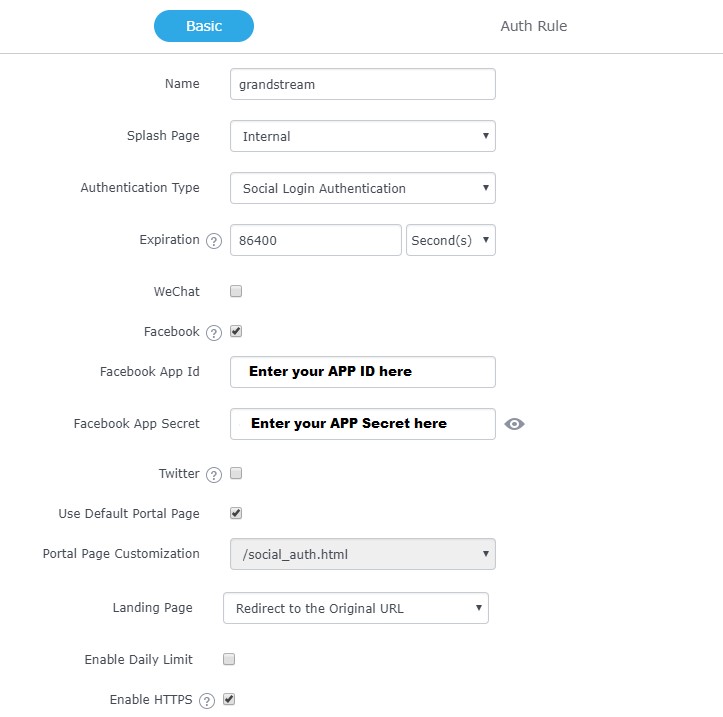
This includes both cases: If the master is the GWN7000 router or a GWN76XX Access Point. First, users need to take note of the APP ID and Secret ID from Facebook app basic settings, to use them when configuring captive portal policy. Then, navigate on the GWNXXXX master web GUI under Captive Portal menu Policy List and add new policy with Facebook authentication and configure the following required options.
- Authentication Type: Social Login Authentication
- Enable Facebook Authentication.
- Enter the Facebook App ID and Secret.
- Portal Page Customization: /social_auth.html
Enable
HTTPS
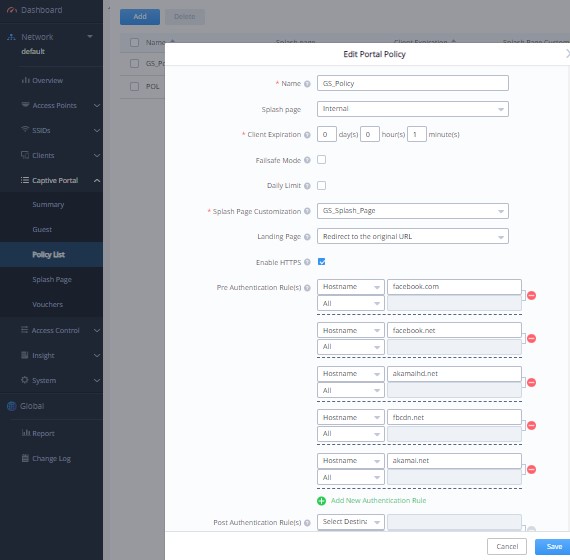
- Pre-Authentication Rules: When using Facebook authentication for captive portal policy, The GWN76XX Access point will automatically setup the needed domains under preauthentication rules to allow communication with Facebook server during the authentication process and before deciding to allow or deny the Wi-Fi client the access to Internet.
Following figure shows the list of the included domains:
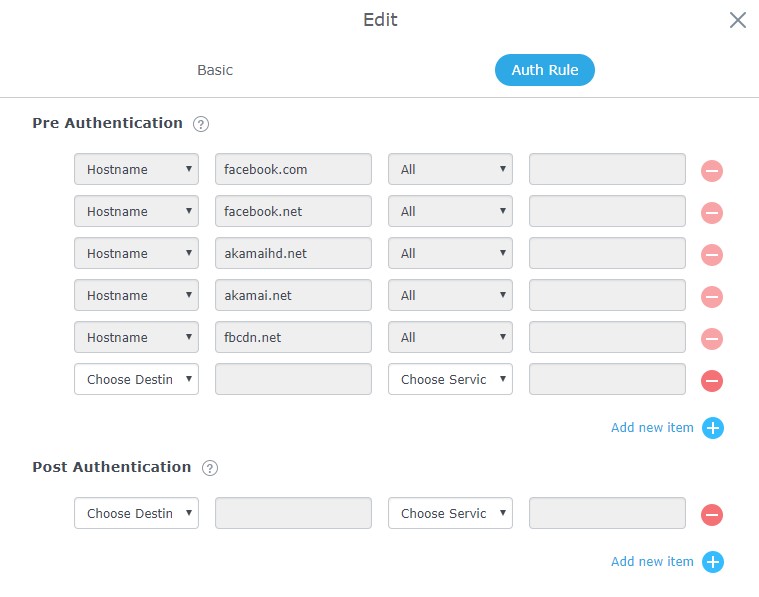
We will check on the next steps how to assign the configured policy to SSIDs.
2. Assign Captive Portal Policy to SSIDs:
Once the captive portal policy has been configured with correct settings for Facebook Authentication, users can assign the created policy to a SSID under Wi-Fi settings tab.
Navigate to SSIDs menu and under Wi-Fi settings click on “Enable Portal Policy”, then select the configured policy from the drop-down policy as shown on the following figure.
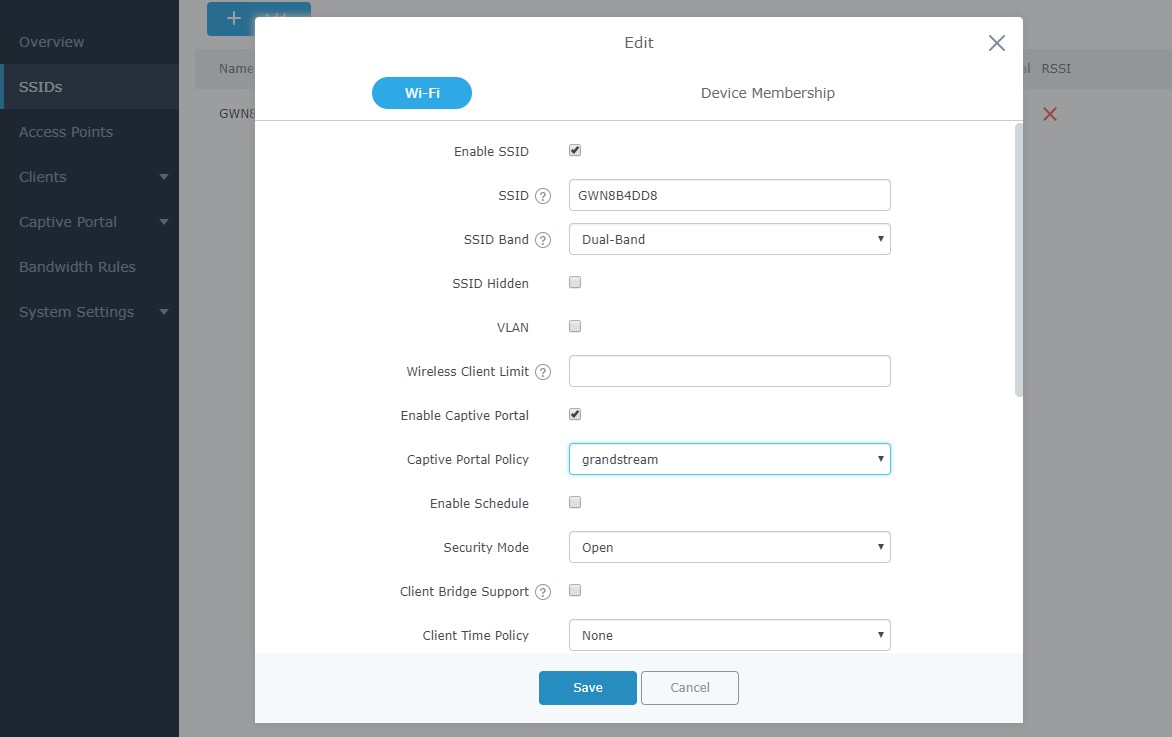
After this is done, save and apply the settings then the AP will broadcast the new Wi-Fi settings for the users. Once a client tries to connect to the Internet via Wi-Fi, they will be request to login using their
Facebook account.
Using GWN Management Platform
This includes both Grandstream management platforms: GWN.Cloud and GWN Manager.
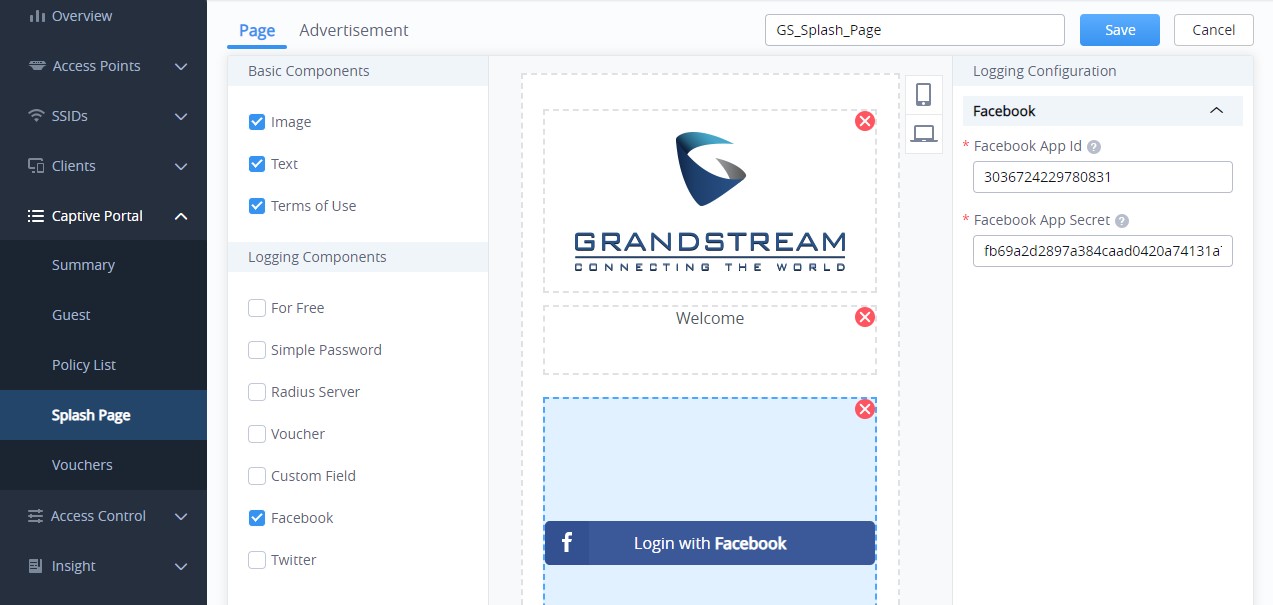
First, users must configure the basic settings for the Facebook app and make sur to take notes of the APP ID and Secret ID to use them when configuring the splash page before moving on the captive portal policy settings.
- Splash Page:
- Enable Facebook Login.
Enter the Facebook
App ID and Secret.
- Captive Portal Policy
- Name the Policy and decide the Client expiration time
- Set Splash Page to Internal
- Select your splash page (including the Facebook Login)
- Choose the landing page: Redirect to the original URL
- Enable HTTPS
- Default Pre-Authentication Rules
- Assign the Captive Portal Policy to SSIDs
Once the captive portal policy has been configured with correct settings for Facebook Authentication, users can assign the created policy to a SSID under Wi-Fi settings tab.
Navigate to SSIDs menu and under Wi-Fi settings click on “Enable Portal Policy”, then select the configured policy from the drop-down policy as shown on the following figure:
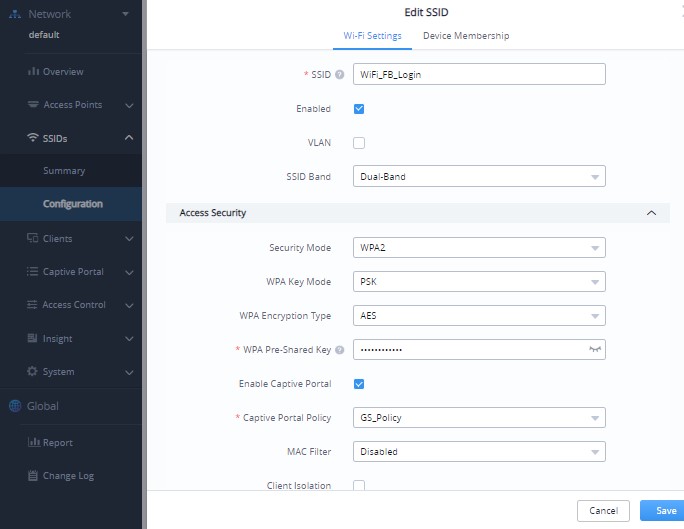
After this is done, save and apply the settings then the AP will broadcast the new Wi-Fi settings for the users.
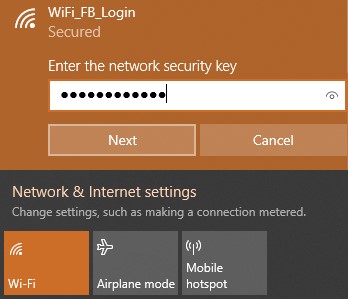
Wi-Fi Client
Once a client tries to connect to the Internet via our previously configured Wi-Fi SSID, they will be request to login using their Facebook account. (In this example we will be using Win10 Laptop as a Wi-Fi client): 1. Select the related SSID and enter the correct password
- The following page will popup asking for Facebook Login before allowing access to the network: – Accept the Terms of use The, click on Login with Facebook
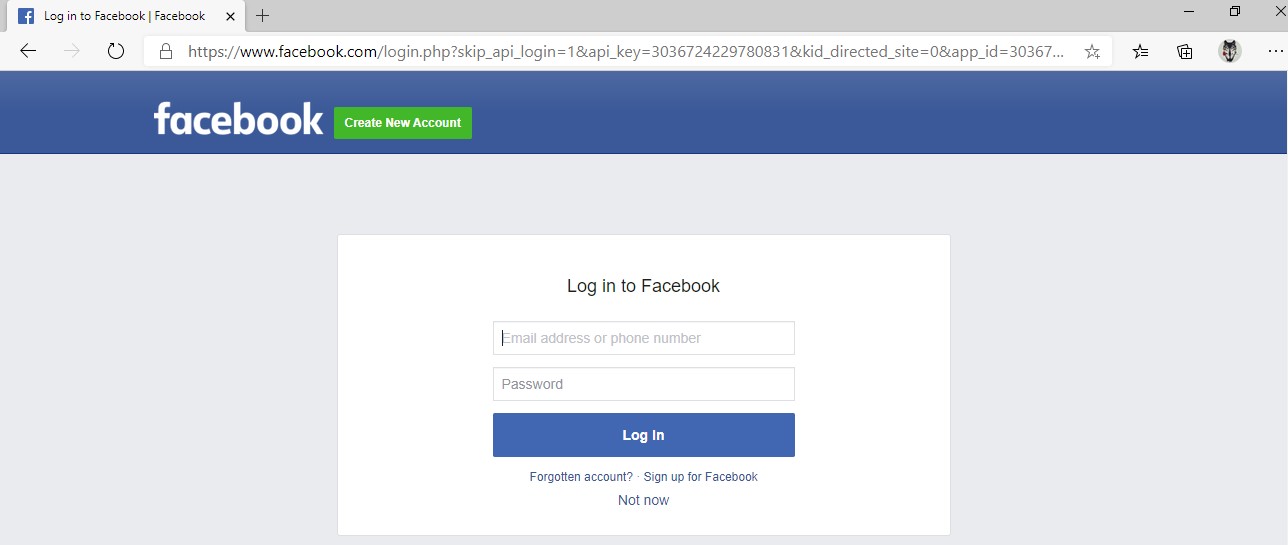
- You will be redirected to Facebook login page to enter your account credentials as shown on the following figure:
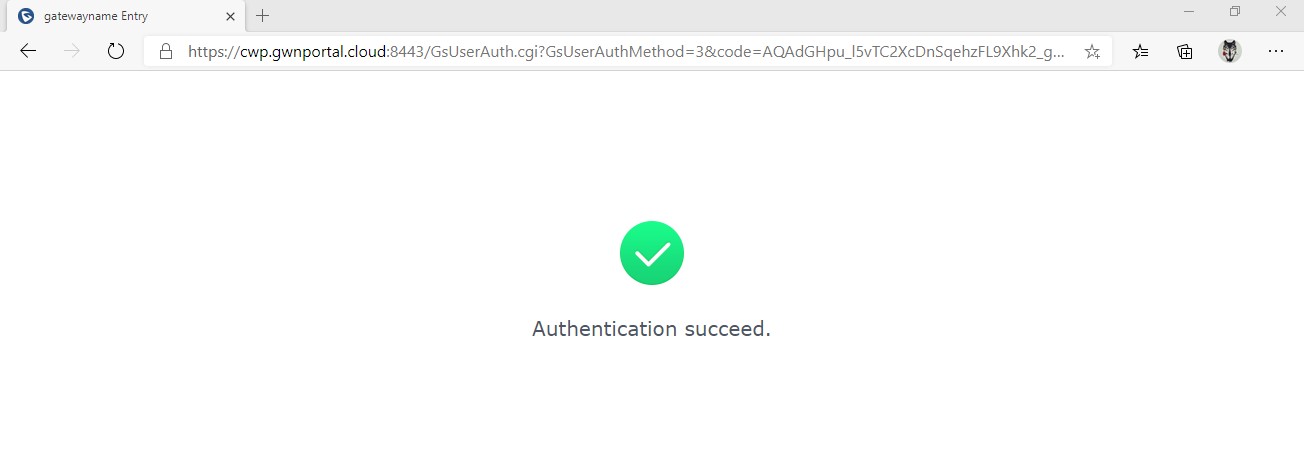
- If authentication credentials are correct, a prompt will announce Authentication succeed then the user will be forwarded according to the Landing Page configuration on the captive portal policy:
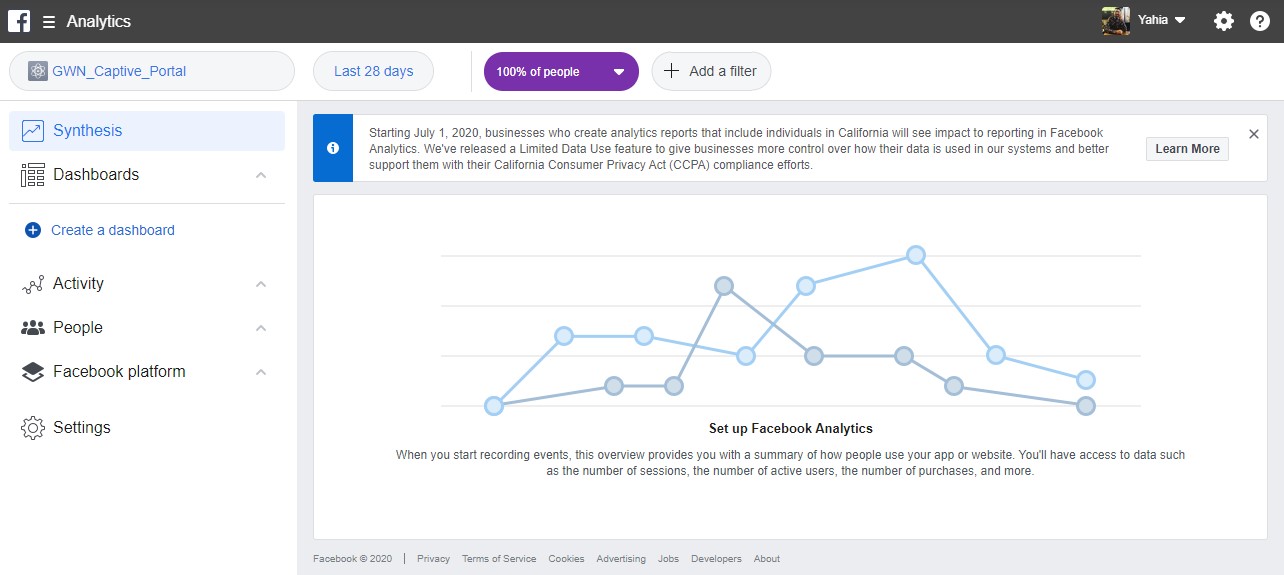
Facebook analytics
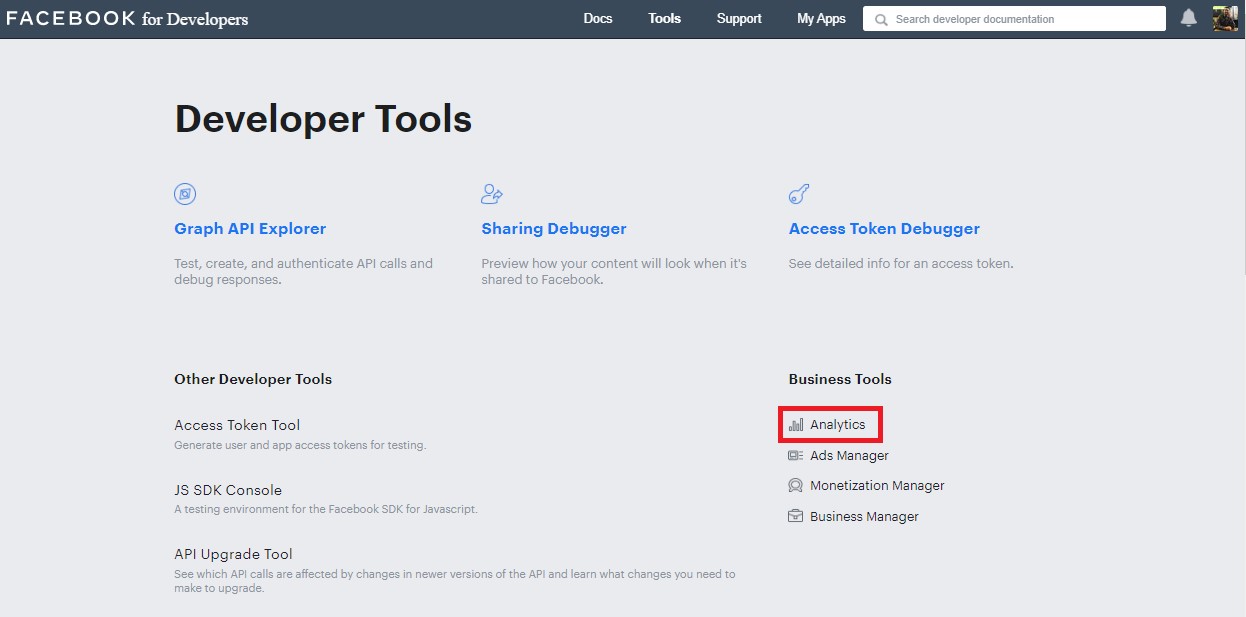
Users could benefit from Facebook analytics feature in order to get dashboard data and reports along with the ability to download reports in CSV files while customizing the date range.
To use Facebook analytics, go to the link:
https://www.facebook.com/analytics
Same as FACEBOOK for Developers GUI Tools Analytics
Then you can gather, customize and download reports using Facebook developers’ platform. Refer to the figure bellow:
SUPPORTED DEVICES
Following table shows Grandstream devices supporting Captive Portal with Facebook Authentication feature:
Table 1: Supported Devices
|
Model |
Supported |
Firmware |
|
GWN7610 |
Yes |
1.0.5.14 or higher |
|
GWN7615 |
Yes |
1.0.15.18 or higher |
|
GWN7605 |
Yes |
1.0.15.18 or higher |
|
GWN7605LR |
Yes |
1.0.15.18 or higher |
|
GWN7600 |
Yes |
1.0.3.19 or higher |
|
GWN7600LR |
Yes |
1.0.4.12 or higher |
|
GWN7630 |
Yes |
1.0.9.12 or higher |
|
GWN7630LR |
Yes |
1.0.15.18 or higher |
|
GWN7000 |
Yes |
1.0.4.23 or higher |