
Voucher feature will allow clients to have internet access for a limited duration using a code that is randomly generated from GWN controller.
As an example, a coffee shop could offer internet access to customers via WIFI using voucher codes that can be delivered on each command. Once the voucher expires the client can no longer connect to the internet.
Note that multiple users can use a single voucher for connection with expiration duration of the voucher that starts counting after first successful connection from one of the users that are allowed.
Another interesting feature, is that the admin can set data bandwidth limitation on each created voucher depending on the current load on the network, users profile (VIP customers get more speed than regular ones etc.…) and the internet connection available (fiber, DSL or cable etc.…) to avoid connection congestion and slowness of the service.
Each created voucher can be printed and served to the customers for usage, and the limit is 1000 vouchers.
The usage of voucher feature needs to be combined with captive portal that is explained after this section, to have the portal page requesting clients to enter voucher code for authentication.
CAPTIVE PORTAL SETTINGS
The Captive Portal feature can be configured from the web page by navigating to “Captive Portal”.
The page contains three tabs: Policy, Files and Clients.
- Policy Tab: In this page, users can configure multiple portal policies which then can be assigned to specifc network groups under the menu “Network Groups”. (For example having nonauthentication based portal for temporary guests and setting up an authentication based portal policy for the internal staff).
- Files Tab: Under this tab, users could download and upload customized portal landing page to display to the users when they try to connect over the WiFi.
- Clients Tab: This tab lists the authenticated clients MAC addresses.
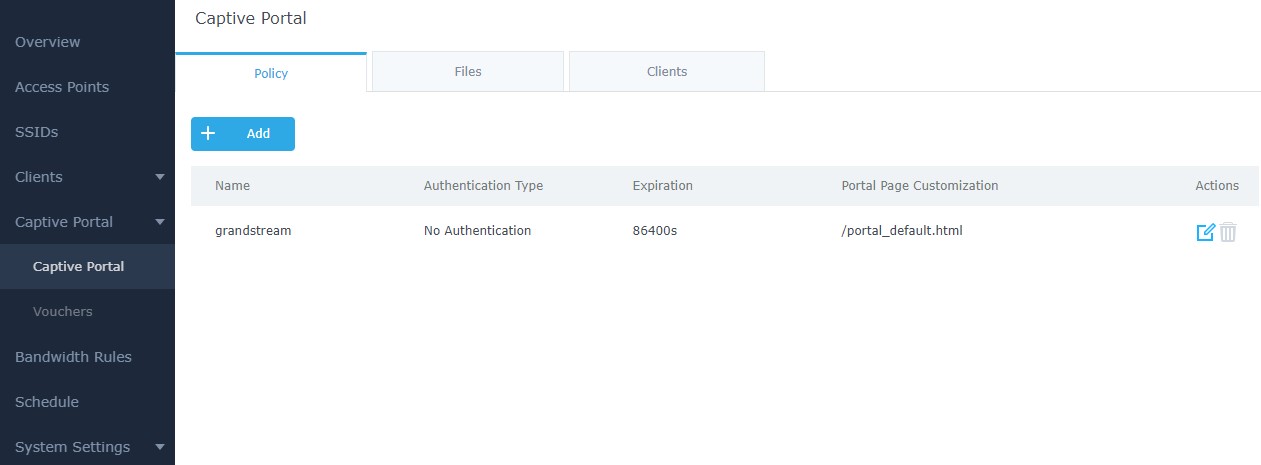
Policy Configuration Page
The Policy configuration allows users to configure and customize different captive portal policies which then can be selected on network group configuration page, giving the admin the ability to set different captive portals for each network group.
The following table describes all the settings on this page (only parameters when setting “Authentication Type” to “Vouchers” are included in below table):
Field | Description |
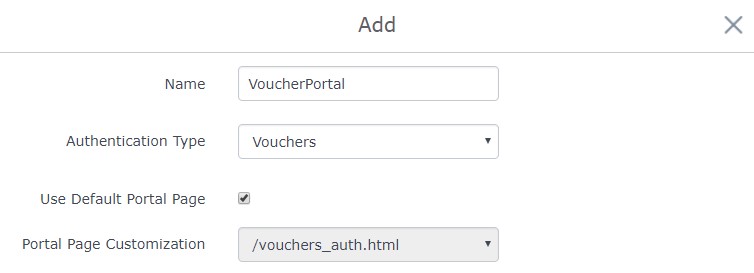
Name | Enter a name to identify the created policy (ex: Guest Portal). |
Authentication Type | Types of authentication are available:
|
Use Default Portal Page | If checked, GWN will use pre-configured default portal page which is “vouchers_auth.html” when using Vouchers as authentication Type. |
Portal Page Customization | If not using default page, select custom portal page that will be shown to clients trying to connect to the WiFi. |
Enable HTTPS | Check this box to enable captive portal over HTTPS. |
Pre-Authentication Rules | From this menu, users can set matching rules to allow certain types of traffic before authentication happens or simply allow the traffic for non-authenticated end points. |
Post Authentication Rules | This tool can be used to block certain type of traffic to authenticated clients, anything else is allowed by default. (Ex: Settings a rule that matches HTTP will ban all authenticated clients to not access web server that are based on HTTP). |
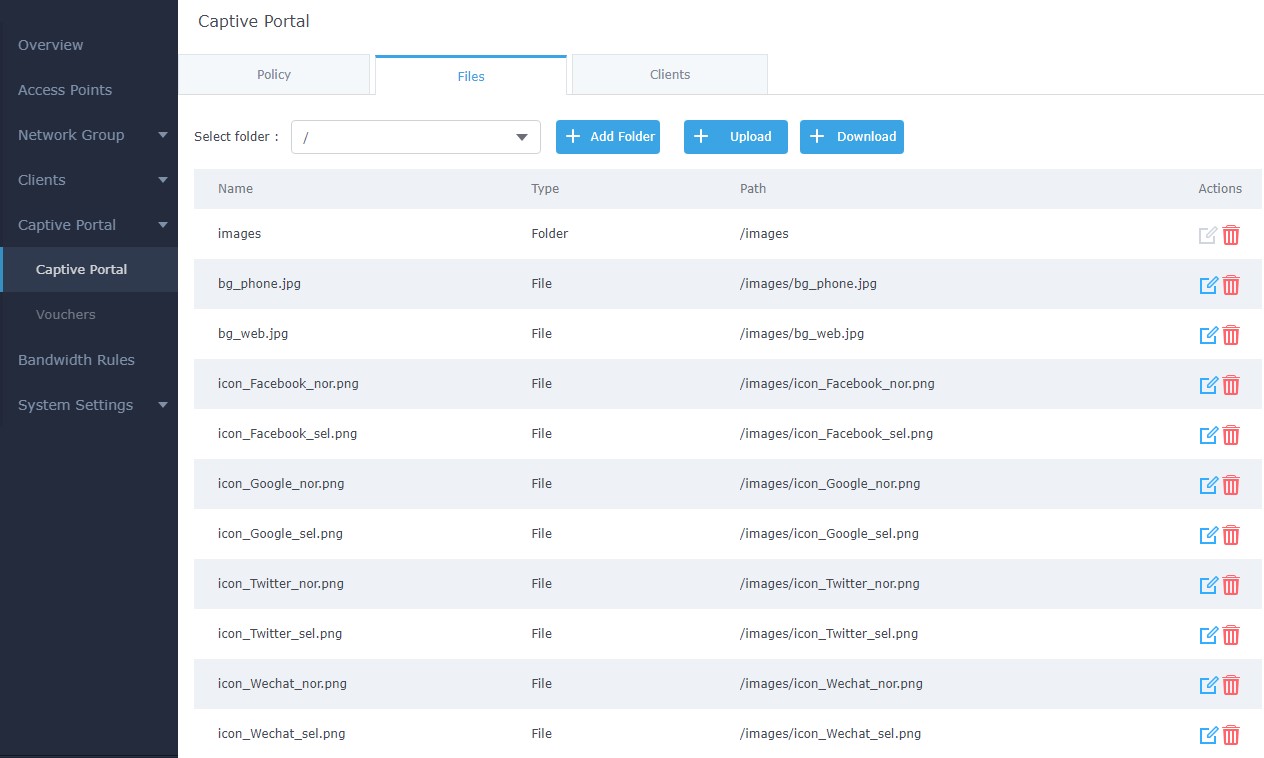
Files Configuration Page
Files configuration page allows to view and upload HTML pages and related files (images…).
The captive portal with voucher authentication uses vouchers_auth.html as default portal page.
The following figure shows default files used for Captive Portal in GWN Access point.
Click ![]() to upload a new web page.
to upload a new web page.
Click ![]() to add a new folder.
to add a new folder.
Click ![]() to upload files to the selected folder.
to upload files to the selected folder.
Folder can be selected from the dropdown list ![]() .
.
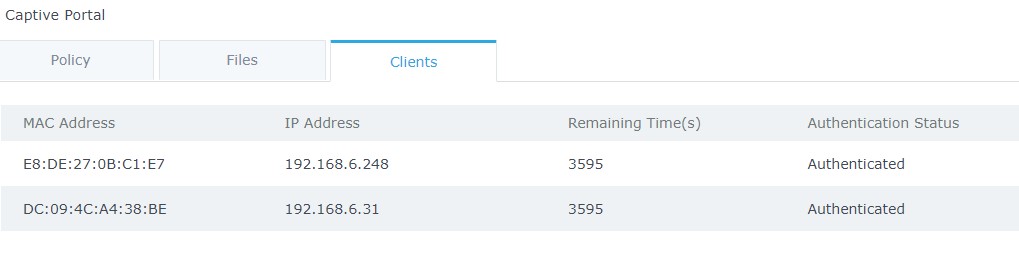
Clients Page
For Information Purposes Clients page lists MAC addresses of authenticated devices using captive portal. As we can see on the below figure, two WiFi clients have been authenticated and granted internet access from the GWN:
Client 1 → E8:DE:27:0B:C1:E7
Client 2 → DC:09:4C:A4:38:BE
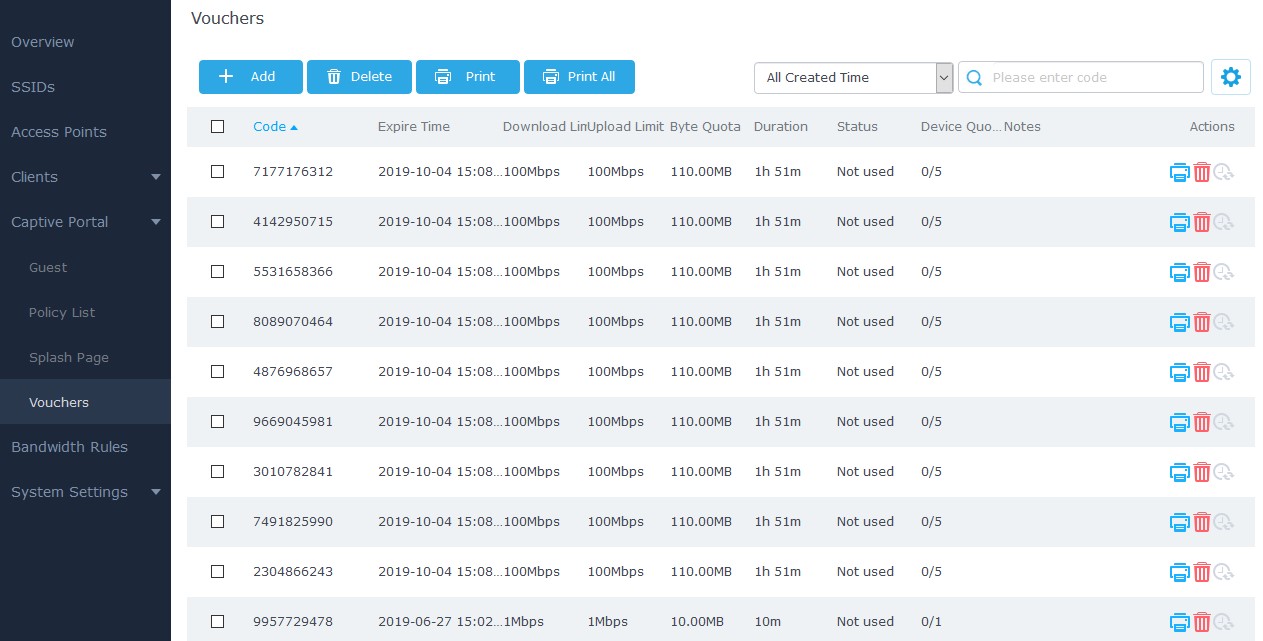
VOUCHERS SETTINGS
The Vouchers parameters can be configured from the web page by navigating to “Captive Portal Vouchers”.
-
Press button
 to create new voucher(s). For more details to generate vouchers, refer to [Create Vouchers] section.
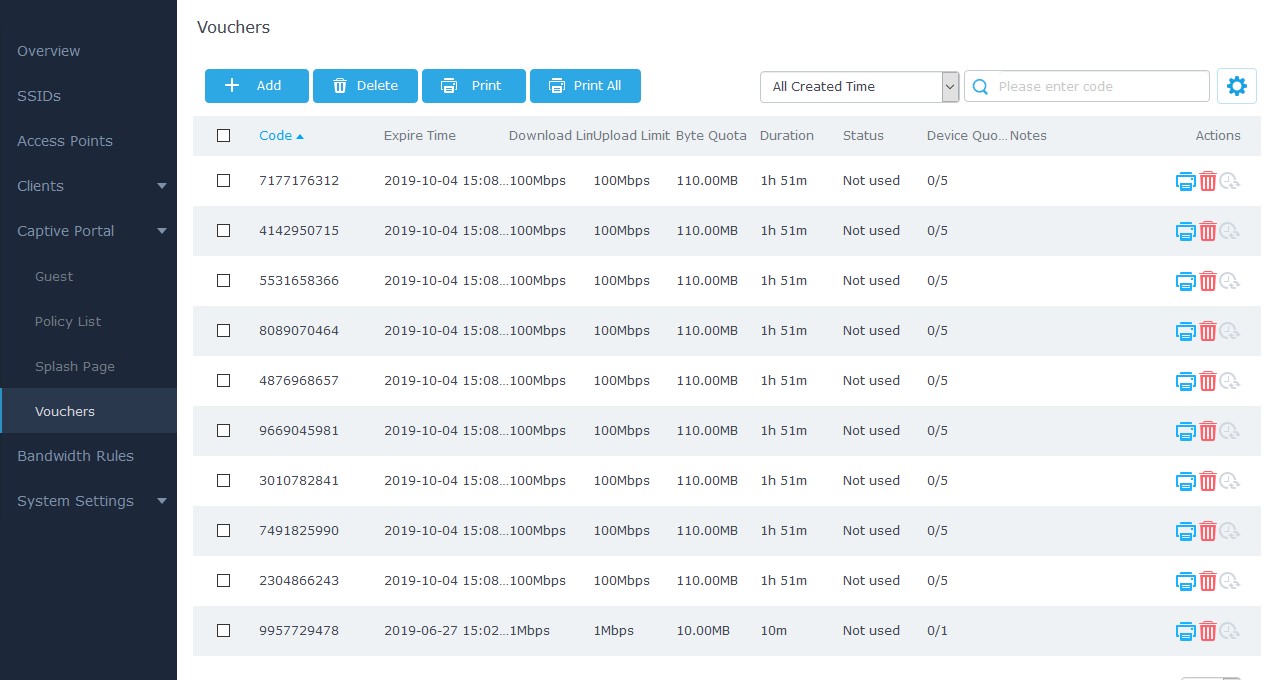
- List of randomly generated vouchers will be displayed with following details:
Code | Voucher code which needs to be entered by user during authentication. |
Expire Time | The time when the voucher will be expired. Maximum is 365 days. |
Download Limit | Configured downstream limit for the voucher. 0 means unlimited. |
Upload Limit | Configured downstream limit for the voucher. 0 means unlimited. |
Byte Quota | Specifies the Byte limit set for this voucher. |
Duration | Duration of validity of the voucher. It starts with first authentication. Maximum is 7 days. |
Status |
Voucher with “Used” status cannot be re-used. |
| Device Quota | Specifies how many users are currently using the voucher. |
| Notes | Notes entered during configuration. |
| Actions | Print a voucher. Refer to [Print Vouchers] section for more details.  |
Delete a voucher | |
Renew the voucher duration timeout. |
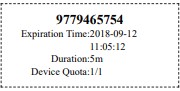
Print Vouchers
To print a Voucher, access web UI → Captive Portal → Vouchers and press ![]() button.
button.
Once print button pressed, a new page will be displayed to initiate the printing. Press Print to continue. The following screenshot shows an example of voucher print page:
CONFIGURATION STEPS
In this section, we will provide all steps needed to use Captive Portal with Vouchers authentication.
Create Vouchers
Voucher Configuration
To configure/create vouchers for clients to use, follow below steps:
- On controller web GUI, navigate under “Captive Portal → Vouchers”
- Click on
 button in order to add a new voucher.
 - Enter voucher details which are explained on the next table.
- Press save to create the voucher(s).
Notes:
- Users can specify how many vouchers to generate which have the same profile, this way the GWN will generate as many vouchers as needed which do have the same settings avoiding creating them one by one.
- The admin can verify the status of each vocoder on the list (In use, not used, expired …etc.).
-
Press
 to print the voucher,
 to delete it or
 to renew the voucher.

The below figure shows the status of the vouchers after GWN randomly generates the code for each one.
Notes:
- Users can specify how many vouchers to generate which have the same profile, this way the GWN will generate as many vouchers as needed which do have the same settings avoiding creating them one by one.
- The admin can verify the status of each vocoder on the list (Using, not used, expired …etc).
- Pressto print the to delete it and
 Print
Print  to print the voucher.
- Users can click on buttons to delete and print multiple vouchers.
Also, users can use the drop-down list filter to filter the vouchers that where created at specific date-time.
For more details, refer to [VOUCHERS SETTINGS] section.
Field | Description |
Create Number One Time | Specify how many vouchers to generate which will have same profile/settings (duration, bandwidth and number of users). Valid range: 1 – 1000. |
Max Devices | Specify how many users can use same voucher. Valid range: 1 – 5. |
Byte Limit | Specify download byte limit for the voucher. The unit can be either M (Megabyte) or G (Gibabyte). Valid range: 10 – 1048576 (M) 1 – 1024 (G) |
Duration | Specify the duration after which the voucher will expire, and clients will be disconnected from internet. Note: in case or multiple users, the duration will start counting after first user starts using the voucher. |
Validity Time | Set the validity period of credentials, limited to 1-365 integer. The unit is day. |
Download Limit | Set the downstream bandwidth speed limit (in Kbps or Mbps). |
Upload Limit | Set the upstream bandwidth speed limit (in Kbps or Mbps). |
Notes | Notes for the admin when checking the list of vouchers. |
Using Voucher with GWN Captive Portal
In order to successfully use the voucher feature, users will need to create a captive portal in order to request voucher authentication codes from users before allowing them access to internet. More details about captive portal will be covered on next section but for voucher configuration please follow below steps.
- Go under “Captive Portal→ Captive portal” menu.
- Press in order to add new captive portal policy.
- Set the following parameters as shown on the screenshot for basic setup then save and apply.
Then go under your SSID configuration page and enable the generated captive portal under Wi-Fi settings tab.
Assign Captive Portal to SSIDs
Once the captive portal policy has been configured with correct settings for Vouchers Authentication, users can assign the created policy to an SSID under WiFi settings tab.
Navigate to Network Groups menu and under WiFi settings click on “Enable Captive Portal”, then select the configured policy from the drop-down policy as shown on the following figure.

After this is done, save and apply the settings then the AP will broadcast the new WiFi settings for the users.
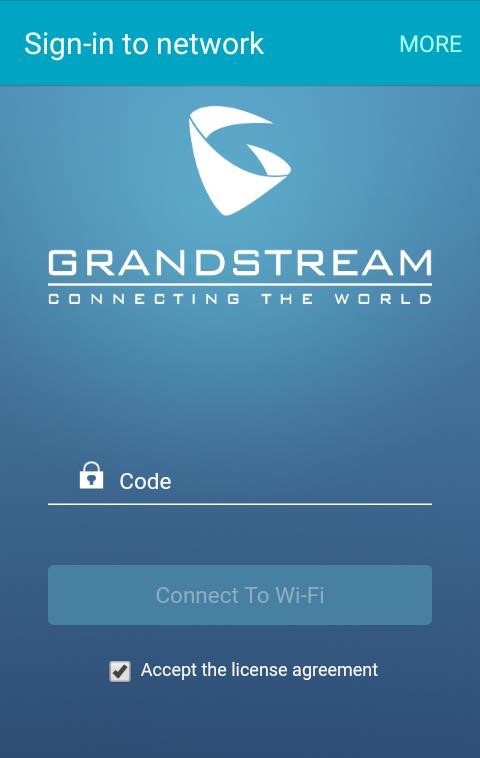
Connect to Network
Once the Configuration done, guests can connect to the broadcasted WiFi SSID CoffeeABC, and will be automatically directed to below screen where they can enter their vouchers under the “Code” field:
Important notes:
-
After the Voucher duration is reached the user will be automatically disconnected from Internet and the voucher will expire; Pressing renew button
 will reset the voucher duration time to “Using” state.
- Same Voucher can be used by multiple users if [Device Quota] is higher than 1.
- In case of multiple users, the configured [Duration] will be counted starting from the time when the first user is authenticated with the voucher.
SUPPORTED DEVICES
Following table shows Grandstream networking products supporting Voucher feature:
Model | Supported | Firmware |
GWN7610 | Yes | 1.0.5.12 or higher |
GWN7600 | Yes | 1.0.6.41 or higher |
GWN7630 | Yes | 1.0.9.12 or higher |
GWN7600LR | Yes | 1.0.6.41 or higher |
GWN7000 | Yes | 1.0.6.28 or higher |