Social WiFi® is a customizable Wi-Fi captive portal for marketing purposes through the use of Wi-Fi captive portals also known as WiFi Marketing using social media login options, it delivers more feedback, loyalty and customers, thus increasing the revenue. Social WiFi enables gathering customers data, collecting positive reviews, and sending timely marketing messages.
GWN Configuration Interface
This guide assumes that the device is already configured and you know how to access its configuration interface. If in doubt, please consult the Quick Installation Guide of Grandstream GWN products that includes GWN76xx Access points or GWN70xx Routers: https://documentation.grandstream.com/article-categories/networking
Here is an example of GWN7664 Quick Installation Guide: https://documentation.grandstream.com/knowledge-base/gwn7664-quick-installation-guide/
If the device is cloud-managed, you can access its configuration interface with GWN Cloud: https://www.gwn.cloud.
Please follow the steps below to setup up the Captive Portal with Social WiFi.
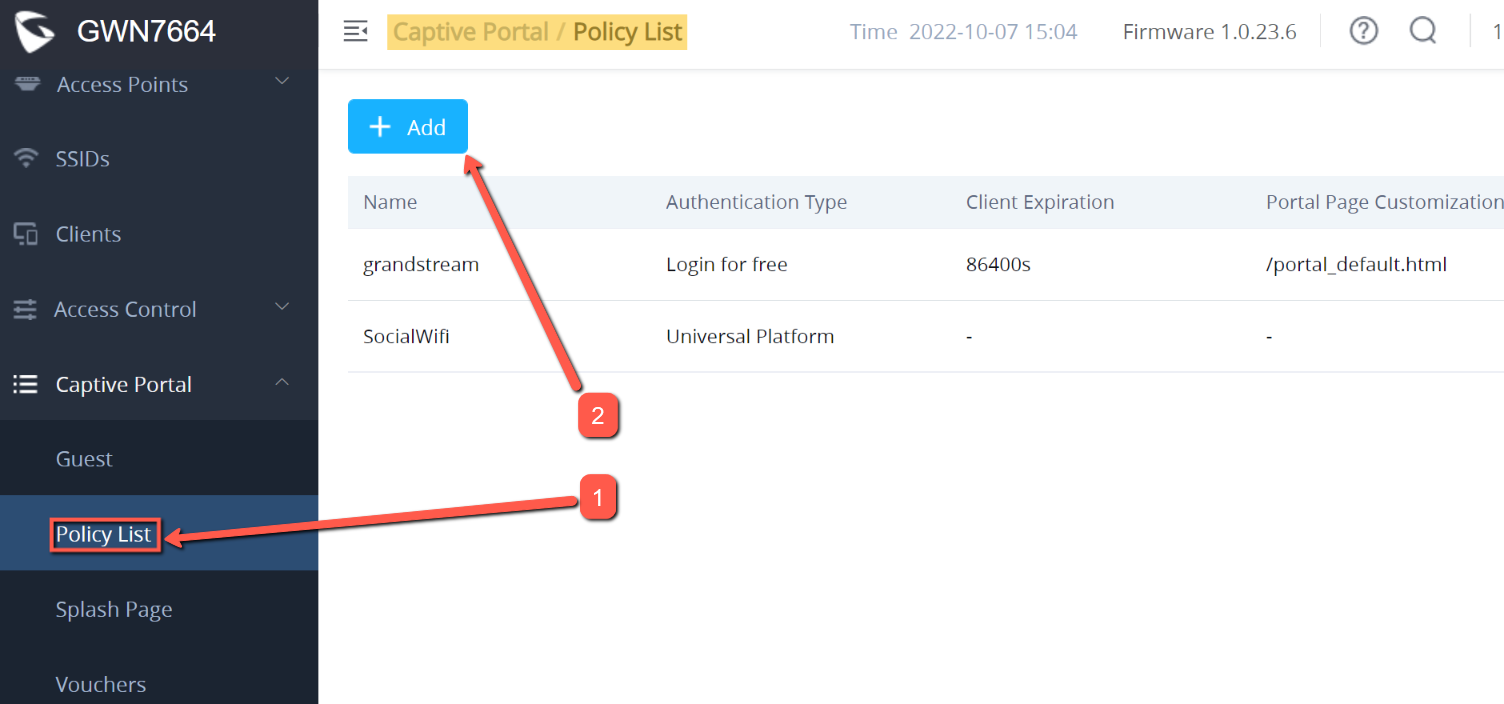
Captive Portal Policy
- Go to Captive Portal → Policy List in the menu on the left. Click the Add button.
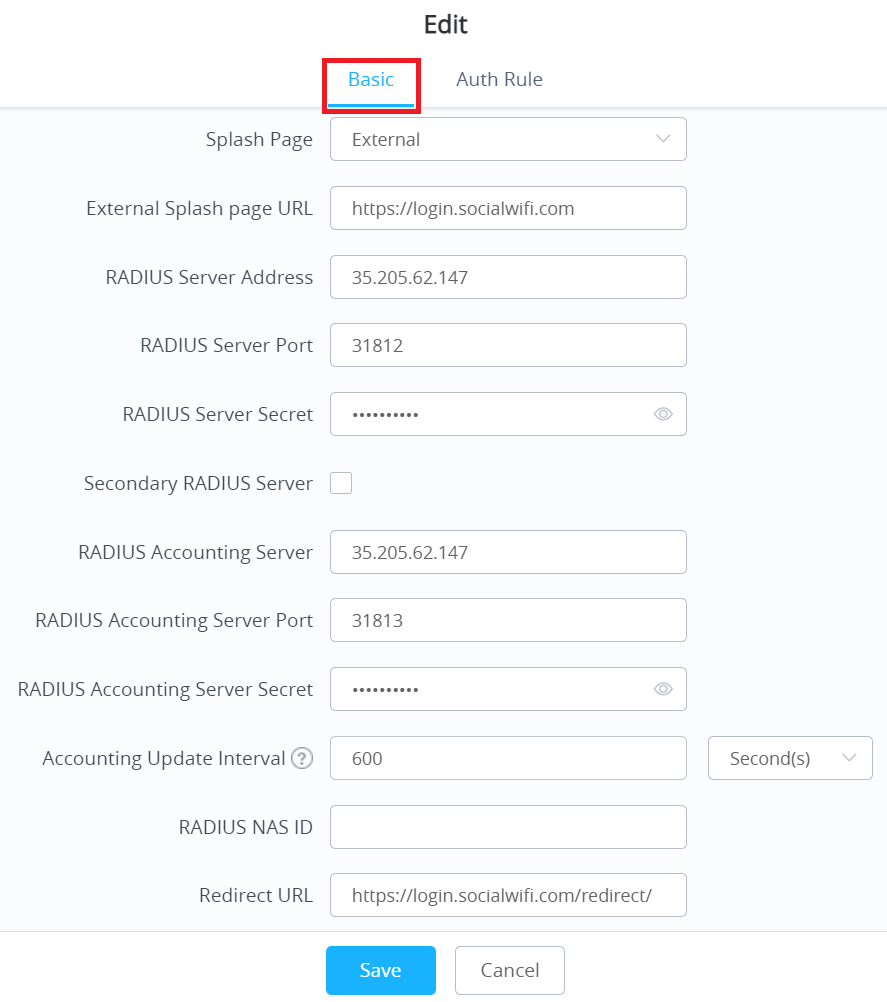
- Use the following settings:
Name | Social WiFi |
Splash Page | External |
External Splash page URL | http://login.socialwifi.com |
RADIUS Server Address | 35.205.62.147 |
RADIUS Server Port | 31812 |
RADIUS Server Secret | RADIUS Secret is available in Access Points tab of the Social WiFi Panel |
Secondary RADIUS Server | (leave unchecked) |
RADIUS Accounting Server | 35.205.62.147 |
RADIUS Accounting Server Port | 31813 |
RADIUS Accounting Server Secret | (the same as above, in RADIUS Server Secret) |
Accounting Update Interval | 600 seconds |
RADIUS NAS ID | (leave empty) |
Redirect URL | https://login.socialwifi.com/redirect/ |
Enable HTTPS Redirection | (leave unchecked) |
Enable Secure Portal | (leave unchecked) |
Table 1: Add Policy
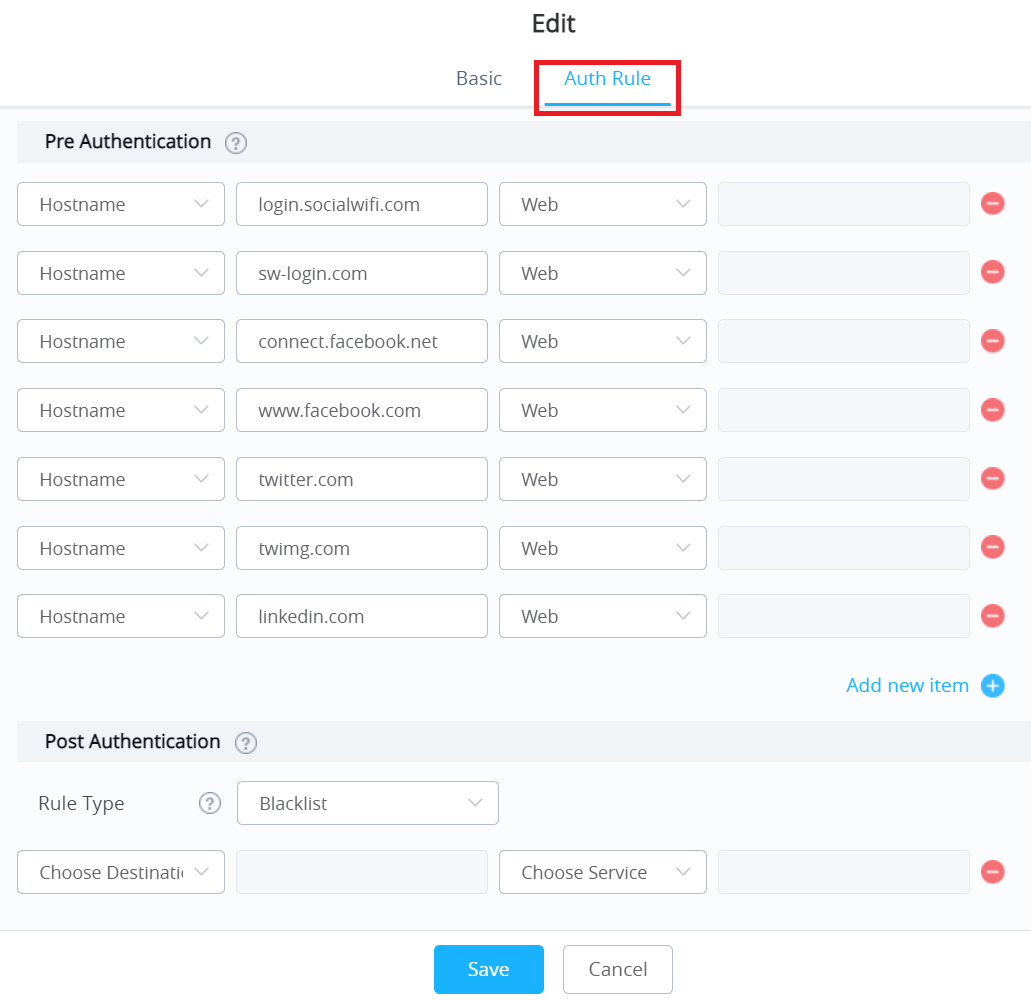
When finished, switch to the Auth Rule tab at the top. Now you’ll need to add the following domains in the Pre Authentication section.
Each domain needs to be added separately. For each one, click the Choose Destination drop-down list and select Hostname. Use the domain as the value for the field next to the drop-down list. Click the Choose Service drop-down list and select Web.
You can add more entries by clicking the Add new item button.
Facebook login | Twitter login | LinkedIn login |
Facebook remarketing pixel | Google Remarketing tag | YouTube widget on login pages |
Google login | ||
- When finished, press Save at the bottom.
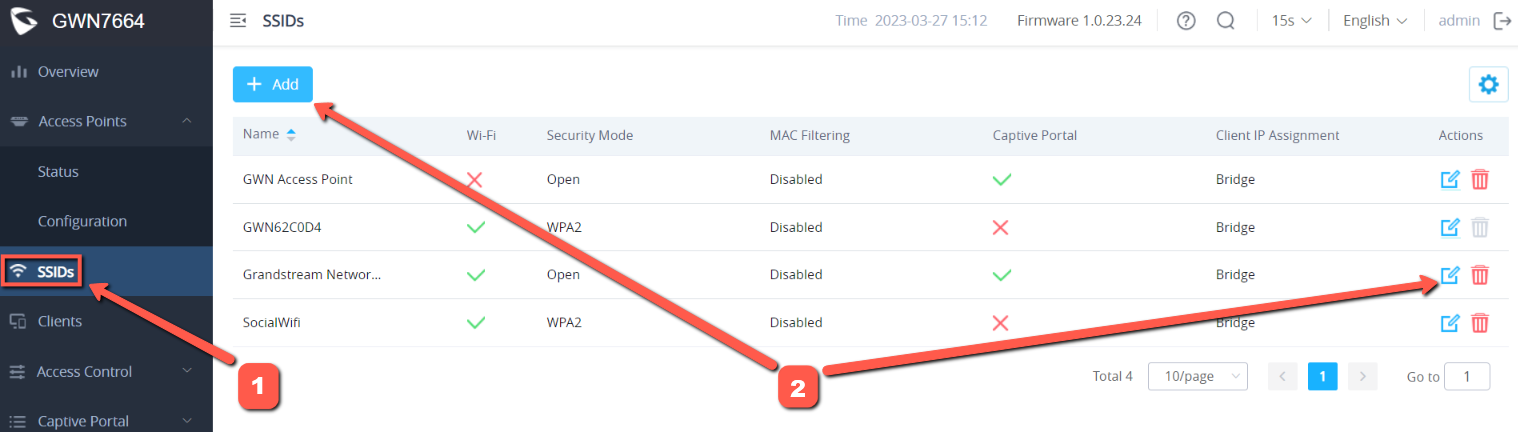
Enable Captive Portal on SSID
- Go to SSIDs in the menu on the left. Click the Edit icon (if you already have a working Wi-Fi network) or the Add button (if you need to create a new Wi-Fi network).
- In the Access Security section use the following settings:
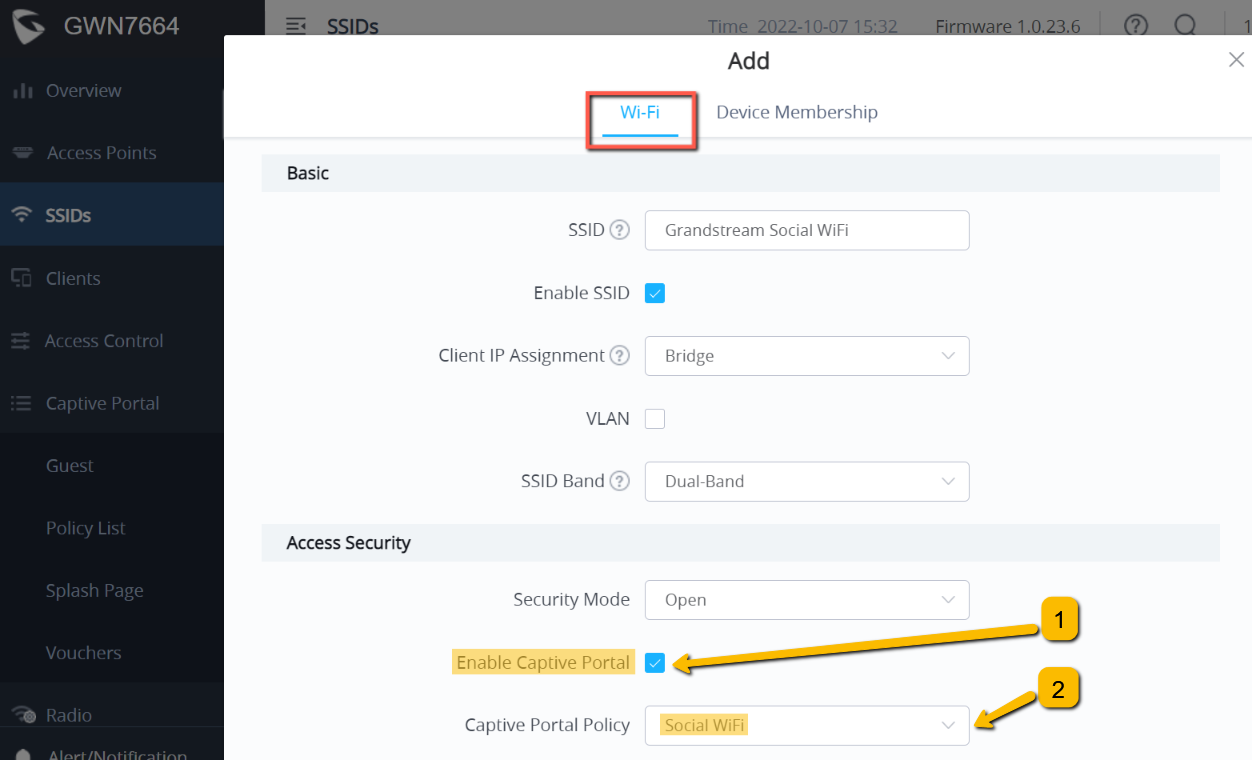
- When finished, press Save at the bottom.
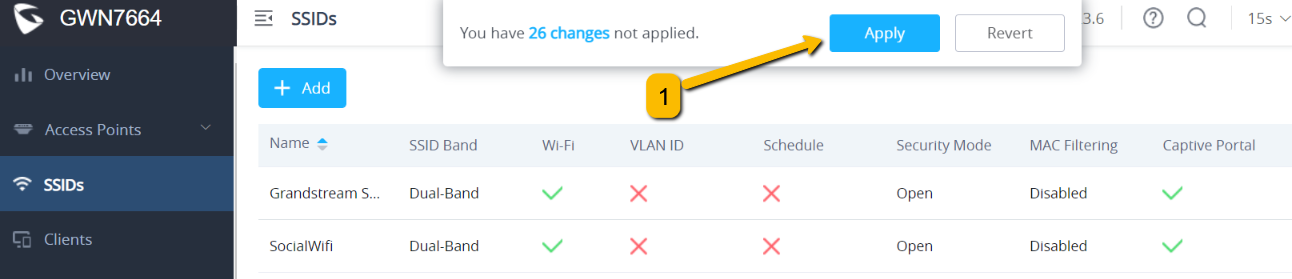
Apply configuration changes
At the top of the page, find a message box saying “You have X changes not applied”. Click the Apply button to save the configuration.
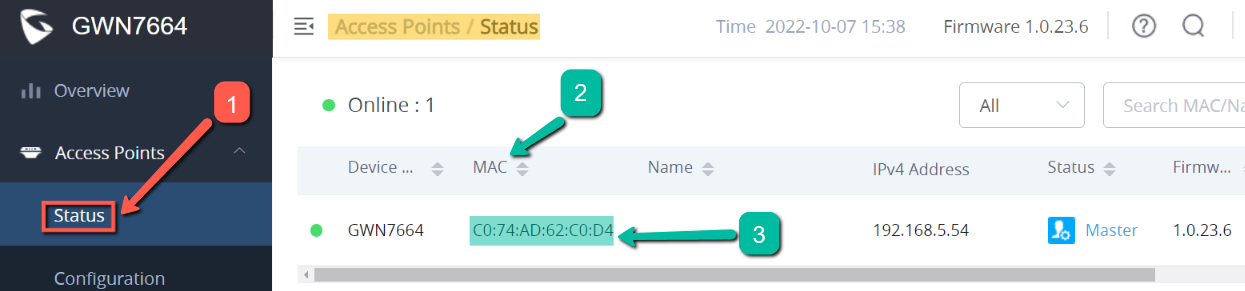
Add the access points to Social WiFi panel
The setup of the controller is now finished. The last step is to add all access points to the Social WiFi platform.
Go to Access Points → Status in the menu on the left. You’ll find the list of all connected access points. One of the columns should be “MAC”. You’ll need to copy the MAC address and paste it into Social WiFi panel. To do that, switch to Social WiFi Panel, go to Access Points tab, click the Add button and paste the MAC address of the access point. Click Create. Repeat this step for each access point.
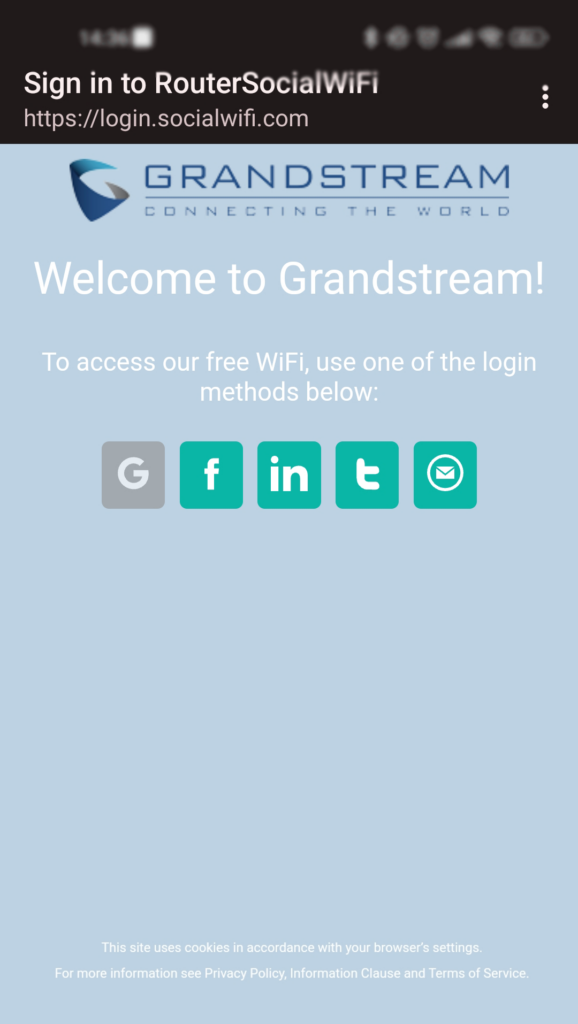
Login Page
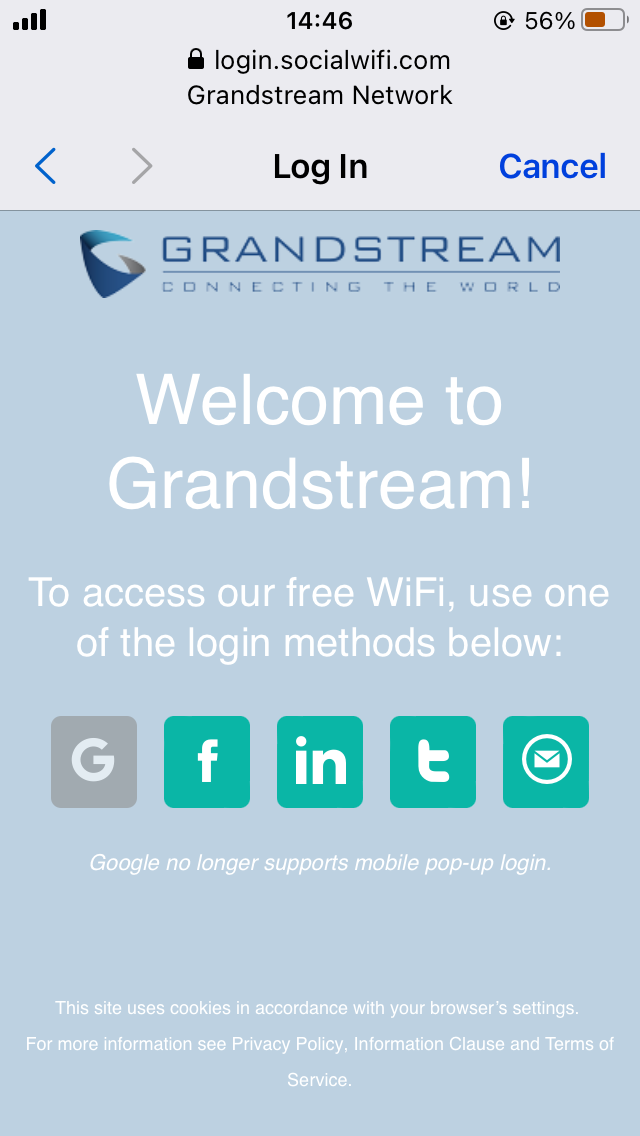
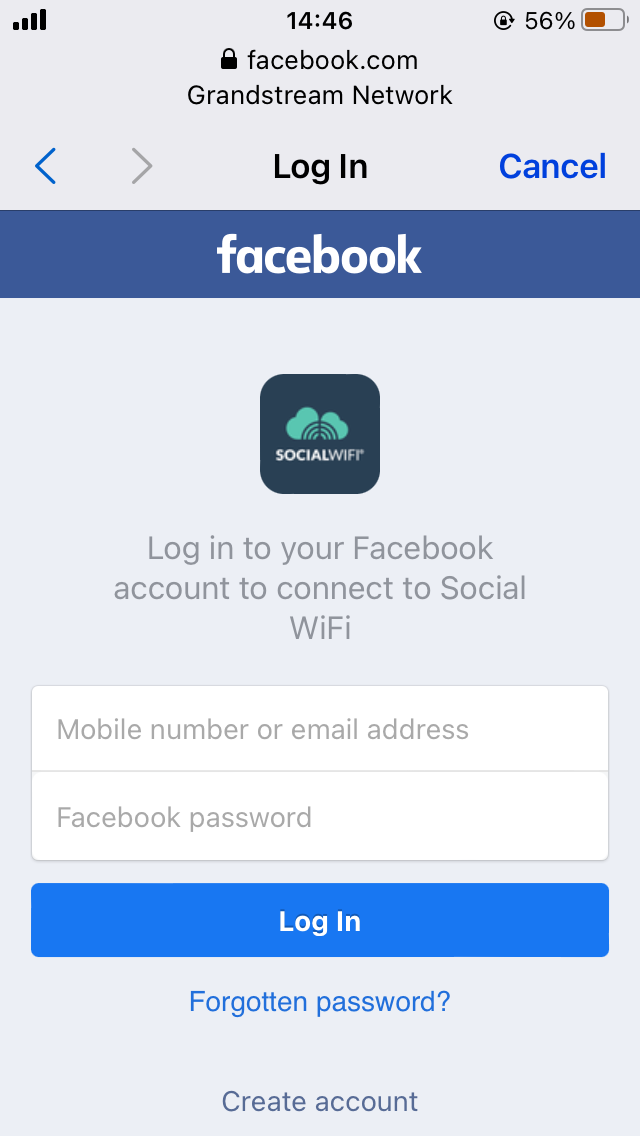
Connect with the Wi-Fi network. You should see a login page. Go through the login process and, once finished, you should have internet access. You should see first connections and authorizations in the Social WiFi Panel’s statistics section.
Social WiFi Captive Portal on Android®
Social WiFi Captive Portal on iPhone®
Social WiFi
For more details please visit the official site: 
Social WiFi is a trademark of Social WiFi Sp. z o.o.
Android is a trademark of Google LLC.
iPhone is a trademark of Apple Inc.