
The GWN76xx Wireless Access Points Series can be managed locally and remotely, through Web access or via Command Line, offering more flexibility along with secured login sessions. The various features and operations on the GWN7600 and GWN76XX access points can now be managed either through Web GUI offering a friendly user interface, or via Command Line through SSH access.
SSH is a secure protocol used for the connection to a remote host, through command lines and text-based interface. Once authenticated and connected, all typed commands on the terminal are sent to the remote device and executed there.
The CLI (Command Line Interface) on GWN76xx provides access to many advanced diagnostic commands as well as configuration, and allows discovering / pairing nearby access points, managing connected clients, managing Network Groups and SSIDs, maintaining and updating the AP.
This guide will describe the usage of Command Line to manage the GWN76xx access points, and will be illustrated using Putty tool, as SSH client Console.
PREREQUISITES
Along this guide, the user is supposed to be familiar with GWN76xx series, with knowledge of how to configure GWN7600 and GWN76XX APs, and basic knowledge of SSH.
The information in this document is based on the following software and hardware:
- GWN76XX Series AP that runs firmware 1.0.3.21.
- PC or laptop with PuTTY tool available here.
Note: In this document, we will use PuTTY client tool in order to verify / run / save the configuration, users can use any third-party client to login and manage the AP through SSH.
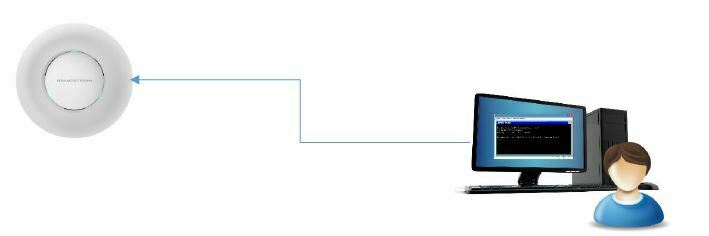
The deployed diagram in our scenario is the below one:
DISCOVERING AND CONNECTIING TO THE AP
Discovering the AP
Once the GWN76xx is powered up and connected to the LAN network, you can discover it using GWNDiscoveryTool to get the IP address of the AP which will be used for SSG access.
For more details on how to discover your GWN76xx, please refer to the product user manual: https://documentation.grandstream.com/knowledge-base/gwn76xx-user-manual/
Connecting to the AP
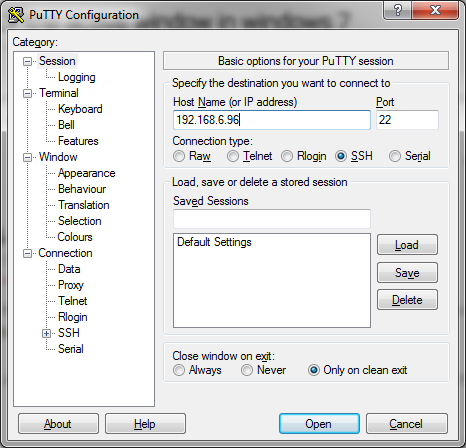
Secure Shell (SSH) provides both secure authentication and secure communications to the CLI. First step to do is to run the SSH client application (PuTTY in our case) and set the following:
- Host Name or IP Address: GWN76xx’s IP Address, (ex: 192.168.6.96).
- Port: 22, this is the by default port for SSH protocol.
- Connection type: Set this to SSH
The settings should be similar to the following figure:
Once done, you can press Open to start the SSH session and open the console.
RUNNING THE CLI
Login to the CLI
Once pressing Open to start the session, the login prompt will appear on the CLI, type in “admin” followed by the AP admin password:

Main Menu
Once the authentication is done and validated, the SSH client will connect to the GWN76xx, and will display the following main menu:
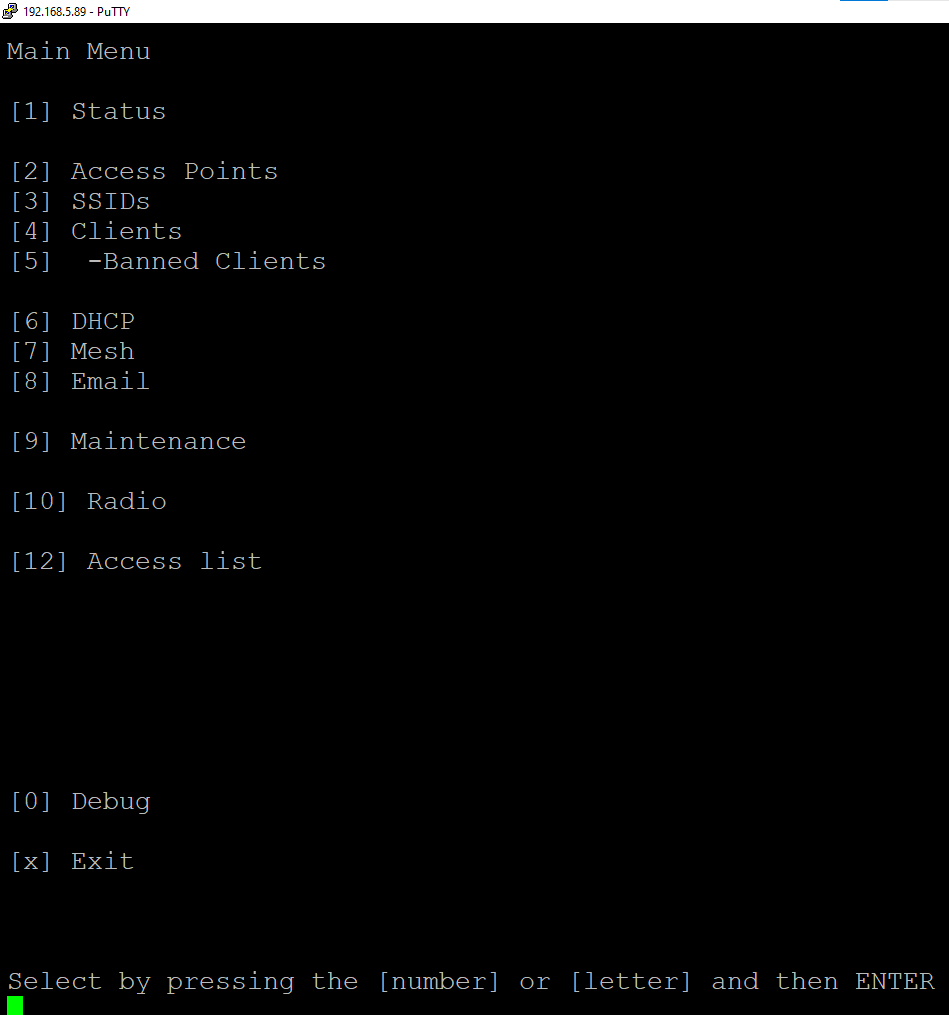
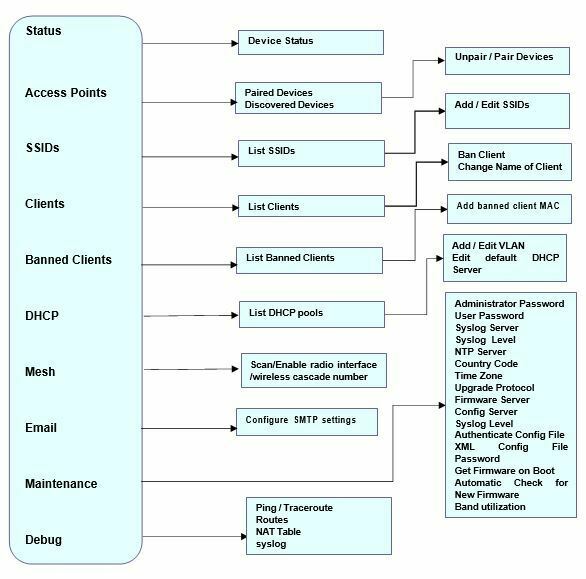
The main menu includes the following sections:
Section | Description |
Status | Shows the device’s status information such as Firmware version, Role, Mac Address, Ip Address, Link Speed, Uptime, and users count via different Radio channels. |
Access Points | This section is mainly to discover/pair other access points. |
SSIDs | When using GWN76xx as Master Access Point, users have the ability to create different SSIDs. |
Clients | Access clients list connected to GWN76xx zone. |
Banned Clients | Display the list of clients blocked to connect. |
DHCP | Edit the default DHCP server or add new VLAN. |
Mesh | Scan and change the number of cascades. |
Set the STMP settings. | |
Maintenance | Configuration and maintenance details of the AP. |
Radio | Edit the Band/Client Steeting, Airtime Fairness, Beacon Interval, Channel Width, Radio Power, RSSI and Access Rate Limit. |
Access List | Add or Edit Access List |
Debug | Tools for managing and monitoring connected clients to network groups, as well as debugging and troubleshooting. |
Exit | Typing “x” will exit the session. |
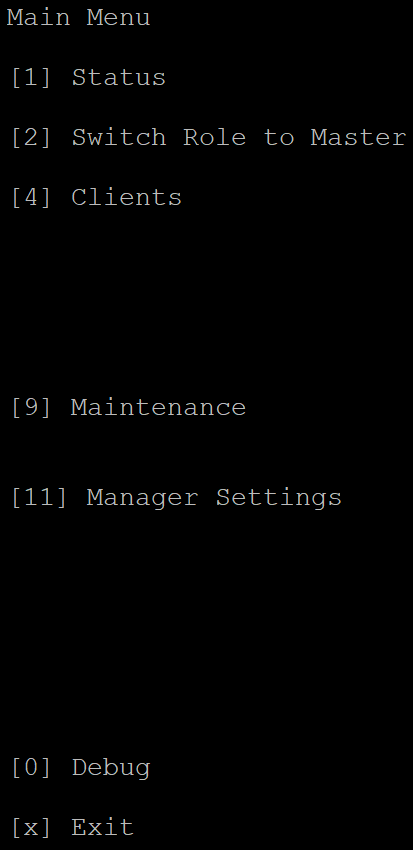
Note: If this is the first time you are connecting to the GWN76xx, or the device was reset to factory settings, the main screen will not display the options above, and most of those options shall be hidden. The main screen in this case show only the Status, option to set the GWN76xx as a Master, Clients, Maintenance and Manager Settings.
USING THE CLI EXAMPLES
Example 1: Managing Access points
This section will display all the paired and discovered access points in the zone, and allow to pair a GWN76xx access point connected to the same Network.
On the main menu press 2 to select Access Points, the following options will be displayed:

[1] Paired Devices
Selecting and pressing “1” for paired devices will lead to the following interface:
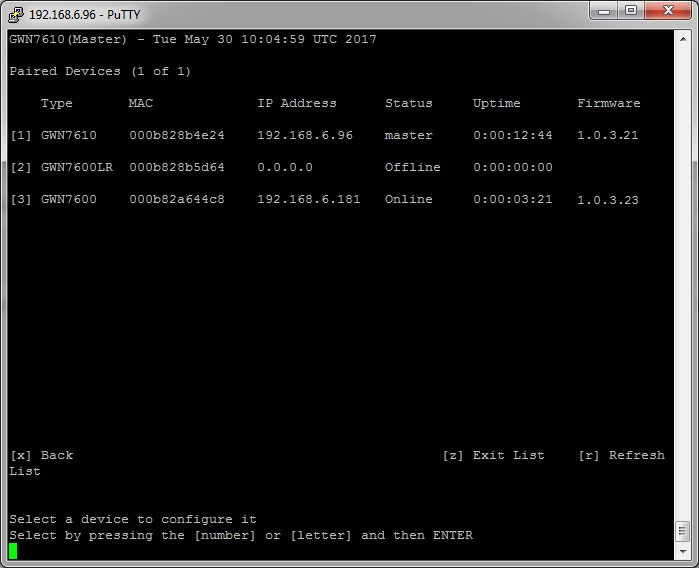
The above interface shows the paired APs, with corresponding Type / MAC Address / IP Address / Status / Uptime and Firmware.
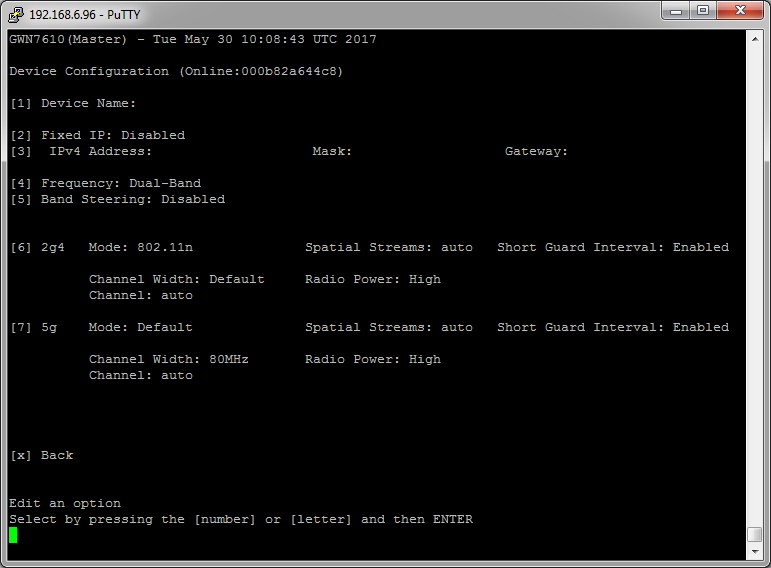
You can select a device among the listed ones, and then you will have a list of the available operations to perform on the selected AP, the following screenshots show the available details when selecting device 3 from the above list (GWN7600), and then selecting Configuration (Option 1):
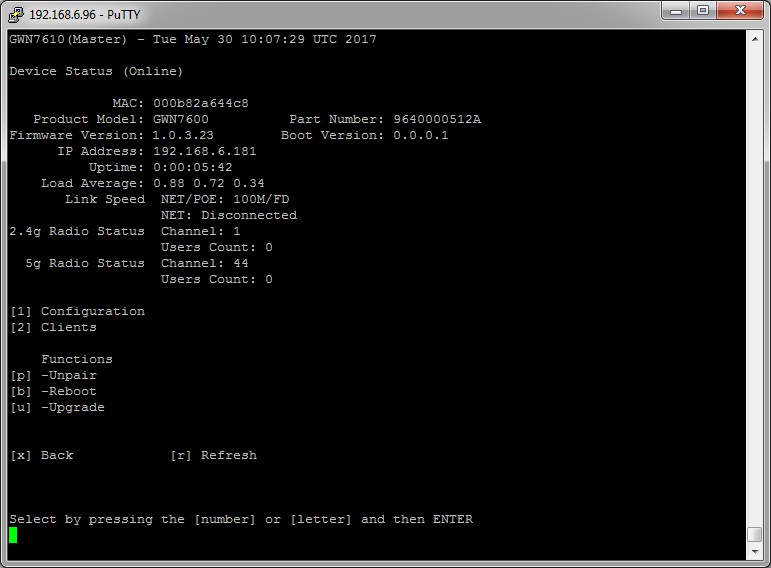
Besides Configuration option, users can select other options as displayed on the CLI, for example pressing “2” will display the device clients, pressing “p” will unpair the AP, and “b” will reboot the device. etc.
[2] Discovered Devices
This section lists the discovered APs, click on [2] to show discovered access points within GWN76XX’s Network, the following page will appear:
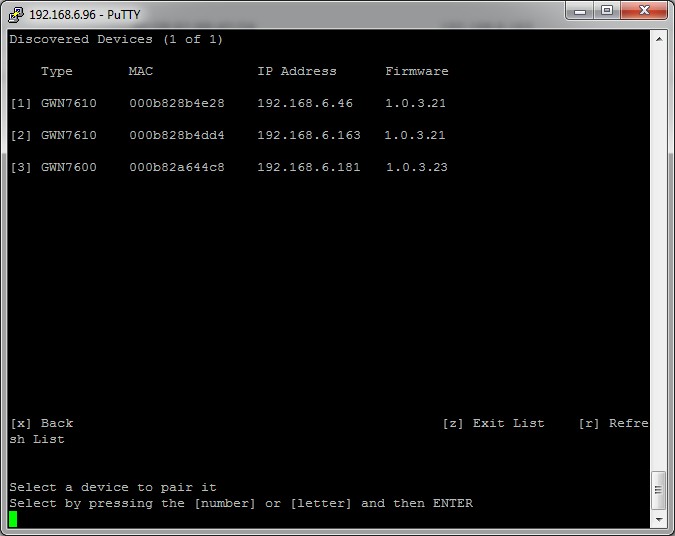
You can select the discovered device by pressing the corresponding number, pressing Option 3 in above screenshot will display the following message which indicates successful pairing:

The paired device will be listed on Paired Devices section, and you can then enter to the related configuration options of the device.
Example 2: Maintenance Operations
This section is mainly for maintenance purposes, it allows to maintain the GWN76xx working properly and up to date, you can refer to the user manual for more details about the Maintenance options on GWN76xx.
From the main menu, you can enter Maintenance option by pressing “9”, the following interface will be displayed:
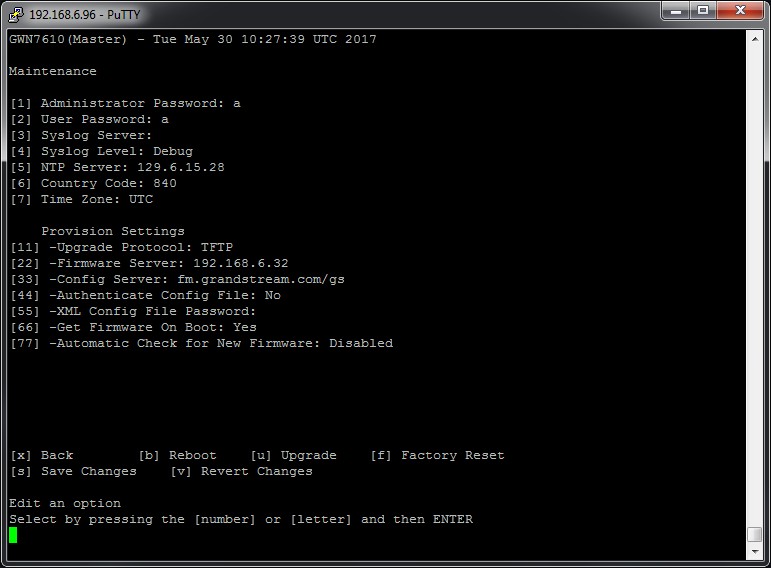
Several options are available under Maintenance menu, those options are detailed on the user manual. For example, once selecting option “1”, the user will be prompted to change the admin password, and the following messages will be gradually displayed:


Note: Any configuration change on the CLI needs to be saved, therefore two options are always displayed on the CLI after each change, in order to allow users to save or discard the changes:
