UCM6xxx series introduced the “Announcement Center” feature allowing to initiate calls and play a pre-configured voice prompt to extensions within the same group.
When the code and the group number are dialed together in the combination of code + group number, the specified voice message is sent to all group members and only extensions in the group will hear the voice message.
Announcement center feature can be used in different scenarios such as in hospitals (Code Blue), companies, supermarkets…
This guide will help to understand announcement center settings, steps needed to configure this feature, how to create and upload custom prompt to be used within the announcement center feature, and gives an example illustrating the utility of this option.
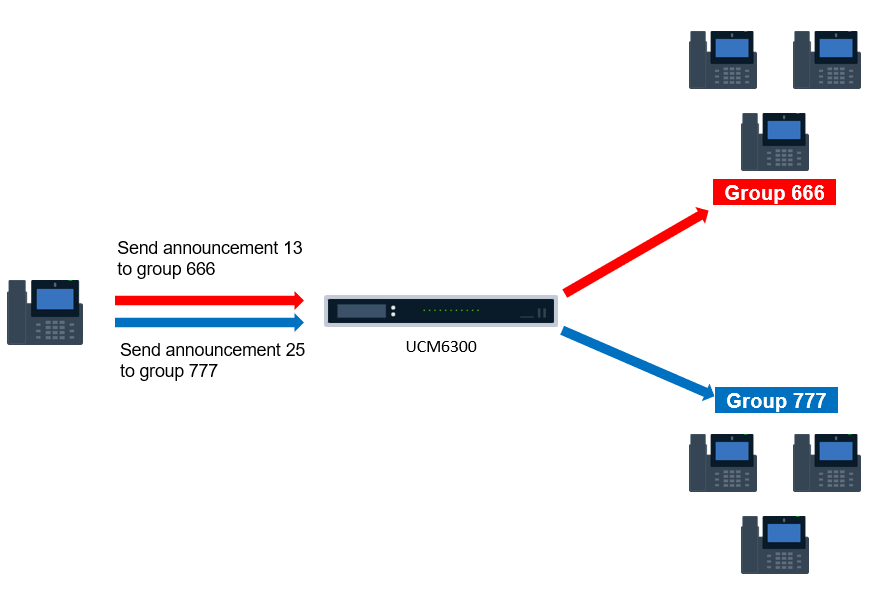
The user sending the announcement dials “13666” to send the announcement 13 to group 666, and to send the announcement 25 to group 777, the user dials “25777” as shown in the figure above.
Announcements Center Settings
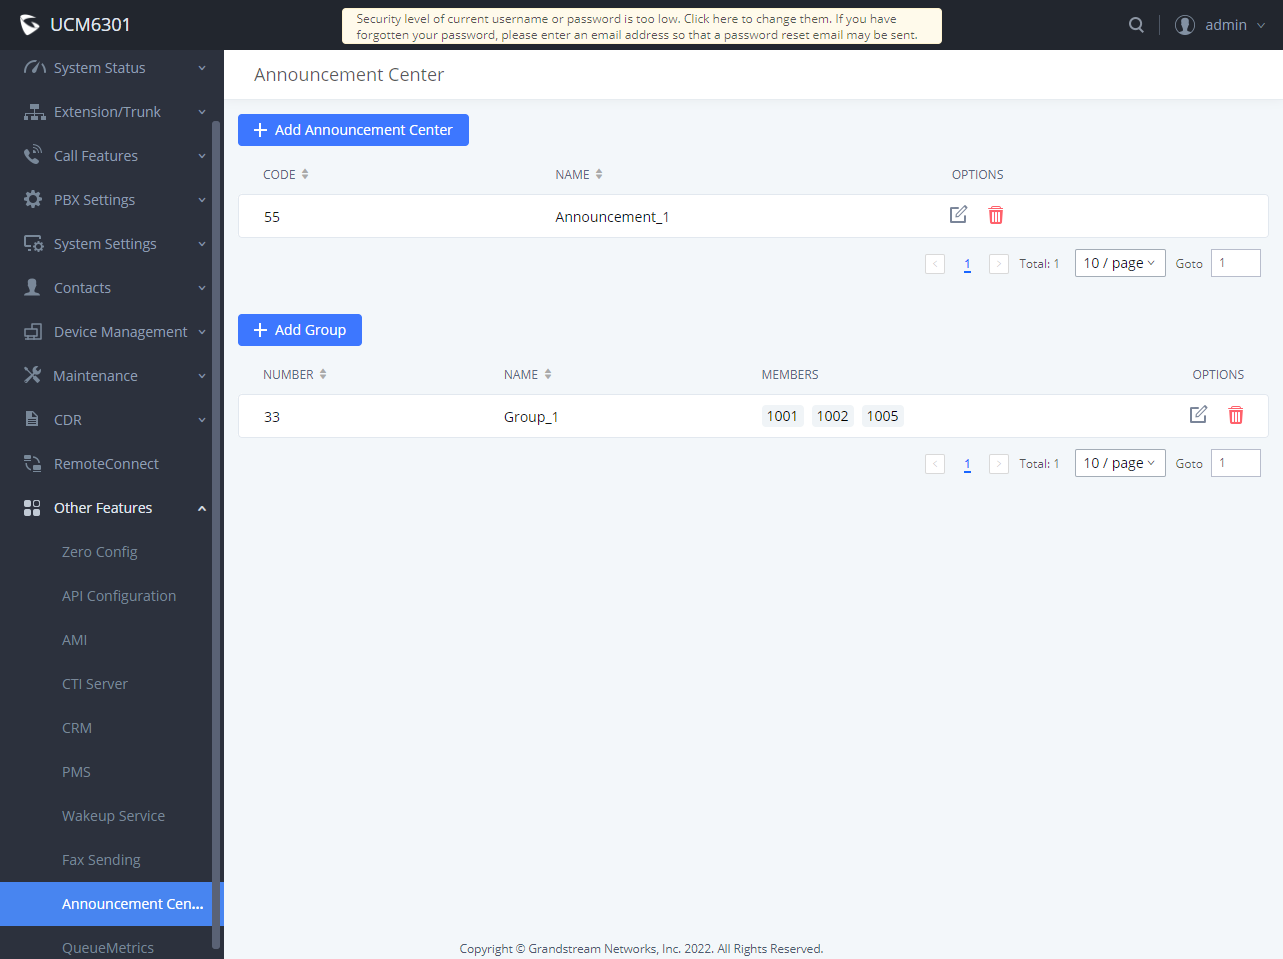
The announcement center settings are available on the UCM6xxx Web GUI under the Other Features🡪 Announcement Center as displayed on the figure below:
The following tables describe the needed options to configure a new announcement center and a new group.
Announcements Settings
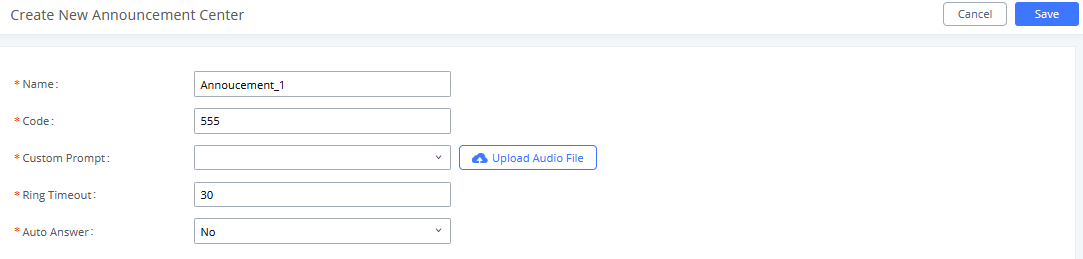
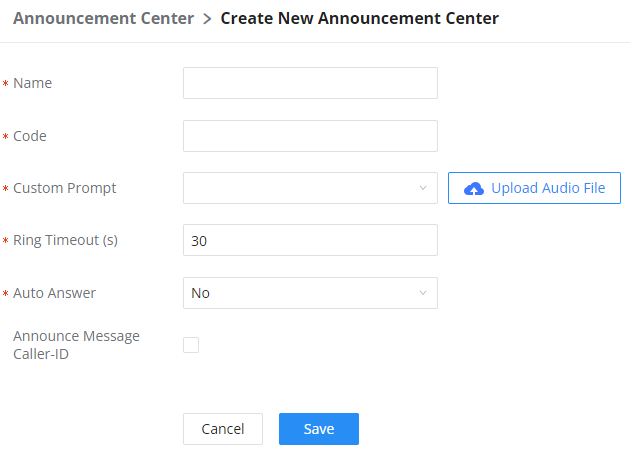
Name | Configure a name for the newly created Announcement Center to identify this announcement center. |
Code | Enter a code number for the custom prompt. This code will be used in combination with the group number. For example, if the code is 55, and group number is 666. The user can dial 55666 to send prompt 55 to all members in group 666. Note: The combination number must not conflict with any number in the system such as extension number or conference number. |
Custom Prompt | This option is to set a custom prompt as an announcement to notify group members. The file can be uploaded from page ‘Custom Prompt’. Click ‘Prompt’ to add additional record. Note: When uploading a custom, please ensure that the custom prompt file respect the following requirements.
|
Ring Timeout | Configure the ring timeout for the group members. The default value is 30 seconds. |
Auto Answer | If set to Yes, the Auto answer will be enabled by the members. |
Announce Message Caller-ID | If enabled, the caller's CID number will be announced before playing the uploaded prompt. This CID will also be used as the displayed CID of the call. |
Group Settings
Name | Configure a name for the newly created group to identify the group. Note: Name cannot exceed 64 characters. |
Number | Configure the group number. The group number is used in combination with the code. For example, if group number is 666, and code is 55. The user can dial 55666 to send prompt 55 to all members in group 666. Note: The combination number must not conflict with any number in the system such as extension number or conference number and cannot exceed 64 characters. |
Internal Members | Choose the local extensions to add to the group. |
LDAP Members | Choose the LDAP contacts to add to the group. |
Custom Members | Enter the custom phone numbers to add to the group. Note: The maximum number of custom numbers which can be added are 50 custom number. |
Configuring Announcement Center
Please refer to the following steps in order to configure the announcement center on the UCM6xxx series:
Creating New Group:
- Access the web GUI of your UCM and navigate to PBX🡪Other Features🡪Announcement Center
- Click on
 to create new group.
 - Specify the name of the newly created group.
- Configure group number which it will be used with code to send voice message.
- Select the extensions to be included in the group, who will receive the voice message.
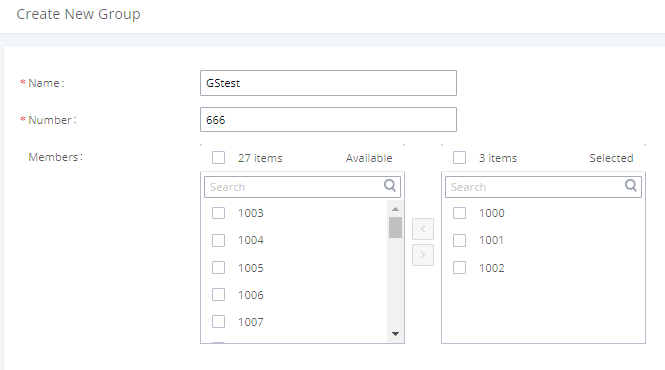
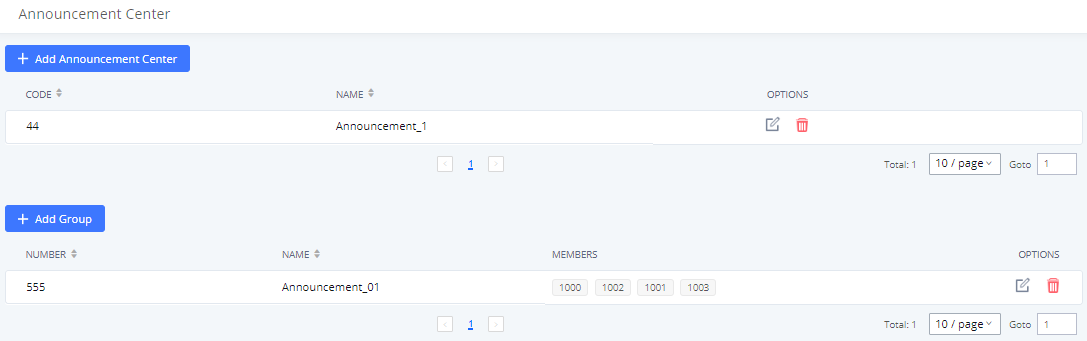
In the example illustrated in Figure 3, the group “Announcement_01” has the number 555. Extensions 1000, 1001, 1002, and 1003 are in this group.
Creating New Announcements Center
- Access the web GUI of your UCM and navigate to PBX🡪Other Features🡪Announcement Center
- Click on
 to create a new announcement center.
 - Specify the name to the newly created announcement center.
- Configures the code which will be used with group number to send the voice message to.
- Select the message that will be used by the code from the custom prompt drop down menu. To create a new Prompt, please click “Prompt” link and follow the instructions in that page. (Please refer to: [CREATE CUSTOM PROMPTS FOR ANNONCEMENTS CENTER]).
Code and Group numbers are used together to direct specified messages to the target group. All extensions in the group will receive the message. For example, we can send code 44 to group 555 by dialing 44555 from any extension registered to the UCM6xxx. All the members in group 555 which are extensions 1000, 1001, 1002, and 1003 will receive this voice message after they pick up the call.
Announcement Center Example
In a hospital where UCM6xxx is installed, the “Announcement Center” feature can be used as a “Code Blue” service.
“Code Blue” is mainly used in hospitals to indicate a patient requiring resuscitation or immediate medical attention. Instead of announcing on the speakers that there is an emergency in room XXX and disturb the whole hospital.
Using the “Announcement Center” feature on UCM6xxx will allow to dial a code with the room number of the patient and hang up, then calls will be initiated (with caller ID as room number) to the specified group including doctors, nurses… and once answered, pre-recorded voice messages will be played indicating urgency level and room to go to.
To fulfill these requirements, administrator can create different announcement centers and different groups as follows:
Code | Name | Voice prompt |
00 | CPR | Immediate attention required – CPR |
01 | Nurse_requested | Nurse requested |
02 | Doctor_requested | Doctor requested |
03 | Consultation | Doctor requested for consultation |
04 | Emergency | Emergency doctors and nurses requested |
… | … | … |
Group / Room Name | Extension | Members |
Room 201 | 201 | 2007,2008,2009 |
Room 202 | 202 | 2009, 3010, 3020 |
Room 203 | 203 | 3002, 3010, 3025 |
…. | … | … |
Consultation Room 01 (General) | 301 | 2002, 2010 |
Consultation Room 02 (Cardio) | 302 | 2003, 2011, 2012 |
… | … | … |
Emergency Room 01 | 401 | 2020, 2021, 2030, 2031, 2032, 2033 |
Emergency Room 02 | 402 | 2040, 2041, 2042, 2043 |
… | … | … |
Once configured, users can dial following combinations:
Dial number | Results | ||
Caller ID (Room number) | Extensions ringing | Voice prompt played after pickup | |
00201 | 201 | 2009, 2008, 2007 | Immediate attention required – CPR |
04401 | 401 | 2020, 2021, 2030, 2031, 2032, 2033 | Emergency doctors and nurses requested |
01201 | 201 | 2009, 3000, 3002 | Nurse requested |
03302 | 302 | 2003, 2011, 2012 | Doctor requested for consultation |
… | … | … | … |
Configuration Steps
Before configuring the group announcement, the administrator needs to record or upload the custom prompts to be played when receiving the patient’s call.
Please refer to [CREATE CUSTOM PROMPTS FOR ANNOUNCEMENTS CENTER] for more details.
Creating Announcement Group
- Access the web GUI🡪Other Features🡪Announcement Center.
- Click on to create new announcement group.
- Configure the name of the group as “room1” for example.
- Set the group number to “201” for example.
- Select the extensions to be included in the group. In this example: extensions 1004 and 1005 as displayed on the following figure.
6. Press the Save button.
Now we have created the announcement group “room1” for room 201, we can create similar groups for the other hospital’s rooms using the same steps.
Creating Announcement Centers
- Access the Web GUI🡪Other Features🡪Announcement Center.
- Click on to create a new announcement center.
- Set the name to the newly created announcement center to “Test”.
- Configure the code 04 which will be used with group number to send the voice message to.
- Select the voice prompt to use from the custom prompt drop down menu.
6. Press the Save button.
Now we have created the announcement center “Emergency” with code 04, we can create other similar announcement centers using the same steps.
Create Custom Prompts for Announcements Center
Prompts on the UCM6xxx can be customized/personalized at the customer’s convenience by either recording or uploading new prompts.
Upload Custom Prompt
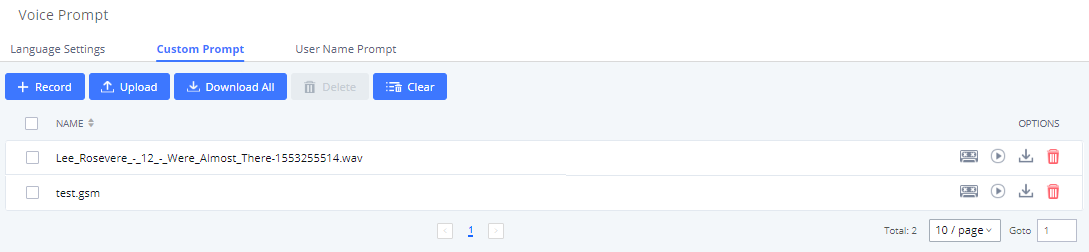
Click on the “Upload Audio File” option as shown on the following figure to upload the file to the UCM device, then pick the newly uploaded file from the list.
Once the prompt file (created/uploaded) is successfully added to the UCM6xxx, it will be shown in the prompt list options to select in different announcements scenarios.
Record Custom Prompt
In the UCM6xxx web UI🡪PBX Settings🡪Voice Prompt🡪Custom Prompt page, click on “Record” and follow the steps below to record a new prompt.
- Specify the custom prompt file name.
- Select the format (GSM or WAV) for the IVR prompt file to be recorded.
- Select the “Extension” to receive the call from the UCM6xxx to record the new prompt.
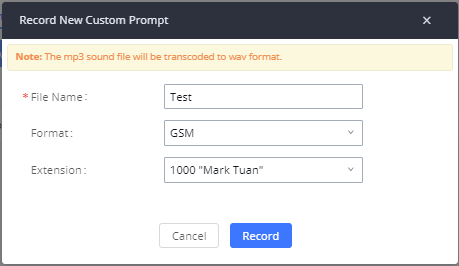
- Click the “Record” button. A call will be initiated to the selected extension.
- Pick up the call and start the recording following voice prompts.
- The recorded file will be listed in the Custom Prompt web page (see figure 10). Users could select to re-record, play or delete the recording.