
Overview
All Grandstream products’ firmware are improved and updated on a regular basis. Latest firmware versions are available in http://www.grandstream.com/support/firmware
Published firmware versions in Grandstream official website have passed QA tests and included new enhancements implemented, reported issues fixes for better user experience; all changes are logged in Release Notes documents.
Provided Firmware package is specific to a single product or product series, same as release notes document. For example, Release_GXP16xx_1.0.3.28.zip and Release_Note_GXP16xx_1.0.3.28.pdf are specific to GXP16xx Small Business IP Phones series.
Grandstream recommends to read Release Notes document which may include special firmware upgrade notices and always keep your devices up-to-date by upgrading their firmware versions regularly.
This document describes the steps needed to upgrade Grandstream devices firmware version and covers the following scenarios:
- Scenario 1: Upgrade using the device’s web UI to upload the firmware file.
- Scenario 2: Upgrade using Grandstream Public HTTP Server.
- Scenario 3: Upgrade using local HTTP/HTTPS/TFTP/FTP/FTPS Server.
Scenario 1: Upgrade using the device’s web UI to upload the firmware file
Users can directly download new firmware files found on the official Grandstream firmware page, the page can be accessed via the link: https://www.grandstream.com/support/firmware
After the firmware file is downloaded, it can be uploaded directly to the Device’s web UI under the Upgrade and provisioning section, depending on the specific model, the WEB UI layout might differ, but the concept of uploading the file on the web GUI is the same, we will take an example on how to upload a new firmware on the Wi-Fi Phone WP810:
- Access the WEB UI of the WP810
- Go to Maintenance => Upgrade and Provisioning => Upgrade Firmware
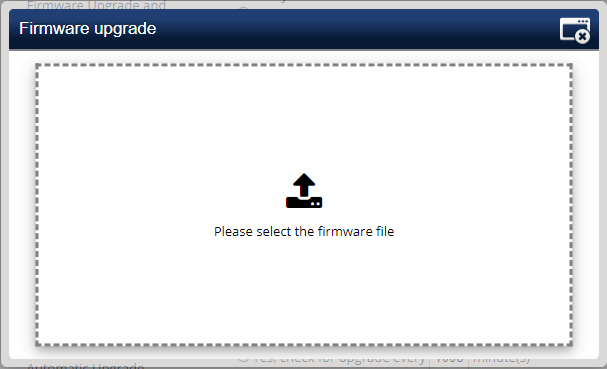
- Click on
 to upload the firmware file in .bin format.
 - Either drag the firmware file to the firmware upgrade pop-up or click on it to upload the firmware file.
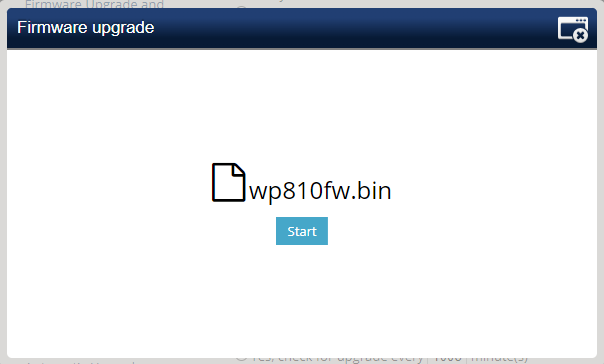
5. After the firmware file is uploaded, click again on ![]() to start the firmware upgrade process.
to start the firmware upgrade process.
6. Once you click ![]() , a confirmation pop-up will be displayed on the WP810 LCD, click on “Yes” to confirm, after this the firmware will be uploading with the following message displayed on the Web UI
, a confirmation pop-up will be displayed on the WP810 LCD, click on “Yes” to confirm, after this the firmware will be uploading with the following message displayed on the Web UI
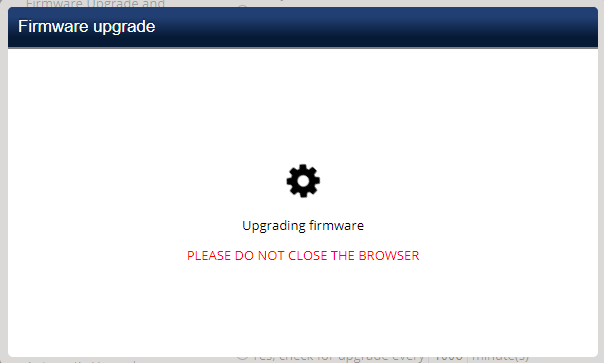
After the firmware is successfully uploaded the device will restart with the new firmware.
Scenario 2: Upgrade using Grandstream Public HTTP Server
Grandstream is hosting latest firmware files in a public HTTP server so customers can use it to directly upgrade their Grandstream devices with latest firmware. The same server hosts also BETA firmware when available.
Follow below steps to successfully upgrade your device:
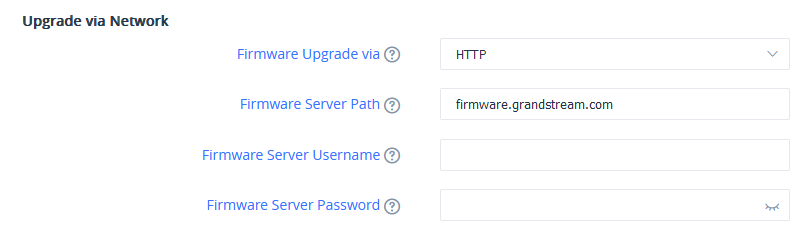
- Access the web interface of your device and go to the Maintenance → Upgrade and Provisioning settings page
- Make sure to select “Always Check for New Firmware”.
- Under “Firmware”, Select Upgrade via HTTP.
- Enter “firmware.grandstream.com” under Firmware Server Path.
- Press Save and Apply button to apply the new settings.
- Reboot the device and wait until the upgrade process is completed.
Notes:
- To upgrade using Grandstream HTTP server, the device needs to be connected to Internet.
- To upgrade to BETA firmware (if available), use “firmware.grandstream.com/BETA” in step 4.
Scenario 3: Upgrade using Local HTTP/ HTTPS/TFTP/FTP/FTPS Server
Customers can use their own HTTP, HTTPS or TFTP server to upgrade Grandstream devices.
To achieve this, first download firmware files for the appropriate device model from http://www.grandstream.com/support/firmware. Unzip downloaded package and put extracted files in the root directory of your server.
Notes:
- Devices and your server needs to be in same LAN.
- If using remote server, make sure to open/redirect ports in your router, so devices can download firmware files from it.
Reminder:
HTTP (TCP) default port is 80, HTTPS (TCP) default port is 443 and TFTP (UDP) default port is 69.
Local Upgrade via HTTP Server
Please refer to steps below for the local upgrade using HTTP File Server tool.
Installing HTTP Server and Uploading Firmware File(s)
Please refer to following steps in order to download / install the HTTP server and upload the firmware:
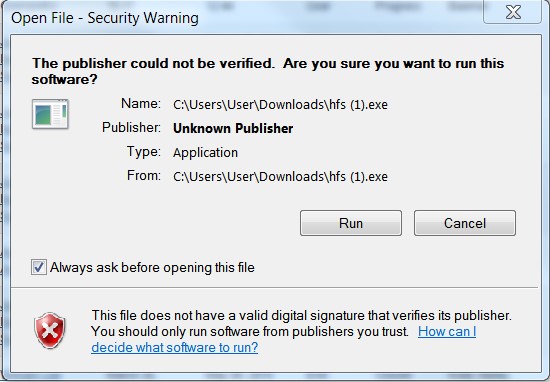
- Launch the install of the tool once it’s fully downloaded from the following link: “ http://www.rejetto.com/hfs/download ”
- Click on Run to launch the HTTP server.
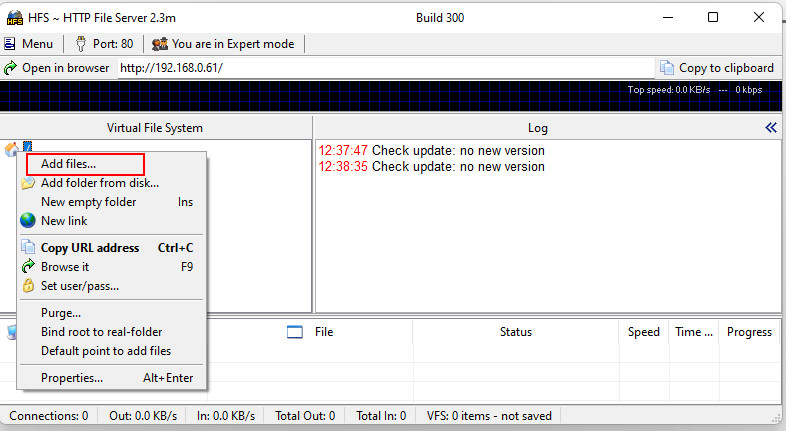
- Start the HFS server, browse to locate and select the required firmware files from your local directories by right-clicking on the root directory and selecting Add files.
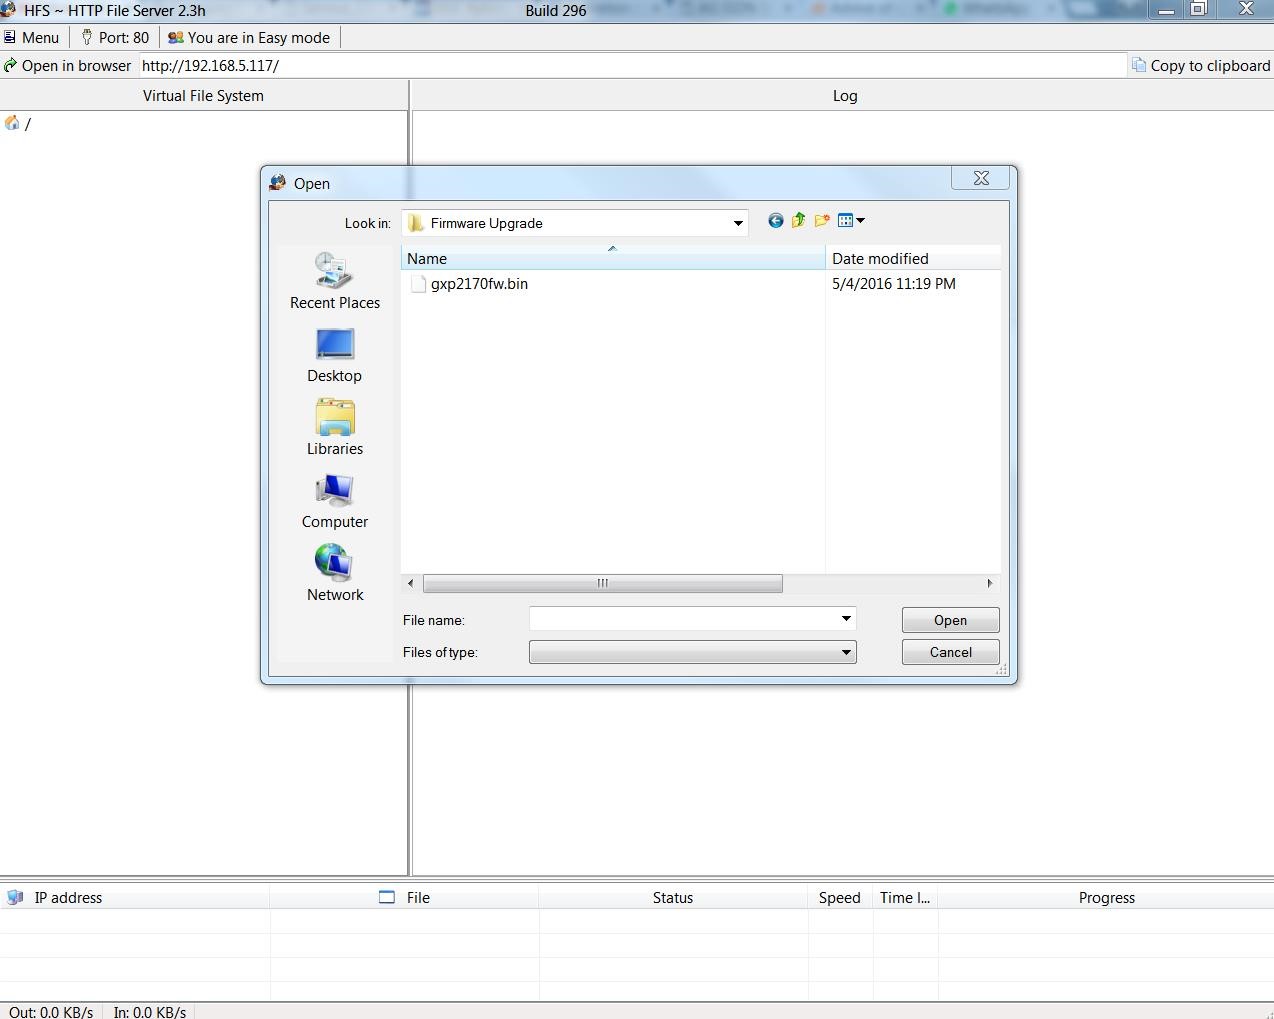
- Choose from your local directory where the firmware files are downloaded and click Open to upload the file(s) to your HTTP server.
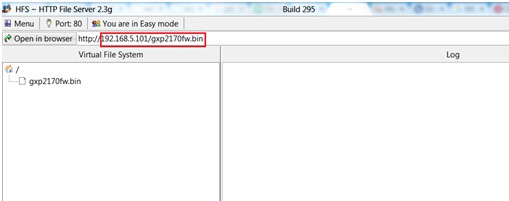
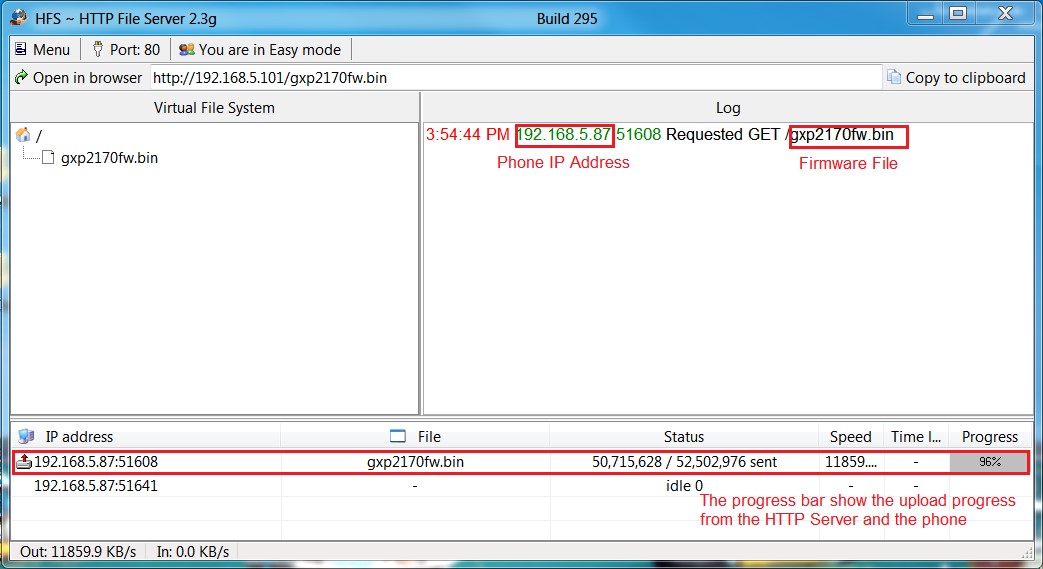
- Once uploaded to the HTTP server, the firmware file will be available. In our example, on the following link: “192.168.5.101/gxp2170fw.bin“ as shown on the screenshot below (where 192.168.5.101 is the IP address of the computer running the local HTTP server).
Configuring Grandstream devices for local HTTP upgrade
Please refer to following steps to configure Grandstream devices to upgrade the firmware:
- Access the web GUI of your device and navigate to “Upgrade and Provisioning” settings.
- Make sure to select “Always Check for New Firmware”.
- Select Upgrade via HTTP
- Enter the path of your HTTP server containing the firmware file under Firmware Server Path.
Notes:
- In our example, we have configured the firmware server path as: “192.168.5.101“.
- Make sure to not include leading http:// in HTTP Firmware server path.
- Press Save and Apply at the bottom of the page to apply the new settings
- Reboot the device and wait until the upgrade process is completed.
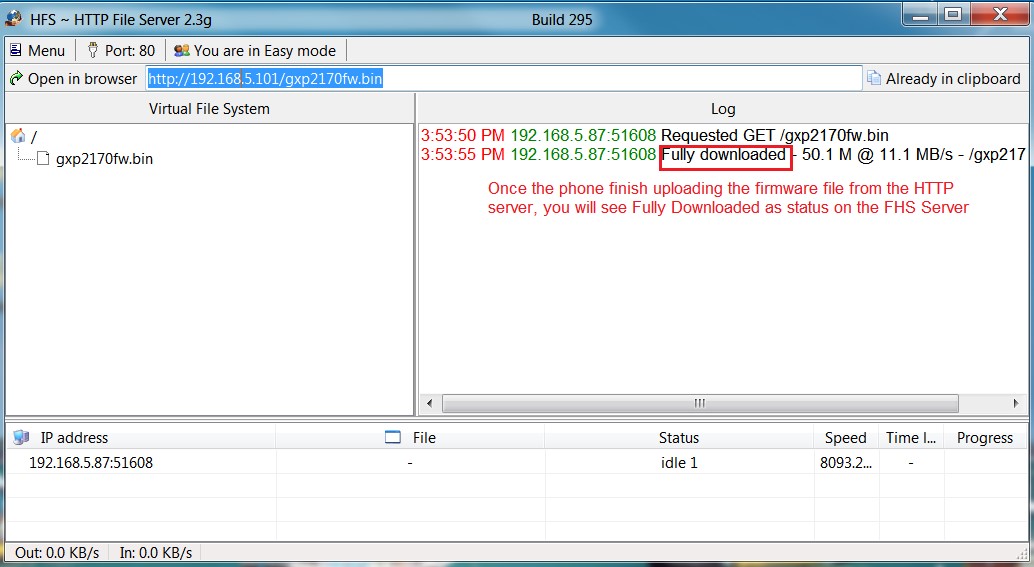
You can also verify the status of the upgrade progress on the HFS Server as displayed on the following screenshots:
Local Upgrade via HTTPS Server
Please refer to steps below for the local upgrade using HTTPS.
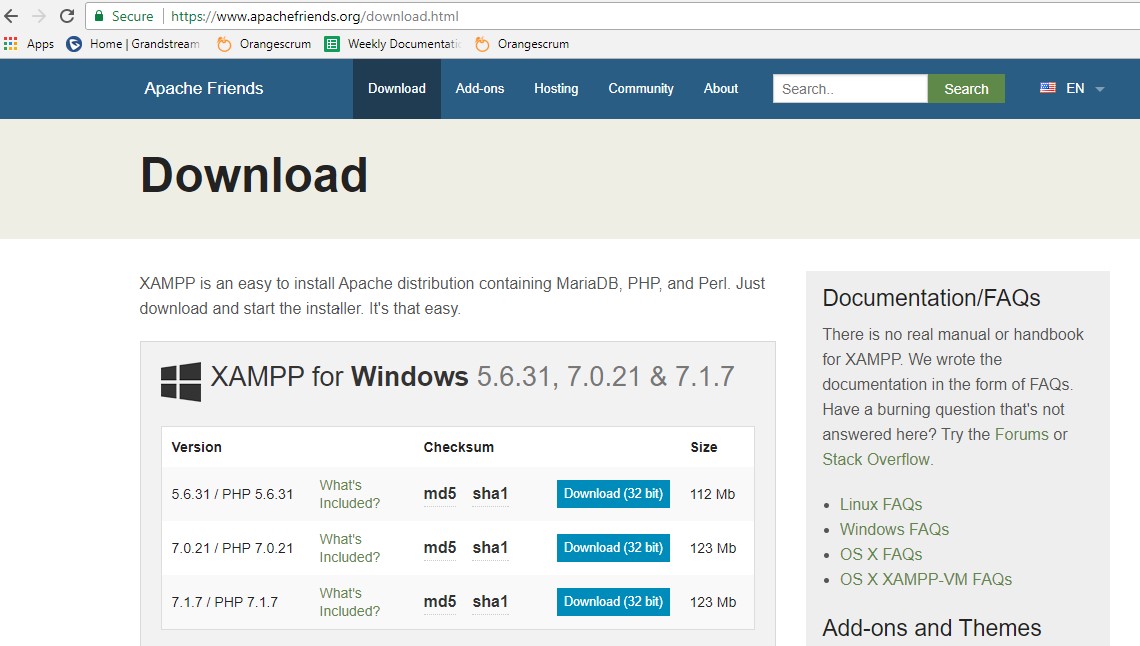
XAMPP with built in HTTPS server is available in this link (https://www.apachefriends.org/download.html) and can be used.
Installing HTTPS Server
- Download appropriate version depending on your platform.
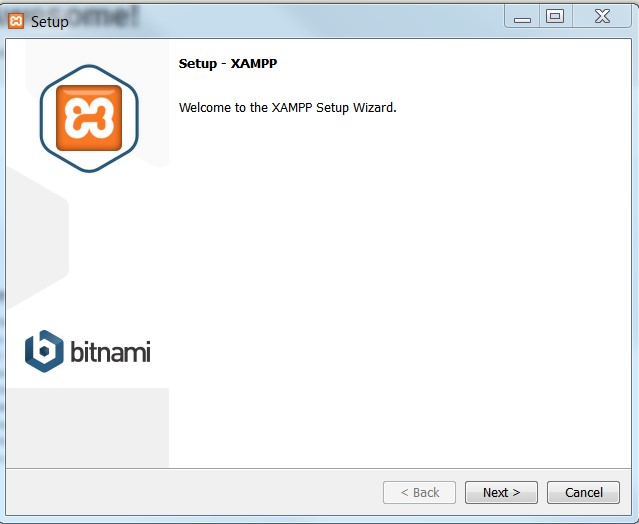
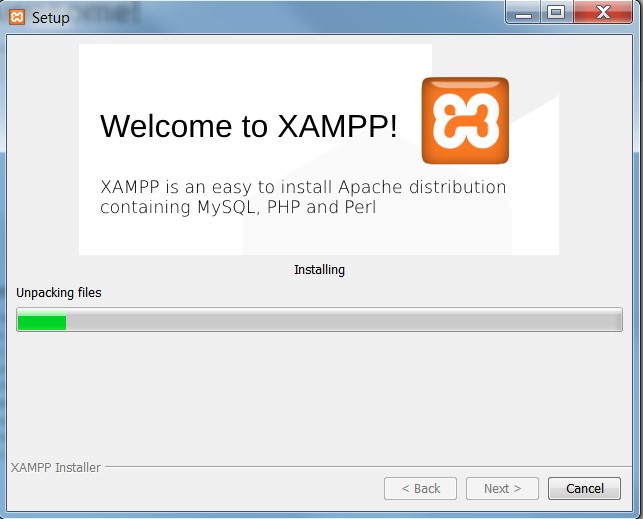
- Launch the install of the XAMPP server once it’s fully downloaded and follow the installation steps by clicking on Next button.
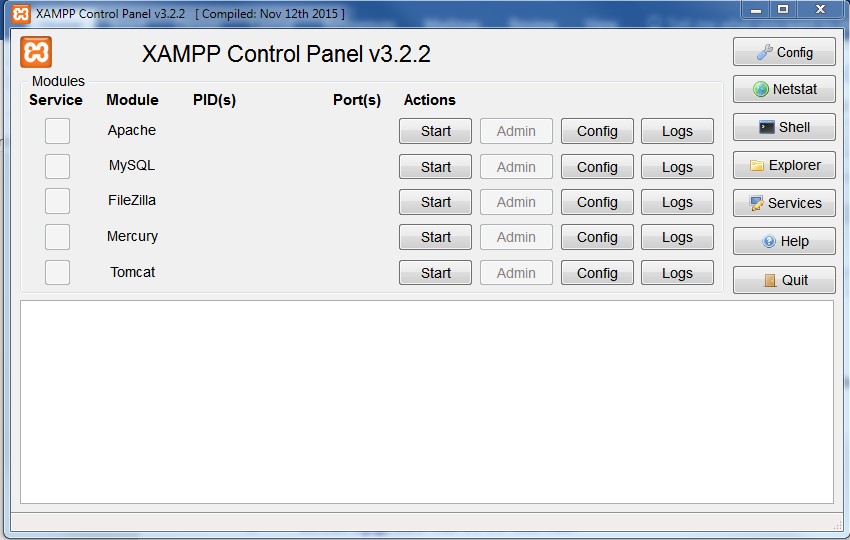
- Launch the XAMPP server. Following interface will be available.
Uploading firmware file(s) to XAMPP HTTPS Server
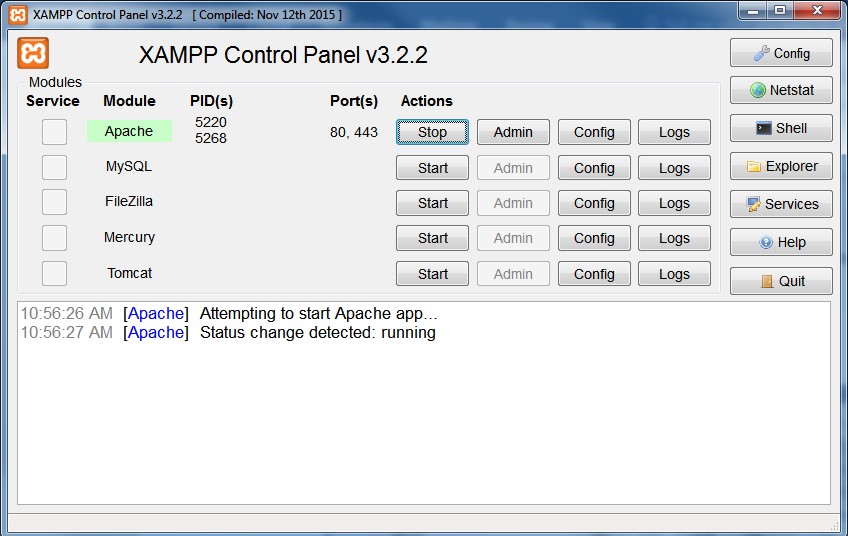
1. Start Apache module in order to use the HTTPS server.
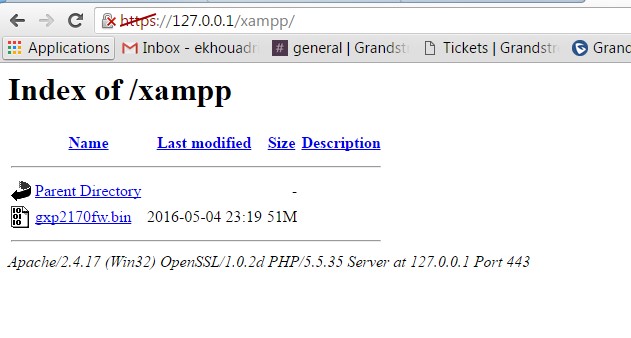
- Access the XAMPP root directory on your computer and put the firmware files on the following directory: “C:\xampp\htdocs\xampp“
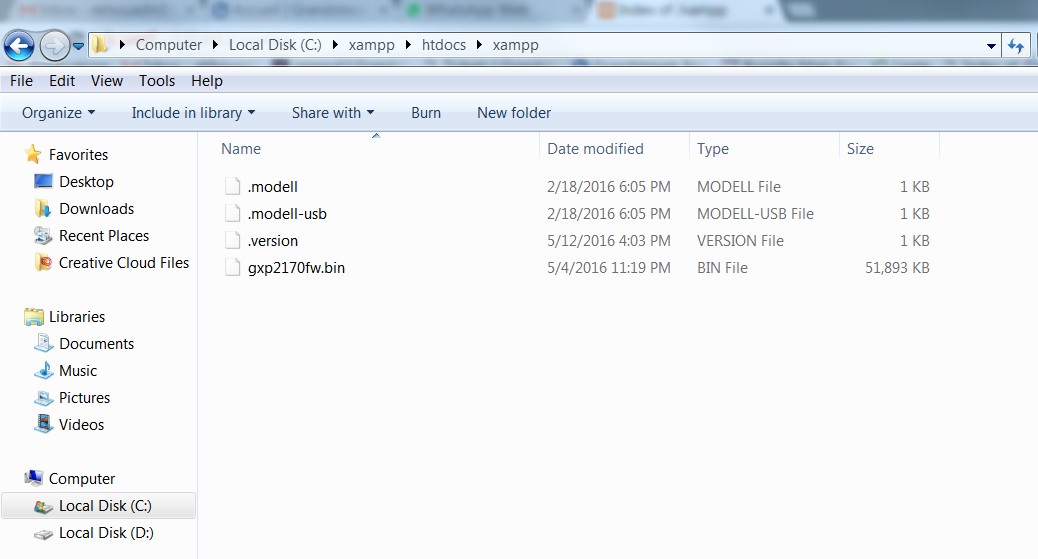
- To list available firmware files on the root directory, access local link address (https://127.0.0.1/xampp/) from computer running HTTPS server.
Note: XAMPP has a built-in SSL certificates for HTTPS access, if users need to change the certificates, this can be done by copy/paste generated certificates on the following folder: “C:\xampp\apache\conf “. This folder contains 3 sub directories (ssl.crt, ssl.csr, ssl.key) where to put SSL certificates.
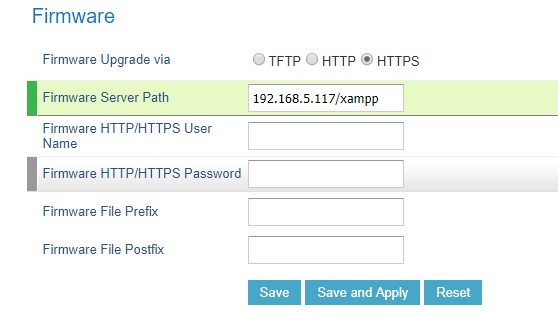
Configuring Grandstream devices for a local HTTPS upgrade
Please refer to following steps to configure Grandstream devices to upgrade the firmware:
- Access the web GUI of your device and navigate to “Upgrade and Provisioning” settings:
- Make sure to select “Always Check for New Firmware”.
- Select Upgrade via HTTPS.
- Enter HTTPS server URL containing the firmware file in “Firmware Server Path” field.
Example: (x.x.x.x/xampp) where x.x.x.x is the IP address of computer running XAMPP.
- Press “Save and Apply” at the bottom of the page to apply the new settings
- Reboot the device and wait until firmware upgrade process is completed.
The following screenshot illustrates the steps mentioned above.
Local Upgrade via TFTP Server
To upgrade locally using TFTP protocol, users can download and install a free TFTP server as described in below steps.
Installing the TFTP Server
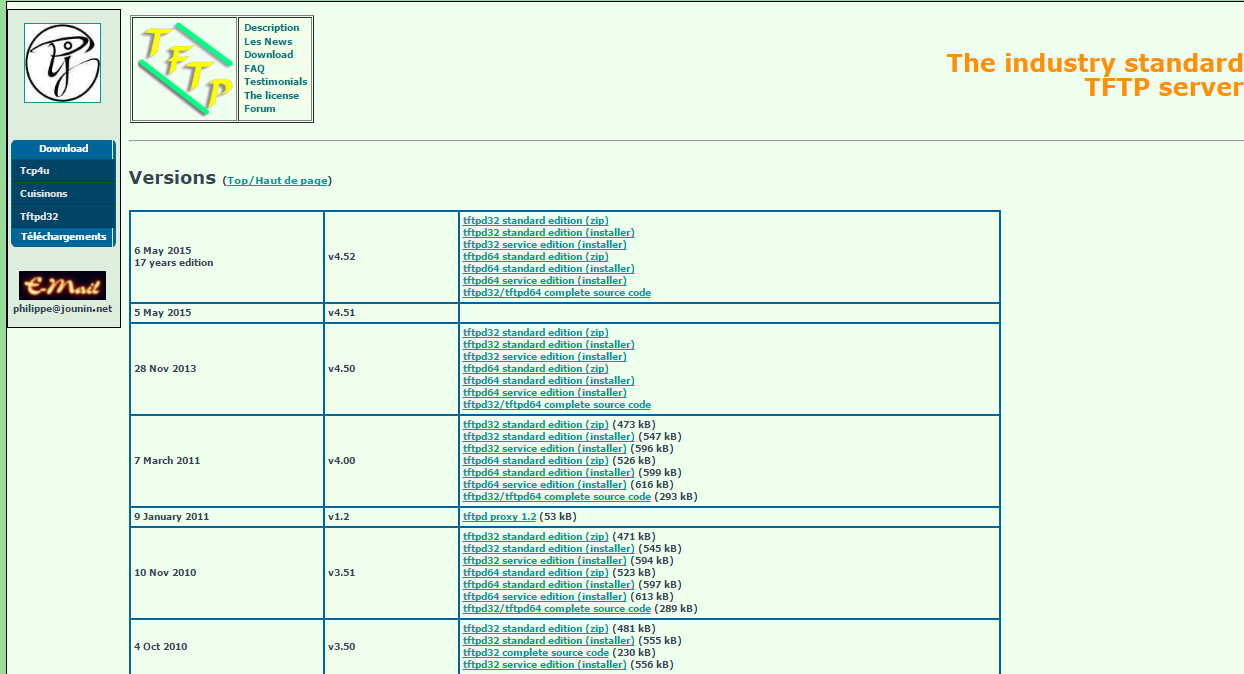
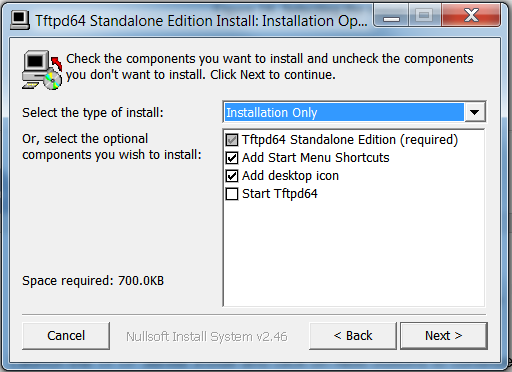
A free windows version TFTP server is available for download from following link: http://tftpd32.jounin.net/
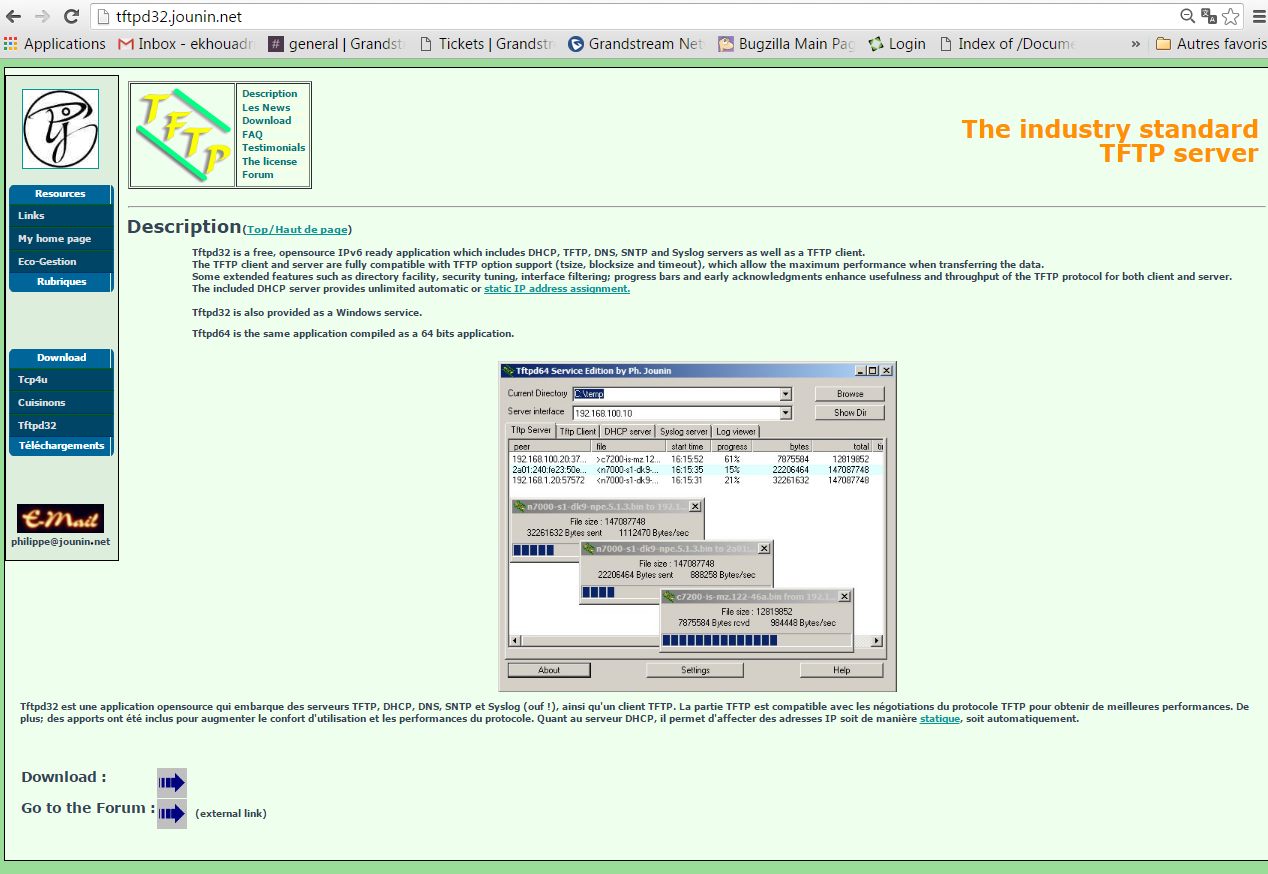
- Select which version is appropriate for your computer, and start downloading it.
- Launch the TFTP server install wizard.
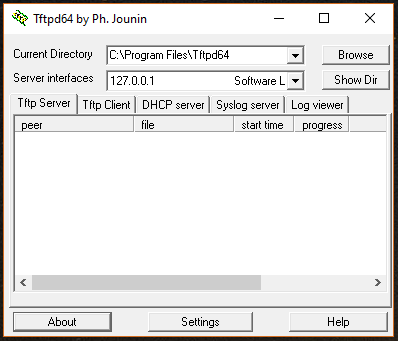
- Once the TFTP server is installed, Open TFTPD64. The following interface will be displayed:
Uploading the firmware file
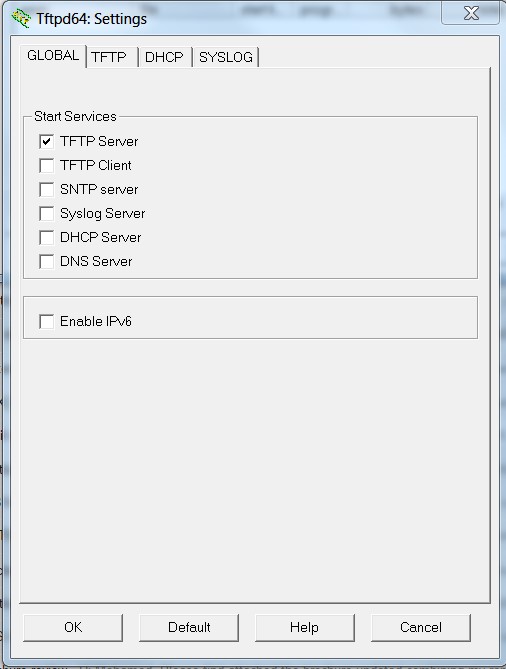
- Make sure that the TFTP services are selected and started under Settings → Global and click button OK to confirm your configuration.
- Browse to locate and select the required firmware from your local system.
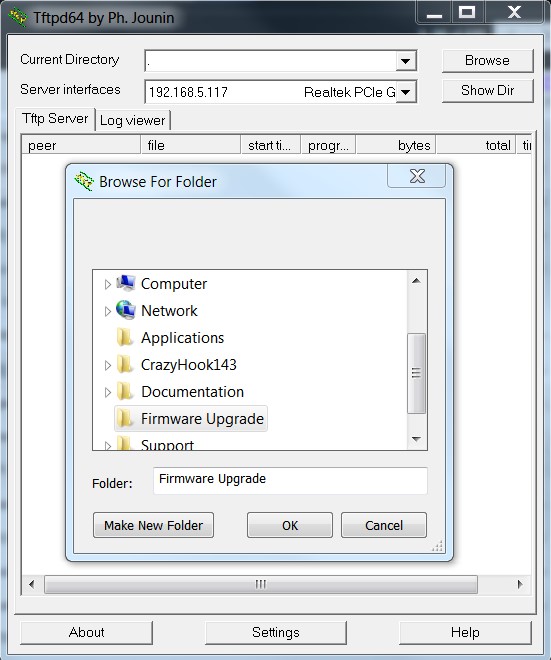
- Press Show Dir to see if the firmware file is uploaded on the TFTP server.
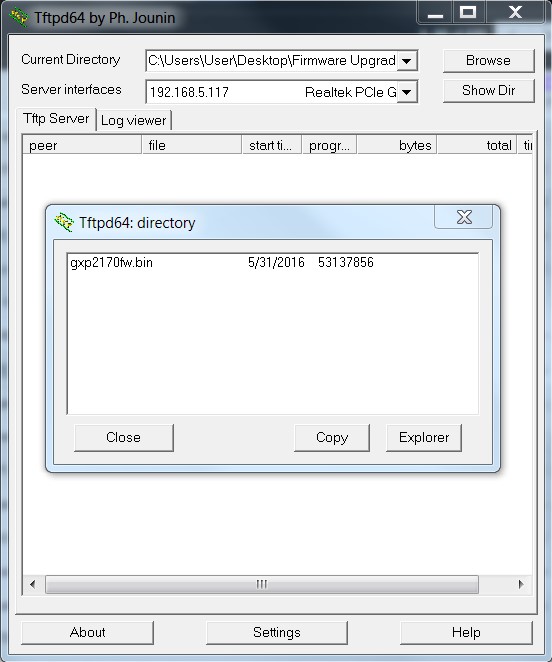
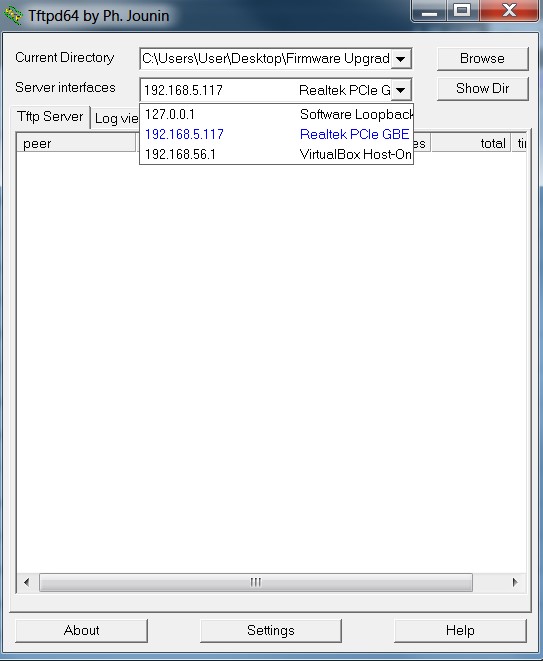
- Select the interface of the computer running the TFTP server on Server Interfaces.
Configuring Grandstream devices for local TFTP upgrade
To configure your Grandstream devices for upgrading via your TFTP server, please follow the steps below:
- Access the web GUI of your device and navigate to “Upgrade and Provisioning” settings:
- Make sure to select “Always Check for New Firmware”
- Select Upgrade via TFTP
- Enter the path of your TFTP server containing the firmware file under “Firmware Server Path”
- Press “Save and Apply” at the bottom of the page to apply the new settings 6- Reboot the phone and until the upgrade process is completed.
Local Upgrade via FTP/FTPS Server
The following section contains the steps to upgrade using a local FTP/FTPS server.
Installing the FTP/FTPS Server
Users can download a free FTP server for windows using this link : http://filezilla-project.org
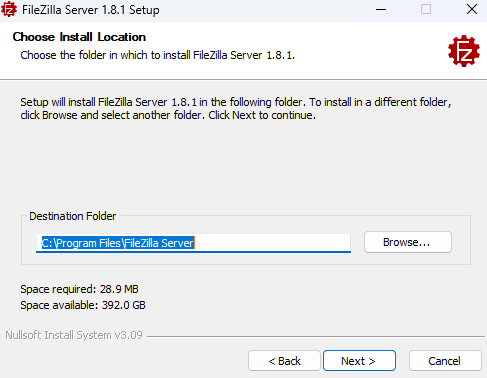
- Choose the option “Download FileZilla Server” and launch the Install wizard;
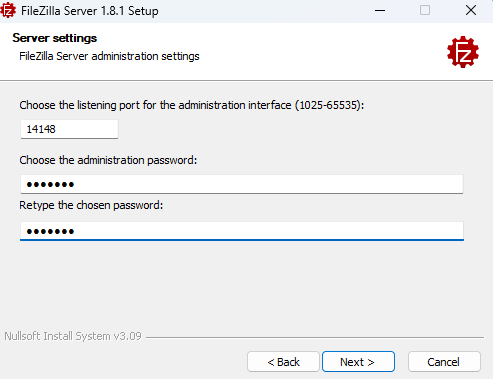
- During the installation process, you will be prompted to enter the listening port for the administration interface as well as a password (We chose the default port number “14148”).
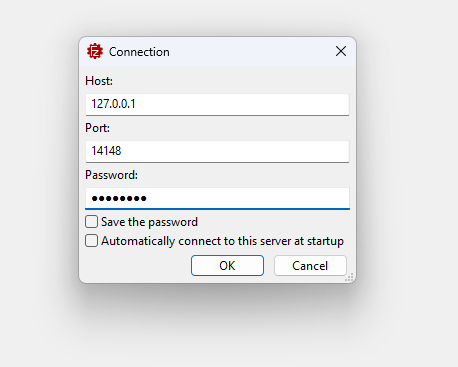
- Once the installation is finished, you can open the FTP/FTPS server and connect using your admin port and password.
Configuring the FTP Server
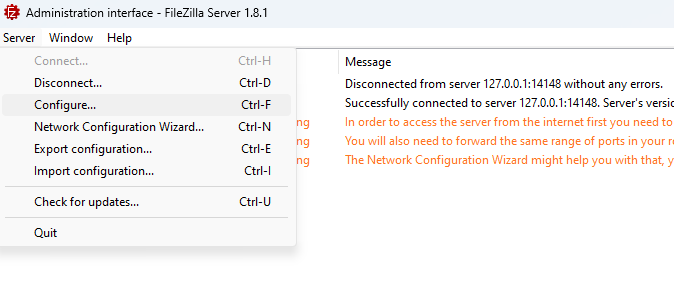
- To configure the FTP server, in the “Server” drop-down menu, select “Configure“.
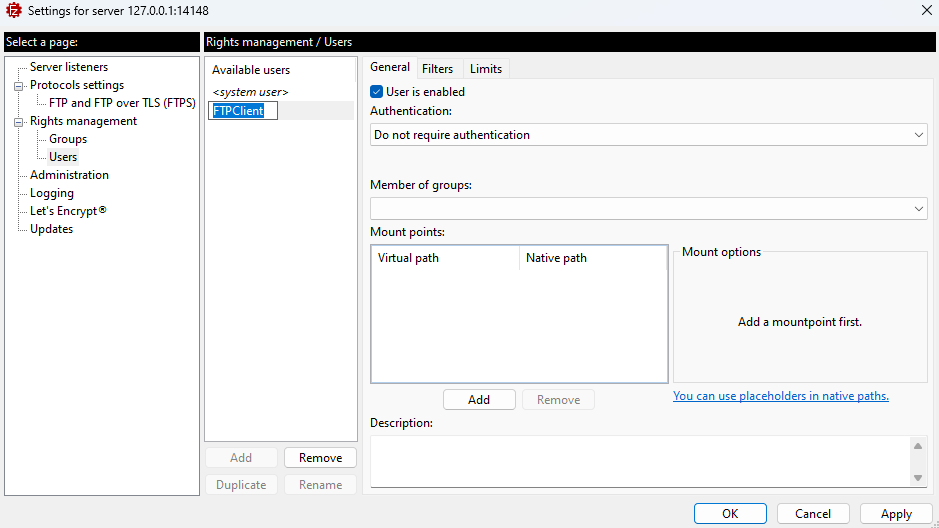
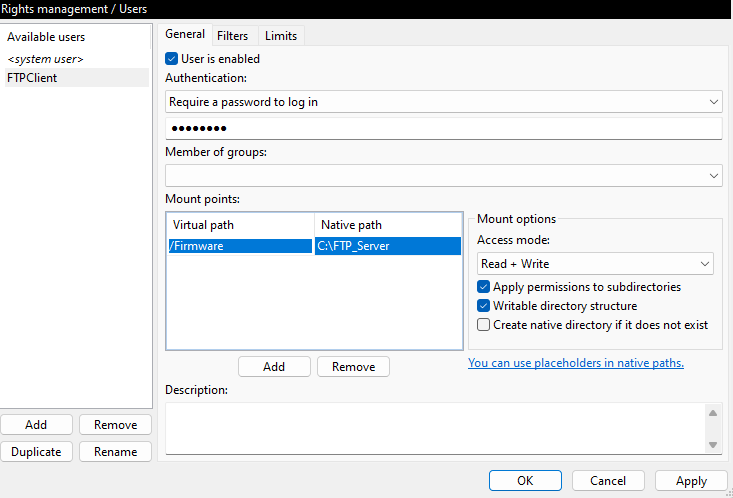
- Select the Users page and click the “Add” button under “Available users” (In this scenario we’re naming our user “FTPClient”).
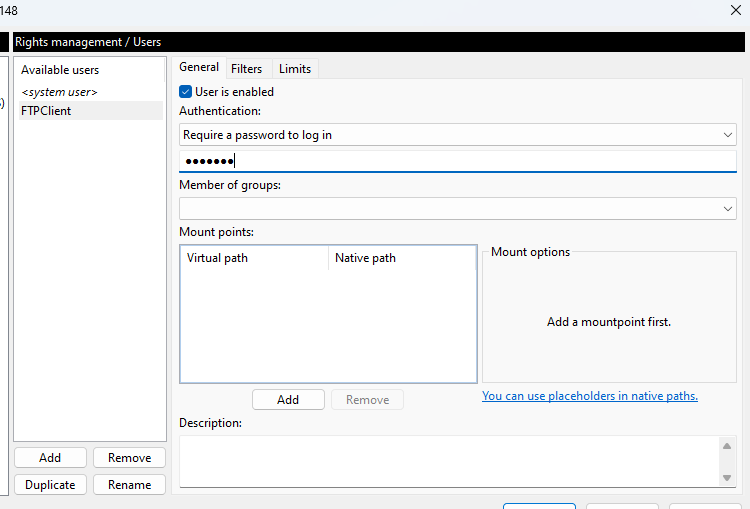
- For authentication, choose the option “Require a password to log in” and enter the user’s password.
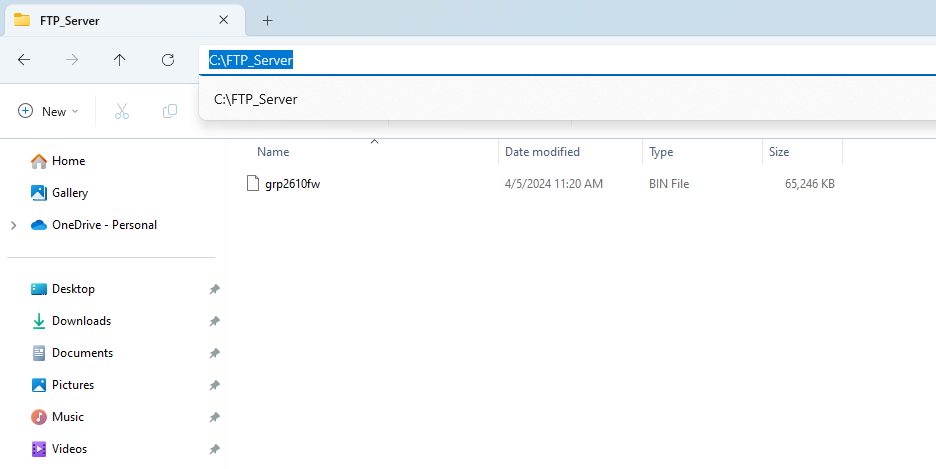
- On the computer running the FTP Sever, create a Folder containing the firmware files and copy the folder path.
- In the settings of the FTP user created, add the copied folder path under “Native Path” and provide a name in “Virtual path“.
- To configure the user’s rights, choose one of the options in the “Access mode” drop-down menu. (For this example we selected “Read + Write“).
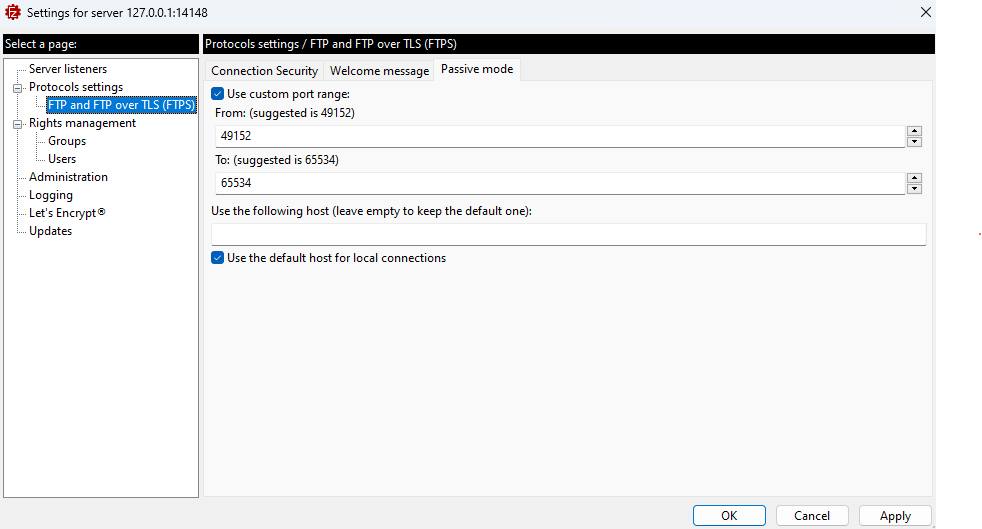
- In order to enable FTP Passive Mode, select the page “FTP and FTP over TLS (FTPS)” and click on the “Passive Mode” tab.
- Check the option to “Use custom port range” and enter the suggested port range.
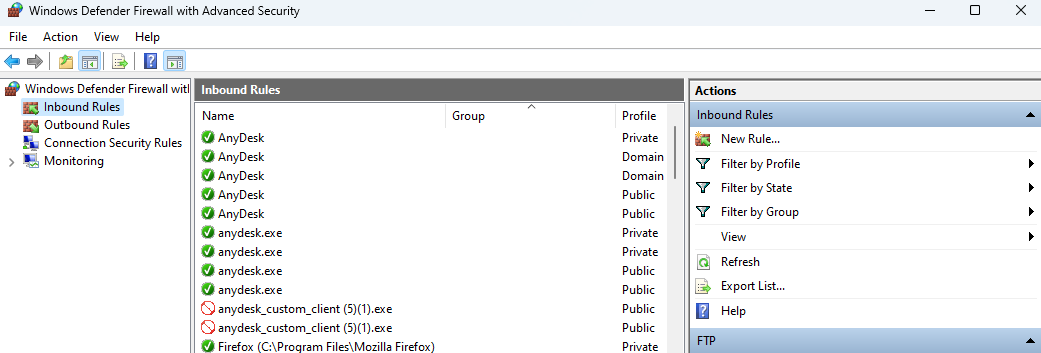
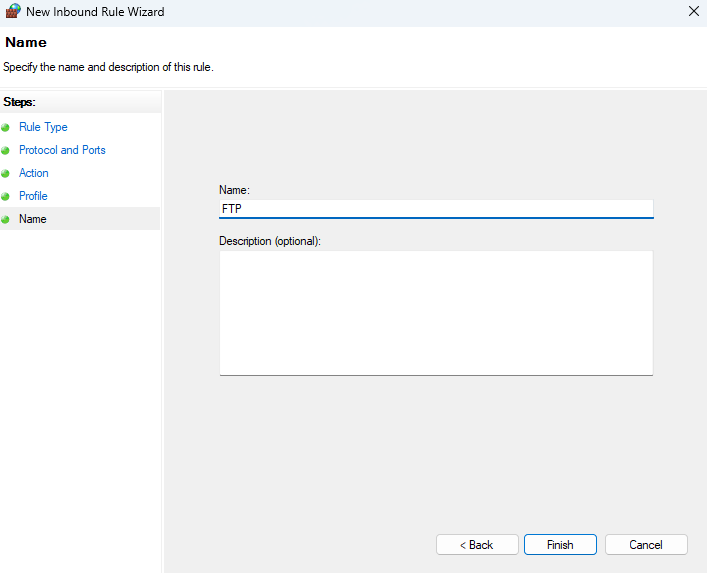
- Now that we have created a user and defined the port range for FTP Passive Mode, the next step is to open FTP port (TCP port 21) as well as the FTP Passive Mode port range (TCP ports 49152-65534) on the firewall. (In this case, we’re using Windows Defender Firewall).
- Open Windows Defender Firewall with Advanced Security and create a “New Rule” under “Inboud Rules“.
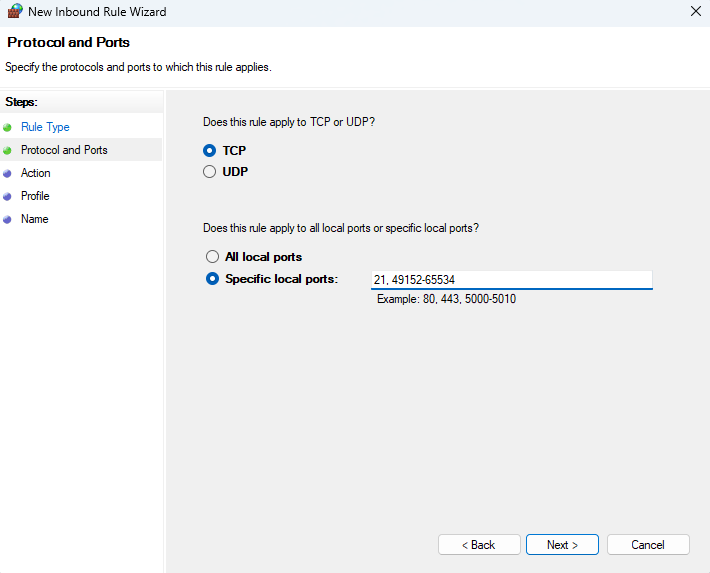
- Choose “Port” as a “Rule Type” and “21, 49152-65534” in “Protocols and Ports“.
- Check the option “Allow connection” in “Action” and leave the “Profile” settings as default.
- The last step in creating this Inbound Rule is providing a “Name” and clicking on the Finish button.
Configuring the FTPS Server
In order to configure the FTPS server, users will have to follow the same instructions in the section [Configuring the FTP Server] and add the following steps :
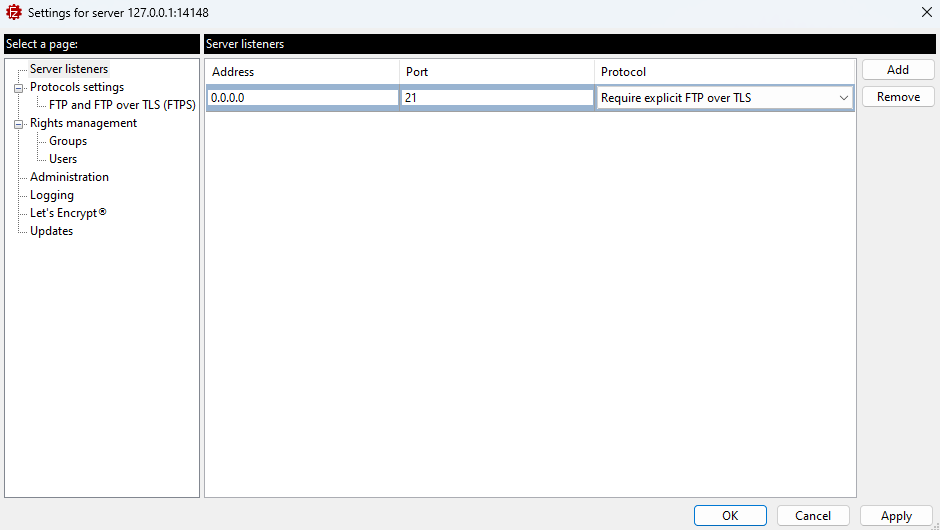
- Select “Configure” from the “Server” Menu.
- On the “Server listeners” page, after removing all the entries by clicking on the “Remove” button, enter “0.0.0.0” under Address, “21” in port and “Require explicit FTP over TLS” for Protocol.
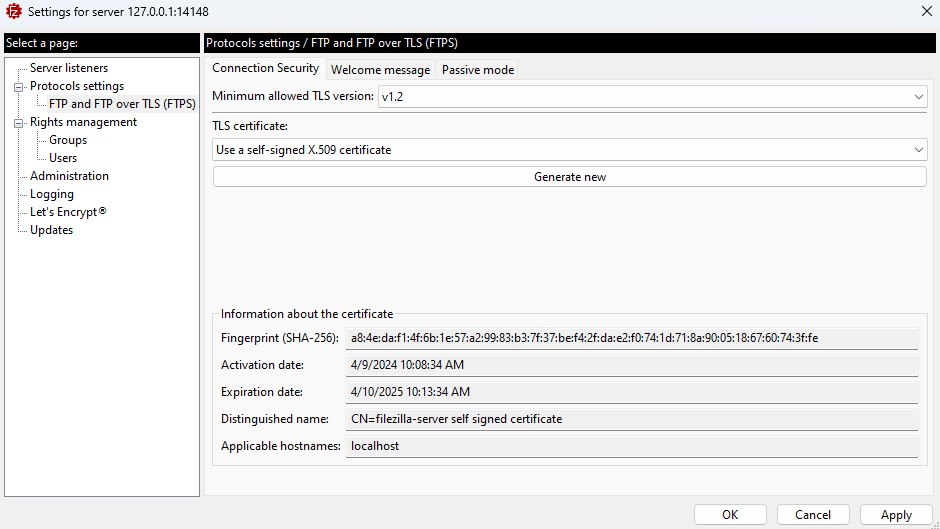
By default, Filezilla uses a self-signed X.509 TLS certificate. We can choose the minimum allowed TLS version by going to the “FTP and FTP over TLS (FTPS)” page from the server’s configuration settings.
Configuring Grandstream devices for local FTP/FTPS upgrade
Please follow the steps below to configure Grandstream devices to upgrade their firmware via FTP:
- Access the Web GUI and navigate to “Upgrade and Provisioning” page.
- In the “Provision” section, Set “Firmware Upgrade and Provisioning” to “Always Check for New Firmware”.
- Go to the “Firmware” section,
- Select “FTP” or “FTPS” for “Firmware Upgrade via”.
- Enter the path of the FTP/FTPS server containing the firmware file under “Firmware Server Path”.
- Fill in the “Firmware Server Username” and the “Firmware Server Password” fields with the credentials of the FTP/FTPS user created.
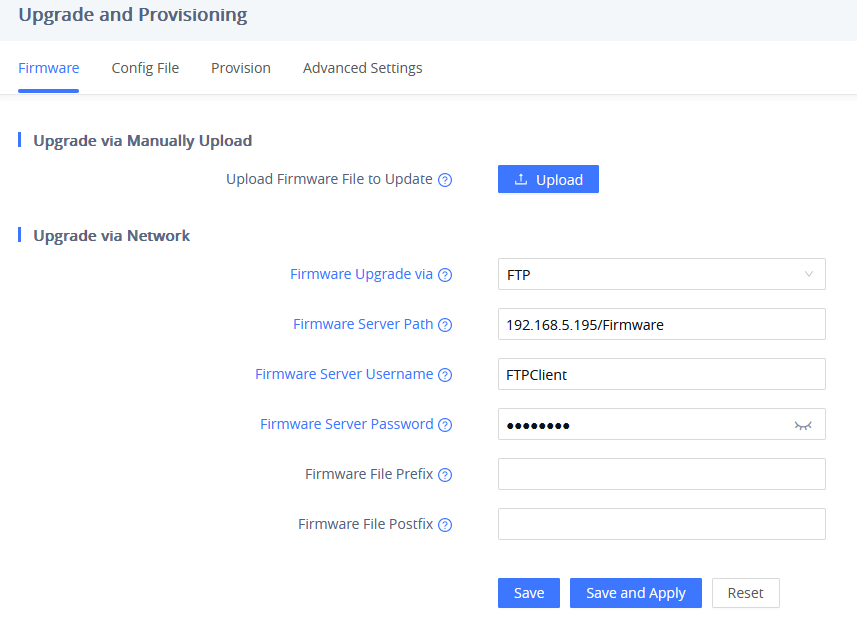
- Press “Save and Apply” at the bottom of the page to apply the new settings.
- Reboot the device and wait until the firmware upgrade process is completed.
ADVANCED OPTIONS
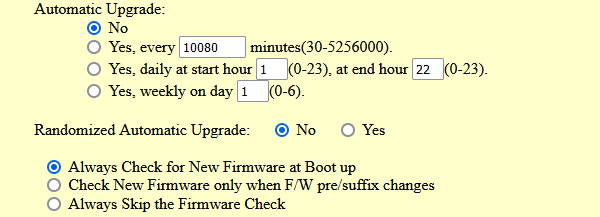
Automatic Upgrade
Automatic Upgrade allows to periodically check if a newer firmware is available to download and upgrade the device. This option will help to keep the devices up-to-date.
Automatic Upgrade can be enabled from web configuration interface Upgrade and provisioning settings.
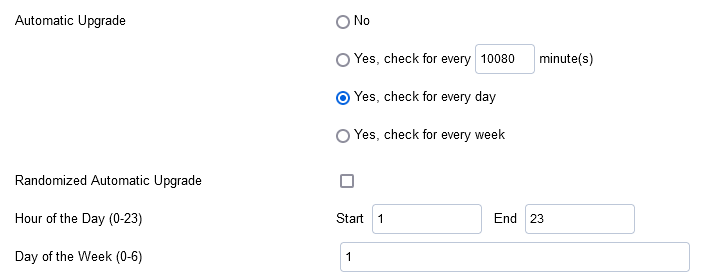
The automatic upgrade can be configured based on following options:
- Every interval in minute(s)
- Every day (“Hour of the Day” should be configured)
- Every week (“Hour of the Day” and “Day of the Week” should be configured, 0 is Sunday) If the firmware is available, it will be downloaded and the device will be upgraded automatically.
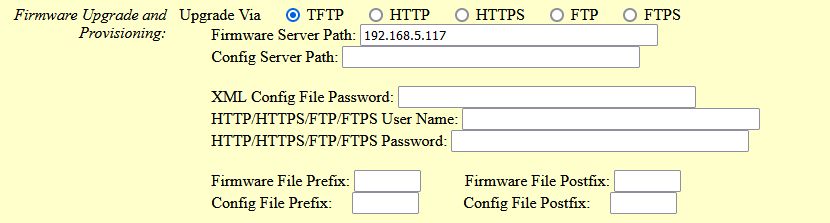
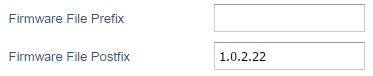
Firmware File Prefix and Postfix
Firmware prefix and postfix are two options which can be configured by users to lock the firmware update, then only the firmware with the matching prefix and/or postfix will be downloaded and flashed into phone.
Firmware file prefix and postfix can be configured from web GUI →Maintenance → Upgrade and provisioning.

Use Case Example:
Using firmware prefix and postfix, users store different firmware versions in same folder and upgrade to specific version.
- If Firmware File Prefix is set to 1.0.3.14 on GXP1600 series phone, for example, requested firmware file will be 1.0.3.14gxp1600fw.bin

- If Firmware File Postfix is set to 1.0.2.22 on GXP1600 series phone, for example, requested firmware file will be gxp1600fw.bin1.0.2.22
Firmware Server Username and Password
A username and password need to be configured if the firmware server requires authentication to access and download firmware files.
To begin the firmware upgrade process, the phone sends an initial request to download firmware files from the server, the request will be challenged by the server to provide valid credentials, the phone sends same request including configured firmware server Username and Password, if accepted, firmware upgrade process can start.
If Always Authenticate Before Challenge is set to “Yes”, the phone includes configured credentials in initial request to download firmware files before being challenged by the server. The default setting is “No”.

Upgrade via Firmware Server Supported Devices
Category | Models | Firmware Upgrade via HTTP | Firmware Upgrade via HTTPS | Firmware Upgrade via TFTP | Firmware Upgrade via FTP | Firmware Upgrade via FTPS |
IP Voice Telephony | GRP Series IP Phones | |||||
GRP260x | ||||||
GRP261x | ||||||
GRP262x | ||||||
GRP263x | ||||||
GRP2650 | ||||||
GRP2670 | ||||||
GXP Series IP Phones | ||||||
GXP16xx | ||||||
GXP17xx | ||||||
GXP21xx | ||||||
GHP Series Hotel Phones | ||||||
GHP61x | ||||||
GHP62x | ||||||
GHP63x | ||||||
DECT Cordless | ||||||
DP75x | ||||||
DP760 | ||||||
Wi-Fi Cordless IP Phones | ||||||
WP810 | ||||||
WP820 | ||||||
WP822 | ||||||
WP825 | ||||||
IP Video Telephony | GXV Series of IP Video Phones | |||||
GXV33xx | ||||||
GXV34xx | ||||||
Gateways & ATAs | Analog VoIP Gateways | |||||
GXW4104/4108 | ||||||
GXW42xx v1 | ||||||
GXW42xx v2 | ||||||
GXW45xx | ||||||
Analog Telephone Adapters | ||||||
HT841/HT881 | ||||||
HT8xx | ||||||
Business Conferencing | Audio Conferencing | |||||
GAC2500 | ||||||
GAC2570 | ||||||
Video Conferencing | ||||||
GVC3212 | ||||||
GVC3220 | ||||||
Facility Management | Control Stations | |||||
GSC3570 | ||||||
IP Video Surveillance | ||||||
GSC3610 | ||||||
SIP Intercoms & Paging | ||||||
GSC350x | ||||||
GSC351x | ||||||
Facility Access Systems | ||||||
GDS370x | ||||||
GDS371x | ||||||